For that is your fate... the fate of the cursed."
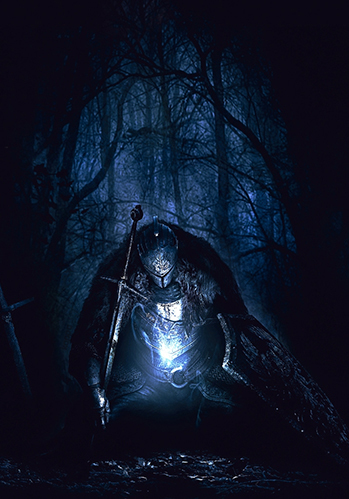
Dark Souls II is the second game in the Dark Souls series. It was developed by FromSoftware and published by Bandai Namco Entertainment in 2014 for Xbox 360, PlayStation 3, PC, PlayStation 4 and Xbox One.
Long ago, in a walled off land, far to the north, a great king built a great kingdom called Drangleic. A place where souls may mend the ailing mind of humans cursed by the Darksign, an augur of darkness that grants its bearer the inability to die. But in return, the curse will take your past, your future, your very light, until you're something other than human. A thing that feeds on souls. A Hollow. And so, one day all "Undead" find themselves standing before Drangleic's gates, without really knowing why...
You take the role of one of these Undead, dubbed The Bearer of the Curse, an untold number of years after the events of the first Dark Souls. After arriving in a desperate gambit to not succumb to the curse of undeath and discovering all that's left of Drangleic is a decrepit fallen kingdom, you are tasked with seeking out its long-lost king, Vendrick. But to do so, you must first take the souls of the four Great Ones scattered across the ruins of Drangleic whose power may yet lead the Bearer of the Curse to Vendrick… and perhaps the truth behind Drangleic’s downfall.
3 Downloadable Content episodes, titled The Lost Crowns Trilogy, were released between July and September 2014: The Crown of the Sunken King, The Crown of the Old Iron King and The Crown of the Ivory King. Each episode adds new areas, enemies, bosses, and equipment, while delving into the past of previous kingdoms that rose and fell where Drangleic now stands.
An Expansion Pack update patch, Dark Souls II: Scholar of the First Sin, followed on February 5, 2015. It added a new story NPC, augmented item descriptions and re-balanced gameplay. A retail "all-in" Game of The Year Edition was released the same day with the update features and all 3 previous DLC. A "high-spec" Updated Re-release version was also released on April 1, 2015 for Direct X11 PCs and April 7, 2015 for PS4 and Xbox One. The "high-spec" version included all the aforementioned content, upgraded graphics and remixed levels.
Received a sequel, Dark Souls III, in April 2016.
Dark Souls II provides examples of:
- Abandoned Laboratory: Aldia's Keep, where captured dragons and various mutant monsters were experimented on.
- Absurdly High Level Cap: The level cap in this game is 838 for all eight classes, even higher than Dark Souls level 720 cap. Most players won't finish above level 120.
- Achievement Mockery: The achievement "This is Dark Souls", which unlocks the first time you die. There is no known player who does not have this achievement unlocked.
- Action Bomb: The Undead Citizens, who can explode into fire, petrifying gas and acidic gas. The later two don't die when they explode either.
- Action Survivor: The player character once again is just a minor adventurer who ended up cursed, and now has to fight demons, ancient kings, and dragons.
- Aerith and Bob:
- Weird names: Blacksmith Lenigrast, Crestfallen Saulden, Maughlin the Armorer, Sweet Shalquoir and Benhart of Jugo.
- Standard names: Steady Hand McDuff, Laddersmith Gilligan, Jester Thomas. Almost all of the NPC phantoms added by the DLC have fairly ordinary Western names, such as Bashful Ray, Quicksword Rachel, Oliver the Collector, and Woodland Child Victor.
- Affably Evil: Mild Mannered Pate is perfectly polite and helpful to you every time you meet. But Creighton of Mirrah claims he was locked up by them, and Pate will mock you when you hit a booby-trap he "forgot" to warn you about at the end of his quest line.
- The Alcatraz: The Undead Purgatory, where the Old Iron King kept the Undead for his kingdom's Undead hunts. Also the Lost Bastille and Sinner's Rise, the former being a massive fortress turned prison for locking away the Undead in hopes of staving off the curse and the latter being the deepest reaches of the Bastille that housed only the worst heretics and sinners.
- Alien Geometries: Not explicitly stated, but can easily be inferred from the layout of the game. Taking an elevator at the top of a windmill up somehow results in being placed at the base of a castle sunken into a sea of lava. Lining up the game's maps also shows some underground areas are above mountains and multiple areas occupying the same space. This is partially due to areas that would have connected the world more properly being cut, but adds to the already bizarre nature of Drangleic. Heck, the Bearer of the Curse finds Drangleic by jumping into a tempest, which leads to an underground cavern that anyone entering or leaving has to go through since the kingdom itself can't be found over land or sea otherwise.
- All Love Is Unrequited: In Earthen Peak, the King did not return Queen Mytha's feelings for her. Mytha in turn did not return the feelings of the man who became the Covetous Demon. It corrupted them both and ruined the realm.
- All There in the Manual: The official game guide confirms a number of lore facts hinted at in the game itself, most notably that Queen Nashandra is a reborn fragment of Manus from Dark Souls.
- Ambiguous Ending: Both endings leave the future unclear.
- Take the Throne: You never find out if the Bearer of the Curse linked the fire or let it die out, and if either choice will end the Vicious Cycle of the Curse this time around.Emerald Herald: What lies ahead, only you can see.
- Leave the Throne: It's unclear where the Bearer of the Curse will go next, only that they will seek another way to end the cycle of Light and Dark.Scholar: There is no path. Beyond the scope of Light, beyond the reach of Dark ...what could possibly await us?
- The endings become a little less ambiguous in Scholar of the First Sin. The version of King Vendrick you can meet in the past explicitly refers to taking the throne as linking the fire. He also helps The Bearer find a way to end the Undead Curse, at least for them.
- Dark Souls III ultimately confirms that whichever ending the Bearer chose, the Fire was eventually linked by someone and the cycle continued.
- Take the Throne: You never find out if the Bearer of the Curse linked the fire or let it die out, and if either choice will end the Vicious Cycle of the Curse this time around.
- And Your Reward Is Clothes: Clearing the game without dying or using a bonfire nets you a ring each. All they do is make your weapons invisible, which has limited utility in multiplayer.
- And Then John Was a Zombie: There's no shortage of examples in-story. The Skeleton Lords and Undead Hunters in Huntsman's Copse were originally hunters of the Undead under the Old Iron King, who later went Hollowed. The Undead Crypt is also guarded by the Imperious and Insolent soldiers, who once tried to conquer it and instead were made its gatekeepers after their death.
- Anti-Frustration Feature:
- Backtracking is even easier now that you can teleport between bonfires right from the start.
- Enemies will eventually depopulate in a zone if you kill enough of them, making repeated boss runs easier. You can also bring enemies back with an item if you want later.
- One covenant, Way of Blue, is available after the tutorial and sends you defenders when you're invaded.
- Phantom summons are easier, and Small Soapstone Sign Shades can be temporarily summoned even after defeating an area's boss.
- An NPC will take multiple hits before becoming hostile. So unlike the last game, you won't have to absolve a sin if you accidentally hit an attack button when next to one of them, or if you deliberately attack because you mistake one for an enemy (as the game often toys with you on whether they are friendly or not).
- You can temporarily resurrect any NPC you've killed for a fixed amount of souls.
- You can bypass the four Old Ones if your Soul Memory is over one million at the Shrine of Winter. note
- Soul Vessel items that let you redistribute all your stat points, and thus salvage a botched character build or even try a completely new one without having to start an entire new game.
- The Ring of Life Protection saves your humanity and all souls obtained if you die, but unlike the Ring of Sacrifice in the first game, this ring can indefinitely be repaired (for 3000 souls each time) instead of being lost (this was later nerfed to 14,000 souls).
- Human Effigies are far more common than Humanity in the first game, making gradual loss of health from hollowing more manageable (although they don't heal you like Humanity).
- The Ring of Binding halves the loss of maximum HP from hollowing, causing it to cap out at 80% of max, instead of 50%.
- Beating a boss as a Phantom or Shade sends you back to your world with fully restored health, spell uses, condition of unbroken equipment, and humanity.
- There is a shrine in a late game area which will restore the player's humanity if they don't have any human effigies in their inventory or too high a sin rating.
- After defeating the Last Giant, Melentia will have infinite Lifegems in stock and they go for a very cheap price.
- Adding magic / fire / etc. damage now only requires a single item, instead of an entire series of unique upgrade materials.
- The player no longer starts New Game Plus automatically upon viewing the credits, but is instead dumped back at the Far Fire, where they can choose to start a new cycle from the fire menu.
- From New Game Plus and onwards, the 6 minute credits can be skipped.
- Scholar of the First Sin's Agape Ring will prevent you from gaining any souls while you wear it, which you can use to control your Soul Memory.
- Practically every boss has NPC summon signs now, often two of them. While this does increase the boss's health, having someone to draw their attention away from you is often worth it, especially given this game's prevalence of Duel Bosses compared to the first game's giant monsters.
- Weapon durability is now restored at Bonfires (though broken ones will still need to be repaired). Although to balance this out, all weapons are now made out of movie prop glass. Or at least, it sure seems like it based on how quickly they can break.
- Bonfire Ascetics can respawn the boss, allowing you to get all the boss soul weapons in one playthrough.
- Two NPC quests (Lucatiel and Benhart's) require you to summon them and have them help you beat 3 bosses before meeting them at a late-game area. However, if you screw up and accidentally miss a summon, you can use a Bonfire Ascetic to re-fight a boss with them and it'll still count. If you don't want to do that, then each of them is also summonable for a DLC boss which counts towards their total.
- Palestones can remove enchantments from weapons without also undoing a chunk of their previous upgrades.
- Divine Blessings are a more common item (though still pretty rare).
- There are many more healing items with the various Charms and Waters. Although the animation is too slow to use them in battle, they are helpful for if you're exploring an area for the first time and don't want to respawn all the enemies to replenish your Estus.
- You start off with the Bottomless Box instead of having to buy it, and useable items don't get automatically added to your toolbelt, preventing the clutter prevalent in the first game.
- There is a pyromancy and a miracle obtained by earning Rank 3 in the Brotherhood of Blood and Blue Sentinels, respectively, which essentially amounts to getting 500 PvP victories for each covenant. This would have taken ages to achieve even back when the game was new and full of players, and takes even longer now. Fortunately, if you still want the achievements for obtaining all pyromancies/miracles, you can just buy both of these spells from Chancellor Wellager... on NG++ (and no, Bonfire Ascetics don't work). Sure, you have to play through the game 2 and a half times, but that's still less tedious than doing it the normal way.
- Multiple copies of a soul item can be used at once, making using them less tedious.
- Anti-Grinding: As mentioned above under Anti-Frustration Features, killing the same enemy enough times (around 12 or so) will make it stop respawning. While it was probably intended to make the runback to the boss easier for players who may be having trouble, it also makes it difficult to farm enemies for souls or drops. You can burn Bonfire Ascetic to cause the area surrounding that particular bonfire to go up one New Game cycle, which will bring back the enemies (including bosses where applicable) until you kill them enough times to make them stop respawning again. In Scholar of the First Sin, however, joining the Company of Champions covenant will enable infinitely respawning enemies like in the previous game, so you can simply join the covenant when you want to farm and then leave it when you're done.
- Arc Symbol:
- Ashes. You turn to ashes when you die; Sinners Rise, The Throne of Want, and other areas are covered in them, and Ashes can be used to power up your healing items.
- Dark, even more so than in the first game. Drangleic was a kingdom mired in the dark as it was a kingdom of men, many areas (the Gutter, the Undead Crypt, the Dark Chasm of Old, the lower levels of Shulva, and the Throne of Want) are all poorly lit or completely pitch black, each DLC and the Final Boss of the main story focuses on a Child of Dark and the effects they had on their kingdom, and, ultimately, Aldia reveals that the Dark within mankind is natural and was perverted by the ancient Lord of Sunlight to deny humanity its true power.
- Arc Words:
- "Bearer of the curse" and "Seek the king"
- "What do you want?" More specifically, "Want" as a philosophical concept; the Ancient Dragon muses that "the curse of life is the curse of want", and the final area is the "Throne of Want".
- "I'll be around, if you ever make it back" from a few NPCs.
- "Flame, dear Flame" can also seldom be heard.
- Arc Villain: The Old Iron King is responsible for many of the monsters you fight during the game, including the Executioner's Chariot and the notorious Smelter Demon, but is only one of the four great souls you need to reach Castle Drangleic.
- Arrows on Fire: Bows and crossbows can both fire Fire Arrows/Bolts, which as well as doing fire damage, can also detonate explosive casks or ignite pits of tar. A bow or crossbow infused with a Firedrake Stone will also apply this effect to arrows/bolts fired from it.
- Artifact Mook:
- The Rusted Ironclads in the Forest of Fallen Giants said to have wandered away from the Old Iron King's land into Drangleic. Alonne Captains from that land can also be found at Drangleic Castle.
- Inverted with the Grave Wardens, who show up in the Earthen Peak before you see them in the Undead Crypt (the description of their items only explaining their presence in the latter).
- Also inverted with the Cyclopes, who appear in Things Betwixt far, far before you see them in Aldia's Keep and get any idea to the origin. They are off the beaten path, though, for good reason.
- Artificial Brilliance:
- Enemies will start using backwards attacks if you constantly attack them from behind. If you're hiding behind your shield, most will use a guard break.
- DLC invader NPCs will use player gestures and tactics against you, including "mock" if you lose.
- Covenant of Champions members will see enemies retreat when injured and coordinate attacks.
- More than a few enemies will charge you the second you tap the Estus button.
- When a Belfry Gargoyle is below 50% HP, they'll start breathing fire, while the others form a defensive line.
- Artificial Stupidity:
- AI can occasionally be broken by circling around them, leaving them standing motionless.
- In the Sunken King DLC, Jester Thomas can be caught in an infinite stagger loop by spikes, as his AI will think it's in melee combat with the spikes.
- Some AI enemies have a limited aggro range, making them easy to kite. The giant Basilisk in Shaded Woods is particularly bad; you can stand out in the open and shoot it to death as long as you're out of its attack range.
- Ascended Meme:
- In the Undead Crypt, you encounter two enemies who use the dual greatshields build that was used for challenge runs in Dark Souls. Their shield descriptions even calls it "playful". Their shields, The Orma's and Reeve's Greatshields respectively for left hand and right, even have significantly more damage compared to other great shields and can be powerstanced for a unique pincer attack that is very practical in terms of damage output, if somewhat difficult to handle due to the slow windup and inherent short range. This spawned a new meta of players powerstanceing these shields as a legit build.
- The achievement/trophy for Heirs of the Sun lampshades Solaire fandom jokes with "Brilliant Covenant: Discover a most brilliant covenant".
- Memetic Badass Jester Thomas became a powerful invader in the Sunken King DLC.
- The Pharros Mask from the Iron King DLC allows fans to recreate the "Giant Dad
 " build from Dark Souls.
- Authority Equals Asskicking: Prestigious enemies and bosses have much more intricate move sets when compared to the typical, listless Hollow.
- Automatic Crossbows: The Avelyn, returning from the first Dark Souls. Of note is that powerstancing two of them allows you to unleash 6 bolts at once, at a reasonable reload time.
- Awesome, but Impractical:
- Higher level spells can one-shot tough enemies, but have long wind-ups or impractical costs:
- Forbidden Sun, a giant fireball that leaves its own trail of fire, but costs multiple attunement slots and has only a few uses.
- Climax is the most damaging attack in the game if you have over 5000 souls. However, each use eats all your souls, which is not only bothersome but requires one to stock up on Souls of a Brave Warrior to even use its three charges in a row.
- Soul Geyser unleashes multiple Soul Spears, but has terrible accuracy and slow casting time.
- Soul Appease, a powerful miracle with a wide radius that only damages low-level Hollows. It's surprisingly effective against the Rat bosses, The Rotten and undead players, but not much against Vendrick.
- Repel grants invincibility against most damage sources, but costs three attunement slots and has to be cast in advance just to last for 1.5 seconds (the Northwarder set can raise that a bit). It doesn't prevent knockback either, so in most situations the player is better off just practicing how to dodge and parry. In cooperative play, however, it can be used to protect allies.
- Greatbows deal lots of damage, but have a slow wind-up, high stamina cost, high weight, and expensive ammunition.
- The Smelter Hammer deals strike damage, which few enemies can defend against, and has high durability. But it's massively heavy, requires 70 strength to one-hand, and has a slow wind-up.
- Old Whip, the highest damage whip, has extremely low durability.
- The Ruler's Sword you get from Vendrick's soul powers up as you gain souls, requiring a million for its full power. Sounds like a high-risk Infinity +1 Sword but it actually doesn't become much stronger than other more practical weapons you can get, has no scaling and requires faith and intelligence for no particular reason.
- The Ivory Straight Sword, from the Crown of the Ivory King DLC, has very high raw damage and is a freakin light saber. How cool is that? On the downside, it has zero scaling, you will almost certainly get it in the endgame where scaling is what makes or breaks a weapon, it has very high dex requirements to even use, and to top it off, it has the durability of wet tissue paper, probably the least durable weapon in the game.note
- You can parry most bosses, but they only have a second or two of vulnerability afterwards.
- Three weapon slots give you more flexibility, but using all of them will usually make your character overencumbered. Besides, switching weapons in the middle of a fight briefly makes you vulnerable.
- Higher level spells can one-shot tough enemies, but have long wind-ups or impractical costs:
- Awesome Moment of Crowning: The Take the Throne ending, where you sit upon upon the Throne of Want and become the true king of Drangleic, after defeating every ancient evil that roamed the land.
- Ax-Crazy:
- The Bell Keepers all have a mad obsession with protecting the bells... by chopping any intruders into tiny little bits.
- The Brotherhood of Blood covenant is an entire religion built around being Ax-Crazy Blood Knight invaders. Their leader is also a nutjob devoted to the God of War, Nahr Alma.
- Badass Cape: Many high level chest armors come with a billowing capes. Examples include the Drangleic Armor, the Llewellyn Armor, and Velstadt's Armor.
- Badass Longcoat: A good number of armour pieces sport this, the most notable being the Faraam Armor, this game's Iconic Outfit.
- Badass Normal: Benhart is one of the few characters totally unaffected by the curse - he's just passing through Drangleic to find giant monsters to kill.
- Balance Buff: Compared to the first game:
- Spells have a considerably shorter casting speed, partly because this aspect is shared among three level stats instead of one.
- Elemental weapons were buffed. In the first game, they had severe penalties for scaling reductions and/or base stat reductions, while not having that much of a damage bonus against enemies that were weak against those elements. Thus, they were good at low levels but soon got outclassed by Non-Elemental weapons and spells of those elements. In II, the penalties are reduced and the damage bonuses are enhanced, so an elemental weapon against the right enemy will do even more damage than some normal weapons that have higher base damage.
- Pyromancy was both nerfed and buffed. While it's not as effective for non-spellcasting builds (though still useable), with spellcasting builds pyromancy can eventually do even more damage than fully upgraded fire spells in the first game.
- Even special armours like Havel's Armour, while having a rather decent set of stats on their collection, can be upgraded further. Armours of its class in the first game could not be upgraded, and in the case of Havel's Armour, one other armour set could be upgraded to provide better stats, and several other comparable pieces of armour exist. Havel's in Dark Souls 2, conversely, has some of the highest stats of any armour by a considerable margin, particularly physical defenses for arms, legs and torso pieces.
- Bare-Fisted Monk: The Vanquisher's Seal from the Company of Champions lets the player enter Power Stance with bare hands, and gives their fists a humongous damage boost.
- Battle in the Rain: The duel with the Looking Glass Knight, which takes place at the summit of Drangleic Castle in the midst of a ferocious snow and rain storm. It actually affects gameplay as well, as being in the rain gives you the "wet" status, which increases fire resistance (useless because the Knight doesn't use fire) and slashes lightning resistance (painful because it does).
- Beneath the Earth:
- The Grave of Saints, Gutter, and Black Gulch. Each is a series of catacombs, sewers, and caves far beneath the hub town of Majula filled with rat kingdoms, mutants, and other strange creatures.
- The Sunken King DLC adds Shulva, a sanctum city of towering pyramids in a cavern miles below ground.
- The Ivory King DLC presents the hellish Old Chaos under the frozen barrage of Eleum Loyce.
- Berserk Button:
- Milibeth will not take kindly to you attacking any of the three retired Fire Keepers, even if it's a stray hit.
- Destroying eggs at the Dragon Aerie (and not resetting them with resting at a bonfire) will make all the Guardian Dragons become more aggressive, and one will even destroy the bridge when you try to reach the Dragon Shrine.
- Gravewarden Agdayne will attempt to kill any player that shines a torch in his room.
- The Fume Knight will instantly go into berserk mode if the host player wears Velstadt's helm, due to the enmity between Raime and the Royal Aegis.
- In Scholar of the First Sin, killing either of the bosses in Heide's Tower of Flame (the Dragonrider blocking the way to No-Man's Wharf or the Guardian Dragon sleeping in front of the Blue Cathedral entrance) will make all Heide Knights in the level aggressive.
- Also in Scholar of the First Sin, the staircase leading to the Ancient Dragon is filled with multiple Dragon Knights that won't attack you on sight, save for one as a Red Phantom. Hit just one, however, and you'll have the whole pack hounding you. The same Dragon Knights are scattered all throughout the level, usually next to a Drakekeeper. Fight the Drakekeeper head-on and they will ignore you. Run away from the Drakekeeper, however, and they will begin chasing and attacking you; justified as the Dragon Remnants covenant is all about honorable dueling, so running away is anathema to them.
- Beware the Silly Ones:
- The Bell Guardians are tiny, insane marionette midgets who are violently fanatical about defending their bells. And they will utterly destroy you if they gang up on you.
- The only kingdom to survive from the first game to the second? Catarina, land of the onion knights.
- The 3 tiny pigs in Majula can easily kill a new player due to their high health, fair damage dealing, and small hitboxes.
- Crown of the Ivory King's Twiggy Shei, a strange man with a bell on his head and a greatbow. He's also one of the most effective summon allies out there.
- Jester Thomas, who, as you can probably guess, is a court jester. Can't get much sillier than that. He is summonable for one boss which he can easily solo with his extremely powerful pyromancy. He also shows up in the DLC... as an invader.
- BFS: A series staple. Examples include the King's Ultra Greatsword, a massive vaguely sword-like statue, as well as Dragonslayer lookalikes like the Greatsword and the Crypt Blacksword.
- Big Badass Battle Sequence: The Giant Memories pull you back in time to the height of the Giant War, where you're caught in between the rampaging giants and the beleaguered royal forces. Mercifully for this game, the latter side are non-hostile to you until you provoke them.
- Big Bad: Queen Nashandra, who caused most of Vendrick's foolish acts and is actually a Soul Fragment of Manus, the main villain from the first Dark Souls' DLC.
- Big Damn Heroes: The Blue Sentinel covenant, which will summon players into the games of Way of Blue covenant members to protect them from invaders.
- Big Red Devil: The Old Iron King, one of the four Great Soul bearers, looks a fair bit like Diablo.
- Bittersweet Ending: Regardless of what happens at the Throne of Want, the Bearer of the Curse successfully finds a way to stop themself from going Hollow, solving the issue they came to Drangleic for.
- Blatant Lies: Licia claims that the door between Heide's Tower and Huntsman's Copse is powered by miracles. In actuality, it's a key which you can see her use as soon as you bow your head to pray.
- "Blind Idiot" Translation: Some of the descriptions omit a lot of the lore details, and even misspell words: the boss called "Sentry of Exile" in the Japanese version has its name translated into English as "Flexile Sentry", which is a similar-sounding but otherwise unrelated word.
- Body Horror:
- Your body will gradually rot as you die and become more Hollow.
- The Rotten, a Wickerman-esque golem made of still moving undead, screaming for release.
- Booby Trap:
- There are now booby trapped chests, in addition to the Mimic enemy from the first game.
- The Doors of Pharros is an entire underground city of traps. Ax-launchers, extra enemies, wall spikes, extra obstacles, the lot. This is because these are supposed to aid Rat King Covenant members in defeating trespassers. With enough Pharros Lockstones, they can literally turn the whole Doors of Pharros area into a gauntlet/obstacle course of death.
- Book Ends: Several.
- You return to the Forest of Fallen Giants, one of the first major areas in the game, for the late game Memory of the Giants section. The Giant Lord you encounter there is also the true form of the earlier Last Giant.
- The massive spires at the beginning in Things Betwixt return late in the game, when you reach the Dragon Aerie.
- Crestfallen Saulden even gives this one a mention. "Life is a journey... And every journey eventually leads to home..." You respawn at the Majula bonfire after defeating the Final Boss.
- Boring, but Practical:
- The bastard sword is easy to obtain, equip, and fully upgrade, making it the most powerful weapon you can have for long stretches of the game.
- The Drangleic Mail can be obtained after only the second boss-fight and has some of the best resistance and defense to weight ratios.
- The Morning Star can be obtained right after leaving Things Betwixt and, while it has short range and its bleeding effect won't proc often except against bosses or enemies with lots of HP, it has decent scaling with all infusions and can carry you through a good chunk of the game.
- Many otherwise complicated encounters can be solved by packing a ton of arrows and slowly sniping everything you can from a safe distance, especially if you can stand outside of the range enemies are allowed to move on. Even the notorious spellcasters at Shrine of Amana can be easily slain one by one like this.
- Your best loadout is going to contain one of two weapons: the Estoc or the Mace, which can both be purchased for about 1000 souls prior to encountering the first boss. Strength characters can pull the Estoc's 12Str and 12Dex for the extra speed to help get rid of or wear down an enemy, and the combination of thrust and swinging means its versatile. The Mace requires 12Str to the Morning Star's 13 and has no bleed, but swings just a hair faster and straighter and provides a low-cost Strike weapon to anyone playing on a Dexterity route. Magic-based characters are likely to have both for any close-up encounters, and they remain decently-powered and competitive if the caster has a weapon buff.
- Boss-Altering Consequence:
- Behind the Pursuer boss is a pair of Ballistas that can be used to take off significant chunks of its health. Be careful, though, as they can also hurt co-op phantoms if they get in the way and the Pursuer can destroy the Ballistas if it gets too close.
- In Brume Tower, there are four Ashen Idols right outside of the Fume Knight's boss arena. If you don't destroy them using Smelter Wedges before you fight him, they'll heal him during the battle.
- If you start the Fume Knight's fight wearing Velstadt's Helm, he will automatically transition to his second phase. Justified by the fact that Velstadt, the Royal Aegis, is (partially) responsible for having the Fume Knight declared a traitor.
- The first boss of Frozen Eleum Loyce, Aava, the King's Pet, starts off completely invisible. You are supposed to trek around the level and find the Eye of the Priestess, which lets you see her, but you can fight her without it.
- There are three frozen Loyce Knights hidden away in various corners of Eleum Loyce. Finding and freeing them secures their help for the fight with the Burnt Ivory King (you get one for free from Alsannah before the fight): the first three knights will each seal a portal that spawns an infinite amount of fairly annoying enemies, while the fourth will continue to fight by your side.
- Boss Battle: Just like the first Dark Souls and Demon's Souls before it, Dark Souls II is host to an enormous amount of boss fights.
- Boss Corridor:
- The King's Passage is a straight hall to the Looking Glass Knight with nothing but statues. Some of which come alive and attack you.
- The path to The Throne of Want, a straight path down to the room where you fight the Throne Watcher / Defender and Nashandra.
- Boss in Mook Clothing: Vengarl's body, which has 2 powerful weapons, decently high resistances, and a farily high HP for how early it can be found and more than the standard set of invaders. While it does take a bit to find (it's behind no less than 2 petrified statues) it hits as hard and fast as most bosses despite just roaming around the Shaded Woods. Defeating it gives you access to the Red Rust weapon and shield set, and the ability to summon Vengarl for a few boss fights including the Throne Watcher/Defender and Nashandra so it's well worth it.
- Boss-Only Level:
- The Blue Cathedral, which houses the Old Dragonslayer.
- The Undead Purgatory, the Brotherhood of Blood's answer to the Blue Cathedral, is little more than a long hallway that houses the Executioner's Chariot.
- The Throne of Want, which consists solely of a long pathway leading to the arena housing the penultimate and final bosses.
- Boss Rush: Overlaps with the final set of bosses. If players don't make a side trek to the Throne of Want without having the Giant's Kinship, players will have to battle the Throne Watcher/Defender duo and Nashandra, back to back. As of the Scholar of the First Sin update, if the player defeats Vendrick and activates all of Aldia's encounters, the latter will show up as the True Final Boss after Nashandra's death. All in all, the player can choose to fight four bosses back-to-back at the endgame. As compensation, any summoned players are kept between each fight.
- Bottomless Pit: The Dark Chasm of Old is filled with these, where if you fall off the level you'll just go straight into an endless abyss.
- Boxing Battler: Power stance with the Cestus dramatically improves the player character's technique to a very fast boxing-like style.
- Bragging Rights Reward:
- King Vendrick's Blessing. It will stop you from ever Hollowing, but getting it requires finishing all the DLC and beating Optional Boss Hollowed Vendrick, all of which are in late game areas. And worst of all, it doesn't carry over to NG+, so when you enter that, you will have to do all of the above again before you get the Blessing again.
- Two rings are obtainable via special challenges, and these do carry over to NG+ The kicker? One is obtained by not dying at all, the other is done by never using a bonfire (except the primal bonfires). They hide your left and right hand equipment from other players, useful in PvP but basically require two of the hardest challenges in the game to get.
- Breakable Weapons: All weapons in the game degrade and break if you don't regularly rest at bonfires or fix them with repair powder. Once a weapon breaks, it can only be repaired by blacksmiths or by whipping the Pagan Tree at Shulva.
- Broke Your Arm Punching Out Cthulhu: Drangleic was able to defeat the Giants thanks to you, time-traveling to defeat the Giant Lord, despite their numbers and massive strength, but it left the kingdom too weakened to deal with the Undead curse that came shortly afterward.
- Brutal Bonus Level: The Iron Passage in Crown of the Old Iron King, a series of caves filled with gangs of melee opponents that will swarm you while you're being bombarded at the same time by spellcasters placed too far above you for you to reach them. It ends with a battle against a blue Smelter Demon.
- The Frigid Outskirts in Crown of the Ivory King are another example. Reaching it requires you to find a key in an extremely out of the way secret area, and the area itself is a barren wasteland cloaked by a blizzard that severely limits your visibility. The main enemies are giant, evil reindeer that love ambushing you right where you can't see them, and the boss of the area is just a Dual Boss version of Aava, the King's Pet.
- The Cave of the Dead in Crown of the Sunken King makes it 3 for 3 for DLC bonus areas; it's little more than a succession of rooms that you drop into crammed with powerful, annoying enemies, including the poison-spitting statues from the Gutter and Black Gulch, only this time their spit petrifies you and they're carried around in clusters on the backs of little turtle-like creatures. Just to put the cherry on top, the boss is a simple 3-on-1 gank against a trio of graverobber NPCs that don't even PRETEND to be following the same rules as you.
- Brume Tower from Crown of the Old Iron King is fairly punishing in its own right. The tower is cramped and difficult to navigate, and the entire area is filled with Ashen Warriors, some of the fastest and deadliest melee fighters in the game. It’s easy to make a wrong turn and get swarmed by a crowd of them.
- Bow and Sword in Accord: Mechanically encouraged. When firing a light or heavy crossbow after a melee weapon attack, your character will skip the aiming part of aiming and firing it, making it a lot safer to use in close quarters.
- Call-Back: Quite a few to the first Dark Souls, and some legacy ones to Demon's Souls and King's Field.
- The description of many Magics, Pyromancies, and Miracles harken back to their originators, the Lords/Gods in the first game. Notably, the Remedy spell, once a sorcery in the first game, returns in Dark Souls 2 as the Caressing Prayer miracle. It is one of few spells significantly altered in this way, outside of the way dark magic was handled after its introduction in Dark Souls 1's DLC, and has one of the only in-lore explanations of its shift. Its description harkens back to its original status as a much older Oolacile sorcery. "This spell was recently developed, and may not be an authentic miracle."
- A number of invader enemies and bosses from Dark Souls return as Black Phantoms.
- Manscorpion Tark strongly indicates that he and Najka were creations of Seath the Scaleless. The area of Brightstone Cove Tseldora, similarly, hints that it is the remnant of Seath and/or the crystal area he once inhabited.
- Mild-Mannered Pate is a dead ringer for Patches, using the same long spear and greatshield combo in battle. And like Patches, he mildly screws you over after giving you gifts and sweet-talking you to lower your guard.
- The Lingering Dragoncrest Ring mentions Vinheim from the first game.
- Straid's dialogue indicates that Drangleic might actually be the kingdom where the Northern Undead Asylum was located.
- In New Game Plus, the four Old Ones drop souls that directly reference the holders of the Lord Souls from Dark Souls.
- The Black Dragon equipment references the Kalameet boss fight from the first game's DLC.
- The Milfanito in the Shrine of Amana are singing a rendition of the Nameless Song, the credits theme from Dark Souls.
- You can find the remains of the Lordvessel in the basement of the small mansion in Majula. The complete model for it appears outside the playable map.
- Blacksmith Lenigrast looks similar to the depiction of the Excavator/Burrower King on the Stonefang Archstone from Demon's Souls.
- The Dragon Memories area is identical to the area from the opening of Dark Souls where Gwyn and his allies defeat the Everlasting Dragons.
- In the Black Gulch, Lucatiel speculates that everyone is born with the Curse, mirroring the words of the Primordial Serpents from Dark Souls.
- The sunken city of Shulva in the Crown of the Sunken King DLC has been compared to the Ancient City from King's Field IV.
- In the Crown of the Ivory King DLC, the Old Chaos has tree roots protruding from its ceiling, a call-back to Lost Izalith and the Demon Ruins from the original Dark Souls.
- The city-fortress of Eleum Loyce itself appears to be the realized concept of the cut Land of Giants from Demon's Souls.
- The Cake Is a Lie: The rumors of a cure for the Undead Curse are nothing but lies to lure Undead to Drangleic spread by Shanalotte as part of her plan to find a champion to defeat Nashandra and claim the Throne of Want. Or so it seems, as Scholar of the First Sin give the player a chance to find a cure with Vendrick's help.
- Camera Lock-On: Returns from the previous game, slightly tweaked. The Gameplay Demo shows◊ the player turning around and sprinting away from the Executioner's Chariot without breaking lock-on.
- Carry a Big Stick: Clubs, which are very heavy and have insane strength requirements. The Giant Warrior Club has 30 weight and needs 60 strength just to use with one hand. The Smelter Hammer from the Iron Crown DLC weights 35 and needs 70 strength for one-handing!
- Cast from Experience Points: Some of the hexes use up souls to cast. One uses all souls the player has, but when the count is 5,000 or higher the spell's power reaches Critical Hit levels. Since souls are both XP and currency, it's Cast from Money at the same time.
- Cast from Money: Some powerful hexes cost souls to use, and do a pitiful amount of damage if you have none. "Climax" in particular, the reward for defeating Darklurker, deals immense damage, but drains all your souls.
- Casting a Shadow: Hexes, a new Dark magic type focused on offensive and disruptive spells, some of which cost souls to use. They scale with both Faith and Intelligence (whichever is less), and require points in both to equip.
- Cave Mouth: A few entrances, such as the one to the Grave of Saints contain these. They make a return in Doors of Pharros. Why are they there? To warn you that entering these places contain players who are from the Rat King Covenant.
- Central Theme: What it means to be subject to Eternal Recurrence and how many different ways a person can respond to this knowledge. The game suggests that the curse and the soul are one in the same, and that the curse is a consequence of the souls feeling wants and desires. Lore informs the player that even the overarching conflict between Fire and Dark in the first game is itself just part of a grander cycle where no choice changes the pattern of history. With knowledge of the reality of the world, what should one do? Accept the necessity of the cycle and work for its continuation, or deny the reality of the world and seek to destroy it? Both options are shown in mixed lights.
- Character Customization: You can customize your facial features, gender, body type, and hair at the outset of the game, and change your armor and weapons to suit your playstyle or aesthetics anytime you like.
- Chekhov's Gun:
- The corpses of Giants that have turned into trees in the Forest of Fallen Giants. You eventually use them to enter the Giants' Memories and witness the Giants' war with Drangleic.
- The battlement-lined wall that runs alongside the path to Castle Drangleic is accessible in the Ivory King DLC.
- Chest Monster: Mimics return and still chomp on the unwary (can be both wood and metal chests, but neither is stronger than the other). They have two major differences this time:
- They are four-legged instead of bipedal.
- Their giveaway is padlocks in the front of the lid. Safe chests do not have these, except for one chest in the Black Gulch. If you look VERY closely, you can also spot a mimic's teeth in the crack between the lid and the body.
- Clone Degradation: Though they're not literally clones, the lore states that knights who wear replicas of Syan's armor have gone thoroughly mad. It's implied to be a curse of sorts as Syan is the only one of the Drangleic Great Knights who fell against the Giants.
- Color-Coded for Your Convenience: Phantoms are color-coded based on how they joined the player's session or on their covenant. White for players who have used White Sign Soapstones (co-op). Blue for Blue Sentinels (co-op/PvP). Red for regular invaders or those who have used the Red Sign Soapstone, which can be acquired upon joining Brotherhood of Blood (Pv). Gold for The Heirs of the Sun (co-op). Gray for Bell Keepers, victims of the Rat King's Covenant, or Dragon Remnants (PvP).
- Competitive Multiplayer:
- Do you like PvP? Then become a Black Phantom and invade other players' worlds for their souls. Try the Brotherhood of Blood covenant to duel over the favor of the war god Nahr Alma and to hunt your own Undead kind, the Bell Keepers covenant to protect the Belfry Sol and Luna, and the Rat King covenant to defend the Doors of Pharros or the Grave of the Saints from would-be intruders. The Dragon Remnants covenant, on the other hand, duel over dragon scales to level up in their covenant.
- Alternatively, if you want to help against the forces arrayed against players by others, join the Blue Sentinels covenant.
- Confusion Fu: This is the tenet that PVP-oriented hex users are founded upon. With both enough intelligence to use strong magic, enough faith to use the best miracles, and enough versatility to use Hexes, they're very unpredictable opponents. Although since they've put all their points (generally) in Faith, Intelligence, and Attunement, they're incredibly frail, and tend to go down in one or two hits.
- Continuing is Painful: The penalty for dying is harsher than in the first game. In addition to losing your current supply of souls and having only one chance to retrieve them, each time you die, you suffer a permanent reduction to your maximum health that bottoms out from -50% to -90%. This can only be reversed by sacrificing human effigies, which are somewhat rare and limited.
- Convection, Schmonvection: Par for the course for the series - you can walk around the Iron Keep that's literally half-sunken into a massive pit of boiling lava, then fight the Old Iron King at the end on a tiny platform in the middle of a sea of the stuff...and it'll only hurt or negatively affect you if you walk or fall into it.
- Cool Versus Awesome: In Crown of the Ivory King, you can gather the scattered the Loyce Knights and pit them against the Charred Loyce Knights in a spectacular clash of ice and fire. The battle then climaxes with the Bearer facing off against the Ivory King.
- Cooperative Multiplayer:
- Placing a white soapstone on the ground allows a player to be summoned as a White Phantom and assist the host in killing an area's boss. White phantoms, however, do not stay with the host indefinitely. They return to their world upon defeating the boss, or after a set amount of time.
- Joining the 'Heirs of the Sun' makes it even easier to connect to other worlds for co-op. Another benefit of this covenant is that members have a longer time limit in the host's world as compared to a regular White Phantom.
- Joining the 'Blue Sentinels' allows you to be auto-summoned to the worlds of 'Way of the Blue' covenant members when they are invaded.
- Corridor Cubbyhole Run: The first phase of the Executioner's Chariot boss forces you to duck into small alcoves to avoid the chariot running you over.
- Cowardly Mooks: The Tower of Brume features Hollows who carry around Explosive Barrels and always back away as long as the player faces them. This can be used tactically to goad them towards stronger enemies and exploding their barrels from a distance.
- Creating Life: A good number of monstrosities in-game are results of life creation attempted by the great kingdom's monarches (anything found in Aldia's Keep, the Primal Knights guarding Drangleic castle, the Ironclad soldiers in Iron Keep, the Rampart Golems in Eleum Loyce, etc.). In case of Aldia and Vendrick, they did it to figure out a cure to the Curse and a solution to the Cycle of Fire and Dark. The Old Iron King presumably did it just because he could. And the Ivory King did it to reinforce the line of defense within Eleum Loyce, containing the abominations that come from the Old Chaos.
- Critical Hit: The Engraved Gauntlets add a 15% chance of attacks dealing 50% more damage. They combine well with weapons that attack rapidly.
- Crown of Power: The titular Crowns of the Sunken King, Burnt King, and Ivory King have no inherent power alone. However, after getting all of them, King Vendrick finds a way to empower the crowns with the ability to nullify Hollowing as long as the player character wears them.
- Curb-Stomp Battle: Your trip in the memories of Giants shows that the eponymous Giants completely wrecked Vendrick's royal forces, and that they were only stopped after an unknown hero defeated the Giant Lord.
- Cutting Off the Branches: Averted. The game suggests in the Eternal Recurrence of the Undead Curse, Ages of Fire have given way to Ages of the Dark, only for the next cycle to in turn rekindle the flames and begin a new Age of Fire. In short, the two Dark Souls endings both happened, eventually.
- Damage-Sponge Boss: The HP of most bosses in this game have been greatly increased from the previous game, although there are two bosses who have way too much:
- Unless the player has 4 Souls of a Giant, King Vendrick will take hundreds of hits to finish.
- The Ancient Dragon takes approximately 30-50 hits to finish, even with fully upgraded weapons.
- Damn You, Muscle Memory!: A number of gameplay elements changed between Dark Souls and this game.
- The default jump button was changed to L3, which screws up players used to the previous game's jumping. This can be changed to the previous game's control, but it's the only change with that option.
- The same button now controls holding and firing a bow. New players often waste some of their starting ammo trying to aim.
- Simply pushing the dash button on a ladder now causes you to jump off it instead of sliding down. To do that here, you have to hold dash and move the stick down.
- Several weapons have their movesets changed, such as overhead smashes here often turn around on the second attack to hit behind the player, even when locked on. This can be useful for crowd control, but still messes with players hoping to combo an enemy.
- On the PS4 version at least, the main menu is brought up with the touchpad, while the options button brings up the gesture menu, which is the opposite of every other From Software game on the console.
- Dare to Be Badass: The Emerald Herald's decrees.
- Dark Is Evil: The Children of Dark, most notably Queen Nashandra and Elana, who were actually born from the corpse of Manus, Father of the Abyss, and serve as the antagonists respectively for the main game and its first DLC content. Averted by Alsanna, who was redeemed by the love of the Ivory King.
- Dark Is Not Evil: As mentioned above, Alsanna. A few of the game's hexer NPC's also qualify; Felkin the Outcast is a somewhat pitiable social misfit who didn't fit in at his academy and pursued the Dark for further study, Darkdiver Grandahl is a pleasant old wizard who tries to help you become more powerful with his knowledge, and Straid is an Insufferable Genius who nevertheless provides the extremely valuable service of transposing boss souls into high level spells for you.
- Death Course: The Doors of Pharros and the Grave of Saints, where non-rat covenant players get dragged into a madcap race for the bonfire as absolutely everything tries to kill them. The more Pharros Lockstones the rat covenant members use, the worse it gets.
- Degraded Boss:
- The Ruin Sentinels from the Lost Bastille return in Drangleic Castle as elite mooks.
- The Flexile Sentry reappears as an enemy in Shaded Woods (Lost Bastille in Scholar of the First Sin), but as a mini boss instead of a mook.
- The Guardian Dragon, who reappears many times in the Dragon Aerie. Scholar of the First Sin adds a much weaker version to Heide's Tower of Flame, which you will encounter long before ever seeing the original boss.
- Elana the Squalid Queen will summon mook versions of Velstadt during her boss fight.
- A pale-skinned version of the Covetous Demon appears in Eleum Loyce as a miniboss.
- Scholar of the First Sin adds several Dragonriders to various late game areas. They're just as tough as the original (and at least one of them respawns), but by this point the player will have greatly increased stats, gear, and skills.
- Developer's Foresight: You might assume that when you set the Earthen Peak windmill on fire, causing all of the pools of poison on the upper levels (including the boss chamber where it causes the boss to constantly heal) to disappear, the developers would just have the poison blink out of existence, because it's not like you can actually get up to a point where you can see it before it's gone, right? As it turns out, if you make your way up to the bonfire above the boss chamber and set it as your respawn point, climb back down to the windmill, then set it on fire and use a Homeward Bone to teleport back to the boss bonfire before it finishes burning up, you can actually watch a unique animation of the poison draining away.
- Difficult, but Awesome: Among the new weapon classes added are the Reapers, based off of the Great Scythe and Lifehunt Scythe from 1. On paper, their stats aren't amazing, almost all of them lack Bleed, which itself is a shell of what it is in other Souls games, and they all possess a "sweetspot" mechanic where you have to hit with the actual blade of the weapon to deal full damage. If you learn to properly space and handle the weapon, you're rewarded with deceptively high damage contrary to what its stats tell you and highly mobile and wide sweeping attacks, the only weaknesses at that point being some scythes being too long for enclosed quarters.
- Disc-One Nuke:
- The Fire Longsword in the Forest of Fallen Giants, since most of the early enemies, including the Last Giant, are vulnerable to fire.
- The Greatsword, one of the best Strength weapons, can be found in No Man's Wharf, which you can access after beating just one low-level boss, the Dragonrider. It's also very easy to upgrade.
- The Malformed Skull, dropped by the Enhanced Undead, has one of the highest upgraded attack ratings in the game. And Enhanced Undead can be found at the bottom of the Lost Bastille, the earliest Great Old One dungeons. Scholar of the First Sin gets rid of this, instead having it drop from a Mimic out the front of Aldia's Keep.
- Trading with the crow siblings in Things Betwixt can earn you a powerful Channeler's Trident, Old Whip, or Demon's Great Hammer in the first five minutes of the game (though you still have to level grind before wielding those, and the Old Whip is Awesome, but Impractical later on).
- The Drangleic set can be gained after beating just two bosses (The Last Giant and The Pursuer). This includes a shield that offers 100% physical blocking, a greatsword with high power (though needs a fair amount of levels in strength and dexterity), and an armor set that has some of the best weight to defense in the game.
- Killing Benhart gets you the Bluemoon Greatsword, which has extremely high base damage, in the first five minutes of the game.
- The first of three Dark Orb casts can be bought in Huntsman's Copse (which just requires beating one boss and making a merchant move to the hub area). The spell has very high power and very fast casting speed. This will allow players to take a majority of the high end enemies down in just a few hits, as well as many bosses (unless they have high dark resistance).
- Soul Spear, the late game sorcery from the first game, can be obtained early on in Huntsman's Copse. You can even farm duplicates by burning Bonfire Ascetic at the second Bonfire of that area.
- Lizard Staff has high base damage, high magic scaling, and a faster casting speed than the starting staff. It can be also obtained early on, during the Executioner Chariot battle. As long as the boss is alive (disabled or still running around), the Black Hollow Mages (Necromancers) can be farmed by just teleporting out after they are killed without dropping the staff.
- Moon Butterfly Set, an armor supposed to be unlocked in New Game Plus, can actually be obtained by merely burning Bonfire Ascetic at Majula Bonfire and be bought in the armorer's shop once you've got the souls. It reduces falling speed, falling damage, and even inflicts poison by merely standing next to anyone.
- Buy 10,000 souls worth of items from Melentia (the merchant in the Forest of Fallen Giants) and then talk to her to get the Covetous Silver Serpent Ring +1, and your soul increases go up by 20%. You can also get the Tseldora set (up to 22.5% more souls) if you are willing to kill Maughlin the Armourer.
- The Grand Lance, otherwise found late in the original versions, is available as early as right after slaying the Last Giant in Scholar of the First Sin. Not only is it the most balanced weapon of its class (and the class itself is powerful) due to being all physical damage with an absurdly high counter modifier, but it's also the easiest to upgrade.
- Do Not Run with a Gun: Averted with bows. Archery previously required the player to be completely stationary while aiming and firing. This time around the player can, at the very least, back away from enemies while firing arrows from a shortbow.
- Double-Edged Buff: The Numbness spell reduces the damage the user receives at the cost of narrowing their vision.
- Double Weapon: Twinblades, double-ended swords that deal multiple hits at low damage per hit, and have middle of the road durability.
- Downloadable Content: Dark Souls II got a paid three-part DLC in which the Undead Hero seeks out the lost crowns of the Sunken King of Shulva, the Old Iron King of the Iron Keep, and the Ivory King of Eleum Loyce. There is also the Scholar of the First Sin content, although that is being released as a massive free update.
- Dramatic Wind: One can't help but wonder if Majula was designed specifically to show off the new clothes physics, compared to the last game.
- Draw Aggro: The Redeye Ring makes the wearer more likely to be detected and attacked by enemies, so its main use is in getting players to tank bosses so that other players and NPC summons can attack.
- Drone of Dread: Almost immediately audible upon entering Aldia's Keep. It's probably coming from a magical barrier early in the Keep, but it may as well not. Between the autonomously bouncing cratesnote , suspicious mirrorsnote , petrified monsters, and a hallway completely covered in dozens of messages outright begging you to not pull the lever at its end, this is one place where being uneasy and trusting nothing certainly comes in handy.
- Dual Boss: The Dragonrider from Heide's Tower of Flame returns in Drangleic Castle, and now he has a partner! With a greatbow! This is also the case for the Throne Watcher and Throne Defender, who can bring one another back to life at full health, should one die before the other. The Darklurker will clone itself when its health gets low, forcing you to fight two targets that share the same health pool.
- Dual Wielding: Equipping two weapons instead of just one is a viable option compared to the previous games. You can even dual-wield two-handed weapons this time around. There's also the power stance, which allows you to attack with both weapons at once when pressing the attack buttons for your left hand. However, using the power stance requires two things: a pair of compatible weapons and you need 1.5 times the required stats for said weapons.
- Dug Too Deep:
- It's implied that the Iron Keep became a Lethal Lava Land as a result of the Old Iron King's greed, tunneling too deep and covering his castle in too much iron, till his castle sunk into the Earth and released the Smelter Demon and one of the Great Old Ones' souls.
- The lore behind Brightstone Cove Tseldora implies that Lord Tseldora found one of the Great Old Ones' souls while mining. Not to mention the brightstones they dug out and built their prosperity on were implied to be fragments from Seath the Scaleless.
- Dynamic Entry: The Pursuer. Nothing says more dynamic than planting an at least two meter long BFS right in front of the player's feet, and then dropping from the claws of a giant eagle that carried you through the air. And he does it twice.
- Early Game Hell:
- You need to go hunting for shards to make your Estus Flask hold more than one charge at the start of the game. They are found in very specific locations, so the early game makes healing more difficult than the late game.
- All of the character classes (ignoring the Deprived) have glaring flaws in their initial equipment, stats, or both. For example, only one melee class starts with a shield and, compensating for this "generosity," also has a terrible weapon, poor armor, and extremely specialized stats (and the shield isn't even a good one). Compare this to the previous games, where all the classes were competently equipped enough to carry the player for a good while. Of course, one can bypass this just by picking up some loot from the starting zone, including a passable, if rather weak shield and a slow but effective weapon, whereas the first game tossed the Asylum Demon at you before even letting you get to the hub. On the other hand, the Asylum Demon was not difficult to defeat once you had your starting gear as long as you knew what rolling did, and beating it meant you reached Firelink Shrine with enough souls to level up several times right off the bat. Dark Souls II doesn't actually have a defined tutorial boss, and going through Things Betwixt will give most classes barely enough souls for a single level-up by the time they meet the Emerald Herald. Plus the Morning Star you find hidden in Majula has very high strength requirements that most classes won't be able to meet.
- Eldritch Location: Drangleic does not make sense if it's to be viewed as a location in the real world, which is most notable in a few areas. Things Betwixt is apparently underground and accessible by a whirlpool, but when you get out, you see that it is on the surface, and far smaller than its inside proportions would allow. Going through a tunnel will take you from a verdant forest to a rainy mountainrange, and taking the elevator up from the top of a tower will take you to the top of a volcano that was not visible from the ground. If you were to make a complete map of every area in the game, several areas would overlay each other and be in the same location. This is intentional to some degree, adding to the strange feeling present throughout, but also the result of the areas being drastically reshuffled during the game's
 Troubled Production - for example, the aforementioned elevator was originally located in a mountain behind the tower that was cut from the final game, but is still visible in the area's Bonfire image.
 - Empire with a Dark Secret: The land of Lindelt in the lore was this. In the changed lore from Scholar of the First Sin, it is stated that the Archdrake sect where the Archdrake enemies hailed from existed for the purpose of keeping the history of the land's foundation, as well as the sect's itself, a secret. Further examination of the descriptions on the Archdrake Chime and the Slumbering Dragon Crest Shield strongly hint that they are connected to the survivors of the knight order that woke up Sinh, the Slumbering Dragon and brought about the destruction of Shulva, a sin that they later tried to cover up. It's also implied that those people founded the current sect as a show of atonement for the ruined kingdom, by carrying on its knowledge.
- Eternal Recurrence: The curse and the Fire fading are revealed to have happened multiple times and 'resolved' in multiple ways. It is even hinted that the cycle is a necessary part of the world's order.
- Evil Laugh: Many of the NPCs in Drangleic like to laugh, oftentimes to mock you.
- Evil Tower of Ominousness: Drangleic Castle's tower can be seen in the distance as soon as you set foot on Majula. Although the castle contains the final area of the game, there's quite a ways to go before that and the top of the tower itself only features a couple of prisoners and a key item.
- Evil vs. Evil: Thoughout the game, Mild Mannered Pate and Creighton the Wanderer will try to convince you that the other is an evil man who will turn on you. They are both completely right. Pate is a looter who will send you into traps hoping to loot your corpse and Creighton is a serial killer who escaped execution in Mirrah. If you help either one out when they eventually come to blows, the winner will "reward" you by telling you about a nearby chest, but neglect to let you know that it is in fact boobytrapped. And said survivor will laugh at your foolishness when you open the chest.
- Excalibur in the Rust: The Majestic Greatsword (implied to be Artorias' sword) in Crown of the Iron King is gathering dust in a chest left behind in Brume Tower and is so ancient that it's fossilized. Wielding it left-handed makes it clear that it has lost none of its power.
- Fantasy Character Classes: Just like in the first game, at character creation, you can select a class to determine your starting stats and gear. This does not limit your later development in any way and you can potentially take up any role regardless of your starting class choice, but keep in mind that some classes are optimal towards a certain style of play:
- Warrior: The Warrior is the most balanced physical class — starts with decent armour and a metal shield but a rather subpar weapon, and high enough stats to use many of the other better weapons immediately, with have decent mobility to boot. Magic stats are relatively low to start, but with some patient investment basic spells and miracles can become an option later. A superb choice for a new player or otherwise an optimal choice for total beginners.
- Knight: This is the Mighty Glacier class, the most durable of all starting classes with the most robust armour and highest Vigor. However the rather heavy armour also makes the Knight slow and limits how they can evade attacks. The Knight is a very forgiving class for mistakes, making it good for beginners, and best-suited for players who want to focus on Strength builds.
- Swordsman: A relatively challenging start as the Swordsman is a bona-fide Fragile Speedster — generally poor physical stats (except Dexterity which is very high) and limited to lighter weapons and armour due to low Strength, forcing them to rely on parrying and backstabs with their scimitar and shortsword to deal effective damage. With the correct investment, they can use power stances with the lightest weapons quickly, boosting their damage output at the cost of being frail.
- Bandit: The ranged variant of the Swordsman, the Bandit is hampered by their low stats and reliance on arrows (or their bland hand axe) to deal the most damage, of which they have a limited supply and no way to buy more until the Forest of Fallen Giants; their redeeming grace being a very good armor. The Bandit however has slightly above-average faith, making them able to benefit from miracles and lightning-infused weapons later on.
- Explorer: The Explorer's dagger is one of the weakest weapons of the game, but their light armour allows quick rolling and evasion with good early-game stats (with the hat giving an item drop rate boost) and they start with a rare Pharos Lockstone, allowing them to open a treasure room or activate a mechanism with having to buy or find one. The Explorer is quite unforgiving and recommended for experienced players or those who want a challenge.
- Sorcerer: Magic is the Sorcerer's bread and butter; they start with the Soul Arrow sorcery and can pick up sorceries (including another Soul Arrow, giving them much more combat potential) very quickly; their low Faith locks them out of Hexes for a while, however. They have fantastic damage potential and can command a lot of useful magical effects eventually, but their limited physical stats and lack of armour will make them poor fighters and thus very easy to die in direct combat, so perhaps this is a choice best left to experienced players.
- Cleric: Clerics can use miracles, a slew of defensive and support magic which makes a difference in keeping a run between bonfires going, and they can hit fairly hard with their mace as well, but they start with only robes, a mace and a talisman. A good choice for an intermediate player. Like the Sorcerer above, they won't be able to use Hexes for a while due to a low stat (Intelligence in their case).
- Deprived: The clothes on their back. And that's it. The Deprived starts out unarmed (and naked until you re-equip the Imported set!), locked out of magic of any sort due to low stats, and all gear will have to be obtained or purchased. The balanced stats are not even a plus due to the Deprived being level 1 and too weak to use almost every weapon except the basic dagger and the lightest axes. However, the lack of any initial specialisation and lowest starting soul level might allow switch playstyles on a whim if the player knows what they're doing. Only the professional, truly crazed or
 Soul Level 1 runners need apply.
- Fantasy Counterpart Culture: Drangleic has elements of the Eastern Roman Empire: Heide's Tower of Flame looks a little like Byzantine architecture, and the Drangleic Set armour resembles the armour of a 9th-century Byzantine soldier. There are also "Varangians" who resemble the Germanic peoples that often flocked to the Empire to work as guards for the Emperors, AKA the Varangian Guard. Drangleic also has elements of France, with a Lost Bastille ("bastille" designing a fortification built to defend the entrance to a city and, in old French, a synonym for "prison").
- Fat Bastard: The Covetous Demon was a human being who ate so much that he became a massive slug monster.
- Final Boss: Set up throughout the game to be King Vendrick, but is in fact his queen, Nashandra; Vendrick himself is relegated to being a Optional Boss.
- Find the Cure!: The chosen undead comes to Drangleic searching for a cure for the undead curse. Vendrick also spent the later part of his rule searching for one, but Drangleic fell before he could succeed. Without the DLC, you won't know that he actually did find one, and one that would work permanently to end the Cycle of Fire: Harness both the First Flame and the Dark Soul in tandem. While he was only able to partially harness the First Flame, he tells the chosen undead that it is the fate of the true, future king to end the curse once and for all.
- First Town: Majula. It makes Firelink Shrine look like an empty cliff, with its abundance of friendly NPCs, multiple buildings in only moderate disrepair, beautiful lighting, and calm atmosphere.
- Flash Step: The Alonne Knights utilize this technique in combat to deadly effect. Sir Alonne himself takes it up to eleven.
- Flawless Victory: If you manage to defeat Sir Alonne without losing any health and in under 3 minutes (plus 1 for every New Game Plus cycle), he'll commit seppuku instead. It doesn't do anything else.
- Flunky Boss: Many bosses are accompanied by weaker enemies that spice up the battle.
- The Royal Rat Vanguard within the Grave of Saints; the Vanguard himself is not only constantly surrounded by his rat minions, he also looks almost exactly like them.
- The Royal Rat Authority does something similar, with four toxic rats backing him up.
- The Duke's Dear Freja and her minion spiders.
- The Executioner's Chariot is backed up by a few skeletons and dark mages. The chariot can trample over the skeletons as well, but if you don't kill the mages, they'll come back anyway.
- The Looking Glass Knight becomes one if he summons NPCs or other players through his mirror shield. However, he is quite capable in combat by himself, as he will happily demonstrate to you.
- The Skeleton Lords will summon some generic skeletons when you defeat any of them, which share the same life bar.
- New Game Plus adds a few enemies to the Lost Sinner and the Flexile Sentry's fights.
- Crown of the Sunken King adds Elana the Squalid Queen, who can call forth several skeletons, or, if you're unlucky enough, a clone of Velstadt the Royal Aegis. For added fun, it's also possible she will fail and summon... baby pigs.
- Foreshadowing:
- When you look closely, the true nature and intentions of Queen Nashandra are hinted at pretty early on. The description of the Giant Stone Ax (obtained with the soul of the Last Giant, the first boss in the game) implies that there's something wrong with her even though at that point her existence wasn't even known. When you pass too close by her painting in Drangleic Castle, your curse meter shoots through the roof, hinting at her curse attacks during the fight. And the item descriptions on the King's Shield/Ruler's Sword (obtained with the soul of Vendrick) pretty much spells out her nature as a Child of Dark.
- The Throne of Want, viewed from the outside, looks a lot like a kiln. Scholar of the First Sin makes it clear that accepting the Throne means linking the Fire.
- The twisted spiral-like altar in the Shrine of Winter does nothing in the vanilla game. The Crown of the Sunken King and Crown of the Old Iron King DLCs add identical altar to the Black Gulch and Iron Keep that allow the player to access Shulva and the Brume Tower, respectively. In the 3rd DLC, Crown of the Ivory King, the Shrine of Winter's altar becomes the portal to the glacial kingdom of Eleum Loyce.
- A more minor example. Upon entering Aldia's Keep proper, you'll be attacked by a skeletal dragon that falls apart before you can have a proper fight. Guess what you're going to have to fight for real on the way out of the Keep?
- Once Crown of the Sunken King came out, the lore pertaining to Lindelt (found in the descriptions of the Archdrake items and several miracles) becomes massive Foreshadowing in hindsight.
- From Bad to Worse: Drangleic was mostly destroyed by a brutal, apocalyptic war with the giants, and then got hit with the curse of undeath.
- Functional Magic: There's now four types of magic.
- Sorcery, mostly dealing in damage, but also Utility Magic.
- Miracles, which mostly focus on healing and curing, with some non-combat spells thrown in for good measure, but lightning spells and powerful force blasts are covered by it too.
- Pyromancy now scales in effectiveness with your combined faith and intellect stats, but has no hard requirements to be used either way, so it can be used by anyone. They're mostly blow-stuff-up spells that let you chuck fireballs like grenades, but there's a couple of buffs and two poison spells. Due to how much of an edge the Pyromancer class had starting out in the first game, you can no longer start as a character who knows pyromancy.
- Hexes are a new category encompassing the dark & abyssal magic of Manus from the first game, and require you to have both intelligence and faith (scaling is based on whichever is lower for your character), making these for advanced, dedicated spell-slingers only. These spells tend to be powerful and have really nasty debuffs that badly weaken enemies. However, hexes require either a sorcery staff or a sacred chime to be able to cast them, since some hexes require higher intelligence than faith to cast and vice versa. There are also six hexes that require souls to perform them with full power.
- Game of The Year Edition: The Scholar of the First Sin retail release for PlayStation 3 and Xbox 360, a compilation of the main game, the 1.10 Expansion Pack patch, and the three DLC.
- Gameplay and Story Integration: By the time you reach the end of the game, the length and difficulty of your journey has likely caused the player to forget the original purpose of their quest, much like the Bearer of the Curse has likely forgotten why they even set out across Drangleic in the first place.
- Gangplank Galleon: No-Man's Wharf, a dark, dank cave hiding a pirate ship.
- Gender Bender: There's a coffin in Things Betwixt, guarded by two Ogres, and hopping into it swaps your character's gender. Presumably this is for aesthetic reasons.
- Genius Loci: In the changed lore on the description of the Tseldora set and the soul of the Duke's Dear Freja, apparently the Writhing Ruin on which Tseldora is based is an ancient thing "whose shadow remains cast over the land". The brightstones that the Tseldorans greedily mined are actually fragments of that being, and the people gradually became obsessed with "searching that which they lacked"... something alarmingly similar to a certain albino dragon which craved the immortality scales that it was born without in the first game. A likely interpretation of this is that the Tseldorans built their mines on the grave of Seath the Scaleless himself and close contacts with his remnant drove them to be possessed by his will, as well as led to the creation of the Duke's Dear Freja.
- "Get Back Here!" Boss:
- The Guardian Dragon at the end of Aldia's Keep can sometimes prove very irritating if it repeatedly flies up and away from you in order to rain down fire, forcing you to spend a lot of time running from its fire then running after it to land a hit before it flies away again, although it is subject to A.I. Roulette.
- Sinh, the Slumbering Dragon tends to be as bad as, if not worse than the Guardian Dragon in this regard. The arena you fight Sinh in is much larger than the Guardian Dragon's cage, allowing him to make giant strafing runs on you and making it hard to catch up with him, and even falling back on ranged attacks is much more difficult.
- Giant Space Flea from Nowhere: The Demon of Song is just sort of...there. The only background information we get is that it took up residence in that area sometime before the game, and that the line of maidens who would appease it has died out.
- Ghost Ship: There's one in No Man's Wharf, illuminated by blue flames and with no operating crew in sight save for a few Varangian soldiers and the Flexile Sentry. And you can ride it to the Lost Bastille!
- Glass Cannon:
- The Undead Citizens are fragile and weak (a swift hit or two, when you first encounter one, is enough to kill it), but their method of attack is charging at you and do a bellyflop. A bellyflop that launches you into the air and usually takes down a large amount of your healthnote . May the game have mercy on your poor butt if you encounter a group and they all charge at you. Oh, and one variant can petrify you with their attacks as well.
- Hex-based builds typically deal high amounts of damage, and are versatile for retooling into miracle, sorcery, or pyromancy builds, but since dark damage scales with the lower of your INT and FTH, in order to keep up they have to pump lots of points into both. Hexes also require lots of attunement slots, meaning they have to keep ATN high as well. The result is that they don't have many levels free to spend on stats like VGR, VIT, END, or ADP, which are all useful for keeping you alive.
- Golem: Drangleic was built on an army of them made by King Vendrick after he stole a "great power" from a race of giants across the sea...and triggered a counterattack by the Giant Lord's armies.
- Good Old Fisticuffs:
- The hand-to-hand Caestus is basically just a little leather boxing glove to protect your fist while you punch monsters in the face. It has utter crap for base damage but A scaling in both Strength and Dexterity when fully upgraded, which makes it hit very hard when used by a character that has levelled both stats to the soft cap. Dual Wielding them in power stance will let you steamroll over practically anything with a few taps of the left bumper.
- Crown of the Ivory King adds the Bone Fist, which has S Strength Scaling while still having A Dexterity scaling. That's right, you can strap a skeleton's fist to your own fist to punch with the power of two fists at once, in Bājíquán style! And that's just when you only have one equipped. When you powerstance two bone fists together, it unlocks a special move.
- The Vanquisher's Seal obtained from reaching Rank 3 in the Company of Champions beefs up your bare fists (as in no weapon equipped at all) to be stronger than either of the above weapons, and allows you to power stance when you have no weapon equipped in either hand.
- Griefer: It wouldn't be a Souls game without them in the multiplayer component! One particularly hilarious instance is the series of ziplines in the Dragon Aerie, where one hit to the player while they are zipping will make them fall down to their death. Someone had a field day with this.
- Grievous Harm with a Body: The Last Giant will rip off its own arm to use as a club when its health is depleted by half.
- Grim Up North: Crown of the Ivory King lets you visit the castle of Eleum Loyce within the kingdom of Forossa, perpetually covered in ice and home to incredibly vicious frozen soldiers and golems. When you first enter the DLC, a violent blizzard will also blanket the entire area, limiting what places you can visit and making torches useless outdoors. You need to accept Alsanna's plight to remove the snowstorm.
- Guide Dang It!:
- The game in general gets a little less inclined to point you in the right direction to progress through the story until the later stages of the game. There are plenty of options and routes to choose from in the early game, making it easy to stumble across an area that's actually meant for the endgame.
- The game never directly states what "Agility" affects beyond its vague descriptionnote .
- Turns out that there are two ways to open "illusory walls." You can either hit them with your weapon or use an unprompted press of you interact button. The tricky part is that attacking the wall only works on walls revealed by Pharros Lockstones, and pressing the interact button only works on "normal" illusory walls. It doesn't help that there are still walls that can be opened by hitting them just like in Dark Souls.
- There are two rings that can be earned by beating the game: the Illusory Ring of the Exalted and the Illusory Ring of a Conqueror, which turn the weapon in your right and left hands invisible respectively. The catch? The Conqueror's Ring is obtained by beating the game without dying at all. The Exalted's Ring is obtained by beating the game without resting at a bonfire. Good luck.
- Getting the Flying Feline Boots. You have to buy them from Shalquoir after defeating the two Rat King covenant bosses. It verges into Bragging Rights Reward since, if you managed to reach the Royal Rat Vanguard, you've already dealt with what they help you with.
- Getting the Pickaxe. You have to lead one of the undead pigs from the army camp at the top of Brightstone Cove Tseldora all the way to the Duke's mansion at the bottom where you fight Freja, where it will dig up the Pickaxe for you. Video here.note
- Did you notice that the Throne Watcher and Throne Defender and Nashandra share a boss arena? Well, if you kill the Giant Lord before the Watcher/Defender and then beat them, then Nashandra literally enters the arena through the fog gate and begins the final boss fight immediately, with no break after Watcher/Defender at all. This is why most people take a detour to get rid of Watcher/Defender first. At the very least, any phantoms the player summoned do carry over to make things easier.
- Getting the treasures that are on the lava islands in the Iron Keep can be tricky since there is no item that makes it safe to run on lava like the Orange Charred Ring in the first game. It's surprisingly easy to get them once you realize that the seemingly useless jars of water and the pools created by the Pharros Lockstone Faces temporarily double your fire resistance. Just get your fire resistance as high as possible with the proper gear and Flash Sweat, roll into the jars and/or roll around in a pool and you're good to go.
- An entire branch of areas (usually necessary for progression save for Sequence Breaking) can only be accessed by exhausting a certain merchant's dialogue (said merchant only shows up after defeating a certain boss), at which point she moves to another location you probably no longer pass through due to warping between visited bonfires. Then you'll have the option to open up this new path at the cost of 2000 souls.
- Fighting Aldia, Scholar of the First Sin in the Scholar of the First Sin edition of the game requires you to speak to him at several locations, exhausting his dialogue each time. However, he won't show up in his last spot, The Throne of Want, unless an optional boss is fought. Some people skip the fight with King Vendrick due to another Guide Dang It with that fight. As with the above case for the Throne Watcher/Defender and Nashandra, any phantoms that survive that fight carry over to this one.
- Speaking of, Vendrick takes a tremendous amount of punishment due to an ill-described mechanic where Giant Souls reduce his defenses. Each one reduces his defense by half, down to 1/32 if you have 5 in your inventory. Otherwise, individual hits of even a properly leveled character will do Scratch Damage. It's possible to beat him this way, but even a weapon that normally does over 1000 damage between base power and stat bonuses will do double digit amounts of damage. In NG+, you'd be whittling down 180,000 HP about 30 points at a time.
- Everything about the Darklurker. For starters, entering the Pilgrims of Dark covenant requires you to find a certain NPC at three points, all of which are fairly well off the beaten path. After you join it, he lets you into the Dark Chasm of Old. It's fairly easy to guess that each portal leads you to a different place and that you need to complete them all, but that's not all; you also have to light the giant braziers in each dungeon, and make sure they are lit when you leave. Otherwise, it doesn't count.
- The queen of Earthen Peak is fought in a pool of poison, which can be drained if you do a specific thing earlier in the level. Trouble is, there is nothing pointing to this unless you make some absurd leaps of logic. Burning the windmill causes the machinery to stop up and drains the pool, but there's no reason for an average player to assume such a thing is possible, especially since the structure you need to burn is textured like metal.
- Guns Akimbo: Okay, not actual guns, but you can enter power stance mode with two crossbows, allowing you to fire both weapons at the same time at the cost of a lot of stamina and an even greater reload time, depending on the crossbow used.
- Has Two Thumbs and...: Implied through the "This one's me" gesture.
- Haunted House: Aldia's Keep. There is still some life left in the dragon skeleton littering the foyer...
- Having a Blast: Some spells are able to cause a violent explosion shortly after being cast.
- Flame Swathe launches a small erratic fireball which flickers a bit before detonating into one of the strongest pyromancies in the game.
- Lingering Flame lets out a small orb of fire that stays stationary for 30 seconds, setting off only when an enemy is nearby. You can place several at once for a chain reaction.
- Dead Again is a hex that emits a large shockwave, and any physical corpse caught within it will burst in a powerful explosion of darkness.
- Heal Thyself: Estus flasks return from Dark Souls, and are supplemented by lifegems which drops from slain enemies in limited quantities. Healing methods have also been rebalanced somewhat: The flask's animations have been slowed down a bit (though this can be countered by raising ones Agility), and its healing is cancelled if you get hit while it's taking place. Lifegems restore less health, and do it more slowly, but they're faster to use and damage doesn't interrupt them.
- Heavily Armored Mook: The Old Ironclad Knights who wield giant maces. In a display of the more advanced AI, attacking them from behind will make them drop backwards on the player, squashing them under the hard and heavy shell. Frankly, there are a lot of enemies like this. Some of them are terrifyingly fast, too. Fortunately Strike damage (from maces, hammers etc) absolutely WRECKS them.
- Heel–Face Turn:
- An exception among the Children of Dark, Alsanna the Silent Oracle abandoned the quest her sisters followed when the love of the Ivory King redeemed her. After his descent into the Old Chaos, she would remain vigilant over Eleum Loyce to contain the spread of the demons and honor her King's wish.
- In the lore, there's another case that heavily mirrors the above In Love with the Mark-induced Turn: Zullie the Witch who at first made many attempts to seduce Alva the Wayfarer and undo his religious dedication, but eventually came to support him and they spent their lives together.
- Hell Is That Noise: The Curse Jars. When they're around once in a while you'll hear a man, a woman, and a little girl laughing, interspersed with a demonic chanting.
- Hellish Horse: A two-headed one pulls the Executioner's Chariot. And tramples over you.
- Helpful Mook:
- Scholar adds to No Man's Wharf and Undead Crypt a hollow with a torch that follows the player without attacking and that drops a torch upon death. At the Wharf, lit torches can be used to scare off the Darkdwellers but at the Crypt that's actually not too important and will upset Agdayne if you're not careful. He'll even blame the player for the torch hollow if they walk before him.
- A giant ant exists in a cramped room at the Gutter. It looks intimidating but does nothing but release gas that breaks equipment while also healing poison buildup.
- The Pagan Tree hidden at Shulva releases an aura upon being whipped that restores the player's current equipment even if it is broken. A whip's guard break move can be used to trigger the effect without hurting it.
- Heroic Sacrifice:
- One of the endings, in which the Undead Hero sits upon the Throne of Want and links the fire.
- After a lifetime of battle to contain its horrors, the Ivory King fed his soul to the Old Chaos to appease and delay it from completely wiping out Forossa.
- Hitbox Dissonance:
- Many enemies seem to have their weapon's hitboxes come out before their attack physically begins on-screen, causing the player to take damage even if they kill that enemy as long as said attack animation was starting just as the player landed the final blow. Notable examples are The Pursuer's curse-stab◊ and The Rotten's grab attack, both of which can hit you even if you're off to one side.
- There can also be times where the player rolls but their hitbox remains where the roll was initiated. Example here.◊
- Many enemies seem to have their weapon's hitboxes come out before their attack physically begins on-screen, causing the player to take damage even if they kill that enemy as long as said attack animation was starting just as the player landed the final blow. Notable examples are The Pursuer's curse-stab
- Hopeless War: The Giant War, which was part of what reduced Drangleic to its current state. According to Captain Drummond, both his father and his grandfather fought the giants, and so many giants fell in the long siege that an entire forest sprouted from their remains. Apparently, whatever Vendrick stole from them drove them to such fury that the giants kept constantly attacking Drangleic, repeatedly devastating the country's armies, until the player traveled back in time and killed the Giant Lord.
- Horny Vikings: Two different versions. One are the Varangians, who were pirates along the northern coast of Drangleic. note The others are the Gyrm, a nomadic race of inhumanly large "dwarves" who were forced underground.
- The Hunter Becomes the Hunted:
- After obtaining the Crushed Eye Orb, and venturing to a certain location, the eye activates. If you use the eye, you invade the nearby NPC, who has been invading you several times throughout the game. Said NPC is Licia of Lindelt, the priestess you first encountered after the Dragonrider battle.
- Also, the Pursuer, to some degree. You can fight him 3 times, with one of those times being his actual death.
- Iconic Outfit: The Faraam set. Like the Elite Knight set of the previous game, it was featured heavily in advertisements, trailers, and official art. Namco Bandai even had the Faraam armor forged in real life by a modern day blacksmith for a commercial. To a lesser extent, the Alva set, which is used for the gesture icons.
- Immortality Hurts: Dying makes you more hollow and you lose more of your max HP. If you accumulate enough Sin, you can even be reduced down to 10% HP.
- Infinity -1 Sword:
- Caitha's Chime for hexers. It's less powerful than the Chime of Want, but it's also available far earlier in the game, can be upgraded with standard titanite, and has a faster casting speed to boot.
- The Greatsword. Likely the very first ultra greatsword the player will ever find, available as early as No Man's Wharf. It has tremendous base damage and superb strength scaling, offset by being incredibly heavy and slow, and can easily last a player the entire game. It's also a near perfect replica of the Dragonslayer.
- The Gyrm Greatshield has the highest stability of any single shield in the game, as well as 100% physical AND fire damage reduction (though subpar resistance to every other damage type and status ailment), and it can be obtained simply by farming the Gyrm warriors who wield them.
- Infinity +1 Sword:
- Hexing is the most powerful magic in the game. The Chime of Want is the most powerful hexing chime in the game. To obtain it, you have to kill the Final Boss and then cart its soul over to Weaponsmith Ornifex (not a completely straightforward task in its own right), meaning that it'll only really be of practical use in the New Game Plus or revisiting bosses with Bonfire Ascetics.
- The Curved Dragon Greatsword is the heaviest and most powerful out of the curved greatswords and has a unique ability that makes it stand out from a good portion of your arsenal, but you can only acquire it late in the game and by backtracking to an area where you previously lit a Primal Bonfire.
- Similarly, the Curved Nil Greatsword is acquired late in the third DLC and in a room full of dangerous enemies, and it only reveals its full power once the player has gone beyond NG+9. Its unique moveset and sheer power appropriately make up for that effort, though.
- The Bone Fist requires you to backtrack through Eleum Loyce after the snowstorm is lifted, and into a hidden cave containing two minibosses. However, once you obtain it, it's a weapon with an extremely diverse moveset based on Bājíquán with a mix of Muay Thai and Ryu's moves, that scales magnificently with your strength and dexterity, offering little variation upon upgrading, and easily dealing massive damage to armoured enemies with its slow but powerful punches.
- The Ruler's Sword is one of the strongest greatswords in the game. However, getting it requires defeating a Optional Boss who is Nigh-Invulnerable unless you have certain key items in your inventory (one of which is dropped by another Optional Boss) and taking its soul to the aforementioned Ornifex. Said Optional Boss is only encountered at the very end of one of the last areas in the game. Its power is also dependent on the number of souls you are carrying. You need at least a million souls to get the full bonus. Furthermore, the Soul that is used to craft the Sword cannot be farmed with Ascetics since the boss doesn't actually drop the Soul upon defeat it appears in a different area behind a locked door that only opens when you're human.
- Much of the above also applies to the King's Ultra Greatsword, which is crafted using the same Soul needed to make the Ruler's Sword. The KUG is certainly an Infinity Plus One Sword for a Strength build, since it has bar none the best Strength scaling in the game. It also has a good moveset and can be buffed with resins/enchantments, though its reach leaves something to be desired.
- And then there's the Fume Ultra Greatsword. Requiring you to beat the ridiculously hard Fume Knight, and having a requirement of 40 strength and 30 dexterity just to use the thing, it's power is second only to the above King's variant, and equalling it's scaling, combined with great range and a unique heavy attack that uses the sword to block any attacks while revving up, and unmatched blocking capability for a weapon, all in all, if you can use it, it's hands-down one of the most powerful weapons in the game.
- The real Moonlight Greatsword. It's an entirely magic-damage sword that scales on Intelligence alone, and requires fairly low strength and dexterity, allowing sorcerers a backup option for when they don't want to expend a spell and still do serious damage. If you give it the Enchanted infusion, it's magic damage becomes physical while keeping the Intelligence scaling, making it useful for dealing with enemies with high magic resistance, though this comes at the cost of its signature Sword Beam no longer doing any damage whatsoever.
- Insurmountable Waist-Height Fence:
- You have to hunt down and kill the four ancient and powerful Great Ones and embrace their soulsnote in order to unlock a door that lets you get around this single fallen pillar blocking your path◊. Anyone could easily climb over that thing in real life, but sadly in the game you can't jump that high. Nor can any of the ridiculously enormous weapons you could potentially be wielding simply finish what nature started and smash it to rubble, clearing the path for you.
- In the Gutter, you can climb up and around the area and return to where you started by falling off a tiny ledge that you can't climb or jump up no matter what, despite it being only about as high as most of the stairs in the game.
- The bonfire in the Belfry Sol is separated from the rest of the Iron Keep by a chest-high wall that you would easily be able to climb over in real life.
- A side area in Earthen Peak locks you into a fight against a group of tough enemies using some rocks that don't even reach up to your knees.
- You have to hunt down and kill the four ancient and powerful Great Ones and embrace their soulsnote in order to unlock a door that lets you get around this single fallen pillar blocking your path
- Interface Spoiler:
- A player's summon sign suddenly disappearing is a sign of an incoming dark spirit invasion.
- The bonfire menu shows initially blank spots for all warp locations in the game, letting you know when you're missing bonfires and that there is a lot of areas to explore after the ominous Drangleic Castle.
- Irony:
- Artorias's greatsword can be found, with a description reading that the sword's origins and original owner are unknown, but everyone who was known to use it was coincidentally left-handed. Anyone who has fought Artorias will know that not only does he use the sword in his right hand, his left arm is broken (though that could possibly be the reason he was using his right hand at that point).
- The two human blacksmiths have this going on. Lenigrast's Hollowing is fairly advanced yet he is totally sane and in control of his faculties. McDuff, on the other hand, is fully human yet he's most certainly not all there and has a creepy obsession with fire.
- Jack of All Stats: Infusing a weapon with Mundane will give it (very good) scaling off of your lowest stat, meaning you will have to keep all your stats at around the same level in order to get the most out of it.
- Joke Item:
- After going through the utter hell that is NG+, you can enter Maughlain's shop, and find a new chest. Inside is the Moonlight Butterfly set, that increases your jump height, poisons nearby enemies, and looks absolutely ridiculous. Then there's the Moon Butterfly Shield, while it seem to be too weak to block anything, if you infused it with Poison, this shield has 100% Poison damage reduction, meaning it can block the poison spits from the Gutter Statues. And it inflicts a high amount of poison if you bash people with it.
- It's possible to obtain a soup ladle. As a weapon. It has about the worst base damage in the game, no scaling, and breaks in ten hits. However, each attack has a very low stamina cost. Upgrading it to the Mundane type gives a fixed damage bonus to every attack that it won't lose if it breaks, so if all your stats are fairly high it is very capable of a Death of a Thousand Cuts.
- In Undead Crypt, you can find the Olenford's Staff, despite how it claimed how great Olenford was in the description, this staff is actually a weaker version of the Witchtree branch, not only both have the same stat, Olenford's staff actually casts much slower than a tree branch, weights 4.0 while the branch was barely 0.5, and the ridiculous 40 Intelligence requirement for a staff which is clearly made for casting hexes, there is no redeeming factor for this staff.
- The Crown of the Iron King DLC adds the Chime of Screams, obtained from Nadalia's soul. At first it seems like a decent chime, with the added perk of boosting your faith by 3-4 points. Then you notice that the casting speed is 25, the lowest in the game by more than four times over. It's so slow that the amount of spells you can cast in a minute with it is almost never more than 5, and that's before getting into the already snail-pace healing miracles. However, one can simply carry the chime for the perk while casting with another chime.
- Crown of the Ivory King adds a similar item to the Chime of Screams in the form of Azal's Staff. Decent-to-high scaling for Dark magic? Sounds good. Casting speed of 30, durability of 4 and spell amount quartered into 1/4? Not quite. Nevertheless, the unpredictable delay due to Hitbox Dissonance combined with some Hexes such as Dark Orb and Affinity, it has the potential to kill most PvP opponents in one hit.
- Jousting Lance: Lances, which are heavier, slower, stronger, and usually scale better with strength than regular spears. You can trade the Soul of the Executioner's Chariot with Straid of Olaphis for one, and loot a chest hidden in the Giants' Memories for another. In SotFS edition, the Lance hidden in the Giants' Memories have been moved to one of the noob caves areas after the hub area.
- Jump Scare: In the Scholar update, lighting the bonfire in the Undead Crypt causes Aldia to spew forth, despite it not being a primal bonfire.
- Kaizo Trap: Unlike Dark Souls, the game only registers a boss' defeat once the entire death animation, victory text and potential allied phantoms are gone, meaning it's possible to get caught up in a boss' post-mortem attack (like the Royal Rat Authority's poison pool or the Duke Dear Freja's minion spiders), forcing you to fight them all over again. Also, Vengarl's body will attack you in the primal bonfire room after you killed the Duke's Dear Freja.
- Killer Rabbit:
- The undead pigs found in Majula have a ton of HP, deal lots of damage, and will chase you forever. And those particular pigs are just babies. The full-sized ones (and even bigger ones that spawn only in New Game Plus) hit even harder, though they are at least much easier to hit.
- The Basilisks make a return, with the same appearance and petrification abilities. And there are variations now.
- Aww, look at those scruffy, goofy-looking mummies waddling towards me! And look, he tripped, how adorab—BOOM. By the way, the most common variation is immune to its own explosion, so it can do this over and over.
- Hey, look! Classic dwarves! You'd probably never suspect that they hit like a ton of bricks and that their ranged attacks are just as bad.
- Crown of the Ivory King adds frozen rabbits, which can cover themselves in ice spikes and roll towards you like the Bonewheel Skeletons. The mere contact of them will drain your health quickly.
- Last Chance Hit Point: The Denial miracle. This is extremely useful for preventing One Hit Kills; but Poison, Petrification, and Scratch Damage from multiple enemies easily work through this buff.
- Laser Blade: The Ivory Straight Sword found in the Crown of the Old Ivory King, a handle which generates a blade of light when swung.
- Legacy Boss Battle:
- The Old Dragonslayer is a reskinned Dragonslayer Ornstein from the previous Dark Souls, leaving players wondering if he's the real one. Dark Souls III confirms he isn't: the real Ornstein died while looking for the Nameless King, possibly slain by him. The Orsteins fought in Anor Londo and the Blue Cathedral are respectively an illusion and an Animated Armor.
- The Belfry Gargoyles are a clear tribute to the Bell Gargoyles of the Undead Parish. And they invited their whole family this time!
- The battle with The Rotten shares many similarities with Gravelord Nito. Which makes sense, since The Rotten is implied to be a reincarnation of Nito's Lord Soul.
- Legend Fades to Myth: As Dark Souls II takes place very far in the future (we're talking many cycles of Rekindling the Flame since the Chosen Undead's time in Dark Souls I here), tales of the Gods and Lord Souls bearers as well as the roots of many Pyromancies, Magics and Miracles have been lost to time, and are only vaguely alluded to in the item descriptions. One can still make the connection if one looks closely enough, though. In addition, the Vicious Cycle of nature in this world makes sure that though the Gods are long gone, the impact of their actions still affects the present.
- Leitmotif: Every single boss has their own battle theme, though some share tracks together like the Ruin Sentinels and the Smelter Demon. Majula, the old Fire Keepers' house in Things Betwixt and the Shrine of Amana before you kill the Demon of Song are the only locations that get a song outside of boss battles.
- Lethal Lava Land: Iron Keep, a massive metal fortress filled with lava and fire.
- Level Limiter: The Agape Ring is a ring that absorbs all Souls (which serve as both money and XP for levelling up) instead of the player. This is mainly relevant for Player Versus Player multiplayer, as the game's matchmaker uses Soul Memory — the total amount of Souls the character has obtained — to limit which other players you can connect with.
- Lightning Bruiser:
- The Pursuer, a heavily armed and armored knight who hits like a freight train and flies as fast as one.
- The Old Dragonslayer, who is quick on his feet and dashes across the boss room to lunge at you with his spear.
- The Lost Sinner, who shows you just how vicious her swordsmanship can get with the crazed flurries and ninja lunges.
- The Royal Rat Authority, who is not only big and fast, but hits hard enough to break your guard even if you wield the sturdiest shield.
- Lighter and Softer: Compared to the extremely bleak Lordran, Drangleic appears lighter in looks and spirit. Sunlit areas appear much more radiant instead of gloomy, NPCs are less resigned to their fate and more vibrant (even Crestfallen Saulden can be cheered up if you bring enough people to Majula!) and summonable allies, merchants and teachers don't wander off to die or turn Hollow as soon as they don't have anything to sell or teach you anymore (save Licia, who's a bandit masquerading as a cleric and decides you'll make a good prey, and Lucatiel).
- Losing Your Head:
- In the Shaded Woods, you can find the head of Vengarl, a Hollowed former knight. He's initially irritated when the player disturbs him as he enjoys being alone, but he'll quickly warm up if you kill his psychotic old body.
- The Manikins in Earthen Peak are all headless, in a potential case of Real Life Writes the Plot: fans pointed out that the original Manikin mask, featured in trailers, looked a lot like the one worn by Hei. Possibly concerned by legal issues, From made the Manikins headless in the release version, with only one (modified) mask available in the game, it's description stating that Mytha tore the heads off the Manikins as punishment for looking at her.
- Lost in Translation: As a result of having three different companies working on the English translation, a fair amount of the lore present in the Japanese version was lost or changed.
- Alken and Venn were countries rather than kingdoms, and nothing about their founder is mentioned in the Japanese text.
- The "Bewitched" in Bewitched Alonne Sword is derived from the Japanese word "Youtou", which is a type of folkloric sword which gained sentience and often seeks blood of their own accord, possibly by possessing the wielder.note This carries the implication that Sir Alonne is either possessed by a cursed katana similar to Dark Souls's Chaos Blade note , or simply strong enough to control it, a depth of lore that is not really apparent in the English localization.
- The description of the Pursuer, whose Ring of Blades refers to him as the Mad Warrior of Alken, states that the name of the Mad Warrior is Adgars.
- In a strange variation of this trope, the Ancient Dragon's speech makes absolutely no sense in any language. If anything, the localization removed the ambiguity about who the dragon referred to.
- The Old Iron King's corpse became the vessel for the monster known as Ichorous Earth, but in the Japanese version, it's instead mentioned as molten earth, implying the Old Iron King's demonic form had no particular name. The Japanese version also makes it clear that the entity that the Old Iron King met after sinking into the lava was Gwyn from the first Dark Souls game.
- The Undead Huntsmen were originally Undead Hunters, implying that they weren't so much hunters who became undead but hunters of the undead who became undead themselves, in keeping with the area's lore.
- Giant's Kinship was originally named the Resonance of Giants. The Giant King's soul clarifies that the giants came from the north and weren't interested in conquering Drangleic, just laying waste to it on their way to take back what Vendrick stole from them.
- The Royal Rat Authority was originally named the Rat King's Test, in line with his actual purpose of proving yourself worthy to the Rat King.
- The Emerald Herald at the Dragon's Aerie states that the Undead hero was led to Drangleic by a bunshin of her in the Japanese version, possibly explaining how she was able to pop up in sealed off locations. In the English version that implication is lost.
- The Lost Woods: The Huntsman's Copse, a dark pine forest filled with zombies and hulking barbarians. Also, the Shaded Forest, which is heavily bathed in fog.
- MacGuffin: An In-Universe, offscreen example in Drangleic's history. At some point, Vendrick went to war against the giants and stole a "great power", causing the giants to retaliate in kind. What this "great power" was is never made clear (it might have been the ability to create golems), but it caused the war that brought Drangleic to ruin.
- MacGuffin Delivery Service: Nashandra is waiting for you to get the Giant's Kinship, so she can kill you and have the Throne of Want for herself.
- Magic Feather:
- Implied with the Dull Ember. Lenigrast specifically tells you that blacksmiths can no longer use embers, yet when you give it to McDuff, he stops his incoherent rambling and tells you he can infuse weapons.
- Ironically, when you get to the Dragon Aerie, the Emerald Herald gives you an actual magic feather (the Aged Feather), which allows you to recall to the last bonfire like a Homeward Bone, but has infinite uses.
- The Many Deaths of You:
- In keeping with tradition, the Tokyo Game Show trailer showcased the various ways to die.
- There's now a death counter that tracks how many times you've died. Playing offline just tracks your deaths, but playing online tracks every death across the world, which after just two days after the game was released was well into the millions.
- The official website even has a break-down of how players have died (falling, other players, AI enemies, traps, and "Other").
-
- Maximum HP Reduction: Returning from Demon's Souls, but slightly less punishing; dying in Hollow form reduces your maximum health with each death, with a soft cap of a 50% max HP, or 80% if you have the Ring of Binding. The hard cap is 10% of your max HP, but it only goes into effect if your Sin level is incredibly high.
- Medieval Stasis: Averted Trope, surprisingly. The Old Iron King reached the Souls universe' version of the industrial era before he was cut down by the Smelter Demon, and many of his contraptions are still in use throughout the land.
- Mêlée à Trois: Averted for most of the game, where enemies will ignore each other even if they seem like members of different factions, to the point that merchants that get hit by enemies will aggro against you. Finally played straight at the end of the game when you enter the past, where Giants and Drangleic Knights are actively fighting each other while both are hostile towards you.
- Mind Screw: At one point in the game, the Bearer of the Curse reaches the top of a tall tower, takes an elevator up, and ends up at the surface of a lake of lava stretching as far as the eye can see in all directions. Another blatant case of Alien Geometries is on the tunnel right before Drangleic Castle. Before the tunnel, you can see the castle's highest tower right ahead in the distance. Once you cross the straight tunnel, it is suddenly Always Night and you'll find the castle suddenly positioned further back to the left.
- Mini-Boss: Several of them, including the Heide Knights in the Forest of Fallen Giants, the Lost Bastille and the Shrine of Winter, the Red Phantom in front of the Undead Purgatory, the return of the Flexile Sentry in the Shaded Woods, the giant basilisk in both the Shaded Woods and Aldia's Keep, the list goes on...
- Mirror Boss: The Looking Glass Knight, appropriately enough, can use his mirror shield to summon another player to fight alongside him, similar to the Old Monk gimmick in Demon's Souls.
- Morton's Fork:
- The Shrine of Amana is downright mean when it comes to getting through the water and past the casters' Homing Projectiles. Try to block the projectiles, you'll probably get hit anyway half the time because the casters are too far away to lock on, forcing you to manually point yourself in the direction the attacks come from, and take significant damage even when you do block because few shields have good magic protection. Try to dodge them and you'll probably end up falling into a Bottomless Pit. Stick the path, you'll aggro as many enemies as possible. Go off the path without a torch, you have to either point the camera almost downward, making it even harder to defend against projectiles, or risk walking off a barely visible underwater ledge. Go off the path with a torch, you can't hold a shield and weapon at the same time, you can't roll without extinguishing the torch in the water, and the light will scare away the fireflies, drawing the lizardmen's attention from an even greater distance.
- There is also a story related one that gets revealed over the course of the Lost Crowns Trilogy and is clarified in Scholar of the First Sin: the choice from Dark Souls to either Link the Fire or become a Dark Lord isn't two choices, it's one that will eventually lead to the other. Ages of Fire will eventually give way to Ages of Dark, only to be reignited from the embers of past ages, so the choice to Link the Fire or not ultimately doesn't matter in the long run as the Cycle of the Curse will continue regardless. Vendrick and Aldia realized this and tried to Take a Third Option that would have required harnessing the First Flame and the Dark Soul in tandem, but Vendrick's efforts were thwarted by Nashandra and he contracted the Curse himself for his efforts. Then SotFS lets you talk with Aldia on the subject (him now being a soulless plant-like Eldritch Abomination at this point), and he reveals that the third option is itself another tine on the fork since to harness the Flame and the Dark Soul together would require abandoning one's humanity entirely, thus eliminating the entire reason behind breaking the curse to begin with.
- Motion Blur: Weapon swings now have the added effect of creating a small blur, making it more realistic. This is more pronounced with the twinblades' whirling animation, given they hit multiple times.
- My Rules Are Not Your Rules: Several enemies do not abide by player character limitations, such as the Graverobber Trio not being slowed down despite being in water deep enough to slow the player, and never getting staggered by any of your attacks; or the Drakekeepers with the giant maces being able to reset and chain combo animations ad-infinitum, with no worry about stamina or wind up time.
- Mythology Gag:
- The first time the player meets Benhart of Jugo, his way forward is blocked and he is, as he puts it, "in quite a pickle".
- The description for the Great Lightning Spear states that "the gross incandescence of our magnificent father shall never wane."
- Name Amnesia: The Great Old Ones are so old that their names have been lost to history. The fact that the Duke's Dear Freja has a proper name is a hint that it is not a true Great Old One. The Great Old One is actually the fossilized dragon that Freja and her kin are using as a nest.
- Nerf:
- Compared to the first game, heavy armor is less useful for a number of reasons:
- Poise is drastically less effective. Poise damage from melee weapons has been magnified by a factor of about three for one-handed attacks and five for two-handed attacks. Taking a hit while not attacking slows you down even if it doesn't cause you to stagger. Quite a few attacks ignore poise to cause an automatic stagger unless you're in the middle of attacking with certain weapons. The Poise meter regenerates so slow that it may literally take several minutes to recover from a single attack (and since it instantly refills after you've been staggered, it may as well not at all).
- Elemental damage reduction works completely differently, now being percentage based, with most armors providing a rather insignificant reduction unless you stack them together with temporary buffs—even the best armor for a specific element only reduces damage by about one fourth of the base damage.
- Stamina regeneration penalties are much more severe: encumbrance above 50% in I makes stamina regenerate one-fifth slower, and there's a smaller penalty for wearing certain heavy armor sets. In II, every percentage of encumbrance slows down stamina regeneration, with 100% encumbrance cutting it in half compared to 0%.
- On the other hand, the rehaul to encumbrance tiers makes your mobility suffer less as long as it's below 70% when rolling or 100% when walking or sprinting.
- Patch 1.04 reduced the damage of some spells as well as increasing their casting time and stamina cost, toned down the damage/health of some enemies/bosses, made some weapons unbuffable (like the Moonlight Greatsword), and reduced the effect of two rings. Subsequent calibrations also cut the number of uses for several spells, and in some cases reduced the damage dealt by them.
- The Great Scythe, the best weapon for Dex builds in the first game, is significantly less useful here due to A: no longer causing Bleed and B: its moveset being much less efficient; it is for all intents and purposes an entirely different weapon, which will still upset players prone to Complacent Gaming Syndrome.
- The Red Tearstone Ring still raises attack when HP is low, but not nearly as much as the previous game.
- The Power Within spell has been replaced with Unleash Magic, which only raises damage from spells, and not nearly as much as the former spell.
- Compared to the first game, heavy armor is less useful for a number of reasons:
- Never Found the Body: A late-game NPC asks you to assassinate other NPCs, but only asks for specific items that they own as proof of their death. Every single one of your "targets" can give you said items if you fulfill specific conditions. Heck, you can even buy the item from your first victim. Your contractor just assumes you actually killed them when you bring the items back to him, as he can't leave his cell to see for himself unless you free him.
- Never Trust a Trailer: The game didn't end up looking a fraction as good as it did in some of its prerelease trailers, largely thanks to a massive downgrade in the lighting engine being required in order to get it to run at an even vaguely acceptable FPS rate.
- Nice Job Breaking It, Hero:
- If you don't take a cue about the written messages in Aldia's Keep and press the wrong switch, you will end up releasing Royal Sorcerer Navlaan from his magic prison, who will invade you several times throughout the remainder of the game.
- If you disregard the Ancient Dragon's hospitality and try to strike it, it will stand up and engage you in an extremely brutal Optional Boss fight.
- There was also one case in the lore of the Crown of the Sunken King DLC. Sir Yorgh sought the blood of dragons, so when he heard Sinh the Slumbering Dragon was resting in under the Sanctum City of Shulva, he invaded it, deposed its king, and struck the dragon with his signature spear. Not only did the dragon survive, but he became unable to contain its store of poison any longer, plunging the entire city into a deathly miasma of toxic.
- Ninja Pirate Zombie Robot: The Frozen Reindeer found in the Frigid Outskirts of Crown of the Ivory King are a strange mixture of ice-skinned, darkness-covered horses / stags that shoot out bolts of lightning.
- No Flow in CGI: Averted. The 12 minute debut has the duster covers on the Player Characters armor flow with a surprising degree of fluidity, likely because of the new game engine. Hell, some think that the constant breeze in Majula was put in just to show this off. Even just swinging weapons generates visible wind effects (most easily observed by swinging a weapon around Straid).
- Non-Malicious Monster: The giant ant queen hiding in a cave in the Gutter looks pretty scary but it won't attack. It also emits a blue gas that cures poisoning, though it also slowly degrades equipment.
- Nonindicative Name:
- Two weapon classes are "Greatswords" and "Ultra Greatswords". The weapon simply called "Greatsword" belong to the latter category.
- A bigger offender: Santier's Spear. A good weapon, no doubt, but the fact that it's called Santier's Spear and is referenced by its flavor text as a spear, but is classified as a halberd / polearm in the engine, and has the moveset of a twinblade (once you unlock its true form by reducing its absurdly high durability to 0) can cause quite a bit of confusion.
- Not the Intended Use: The Disc Chime is a special chime that also functions as a shield. What the game doesn't tell you is that unlike every other chime, those of which intentionally have bad attack damage modifiers so you can't punch things for hundreds of points of lightning/dark damage, the Disc Chime's shield bashing attacks do not have said limitations on it, making it a surprisingly effective electric bludgeon in a pinch.
- Obvious Rule Patch: In the first game, very quickly opening the menu and hitting "Save & Quit" let you survive death from very high falls; when you continue you'll be safely on the last surface you stood on. Now being in mid-air automatically closes your menu and prevents it from opening until you land.
- Once per Episode: A number of set pieces and other elements from Dark Souls and Demon's Souls return once again.
- A Dragon guarded bridge, like the Red Dragon in Boletaria and the Hellkite Dragon in Undead Burg. Though this time there's dozens of dragons instead of just one.
- A once mighty king who turned to darkness and thus destroyed his kingdom. note
- Similarly, having to put a mighty and venerable king out of his misery after he's descended to a fallen, almost mindless state. note
- The analogy with Gwyn is drawn again with the introduction of another heroic king who descended into the flame to save his kingdom and commanded a legion of knights who burned away following their king to his death, the Burnt Ivory King.
- The four greatest knights of said king, with some of them already dead and others faced as enemies out of duty or madness note
- A Giant Crow serves as transportation to certain areas.
- A frail creature who attracts the attention of someone more powerful, before following it's own agenda after gaining enough clout and being motivated by a burning hatred for dragonkind. note
- A woman fused with an arachnid that serves as a boss, as well as another person/arachnid hybrid related to them that can only be spoken to by way of a specific ring. note
- A Dragonslayer serves as a boss once more.
- A bearded, bald and grumpy blacksmith who treats you like a nuisance to his work. note
- A boastful and lively ally in battle who favors a greatsword. note
- A soft-spoken friendly character with a very dark streak. note
- A silver-tongued warrior carrying a spear and greatshield who stabs you in the back after sweet-talking you note
- An area that's guarded by invading players. note
- Another crow nest requests you to give it items and trades them for better ones. note
- An area that was used as a dumping grounds and has turned into a complete cesspit of nastiness, both figuratively and literally. note
- A maiden born of an ambiguous mixture of humans and dragons. Priscilla, the Emerald Herald.
- An out-of-the-way covenant that yearns for the ushering of Dark (specifically, the Pilgrims of Dark).
- A corrupted holy knight, wielding a gigantic mace, serves as an opponent. note
- A somewhat mysterious mage, hidden in an out of the way area that is very easy to miss, who teaches you immensely powerful spells. note
- A powerful warrior seen as both a force to be reckoned with and a horrible being by his peers due to his actions. note
- A priest clad in black who offers you to atone for your sins for a price. note
- A powerful sorcerer who requires your rescue in a dungeon-themed location and is credited with the creation of many powerful artifacts and spells. note
- A socially awkward mage considered uncouth by sorcerers, who feels better left to his own devices but quickly warms up once you take an interest in his speciality note
- A powerful sorcerer who focuses more on his craft than anything else and cares very little about what happens around him. note
- Said sorcerer's apprentice who ran into trouble while following their master, gets rescued by you and teaches you many spells in gratitude. note
- A Mad Scientist note who once resided in a now-abandoned and sealed mansion, conducted many inhuman experiments and created many monstrosities scattered throughout the game, with their servants still carrying out grisly ritual note , and at some point in the lore achieved immortality.
- One-Hit Kill: Several enemy attacks can do this even if the player has over 1000 HP. The grab attacks of the Mimic (if you unwittingly try to open one) or the Ogre in particular do such insane amounts of damage (including a more or less guaranteed Bleed proc) that survival is effectively impossible.
- One Stat to Rule Them All:
- This game largely averts this compared to Dark Souls I and Demon's Souls. While each stat can raise several attributes, the major ones are among multiple ones. So in the previous game, Endurance controlled stamina, maximum equipment weight, and dodging ability. In this game the latter two stats are instead determined respectively by Vitality and Adaptability. Also Dexterity controlled casting speed in the previous game, while this game splits it among the three magic stats (Attunement, Intelligence, and Faith).
- However, Adaptability itself is still seen as one of the most important stats due to how it raises Agility, which determines how many invincibility frames you get while dodge rolling. You need 96 Agility to have the same amount of i-frames as a Dark Souls I midroll, and 105 for a lightroll. As dodge rolling and evasion has long been a staple of surviving attacks in these games, be prepared to pump many levels into Adaptability. Agility also determines the speed of certain animations such as drinking Estus, drastically reducing the chance that you get interrupted while performing these animations.
- Our Dwarves Are All the Same:
- The Gyrm are a customized Aversion. Yes, they're as stout and stocky and bearded as dwarves. Sure their chief can be seen taking swigs from a large wooden stein. But the Gyrm are actually around the same height as humans and were once a surface-dwelling race, being driven from the surface and forced to live underground after humans regarded the Gyrm as an inferior race.
- The Bellkeepers are another aversion. Like typical dwarves, they are shorter than humans, and the axe is their weapon of choice, but they're Artificial Humans who were created to guard the bells from trespassers at all times. They're also completely Ax-Crazy.
- Our Giants Are Bigger: Dark Souls II seems to have multiple types of giants. King Vendrick and his knights are similar to the lords in Dark Souls in that they appear to be very tall humans. Meanwhile, the creatures referred to as Giants in the dialogue appear to be made out of earth, have a black hole where their faces should be, and turn into trees upon death.
- Pelts of the Barbarian: The kingdom of Forossa collapsed after war, so the people turned into lawless raiders. The bandit armor set is from there, and it's made of metal, leathers, furs, and a pile of animal skulls on one shoulder.
- Peninsula of Power Leveling:
- An extremely early example is in Things Betwixt, the Tutorial Level holds easy to kill enemies that will net a 550 soul profit a run. However the real early game meat lies in the Ogres, three hulking one eyed beasts that can kill you in just a couple hits, but are conveniently located near doorways they cannot pass through, chipping away at them nets you 1k souls per Ogre and a Ring that lowers enemies poise, a great way to start a Nintendo Hard game. Patience will net the player 9600 souls before ever having set foot in Majula.
- Another one of the aforementioned Ogres can be found at the start of the Forest of Fallen Giants, right next to a bonfire for convenient enemy respawning. With a half-decent weapon or spell, he isn't hard to kill due to his tendency to drop on his back at the end of a combo, taking a few seconds to get back up while you can whale on him. Each Ogre kill nets you 1000 souls and occasionally also useful earlygame item drops such as titanite shards or even more souls.
- As soon as Majula has been reached, if you go to the tunnel beside the house with the cat in it you'll end up in Heide's Tower of Flame. The enemies there are giant, slow moving but hard hitting. Their attack patterns are easy to learn and each nets 400 souls a kill and have a chance of dropping the 'old knight' armor set, which is a set of armor that's extremely heavy and has low durability, but one of the highest defenses in the game. To sweeten the pot, the first enemy of the area can be killed without even attacking it, but luring it up the windy entry bridge and tricking it into falling off the side during an attack, all while right next to a bonfire. Scholar of the First Sin adjusts this somewhat, as now the area has several Heide Knights in the area who are normally passive, except for the approach to the Blue Cathedral... until you kill the Dragonrider, at which point they become active and highly aggressive, which renders the normal power-leveling route much, much harder.
- An extremely late example is the Giant Lord boss, who can be killed for over 500,000 souls in less than two minutes with the right equipment. The process can be repeated infinitely thanks to the fact that the area contains a bonfire ascetic, an item which can be used to respawn everything in the area, including the boss and a new bonfire ascetic.
- There's a skeleton in the basement of the mansion in Majula that drops a Human Effigy upon death. Up to seven skeletons can be spawned in total by burning ascetics at the bonfire, so it's a convenient place for farming humanity. It's easier said than done, though, as it is all too possible to miss any dropped items by getting killed by the remaining skeletons — one of which is of course a Bonewheel — before collecting them.
- An extremely early example is in Things Betwixt, the Tutorial Level holds easy to kill enemies that will net a 550 soul profit a run. However the real early game meat lies in the Ogres, three hulking one eyed beasts that can kill you in just a couple hits, but are conveniently located near doorways they cannot pass through, chipping away at them nets you 1k souls per Ogre and a Ring that lowers enemies poise, a great way to start a
- Permanently Missable Content:
- There's an item on top of a tree in the boss area for Scorpioness Najka, and if you kill her before getting her to knock down that tree, it's unobtainable for the rest of the game. Thankfully, it's just a Flame Butterfly.
- As you explore, you might find an item called a Soul of a Giant. It seems like an unusually fancy way of gaining a load of souls, but they're also used to weaken Vendrick. Without at least four, it will take literally hundreds of hits to kill Vendrick. Since there's only five of them in the game for every cycle, if you use them all up for their souls, you will almost certainly not be able to kill Vendrick, and thus miss out on Vendrick's Blessing, the King's Set, the Soul of the King, and the True Final Boss fight.
- If you happen to kill both Mild-Mannered Pate and Creighton the Wanderer during their confrontation without talking to either one of them first, you will not receive the key necessary to unlock the door to their hidden stash.
- Planet Heck: The Old Chaos found in Crown of the Ivory King, which is located miles below a massive cathedral and is made completely of lava, with the roots of a World Tree visible in the distance. Not only does it references Dark Souls's own Planet Heck that was Lost Izalith, but it's also the boss arena for the Burnt Ivory King and his Charred Loyce Knights.
- Playable Epilogue: Unlike the first game, New Game Plus does not start automatically upon beating the final boss. It only happens once you select it from the bonfire in Majula. While extremely few NPCs acknowledge the difference, some items can only be bought from merchants in infinite quantity, or at all, after beating the Final Boss—most notably Titanite Chunks, which gives you a way to upgrade most equipment more for taking down Optional Bosses or before moving onto New Game Plus.
- Playing with Fire: Pyromancy's effectiveness scales with three elements: powering up the flame weapon (like the previous game, save you also need an item), the Faith stat, and Intelligence stat.
- Poison Mushroom: Red Crystal Lizards will explode when you get close, instead of running away with rare items.
- Post-Climax Confrontation: The final boss of Brightstone Cove Tseldora is the Duke's Dear Freja, a giant two-headed spider. It is the climax boss of the series of levels and leads to one of the Primal Bonfires you need to access Drangleic Castle. However, you have 1-2 more fights left after defeating it. The first fight which is in both versions of the game is the Duke himself, who has long since hollowed and attacks you on sight. He is rather weak and puts up very little of a fight. Slightly more scary though would be Vengarl's headless body that attacks you in the room where the primal bonfire lies. Vengarl only appears in said room in the original version of the game, in the Scholar of the First Sin edition, he has been moved to near where you find his head.
- Post-Final Level: The finale of the game is at the Throne of Want, a section of Drangleic Castle with three boss fights and nothing more. The area can be accessed early to fight one of the bosses, but the final boss and True Final Boss can only be fought after obtaining a key item behind the last few required areas.
- Power Floats: The Pursuer levitates as it fights you. The uniquely sorcerous Darklurker also hovers above the ground, and can fly for a few of its attacks.
- Power Nullifier: The Profound Still Hex, which prevents all enemies in an area around you from casting spells. The caster is immune to this effect, of course.
- The Power of Hate: The Giants practically run on this. The Last Giant ignores the stalagmite still impaled in its chest and even tears off its own arm in its desperation to take its revenge against the warrior who defeated it in the past. The entire reason the Giant War lasted so long in the backstory was because the Giants absolutely refused to forgive Vendrick for stealing from them and enslaving their brethren. Even in death, their hate for Vendrick is so strong that the mere presence of their souls weakens him.
- Pre-Character Customization Gameplay: The player, clad in completely concealing clothing, wanders about an intro area before entering the Firekeepers' house where customization takes place. It's not only possible to fall to your death here, but there's even a branching path leading to a fight with an ogre (this is before you even have access to any weapons or equipment, so most players will simply meet a grisly death.)
- Pretty in Mink: There are quite a few fancy armor sets that include a fine cape with a fur collar (so you can know the wearer isn't just any old knight). The cleric class even starts out with one: the Archdrake Robe.
- Product Placement: A very subtle one, but the "Heineken" brand can be faintly made out from observant players looking at... a puddle of corrosive acid. It was silently removed in one of the patches.
- Proud Warrior Race Guy: Forossans are implied to be this, considering that its inhabitants include Vengarl, the Burnt Ivory King, and the Lion Warriors. The Bandit set description claims the kingdom collapsed long ago and is now in a constant state of war, which would justify this.
- Puzzle Boss:
- The Executioner's Chariot has two ways to defeat it. One way is to perform a Corridor Cubbyhole Run until you reach a lever, which you pull to lower the gate and send the chariot and rider crashing into it. Then you can kill the horse. The other is to take your time whittling down its health until it's too weak to make the jump across the pit in the boss arena. Once it misses and the horse is trying to hang on, you can hit it so that it falls.
- The invading spirit Armourer Dennis may as well be a miniboss; he appears just after the first boss fight every time you walk near a certain area. He's also tougher than the boss, hides behind his shield as his name suggests, and casts strong spells that may just one-shot you. Going up against him is an exercise in frustration unless you use one of two techniques - try to guard break his shield to be able to riposte him, or notice that the tree where he spawns also often spawns a Seed of a Tree of Giants, an item that turns enemies hostile against invaders. The area you're in also has a large number of enemies who are strongly magic resistant and can ignore shields with their strikes...
- Rage Helm: Played straight by Vengarl's helm, which is set in the visage of a snarling dragon or lion. Unusually, it doesn't actually hide the wearer's face. Chillingly inverted by the Looking Glass Knight's helm, however, which has three faces, the foremost one being set in an expression of utter calm with tears flowing from black, empty eye-sockets.
- Random Drop Booster:
- The Gold Serpent Ring has three levels (though only one can be worn at a time)
- There are several helmets that increase drops in addition to the Symbol of Avarice.
- Wearing the Prisoner's Tatters body armor also increases drops.
- The Rusted Coin item temporarily increases drop rates.
- Random Loot Exchanger: There is a crow's nest in Things Betwixt where you can drop off certain types of stones to receive random items in return. While you can receive anything from the drop table, higher tier stones give a higher chance of yielding the best items.
- Rat King: A large hyper-intelligent rat goes by "the Rat King" moniker, commanding all other rats in the game. You can actually join the Rat King's Covenant—while he bemoans your un-rat-ness, he magnanimously allows you to serve him for some nifty multiplayer perks.
- Recurring Element: Several elements from not only Demon's Souls but also Dark Souls 1 reappear in this game, solidifying them as deliberately repeated elements rather than merely one-off Mythology Gags to the series' spiritual predecessor:
- The Crestfallen Warrior returns yet again, still voiced by the same actor, although this time he has a name (Saulden) and a meaningful gameplay purpose (keeper of the Way of Blue covenant). And he even stops being so depressed once enough NPCs come live in Majula!)
- The "blighted, diseased, rickety swamp shantytown" level (Valley of Defilement, Blighttown) returns again as The Gutter.
- Melinda the Butcher is the 3rd incarnation of the "beefy female invader in ragged clothing and a hood with big crude axe", following Executioner Miralda and Maneater Mildred.
- The Guardian Dragon is the same fire-breathing wyvern as the Red Dragon and Hellkite Dragon. In Scholar of the First Sin an additional one is even placed to guarding the bridge leading to the Cathedral of Blue by blowing powerful flames at the player as they approach, although unlike its predecessors it's not nearly as dangerous and you have to kill it to pass (whereas the previous 2 were effectively Optional Bosses that you were normally meant to run past or sneak around; though it should be noted that it guards an optional boss and covenant).
- The Belfry Gargoyles are a rehash of the Bell Gargoyles, which were themselves a remake of Demon's Souls' Maneaters (a fight against multiple winged, demonlike opponents on a narrow, precarious battlefield).
- While this marks the only time his name has been modified to make the connection less-obvious, Mild-Mannered Pate is still clearly the latest incarnation of Patches the Hyena/Trusty Patches.
- Royal Sorcerer Navlaan combines elements from two different characters in previous games; Mephistopheles from Demon's Souls, who contracted you to kill other NPCs for a reward (and would eventually attack you once you were done), and Kirk, Knight of Thorns, a black phantom NPC who repeatedly invades you several times throughout the game (which Navlaan will do if you're foolish enough to release him).
- The Emerald Herald is obviously a retread of the Maiden in Black, but while Dark Souls did away with requiring a specific NPC to level in favour of allowing you to do so from any bonfire, there was still an approximate equivalent character in Anastacia of Astora (a beautiful yet strange woman key to the maintenance of your "hub area"), making the Herald her successor as well.
- Redshirt Army: The Drangleic soldiers in the Giant Memories have a very low life expectancy against the enemy giants, and their corpses are scattered all around the ruins of the fortress.
- Renovating the Player Headquarters: The deserted village of Majula, where the Emerald Herald lives (which makes Majula the player HQ, as she is the only one who can trade their accumulated souls for Character Levels), is slowly restored back to life, as the player rescues NPCs from across Drangleic, who come to Majula, rebuild its ruined structures (such as the smithy) and set up shops and other services.
- Rising Water, Rising Tension: The fight with the Flexile Sentry takes place in the hold of a Ghost Ship with the water starting at ankle level and slowly rising, making it harder to manoeuvre and dodge the boss's attacks as the fight goes on.
- Ruins for Ruins' Sake: Heide's Tower of Flame. A collapsed tower that's fallen partially into the sea. All that's known is that it's possibly an important city in the game, possibly a pyromancers haven, and that it was owned by some dude named Heide.
- Running Gag: Pigs as easter eggs. In Majula there is a trio of surprisingly strong baby pigs. Kill them enough times and they'll be replaced by larger ones. Then in Brightstone Cove Tseldora, luring a pig all the way into the spider-filled room towards the end of the stage will cause it to dig up a not-exactly-useful pickaxe. Much later, Elana might summon the three little pigs, presumably by mistake.
- Sad Battle Music: The True Final Boss in Scholar of the First Sin has this in true series fashion.
- Scenery Gorn: Drangleic is littered with half destroyed fortresses, cities and so forth.
- Scenery Porn: Most of the area backdrops are detailed and massive.
- Schmuck Bait:
- In the beginning of Brightstone Cove Tseldora, there is a iron chest inside a closed-off house that's accessible by jumping into a well and moving past a secret path and a pig. You'd think that'd be the end of it, no way they would make a secret chest inside such a cramped space a mimic, but...
- The milfanito sitting next to the entrance of the Demon of Song arena can inexplicably be locked on to as if she's an enemy, unlike NPCs and actual enemies in resting poses, which makes it easy to kill her by accident in the spur of the moment. Talking to her normally is needed to access a side area and some goodies, so the player will need to bother upgrading that section of the Shrine with an Bonfire Ascetic just to respawn her.
- Grave Warden Agdayne at the Undead Crypt will warn you to not bring any sources of light near him. Naturally, he'll be surrounded by player messages recommending you to light a torch right there. In both this area and Aldia's Keep, lightning inconspicuous sconces will spawn a dark spirit right behind you.
- In Aldia's Keep there are many other hazards that must be manually triggered, in particular one involving a hallway with a series of messages telling you to "Pull Back." At the end of the hallway is a lever marked "Don't You Dare!" Go ahead and pull it. Go ahead. It releases Royal Sorcerer Navlaan, a very powerful and very crazy wizard who will invade you at many different locations, while leaving it alone will make him a merchant.
- Scunthorpe Problem: The PC version of the game uses the name input for the character rather than the player's Steam Profile name. However, the character names have a filter that they are put through that censors them if they are offensive. The filter list that character names are put through, which replaces any word or word fragment with asterisks, is completely ridiculous, banning even words whose meanings are usually innocuous or only vaguely obscene in any way and making many other common words incomprehensible—most infamously, banning the letter sequence "ho", affects a large number of common words like "hood" and "home". This even impacts someone that decided to name themselves "Knight" something. However, the filter lists are easily found within the game files, so you can just replace them with blank ones and turn off the censorship entirely.
- Sequel Escalation: The world is twice as large as Dark Souls, the bosses are even more horrifying, and equipment has stricter stat requirements.
- Sequel Hook: Once two of the DLC crowns have been obtained, speaking to Vendrick reveals that to end the curse once and for all, the First Flame and Dark Soul must be harnessed in tandem, something that is not accomplished by the end of the game. The next game shows that with some effort and a guide, it is possible.
- Sequence Breaking:
- In true Dark Souls fashion, a great number of areas can be skipped one way or another. To access the Final Boss without too many bosses in the way, you only need one Fragrant Branch of Yore, the King's Ring, the Ashen Mist Heart, the Giants' Kinship, and either one million souls in your Soul Memory or four Souls of a Great Old One (this last requirement skips bosses that would otherwise be necessary to open the Shrine of Winter).
- In the vein of Sequence Breaking the developers didn't intend to be possible, you can bypass the Shrine of Winter entirely by jumping off the stairs to the front gate, the ground above the path to the gate, and the ruins that show you a path behind the gate. Which, as previously mentioned, lets you bypass a very large amount of the game—there have already been speedruns that complete the entire thing in less than fifty minutes. A patch made this specific route impossible by putting up an Invisible Wall on the ruins, but people have since found other ways to get around.
- The Binoculars Speed Glitch and Skywalking Glitch used to allow for ridiculous sequence breaking to the point that the game could be beat in around a 20 minute speedrun if you knew what you were doing. It was eventually patched.
- Shock and Awe:
- The Looking Glass Knight boss can cast lighting over a fairly large area. The Alonne Knight Captains in the Iron Keep will put away their greatbows to draw swords of lightning when you're up close. A handful of endgame sorcerer enemies will also shoot homing lightning projectiles at you from long range.
- Offensive miracles like Lightning Spear have you emit and launch powerful bolts of lightning. Their damage scales with the Faith stat.
- Shout-Out:
- Knowing the few previous references the developers have made Silver Chariot likely is one to the Stand of the same name. Although it's named the Executioner's Chariot in the final product.
- The Penal Mask worn by the Lost Sinner bears some resemblance to the Stone Masks that turn people into vampires. It even comes with spikes on the inside, although for the purpose of punishing the wearer rather than transforming them.
- The black hood items description mention the characters Straid and the ancient king of old Olaphis. Now who do those two kind of sound like... Straid's name being almost the same as Strayed, his back story sounds a lot like the Destruction Path in For Answer.
- The Crypt Blacksword looks quite a lot like the Dragonslayer from Berserk. The Greatsword looks like a combination of the Dragonslayer and the thinner BFS Guts used during the Golden Age arc.
- Another Berserk reference is how the Ironclad soldiers are basically dressed as Bazuso, except with a slightly different helmet.
- The Ogres are, again, remarkably similar in shape to their Berserk counterparts, even if their heads are less 'sperm whale' and more 'hippo'.
- The also bear a strong resemblance to the Cyclopes from Dragon's Dogma, being a recurring, one eyed Giant Mook based on a large African animal.
- The Old Knight Ultra Greatsword looks a lot like the Buster Sword.
- The Smelter Sword looks a lot like Soul Edge, though it lacks an eye in its hilt.
- The Curved Dragon Greatsword bears a strong resemblance to the Tessaiga from Inuyasha, complete with a furred mantle for a guard, and a Blow You Away Special Attack.
- The Lost Bastille, Royal Swordsmen, a Lost Sinner in an Iron Mask? Remind you of anything?
- The Old Whip gained from trading with Dyna & Tillo seems to be one to the Vampire Killer from Castlevania, having an innate attack boost against Hollow enemies.
- There is a book in the library of the mansion in Majula that is also in the Duke's Archives in Dark Souls. The cover is low res, but the title can still be made out. Said book is a real novel by French writer Paul Acker which is titled "Le Desir de Vivre", or "The Desire to Live".
- The first time you encounter Chloanne, she will say "Perhaps we'll meet again, if we live that long." This is a reference to Maria's quote after meeting Alucard for the first time in Castlevania: Symphony of the Night - "Perhaps we'll meet again, if you live that long."
- The Bone Fist from the Crown of the Ivory King DLC lets the player perform a Hadouken when dual-wielded.
- The head of the Gargoyle's Bident has a rather familiar double-helix shape leading up to the blades.
- The Doors of Pharros is a derelict underground fortress filled with death traps and populated by Dwarves and Elephants.
- Simple, yet Awesome:
- The lance weapon class' moveset consists of nothing but slow, straightforward thrust attacks. Doesn't stop them from being some of the most destructive weapons in the game.
- Power-stancing clubs or maces can be like this. They require little stats, have incredible scaling, are available almost from the start and hit like almost nothing else with sufficient investment. One of their moves is a triple strike, with a third hit that automatically breaks poise. If it can be poise-broken, you WILL poise-break it with these weapons, and you can make the Ruin Sentinels a complete joke by stun-locking them into oblivion.
- Similarly, there's the caestus. Low stat requirements, excellent scaling for Strength, and when power-stanced, they hit incredibly fast (the L2/Left Bumper one-two punch has almost no lead time) and are blunt attacks so their pierce armor and can stun lock very easily. If you get around their extremely short range and learn to dodge effectively, you can easily punch your way through most bosses and enemies.
- The Alva the Wayfarer set is a decent and light-weight armor set that is relatively easy to obtain (purchasable in Maughlin's shop after spending several thousand souls).
- The Large and Great Clubs are just really big sticks, but their reach, strike damage, good base damage, simple upgrading requirements, and high strength scaling makes them two of the most useful weapons in the game. Their item descriptions note that they are crude but effective weapons.
- Skippable Boss: In order to fight the Final Boss, you just need King's Ring, Ashen Mist Heart, Giant's Kinship, one Branch of Yore, and either one million souls memory or four great souls. If you skip the four great souls, the only bosses you need are The Last Giant, the Giant Lord and the Throne Defender/Watcher (will unlock the Nashandra fight); Guardian Dragon (will permit you to reach Dragon Shrine and get the Ashen Mist Heart to then go to the Memory of Jeigh); To get the King's Ring in order to get to Memory of Jeigh and Aldia's Keep: Branch of Yore from bottom of Gutter, before Black Gulch. Twin Dragonriders; Looking Glass Knight; Demon of Song; Velstadt the Royal Aegis.
- Small, Secluded World: The Dark Chasm of Old counts. You have to find Darkdiver Grandahl three times, in increasingly out-of-the-way locations, to even access it.
- Smash Mook: One of the enemies encountered in multiple areas (Things Betwixt, Shrine of Amana, and Aldia's Keep) is the Ogre: a 20 foot tall bipedal Cyclops hippo with rhino horns and a long tail, who fights by smashing you with its arms, flopping on you, sitting on you, or grabbing you and chewing you to death.
- Soul Jar: The Sanctum Knights in the Crown of the Sunken King DLC are ghosts that are completely immune to physical damage (including backstabs) and take very little elemental damage, thanks to a ritual that granted them immortality to allow them to guard the sanctum. But destroying their former bodies will render them vulnerable by taking away their ghost form. Of course, determined players can kill them in their ghost forms too.
- Space Compression: Quite a few areas are visible in the distance from others to make the game feel larger. This does not mean the actual path to them will be at all like the one a player would assume is taken. One of the more jarring cases is the path to Heide's Tower of Flame which, despite it being at least three kilometers away from Majula, is possible to reach on foot within five minutes.
- Spiked Wheels: The Executioner's Chariot has them. All the better for trampling you.
- Spiteful A.I.: Enemy mobs just love ganging up on whoever has the lowest health while playing online, often redirecting their attention at the recovering player even if they had been thoroughly distracted by allies beforehand.
- Squishy Wizard: Most spell-caster enemies are relatively fragile. They make up for it either by stationing themselves in out of reach places, surrounding themselves with beefier enemies, or both.
- Solemn Ending Theme: The end credits theme, "Longing".
- Sorting Algorithm of Threatening Geography: The path to each Great Old One has its own escalation of environmental hostility and each path is an escalation from the last. What's most often the first path starts in a fort in a forest and ends in a giant dungeon. The path most often taken last starts in a giant pit and ends in a cesspool miles below the ground. The rest of the game escalates into the esoteric, going from a giant castle to the last area before the Boss-Only Level—the dreams of the giants whose corpses litter the fort near the start of the game.
- Special Ability Shield:
- The Blossom Kite Shield makes the Sprint Meter refill faster.
- The Charred Loyce Shield restores hit points over time.
- The Watchdragon Parma is a Random Drop Booster.
- The King's Mirror is an Attack Reflector.
- The Wicked Eye Greatshield restores Hit Points after killing an enemy.
- Stable Time Loop: One that is caused by your mere existence in Drangleic no less. Over the course of the game various NPCs tell you about the disastrous war against the giants that seemed all but lost, until their king was defeated and imprisoned underneath the fortress in the aptly named Forest of Fallen Giants. Near the end of the game, the Ancient Dragon provides you with the Ashen Mist Heart and cryptically tells you to visit the memories of those long past. Returning to the forest allows you to relive the memories of the giant's and their siege on Drangleic, where you can cross paths with their king and defeat him, thus ending the war and creating the Drangleic you see today.
- Star-Crossed Lovers: The Prince and Princess who built the Belfry Towers were this. The bells allowed them to communicate, even if they could never be together. It's heavily implied that the Old Iron King was the prince of the tale.
- Stripperific: The Desert Sorceress set looks like it came out of a Frank Frazetta painting, and the Prisoner's Tatters were designed to show off the decaying wreckage of a zombie, meaning that on a human with actual skin it's pretty revealing.
- Stuff Blowing Up: A great many things are able to cause spectacular explosions in this game. From the powder kegs in the Lost Bastille to the stronger pyromancy spells, "kaboom" has never been more defined in a Souls game.
- Stylistic Suck: A fairly subtle example. The enemy AI in starting conditions has a number of minor holes in their tactics ability that seem to have been intentionally put in, as becoming a Champion makes the enemy NPCs use better strategies and become less easily confused.
- Super Boss: There are a number of optional encounters even harder than the final boss.
- The Darklurker, which requires going through the optional "Pilgrims of Dark" covenant.
- The Ancient Dragon, a Damage-Sponge Boss who will just sit there unless you attack it a few times.
- King Vendrick, another Damage-Sponge Boss who will just walk around his room unless you attack him.
- All the DLC bosses, who employ unique mechanics but are in entirely optional areas, particularly: Sinh the Slumbering Dragon and Sir Alonne.
- Even within the DLCs 3 of the 9 bosses are considered "bonus" ones unrelated to the story of the DLC, each found at the end of a Brutal Bonus Level: the Blue Smelter Demon from the Crown of the Iron King at the end of the Iron Passage, the Afflicted Gank Squad from the Crown of the Sunken King at the end of the Cave of the Dead, and Lud and Zallen, the King's Pets from the Crown of the Ivory King at the end of the Frigid Outskirts.
- Tactical Suicide Boss: It would be much, much harder to kill the Old Iron King if he didn't keep smashing his fists into the platform.
- Tagline: Interestingly, the game developers allowed the fans to choose the tagline. Eventually, one was chosen: "Go Beyond Death".
- Take a Third Option: Zig-zagged. King Vendrick tried to find an alternate solution to the curse than linking the Flame. The current state of the game-world tells you exactly how well that worked. However, zig-zagged in that his efforts were sabotaged from the get-go by his queen Nashandra and he contracted the Undead Curse - Nashandra was, in fact, a soul fragment of Manus. It's unclear whether Vendrick would have succeeded if his efforts had not been ruined by Nashandra.
- Take That, Critics!: The trophy attained at the player's first death is called "This Is Dark Souls".
- Taken for Granite: A few statues of NPCs are here and there, courtesy of those goddamned basilisks. Fortunately you can cure them with a rare item and they'll get out of your way, and some even reward you back at Majula, like the pyromancy trainer. On the other hand, some of the others try to kill you...
- Talking Animal:
- One of the NPCs encountered in Majula is a talking cat. note
- Another covenant leader, found in a crypt beneath Majula's well, is a talking rat who lets you join the Rat Covenant (mostly about laying traps and attacking other players also entering the crypt).
- Somewhat in the form of Manscorpion Tark, if you can find the ring that allows you two to communicate.
- There Was a Door: In the Lost Bastille, you can blow up a cracked wall to enter McDuff's Workshop. The actual door is simply just beside it, although the Bastille Key is required to enter his workshop in the normal way.
- This Is Gonna Suck: The old ladies (former Fire Keepers) mock you and tell you to your face you're finished. One says that if you can hold onto your souls you might retain your sanity, but then she scoffs and says you're just going to die and lose your souls over and over again. This also counts as a Take That, Audience! towards players who thought that making the game more accessible to newcomers meant that it was going to be made easier.
- Time-Limit Boss: The player character can only remain inside the memories of the giant invasion for five minutes each, and seeing as one of the memories contains the Giant Lord, this trope certainly comes into play.
- To Hell and Back: The ultimate scenario presented in Crown of the Ivory King, given you dive down several miles underground into the hellish Old Chaos, fight the Burnt Ivory King and his knights, and retrieve the titular crown, before warping back to the cathedral via a beam of light.
- Too Awesome to Use: Brightbugs, which temporarily reduce the damage inflicted upon you by enemies and likewise temporarily increase the damage you deal to them, can easily end up qualifying as this.
- True Final Boss: Defeating all four Primal Bonfire guardians, Vendrick and Nashandra in the current patch of the game or in the Scholar of the First Sin version grants a final encounter with Aldia.
- Unfriendly Fire: The hex Lifedrain Patch creates a stationary orb that deals multiple hits to anyone who steps in it, be it enemies, allied phantoms, or the caster themselves. Cue some more trolling.
- Unintentionally Unwinnable: Not the game itself, but there is one particular ring that can only be gotten by clearing the game without resting at a bonfire once (though lighting bonfires is allowed, which will make them serve as checkpoints). However, in Belfry Luna, the final bonfire is after a one-way drop, so if you make the mistake of lighting said bonfire, your run is screwed as the only way out is to warp to another bonfire which requires resting at said bonfire.
- The Unseen: Of the three kings whose crowns are the objectives of the Lost Crowns DLC trilogy, the Old Iron King is one of the major bosses in the main game and the (Burnt) Ivory King is the Climax Boss of his DLC. Of the Sunken King we know barely anything other than that Elana was his queen, he ordered the creation of the shrine to worship the sleeping Sinh, and he was defeated (and presumably killed) by Sir Yorgh and the Drakeblood Knights (although according to cut content his name was going to be Gryth).
- Updated Re-release: Scholar of the First Sin for PlayStation 4, Xbox One, and DirectX 11 PCs. It includes the 1.10 Expansion Pack update patch, the 3 DLC episodes, remastered graphics, remixed levels, and improved multiplayer capabilities (6 players max).
- Useless Useful Spell: The Dead Again hex, which allows you to cause the bodies of dead enemies to explode with dark energy. Perfect for ambushing invaders, right? WRONG! Due to the sheer number of enemies that now fade into ash when they're killed, using the remaining few enemies that do leave a corpse makes the hex completely situational and borderline useless.
- Vain Sorceress: The Desert Sorceresses emulate Queen Mytha in her pursuit of beauty.
- The Vamp: The item lore on the Desert Sorceress' equipment mentions that they use their beauty to make their enemies lower their guard. Even people who are aware of this often fall for their wiles. One of the Sorceress' signature attacks is to grab the player character if he/she stands next to them for too long and give him/her a passionate kiss...that drains his/her lifeforce.
- Vestigial Empire: Dark Souls II is set in the fallen kingdom of Drangleic, which was decimated by a war with Giants from across the sea. Some Dark Souls loreists have interpreted this to be referring to the gods from the first game, who crossed the sea when the First Flame started dying. The Lingering Dragoncrest Ring's description also indicates that Drangleic is currently located in a place where the ring was used, possibly indicating Vinheim. Other interpretations put Drangleic where Lordran itself stood. Straid's dialogue indicates that this isn't far off, even if it's not precisely where Lordran was.
- Video Game Caring Potential: Just like the first game, it is quite possible to help quite a few NPCs along over the course of the game that you really don't have to, and joining one of the Co-Op focused covenants can allow you to give a leg up to an ailing player for no more satisfaction than the knowledge that you made someone's day a bit easier (and if you just use the White Sign Soapstone, you don't actually get much of anything other than that)...note
- Video Game Cruelty Potential: ... And also just like in the first, it is completely possible to play the game as a mass-murdering psychopath and slaughter every enemy and NPC that gets in your way for no other reason than you could. Plus, if you build your character right and make liberal use of the PvP covenants and Cracked Red Eye Orbs, you can make another player's time with the game an absolute goddamn nightmare as an invader...
- Video Game Cruelty Punishment: ... However, there are a few more punishments for extremely dickish behavior than the first game, both in the main game and the multiplayer. If you happen to invade the world of a member of the Way of Blue covenant then you had best be prepared to get counter-invaded by a Blue Sentinel in retribution (not to mention the ever-present possibility of being triple-teamed by a well prepared invadee and their two phantom summons), and if you go on an NPC murder spree than you are going to miss out on a lot of lore and items, some of which can be Permanently Missable in the right circumstances. For instance, if you kill the Emerald Herald the minute you get to Majula, then say goodbye to the Estus Flask and the ability to level, which can just about ruin a character or run on that save file. Murdering NPCs willy-nilly also raises your sin rating, opening you up for more Blue Sentinel invasions and potentially causing your maximum hollowing to cap out at 5% of your total health bar should you accumulate 100 points of sin. You better really enjoy that wanton murder.
- Video Game Perversity Potential: Wearing the Smelter Demon Armor as a woman can give you quite the view if you position the camera right. There is also a certain female character who will wear any equipment you give her. Including the aforementioned Smelter Demon Armor. The Prisoner and Desert Pyromancer sets are also, shall we say, somewhat revealing.
- Video Game Setpiece: In Aldia's Keep, a giant dragon skeleton comes to life and attacks the player, shattering itself in the process.
- Wake-Up Call Boss:
- The Pursuer is fast, strong and deadly, and depending on what path you take, he's the second boss!
- Exaggerated in Scholar of the First Sin, where, depending on the paths taken through early areas, the Pursuer can be encountered on a new file as a "normal" enemy before fighting even a single boss, sporting its post-curse attack buff to boot! As a consolation prize, if you defeat him here, we will not appear in his boss arena, and defeating him here as a summoned phantom or shade earns you the full soul reward, instead of the usual halved reward for normal enemies or his boss encounter.
- The Lost Sinner. Fast, aggressive, and hits like a freight train. She's also likely to be the first of the Great Souls bosses you kill, being anywhere from the fourth to sixth boss faced.
- And again on New Game +. Though not the first boss to have minions added (that's the Flexile Sentry, though his aren't too threatening), her new buddies are pyromancers that spam Forbidden Sun (read: giant exploding fireball) and Flame Swathe (read: giant fireball proximity mine). Essentially, two (mercifully low HP) Jester Thomases on top of the still aggressive and fast boss.
- The Pursuer is fast, strong and deadly, and depending on what path you take, he's the second boss!
- The War Sequence: Twice, once in the main game, once in the DLC:
- When you use the Ashen Mist Heart to travel into the Memory of Jeigh, you head back in time to the war between the soldiers of Drangleic and the invading army of giants to confront and defeat the Giant Lord while the battle rages around you, complete with siege weapons demolishing the scenery. Unfortunately, both the Giants and the Royal Soldiers will attack you if you catch their attention, so it's best that you don't try to aid the humans and just head Straight for the Commander as soon as possible.
- If you find all the Knights of Eleum Loyce in the Crown of the Ivory King DLC before you set out to put the Ivory King out of his suffering, they will all rally together with you in the room above the Old Chaos before you all plunge down into the fiery hellscape together. They'll fight by your side against the waves of the Ivory King's Charred Loyce Knights, cutting through their corrupted brethren like butter, before three of them sacrifice themselves to seal off the spawn gates the Charred Knights are emerging from, leaving the last one to fight by your side against his corrupted liege lord the Burnt Ivory King himself. Made even better if you use the summons in the Grand Cathedral, as you can potentially go into battle with six allies, turning it into a miniature Big Badass Battle Sequence.
- Wham Shot: After putting down Velstadt, the mightiest and most loyal of Vendrick's knights, you go into the tomb of face the ancient king of Drangleic, the one you have been told all game is the Big Bad, the man responsible for everything in the game... And you see an old hollow so far gone he only wanders aimlessly around in circles.
- Wide-Open Sandbox: Dark Souls II has the most free-form early game progression in the entire series. Once you get to Majula, there are three paths you can take provided you have the right items, with a fourth also being blocked by a cursed statue that needs a Fragrant Branch of Yore to cure. The four paths are the "Bastille" path that leads to the Lost Sinner, the "Gutter" path that leads to The Rotten, the "Undead Hunting Grounds" path that leads to the Old Iron King, and the "Tseldora" path that ends at the fight with the Duke's Dear Freja. Each of these four paths can be completed in any major order the player likes, and there are several secret routes that bypass tough challenges if the player is suitably skilled enough to overcome them.
- Wolfpack Boss: More prevalent in this game than in the other two, in keeping with its theme of having boss fights with multiple opponents.
- The Skeleton Lords would all be very easy to deal with on their own, but become more of a challenge due to the fact that they are a trio and spawn several more skeleton Mooks.
- The Belfry Gargoyles have a rather middling amount of health individually, but you have to fight six of them, possibly all at once if you don't watch where you're hitting.
- Afflicted Graverobber, Ancient Soldier Varg and Cerah the Old Explorer from Crown of the Sunken King, who fight as a group and cover each other's weaknesses.
- The Prowling Magus and Congregation, which is essentially a bunch of zombies in a room.
- The Royal Rat Vanguard, which is essentially a bunch of rats in a room. Only the Rat King (recognizable by his mohawk) takes real damage, but he goes down really quickly once you find him.
- Welcome to Corneria: Almost every NPC has looping lines. the Emerald Herald in particular will always deliver her similar "Bear-Seek-Seek-Lest-" speeches...
- Whip Sword: the Puzzling Stone Sword, from Crown of the Sunken King, is a shiny blade whose strong attacks extend it into a chain whip.
- Who Wants to Live Forever?:
- "You are of the undead. Forever without hope. Forever without light."
- The intro shows Undead slowly lose their memories, forgetting everything about their past and loved ones.
- Even if you get Vendrick's cure for hollowing in the DLC, the rest of the world will still go Hollow anyway.
- World Half Full:
- Crestfallen Saulden cheers up as you gather more and more people in Majula.
- Most of the NPC merchants you meet are still alive by the end of the game, and none of them are truly bad people. While some might act a bit rough around the edges, they are mostly friendly and helpful. Even the few that are actually deceiving you, like Licia, is more a harmless scammer than anything actively malicious.
- One of the old Firekeepers who mocked you at the beginning of the game will be impressed the more you progress.
- the Emerald Herald becomes more hopeful that her mission to break the cycle might not be in vain after all when you reach the final dungeon.
- The Lost Crowns Trilogy explores a potential cure for Hollowing, which Vendrick will transfer from himself to you if you beat the DLC content.
- World of Symbolism: The layout of Drangleic is nonsensical, and seems at times to represent its history in symbolic terms than literal geography.
- Things Betwixt is the greatest example. A seemingly infinite cave that could not possibly fit within the earth you crawl out of. This is where your game begins, you are ushered forward by three old midwife-like women, and you exist through a thin slit that shows the light of the outside world. The birth symbolism is obvious.
- The lands of the Old Iron King are laid out in a way that clearly shows the effect of his rule before you reach his castle, with the heavily forested Huntsman's Copse leading into the barren mountainous and polluted Harvest Valley, before taking an elevator up from the top of a tower to reach the bottom of a great lake of lava.
- You Shall Not Pass!: The Rat covenant and Bell Keepers covenant is set up like this. If you manage to fight your way though the Grave of Saints and beat the Wolfpack Boss that guards it, you too can join the rat covenant and try to attack other players attempting to invade your precious catacombs!
- Zombie Apocalypse: The curse of the Darksign has left many of Drangleic's residents as mindless Hollows seeking to feed on those that still have souls.