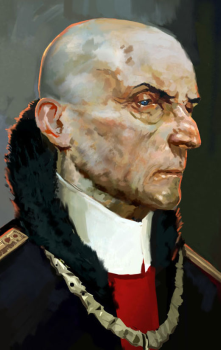
Hiram Burrows, the Lord Regent
The man who facilitated the murder of the Empress and framed Corvo. Formerly the Royal Spymaster for the Empress, he is currently in control of Dunwall.
- All for Nothing: As his regime collapses around him, his allies are dispatched one by one, and his actions only make life in Dunwall even worse, Burrows comes to realize that all of his efforts in attempting to maintain order — even going so far as to kill the Empress — have amounted to nothing.
- Aristocrats Are Evil: Obviously, going with the trend of power corrupts, and his evil is what triggered all of this.
- Bald of Evil: For whatever reason, be it age, health, or OCD, his head is as bald as he is corrupt.
- Big Bad: He's the cause for most of Dunwall's woes. He hired Daud to assassinate the Empress, had Corvo framed for the murder, and usurped control of the Empire for himself. He's later revealed to be the cause of the Plague, as well.
- Control Freak: He genuinely believes Dunwall would be safe if every single aspect of its rule was controlled by him, and everyone simply did as they were told. Of course, it's not that simple, but his obsession with having order over all things drives him forward.
- Crazy-Prepared: If you confront him in his panic room on the top floor, he mentions that he and his guards have held many drills to prepare for an assassination attempt.
- Didn't Think This Through: His entire rat plague scheme is filled with so many holes one has to wonder if wrote the plan on Swiss cheese. First, he completely underestimated how fast the plague-carrying rats spread, meaning they were killing more people than he probably intended. Second, his quarantine was ineffectual and unable to stop loved ones from seeing their afflicted relatives, which reflected badly on him and spread the plague even further. Third, unleashing a highly contagious plague without any means to cure it meant he and his conspirators were just as susceptible to it as anyone else. And this is just pertaining the plague; how he handled the murder of the Empress and Corvo's subsequent frame-up is a whole other story.
- Disc-One Final Boss: There are still three chapters left after Corvo deals with him. Havelock takes over his position as Big Bad from that point on.
- Engineered Public Confession: Neutralizing him non-lethally involves publicly broadcasting a confession of his artificial instigation of the rat plague to Kill the Poor that he keeps in his safe. Naturally, in a plague where pretty much everyone lost someone they care about, his own guards move in to arrest him.
- Even Evil Has Loved Ones: He seems genuinely fond of Lady Boyle, spending his limited off-time in her company, and becomes highly distressed learning her eventual fate.
- Evil Chancellor: Before the assassination of the Empress, when he worked under her and plotted her demise so that he could take the throne.
- Evil Overlord: After the assassination of the Empress, where he begins his rule by abusing his powers and falsely naming Corvo as the Empress' killer.
- Failed a Spot Check: It takes him a long time to notice if his safe is left open after Corvo robs it. Once he does, he panics.
- Freudian Excuse Is No Excuse: He seems to suffer from serious mental health issues, including OCD, depression, and paranoia...but as the Outsider himself points out, he deserves no sympathy, and his downfall is entirely his own doing.
- Heel Realization: Subverted. In a recording that Corvo can find in his safe, Burrows more or less cops to the fact that he's responsible for bringing the plague to Dunwall, and that he's the reason that things have gotten so bad. However, Burrows doesn't blame himself as much as he blames poor people for breaking the quarantine to see their loved ones, and blames his guards for failing to control them.
- Insane Troll Logic: Murdering off the poor with a plague will solve all of Dunwall’s problems. So he thinks.
- Kill the Poor: His motivation for releasing the Rat Plague was to "thin out the undesirables." Too bad for Burrows that he totally underestimated the breeding capacity of the plague-carrying rats, and that people would still try to see their loved ones in quarantine.
- Laser-Guided Karma: The reason he's had Corvo kept alive in jail for months is to have him tortured and give a confession to killing the Empress. In a low chaos playthrough Corvo broadcasts Burrows' own confession to releasing the plague.
- Manipulative Bastard: Pendleton uses the phrase word-for-word to describe him.
- Man of Wealth and Taste: More so than most evil nobles as you make your way through his home when he's your target.
- My God, What Have I Done?: One of The Outsider conversations, if you visit his Shrine after killing him, has the Outsider note that Hiram Burrows secretly regreted how things got so far out of control, and is burdened with the knowledge that he is ultimately to blame for Dunwall's descent, and there's no way he can make amends. The tape on which his Engineered Public Confession is recorded has him come close to admitting this out loud... but not quite.
- Neck Snap: A part of his close combat death animation. Corvo stabs him in the left shoulder blade, then turns him around so that he is facing away from Corvo. He finishes it with a brutal neck snap and removes the blade.
- Never My Fault: In his Engineered Public Confession, he comes close to this, admitting that he's the reason the rat plague came to Dunwall. But he blames poor people for breaking quarantine for his plan failing instead of himself for bringing the plague in the first place.
- Obsessively Organized: The Heart indicates that Burrows actually suffers from something akin to Obsessive–Compulsive Personality Disorder, though it isn't named as such; as well as noting his desire to keep everything in order and his inability to stop thinking about it, the Heart also mentions that he counts the flagstones as he walks, stepping on each stone only once. Finally, if you choose to confront him at his safe-house, he actually goes so far as to ask if he's being punished for imperfection.
- Obviously Evil: The guy is a thin, bald figure that looks like the bastard offspring of Palpatine and Count Orlok. Even during the first 5 minutes when nothing has happened yet, he seems like a slimy Evil Chancellor and the comments from Emily also give away quite early that he might become trouble.
- Oh, Crap!: If you break into his supposedly impenetrable safe room while he's in it, he has this reaction. Doubly so if Corvo decides to reveal his identity to him. This is also his reaction to finding his safe being left open if Corvo chooses to rob it.
- Pet the Dog: According to a conversation heard between two guards in "Lady Boyle’s Last Party", he once personally wrote a notorized letter to the Overseers to order them to free a woman who got unjustly accused of being a witch, even though freeing her probably wouldn’t profit him in any significant way.
- Rank Scales with Asskicking: He's not in Corvo or Daud's league, but despite being a skinny older man he's at least as good as an Elite Mook if you challenge him to a fair fight. He's notably a better fighter than High Overseer Campbell, his own Dragon. The Outsider even claims that he would have fought harder had he not become a Death Seeker by the very end.
- Sanity Slippage: It's specifically noted that he's becoming more and more unhinged as time goes on and things spiral out of control. If you break into his panic room and confront him in person, you'll find that he's gone full on Macbeth, and even tries to convince himself that you're a hallucination brought on by stress.
- The Spymaster: Formerly to the Empress.
- The Starscream: A rare successful case towards the Empress as her death proves.
- Start of Darkness:
- One of the pre-order DLC packs unlock an excerpt
 from his journal dated several years prior to the events of the game. It paints him as a very paranoid man, but one primarily obsessed with protecting the city and the Empress herself from potential "traitors"; he was frustrated that his calls for vigilance and heightened security were constantly being rejected. Apparently much of it was reinforced by a recurring dream that he had:Lord Regent: Why do I worry so, when no one else seems to care? If I ever fall asleep, will it all sink into the ocean? Will the rough things clamber over the walls and fill themselves on our flesh? This is what I see in the same dream several times each month. If only I had more say in things, more authority, I could protect us all.
 - His recurring dream also sounds like a premonition of the Flooded District and Rat Plague, and becomes a Self-Fulfilling Prophecy when he decides to unleash the rat plague himself - and then discovered he didn't quite have the means to control it.
- One of the pre-order DLC packs unlock an excerpt
- Too Dumb to Live: For some reason, he's recorded a confession to his crimes. Even though he keeps it locked up in a safe in his private chambers, one has to wonder why a Spymaster would create such a thing that can be used against him. However, seeing as he was losing his grip on his sanity from stress of everything collapsing around him, and he felt the need to keep everything in order at all times, it's probably related to his OCD.
- The Usurper: He supplants the Empress by having her assassinated and framing Corvo for it.
- Villainous Breakdown: He gets one of these, whether you choose to take him out in the lethal way or the non-lethal way.
- Lethal: When Corvo gets to him, Burrows is trying to convince himself that the assassin is some sort of phantom that punishes him for imperfection. Should Corvo reveal his identity, the breakdown continues, with Burrows wondering why Corvo came back despite getting away. Then, after trying to believe that things will somehow work out if he kills Corvo, Burrows can only put up a token effort before Corvo buries his blade in the Lord Regent's shoulder and snaps his neck.
- Non-lethal: His recorded confession has shades of this. Burrows, by the time he made the recording, had seen how far things had gone out of his control, and was desperately trying to justify it.Lord Regent: You can see how my plan should have worked? Would have worked! If everyone had just followed orders.
- Well-Intentioned Extremist: He is not just power-hungry, he genuinely believes he is the only competent leader around and that committing various atrocities like having the Empress killed and engineering the plague outbreak are the only way he can save his country.
- Xanatos Speed Chess: Burrows hadn't planned on Corvo coming back from his trip two days early. However, Burrows works this into the conspiracy's plan by setting Corvo up as a convenient patsy for Jessamine's death.
- "You!" Exclamation: Does this if you reveal your face to him through the video screen in the tower's main lobby. This also causes him to remain in his panic room instead of coming down to his bedroom.
High Overseer Thaddeus Campbell

The very, very corrupt High Overseer of the Abbey of the Everyman, and one of the Lord Regent's closest allies.
- An Arm and a Leg: Type 3 if assassinated in close combat. Corvo cuts off his right (sword-holding) arm, then stabs him in the left side of his neck.
- Bald of Evil: As seen on his portrait.
- Blackmail: Stated to be how he got his job, and a pivotal function of his actual role. He carries around a book containing all of the personal information and dirty secrets necessary to turn the Abbey of the Everyman into a totalitarian police force with control over every important official. In a High Chaos run, Martin ends up using this book for himself.
- Church Militant: Heads one of these. How bad it was before he took control is debatable, but there is no doubt its far worse now.
- Corrupt Church: Certainly helped make the Overseers this way.
- The Dragon: Is implied to be this for the Lord Regent, given his powerful position and presence at Corvo's torture. Being the first target, his tenure as this position doesn't last long after Corvo's escape.
- Dragon with an Agenda: He planned to use the Heretic's Brand against Burrows if the need arised.
- Dying Declaration of Hate: Should you poison him, he will instruct Curnow to warn the Lord Regent to burn the black book, then snarls for him to die of the plague as he succumbs to the poison.
- Faux Affably Evil: Campbell puts up a cordial front when interacting with Curnow, even when attempting to murder him.
- Humiliation Conga: What you inflict on him if you go the non-lethal route. First, you use a chemical brand to mark his face forever. Next, he is banished from his luxurious and decadent lifestyle, forced to scrounge for scraps to survive as it is literally a crime for anyone to try to help him. Finally, he contracts the plague and lives out his final days in squalor and agony, cursing your name. To top things off, you can choose to kill him or just knock him out again if you happen upon him.
- Hypocrite: breaks every single one of the Seven Strictures every day. According to The Heart, it is his own little joke.
- Hoist by His Own Petard: It is possible to brand his face with the mark of a heretic, turning his own organization against him, and subjecting him to the cruel anti-heresy laws he enforced. Alternatively, you can kill him with the poisoned wine he intended for Captain Curnow.
- Hookers and Blow: Along with the sleep darts and lingerie scattered around his hidden lair, Campbell's audiolog notes his interest in "sampling the merchandise" at the Golden Cat, apparently while making sure that Emily remains a captive there.
- Hypocrite: Despite being the head of an organization dedicated to destroying the works of the Outsider and maintaining temperance within its ranks, he has a secret room filled with books of black magic, an Outsider Rune, discarded lady's undergarments, notes from a nearby brothel, and numerous other luxuries. The Heart refers to it as his own private joke.
- Karmic Death: Has one of these if you switch his poisoned wine glass. Also a Karmic Fate Worse than Death if you decide to brand him. The once rich and corrupt leader of the Overseers reduced to less than nothing by his own brand.
- Let No Crisis Go to Waste: An optional conversation with him at the Prologue has Campbell remark, with breathtaking cynicism, that the rat plague has its plus sides since so many people are driven to religion in the wake of tragedy and this has made the Abbey stronger than ever.
- Mark of Shame: One can be placed on his face with a special chemical brand if the player opts to remove him from power by non-lethal means.
- Mercy Kill: If Corvo didn't kill him during the mission where he's a target, he can find him later in the game as a Weeper. If you kill him then, the after mission report lists it as this."Put Weeper Campbell Out of His Misery"
- Sinister Minister: One of the most explicitly evil members of the Overseers regardless of your chaos level.
- Smug Snake: It's hard to take him seriously as a villain since he's the first of the bad guys you take out.
- Strawman Political: Implied to be one in-universe, with even the City Watch disgusted by the lengths he'll go to protect his image. One of the Overseers under his control believes a girl showing interest in being a mechanic is a sign of possession. On the other hand, Anton Sokolov and Piero Joplin (often unknowingly) receive their ideas from The Outsider directly. And the Overseer duly points that the asking man should not interfere but rather look for the 'typical' signs of dark arts - runes, charms etc.
- Unperson: Part and parcel to receiving the Heretic's Brand is that it's forbidden to even say his name, which has been stricken from the records. Dialogue from the Overseers in the sequel confirm that this happened to him and that he's now nothing more than a cautionary tale the Abbey preaches to the masses.
The Pendleton Twins

Twin brothers and Lords Custis and Morgan Pendleton, older brothers of Lord Treavor Pendleton. They are corrupt members of Parliament, and can be found at the Golden Cat.
- Aristocrats Are Evil: Both nobility using their power to encourage corruption in the Parliament. They are renowned even among other nobles for their cruelty.
- Big Brother Bully: They tied Treavor to his crib as a kid and let loose a bunch of vipers in with him, among other hinted cruelties. He also apparently barely survived a hunting trip with the twins just before the events of the game.
- Cain and Abel: The Cain to their younger brother Treavor's Abel. Played with, as Treavor is hardly a saint himself. Treavor himself also ends up plotting to kill them, although he's not pleased about it.
- Conjoined Twins: They were born connected at the hand.
- Decadent Court: Implied to have contributed to making Parliament one of these.
- Defiant to the End: Unlike Morgan, Custis tries his hardest to fight Corvo off before he is stabbed through the neck.
- Depraved Bisexual: If a guard is possessed, Morgan will say the following:Morgan: Well, hello. Another pretty face for the party?
- Early-Bird Cameo: Corvo sees the twins with Emily in the Golden Cat when he dreams of the Outsider during his first night at the Hound Pits, before taking any missions from the loyalists.
- Wallace will remark that Corvo had actually met the twins without realizing it during his tenure as Royal Protector. Apparently, Custis made an inappropriate comment about the Empress at a formal dinner and Corvo promptly threw him out, not knowing or caring who the noble was.
- Enfant Terrible: They were nine when the above viper incident happened.
- Fate Worse than Death: If you choose not to kill them, with Slackjaw planning to have his thugs abduct them, cut out their tongues, and put them to work in their own silver mines.
- Hate Sink: To their brother, any NPC who knows them and potentially the player. The twins are vicious, sadistic bullies who have tormented their little brother for his entire life and currently run a silver mine that operates on slave labor. Even gang boss Slackjaw finds them repulsive. Consulting the Heart and eavesdropping on conversations around the Golden Cat reveals further tales of depravity and cruelty.
- The Hedonist: Both spend an awful lot of time at the Golden Cat, especially considering the precarious state of the family business. The Heart informs you that Morgan is notorious for his "unusual requests" at the brothel, and a disturbing audiograph from Emily explains that Custis once disgusted a courtesan by asking for a certain unnamed service and had to pay for a specific girl to see it satisfied.
- Hidden Depths: Custis, at least, is not simply a brute. The Heart says that he has "one of the keenest minds for business in all of Gristol". It also asserts that he is considered the smartest of the Pendleton brothers... but also the cruelest.
- Hoist by Their Own Petard: One of the possible resolutions to their quest is to have them kidnapped, disfigured, and sent to be worked to death in their own mines.
- Identical Twin ID Tag: Morgan is said to be the larger of the twins.
- Jerkass: It's said by many different people, including the Heart, that they're incredibly cruel.
- Kick the Dog: It's stated they confiscated the property of numerous people who didn't have the plague, then tossed them in plague-ridden areas.
- Made a Slave: If you deal with them in a non-lethal manner both of them are reduced to slaves working in their own mines.
- Make It Look Like an Accident: Another way of eliminating one of them, by filling up the steam room beyond its normal limits.
- Neck Lift: Part of Custis' death animation.
- Oh, Crap!: Morgan's last words in close combat are "Help me!"
- Offscreen Villainy: We're told a lot about their depraved acts, both to Treavor and to the slaves they own, but we don't really see much of it at all. Custis at least comes off as somewhat arrogant and snooty through in-game dialogue, but Morgan seems to be quite pleasant to his paramour.
- Red Oni, Blue Oni: Custis's death animation has him furiously fighting back while Morgan begs for his life.
- Sadist: Both, as evidenced by their treatment of Treavor, but the Heart claims that Morgan in particular takes great pleasure in the pain of others.
- Slashed Throat: If Morgan is faced in close combat, he goes out this way.
- The Smart Guy: The Heart claims that Custis is the smartest Pendleton and has one of the best minds for business in all of Gristol.
- Twincest: Implied by the Heart when used on Custis; it says that his attachment to his brother is "not wholesome".
- Twin Switch: The Madame assumes the brother taking the soundproof ivory room is the depraved one, and the one taking the smoking room is looking more for actual companionship than simple sex. She has it reversed: one is taking the ivory room so he can talk freely about politics with his companion, and the other took the smoking room so he could smoke during the act.
Anton Sokolov

Roseburrow's former partner and one of the main people responsible for the industrial revolution that swept over Dunwall. Currently the head of the Academy of Natural Philosophy and Piero's rival. Also an artist, drunkard, whoremonger and wannabe mystic. Like Corvo, he is a foreigner; in this case, from the remote and frozen Tyvia.
- Affably Evil: He's more amoral than evil, but he still does some horrific things in the course of his experiments. All the same, he's pretty friendly and talkative with Corvo once he's been bribed with wine and when Corvo shows up to save him and Piero from Havelock's guards. Aided by the fact that his cruelty tends toward the Necessarily Evil side as he worked toward a cure for a plague killing hundreds every day and his worst seen acts are studying the sick as they died.
- The Atoner: In Dishonored 2, he is haunted by how his inventions were used and the human experimentation he did during the rat plague and seeks to atone. Regrets over their pasts is mentioned by the Heart as what unites him and Meagan.
- Beard of Evil: Though not nearly as evil as the other targets.
- Being Tortured Makes You Evil: Inverted in the sequel. If anything, being tortured by Jindosh made him more good, as it reminded him of the many people he experimented on in the past and further compounded his regret.
- Can't Kill You, Still Need You: He's the only target that Corvo is sent to capture rather than kill, because he knows the identity of the Lord Regent's mistress.
- Cool Old Guy: Emily seems to regard him as this in the sequel, seeing Sokolov as a Cool Teacher who taught her many interesting things, invented many great machines, and had a lot of funny (and crass) stories to tell.
- Deadpan Snarker: If you take the bottle of Brandy by Campbell while Sokolov is painting his portrait, he will complain that he needs it to "draw the eye away from Campbell". He'll also snark about being asked to paint the fairly ugly Campbell.
- Defeat Means Friendship: He's rather cordial to Corvo after being captured, and by Dishonored 2, Corvo regards Sokolov with some measure of fondness. Sokolov returns the feelings.
- Defiant Captive: By the time he's found in the second game, he's been captured by the Crown Killer and tortured by Kirin Jindosh, to no avail. The torture has taken its toll on the old man, but he remains flippant in Jindosh's face, taunting that if Jindosh's electro-torture lobotomy device reduces him to a drooling idiot, he'd welcome being freed from having to endure Jindosh's rantings.
- Dirty Old Man: He makes a few comments that hint at this, and the Heart mentions that he often beds maidservants. Its precise words are that he has "the manners of a Tyvian swineherd." You can also overhear a maid saying she's heard that he "spends more time with prostitutes than he does in the laboratory".
- Exact Words: He makes use of this with one of his test subjects. She asks when she'll be allowed to leave. He promises her that the guards will take her out of her cell in the morning; around noon at the latest. What he fails to tell her is that she won't be alive by the time they remove her from the cell.
- Evil Genius: To the Lord Regent. Somewhat averted as while he created many of the tools used to enslave the populace, he's also devoting the majority of his efforts to curing the Rat Plague.
- Food as Bribe: An alternative to feeding him to the rats, he has a favorite alcoholic drink that can be bought to convince him to do a Heel–Face Turn.
- Formula-Breaking Episode: While most chapters give you a non-lethal alternative to killing your target, Sokolov is strictly meant to be brought in alive, since the Loyalists need him to tell them who's giving Burrows funding for the military.
- Heel–Face Turn: He's eventually captured by Corvo and "convinced" to side with the Loyalists, though it helps that he has no real fondness for the Lord Regent.
- How the Mighty Have Fallen: Said verbatim by the Heart in the squeal. As discussed in the game itself, gone is the Mad Scientist Renaissance Man who once looked his enemies in the eyes and dared them to kill him, and in his place is a feeble old man living in a dingy, beaten down ship who can hardly take care of himself without Meagan Foster's assistance. An audiograph record reveals he believes himself to only have it in him to make one last painting (of Emily/Corvo), and in Low Chaos endings he simply sails back to Tyvia to live his remaining years in peace and quiet.
- I Did What I Had to Do: Despite his experiments on live humans mentioned above, it's important to remember that he didn't do that to be cruel (some notes and logs by him indicate that he really isn't a fan of unnecessary cruelty, actually), but because observing the progression of the plague and how the various versions of his serum affect it is the most direct route to developing a cure for the rat plague. It's not that he isn't cognizant of the suffering he's causing, it's that the best way to honor their sacrifice is to cure this plague...which he eventually does by joining forces with Piero.
- I Just Want to Be Special: He's obsessed with contacting the Outsider through finding the right sequence of symbols and stars. The Outsider is well aware of his efforts, and doesn't bother to reward them because he believes Sokolov isn't interesting enough. He seems to find Sokolov's conviction that he can be summoned that way both a little amusing and slightly insulting.
- Inverted in the sequel, the heart points out that Sokolov, now haunted by regrets on some of the experiments he did, and the way some of his inventions have been used, is content to fade from the limelight and be forgotten.
- Intergenerational Friendship: Has one with Meagan Foster.
- Lack of Empathy: It seems to be a learned trait, rather than a fundamental part of his personality. He is completely dispassionate about the below-mentioned test subject, and actually hopes that her skin will slough off so that the experiment's results match up with his expectations. When the plague has subsided and Sokolov has some time to look back on what he did, he is utterly horrified at the extremes he went to.
- Mad Scientist: He doesn't have much use for ethics and even keeps a woman imprisoned in his laboratory to use as a test subject to observe the progression of the plague. She's number "312" even to her face, she was originally healthy, and she is evidently not the first.
- My God, What Have I Done?: In the second game, using the Heart on him reveals that he is haunted by the horrific experiments he performed to end the rat plague.
- No Historical Figures Were Harmed: A skilled painter of portraits who is also an inventor of deadly weapons and respected scientist, Sokolov is Steampunk Leonardo da Vinci, albeit without Leonardo's famous good looks.
- He's also very reminiscent of Rasputin the Mad Monk - he's from an in-universe Russia analogue, demonstrates a total disregard for etiquette and personal grooming, dabbles in the occult, has a reputation for lasciviousness, and is closely ingratiated with the ruling powers of the Empire despite his unpopularity amongst its people.
- Omnidisciplinary Scientist: As well as being an inventor who helped jump-started the industrial revolution, Sokolov is also the Royal Physician attempting to cure the plague.
- Platonic Life-Partners:
- He and Piero develop this dynamic towards the end of the first game. A Low Chaos epilogue reveals that they formed a fulfilling partnership and cured the plague, and one of the elixirs in the second game is named jointly after both of them.
- With Meagan Foster a.k.a. Billie Lurk in the second game. He's a paying guest on her ship, but it's clear that they care about each other deeply and enjoy each other's company a good deal.
- Really Gets Around: In the second game we learn he became well known in high society for having trysts with promising artists or scientists.
- Renaissance Man: As well as being a scientist, inventor and doctor working on creating a cure for the plague (which is used in-game as a health potion), Sokolov is also a renowned painter and sculptor.
- The Rival: To Piero. When they actually meet, however, they become quick friends and work together to fight the plague.
- Sesquipedalian Loquaciousness: Not he himself, but the titles of his many paintings exhibit names such as "The Torturer's Quaternionic Groan".
- Shout-Out: To Nikolai Sokolov, the scientist who goes missing in Metal Gear Solid 3: Snake Eater.
- Sparing the Aces: Part of why people keep him around despite his flaws is that he is a genius and one of the few people making any headway on a cure for the plague. Which is also why you need him around. You can't really afford to lose a mind like this.
- Token Evil Teammate: He's forcefully recruited to the heroes' side, but remains as amoral as ever. Subverted in that he doesn't betray Corvo like Havelock, Martin, and Pendleton do, providing support instead and remains loyal to the empire.
- Took a Level in Kindness: He's considerably nicer and more retrospective in Dishonored 2. Emily sees him as the Cool Old Guy and Eccentric Mentor from her childhood and Sokolov comes to care greatly for her. Corvo also regards Sokolov rather fondly, having enjoyed the man's stories. Players of the first game remembered him as a Mad Scientist Dirty Old Man who was desperate for the Outsider's attention, ignorant of the fact that said god had nothing but contempt for him.
- Unwitting Instigator of Doom: His relationship with Delilah prior to the games proper. While he was supportive of her talents, the sexually exploitive nature of her tutelage likely did little favors for her mental health. Strangely enough, none of the protagonists seem to ever call him out on this, but his habit of Really Getting Around probably hurt a lot more women than just Delilah, as well as all of Dunwall by furthering her descent into madness.
Lady Boyle
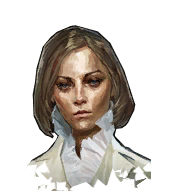
A corrupt aristocrat who is also the Lord Regent's lover. She is funding the military. One of three sisters — either Waverly, Esma, or Lydia Boyle.
In General
- ...And That Would Be Wrong: "Things have become so much better for us since the rats came. ...Not that I'm in favour of it, morally."
- Aristocrats Are Evil: All of them are, to various extents. The only real difference between them is if they are a shade of grey or black.
- The Atoner: One of the possible conversations with The Outsider (i.e. if you visit his Shrine after neutralizing Lady Boyle non-lethally) has him note that perhaps Lady Boyle if spared would spend her remaining days regretting living it large while people were dying of diseases.
- Dark Mistress: To Hiram Burrows, though they aren't seen together.
- Fate Worse than Death: Should Corvo desire to spare her, he gives her to her stalker for the rest of her life.
- Graceful Loser: Of sorts. If Corvo spares one or both of the remaining sisters, they will anonymously send a letter to him showing thanks for his mercy, and offers a rune as payment before noting that they hope they will never cross paths again.
- Impaled with Extreme Prejudice: Her close combat death animation.
- Last-Name Basis: Corvo is told that Lady Boyle is one of three sisters in a party, but not which one is his target. He'll have to figure that out himself. Since she's the main financier of the Regent's high-tech new army, her identity is a closely-guarded secret. Even Sokolov had to paint her from behind◊.
- Made a Slave: Possibly, but unconfirmed. And even then, The Corroded Man reveals her stalker didn't last long.
- Puzzle Boss: There's three Ladies Boyle, but only one of them is the actual target — The goal is to figure out which one it is.note
- Rich Bitch: Is apparently rich enough to pay for the Lord Regent's entire Police State apparatus once Parliament stops passing the budgets he wants.
- Schrödinger's Gun: Burrows is always having an affair with a Boyle sister and she is always funding the military, but which Boyle sister changes every runthrough. See Last-Name Basis.
- Spot the Thread: The correct Lady Boyle's bedroom always has a private letter from the Lord Regent (revealing her color), as well as a collectible portrait of the man.
- Stalker with a Crush: She has one of these. If you're going for a Pacifist Run, or just don't want to kill her, you can hand her over to him and he promises you that she'll never be seen or heard from again.
Lydia
- Bad Boss: What, with being an implied Serial Killer, and all.
- Hidden Depths: She's one of the finest musicians in Dunwall. She plays the harpsichord. In addition... well...
- Hope Spot: Zhukov cures her madness with his Outsider powers so he can steal from her then kill her.
- Human Sacrifice: Is used as one by Zhukov after he breaks her out of the asylum she's held at.
- Informed Flaw: The Heart says that Lydia is not a great beauty, and has had to cultivate other skills to survive in the world of a Decadent Court. However, when she is the target, her image is the same as the one used for her sisters — which is quite lovely.
- Madwoman in the Attic: After Waverly's kidnapping, Lydia went insane and was imprisoned in an entire wing of the Boyle mansion by Sokolov and Esma.
- Serial Killer: Heavily implied to be one, as the Heart says her servants have a High Turnover Rate and a tendency to never be seen again.
Waverly
- Alpha Bitch: The Heart notes that one of her favorite "games" is to befriend a young socialite, then see the girl ruined within a year.
- Bitch in Sheep's Clothing: Hides her cruel nature behind a mask of affability.
- Chekhov's Gunman: Her first name is dropped before the other sisters' and long before the mission involving her, as part of Treavor Pendleton's autobiography.
- Cutting Off the Branches: Since she's treated like the "leader" of the family and has more in common with Burrows than either of the other sisters, she's been confirmed as the canon mistress by supplemental material.
- Damsel out of Distress: She's canonically the one kidnapped by Brisby, and unable to return to Dunwall due to her crimes against Empress Jessamine. She proceeds to do away with Brisby and take his fortune for herself.
- Karma Houdini: Dishonored: The Corroded Man states she seduced her captor, married him, and then killed him. She's now rich again and living on an island away from Emily and Corvo.
- Mood-Swinger: Waverly is implied to have bipolar disorder by the Heart, as it mentions that she has both manic and depressive periods.The Heart: She suffers from reckless frivolity, followed by long bouts of melancholy.
- Pay Evil unto Evil: Given that Brisby is a stalker who kidnapped Waverly, it's hard to blame her for killing him.
- Pet the Dog: Daud can find a commission letter from her to the Dressmaker where she expresses sympathy for his recent business struggles and offers to ask a doctor of hers to help him with his ailing hands. It's very friendly for a normally snobbish noblewoman.
- Properly Paranoid: Played with. Waverly is terrified that someone is after her. It's played straight if she happens to be Corvo's target but subverted if she's not; someone is after a Lady Boyle, but it's not her.
- Really Gets Around: Though less obviously than her sister, Esma. The Heart says that while Waverly acts like she's too good for her suitors, the servant boys are very familiar with her.
- Yandere: She was once "stirred so deeply" by a servant from Morley that she had him killed the next day.
Esma
- Anti-Villain: She's a bit of a Rich Bitch but is only the mistress of the Lord Regent for the purpose of keeping her family's name safe and doesn't seem interested in scheming. Additionally, unlike her sisters, she is not implied to murder and destroy people for the fun of it. This may be why most of the fan base seems to prefer going after one of the more clearly evil sisters instead.
- Dark Mistress: Subverted, at least in her case. Esma admits to Corvo on the way to the bedroom that she's only sleeping with the Lord Regent to keep her family name safe, and she'd free herself from him if she could. And Corvo will grant her wish, one way or another.
- Drowning My Sorrows: It's mentioned that Esma drinks to forget herself.
- Grey-and-Grey Morality: If she's the mistress, in contrast to her sisters. She's a bit inconsiderate towards the poor and she's helping the Lord Regent but mainly because she just seems to want to save her family name, and she dislikes the situation.
- Lady Drunk: Her sister Waverly even notes that if Esma didn't have a drink in her hand, she'd probably fall over.
- Missing Mom: According to the Heart, though there is no mention of it otherwise and nothing in the level will give you any indication that Esma is a mother. Her daughter will end up being a victim of this trope if Esma is Corvo's target, if this hasn't already happened through abandonment.
- Really Gets Around: Esma's diary states that, at the party, she will bed the first man who asks for her, as well as the one after that. Yes, her diary says this even if she's the one who is the Lord Regent's mistress.
- Token Good Teammate: More like "token neutral teammate", but she's this in comparison to her more outright psychotic sisters.
Morris Sullivan, the Royal Interrogator

A mute torturer for the Lord Regent who worships the Outsider and has some supernatural abilities, he is a secondary target for Corvo when entering Dunwall Tower.
- All There in the Manual: His name and background can only be discovered if the players uses the Heart on him.
- Ax-Crazy: Well, he is a torturer. On top of that, when you find him, he's brutally beating a horrifically-mutilated and rotting corpse that's hanging from the ceiling. The man is seriously unhinged, and perhaps doesn't even know he is doing anything wrong due to his underdeveloped brain.
- Badass Normal: It's strongly hinted that his resistance to Corvo's powers comes from the use of Void relics rather than being directly empowered by the Outsider like Corvo or Daud.
- Bald of Evil: One of his most obvious features aside from his cruelty is his baldness.
- Boss in Mook's Clothing: He has a huge amount of health, deals enormous damage and resists most of your powers and weapons. Otherwise, he's presented an optional secondary target.
- In The Dunwall City Trials, he's used as a mid-boss in the Back Alley Brawl challenge, appearing in the ninth round.
- The Brute: He may be dumb and mute but he is certainly brutal, even when he has no reason to be as that corpse mentioned above can attest.
- Contractual Boss Immunity: He's resistant to Bend Time and Windblast, and his sizable health pool also means he can take a few hits from other attacks (like rat swarms, springrazor mines, or incendiary bolts) that pretty much one-hit-kill anything else in the game.
- Dumb Muscle: His brain is underdeveloped due to being inbred. The Heart actually says that as he grew bigger, his brain got smaller.
- Even Bad Men Love Their Mamas: Implied. A Bottle Street Gang account lists "Nelly & Morris Sullivan" among the people buying elixir from them.
- Intergenerational Friendship: Is hinted to have one with Granny Rags, who is the person who taught him how to harness the powers of the Void.
- Kissing Cousins: His noble family married cousins for generations, which is likely why he's mute and insane.
- Morality Pet: A literal example in his wolfhound.
- Optional Boss: Confronting him is entirely optional, and doesn't really benefit you in any way other than ticking off a mark on your optional mission checklist.
- The Speechless: He is genuinely mute, which is why you can't find anything about him from him directly.
- Torture Technician: He's in charge of torturing prisoners, and is the man who tortured Corvo during the six months that Corvo was in prison.
- Troll: He's apparently made a habit of sneaking into the Dunwall Tower barracks at night in order to stare at some of the guards as they sleep. It's also mentioned that he's been stealing thing from the guards so that he can replace what he's stolen with things like handkerchiefs full of teeth or painted rat heads.