Main Characters (Halara Nightmare) | Makoto Kagutsuchi
Warning! All spoilers below are unmarked.
It's virtually impossible to list tropes for this game without spoiling everything or creating Self-Fulfilling Spoilers because of the large amount of twists and Murder Mystery-related tropes it contains.
Main Characters
- See their tropes HERE.
Amaterasu Corporation
- Big Bad: The Amaterasu Corporation are the main antagonists of the game, and any opposition or conflict regarding the protagonists is related to them in some way. In more accurate terms, however, the overall cause is the power-hungry Yomi Hellsmile presented as all of Amaterasu Corporation, as all the conflict can be linked back to him and the Peacekeepers.
- Card-Carrying Villain: Zig-Zagged. The company and its people are fully aware of their own corruption, which is specifically why they conspire to cover it up in the first place, since they all acknowledge they're criminals. However, most, if not all, are completely self-righteous at the same time and don't actually notice their crimes make them evil. As an example:
- Yomi is perfectly aware he's a deranged killer security officer who is using the perks of his power for his own benefit, but at the same time, thinks that he is being a hero and is keeping the city safe from those who could "create chaos".
- Makoto is aware that he's doing bad things for the sake of Kanai Ward (even labelling what he does to Yuma in Chapter 5 as a "perfect crime" outright), but thinks it's completely necessary and continuously acts in a self-righteous manner as he claims awareness of this.
- As seen in the final Labyrinth, Dr. Huesca and the researchers are completely aware they're doing unethical experimentations to rival a governmental faction much more experienced than them, but pursue it anyway because they think that said rivalry is a good thing and that the UG is evil, and well, the entire city of Kanai Ward died from homunculi as a result of that.
- Corrupt Corporate Executive: A lot of their higher ups are implied to be this, with them routinely abusing their power for their own benefit and using the Peacekeepers to have any undesirables "dealt with". One notable example was Karen's father, whose high rank in the company meant the Peacekeepers were unwilling to even investigate his daughter's murder of Aiko and simply ruled as a suicide case. That said, most of them are also noted to be fearful of and vulnerable to the Peacekeepers, who hold most of the actual power in Kanai Ward and will abuse other Amatarasu factions almost as readily as regular citizens. Despite this, out of all of the executives in the company, Makoto is the most corrupt out of all of them due to being the head of the entire company, and being the one chiefly driving Kanai Ward's mysteries that cause everything in the game to happen in the first place, though unlike them, he actually has altruistic intentions.
- Cut Lex Luthor a Check: Defied. Amaterasu Corporation's researchers allow the corporation to create impressive products of all sorts, despite some of it being used for evil and to subdue people into following their whims. The whole appeal of their products is exactly why the corporation is so profitable in the first place.
- Evil, Inc.: If "Amaterasu Corporation" ever comes up in dialogue or in anyone who works for it, expect there to be villainy and suspicious deals behind it. Downplayed when it turns out only certain individuals in certain factions are really a problem in the massive corporation.
- Fiction 500: It's never specified how financially stable the company as a whole is. Since it's a MegaCorp that is extremely powerful with advanced technology in its grasp and is able to cover anything up with ease, it is quite likely that everyone is incalculably rich.
- Heel–Face Turn: After Makoto undergoes one himself, he uses his position as CEO to clean up the company and have it develop beneficial products for the Homunculi of Kanai Ward to protect them from harmful UV rays if they choose to leave, with many people genuinely praising the company for its work rather than out of fear or outright resenting it.
- I Control My Minions Through...: A tangible reason for Amaterasu Corporation's success in controlling Kanai Ward is making the citizens complacent. Primarily, Yomi encourages everyone to believe the Peacekeepers are gods within the city and to never question them, therefore keeping them in power and convincing residents to join them and make them stronger in numbers.
- Incompetence, Inc.: Though the current CEO is the much more competent Makoto Kagutsuchi, the former CEO was planning to make Yomi Hellsmile the CEO of the company before Makoto intervened. Evidently, if this happened, the entire company would topple over in an instant.
- Ironic Name: Amaterasu is the name of the Japanese sun goddess, so one wouldn't expect it to be the name of the ones ruling over a city of perpetual rain.
- Lean and Mean: Both Makoto and Yomi, the story's villains, are rather thin, with Yomi being much taller than Makoto.
- Lonely at the Top: Makoto, Yomi, and Dr. Huesca are apparent as being rather wealthy individuals as the leaders of the corporation. However, it's notable that none of them have any real friends and their relationships with one another are purely professional. Even if Makoto is the only one to try and actively make friends with others, he is incapable of actually trusting people due to being Number One's clone, therefore meaning he still remains alone; and quite literally "at the top" as the one living in Kanai Tower as well.
- Manipulative Bastard: The whole company has Kanai Ward's population under its control, so they're obviously manipulative.
- Meaningful Name: On the other hand, it is rather appropriate for a company named after a sun goddess to be the oppressive regime ruling over a city whose population is allergic to sunlight. The company is also a rather literal Amaterasu (though a "god" than a "goddess"), as Makoto, the leader of the company, is quite literally controlling the sun so he can cover it up with his cloud machine, making him a Physical God to all of Kanai Ward.
- MegaCorp: An extremely popular and wealthy corporation that controls everything in Kanai Ward, all people associated with it serving as the drive for the game's conflict.
- The Men in Black: Makoto, the CEO, seems to have a group of men at his disposal, of whom he is certain do not work for Yomi, his rival. They bring Yuma to Makoto's penthouse in their first meeting, among other things.
- No-Nonsense Nemesis: The only thing more terrifying than Amaterasu Corporation's corruption is the absolute lack of restraint on those who lead it and the conspiracies surrounding it in its current state, namely Makoto, Yomi, and Dr. Huesca.
- No Such Thing as H.R.: While the WDO has a Human Resources department, as they're the ones who send the detectives to Kanai Ward, Amaterasu's H.R. is seemingly nonexistent with employee abuse and gross misconduct happening everywhere and no one in the company doing anything about it.
- One Nation Under Copyright: They're the de-facto political leadership of the Kanai Ward, running almost every aspect of its society, right down to the law enforcement.
- Standard Evil Empire Hierarchy: Played With due to the power struggle, but still applicable.
- The Emperor / Evil Counterpart: Makoto Kagutsuchi.
- The Right-Hand / General / Security Officer: Yomi Hellsmile.
- Take Over the City: Makoto and Yomi succeeded at taking over Kanai Ward before the game even began. Everything that happens in the present day plot is a direct consequence of their success.
- Tyrannical Town Tycoon: Since Amaterasu own everything in Kanai Ward, right down to transactional pay with their "Ama-Pay" system, citizens are unable to defy their rule as they can easily revoke their privileges if they so desire.
- Unwitting Pawn: Apparently, everyone working under Makoto, his men and the Peacekeepers both, are unaware they're aiding him in hiding the fact that Kanai Ward's citizens are homunculi, with the Peacekeepers disposing of bodies within 24 hours to hide their revival due to the rumors he made about the rain rotting corpses, and his men taking the bodies to the restricted area under Makoto's orders completely in the dark about his intentions.
Voiced by: Atsumi Tanezaki (Japanese), Brandon Winckler (English)

 "Are you really shocked? Naturally, I knew at first sight. Because you and I have the same face."
The CEO of Amaterasu Corporation, and the Big Bad Evil Twin of the WDO's Number One.
He is the main antagonist of Chapter 5, preventing "Yuma" from, yet also aiding him in, finding out the truth of Kanai Ward.
Voiced by: Kazuhiro Yamaji (Japanese), Michael Sorich (English)

The head researcher of Amaterasu Corporation.
He is the victim of the fourth chapter, stabbed to death by Yakou Furio as vengeance for his deceased wife.
- Accidental Murder: He ends up completely unintentionally killing the entirety of Kanai Ward's original population, himself included, as a direct result of his experiments, which is not what he intended when creating the homunculus clones.
- All for Nothing: His plan to fake his death and escape Kanai Ward only led to his killer gaining an opportunity to slip past his security system. Even if he had escaped, the sunlight outside Kanai Ward would have driven him berserk and eventually killed him.
- Apocalyptic Log: Shortly before being eaten alive by those homunculi, his original self left behind a video message warning its viewer of the defective homunculi he created and explaining that he and his team are responsible for the catastrophe. This message of his ends up being key evidence for what happened to Kanai Ward while defending against Makoto's Mystery Phantom in Chapter 5's Mystery Labyrinth.
- Asshole Victim: Considering he was trying to lure Yuma, Fubuki, and Desuhiko into his deadly security system so he could use their corpses for his escape plans, it's hard to feel bad for him when Yakou stabs him to death, especially considering why Yakou was targeting him in the first place. Even setting that aside, according to the robot researcher Huesca's research was "sanctimonious and unethical", and he was ruthless enough to sacrifice others for the sake of his research, so unsurprisingly very few mourn his death.
- Barefoot Loon: He never wears any footwear because he believes it'll take away time for his research. Said research apparently involves unethical experimentation involving the (mostly) innocent citizens of Kanai Ward and, as discovered in Chapter 5, extremely lethal results; said results being something he sees as "necessary" if it's for a personal achievement.
- Big Bad Wannabe: Played with. He is in a Big Bad Duumvirate with Yomi and is the game's real Greater-Scope Villain, but despite being the head researcher and weapons designer of Amaterasu Corporation as a whole and being responsible for much of Kanai Ward's present day issues, alongside Makoto's rise to his position as the Big Bad, Makoto and Yomi manipulate Yakou into killing him off with ease and he spends the rest of his days in the restricted area as an immortal, near-braindead zombie homunculus questioning his credibility as a researcher, thanks to his failed homunculus experiment.
- Chekhov's Gunman: The Logical Extreme for the game. He only appears in Chapter 4 as the designated victim, never returning again besides his reappearance in Chapter 5 as a zombie and via a tape recording given to Yuma; however, he's the leading cause of the Ontological Mystery that the Master Detectives were sent to Kanai Ward to solve in the first place as a result of his unethical experimentations (Kanai Ward is filled with defective homunculi who replaced the original residents), and his actions in creating the defective homunculi caused Makoto to come to Kanai Ward in the first place.
- Crazy Survivalist: Set up an impenetrable security system on a separate power grid that only he could disable to secure and isolate himself from being targeted for murder, trapped in his critical lab with extra supplies, since he is the head researcher of Amaterasu, an incredibly easy target for murder and anyone who'd come for him. The setup doesn't work out for him, and Yakou bypasses his security system regardless, allowing him to be killed without a trace and killing Yakou in the process.
- Death by Irony: Faking someone is making an attempt on his life creates the opening needed for someone to actually kill him.
- Didn't Think This Through: Tricking the detectives into unwittingly getting themselves killed by his security system is what ends up in the death of his homunculus clone, as he doesn't consider that they might end up thinking ahead and use some other means to access his room. The trio checking on him (Yuma, Desuhiko, and Fubuki) chooses to use the Ama-Pal that Akira created as said means, only for their chief, Yakou Furio, to happen to be riding on said Ama-Pal in order to sneak into his lab with the aid of Fubuki's Time Leap ability and kill him without a trace.
- Dirty Old Man: Played with. He rather convincingly invokes this when he seems more amicable toward Fubuki than Yuma and Desuhiko, with Desuhiko outright calling the behavior out and trying to get Fubuki to take advantage of it. Of course it turns out this was a facade, as his intentions were murderous rather than lecherous.
- Evil Old Folks: The amoral head researcher of Amaterasu Corporation who ended up creating the very homunculi that replaced Kanai Ward's population, he's also a very old man.
- Fatal Flaw: Arrogance. Dr. Huesca's inability to accept his own flaws as a Mad Scientist and belief that sacrifices are necessary for research is what leads to the downfall of himself and his indirect massacre of all of Kanai Ward's residents and Amaterasu's employees, as it his determination to counter the Unified Government's success in creating a perfect homunculus (Makoto Kagutsuchi) that causes him to create the defective homunculi in the first place. His original self has a Heel Realization and Humble Pie just before his death, but the homunculus that replaces him doesn't have that realization. His arrogance once again has him killed when he believes he is safe from any potential attacks, and thinks he can take advantage of the detectives who are concerned for him without receiving a comeuppance for it once again; of course, Yakou Furio, the leader of those detectives, ends up killing his homunculus clone as well as a direct result of this belief.
- Faux Affably Evil: He speaks politely, but is an apathetic Mad Scientist who sees everyone around him as his inferior and is the cause of everything wrong in Kanai Ward alongside Yomi.
- Gone Horribly Right: Despite his homunculus experiment leading to the entirety of Kanai Ward being devoured, including himself, the homunculi replicated their original counterparts so well when pacified that even the clones themselves couldn't tell they were clones... or that their original counterparts died... or that anything even happened to Kanai Ward in the first place. The only one who knew all along was Makoto, but he was too strict about their knowledge of their true selves due to the threat of the UG and opted to hide the truth from them instead.
- Gone Horribly Wrong:
- The homunculus experiment. One of his initial homunculi died from sunlight, so Dr. Huesca tried to adjust for it... only for the sunlight to drive homunculi berserk instead. This ends up leading to the berserk homunculi attacking Kanai Ward and slaying all the ward's residents, including the doctor himself.
- For his homunculus self, according to Makoto, the reason he held up his tight security was to deter intruders, not kill them. While he was intending to use its lethality to kill Yuma, Desuhiko, and Fubuki, it (presumably) wasn't to kill someone like Yakou in Yakou's attempt to kill him... and of course, it did, something Yakou had to cover up through Fink's notoriety.
- Greater-Scope Villain: His original may have been encouraged by the UG to do the research three years prior to the present, but he's still the reason Kanai Ward's initial human population was replaced with defective homunculi after his experiments went awry. As we discover before that — though it's immediately glossed over again due to Yomi himself being Put on a Prison Bus — he also made deals with Yomi to sell trade secrets to other corporations and reap the profits, which is primarily what gave Yomi the means to control Kanai Ward with various amounts of resources and weapons.
- Hated by All: Dr. Huesca is infamous in Amaterasu's research facility... for how ruthless he is.
- Heel Realization: His original self seems to have had this shortly before his death; he admits in his final message that leaving the message betrays everything he's worked towards in his entire career, but that he can't allow himself to let the defective homunculi wipe out the population of Kanai Ward without leaving some kind of explanation for what happened, which implicitly includes admitting his own role in the tragedy.
- Humiliation Conga: Dr. Huesca's a Know-Nothing Know-It-All who thinks he knows what he's doing as head researcher. His entire character is one misfortune after another, and both his forms suffer a Karmic Death.
- In the backstory, his attempt to rival the UG's success in creating a perfect homunculus (Makoto Kagutsuchi) under the belief that he can do better leads to him killing the entirety of Kanai Ward's human population with defective homunculi, himself included, forcing Makoto to cover up the incident as the Big Bad and pretend nothing happened. Makoto even overpowers Yomi, Huesca's master, in the process.
- In the main story, he thinks his security system will deter anyone and that he doesn't have to worry about a hitman, attempting to escape by luring Yuma, Desuhiko and Fubuki to their deaths so he can fake his own. The detectives he tries to lure are members of the Nocturnal Detective Agency, with Yakou Furio as their leader. Yakou slips past his security with ease and stabs him in his critical lab, then leaves without a trace besides his Suicide by Assassin afterwards.
- In the Back: In Chapter 4, Yakou stabs him in the back with a Fink the Slaughter Artist knife at least three times upon entering and ambushing him from within the critical lab, killing him.
- Karmic Death: Twofold.
- The first death is with his original self, who was eaten alive by the very defective homunculi he created in Amaterasu's original research lab.
- The second death is of his homunculus self in the present day. Huesca tries to lure in Yuma, Fubuki, and Desuhiko — members of the Nocturnal Detective Agency — into his security system in order to kill them and disfigure their corpses to fake his death, but it fails because they decide to get an Ama-Pal to bypass his lethal security instead. The very same Ama-Pal the trio used was ridden on by Yakou Furio, who was the head of their agency and was planning to kill him after riding to his critical lab; although Huesca intended to kill the NDA detectives, not only did he fail, he was killed by the very man who led them.
- Knight of Cerebus: Huesca himself isn't problematic within Chapter 4, but everything revolving around him and his actions in the game's backstory significantly darkens the tone, from his indirect murder of Yakou due to Yomi scapegoating him to his homunculus experiment being the reason for Makoto's current overarching schemes.
- Know-Nothing Know-It-All: He acts like he's a genius incomparable to anyone else, but the homunculus research results creating defective killer homunculi while the UG's research produced a perfect specimen (Makoto) say otherwise.
- Large and in Charge: Dr. Huesca is the head researcher leading the scientists below him and is seemingly the tallest out of all of the scientists in Amaterasu's research lab.
- Leave Me Alone!: He tells the detectives, and Makoto, to do this when they try to warn him of Fink being out to get him, since he's fully aware that his security system can't be penetrated, even by a first-rate hitman.
- Lethally Stupid: Despite calling himself a genius, it's ultimately his stupidity in making inferior homunculus clones of Kanai Ward's residents that replace the original residents with their clones that causes the game's overarching disaster.
- Lotsa People Try to Dun It: It turns out Yakou isn't the only one who enforced his death, or at least his homunculus self's death, as Yomi and Makoto, who manipulated Yakou into committing the murder in the first place, wanted him dead just as much.
- The Madness Place: He's so invested in his experiments that he'll take any possible means to pursue them, even tricking Kanai Ward into thinking that they're taking a total population blood test when it's really to produce homunculus clones.
- Mad Scientist: Dr. Huesca is the head researcher for Amaterasu, and he has some... unethical methods of experimentation. Judging from his homunculus, he really doesn't take criticism of those methods well, even if they end up causing havoc.
- The Man in Front of the Man: As Amaterasu Corporation's head researcher and weapons designer, any and all suffering caused by the company can be traced back to Dr. Huesca and his corrupt aiding of the company's amoral interests with his unethical experimentation and weapons engineering, alongside Yomi's own brazenly corrupt efforts as his accomplice. Actually, in spite of Yomi's efforts to kill any arriving members to Yakou's detective agency to stop detectives from entering Kanai Ward as the Peacekeepers' director, Huesca is the one who actually succeeds in killing the agency's leader Yakou himself, albeit with his homunculus clone, under Yomi's plotting, and by complete accident, because the deadly gas that ended up killing Yakou was one of Huesca's failed experiments.
- Misplaced Retribution: Yakou killed him, believing Dr. Huesca killed the detective's wife four years ago due to her acting as a whistleblower and exposing the secret lab's dealings. As it turns out, it was the original fake Zilch that killed her on Yomi Hellsmile's orders; Huesca had nothing to do with her death.
- Morally Ambiguous Doctorate: His title is "Dr.", but he's actually a Mad Scientist who does the opposite of what a doctor should do.
- Morally Superior Copy: Inverted. While the original Dr. Huesca had a Heel Realization after the attempts to create homunculi went horribly wrong, his homunculus still remains an unethical Mad Scientist.
- Murder by Mistake: Accidentally kills Chief Yakou with his security system, not being one of his intended targets or decoys, though he was going for convenience regarding his escape plan regardless, so it might not have mattered anyway.
- Nice Job Fixing It, Villain: Dr. Huesca's failed homunculus experiment in his attempts to rival Makoto Kagutsuchi's creation leads directly to the events of Yomi Hellsmile's downfall, though only his homunculus clone.
- Thanks to his results ending up in defects, Makoto turns to extremism to hide the truth, which involves Makoto becoming Amaterasu's CEO due to the former CEO abdicating his position to Makoto after Makoto stopping the UG from consuming Amaterasu Corporation, which leads the company to be more successful under his management.
- Makoto lures the original Number One of the WDO to Kanai Ward so he could usurp Yomi, but after his original defeats him following Yomi's removal, the city of Kanai Ward runs with much more stability thanks to Yomi's absence, albeit with homunculus clones of the residents than their original selves.
- Obliviously Evil: He attempted to produce perfect homunculi (immortal humans who can live like normal humans) in order to rival the UG's research, but results only produced defective homunculi (immortal humans who revive as a zombie after a day and can't go out in sunlight)... all of which ended up killing and replacing the entire population of Kanai Ward, including himself.
- Obviously Evil: A Mad Scientist with a Hair-Trigger Temper and a bad reputation. Turns out he not only intended to kill strangers who were concerned for him in the present day, but almost everything that's gone wrong in Kanai Ward these days is a consequence of his research and experimentation in the past, circa his creation of the defective homunculi that went on a murderous rampage around Kanai Ward.
- Properly Paranoid: He locked himself up in his lab for several months, using a highly lethal security system, and plotted to flee from Kanai Ward at some point — to the point that he was willing to fake his own death by using someone's corpse. Huesca was absolutely right about his life being in danger, since Yomi manipulated Yakou into murdering the doctor.
- Reading Lips: Several scientists mentions that he's actually deaf, so he relays on lip reading; this is why he refused to speak with Makoto, as the latter was wearing a mask at the time.
- The Scapegoat: Courtesy of Yomi, he was framed for the murder of Yakou Furio's wife; though she was actually murdered by the fake Zilch from Chapter 0, in order for Yomi to get off scott-free, Huesca was framed for the event. The blame-shift worked so well that Yakou ended up believing it, sacrificing himself through Huesca's lethal security system when murdering him as vengeance for the sake of the Nocturnal Detective Agency in the present.
- Scratchy-Voiced Senior: He has a very gruff voice to represent his seniority.
- Screw This, I'm Outta Here: His homunculus attempts to do this in Chapter 4, trying to fake his death with victims from his security system, but Yakou stops him from doing so by unwittingly killing him on Yomi’s behalf before he has the chance to.
- Tempting Fate: Invoked. When Yuma, Fubuki and Desuhiko warn him of a hitman, he challenges the idea that one will appear with an obvious bravado. This was because he was eager to have someone to use as a decoy, hoping that said hitman, Fink, would get caught in his security system trying to kill him, allowing him to flee. However, the hitman didn't show up, so he tries to lure the trio into his security system by pretending someone has ambushed him instead (despite knowing that his security system is a one-way entry and the only other possible entry is the vent above him).
- Unwitting Instigator of Doom: Twofold, and goes hand-in-hand with what leads up to his Karmic Death.
- Dr. Huesca did not intend to create homicidal clones of the original residents of Kanai Ward, and intended to create perfect clones instead. The clones he ended up with triggered the events of the game, creating the mystery that would be covered up by Makoto Kagutsuchi, which is what ends up leading the WDO to send Master Detectives over to Kanai Ward to investigate the case.
- Later on in Chapter 4, as a result of his tight security measures, he ends up causing the doom of the Nocturnal Detective Agency by being his Mad Scientist self, reinforcing Yakou's conviction that Huesca murdered the detective's wife. As a result of that conviction, Yakou is caught in the gas chamber within Huesca's lethal security system, leading to his death by Thanatos Gambit; and since Yakou is the head of the NDA, the NDA would also fall in the process.
- Villain in a White Suit: An Obviously Evil Mad Scientist in a big white lab coat.
- Villainous Legacy: Even after the death of his original self and his homunculus clone, every resident in Kanai Ward (who is still alive and isn't secretly a criminal) has to deal with the results of being the clones of the Unwitting Test Subjects of Dr. Huesca's disastrous homunculus experiment for their entire existence. At least said clones accept the truth once Makoto told them at the end of the game - but that doesn't make it any better or less torturous for them, and the original human residents are irrevocably dead.
- Walking Spoiler: Pointing out that Huesca exists reveals who the head researcher of Amaterasu actually is, and it's impossible to describe his character arc without revealing his failed homunculus experiment and its consequences, or that he has any relationship with Yomi.
- Workaholic: To the point that he goes barefoot because he thinks putting on shoes takes too long. That's practically a whole minute he could be spending working on his research instead!
- Wounded Gazelle Gambit: While talking with Yuma, Desuhiko, and Fubuki, he pretends that someone has somehow entered his lab and is about to attack him, in order to lure the three detectives into his security system, kill them, and use their corpses to disguise his own death.
Voiced by: Nobuo Tobita (Japanese), Doug Stone (English)

One of the researchers working in Amaterasu's secret lab, and the one who has developed Ama-Pal.
- Advertised Extra: He appears alongside Swank, Yomi, and Makoto on the boxart, but he never even acts as an antagonist and plays a far smaller role than the Peacekeepers who don't even appear on the boxart.
- And There Was Much Rejoicing: After Dr. Huesca is murdered, he privately celebrates his death and says that he got what was coming to him, which is not so surprising since Dr. Huesca always insulted his research, and the researcher saw Dr. Huesca as an unethical and ruthless scientist. Even before his death, Akira has to take a moment to consider loaning the Ama-Pal to Yuma and the others to save him.
- Honest Corporate Executive: Akira allegedly didn't play a part in Dr. Huesca's homunculus research three years ago (unlike everyone else), and his aim with the Ama-Pal is simply to entertain children. As a member of the Amaterasu Corporation, he's also an executive and stands out for not being an outright villain like most other members.
- Nice Guy: Unless you happen to be Dr. Huesca, he's genuinely a pleasant guy to be around. He loans his Ama-Pal to the heroes (after a bit of hesitation since it's Huesca they're dealing with) and designed it to be as kid-friendly as possible without any ulterior or pragmatic motives.
- No Name Given: Never introduces himself with his name, and the textbox calls him "Robot Researcher", but one of the loading screen tips reveals that his name is Akira.
- Nonstandard Character Design: Has a somewhat more realistic-looking face than the rest of the cast.
- Robot Buddy: Created one in the form of Ama-Pal. During the investigation, he kicks one to vent out his anger toward Dr. Huesca, though he quickly apologizes to the Ama-Pal for it.
Voiced by: Shigeru Chiba (Japanese), Richard Epcar (English)
The former CEO, who agreed to give up his position to Makoto after the latter managed to convince the Unified Government to agree to Kanai Ward's isolation. He was later assassinated by Yomi, and his death was covered up as an accident.- Casting Gag: This isn't the first time Richard Epcar has voiced a CEO whose company was involved in some highly unethical experiments.
- Corrupt Corporate Executive: If the words of his homunculus are anything to go by, the former CEO is much more concerned about the company making profits with their assets under Makoto's control after delegating his position to him than he is about Makoto and Yomi being evil schemers taking over the city and committing various crimes to hold the control they have.
- Entertainingly Wrong: Despite being a homunculus, he falsely concludes that "the Blank Week Mystery" was a rumor the Unified Government made up as an excuse to take over Kanai Ward because he doesn't know the actual details of the event. This is nowhere near the reality of the situation, as it's actually the event when all of Kanai Ward's residents were killed by the homunculus clones that Dr. Huesca created in his rivalry with the UG. Makoto, his successor, is the only one who knows about what really happened because he's the single perfect homunculus who observed the chaos happening three years ago.
- Friendly Zombie: By far the most lucid of the zombies roaming in the restricted zone, since he does not attempt to attack Yuma and speaks coherently, unlike the other nonhostile zombies. Given that homunculi require sustenance from human flesh, and an optional conversation in which he asks Yuma to tell Makoto that he will "bring the wine next time", it may be that Makoto has been habitually meeting with him out of kindness.
- Gracefully Demoted: He gladly gave up his position of CEO since if Makoto had not made the deal with the Unified Government, the latter would have taken over Kanai Ward and consumed Amaterasu. Ultimately, the former CEO does not regret it since Amaterasu has grown significantly from Makoto's leadership.
- Greater-Scope Villain: The former CEO is the posthumous overarching antagonist of the story, as he was the CEO before the Blank Week led to Makoto taking his place, and he's also the reason that Makoto, Yomi, and Dr. Huesca were hired into Amaterasu Corporation in the first place, essentially setting the whole game's backstory in motion. While he's not actively malicious, he did end up hiring three characters who would end up serving as the game's main antagonists in the present day.
- Retirony: Inverted. He dies from Yomi's assassination pretty much immediately after he abdicates his position to Makoto, rather than before.
- No Name Given: He's simply known as the "former CEO".
Voiced by: Sara Matsumoto (Japanese), Janice Kawaye (English)
A toy robot developed by Amaterasu Corporation.- Cheerful A.I.: It's called "Ama-Pal" for a reason. It's anyone's friend, and it has the upbeat attitude to accompany that.
- Chekhov's Gun: It frequently appears throughout the game on advertisements in Kanai Ward, along with the game's opening and the storage room Yuma wakes up in. It's eventually used as a key asset in the murder of Dr. Huesca in Chapter 4, as Yakou Furio uses it to sneak into the victim's critical lab.
- Cute Machines: It's pretty much the cutest thing Amaterasu has produced and was genuinely developed by its creator to be as child-friendly as possible.
- Dissonant Serenity: Even when approaching the brutal scene of Dr. Huesca's stabbed body and when Yuma uses the Ama-Pal to distract the homunculi in the factory, this thing will keep up its cheerful outlook. Justified due to being a program that can't read its surroundings.
- Early-Bird Cameo:
- An Ama-Pal can be seen on one of the shelves in the lost-and-found where Yuma first wakes up in.
- A set also appears in the game's introduction (the sequence representing Chapter 4's case).
- Before Guillaume's broadcast in Chapter 3, an Ama-Pal advertisement is shown for a brief moment.
- Made of Indestructium: Downplayed. Its advertising riffs on the Tonka Truck's selling points down to the famous elephant promo, but its developer Akira mentions that the claims was exaggerated; it can only carry 100 kilograms at best and was designed to be durable from regular child play. The Ama-Pal does break down when hit with a massive electric shock, forcing Fubuki to use her Forte to rewind before that until they get the right combination.
- My Little Panzer: Barely defied. In terms of tech level and toughness the thing is practically military-grade, but it's designed with round hands and a total control lockout while its arms are extending, to avoid risk to children and itself. Doesn't stop the Chapter 4 culprit from using it as part of a murder plot, though and there's discussions to market a version for the military.
- Soundtrack Dissonance:
- By pushing the L, R, ZL, and ZR buttons the Ama-Pal will play various silly toy sounds, which can be freely mixed and matched together or even played all at once. This works at any point you can control Ama-Pal... including when discovering Dr. Huesca's body.
- Whenever Yuma controls the ones he finds in the meat bun factory, they play an upbeat jingle before dispensing various meat buns. He needs them to make noise, otherwise the zombies would ignore the meat buns and eat him instead.
- Super-Powered Robot Meter Maids: It's a children's toy but is apparently incredibly tough, as Chief Yakou proves by jumping on top of it and barely damaging it during the events of Chapter 4. It also has arm extensions, can play music on demand, and is also able to dispense food.
- Very False Advertising: In-universe advertisements describe it being able to withstand the weight of an elephant. While it is able to carry up to 100 kilograms, its creator notes that the ads are exaggerating.
Voiced by: Mirei Kumagai (Japanese), Morgan Laure (English)
An Amaterasu researcher and Yakou's deceased wife.- Bodyguard Crush: She hires Yakou to be her bodyguard, and the rest is history.
- Childhood Friend Romance: She was one of Yakou's friends who he'd play detectives with when he was a kid, though it's apparently been long enough since they'd seen each other that he doesn't recognize her... until she makes a comment about how he hasn't grown up and reveals a crude, handmade detective badge bearing the NDA's logo which she presumably used during their games.
- Classified Information: She discusses her private research on cell regeneration with Yakou during their first meeting, realizing too late she gave confidential information when Yakou points it out.
- The Lost Lenore: She is Yakou's now-deceased wife, and her death is his drive for killing Dr. Huesca in Chapter 4 in the main story.
- No Name Given: Her name is never given, not even in Yakou's DLC episode, in which she is simply referred to as "Amaterasu Researcher".
- Satellite Love Interest: For Yakou at least. Her only physical appearance was in Yakou’s DLC, and the most that’s known about her in general is that she and Yakou knew each other as kids.
- The Stool Pigeon: The reason she was killed in the first place. She leaked information about Dr. Huesca's deals with Yomi, prompting Yomi to assassinate her and frame Dr. Huesca for it, leading to Yakou's murder in Chapter 4.
- Tragic Keepsake: Her glasses. Since Yakou now wears them, they act as a constant reminder of his loss.
The Peacekeepers
- Adapted Out: Not entirely removed, but they're reduced to He Who Must Not Be Seen in the detectives' DLC packs, only being mentioned by name, and, as usual, continuing to distort the truth.
- Amoral Attorney: They serve as one in their Mystery Phantom forms, defending the case's culprit from being accused, until the defendant is undeniably identified by Yuma, that is.
- The Bad Guys Are Cops: While the detectives serve as the good in the story, the Peacekeepers serve as the bad, being the ones covering up cases and finding easy methods to solve everything solely to make it less of a hassle for their own reputation. The Peacekeepers are also the reason why Yakou and a clone of Yuma (Makoto), who are both detectives themselves, become antagonistic in Chapter 4 and 5, respectively, as it's their complete lack of restraint regarding their power trip over Kanai Ward that causes the aforementioned to create conflict revolving around the protagonists.
- Circular Reasoning: Any attempt that Yuma makes in telling them they're corrupt is usually countered with the fact that they're the Amaterasu Corporation Peacekeepers and therefore everything they do is right.
- Co-Dragons: As only a subdivision of Amaterasu Corporation, they're all working under the authority of the CEO, the top-ranking member of the company. Well, not really, since Yomi has a different goal in mind for them, that being overtaking the company and Kanai Ward as a whole.
- Cold Ham: Yomi, Martina, and Seth all speak with hushed tones, giving their voices an eerie presence. The other Peacekeepers, Swank and Guillaume, speak more aggressively.
- Combat Pragmatist: All of them chase after the detectives non-stop once their authority is challenged, stopping at nothing to kill them even when they're unable to fight back.
- Destroy the Evidence: A usual method to show how corrupt they are, the Peacekeepers are willing to remove any evidence that may incriminate someone where one blatantly informs Martina (actually Yuma in disguise) during Chapter 2 that they'll leave out any evidence contrary to their first claim as standard procedure. Seth especially does this with the Nail Man due to being bribed by the priest. However, they (mostly) do this because "corpses rot in the rain" and they have to clear up the crime scene immediately because Kanai Ward's dead are homunculi and revive after a day as a zombie, and this is thanks to Makoto Kagutsuchi's attempts to hide the truth of Kanai Ward. Yomi even tries to do this to Dr. Huesca's body in Chapter 4 even though there's no rain capable of getting into the underground research lab whatsoever.
- Dirty Cop: As a corporate security force turned official law enforcement for the Kanai Ward, they have no ethical restraints on their behavior, and they clearly have let it go to their heads, acting at best as petty tyrants, outright violent thugs who mastermind crime in their territory at worst. It's telling that after Martina has her Heel–Face Turn, her first action is to dissolve them and help create an actual police department composed of native Kanai Ward residents.
- Even Evil Has Standards:
- Most of the Peacekeepers are corrupt enforcers who abuse their authority and embody Police Brutality, but even they can't stand Yomi Hellsmile. The only reason they put up with him is because they're too afraid to defy him while he has the connections to get away with it, but once Makoto exposes his crimes and gives them a reason to arrest him, they don't even hesitate to do so.
- Though it's an ultimately slim standard because they're still dirty cops, the Peacekeepers always target their suspects or anyone associated with those suspects, as well as any challenge to their authority, but avoid actually going after those completely irrelevant to a case, unless they're an obvious witness. They don't want to willingly tarnish their reputation to the public after all.
- Evil Is Petty: The Peacekeepers are villains that are characterized to embody pettiness, all the members being jerks who openly take pleasure in abusing their power to harm others solely because it's entertaining to them. To some capacity, all of them are incredibly immature, even if they hide it behind a "professional" demeanor, always being willing to go after anyone dares to defy their rule for the slightest of reasons until their target is undeniably eliminated.
- Evil Minions: Everything the Peacekeeper bosses and the unnamed soldiers do throughout the story are all under Yomi Hellsmile's orders.
- From Nobody to Nightmare: They started out as one of Amaterasu's many small security branches, but quickly gained power until they overtook the entire organization.
- Gas Mask Mooks: The basic ones all wear different variants of gas masks, with their only distinguising features being their body build and language. The rotund Peacekeeper with a red gas mask is the most distinct overall. This made it incredibly easy for Desuhiko to sneak the detectives into Amaterasu's Secret Lab dressed like Peacekeepers to the point he didn't consider it a major use of his Disguise Forte but more like just changing clothes.
- Good Powers, Bad People: They're a corporate security force designed to help the citizens following Amaterasu's takeover, but thanks to Yomi Hellsmile's leadership alongside immense corporate influence, they abuse their powers and uphold the law selectively.
- Guilty Until Someone Else Is Guilty: Duh. It's practically their mantra; being dirty cops, they naturally assume the first suspect is the one they must punish with no real room for argument, though of course, they appear to accept when they're defeated if there is undeniable proof of the true culprit, as Guillaume does in Chapter 3.
- Heads I Win, Tails You Lose: In-Universe, they're willing to arrest Yuma and his associate no matter what they do in the Mystery Labyrinth to expose the true culprit, and it's only subverted by the fact that a third party comes into play and overpowers the Villain of the Week themselves. The exception to this is Martina.
- Information Wants to Be Free: Keeping important information about a case's suspect private from Kanai Ward's public is practically their modus operandi.
- Inspector Javert: Taken to extremes with this lot. If they see anyone even remotely suspicious, they will chase them down and try to detain them, no matter what.
- Ironic Name: An organization called “the Peacekeepers” is the unity of dirty cops willing to use Police Brutality on their suspects.
- Judge, Jury, and Executioner: The Peacekeepers decide on their own who should and shouldn't be arrested. The public and any potential judges don't get a say, their word is final, according to them.
- Killer Cop: All of them are willing to murder anyone who even remotely poses as a figure of rebellion against their power, especially Yuma. In fact, they almost succeed at the end of every chapter until someone/something gets in the way. However, Yomi is the worst offender by a million miles compared to his subordinates, as his actions are explicitly more "killer" than they are "cop", especially in Chapter 4.
- Knight Templar: Less so than Makoto, who conducts a whole mass kidnapping of criminals on a global scale and thinks he's in the right, but all of them are under the strong belief that what they do as a Dirty Cop is for the good of other people and an act of "justice", which is why they're so dead set on targeting who they believe to be a suspect, since they think they're actually doing the right thing. Though the citizens are oblivious to it, the detectives can see their evil. Most of this can be explained by their leader, Yomi, being a Tautological Templar.
- Lack of Empathy: Apathy towards the unfortunate is the norm for the Peacekeepers, but the most guilty of this is their leader Yomi, who extends this to his own employees.
- Law Enforcement, Inc.: They're technically a private security firm rather than a legal police force, but with the Amaterasu Corporation effectively running the town, they're the only cops around. Moreover, the power they amassed as Amaterasu grew meant they were able to intimidate and coerce the other factions of Amaterasu into serving them.
- Lawman Baton: The unnamed Peacekeepers working under their bosses are typically seen using neon batons as their primary weapons.
- Might Makes Right: As Makoto explains, the Peacekeepers' role in settling the chaos that the corporation was engulfed in (as the various factions within it grew too big and powerful) led to this conceit. Since they brought order where others failed to do the same, the Peacekeepers decided they were the only ones who deserved power, to determine what was right and wrong for Kanai Ward, that everyone else was incompetent, etc. The weapons and influence they amassed meant opposing them directly became impossible for even the rest of Amaterasu's leadership.
- More Despicable Minion: The Peacekeepers serve as Amaterasu's prime enforcers, but their boss, Makoto, turns out to be the Anti-Villain. Meanwhile the Peacekeepers are straightforward villains who believe themselves to be the heroes, when they're really just dirty cops. While both parties are villains, with Makoto being the one with more moral goals by comparison, to some capacity, all of the Peacekeepers are designed specifically to make the viewer loathe them, though not as blatantly obvious as Yomi, and unlike Makoto, all the Peacekeepers are completely willing to apply brute-force to their work and target the protagonists with murderous intent for the most sadistic of reasons.
- My Master, Right or Wrong: While the individual Peacekeeper bosses working for him feed into Yomi's belief that he's the hero in Kanai Ward, the unnamed mooks appear to be aware of how irrational Yomi actually is but still serve him out of loyalty. However, they don't hesitate to assist in his arrest once they get the chance to do so.
- Not Afraid of You Anymore: The Peacekeepers detest Yomi for his cruelty but are too afraid to speak out or openly defy him while he still has the connections to get away with it. Once Makoto exposes his crimes, however, the Peacekeepers refuse to listen to Yomi's orders anymore now that they have an excuse to turn on him, and even refuse to take any bribe he offers them. Once Martina arrives and orders his arrest, they don't even hesitate to carry it out.
- Not So Invincible After All: Everyone who is a Peacekeeper boss is pretty much impossible to defeat by normal means, what with them always acting high and mighty and not listening to reason... until a third party intervenes with the case, that is. Yakou easily talks Swank out of arresting Yuma, Yomi gets rid of Seth and Martina personally For the Evulz, Guillaume is taken down by the NDA's solid and firm convictions, and Yomi himself is personally taken down by Makoto with a file of evidence.
- Not What I Signed Up For: You can find a depressed Peacekeeper completely disillusioned and isn't bothered to uphold the law.
- No Warrant? No Problem!: It's pretty much the standard for the Peacekeepers to investigate a case without a warrant.
- Obliviously Evil: When Amaterasu Corporation took over Kanai Ward, the Peacekeepers were necessary to restore order in the city and therefore, were needed at one point. Since then, despite said order having been restored, they now believe that Kanai Ward is still disorderly, and eliminate any potential threats to their ideal of being the only ones who can restore said order. They are actually unaware they're causing chaos instead, the most obvious candidate being Yomi, who is utterly clueless to the evil he's become on just about every level.
- Order Is Not Good: The Peacekeepers believe themselves to be committing to "justice" by eliminating "injustice" with their imposition, but the consequences of their endeavors say otherwise, as they're only causing more chaos.
- Out-Gambitted: The Peacekeepers' plan to take control of Kanai Ward through their corruption while the Master Detectives are being targeted by them, due to making it past their means of prevention, immediately topples over once Makoto Kagutsuchi exposes Yomi in Chapter 4.
- Pet the Dog: During Chapter 2, after the investigation of the scene where Karen died during a play rehearsal, a Peacekeeper can be seen consoling a crying student. It's a reminder that even though they appear as mindless goons, under the mask are people, some of whom are good and kind-hearted.
- Police Are Useless: The Peacekeepers are more likely to mastermind a case than solve it, aid the culprit of a case in their crimes than find and condemn them, actively make as little effort as possible in seriously investigating anything, and despise other law enforcers who know how to do their job better than them; unfortunately for Kanai Ward, they are the only law enforcement in the city, so naturally, this unethical behavior of theirs ends up causing more crime than solving it. Their negligence of the public is also what directly causes Chapter 2's case and the three girls' plot against Karen to happen in the first place. One can even forget they're supposed to be security officers because of how little actual security they apply. This makes sense, though: they weren't trained to be real law enforcers, and the only thing they do know is how to abuse their power over others ruthlessly and selfishly.
- Put on a Bus to Hell: Swank is talked out of arresting Yuma by Yakou, Seth is indicted by Yomi for taking bribes from the priest, Martina is subjected to a Cruel and Unusual Death by Yomi, Guillaume & Dominic are left in a Villainous BSoD as they accept defeat, and Yomi is given Laser-Guided Karma in the form of being arrested for his crimes. Aside from Martina, who returns for the last case against Yomi and even then it's not much of a reappearance, all of them essentially disappear from the plot after these moments.
- Quirky Miniboss Squad: Yuma faces off against one key member in all but the last case, actively obstructed and threatened if it cannot be resolved, and within the Mystery Labyrinth each of their Phantoms manifest as his first argument rival before the true culprit takes center stage. Yomi’s, befitting The Heavy of the story, gets to be the final opponent of his labyrinth, though.
- Reading Your Rights: Inverted. During an arrest, the Peacekeepers say that you have no right to remain silent and no right to a lawyer. In an ironic twist, Yomi is given the full rights to show that they're no longer going to be brutal anymore.
- Renegade Splinter Faction: They aren't actually leaders within Amaterasu Corporation, only being part of one of the many divisions, but thanks to Yomi's bribery, they act independently and refuse to follow most orders from the higher ups.
- Tom the Dark Lord: Everyone except for "Yomi Hellsmile" has a rather casual name despite the Peacekeepers being the game's secondary villains: Swank, Seth, Martina, Guillaume ("William" in French), and Dominic.
- Two Girls to a Team: Out of the six total Peacekeeper bosses, Guillaume's partner Dominic included, Martina and Guillaume are the only two girls while the rest are guys.
- Villain of the Week: Barring the culprit of each case, each of them acts as the main antagonist of whatever chapter they appear in, with Shinigami always having to spirit Yuma and his partners away to the Mystery Labyrinth whenever they're cornered by them. Swank is this for Chapter 0, Seth follows after in Chapter 1, Martina is faced in Chapter 2, and Guillaume and Dominic share the role for Chapter 3. Yomi is met as early as the end of Chapter 1 and his presence is felt throughout the following chapters, but he finally takes center stage as Chapter 4's overall villain. This type of episodic villain is different, in that the culprit of the case serves as the other that Yuma has to defeat; however, the culprit is not given focus during each chapter, the chapters instead focusing on the Peacekeepers.
- With Us or Against Us: An extreme version. Disagreeing with the Peacekeepers in any way will have them see you as an enemy, and they'll do anything to be seen as the ones in the right.
- Would Hit a Girl: The Peacekeepers target Fubuki and Kurumi equally as they do the male characters, and are totally fine with executing them too. It’s also revealed that Yomi hired the hitman in Chapter 0, who killed off Melami and Pucci, along with many other unnamed female detectives in the WDO.
- Would Hurt a Child: They surround a child investigating the clocktower during the Nail Man case in Chapter 1, since he was seen near the crime scene of the most recent case. This is what ends up uniting Yuma and Halara together to solve it after Halara saves him upon getting involved without a plan.
Voiced by: Yoshitsugu Matsuoka (Japanese), Howard Wang (English)

The Director of the Peacekeepers.
Though he serves as the main obstacle in the way of the detectives, he eventually becomes the main antagonist of Chapter 4, preventing Yuma from finding out the truth of the secret lab case.
- 0% Approval Rating: Understandably, no one likes Yomi, and anyone who displays otherwise has likely been manipulated or threatened by him into doing so.
- Adaptational Comic Relief: The pre-release 4-panel manga comics involving him and Martina feature situations much more comical than the ones featured in the game, as seen here
 where Martina is providing for Yomi at his every word.
 - All There in the Manual: According to the artbook, Yomi dyes his hair red and he actually has a royal blue. Since his real hair color is only barely visible as an undercut on his 3D model, he's still considered a redhead.
- Ambition Is Evil: Yomi is primarily driven by his desire to control everything he believes he should control, Kanai Ward and Amaterasu Corporation itself in particular, which is why he made deals with Dr. Huesca to trade with external corporations beyond Amaterasu and used the money gained to yield his tyrannical ways over Kanai Ward.
- Angelic Abomination: The (first) Mystery Phantom version of him faced in Chapter 4 takes the form of a Two-Faced being with an angelic left side and demonic right side. Funnily enough, the angel side of his body is the only one with a wing, making this form a literal case of a One-Winged Angel.
- Anti-Role Model: Yomi is specifically designed to be a Hate Sink who represents how one should not act towards others, considering he's a sociopathic, hegemonic, and narcissistic jerkass tyrant who absolutely everyone in the setting of the story either rightfully despises or fears.
- Asshole Victim: Non-lethal example. He ends up getting incarcerated by his own Peacekeepers at the end of his character arc due to Makoto exposing his crimes and working with Martina to overthrow him, ending his reign (or rather his homunculus's reign) for good... until he possibly returns in the future. Considering how big of a Tautological Templar Dirty Cop he is, especially compared to his lessers, he deserves no sympathy nor does he get any, though he still demands it.
- Ax-Crazy: The craziest of the lot! If his general behavior didn't give it away, then his drive to commit violence around anyone who crosses him will.
- Bad Boss: Almost as cruel towards his own underlings as he is towards suspects of the cases he investigates. Just ask Martina. It’s telling that his own men - many of whom are shown to be brutal bastards themselves - don't hesitate to turn against and arrest him the moment an excuse to do so arrives in the form of evidence of his corruption.
- Barbaric Bully: He has a... penchant for targeting those who don't have the same power he does, just so he can have his way over other people while still controlling the narrative, and he even shows this to his Peacekeeper underlings just because he has the power to boss them around or even outright have them executed if he feels like it. It's even stated in his profile that he hates "foolish people who defy him".
- Beauty Is Bad: Yomi appears "handsome" on the outside, something that his in-game profile notes, in both his appearance and his voice, but is obviously a very callous and highly barbaric individual who is willing to kill anyone who gets in the way.
- Believing Their Own Lies:
- Yomi is genuinely convinced he's Kanai Ward's true savior and everyone else around him is the one ruining the city's peace, despite blatant evidence of the contrary.
- He claims that he's the one protecting the city and will use whatever he can to eliminate threats to Kanai Ward, but it's obvious to everyone that all he cares about is being in power.
- Big Bad: Not for the game as a whole, that honor goes to Makoto Kagutsuchi, but Yomi serves as the main antagonist of the game up to Chapter 4, being the leader of the Peacekeepers that torment the detectives. Then Makoto takes his position in Chapter 5 and reveals himself as the true main antagonist.
- Black Eyes of Evil: His dialogue sprite gets these whenever he's acting particularly unhinged. Doubles as Foreshadowing, since Chapter 5 reveals that all defective homunculi get them when exposure to sunlight drives them into a murderous rage. It just so happens that "murderous rage" is one of Yomi's normal moods.
- Blatant Lies: No, Yomi is definitely not the one protecting Kanai Ward and other people that aren't him aren't the ones ruining it, no matter how much he tries to convince himself that the opposite is the case. Of course, his inability to accept this is what causes him to go to extremes all the time.
- Break the Haughty: Someone as obnoxiously haughty as Yomi is difficult to break, as long as he believes in control. When Yomi is exposed for his crimes and he realizes his underlings will no longer serve him in Chapter 4, however, he desperately, but pointlessly, pleads innocence and accuses Makoto of fabrication in an attempt to regain control of his situation and save his own hide, but no one wants to hear a word of him and he undergoes a Villainous Breakdown instead.
- Brutal Honesty: An antagonistic jerkass version that's Played for Drama. Yomi never hides his true feelings regarding anyone he meets, and it's arguably what makes him so unlikable and terrifying for his allies and enemies alike, if nothing else. Of course, when compared to Makoto, of whom is a constant liar (though that's because anyone knowing he's a clone of Number One, the greatest mind in the world, might not be to his advantage in a place like Kanai Ward), Yomi's willingness to offer his honest opinion on someone stands out a lot clearer.
- The Caligula: Yomi Hellsmile is the Ax-Crazy director of the Amaterasu Corporation Peacekeepers, and to simply call him insane would still understate the atrocities he commits in regards to Kanai Ward as a whole. The entire reason Kanai Ward is a Wretched Hive at all, where even Amaterasu Corporation's CEO himself is a criminal because of Yomi, is thanks to his ruthless "leadership" of the citizens. In reality, he's just a Jerkass who only cares about himself, but he's so out of touch with reality that he's convinced himself that he's the city's savior.
- The Chessmaster: Considering he's able to secure his position over Kanai Ward to the point that even his own rival can't take him down by conventional means, Yomi is quite an elaborate and successful schemer in his own right. Despite this, he's still an incredibly naive person and perceives himself as Kanai Ward's hero in spite of being the prime cause of the hellscape it's turned into.
- Chronic Backstabbing Disorder: Anyone who works for Yomi is likely to be betrayed by him at some point, as Seth, Martina, and Huesca learn when he sends them to their doom without any compunctions.
- Classic Villain: Though Yomi isn't the Big Bad, he represents the usual vices, envying Makoto, lusting for power, being greedy for more, highly ambitious, easily angered, and a lazy law enforcer. He's also deceptive, manipulating Yakou Furio into committing murder, and also serves as the detectives' main roadblock in searching for Kanai Ward's Ultimate Secret.
- Climax Boss: While he's technically not the Big Bad of the game as a whole — in fact, he's technically not the culprit in any case — he's very much this for the main arc of the game from Chapters 1 to 4. He's introduced at the end of Yuma's first case in Kanai Ward as the Big Bad masterminding the Peacekeepers, and his influence on the game is felt throughout, ultimately leading up to him finally being confronted in the Chapter 4 Mystery Labyrinth (although his actual downfall only comes shortly afterwards).
- The Corpse Stops Here: Invoked. He labels Yuma, Desuhiko and Fubuki as Chapter 4's culprits due to being near Dr. Huesca's corpse. However, Yomi is all the while well aware of what really happened, since he's the real mastermind behind the case and is trying to draw suspicion away from himself.
- The Corrupter: By proxy of being the cause of all the evil in Kanai Ward, Yomi has a negative influence on just about anyone who comes in contact with him, except for the main detectives besides Yakou, whom he successfully manipulates into comitting a murder. This is especially apparent with Makoto, as Yomi is the reason Makoto is a villain alongside him in the events of the immediate plot.
- Creepy Monotone: He barely raises his voice and speaks in a low manner. It comes with villains voiced by Howard Wang.
- Crocodile Tears: Unconvincingly weeps when bemoaning the fact that Seth has become corrupt by stealing donations meant for the church (never mind the fact that Yomi ordered Seth to do it in the first place). He quickly drops the act once he sentences Seth to death.
- Cut His Heart Out with a Spoon: Played for Drama. He has two instances of making some very... interesting execution threats.
- At the end of Chapter 2, he threatens to compress Martina into a cube so he can carry her around by his side at all times.
- Before Chapter 4's Mystery Labyrinth, he threatens to "name a path through Kanai Ward's sewers after Yuma's bones once he dumps them there." Or in other words, dump Yuma's skeleton into Kanai Ward's sewers after killing him.
- Deadpan Snarker: He's a very snarky and condescending man who doesn't take anyone around him seriously for the sole justification that he feels like he doesn't have a reason to. Actually, pretty much every single line Yomi says is loaded with sarcasm and disdain towards everyone around him, and he does not make it subtle.
- Dehumanizing Insult: He frequently gives out degrading, disrespectful insults to his sworn enemies, namely the detectives and Makoto, most preferring "trash", "garbage" or "freak" out of the many he has, all while adopting his obnoxiously smug tone of voice as he does so.
- Despotism Justifies the Means: It's clear that all Yomi cares about is being in charge. The people's lives being affected by the Peacekeepers' general corruption and Police Brutality mean absolutely nothing to him, and he'll do anything to ensure that he gets all the authority, as well as dispose of any potential competition.
- Determinator: Yomi just won't leave the detectives alone and pretty much constantly threatens them throughout the story. That is, until he gets his comeuppance for all of his misdeeds, anyway.
- Didn't See That Coming: Considering Makoto is the one who introduced Yakou to Fink the Slaughter Artist as part of his plan to distract Yomi enough for his plan to expose Yomi for his crimes and place him under arrest, it is very likely that Yomi was unaware that Fink would actually kill Yakou outright, even though he was the one who sent Yakou into the plot to kill Dr. Huesca in the first place. He may have received the false death threat that foreshadowed it, but he was expecting the threat to be a bluff, considering he's so eager to mock it at first. Yakou also dying from being stabbed by the assassin was likely never part of his plan.
- Dirty Coward:
- Seemingly the reason for his fake politeness is that he tries to lower the guard of his victims upon seeing them to be defiant. While this works on his loyal Peacekeeper bosses, who readily submit to his will, it doesn't work on the soldiers or the detectives, who see right through him.
- He chooses to counter Master Detectives being sent to Kanai Ward by the machinations of Makoto Kagutsuchi by masterminding a scheme to kill as many of them as possible all so he can protect his reputation and prevent detectives from uncovering his misdeeds as the cause of the Blank Week.
- When Halara and Vivia save Yuma, Desuhiko, and Fubuki from being unjustly arrested by him by fighting with his own Peacekeepers, Yomi flees from the scene while the detectives are distracted, essentially leaving his own men behind to be attacked by the two of them. Though it's already well-established he's an extremely selfish man by that point, it's still a cowardly move on his part.
- Yomi acts high and mighty as long as he thinks he can get away with it, but as soon as Makoto exposes his crimes and turns the Peacekeepers against him, all of his smugness goes out the window and he undergoes a Villainous Breakdown as he desperately tries to regain control of the situation.
- Disc-One Final Boss: Due to being the director of the Peacekeepers and the main enemy in the way of the detectives' investigation, along with his defeat happening at the same time as Chief Yakou's death, one wouldn't be blamed for believing him to be the Final Boss, with the detectives no longer being restricted from investigating Kanai Ward. Unfortunately, Makoto is revealed to be Evil All Along, and becomes the true Final Boss instead.
- Dog-Kicking Excuse: Yomi tries to use his position as Director of the Peacekeepers to justify his corruption in the sense that he's "keeping order in Kanai Ward". This is obviously to avoid admitting that he's only an egotistical psychopath who wants to torment those he deems less than him. Of course, unlike other examples, Yomi is already fully willing to Kick the Dog if it's to his benefit; he just needs an excuse for it so he can't be held accountable for doing so, plain and simple.
- Dominance Through Furniture: Uses Martina as a chair at the end of Chapter 2.
- Do Wrong, Right: Played for Horror. He gets absolutely furious with Martina not using enough firepower when sending a torpedo to the NDA's submarine, saying that her lack of dedication to "justice" only leads to "senseless destruction", since he actually wanted the submarine to be vaporized with that firepower instead, not just destroyed. We can only imagine what would've happened if the wrong had been done right in that scenario and the NDA had in fact gotten vaporized like he wanted.
- Dragon with an Agenda: While he is the second-most active threat after the Big Bad CEO, Makoto Kagutsuchi, who lured the detectives to Kanai Ward from the start, his Peacekeepers underlings do listen to Makoto, logically works under Makoto since Makoto runs the entire company while Yomi's only part of a division within said company, and it's implied that the Peacekeepers have been following Makoto's orders regarding cleaning up the bodies of the deceased homunculi, Yomi himself largely acts independently and isn't actually following any commands given by Makoto, if he's willing to follow any at all, meaning that despite being subordinate to Amaterasu's CEO, Yomi is acting entirely through his own goals. Makoto acknowledges how unrestrained Yomi is, which is why he's trying to take him down.
- The Dreaded: Pretty much everyone (except seemingly Makoto) is understandably terrified of this guy. Even his own staff go out of their way to avoid drawing his attention; at one point in Chapter 4, a Peacekeeper investigating the storage room — who had previously been adamant that they be allowed to search it regardless of security clearance — immediately drops the subject upon learning that Yomi has the only key.
- Drunk with Power: To say Yomi is "drunk" on his power is an understatement, considering he uses it as an excuse for assisted murder cases, allowing him to not be held liable for any murder he does commit — as he's too addicted to his power as Peacekeeper director to care for or allow himself to be considered as being responsible. Thankfully, Makoto takes him down a few pegs at the end of Chapter 4 by having him arrested. Despite the trope description itself, Yomi was likely never a good person before he became director of the Peacekeepers, considering his go-to method of getting into power from the start was bribery.
- Entitled Bastard: He expects everything to be handed to him — obedience and loyalty, and whatever have you — all while treating everyone around him like trash (even literally calling people that too) and threatening to kill people and desecrate them afterwards. The only way he ever does get anything that he has in the present day is through cheating, and even then his arrogance causes that to fall apart in the end as well.
- Establishing Character Moment: His introduction shows full well how callous and corrupt he is and how much of an utter asshole he is to his own underlings, to the point that he covers up his own corruption by sentencing one of his underlings to death.
- Even Evil Has Loved Ones: Subverted. Yomi at least tries to appear somewhat-likable by showing that he at least loves Martina, even calling her "my beloved right hand", but he reveals at the end of Chapter 2 that the only person he really loves is himself by attempting to execute her the moment that he disappoints her just so he can have Kanai Ward all to himself.
- Evil Cannot Comprehend Good: Yomi is unable to discern innocent people from criminals and conflates the two of them due to his own inability to recognize what evil is, since he is completely delusional and thinks himself to be the only force of good in Kanai Ward, when he's quite the opposite. In a similar fashion, he is unable to comprehend the Anti-Villain that Makoto is, as he doesn't notice that Makoto is sincere in his proclamation that he would do anything for Kanai Ward... or at the very least, its homunculi, which is including, of course, plotting against Yomi and out-gambitting him and his men.
- Evil Gloating: Yomi really enjoys gloating about his position and presumed victories so long as he thinks he can get away with it. It's even gotten to the point where his Mystery Phantom even gloats to Yuma that despite discovering his role in Chief Yakou and Dr. Huesca's deaths, he can't do anything to him since he didn't directly kill either of the victims.
- Evil Is Hammy: The man constantly shouts and growls his every word and sentence with a tirade of petty insults and threats, and it's impossible to ignore him whenever he appears on-screen when he carries his over-the-top attitude around him.
- Evil Is Not Well-Lit: The room that Yomi is seen stationed at, which appears to be his base of operations, is arguably the darkest location in the entirety of Rain Code's story. Well, second darkest, the first being the restricted area where Dr. Huesca's original created the defective homunculi and the third being the current Amaterasu research lab's hallways.
- Evil Redhead: An evil dictator who has red hair.
- Evil Wears Black: He wears a black uniform with a black cap, with white as a secondary color. This color motif is also shared with Martina.
- Exact Words: He reassures Martina that he will keep her by his side despite her failure... as a compressed flesh cube.
- Fatal Flaw:
- Cruelty. While his Bad Boss tendencies make him feared, it also makes him deeply unlikeable to everyone, including the Peacekeepers under his command. Martina was the only known Peacekeeper to have any loyalty to him, but even she loses all respect for Yomi after he decides to subject her to a Cruel and Unusual Death for failing him. The Peacekeepers detest him so much for his cruelty that they don't even hesitate to turn on and arrest him once they have an excuse to do so.
- Arrogance. Although his connections allow him to get away with his crimes, he also seriously underestimates his foes. This allowed Makoto to undermine everything by finding physical evidence of his illegal dealings, as Yomi was too focused on the Master Detectives and believed that simply ordering Makoto to be escorted out of the lab would be enough to get the man out of the way.
- Apathy. Yomi's inability to emphasize with people ends up screwing him over in the long term, as it keeps him from understanding why people would go against him. He's utterly baffled that Martina would turn on him despite the fact that he sentenced her to a Cruel and Unusual Death for failing him and gloated that he never loved her at all. He also never bothered to see the execution through nor check to see if she's really dead, which allowed Makoto to rescue her secretly. Despite knowing that Makoto is a grave threat to his position and stands in the way of his ambition, he doesn’t take him as seriously as he should have, simply having him escorted out of the lab so he can get to work on eliminating the Master Detectives, which allowed Makoto to sneak into his room and find evidence of his illegal dealings. His last attempt to regain control from Makoto after the latter exposes his crimes by bribing the Peacekeepers fails because they detest him so much that they don't care about being paid by him, they just want him gone.
- Paranoia. Yomi’s refusal to trust anyone leads him to be needlessly cruel to allies and enemies alike, especially when they challenge his authority, leading him to earn himself more enemies than necessary. Ironically, despite knowing that Makoto is a grave threat to his position, Yomi doesn’t take him as seriously as he should; when Makoto finally exposes his crimes and turns the Peacekeepers against him, Yomi finally shows himself to be nothing more than a coward when he has nothing to fall back on.
- Faux Affably Evil: He speaks politely, but is very much an evil man with no restraints on what he does.
- First-Name Basis: His underlings commonly refer to him as "Director Yomi".
- Flirty Voice Ploy: He pulls this on Martina whenever the two of them are onscreen together, calling her "my beloved right hand" in a fake, seductive voice. Of course, his "love" is obviously only manipulation, and his flirting is completely empty in the end.
- For the Evulz: There's no indication for his motive behind why he wants so much control over Kanai Ward, nor why he's so desperate to have it no matter the cost, but one can assume that he simply wants it for the sake of it.
- General Ripper: The Director of the Peacekeepers who quickly makes enemies with the surviving Master Detectives of the WDO's Kanai Ward assignment and tries to kill them at any opportunity he can, usually through his minions.
- A God Am I: Yomi has an obvious god complex in regards to being able to control Kanai Ward's law enforcement and it has clearly gone to his head.
- Green-Eyed Monster: He can't ever accept the idea of someone challenging his influence over Kanai Ward, lest he be removed from his position as director of the Peacekeepers. This is especially prominent with Makoto Kagutsuchi, the CEO ranking above him, as he despises the fact that Makoto got the position before he did.
- Hair-Trigger Temper: It's incredibly easy to enrage Yomi, but most of all, challenging him on a personal level is most certainly a way to get him angry, and rightfully so, everyone avoids intentionally provoking him for this reason. His sworn rival, Makoto, even avoids doing so whenever they're on-screen together.
- Hanging Judge: Tries to execute Yuma and co. in Chapter 3 because Yuma planted bombs around Kanai Ward, even when Icardi is the one who manipulated him into doing so and the only bombs that did explode were still Icardi’s doing. He even uses "All Crimes Are Equal" as his justification.
- Hated by All: Everyone either despises or absolutely fears him for good reason. It’s gotten to the point that once his crimes are exposed, the Peacekeepers are all too willing to arrest him now that they have an excuse to do so, showing that even they hate his guts. Martina, the one Peacekeeper who showed any loyalty to him, loses all respect for Yomi when he decides to subject her to a Cruel and Unusual Death for failing him and helps Makoto expose his crimes and order his arrest.
- Hates Everyone Equally: Being one of the worst examples of a human form of The Caligula in fiction, Yomi is a violent misanthrope who spares no one from his tyranny no matter who they are, and he is relentlessly abusive to everyone around him, even to his own colleagues. From his distorted point of view, he's the only morally good person and the only one who should be allowed to rule over everyone. Seemingly the only reason his despotic ways haven't spread beyond Kanai Ward is because he isn't powerful enough to cause such wide-scale damage to humanity, only being the law enforcement within a mega-corporation that he doesn't even run himself (though he loathes those who get such luck like Makoto).
- Hate Sink: Far and away the most despicable person in Kanai Ward; only Dr. Huesca comes close (and even he seems to have had a Heel Realization shortly before his original death). He has absolutely zero redeeming qualities, constantly insults everyone around him, tries to murder the protagonists on flimsy excuses multiple times, subjects his own employees to horrible fates the instant they disappoint him, and is directly responsible for turning Kanai Ward into the crime-riddled hellscape it is when Yuma first arrives. He's also completely oblivious to his true nature, and considers himself a hero, just to make himself even easier to hate.
- The Heavy: Any and all suffering caused by the maliciousness and apathy towards actually helping the citizenry from the Peacekeepers boils back to him and his brazenly corrupt efforts to seize more power and fortune for himself, with even Makoto struggling against his growing influence. Yomi is also the one responsible for Makoto's plot to use the detectives as bait to oust him by summoning them to Kanai Ward under the pretense of an investigation, as Makoto realized he was too greedy to be kept as Kanai Ward's predominant ruler and was an obstacle in Makoto's protection of the city, effectively also making Yomi the real reason the detectives are in Kanai Ward.
- The Hedonist: Yomi does everything he does because he feels pleasure from being able to control a whole town of people and a whole corporation like pawns and not be punished for it, and he has purely selfish motives behind everything he does. Most notably, he does not feel any regret whatsoever because all that matters to him is power and consumption, which he thinks he's doing with good intentions, but it's quite obvious he isn't.
- Hero Killer:
- Not him specifically (though he was going to personally take out Yuma and Vivia in Chapter 4), but his hitman working on his behalf. He orders his hitman, the "Zilch" seen in Chapter 0, to kill the five Master Detectives entering Kanai Ward, which serves as the opening case's main conflict. Along with this, he's had that hitman kill many other people off-screen solely for doing the right thing. However, that included defying Yomi's rule over Kanai Ward, which he certainly didn't want to have challenged.
- Makoto may have indeed been the one who predominantly allowed Yakou's murder plot in Chapter 4 to happen by telling him about Fink, but Yomi is also the one who triggered the events of Chapter 4 to happen by enabling Yakou's desire for revenge in the first place. While definitely aware that Dr. Huesca's lethal security system would end up killing Yakou.
- Hiding Behind Your Bangs: His left eye is covered by his red hair.
- Hoist by His Own Petard:
- His plan to manipulate Yakou Furio to kill Dr. Huesca is exactly what leads to his downfall, as it was Yakou himself who lured Yomi out of his room as part of that plan and gave Makoto the opening to find evidence of his secret trade dealings.
- We eventually find out in Chapter 5 that he was the one who caused the Blank Week to occur in his attempt to create homunculus clones of Kanai Ward's residents with Dr. Huesca's help, including a clone of himself and his underlings... and those very same clones end up killing him and said underlings both, replacing Yomi himself with a clone of himself replicating his likeness as well, because the clones were defective. And to dig in the consequences of his actions further, the one perfect homunculus from the rival UG (Makoto Kagutsuchi) ends up amending the situation after it occurs by infiltrating Kanai Ward and doing everything in his intellectual power to keep Kanai Ward unaware of what really happened.
- Hypocrite:
- He calls Seth unforgivable for turning a blind eye to the church's crimes in exchange for bribes. Later on it's revealed he gained a lot of his influence by selling Amaterasu trade secrets to other companies. Hell, Seth even points out that Yomi was the one who told him to take the bribes to begin with.
- Yomi sees himself as the hero in Kanai Ward, but he is actually the cause of all of the problems regarding the city as a whole.
- Yomi is willing to condemn others for their betrayal of trust as long as it's towards him specifically (the most notable cases being Martina and Dr. Huesca), but he ignores that he betrays the citizens within all of Kanai Ward through his hedonistic attempts to seize control and power over the city no matter how destructive it becomes and no matter who dies in the process.
- I Don't Pay You to Think: As per his Bad Boss tendencies, he expects his underlings to follow his every word, the bosses and the soldiers both, with total obedience, and bemoans them whenever they don't, or they do something that generally opposes his warped self-perception of being a "paragon of justice". He does this to Seth, Martina and Guillaume throughout the story at least once or twice.Yomi: (to Martina, opposing him) You're a member of the Peacekeepers! I won't allow such insubordination!
- I'll Kill You!: "I'll execute you on the spot!" comes up frequently as one of his threats.
- I'm Not Here to Make Friends: A 100% competitive example in Chapter 4. When Yomi follows Makoto and Yuma into the research lab upon hearing the threat that Fink the Slaughter Artist has decided to kill Dr. Huesca (actually a false threat and a lure from Yakou Furio, the case's future culprit), he rejects Makoto's offer for them to search together and turns it into a competition for who can find him first purely out of his pettiness and arrogance. This directly bites him back later when it turns out to have all been a ploy by Makoto to outwit him and expose his crimes in his elaborate plan to overthrow him.
- Infamous, but in Charge: Over the course of his five years of powerful influence over Kanai Ward (two years as a human and three as a homunculus clone), Yomi has been open about his corruption from the very start (with the belief that if he does it then it is not corruption, as he believes he embodies justice), with the public forced to accept him and his equally-corrupt grunts as the end-all-be-all of law enforcement in Kanai Ward. The majority of the reason for this is because there was a need for the Peacekeepers to become powerful to regain order in the chaos that engulfed Amaterasu and Kanai Ward, only for it to get out of hand and their power to remain after it was no longer needed.
- It's All About Me: It's very clear Yomi only cares about being in charge and getting on top by himself. The idea that anyone else could take charge of Kanai Ward and run the place far more responsibly than he ever could never crosses his mind. He also plays the victim whenever it's convenient for him, even though he's the one who's targeting other people first, and he envies Makoto's position as CEO because he wanted the position for himself, presumably so he could continue to be a Bad Boss and ruthlessly abuse his employees like usual. His chronic self-centeredness and the destruction it causes, as he explains himself, is the reason Makoto took advantage of the detectives and pitted them against him.
- I Own This Town: He rules Kanai Ward with an iron fist, and in fact was originally the single most powerful and influential leader in Amaterasu Corporation before Makoto Kagutsuchi showed up and became the new CEO. Much of the backstory of the game involves the power struggle between Yomi and Makoto over control of Amaterasu, and Kanai Ward by extension.
- I Regret Nothing: He himself doesn't say it, but his Mystery Phantom at the end of Chapter 4 does, in the form of taking pride in successfully manipulating Yakou into killing Dr. Huesca.
- The Irredeemable Exception: As the leader of the Peacekeepers and the source of most of the malice that permeates the story, it's unlikely Yomi can be redeemed, compared to his subordinates, anyway, especially when he vows to kill Makoto and co. for outwitting him and placing him under arrest.
- Jerkass: Yomi constantly insults everyone he deems beneath him, tries to have the Master Detectives killed with the flimsiest excuses possible, distorts the rules and the truth for his own benefit, and will even mistreat and kill his own subordinates. He's also highly manipulative and lacks remorse, as he only cares about his own goals and his own reputation, which is what ends up causing much of the conflict in the backstory.
- Jerkass to One: He hates everyone in the setting of the game for sure, but he seems to particularly have something against Yakou Furio since he leads the one detective agency that can counter his influence, being the one who his Peacekeepers target when the main characters try to actively rebel against his influence, and the one he's willing to use as a pawn for his scheme in Chapter 4. While Makoto can count too, it's more of a petty villainous rivalry between the two of them than the outright hatred he apparently shows for Yakou.
- Just Giving Orders: With regards to his relationship with Dr. Huesca. Yomi is the one who wraps Huesca up in their bind of Yomi using him to gain influence over Kanai Ward for the five years they were working together, but when the doctor betrayed his trust six months ago, Yomi shifts the blame onto Huesca and uses Yakou as part of his plan to murder him in Chapter 4 as "punishment" for the doctor's rebellion.
- Justice by Other Legal Means: His abuse of power and his manipulation of Yakou Furio would’ve allowed him to get off scot-free - due to his overwhelming power over other corporations besides Amaterasu - had it not been for Makoto intervening and exposing his illegal trade dealings with Dr. Huesca in Chapter 4.
- Karma Houdini Warranty: He's exposed as the mastermind of Chapter 4 in its Mystery Labyrinth, but as he's not directly responsible for the murder, Shinigami can't reap his soul. After engaging in much Evil Gloating over this, both in Phantom form and the real world, Makoto shows up with evidence of his dealings with the victim and many more of his crimes, leading to his arrest.
- Kick the Dog: Does unnecessarily cruel things out of anger.
- How does he punish Seth after the Nail Man is revealed to be the priest, and one of Yomi's sources of income (donations meant to go to the church) is now gone? He orders Seth to be executed.
- After sending Seth to his execution, Yomi makes a threat to the Master Detectives for trying to defy the Peacekeepers by investigating the Nail Man case. That is, despite Yuma and Halara specifically defying one of his underlings, of whom was following something Yomi himself ordered him to do, making it come off as completely unnecessary and as Yomi just trying to shift the blame for his actions onto his enemies.
- Right after he blows up the detectives' submarine, he kicks Martina because the firepower was not enough, and he wanted to vaporize them instead. Then right after calling her his beloved right hand, he chides her for not solving the case of Karen's murder and for letting the detectives go. So how does he punish her? He orders her to be crushed in a presser so that he can keep her around as a cube. Martina, who has been nothing but loyal to Yomi this whole time, is shocked at his utter disregard for her and begs for mercy, only for her to be taken away.
- After Fink the Slaughter Artist stabs Yakou, Yomi ignores Yuma's pleas to give Yakou medical aid. As if that were not bad enough, Yomi kicks his body several times, all because Yakou will die before Yomi can punish him personally.
- Kick Them While They Are Down: He repeatedly stamps on Chief Yakou's unconscious body after the Chief is stabbed by Fink the Slaughter Artist in his Suicide by Assassin following his murder of Dr. Huesca in Chapter 4, even though he's unable to fight back and is already in enough pain from the wound. As per usual with Yomi, he ignores the fact that he put Yakou in that situation in the first place by provoking the murder.
- Knight of Cerebus: Yomi makes any scene he appears in immediately overwhelming with his pure sadistic energy, especially in his Villainous Breakdown at the end of Chapter 3.
- Laser-Guided Karma: The trade secrets he leaked and his constant power struggle between himself and Makoto end up biting him back twofold when Makoto, all by himself, to add, manages to gather a file of evidence to use against him... though this is only part of his multi-layered gambit to destroy Yomi and seize control of Kanai Ward. Threefold, as well, Martina, whom he sent off to execution at the end of Chapter 2, unites against him with Makoto in doing this.
- Laughing Mad: He doesn't do it often, since he's more prone to shouting like crazy than committing to the Evil Laugh routine, but his Mystery Phantom does this to horrific degrees when Yuma, Shinigami and Vivia reveal him to be the mastermind behind Yakou's murder of Dr. Huesca but can't reap his soul since he didn't kill Dr. Huesca directly.
- Machiavelli Was Wrong: Ultimately his whole character arc. He believes that coercion and intimidation are the only ways to claim power over other people, but he misses trust and loyalty out entirely, which is ultimately what leads to his downfall. Meanwhile, Makoto, his rival, who doesn't do this, has a much better reputation over Yomi because he actually cares about the consequences of his actions and meticulously plans things out, allowing others to actually apply said trust and loyalty to him. Before the epilogue, this attitude of Makoto's was, of course, mostly fake, but he applies it for real in the epilogue when the residents trust him far more than they ever did Yomi.
- Make It Look Like an Accident: Invokes this with his indirect murders in order to get himself off scot-free.
- He uses his assassin, the fake Zilch, to kill various people on his behalf without leaving evidence and labeling it an accident. In particular Yakou's wife is killed in what looked like an accidental explosion in the lab.
- The previous CEO of Amatarasu is implied to have died this way. Makoto states he believes Yomi had him murdered, but he can't prove it was a murder.
- Manipulative Bastard: Provokes Yakou Furio to kill Dr. Huesca by sending him a letter detailing how and why he's responsible for the murder of his wife under an anonymous signature. It works out exactly as planned.
- Miser Advisor: He colluded with Dr. Huesca to sell trade secrets to other corporations solely so he could get the money back to bribe others to follow his whims, essentially allowing him to start his overarching reign over Kanai Ward.
- Modern Major General: He's a very successful schemer, able to become director of the Peacekeepers and rule over Kanai Ward as its law enforcement officer alongside his underlings, but he's incredibly incompetent at actually doing his job.
- Moral Myopia: Despite sentencing Martina to a cruel and unusual punishment for failing him and callously admitting he never really loved her, when the still alive Martina reveals herself and helps Makoto to expose his crimes and order his arrest, Yomi has the gall to be shocked and infuriated that Martina would turn against him, as if he is someone who deserves her loyalty.
- Mysterious Past: While Yomi is undeniably a power-hungry maniac who serves as the main force behind every conflict within the game, down to ordering the blood test that caused the Blank Week Mystery, he's too busy boasting about his power and authority over others as Director of the Peacekeepers to actually explain how he turned out that way.
- Mythical Motifs: If it wasn't already clear, Yomi's character and design is based on the evil of Satan, and not only does his characterization of being an Ax-Crazy psychopath who is motivated by wrath show this, but his entire design does too, due to having red hair and black clothes. His name is also based on the underworld itself, with his forename "Yomi" coming directly from it and "Hell" being part of his surname.
- Names to Run Away from Really Fast: His first name comes from the Japanese underworld, and his last name is Hellsmile. In his first appearance, he quickly establishes himself as an incredibly cruel and dangerous man.
- Narcissist: Yomi is openly a high-functioning narcissist and doesn't actually care about anyone except himself, and he only sees those beyond himself as mere pawns to throw away, including his closest allies. He perceives himself as a hero, when he's anything but that, and his inflated sense of self-importance causes him to never see himself as wrong, no matter what how many people suffer or whose lives are ruined thanks to him. All that matters to Yomi is having control over other people, and having people cater to his delusional belief that he's Kanai Ward's savior, and he'll do anything to get it.
- Never the Obvious Suspect: Subverted. In Chapter 4, the mastermind who manipulated Yakou to murder Dr. Huesca is unknown by Yuma; to players, considering he's the most morally corrupt character, it should obviously have been Yomi. Due to how obvious it is, players deny it. However, it turns out that, all along, Yomi was the mastermind.
- Nonstandard Character Design: His Mystery Phantom looks far different from all other Mystery Phantoms, lacking their distinct neon palette, the rainbow glow that emanates from their eyes (although the final form of Zilch's Phantom also lacks these), and their relatively wacky design aesthetic. Instead, Mystery Phantom Yomi is a massive humanoid black and white monster, his form so twisted he's hardly identifiable as Yomi Hellsmile and looks more like a Shin Megami Tensei entity.
- Not-So-Well-Intentioned Extremist: Yomi believes that everyone and everything is a threat to Kanai Ward, including any detectives who dare to challenge the Peacekeepers' pride and power over Kanai Ward, so he believes he's acting in accordance with that and "keeping Kanai Ward safe". Of course, the reality is, he's eliminating those who are only a threat to himself, and not the city, and he has a highly destructive god complex that makes him destroy everything he touches.
- Obviously Evil: Literally every character realizes this on sight.
- Offing the Annoyance: According to his Mystery Phantom, this is how he perceives instigating Yakou Furio to murder Dr. Huesca and getting him killed in the process via his Thanatos Gambit.
- Oh, Crap!: Yomi's smugness goes out the window when he sees that Makoto has gathered the evidence to implicate him of his crimes, leading to his Villainous Breakdown when his desperate attempts to regain control of the situation by ordering and bribing the Peacekeepers to arrest Makoto don't work.
- Opportunistic Bastard: Over the course of the present day of the game, Yomi doesn't really have an actual plan in mind with his villainy and is merely taking advantage of the fact that Makoto sent detectives to Kanai Ward to oppose him. If that never happened, he wouldn't have anyone to oppose in the first place considering he has the citizens under his rule, and there are no detectives to counter him by that point besides Chief Yakou. Of course, there is one plan that actually did happen, that being taking advantage of Chief Yakou's trauma to drive him to kill Dr. Huesca, but that's about the only time an obvious plan is there.
- The Paranoiac: Oh boy, is he ever. Yomi can't trust anyone around him ever, and always comes to the worst conclusions he possibly can, driving him to act like the unlikable jerkass he is and believe as firmly as he does that Violence is the Only Option. He despises anyone who challenges his authority and always believes someone is trying to take him out of the picture; understandably, there was someone, that being Makoto. When cornered in Chapter 4, he also ends up displaying the most incriminating element of paranoia possible when he realizes none of his underlings will listen to him anymore: cowardice.
- Perpetual Frowner: Whenever he isn't pulling a Slasher Smile, he's usually frowning at everyone who surrounds him, since he sees everyone as inferior to him and refuses to show any respect towards those he sees as his enemies.
- Practically Joker: Yomi is a gleefully sadistic, murderous dictator prone to a very over-the-top way of showing it, who likes to show how unhinged he is through constant slasher smiles and snide remarks against those who dare to challenge him, and cares very little for what others think of his cruelty, as long as he's in control of the narrative. The only thing that it takes to stop him is also evidence of his deeper crimes that allows him to be judicially arrested, similarly to how the Joker is defeated.
- Pride: Yomi's primary vice. His utter inability to see himself as wrong is what makes up most of his character and drives all of his actions, making him a selfish and delusional despot.
- Psychological Projection: Yomi claims everyone else who surrounds him to be the ones ruining the peace in Kanai Ward. This proposition of his is completely off the mark from the truth considering he's the one who's actually responsible for such.
- Psycho Sidekick: As much as Yomi can be considered a sidekick to Amaterasu's CEO, that is. In comparison to Makoto, the CEO, Yomi is absolutely insane, has no moral restraints, and is willing to kill anyone who dares to defy him. He "teaches" his subordinates with a firm hand to act exactly the same way he does, of course. Makoto, on the other hand, has the sanity that Yomi lacks, which in turn also makes Makoto a better schemer than him.
- Psychotic Smirk: He adopts one of these during his moments of Evil Gloating about how much power he has over others, and does it so often that it's even in his character illustration.
- Put on a Prison Bus: He never appears again following his judicial arrest in Chapter 4, and rarely gets mentioned again aside from his Solution Key and the fake Zilch, at that, since Chapter 5 focuses on Makoto instead.
- Pyrrhic Victory: In Chapter 4, he succeeds in his plan to manipulate Yakou Furio into killing Dr. Huesca for him, something he gloats about proudly both as a Mystery Phantom and in the real world. The entire plot is then revealed to actually be a distraction to aid Makoto, who was exploiting his single-minded hatred for those who oppose him so he could find evidence of his illegal activities and have him lawfully arrested.
- Red and Black and Evil All Over: His red hair and black uniform should be an indication that he's not a good person if his awful personality wasn't enough of a sign.
- Red Is Violent: Yomi's red hair stands out on his appearance the most, and he is, obviously, a very violent man.
- Rich Bastard: As a member of the Amaterasu Corporation and by far the most powerful and influential (even beyond the CEO), Yomi is no slacker in the financial department and even has many of Kanai Ward's citizens aiding him in his ascent to power. However, he's also an incredibly selfish and cruel despot, a Bad Boss to all of his employees, and everyone in the game has a negative opinion of him because there's nothing to like about him.
- Royal Brat: The Ax-Crazy Amaterasu Corporation Peacekeepers director with a lot of influence over "his" city, who is also extremely immature, unable to tolerate even the slightest challenge to his position and, in his rage, tries by any means to eliminate it, even to the bitter end when his underlings have turned against him.
- Screw the Rules, I Make Them!: Yomi's character in a nutshell. As the head of the Peacekeepers, he believes his word is the only justice, and therefore the only truth. Using the immense power he's acquired through both legal and illegal means, he distorts and manipulates everything, including the facts, for his own benefit and executes all who stand in his way, even his own employees, purely because he's the leader of the only real police force in the city. No one bothers questioning him due to the power he's amassed, effectively allowing him to rule Kanai Ward like a god.
- Selective Obliviousness: When Seth argues back that he was Just Following Orders from Yomi himself when taking bribes from the priest (the Nail Man, in other words), Yomi completely ignores him, guilt-trips him and then orders an execution.
- Servile Snarker: He is the director of the Amaterasu Corporation Peacekeepers who also hates his eccentric boss, Makoto, for stealing his opportunity to become Amaterasu's CEO from him and snarks at him whenever possible.
- Seven Deadly Sins: Yomi's character as a whole displays all of the traditional sins.
- Envy: He is jealous of those who pose as a challenge to his power over other people, and attempts to eliminate anyone who could interfere with his role as the corrupt leader of Kanai Ward's law.
- Gluttony: He always takes more than he needs to, especially the lives of Kanai Ward's citizens as a whole, ruining them and making the city a crime-ridden hellscape all so he can take it for himself.
- Greed: He always yearns for power and is unable to detach from his obsession with it, and is willing to take it away from others if he so chooses.
- Lust: In a literal sense, he tries to act seductive towards Martina, which while only an act is still a sign of lust. In a figurative sense, he wants the pleasure of being in control of others.
- Pride: His ego convinces him that he is infallible, and any sign of otherwise is an insult to his very existence.
- Sloth: He grew to power through illegitimate means and is incompetent at his job, refusing to even do the basics of actually enforcing law in a populated city.
- Wrath: He is easily angered, so much so that it terrifies those around him besides Makoto.
- Shut Up, Kirk!: He tries many times to deflect and attack anyone who calls out his abuse of power, refusing to listen to them and pulling a terrifying Death Glare as he gives a "The Reason You Suck" Speech instead. This is most apparent with the Nocturnal Detective Agency and Makoto.
- Sir Swears-a-Lot: By far the worst offender of the entire cast, and this is coming from a game where the language is surprisingly tame compared to its predecessor.
- Slasher Smile: Shows this a lot, especially when he punishes his underlings.
- Smug Snake: Yomi is an obnoxious, self-satisfied jackass who speaks sarcastically to everyone he deems beneath him (which is everyone except himself) and believes his position of power means that he's able to get away with it, his sheer smugness outshining even his fellow Peacekeepers, though it's clear that he's also bitter about the fact that Makoto is still in a position of power above him. Despite thinking he has everything under control, it's clear that Makoto is always one step ahead of him, and when he's finally Out-Gambitted, all of his smug attitude goes out the window. Even his Mystery Phantom drips with this knowing that Shinigami can't actually kill Yomi since he technically wasn't the direct murderer, only for his real self to be taken down by Makoto and Martina anyway shortly after.
- The Sociopath: He's quite a blatant example: he doesn't care for anyone but himself, lacks empathy, twists any truth that reveals his true nature for all to see as a means to maintain his own reputation, displays a superficial charm to others (when it's convenient), is quite willing to use people as expendable tools, and his recklessness is taken to such extremes that it's what leads to his own downfall. This is when compared to Makoto, whose villainy is driven by love instead, and unlike Yomi, he at least demonstrates he cares for the lives of actually-innocent people; Yomi has none of those traits. He also switches between high-functioning and low-functioning, being willing to mastermind massacres of other people and target others for murder under the guise of it being an execution, while simultaneously emotionally manipulating those who pose the most loyalty to him so they remain on his side.
- Spiteful Spit: He spits on Chief Yakou when insulting him and his detective agency after Yuma and Halara interfere with the Nail Man case and challenge his control the first time around in Chapter 1.
- The Starscream: Yomi absolutely hates living in Makoto's and the former Amaterasu CEO's shadow, and his every action and move taken is his attempt to take Makoto out of the picture and usurp his position by whatever methods come to mind. Even illegal dealings with Dr. Huesca, which in particular does him in.Yomi: (to Makoto) If you weren't in this city, by now I'd be...
- Tautological Templar: For everything he does, he still thinks he's the hero of his own story, as the embodiment of order in Kanai Ward. Yomi seems to believe whatever is good for him is good morally.
- Terms of Endangerment: A variant, in that he calls Martina "my beloved right hand". Coming from him, it's an obvious sign that he was going to betray her at some point, and at the end of Chapter 2, that is exactly what happens.
- Thin-Skinned Bully: One for the entirety of Kanai Ward. He is willing to antagonize people and ruin the lives of multiple people just for fun and for the sake of power at the expense of living conditions, but when someone has the advantage over him (such as someone like Makoto Kagutsuchi), he immediately cowers in fear, becoming distressed, and desperately tries to save face while yelling maniacally, and is even cowardly enough to demand that his former ally helps him out of his situation.
- Token Evil Teammate: In terms of Amaterasu Corporation as a whole, compared to the two other amoral people who lead the company and drive the game's conflict besides him (Huesca and Makoto), Yomi is definitely the most evil member within the whole company, without a doubt. Yomi is also the one who drives the other two to villainy in the first place, as he's the reason Makoto assembles the detectives in Kanai Ward (so Makoto can take his place), and he's also the reason for Huesca's paranoia in Chapter 4, due to making death threats towards him after Huesca's betrayal.
- Too Important to Remember You: It's pretty obvious that, outside of Yakou Furio himself, since he sent a letter to him directly, and has also known him for a long time as the NDA's chief while in Kanai Ward, he doesn't bother to remember the names of the surviving detectives that he targets throughout the game, only referring to them as "detectives". Yakou even says Yuma's name in front of him at the end of Chapter 3, but he still asks Yuma's name when confronting him at the end of Chapter 4's investigation.
- Torture Technician: When he's not threatening to execute his enemies, Yomi is promising to torture them for later. He boasts that whatever methods he uses will have Yuma and his friends ready to rat each other out to stop the pain or flat-out beg for death. Even his profile lists his major like as handmade torture tools.
- Two-Faced: As a Mystery Phantom, his right side is a grinning demon with black skin, some spikes, and with eyes dotting random places. His left side is white and has the appearance of an angel instead, even down to the wing, but looks just as evil.
- Tyrant Takes the Helm: Yomi is the More Despicable Minion to Makoto, the company's CEO, and he rules Kanai Ward like a dictator and views the citizens as his playthings. Despite someone working above him, he is ultimately the company's de facto leader, having gained control of Amaterasu's factions completely. In an odd way, this seemingly also applies to the game as a whole, as said CEO's goal was really to take his place as the city's ruler and the protagonists were just his pawns for him to take that opening. Had he managed to become Amaterasu's CEO before Makoto beat him to the punch, Kanai Ward would've been a wasteland.
- Underestimating Badassery: Ironically, despite knowing that Makoto poses a threat to his position of power, Yomi doesn’t take him as seriously as he should have. He simply had Makoto escorted out of the lab during the Fink the Slaughter Artist incident and puts all of his focus on the Master Detectives. This allowed Makoto to find evidence of his illegal activities in his room when he’s not paying attention, undermining everything and ousting him from power.
- Villainous Breakdown: After Makoto brings evidence of his crimes straight to his face, he desperately tries to beg his officers to arrest everyone, with none of them listening to his order, and they arrest him instead. He then angrily vows that he will return before being dragged away.
- Villains Want Mercy: Yomi outright demands that he be freed from incrimination and his underlings take out Makoto as Makoto holds the physical evidence of his secret trade dealings in front of him when karma comes his way in Chapter 4 and he gets ousted from power as the Peacekeepers' director and indicted for his crimes.
- Walking Spoiler: Not Yomi himself, but his past and present relationship with Amaterasu's head researcher, Dr. Huesca, spoils both his motive for masterminding Yakou's murder in Chapter 4, and their direct involvement in the events that occurred in the game's backstory that lead to Makoto becoming the Big Bad.
- We Will Meet Again: As he is being taken away and deemed as a criminal, Yomi makes a firm promise to outright kill everyone who stood up against him in return for them taking down his power over Kanai Ward when he inevitably returns from his imprisonment in the future.
- Whip of Dominance: He keeps a whip hidden under his cape as a weapon, though he only brings it out near the end of Chapter 4, cracking Vivia in the face with it when the latter tries to stand up to him.
- Why Won't You Die?: Repeats this time and time again to people he despises and wishes to torture or murder, especially when Yuma gets caught up in Icardi's ploy in Chapter 3 and he tries to kill the entire Nocturnal Detective Agency (and Kurumi) when they refuse to give him over.
- Would Harm a Senior: Implied in that he would've taken on the job of killing Dr. Huesca himself had he not manipulated Yakou to kill him on his behalf in order to avoid dying from the researcher's impenetrable security system.
- Would You Like to Hear How They Died?: The Mystery Phantom representing him describes in very clear detail that Yakou died because of his lack of insight into Yomi's manipulations, directly to Yuma, Shinigami, and Vivia as they hear his every word.
- You Have Failed Me: Does this to Martina Electro at the end of Chapter 2 by having her be pressed into a cube. Unfortunately for him, Makoto saves her. Having Seth arrested and likely executed is also certainly a case of this under flimsy pretenses of stomping out corruption.
- You Have Outlived Your Usefulness: He does this to Dr. Huesca by provoking Yakou to kill him, taking the doctor's betrayal from six months ago as an excuse to take him out of the picture. Dr. Huesca using an impenetrable security system to protect himself made it difficult for Yomi to order his elimination on his own.
- You Meddling Kids: He’s extremely furious about Makoto and Martina exposing his crimes to him and turning his own Peacekeepers against him, and the detectives distracting him enough for the duo to be given an opportunity to do so, saying that it’s because of them that he lost his power over Kanai Ward in the end.
- You're Nothing Without Your Phlebotinum: As an insult to Makoto, the CEO working above him, he claims that he has the power, numbers, and charisma that Makoto lacks. Makoto argues back by sarcastically, but subtly, calling him an idiot.
Voiced by: Shizuka Itō (Japanese), Jenny Yokobori (English)

The Vice-Director of the Peacekeepers. Yomi's right hand woman and rumored mistress.
She is the main antagonist of Chapter 2, preventing Yuma from finding out the truth of the Aetheria Academy case.
- Alto Villainess: She is one of the two female Peacekeeper antagonists Yuma fights against, and she has a very deep, smooth voice to speak with. This also contrasts the voice of Guillaume the following chapter, whose voice is high-pitched instead.
- The Atoner: After Makoto saved her from her execution and Yomi was taken down, she stepped down as his right hand and began working to right her past mistakes.
- Creepy Monotone: Martina speaks with less aggression and desire in her voice compared to Yomi, sounding more even and robotic, and it understandably makes her sound less human by comparison.
- Cruel and Unusual Death: Suffers from this at the end of Chapter 2, where Yomi orders her to be thrown into a "high-performance presser" and turned into a cube. At least, that's what was going to happen until Makoto intervened.
- Dark Action Girl: As seen in Chapter 2, she is much more capable of combat than she lets on, kicking down and threatening with weaponry very openly, something the other Peacekeepers don't match when they attack Yuma.
- Dark Mistress: She starts out as a loyal advocate of Yomi's behavior under the conviction that he's the source of Kanai Ward's order (thanks to his self-delusions), and he seemingly returns the favor by showing that he loves how devoted she is to him. However, Yomi subverts this by the end of Chapter 2, revealing that he never really loved her and only cares about himself.
- The Dog Bites Back: After Makoto exposes Yomi's leaking of Amaterasu trade secrets, she assists him by ordering the Peacekeepers to arrest Yomi as retaliation for his earlier cruelty to her.
- The Dragon: Serves as this for Yomi Hellsmile, and is utterly devoted to the belief that power determines what is true and right, enforcing it on his behalf (though she is notably less utterly brutal than he is, her underlings being quite fond of her in comparison to the terror they show toward Yomi). Subverted as it turns out the assassin working under Yomi (the "Zilch Alexander") actively causes more of the overall conflict, however.
- Dub Name Change: From Swallow to Martina.
- Evil Is Hammy: In her Might Makes Right speech to Yuma in Chapter 2, she absolutely loses any sense of dignity and starts Chewing the Scenery out of pure ecstasy.
- Failed a Spot Check: Fails to recognize Yuma—whom she met just a couple days ago—while he's Disguised in Drag immediately after Karen's death, despite the fact that his "disguise" basically consists of a wig and a girl's school uniform. Even after she hears his name she doesn't make the connection, simply considering it for a moment before declaring that she doesn't know any girls by that name.
- Faux Affably Evil: Like Yomi, Martina speaks with a tone of fake politeness, though exaggerates it much more than he does. Unlike him, she does have a sense of restraint, but she's still a Dirty Cop who's willing to eliminate anyone who challenges the Peacekeepers. She also acts somewhat reasonable towards the disguised Yuma's arguments for Chapter 2's case when he stops her from arresting Kurumi and draws attention to the poison's time limit, but in reality, would've already arrested Kurumi and potentially already tried to kill Yuma and Desuhiko for interfering with "her" case if they weren't disguised for the sake of sneaking into an all-girls academy. She maintains the tone after her Heel–Face Turn, but by that point, it's genuine politeness, having reformed from her position as vice director and being willing to condemn Yomi for his cruelty.
- Femme Fatale: A villainous Dirty Cop who likes to use her feminine charms on her victims and underlings both.
- First-Name Basis: Her underlings commonly refer to her as "Vice Director Martina".
- Gracefully Demoted: She willingly resigns from her position as vice director after Yomi's arrest, and her profile states that she now works in Amaterasu's accounting department.
- Heel–Face Turn: After witnessing that Yomi never actually cared about her and how he ordered her cruel execution despite how loyal she was, she readily turns on him in favor of Makoto when he saves her life. She shows she hasn't simply shifted to idolizing Makoto though, as she genuinely embraces a change in the Peacekeepers to include typical human rights, and also demotes herself as an act of penance.
- Hope Spot: Yuma points out to her that the poison used in Chapter 2's murder had expired, meaning that her first suspect couldn't have killed the victim if she planted it before the play started. Martina contemplates this logical reasoning... only to go insane with power and dismisses the claim completely.
- Interface Spoiler: After Yomi orders her execution, her profile is never crossed out despite her description stating her fate in a crusher. Chapter 4 reveals that Makoto cancelled her execution and she's still alive.
- Love Martyr: At first, she accepts Yomi's false love no matter how obviously fake he's being about it, compared to her much more genuine love in return. When Yomi takes this to its logical extreme by outright having her executed while still putting on the act, she appropriately responds with fear instead.
- Might Makes Right: Embraced this to a zealous degree, basically believing that since the Peacekeepers had the power to determine who was punished regardless of any other factors, it was that power that was most important, with truth being a beautiful but ultimately too fragile a thing to matter. However, when it turns out that even her zealous commitment to this didn't earn her any leniency for mistakes, she abandons it in favor of a more benevolant approach to life.
- Mistreatment-Induced Betrayal: Ends up turning against Yomi as a result of being threatened with a Cruel and Unusual Death at the end of Chapter 2.
- Parasol of Prettiness: Is shown holding a parasol in her illustration and introduction scene when next to Yomi, and is never seen with it again after that.
- Proud Beauty: Readily describes herself as a "elegant beauty" when confronting Yuma disguised as her, and seems to indulge the attraction some of her subordinates have for her, given one Peacekeeper's expressed hope to receive "punishment" from her.
- Psycho Pink: Martina's eyes are a light pink, and she is almost as insane as Yomi himself, though less observant, when acting as Chapter 2's antagonist. Well, before her reformation, anyway.
- Psycho Supporter: Blindly supportive of Yomi's actions regardless of how consequential they are... until he shows that he doesn't care about her after all for the sake of his own goals.
- Reading Your Rights: Does this to Yomi during his arrest in Chapter 4. As the Peacekeepers are known to tell suspects that they have no rights, her doing this shows that his reign of tyranny has come to an end.
- Reasonable Authority Figure: Downplayed as she was still a supporter of an exceedingly corrupt organization, but Martina is notable among the Peacekeeper higher-ups in that while she takes obvious pleasure in her authority, she doesn't seem to enjoy making others suffer for the sake of suffering, nor is she shown to be engaged in any background deals for personal gain. She genuinely believed Kurumi was the culprit (instead of simply wanting a scapegoat or trying to protect the actual culprit), and she had her men conduct at least a somewhat serious investigation. Furthermore, she is the one to most readily accept Yuma's efforts of revealing the real culprit of the case, not needing to be intimidated or coerced into backing off. This is shown too by how her Mystery Phantom is the most quickly dealt with one in the game, as she simply wasn't trying to be that much of an obstacle. Lastly, she's the only Peacekeeper higher-up shown to undergo a Heel–Face Turn.
- Say My Name: Screams "Director Yomi" while begging for mercy as she is taken away for her punishment.
- Screw the Rules, I Make Them!: In Chapter 2, she gets downright horny over the fact that things like "logic" and "truth" are but fragile pieces of glass underneath the mighty boot of the Peacekeepers, to be crushed to dust and replaced with their fabrications that everyone else just has to suck up and accept as fact if they don't want the boot turned on them next. Once it gets turned on her, however, she quickly changes her tune.
- Slasher Smile: Dons a big one when she's about to shoot Yuma and Desuhiko together for defying the Peacekeepers, impersonating her, investigating the Aetheria Academy case behind her back and resisting arrest.
- Smug Snake: She makes a big deal out of what's in her head being better than the detectives', and yet she missed all of the incredibly obvious clues that Kurumi couldn't have been the one who murdered Karen. Even Yomi gives her hell for being fooled by a group of high school girls.
- Sycophantic Servant: So much so that she doesn't even consider that Yomi might betray her. When she finally snaps out of this blind devotion, she's utterly terrified when she finds out Yomi really never cared for her.
- Trick Boss: Her Mystery Phantom appears in the beginning of the labyrinth, and she appears to be the main antagonist hindering your progress, just like Swank and Seth in the previous two cases... but after Yuma fights her Mystery Phantom, she never appears again, and the true obstacle ends up being the three suspects' Mystery Phantoms instead. Justified in that Swank and Seth knew full well who the culprits were in the previous cases, but Martina seemed genuinely sure that Kurumi was the culprit. Thus, once Yuma proves Kurumi's innocence, Martina's Mystery Phantom doesn't attempt to interfere with Yuma anymore, as she herself has no idea who the true culprit is, nor is there any opportunity or reason to suspect Kurumi anymore.
- Violation of Common Sense: Her way of testing if a lethal poison had been rendered harmless? Sticking her finger into it and then tasting it.
Voiced by: Wataru Takagi (Japanese), Brent Mukai (English)
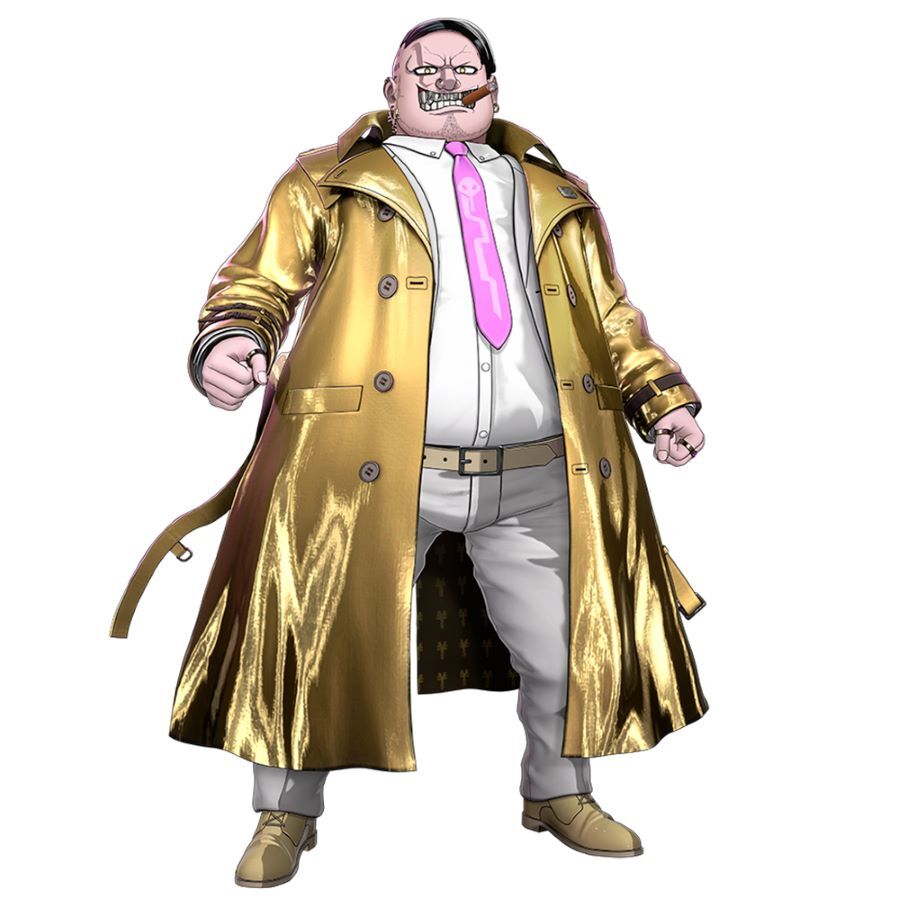
A member of the Peacekeepers.
He is the main antagonist of Chapter 0, preventing Yuma from finding out the truth of the Amaterasu Express case.
- Advertised Extra: He's shown on the game's front cover alongside Makoto and Yomi, but he only appears in Chapter 0 to obstruct Yuma's entry into Kanai Ward by framing him for the Amaterasu Express Massacre, and then exits the story entirely after the incident.
- Barely-Changed Dub Name: From Spank to Swank.
- Cigar Chomper: Never seen without his cigar. It doubles as an Expressive Accessory.
- Expressive Accessory: In his portraits, the smoke from his cigar will change into symbols based on his mood. Usually they are Yen or Dollar signs.
- Fat Bastard: A thoroughly unpleasant Dirty Cop who loves food even more than money, and his talent is "speed eating".
- Gonk: His gaudy and overweight appearance, coupled with the exaggerated facial expressions he makes when angered really make him stand out among the other male characters in the game's artstyle.
- Greed: Makes it pretty clear that he cares a lot more about confiscating anything valuable Yuma has in his possession than actually doing more than a token investigation of the crime scene.
- Hate Sink: Not to the same extent as his boss, Yomi, but with his boisterously abusive attitude, greedy virtues, and refusal to listen to any reason except his own, it's very easy to hate him when he tries to arrest Yuma in Chapter 0.
- Karma Houdini: A thoroughly Dirty Cop who was in on a plan to murder as many detectives en route to Kanai Ward as possible and frame the rest. He's never seen again after Chapter 0, not even given implications of impending punishment like Seth or flavor text suggesting a desire to improve like Guillaume and Dominic.
- Overly-Long Tongue: His Mystery Phantom form sports one of these with multicolored stripes.
- Scary Teeth: Has a pointed silver grill with the word “money” engraved on his top row of teeth.
- Starter Villain: The first named Peacekeeper Yuma goes up against.
- Villainous Glutton: A sinful and greedy Dirty Cop who is also incredibly overweight due to his obsession with food.
- You're Insane!: Outright calls Yuma a psycho when seeing him talk to Shinigami, thinking he's talking to himself since Yuma's the only one who can see her.
Voiced by: Yūma Uchida (Japanese), Landon McDonald (English)

Section Chief of the Peacekeepers' Investigation Team.
He is the main antagonist of Chapter 1, preventing Yuma from finding out the truth of the Nail Man case.
- Aerith and Bob: In the setting featuring names like "Yuma Kokohead" and "Yomi Hellsmile", his name comes off as one of the most mundane.
- Determinator: Similarly to his boss, Yomi, his underling Seth is also equally unstoppable if given the right opportunity, as shown when he tries by any means necessary to arrest Chief Yakou. Halara even describes him as "sly and persistent".
- Doppelgänger Attack: Seth's Mystery Phantom is able to create copies of himself to aid him in hindering Yuma and Halara's trek through the Mystery Labyrinth.
- Green and Mean: Both he and his Mystery Phantom have green as their overall color motif.
- Green Thumb: His Mystery Phantom sports a rose bush for hair and uses vines in some of his attacks, representing his real self's affinity for flowers.
- Hiding Behind Your Bangs: His left eye is covered by his black hair.
- High-Class Glass: Wears a monocle on his right eye.
- Irony: Seth was paid large amounts of money by the priest to cover up the Nail Man's crime scenes by cleaning them up, while Halara was paid large amounts of money to uncover them by seeing what he saw when he first found those crime scenes. Also serves as Laser-Guided Karma to some degree.
- I Will Punish Your Friend for Your Failure: He threatens to arrest Chief Yakou within 3 hours when Yuma and Halara interfere with the clocktower Nail Man case, unless Yuma and Halara turn themselves into him, that is.
- Just Following Orders: He uses this argument against Yomi when indicted for taking bribes from the priest, since he was following Yomi's orders in reality. It doesn't work, of course, and he gets sent to Uncertain Doom.
- Kick the Dog: When Yuma and Halara return to the agency, Seth is already waiting to arrest Chief Yakou. However, he decides to mock both him and the watchmaker he framed as the Nail Man just for the sake of it before doing so.Yakou: H-Hey, wait! You said I had three hours! My watch says... I still got five minutes!
Seth: You need to get your watch repaired. Oh dear... the watchmaker is currently detained as a suspect. Just throw away that piece of trash then. Besides... you're out of time anyway. - Kill the Creditor: Defied in the sense that it's the very situation Seth was trying to avoid by cleaning up the Nail Man crime scenes, as the priest was the one who gave him extra money from donations to the church, and his source of income would've been cut off if he was arrested. It ends up being Played Straight in the end when the priest actually dies.
- Oh, Crap!: As soon as everyone hears a motorbike coming, he becomes absolutely frightened since he knows that it's the director, and for him to interfere is almost certainly nothing but bad news.
- Smug Snake: He's incredibly self-satisfied and thinks he's above everyone else in the NDA, even going as far as arguing against Yakou when Yakou undermines him and questions his sanity. That is, until Halara practically tells him he's nothing compared to the detectives whatsoever, at which point he completely shuts up, despite his former confidence.
- Soft-Spoken Sadist: He constantly requires a megaphone in order to make his quiet voice heard, even within the same room, and he's about as cruel and callous as the rest of the Peacekeeper bosses.
- Surrounded by Idiots: His introduction scene has him getting annoyed at the incompetence of his subordinates. Despite being a Dirty Cop, this is mostly Played for Laughs.
- Uncertain Doom: He's never seen again after Yomi has him taken away at the end of Chapter 1, and aside from a later comment from a minor NPC noting Seth's sudden absence is never mentioned for the rest of the game, so it's left ambiguous whether his execution by Yomi's orders was followed through with. For what it's worth, he doesn't appear as a zombie in the restricted area, and his profile is never marked with a pink X like the other deceased characters, implying he may have lived through the events of the game after all.
Voiced by: Ayane Sakura (Japanese), Brenna Larsen (English)

Leader of the Peacekeepers' Counterterrorism Squad and Dominic's partner.
She is the main antagonist of Chapter 3, preventing Yuma from finding out the truth of the Resistance case.
- The Baroness: For sure. Specifically, she serves as one to Yomi, and she just loves to hurt people, maybe more than he does. As well as this, she likes to offer demeaning taunts and look down on those inferior, demanding she be worshipped by those she deems her "slaves" (which is pretty much everyone).
- Bright Is Not Good: She has some very bright colors, like bright pink hair, a bright blue jacket, and bright blue eyes, but is a total sadist of the highest order.
- Curtains Match the Window: Downplayed what with her hair being primarily pink, but the blue in her hair matches the blue in her eyes.
- Cute and Psycho: Very cute, but very much a strong threat to her enemies and not a force to be reckoned with. Unless, of course, you simply defeat her by debunking her claims on certain things like the NDA does to her at the end of Chapter 3, in which case she'll turn into a mess of emotions and no longer function.
- Cute Is Evil: Despite looking like a high school girl, she easily rivals - or possibly even surpasses - Yomi himself in terms of sheer unhinged insanity and cruelty towards others. It's all but confirmed that she already knows (or at least heavily suspects) that Yuma is being framed for the terrorist bombings, but is simply going along with the accusations just so she can have a new target to hunt.
- Eye Scream: When the Peacekeeper goons under her command aren't able to find Yuma fast enough for her liking, she cheerfully decides to motivate them by informing them of the day's lucky item: a fool's right eyeball. The implications aren't lost on them, and they quickly scatter.
- The Fair Folk: Her Mystery Phantom takes the form of a cruel-looking fairy that flutters around Dominic's Mystery Phantom during Chapter 3's RDMs.
- Fangs Are Evil: Her mouth is filled with razor-sharp teeth that are always present when she's talking or smiling, highlighting her demented personality.
- Faux Affably Evil: Guillaume plays up her "energetic cute girl" persona to extreme degrees, but behind that demeanor is a sadistic individual who takes Police Brutality to its extreme and constantly demeans everyone around her for her own entertainment.
- Gender-Blender Name: "Guillaume" is typically a male name and the French equivalent of "William".
- Hiding Behind Your Bangs: Her left eye is covered by her pink/blue hair.
- Hidden Depths: Nothing in the main story hints at this, but a loading screen blurb reveals one of her hobbies is crafting candy recipes, with her being very picky about how the jam is made.
- Immoral Journalist: She is quick to send a news report to the entirety of Kanai Ward about Yuma being a terrorist regardless of its falsehood, solely to encourage Kanai Ward's population to target him.
- Karma Houdini: Unlike the other Peacekeeper Arc Villains, there's no indication that she gets any punishment for her treatment of her subordinates and Kanai Ward civilians.
- No True Scotsman: Her Mystery Phantom at first argues that Shachi's death was a homicide since she's trying to frame Yuma as the culprit. However, when Yuma proves that Shachi died from a homicide, she changes the argument to say that he died from a suicide after all. Fubuki is quick to catch onto her contradiction.
- Sadist: It's clear she loves her job as the Counterterrorism Squad's leader more as an excuse to hurt others, rather than actually protect Kanai Ward's residents (who she routinely refers to as "slaves"). Even her hobby of fortune-telling is a way for her to make others feel miserable.
- Slasher Smile: Constantly dons one, unless she's feigning innocence by frowning and pulling a falsely sympathetic tone.
- Torture Technician: Like Yomi, Guillaume loves to torture those who disturb the peace in her eyes, with her eager to subject Yuma and his friends to who knows what once they're captured. Her profile even lists her as an expert at torture, but states that she lacks any real fighting ability against more able victims. However, that's where Dominic comes in...
- "Wanted!" Poster: Following her TV announcement, she displays a virtual one on-screen in order to encourage the citizens and the Peacekeepers to target and capture Yuma as a terrorist, trying to convince them he's an intentional one instead of someone who was tricked into accidentally becoming one.
- What Happened to the Mouse?: The last Yuma hears of her is from Servan, who explains he escaped from her and Dominic after Yomi showed up and started yelling at them to let off some steam. Aside from that and a brief update to Guillaume's profile implying she wants revenge on the detectives for outsmarting her, she and Dominic disappear from the story as soon as Chapter 3 is over.
Voiced by: Fukushi Ochiai (Japanese), Kane Jungbluth-Murry (English)

A member of the Peacekeepers and Guillaume's partner. Alongside her, he is a major antagonist in Chapter 3, acting as her muscle.
- Bears Are Bad News: His Mystery Phantom has the left side of his head covered in felt that resembles the scalp and ear of a teddy-bear. Overall, he looks like a terrifying plush toy under the command of Guillaume's fairy Mystery Phantom.
- The Brute: He's the muscle to enforce Guillaume's threats... and that's all there is to him.
- Cyborg: Half of him is seemingly mechanized, with a breathing apparatus on his face and armored gauntlets. A loading screen blurb says there's a rumour he was a soldier who was horribly injured and turned into one by Amaterasu, but it's unknown if it's true or not.
- The Dragon: Acts as Guillaume's right-hand man. He's the least proactive of the pair, only standing by her side and following her orders, which often boil down to 'crush things horribly'.
- Dumb Muscle: Guillaume seems to treat him this way, but given that he is only seen faithfully carrying out all of her orders and never verbally complains, there's no telling if he's actually stupid.
- Power Fist: He has armor covering his shoulders and arms that stops just short of enveloping his fists, leaving his knuckles bare. Instead, the plates lining the outside of his gauntlets are super-heated, giving him branding-irons for fists. Ouch.
- Scary Black Man: Dark-skinned, towers above most of the cast, and augmented with machinery to make him deadlier.
- The Unintelligible: He only speaks in grunts and growls during the entire story.
World Detective Organization
- Arch-Enemy: To Yomi Hellsmile, who loathes detectives with a passion and has been trying to keep them away from Kanai Ward since his reign began, specifically those of the WDO.
- Cavalry Refusal: Fubuki accuses the organization of this at the end of Chapter 4, claiming they could've sent in support to prevent Chief Yakou's death, but Halara dismisses her for it due to it being a pointless thing to worry about by then.
- Contrasting Sequel Main Character: As far as the institution the main characters are part of goes, it's got quite a few differences to Hope's Peak Academy. Whereas the ultimate talents are (for the most part) just exceptional proficiency in a specific skill, the Master Detectives' Fortes are explicitly supernatural in nature. The WDO also doesn't discriminate based on whether one has such an ability or not, with non-empowered individuals being able to become full fledged members, and the Nocturnal Detective Agency treats Yuma as an equal despite only being a trainee. Unlike Hope's Peak's board of trustees, who are corrupt and are self-destructively lax with security, the WDO's shady side came from Makoto impersonating Number One, who genuinely wants to make people in the world happy by solving mysteries. And the only people shown entering their restricted areas are the ones with the proper clearance.
- Decoy Protagonist: The Master Detectives in Chapter 0 are set up as Yuma's companions to Kanai Ward, but none of them survive the trip.
- Empowered Badass Normal: Aside from their personalities, the Master Detectives are rather normal human detectives with normal human values, who have a strong sense of justice and a willingness to fight against evil. What makes them empowered is their Forensic Fortes, which are actually their only supernatural attributes, of which they trained themselves to perfect over time after taking up a job at the WDO.
- Famed In-Story: Number One. The leader is recognized for being able to solve a case on his own, and is a highly respected member of the organization. Despite this, he has to hide from the public and the other Master Detectives because he's an easy target for assassination. In a sense, said hiding never actually happens in the case of the present day story, as Yuma is the current Number One in disguise, Makoto is the Big Bad who is a clone of him with only a mask to hide his face, and the Body Double shows himself clearly to the NDA.
- Interpol Special Agent: All their detectives are essentially this, as the WDO is an international, extra-legal, and extra-priviledged organization, meaning they can investigate anywhere and take over a case regardless of jurisdiction. Halara even outright refers to WDO detectives as "agents" in the prologue when describing the training process to Yuma. Too bad for our detectives that Kanai Ward is entirely isolated from outside world and Amaterasu Peacekeepers don't give a damn about any power the WDO might have.
- Killed Off for Real: The Master Detectives in Chapter 0, besides the fake Zilch, die permanently, since they're humans and not immortal like Kanai Ward's residents. It is implied that various other Master Detectives came in via the routes that Halara, Desuhiko, Fubuki and Vivia took, those of whom also died en route to Kanai Ward.
- Knight Templar: Downplayed. It's mostly due to the WDO's cooperation with Makoto kidnapping criminals that he's able to succeed as the Big Bad, but they seem unaware he's using those criminals for Kanai Ward's food supply. Despite this, the organization still believes it's doing the right thing by helping him.
- Master of One Magic: The Master Detectives who receive a Forensic Forte through training only have that single Forte at their disposal, with there being no suggestions from the more experienced WDO detectives that they can get multiple.
- Private Detective: All of them are private investigators working on their own terms, though they don't work for profit (except for Halara) and solve cases because they personally chose that as their career.
- Reed Richards Is Useless: The WDO gathers people of high intellect to investigate any case around the world with supernatural powers at their disposal, but what does the organization aim to do with these people? Use their powers to investigate cases around the world, and sure, while it's beneficial enough to do that, it's also wasted potential. Even Yakou Furio himself notes how he feels inferior being merely a detective in the prologue.
- Super Cop: Most of the Master Detectives have supernatural powers that aid them in investigations. The Player Character is the real Number One, the leader of the organization, possessing Coalescence, playing the role of "Yuma Kokohead", and with his Coalescence, he connects his power to the other detective's power (in this game's case, Postcognition, Disguise, Time Leap, and Spectral Projection) in order to solve the cases where their use is necessary. Number One is also accompanied by Shinigami, a death god who can summon the Mystery Labyrinth and use her own powers to reap the soul of its creator.
- Thou Shalt Not Kill: Implied with the order Number One's Body Double gives at the end of Chapter 4 after discovering Yakou had committed murder on Dr. Huesca and gotten himself killed in the process. The WDO refuses to sacrifice the lives of others to complete their assignments, and practically vows against it, at the most. This makes the deaths of the Master Detectives in Chapter 0 even more an insult to the organization, as they were killed by one of their own (or whom they thought was one of their own) completely against their agreements when joining the WDO. Doesn't stop the real Number One using the Book of Death to kill the culprits he uncovers during his visit to Kanai Ward, though.
- With Great Power Comes Great Responsibility: The Master Detectives are expected not to abuse their Forensic Fortes to commit crimes rather than solve them. Ironically, a clone of the true Number One, the leader of the WDO, ends up doing exactly this as the Big Bad.
Voiced by: Akira Kamiya (Japanese), SungWon Cho (English)

The title held by the top detective of the WDO. There have been a number of them through history, the details of their identities often shrouded in secrecy to protect them from the many enemies they make over the course of their careers.
At the end of Chapter 4, the current Number One is seemingly killed in an explosion following Yakou Furio's death, and he is later revealed to be nothing more than a double working for the real Number One.
- Advertised Extra: Is marketed alongside the other Master Detectives, but plays no role in any of the cases. Justified as Number One is a fake that the real Number One hired before the game even begins.
- Big Good: Zig-Zagged. He is the one who gives the order for the Nocturnal Detective Agency to search for "Kanai Ward's Ultimate Secret" and the "Great Global Mystery" that sends the plot forward, but he isn't the real Number One. Yuma Kokohead is the real Number One and is the one who actually takes this role, with the Body Double working on his behalf.
- Body Double: For the real Number One. He may look nothing like him, but since so few know what the real Number One looks like, this isn't an issue.
- Catchphrase Interruptus: He gets cut off when saying the "mysteries" within his Character Catchphrase when the explosion strikes him in Chapter 4.
- Character Catchphrase: "Go forth, proud detectives! Eliminate all mysteries from this world!"
- Cool Old Guy: Gives off this impression in his introduction, though Shinigami dismisses him as just some old man. She has very good reason to say so, since he's actually a fake employed by the real Number One, whose identity Shinigami already knows. Setting that aside, he seems to be capable in his own way, as one of the loading screen tips says that he has a muscle-bound body that is full of scars from his encounters with various criminals.
- Cool Shades: Wears purple shades.
- Decoy Leader: His purpose is to be a decoy for the real Number One (the protagonist), who is the leader of the World Detective Organization. Everyone in the NDA believes him to be the real deal because he's a decoy, plus the actual Number One taking advantage of never showing his face in public.
- Disconnected by Death: The explosion that occurs on the other end of the call disconnects the line to him at the end of Chapter 4, displaying white noise on the TV screen, to the horror of the detectives.
- Exact Words: He introduces himself to the detectives as "Now, I simply go by Number One". Not "I am Number One".
- Killed Mid-Sentence: At the end of Chapter 4, just as he recites his motto, he is suddenly struck by an explosion, and footage of the WDO headquarters being struck by an explosion appears on the screen. Ultimately subverted, at least in regards to the WDO building itself, since the epilogue reveals that Makoto faked the footage, presumably to give the impression that even the WDO had fallen.
- Masquerading As the Unseen: Number One is normally unseen by the masses and the other WDO detectives, and using doubles is a common practice for them. The Number One on the TV is in fact only an imposter working on behalf of the real one.
- No Name Given: Since he serves as a Body Double for the real Number One, his actual name is never given.
- Poor Communication Kills: Literally. He never actually says what the "Great Global Mystery" actually is until Yakou Furio dies due to the NDA being in the dark about it actually being a global kidnapping case. Eventually, when Halara insists that he tell them all for Yakou's sake, it's too late by that point since Makoto, the bad guy, has already gotten what he wanted from the detectives and no longer needs them.
- Red Herring:
- He resembles Makoto in a few aspects such as his long hair, so when Makoto is revealed to be a homunculus of Number One, Yuma believes it and hypothesizes at first that Number One's youth was restored in Makoto's creation. Of course, it turns out that the imposter and Makoto have nothing to do with each other.
- In general, this "Number One" is not the real one, but he's certainly intended to trick the viewer into believing he is. The real Number One is not the old man who contacts the detective agency, but rather the Shinigami-possessed "detective trainee" in blue working with them who calls himself "Yuma Kokohead"... and alongside that, the Big Bad is his perfect clone, who appropriately carries across the true Number One's stoic demeanor.
- Retirony: Not retirement exactly, but the explosion that strikes him happens just as he's about to end his second meeting with the Nocturnal Detective Agency following Yakou's death.
- Screw This, I'm Out of Here!: Following the bombing of the WDO, his talent is listed as "Running away", which seems to have worked as it's implied he wasn't killed.
- What Happened to the Mouse?: It's never made clear what exactly happened to him after he was struck by the explosion at the end of Chapter 4. Though Makoto faked the footage of the WDO building being struck, it isn't directly said the footage of Number One was faked. At the same time, he is never referred to as dead after Makoto's ruse is uncovered, and his portrait never gets crossed off. At the very least, he is no longer posing as Number One, since the resignation letter Yuma prepared before his pact with Shinigami is made public to the WDO, and everyone becomes aware he was a body double.
Voiced by: Tomokazu Seki (Japanese), Y. Chang (English)

One of the Master Detectives on the Amaterasu Express. His Forte is Animal Investigation.
He is revealed to be the culprit of Chapter 0, killing the Master Detectives on the Amaterasu Express and framing Yuma in the process.
In truth, the "Zilch" encountered on the Amaterasu Express was actually a hitman disguised as him. The hitman killed the real one prior to the train's departure.
- Asshole Victim: Although Yuma certainly never intended to kill him and is utterly horrified when he finds out that completing a Mystery Labyrinth will kill the culprit, once we find out how much of a Psycho for Hire "Zilch" is, there is no reason to sympathize with him.
- Back for the Finale: He dies in Chapter 0 but comes back in Chapter 5 to serve as an exposition dump regarding the big secret of Kanai Ward.
- The Beastmaster: Zilch's Forte is allegedly controlling small mammals to assist with an investigative work, though we never get to see this because the real Zilch is actually dead and the Zilch giving this information is actually an impostor.
- Bitch in Sheep's Clothing: He's the most openly accepting detective of Yuma despite his amnesia and general suspicious nature. In actuality he was just biding his time until he could kill everyone and the only reason he spared Yuma was so he could be his patsy.
- Broken Record: His mind is only barely still functional by the time Yuma meets him again, and once he's done giving up all the information he can, he goes back to rambling about how close he was with Yomi.
- Came Back Wrong: Albeit less so than the other homunculi. While he can still speak and isn't mindlessly aggressive, his speech eventually starts repeating itself ad nauseum. His cognitive abilities are impaired, as shown when he mistakes Yuma for Yomi. He's also content to simply stand around in his corner of the factory, hardly what anyone would call living.
- Character Catchphrase: Any time Zilch wants to hear what others have to say he specifically says he'll "allow it", which Aphex repeatedly finds annoying.
- Chekhov's Gunman: Many details learned about him actually end up becoming very important to the story, especially during the endgame portions.
- Consulting a Convicted Killer: Yuma does this to his zombie self in Chapter 5, well-aware he's the same assassin from Chapter 0.
- Cruella to Animals: A hint to his treachery is that he has several garments made with animal fur, which is highly ill-fitting for an animal lover.
- The Dragon: To Yomi. While Martina is the Peacekeepers' vice director, the individual behind the fake Zilch causes more conflict in Yomi's elimination of any competition to his position, from executing the Master Detectives in Chapter 0 all the way to killing Yakou's wife and Amaterasu's former CEO.
- Expressive Accessory: The animal ears on his hat wiggle by themselves.
- Faking the Dead: An intentional part of his elaborate murder plot in Chapter 0 is pretending he died from immolation like the others. He is the first "body" Yuma finds after he wakes up from the drugs he induced, and makes absolutely sure that Yuma actually sees his "death" so he can pretend to be amongst the other victims. In reality, he switched himself out with Aphex's corpse and hid under the bed, then left the room after Yuma did. Of course, this elaborate trick turns out to have been All for Nothing when he ends up dying for real in the end.
- Faux Affably Evil: While Zilch may seem like a wise and kind detective he is really a cold-blooded hitman hired to kill all the detectives on the Amaterasu Express before framing Yuma to take the blame for the murders.
- Foil: The real Zilch was a Nature Lover who protected animals from corrupt industries. The bio for the hitman who took his place has his dislikes as "Animals", and his likes as "Destroying Nature". The digital artbook even points out the irony that an animal lover would wear such prominent fur and leather… Because he isn’t!
- Foreshadowing: Though considering his short screentime (in Chapter 0 that is), it's more like Five-Second Foreshadowing. Zilch's constant "requests of permission" for people to talk during the train trip is a hint that he actually means that he's "allowing them to speak", because he's really allowing them to live, since he's really only a dedicated hitman infiltrating the Master Detectives' trip to Kanai Ward in order to kill them all.
- Four Eyes, Zero Soul: Wears glasses and murdered the Master Detectives on the Amaterasu Express by burning them alive while setting up Yuma to take the fall. If the words of his zombie self are anything to go by, he loved killing people, and considered his years working as Yomi's personal hitman to have been the highlight of his life.
- The Ghost: The real Zilch Alexander is never shown once onscreen, having already been killed by the hitman posing as him prior to the other Master Detectives’ arrival. Yakou mentions that his corpse is hidden within the spare first car at the the Kanai Ward train station, but neither Yuma nor the player ever get to see the body.
- Hoist by His Own Petard: Sparing Yuma proved to be his undoing after Shinigami reaped his soul once the case was solved.
- Impersonation-Exclusive Character: The only Zilch encountered in the story is the imposter, as the real one was murdered beforehand.
- Jerkass: He's already shown to have shades of this during Chapter 0, but when he comes back in Chapter 5 as a zombie, even while in a complete daze he reminisces fondly about the awful things he has done over the years for Yomi, and regrets none of it.
- Karmic Death: Yuma and Shinigami kill him (unwittingly) after he, as the game's first culprit, frames him for the murder of the Master Detectives on the Amaterasu Express.
- Kill and Replace: He killed the real Zilch Alexander and took his place before the other detectives boarded the train.
- Killed Offscreen: He dies offscreen after Yuma solves his mystery labyrinth.
- Kill It with Fire: The fake Zilch murders the Master Detectives on the Amaterasu Express through immolation.
- Nature Lover: The real Zilch is allegedly a philanthropist who maintains the balance between humans and nature.
- No Name Given: Only ever referred to as "Zilch", so his real name is never learned. Even after his identity as a hitman is uncovered, the game simply calls him "Fake Zilch" when he appears as a zombie later.
- Posthumous Character: The real Zilch Alexander was already killed by the hitman posing as him before the story even began.
- Professional Killer: The Zilch that Yuma meets on the Amaterasu Express is actually a hitman who killed the real Zilch Alexander and stole his identity in order to kill the other Master Detectives entering Kanai Ward.
- Psycho for Hire: Although he is a hitman hired to kill people, he also enjoys takings lives as part of his job.
- Sadist: He admits that he loves killing people as a hitman in his zombified form to Yuma.
- Significant Birth Date: The real Zilch was born on October 4th, World Animal Day.
- Slipping a Mickey: He knocks the other Master Detectives (and Yuma) out by spiking the drinks onboard the Amaterasu Express with a sleeping drug before the others boarded the train, which is what made them vulnerable to his murderous intent.
- Starter Villain: Zilch, or rather the hitman impersonating him, is the first killer that Yuma must identify with the Mystery Labyrinth.
- Villainous Friendship: Seems to have genuinely held some personal fondness for Yomi, having done his bidding directly and acted as an advisor to him. Knowing Yomi, though, the odds of this fondness being mutual are... low.
- Warm-Up Boss: The first culprit and the first enemy faced via the Mystery Labyrinth, he serves to introduce the player to the "murder mystery" elements of the game.
- Would Harm a Senior: Zange Eraser, a senior Master Detective, is one of his victims in the game's first case, so naturally he was willing to kill him too.
Voiced by: Yui Horie (Japanese), Lindsay Sheppard (English)

One of the Master Detectives on the Amaterasu Express. Her Forte is Audial Aptitude.
- Blessed with Suck: Her Audial Aptitude seems to veer into this. Despite being incredibly useful for gathering intel and solving cases, it has left her with an incredibly diminished sense of self, as well as requiring her to wear headphones at almost all times to avoid being overwhelmed with excessive stimuli.
- Classical Music Is Cool: Her profile states her like as "Classical Music".
- Death of a Child: Is explicitly called a "little girl" by Shinigami and sleeps in a room with stuffed animals, and dies in probable agony via immolation.
- Headphones Equal Isolation: She's not a social person and wears headphones to limit her Super-Hearing ability. Her train car shows a lot of other headphones.
- Luminescent Blush: Despite normally being The Stoic, Pucci turns red and sweats bullets when she nearly touched Yuma's hand when both tried to pick up her Detective Deed, and also comments on own unnatural heartbeat.
- Not So Stoic: Despite being The Quiet One of the group, other people talking loudly while she's concentrating sets her into a rage.
- Perpetual Expression: She has a constant display of anxiety and fear on her face, conveying her shyness. The exception is when she's determined or angry, in which case she'll narrow her eyebrows.
- The Philosopher: She goes on a tangent filled with encyclopedic definitions about the true nature of things before introducing herself as asked, then comments how she dislikes the concept of names.
- Ship Tease: She has a minor moment with Yuma following her Luminescent Blush incident. In true Danganronpa fashion, she dies shortly after.
- Super-Hearing: Pucci Lavmin's Forensic Forte is "audial aptitude" - the ability to detect heartbeats, footsteps, whispers heard in 500 meters radius by concentrating.
- Verbal Tic: When referring to herself in the first person, she, Pucci, usually follows it up with her name. Rather contradictory of her given that she goes on a rant decrying the entire concept of names as meaningless and arbitrary.
- We Hardly Knew Ye: Killed by Zilch during the events of Chapter 0.
- Wise Beyond Their Years: Despite her youth, she mentions that her primary clientele includes corporations and politicians, likely because her Forte allows her detect secret conversations and her maturity allows her to react appropriately. She also demonstrates herself to be very philosophically inclined.
Voiced by: Yukari Tamura (Japanese), Lauren Landa (English)

One of the Master Detectives on the Amaterasu Express. Her Forte is Spiritism.
- Actual Pacifist: Says outright that she avoids solving problems with violence.
- Expy: Of Miu Iruma. Both share similar voices and play off their attractiveness with no shame, have long blonde hair, and take pride in looking fashionable. Melami, however, is a Nice Girl executing herself with dignity and grace, while Miu is a Jerk with a Heart of Gold who openly embraces her sense of chaos and degeneracy and ends up being The Friend Nobody Likes. Spoilers for Danganronpa V3
- The Fashionista: If her excessive makeup and obsession with clothes were any indication, she's quite obsessed with fashion, for a truth-seeking detective, that is.
- Hair of Gold, Heart of Gold: A Nice Girl with blonde hair.
- Necessary Drawback: The ability to summon the dead would be very useful to a detective, however because she has to wear the deceased's clothes to do so, this restricts the victims to be the same body size as her.
- Nice Girl: Aside from Zilch's faked acceptance, she's the only one of the Master Detectives aboard the Amaterasu Express that treat Yuma with any congeniality. It makes her death by being burned alive all the more horrifying.
- No Sense of Personal Space: Melami hugs Yuma to measure his clothes sizes with no warning.
- Right for the Wrong Reasons: While on the trip to Kanai Ward via the Amaterasu Express, Melami deduces that there's a spy from Amaterasu Corporation aiming to disrupt the Master Detectives and prevent them from investigating Kanai Ward, pretending to be a Master Detective. Said spy turns out to be "Zilch", who was exactly that, aiming to disrupt by murdering said detectives, but she concludes this due to someone from Amaterasu spying on her before the trip. The real reason was actually because the Peacekeepers ruling over Kanai Ward didn't want detectives uncovering Yomi's crimes. Regardless, no one believed her deduction.
- Shameless Fanservice Girl: Speaks of having no problem stripping to shake off pursuers.
- Sherlock Scan: Despite her quirk of judging people by what they wear, she proves herself to be a detective by figuring Yuma can't be an imposter if he's wearing a tailor-made WDO uniform.
- Too Good for This Sinful Earth: Among the first Master Detectives that Yuma meets prior to his arrival in Kanai Ward, she is established as the nicest, and is the least begrudging of the five, not prone to holding anything against people or willing to pose any harsh criticisms when unnecessary (aside from sarcastically pointing out Aphex's stupidity), and is in fact that only one who actively tries to do a good deed while on the trip. Actually, prior to being sent to Kanai Ward, she seems to have kept her Nice Girl personality for all of her clients, at that, meaning she may have had a positive reputation as a Master Detective too. To make her niceness even more clear, she's also more modest and less cynical than four of the five Master Detectives that Yuma ends up being forced to work with throughout the main story (Yakou, Halara, Desuhiko, Vivia), with Fubuki being the only other real Nice Girl Yuma ends up with as a colleague. So, of course, she ends up being completely burned alive by an impersonator before she even reaches Kanai Ward with the others.
- Unwitting Instigator of Doom: Combined with No Good Deed Goes Unpunished, but her offering Yuma a coffee not knowing it had a sleeping drug allowed him to be knocked unconscious in the train's bathroom, giving the fake Zilch an opportunity to kill the other Master Detectives, including herself. However, Yuma plays some part too by rejecting having someone accompany him, Melami in particular, preventing someone from witnessing him falling unconscious as a result of that sleeping drug.
- We Hardly Knew Ye: Killed by Zilch during the events of Chapter 0.
- Willing Channeler: Melami Goldmine's Forensic Forte allows her to put on the clothes of a deceased person and channel their spirit, with the catch that she can only do so if the clothes fit her (and if they're fashionable enough for her to actually consider putting them on). She never gets the chance to show this to everyone before she’s killed by the hitman posing as Zilch.
Voiced by: Showtaro Morikubo (Japanese), Stephen Fu (English)

One of the Master Detectives on the Amaterasu Express. His Forte is Life Detection.
- Dark and Troubled Past: His lawyer parents got their necks cut open right in front of him for going after The Mafia. He escaped by stowing away on a ship, and spent most of his life as an illegal immigrant living in the slums where Might Makes Right prevails. He's quite unhinged because of this, is quick to use violence as a solution to his problems, and offers to give Yuma "stab wound training" by stabbing him with progressively larger implements.
- Hair-Trigger Temper: Aphex explodes for the slightest of reasons, threatens murder and wants his fists to do the talking in any conversation.
- Hidden Depths: The most aggressive and downright rude detective seen in the game, he nonetheless makes several important observations across his brief screentime and gets the detectives trying to think about the likelihood of an impostor. Strength aside, it’s not particularly surprising he was the first killed.
- Jerk with a Heart of Gold: Aphex is the only one of the initial Master Detectives whose methods are against what detectives normally do, as he'd rather assume anyone he doesn't like is guilty and to act accordingly. Despite the violent behavior, Aphex also has a strong sense of justice according to his profile card, and shows concern for Yuma when he feels sick.
- Overshadowed by Awesome: Some humor is drawn from the fact that his Forte, life sensing, is extremely similar in functionality to Pucci’s hearing, except her Forte has ten times the range of his and has many more uses than just detecting people. Still, the redundancy makes clear there really are only six people onboard the train. Granted, in day to day life, his doesn’t seem to actively inconvenience him like hers does.
- Psychic Radar: Aphex's Life Detection lets him sense and detect people in a 50-meter radius.
- Right for the Wrong Reasons: At the beginning of the game Yuma believes he's one of the five master detectives that's supposed to be on the Amaterasu Express, which Aphex calls bogus on and labels him as an imposter for being late, having no badge, and giving a story about having amnesia that could be faked. Turns out he was right in two different ways: Yuma Kokohead wasn't a Master Detective, but a trainee who was stationed in Kanai Ward; and later on, it's revealed that the "Yuma" we know is actually Number One, who stole the identity of the real Yuma Kokohead and used it to smuggle himself into Kanai Ward. Either way, Aphex was absolutely right that he wasn't one of the five detectives who were supposed to be on that train.
- Smarter Than You Look: When Aphex temporarily calms down, he demonstrates that he's still a detective by producing a plausible theory that Yuma is indeed a Master Detective and was attacked by an infiltrator who intended to take his place. Melami comments that Aphex has exceeded her expectations.
- We Hardly Knew Ye: Killed by Zilch during the events of Chapter 0.
Voiced by: Yosuke Akimoto (Japanese), Kurt Bicknell (English)

One of the Master Detectives on the Amaterasu Express. His Forte is Thoughtography, which allows him to record 2-3 seconds of footage from five minutes ago onto an electronic medium like phones.
- Cane Fu: The loading screen trivia mentions that his cane acts as a weapon, which he is very skilled at using.
- Cool Old Guy: By the end of the one scene the Chapter 0 gang shared, he was starting to show signs of as much as he grew excited for the next case. Not that it lasted long…
- Feeling Their Age: He mentions that, in his prime, he was able to record ten seconds of video with his Thoughtography, but can now only manage two or three at most.
- Non-Standard Character Design: Zange is the only one of the initial Detectives to not wear WDO-styled clothes.
- Technopath: Zange Eraser's Forensic Forte is "thoughtography", which allows him to record his memories onto electronic devices. It’s pointed out that this creates legally admissible evidence if a copy is sent to a different device before the original footage expires.
- We Hardly Knew Ye: Killed by Zilch during the events of Chapter 0.
- What Kind of Lame Power Is Heart, Anyway?: His ability to copy a visual representation of his memories into electronic devices is seen as useless by Shinigami, since she thinks it to be no different to a recording device. In the Mystery Labyrinth, however, it's used to prove Yuma drank the drugged coffee that Melami offered him.
The Church of the Metal Fox
- Ambiguously Brown: All of the churchgoers appear to have tanned skin.
- Church of Saint Genericus: The specific religion the church actually follows isn't expanded upon beyond that a being called "the Metal Fox" is a part of it.
- Everyone Calls Him "Barkeep": They’re only known by their respective titles without any hint in what their real names are.
- Saintly Church: The churchgoers do in fact want to contribute good to Kanai Ward. However, the priest and worshipper took it to extremes in their endeavors as the Nail Man.
Voiced by: Takahiro Fujiwara (Japanese), JEB (English)

The priest at Kanai Ward's church.
He is revealed to be the culprit of Chapter 1, becoming the Nail Man to eradicate the evil in Kanai Ward by the residents' requests.
- Affably Evil: In spite of his crimes, he's a genuinely kind man.
- Anti-Villain: He's caring and thoughtful toward other people, but it gets to the point that he feels compelled to help those who plead to the Nail Man to kill certain people in order to get rid of Kanai Ward's corruption.
- Beware the Nice Ones: As a priest, he isn't a bad person and is quite affable. As the Nail Man, however, the crime scenes he (and his copycat) created are utterly disturbing.
- Bluffing the Murderer: Yuma tricks his Mystery Phantom by claiming the muddy footprints at the fourth Locked Room Mystery can be definitively matched to his own. This causes the priest to argue that that he already disposed of the shoes in the incinerator, which never came up in the investigation.
- …But He Sounds Handsome: When discussing the Nail Man cases with Yuma, he's quick to point out that some people in the Kanai Ward might view them as a saviour...
- Calling Card: As the Nail Man, the victim being pinned down by nails and strangled to death, with the doll that was used to target them at the scene.
- The Confidant: As a priest, he took it upon himself to walk through Kanai Ward and listen to the citizen's problems and offer advice on how to solve them. Unfortunately, he took it way too far, fulfilling their Nail Man murder requests too. After his death, the nun forces Yuma to take his place for two side quests.
- Death by Irony: The priest is a vigilante who kills people who are evil in an attempt to eradicate Kanai Ward's evil. He becomes an evil of his own in the process, forcing Yuma, who is also a vigilante eradicating Kanai Ward's evil, though an outsider, to identify him via the Mystery Labyrinth and reap his soul.
- Disc-One Final Boss: Of Chapter 1. He's the Nail Man, but the Mystery Labyrinth doesn't end with his Mystery Phantom's defeat, because someone else killed one of the victims.
- Eyes Always Shut: His eyes are closed at all times except for in his pondering and worried sprite, as well as when seen in his homunculus form.
- Family Business: His family's served the church for many generations, so he's proud of his bloodline.
- Frame-Up: Responsible for framing the kid's dad.
- Hoist by His Own Petard: His insistence on making his killings locked room mysteries creates evidence that implicates him. The first killing has him escape through a vent, which means that the Nail Man has to be someone thin. The second killing has him throw a key into a locked room to hide it under a corpse while holding up the corpse with a string, which means that the Nail Man can use both hands well. And the fourth killing has him climb down a clock tower with a ladder, which he disposes of using the church's incinerator, to which only the clergy have access. All these clues help Yuma conclude that he is the Nail Man.
- Hulking Out: His second Mystery Phantom form is a huge, Professional Wrestler-like man covered in nails.
- I'll Never Tell You What I'm Telling You!: He tries to deny that he threw his shoes into the incinerator after committing the clocktower murder by saying he threw his shoes into the incinerator.
- Mythical Motifs: His permanently squinting eyes along with his gaunt face shape and red facial markings give him a similar appearance to a Kitsune mask. Fitting, since the deity they worship is a fox.
- No Name Given: He's only know as "the priest" or Father.
- Pay Evil unto Evil: As the Nail Man, the priest targets people who were already morally questionable and only the people he's requested to target by the public. He kills those people in a misguided attempt at eradicating Kanai Ward's evil.
- "Scooby-Doo" Hoax: He encourages the public to see his serial killings as the Nail Man as just a mere "urban legend" with the Nail Man itself being of supernatural origin, even though as we discover eventually, he's very much a real person, that being the priest himself.
- Screw the Rules, I Have Money!: He bribes Seth Burroughs to cover up the evidence of his serial killings, which, of course, forces Halara to use their Postcognition to see his crimes in the past when someone first found them.
- Serial Killer: He turns out to be the Nail Man, and has killed at least 3 people by strangling them to death.
- Sinister Minister: A priest who moonlights as a mythic serial killer.
- Vigilante Execution: Essentially what the priest does as the Nail Man is to kill anyone whose name is written on a doll and left in the forest, as the targets are those who wronged the people who write their names down on the doll. The priest believes that exterminating evil is the only way to stop the corruption occurring in Kanai Ward, and he strangles them to death in order to make them suffer for their sins.
- Well-Intentioned Extremist: He believes himself to be this at very least. He was only motivated to take the Nail Man's name because he believed it was the only way to put an end to the evil that festered unchecked inside Kanai Ward, and only went after those who he believed deserved to die.
Voiced by: Mami Fujita (Japanese), Shara Kirby (English)

A nun at Kanai Ward's church.
- Disability Alibi: She is cleared as potentially being the Nail Man because her dominant hand being broken prevents her from facilitating the mansion locked room, as she couldn't throw the key in from outside.
- Expy: She's very similar to another violent nun with the penchant of being rude, crass, and foul.
- Genre-Busting: She really works hard for her Death Metal Choir concept to take off, and her annoyance at Yuma is due to the latter's actions causing her to have less time to devote to it.
- I'll Kill You!: When Yuma confronts her during the investigation, which comes up again when she's about to be accused as a Mystery Phantom. "I'll kill your ass in the name of God!"
- Jerk with a Heart of Gold: Despite being outwardly very rude and aggressive, she does deeply care about the people of the city. Notably, after the priest dies and she is unable to deal with the influx of people wanting to share their worries, she makes Yuma go around and listen to the people rather than simply turning them away, suggesting that she does still feel they deserve to be heard and comforted. And if Yuma helps all the people well, she shows her delight at his work.
- No Name Given: She's only known as "the nun".
- Nun Too Holy: Subverted. She's barely conservative with her habit, she's foul-mouthed and foul-tempered, and prefers heavy metal to church hymns. But that's the extent of it, as she's otherwise a dedicated church follower.
- Red Herring: Despite being one of the suspects in the Nail Man killings, Yuma quickly dismisses her as the culprit due to her dominant hand having been broken for some time, so she couldn't have thrown the key through the door vent to facilitate the second murder's Locked Room Mystery.
- Screw the Rules, I Have Connections!: In her introduction, she warns Yuma that if he pisses her off, he'll regret it since her father's a higher-up at Amaterasu. Ultimately, nothing comes out of this.
- Taking Up the Mantle: Continues the priest's work as The Confidant after he dies from the Mystery Labyrinth, and even asks Yuma to do some of the work too.
- Tomboyish Voice: She has a deep, aggressive voice to match her aggressive personality.
- The Smurfette Principle: The only female churchgoer shown.
Voiced by: Daichi Hayashi (Japanese), Doug Stone (English)

A worker at Kanai Ward's church.
- Earn Your Happy Ending: During one of the sidequests, he falls for an obvious scam and tries to buy a "magic potion" from a "wizard" that will supposedly make him strong enough to defend himself. If the correct dialogue option is chosen, Yuma tells him that true strength comes from the heart instead of the body, dissuading him from buying the potion and inspiring him to train both his heart and his body, leading to him becoming a protector of the weak.
- Gentle Giant: He's a large man but soft-spoken, with a secret passion for protecting the weak. His size is why Yuma realizes he can't be the Nail Man, since the first murder's Locked Room Mystery involved the culprit escaping through a narrow vent using nails as a makeshift stepladder.
- Magic Feather: The "magic potion" he seeks to make him strong is almost certainly a scam and does nothing, but if the wrong dialogue option in the above sidequest is chosen, he'll drink it and proceed to beat the mugger who accosted him half to death before going on the run as a fugitive. Given his size, he was probably strong enough to do this already, he just needed the confidence to do it.
- Nice Guy: He's a man who unlike the others, comes off as genuinely sweet, never being abusive once towards Yuma.
- No Name Given: He's only known as "the servant".
- Nonstandard Character Design: Is drawn with a more cartoonish face to emphasize how much of a gentle giant he is.
- Spanner in the Works: He was the one who found the burnt rope in the incinerator. Without this discovery, the Nail Man killings couldn't have been tied to church.
Voiced by: Eiji Hanawa (Japanese), Phillip Reich (English)

A worshipper who frequents Kanai Ward's church.
He is revealed to be the copycat culprit in Chapter 1, attempting his own kill as the Nail Man out of his morbid obsession with the serial killer's story.
- Bait-and-Switch: Solving the third murder didn't provide any additional clues to the Nail Man's identity, because it wasn't perpetrated by the Nail Man. The worshipper did the third murder as a copycat crime.
- Cigar Chomper: Constantly has a cigar in his mouth, and his Mystery Phantom even smokes on it in Chapter 1's Deduction Denouncement.
- Color Motif: Blue. His hair is blue, he has blue eyes, and has a black uniform with blue patterns on it.
- I Never Said It Was Poison: He killed a random woman with a blow to the back of the head, then strangled her corpse to make it look like the Nail Man could have done it. It was meant to look like a Locked Room Mystery that anyone could have set up... Except that the cause of death for all the victims was never made public knowledge. He was first on the scene for the prior two murders, so the only other people who would have known the actual cause of death were the Peacekeepers and the Nail Man himself.
- Irony: He wanted to meet the Nail Man, and yet the Nail Man was actually the priest of the church he frequented, so he pretty much met him already without even realizing it.
- Jack the Ripoff: He was so obsessed with the Nail Man killings that he went and committed one of his own. Yuma realized he wasn't the actual Nail Man, since the rope ladder that allowed for the fourth murder's Locked Room Mystery was disposed of in the church incinerator, which can only be accessed by the church's clergy.
- Mr. Exposition: His only role on-screen (off-screen, he serves as the copycat culprit of Chapter 1's case) outside of the Mystery Labyrinth is expositing about the previous locations of the Nail Man cases, and then, due to being the copycat culprit in one of them, dying from the Mystery Labyrinth afterward.
- Never the Obvious Suspect: Played with. He's the most knowledgeable about the Nail Man and first on the scene at all their killings. A genre-savvy player would think he couldn't possibly be the Nail Man, and they'd be right. But that doesn't mean he didn't kill anyone.
- No Name Given: Like everyone else who is associated with the church, he's only known as "the worshipper".
Aetheria Academy
- Alas, Poor Villain: Waruna, Yoshiko, and Kurane's motive for murdering Karen was to avenge Aiko's murder, and as part of their alibi all three of them feign hostility to hide how they truly felt about each other until their deaths.
- Anti-Villain: Waruna, Yoshiko, and Kurane killed Karen to avenge Aiko's death six months ago, as the Peacekeepers were unwilling to convict Karen themselves. However, they had to hide their mutual friendship for Aiko from the other drama club members due to building an image of fake rivalry, requiring them to also conceal their crime.
- Death by Pragmatism: The reason Waruna, Yoshiko, and Kurane personally took it upon themselves to take revenge upon Karen by killing her was because the Peacekeepers wouldn't take care of the killer they knew to be responsible for Aiko's death themselves, forcing the trio to take action instead. This creates a Mystery Labyrinth revolving around their murder, leading to their deaths when Yuma reaps their souls.
- Everybody Did It: All three suspects in Karen's death conspired to murder her together.
- Face Death with Dignity: The trio of girls accept that they are going to die and let Yuma and Shinigami take them out.
- Friends All Along: Yoshiko, Waruna and Kurane are believed to be rivals with each other according to both Kurumi and Yuma's experiences when disguised as them. It turns out they were not only best friends, but best friends with Aiko, whom Karen, the case's victim, killed. The three of them sought revenge against Karen for killing Aiko.
- Graceful Loser: Yoshiko, Waruna, and Kurane, in contrast to most of the culprits Yuma would identify in the Mystery Labyrinth, all accept their defeat and unmasking as the culprits, explaining their motives and admitting to Yuma that they're all happy they don't have to pretend to be rivals anymore and could join Aiko in death.
- No Full Name Given: The students in Aetheria Academy don't have their surnames revealed, only being known by their given name.
- Non-Standard Character Design: With the exception of Kurumi, all the female characters from the school are drawn in a slightly different artstyle from the rest of the cast, appearing less like Rui Komatsuzaki's usual style and more Shoujo-esque.
- Poor, Predictable Rock: Each of the three girls can only use one defense against GOD Shinigami, so if you've countered one you've countered them all. The only time they pose a real challenge is the last segment when they all work together and thus can mix and match their defense patterns.
- Sailor Fuku: The academy's students wear a red and black sailor fuku as their default uniform, or alternatively, a windbreaker uniform.
- Sympathetic Murderer: Waruna, Yoshiko, and Kurane all plotted to murder Karen to avenge Aiko's murder, since Karen's father being a higher-up in Amatarasu meant the Peacekeepers refused to reopen the case and investigate Karen no matter what evidence or arguments the girls brought them, so she never would have been brought to justice otherwise. Kurumi notes that if detectives like Yuma had been in the city and investigated back when Aiko was killed, Karen's murder would probably not have happened.
- Together in Death: After explaining their reasons for the murder, Waruna, Yoshiko and Kurane's souls find solace in being able to show their friendship again, no longer having to hide it and embracing each other in a circle as Shinigami is about to reap their souls. Aiko's soul even silently joins them to give some comfort.
- Undead Child: Well, undead teenagers. Yoshiko, Waruna, Kurane and Aiko all return as homunculus zombies in Chapter 5 following their deaths in Aetheria Academy.

Kurumi's friend and the theater club's former star actress who died six months ago.
- Bludgeoned to Death: She, or rather her homunculus, dies from being bludgeoned in the back of the head with a brick by an enraged Karen.
- Friendly Zombie: Ends up becoming a zombie because of her nature as a homunculus. Kurumi has an offscreen encounter with her in Chapter 5 where Aiko apparently retains enough of her senses to be able to talk with her and ultimately gives Kurumi her closure in the end. This encounter is also what reminds Kurumi about the blood test that Amaterasu had practically the whole population of Kanai Ward take.
- Heterosexual Life-Partners: Implied to have been this with Kurumi before her death.
- Inspirational Martyr: Her death and the subsequent coverup directly leads her three friends (Yoshiko, Waruna, Kurane) to conspire a revenge plot against her killer, Karen. Karen learns the hard way that you Don't Create a Martyr.
- Never Suicide: Even though Karen tried to frame her death as a suicide, nobody close to Aiko was convinced. It didn't take long for Waruna, Yoshiko, and Kurane to figure out what actually happend.
- Posthumous Character: She's been dead six months prior to the events of the story.
Voiced by: Hitomi Ueda (Japanese), Lizzie Freeman (English)

A member of the theater club and Chapter 2's victim.
- Aerith and Bob: Japanese pronunciation aside, "Karen" sticks out as a surprisingly normal name, perhaps even more than "Seth".
- All Part of the Show: She dies from poison while acting out a scene involving poisoned drinks during a rehearsal play. Briefly, the audience does believe it's an act until it's confirmed to be real.
- Asshole Victim: She had killed Aiko just six months prior and gotten away with due to her family connections and the corrupt Peacekeepers. Is it any wonder her victim's three friends all conspired to kill her?
- Crime of Passion: Given the choice of using a brick in the garden to kill her, Yuma concludes that Karen had never planned to kill Aiko when they had met, and Karen had impulsively killed her after an argument. Though the fact that she framed it as a suicide and used her father's connections to get away with the murder still makes her unsympathetic.
- Fan Disservice: In the Mystery Labyrinth, before turning into a Mystery Phantom, she appears in a small, revealing outfit that shows off her shapely figure... but with the face she had when she died, blood and all. Even Desuhiko is horrified.
- Interface Spoiler: Should one attempt to read her character file immediately after the cutscene where she dies, the bottom image on the left (where profiles display a few pictures of said person) flat-out shows Karen's Mystery Phantom form. This completely spoils the upcoming encounter for the chapter's Mystery Labyrinth and the fact that Mystery Phantoms can even take on the forms of non-living people to begin with.
- The Killer Becomes the Killed: Aiko’s killer, Karen, is killed by Aiko’s three close friends in a revenge plot.
- Meaningful Name: Despite the name being pronounced the Japanese way, she definitely lives up to the Karen standard. She has a sense of entitlement towards the position of star actress so strong that a single heated argument with Aiko led to her envy getting the better of her and her killing Aiko. She comes from a privileged household, which allows her to dodge any accountability. She evokes contempt from those around her, which directly led to her death. And she has (dark) blonde hair and blue eyes, which is Japan's Phenotype Stereotype of white people.
- Screw the Rules, I Have Connections!: She got away with murdering Aiko despite her clumsy fake suicide set up because her father was a higher up at Amaterasu. Deconstructed in that one of Aiko's friends also had connections, which were used to exhume the evidence Karen tried to have buried.
- Teens Are Monsters: She killed another student practically the same age as her out of an impulsive envy and framed it as a suicide, then covered it up due to her connections to Amaterasu Corporation.
- A Tragedy of Impulsiveness: Well, covering up the murder after was no impulse, but the murder itself was. As a result, Aiko's three friends plotted revenge against Karen and killed her on-stage during a play rehearsal... and then those three friends also died as a result of the Mystery Labyrinth. And combined with Aiko's trigger death, Karen's murder led to five deaths in total.
Voiced by: Marika Kouno (Japanese), Suzie Yeung (English)

An actress in Aetheria Academy's theater club. She is revealed to be one of the three culprits in Chapter 2, having worked together with Yoshiko and Kurane to murder Karen to avenge Aiko's death. She was the one who poisoned the drink.
- Don't You Dare Pity Me!: Her profile explains that she dislikes sympathy.
- The Dreaded: She has a very aggressive and intimidating personality, which is why many students try to avoid her at all costs.
- The Fashionista: Obsessed with makeup and looking good, to the point that she specifically stays in the dressing room during Yuma's investigation to apply makeup.
- Jerk with a Heart of Gold: She tries to hide it, but for all her abrasive personality she did have three good friends; Yoshiko, Kurane, and Aiko.
- Red Oni, Blue Oni: The very aggressive red to Yoshiko's and Kurane's blue.
- When She Smiles: Gives a genuine, tearful smile during their confession to their motive behind murdering Karen, before they are to be reaped by Shinigami.
Voiced by: Azumi Waki (Japanese), Brianna Knickerbocker (English)

An honor student and member of the theater club. She is revealed to be one of the three culprits in Chapter 2, having worked together with Waruna and Kurane to murder Karen to avenge Aiko's death. She was the one who delivered the poison to Waruna on stage.
- Beware the Nice Ones: Is amongst the most well-mannered of Chapter 2's Sympathetic Murderer trio (compared to an aggressive Waruna and a defensive Kurane) but is also the one who provides the poison used to kill Karen during the play. However, when Yuma is disguised as the other two suspects and interacts with Yoshiko, she is implied to be guilt-ridden over being responsible for leading the murder.
- Foreshadowing: After the initial shock of Karen's murder during the rehearsal play in Chapter 2, a wide shot of Yuma and Desuhiko watching over is given. However, Yoshiko is also shown standing right next to the stage on the left of that shot, and after she was seen sneaking around during the play, suggesting she did something from the audience that contributed to the murder. It turns out that Yoshiko was the one who gave Waruna the means to poison the victim, and did so from right next to the stage.
- Girls Love Stuffed Animals: Her profile states she likes teddy bears.
- The Heart: Of the four main theater club girls the story focuses on, she seems to be the most well-liked by the other club members, being mentioned as invaluable to the production of the current play. Most of the girls Yuma speaks to while disguised as her have positive things to say (with the exception of the other two culprits, Waruna and Kurane, who are understandably tense around her given what they've just done), and at least a couple seem to have outright crushes on her.
- Heroic BSoD: Although all three are stuck in this to an extent during Yuma's investigation, Yoshiko stands out more than her other two conspirators, as she's isolated herself in gloom and possibly guilt over what she'd done, in contrast to her warm, caring nature towards the theater club.
- Screw the Rules, I Have Connections!: Just as Karen's father used his connections to cover up her crime, Yoshiko used her family connections to find things that were covered up about it.
- Why Did It Have to Be Snakes?: Her profile mentions she dislikes syringes.
Voiced by: Azusa Tadokoro (Japanese), Laura Stahl (English)

A member of the theater club. She is revealed to be one of the three culprits in Chapter 2, having worked together with Waruna and Yoshiko to murder Karen to avenge Aiko's death. She was the one who directed Karen to drink the from the poisoned glass.
- Beneath Notice: Several of the girls of the theater club don't even seem to acknowledge her presence in some cases, to the point that two gossiping girls who clam up the second anyone approaches them just keep chattering away if Yuma is disguised as Kurane. Yuma can only remark on how useful Kurane's nigh-invisibility has been for his investigation.
- Creepy Monotone: Speaks in an mysterious, almost disturbed tone of voice with almost no change in pitch. This is averted when Yuma is disguised as her, as he uses his normal nervous tones with the voice changer when replicating her voice, as opposed to copying the monotone. Also averted by the real Kurane when she gets defensive, which can be seen when Yuma interrogates her while disguised as Martina, and when her Mystery Phantom starts becoming agitated.
- The Friend Nobody Likes: When Yuma disguises himself as Kurane, both Waruna and Yoshiko act very dismissive and cold toward her. Most of the other girls don't even notice when she is close by, giving the impression that Kurane is completely friendless and not all that liked. The reveal behind the case proves that this assumption couldn't be further from the truth, though there are some implications that this was the case before she met Aiko, Waruna, and Yoshiko.
- Hiding Behind Your Bangs: Her right eye is covered by a long growth of her silver hair.
- The Quiet One: Isn't much of a talker, and when she does, she speaks very softly. Likely a result of being Beneath Notice.
- Shrinking Violet: Her Mystery Phantom suggests that she is this, as she gets far more riled up over being accused as the (singular) culprit of Karen's murder than the Mystery Phantoms of Waruna and Yoshiko.
- Signature Headgear: She wears a large red bow on the back of her head.
- Technophobia: Her profile states her dislike as "electronic gadgets".
Voiced by: Yui Kondo (Japanese), Dorothy Elias-Fahn (English)

A teacher whom Desuhiko impersonates for the investigation.
- Brick Joke: She shows up for real in Chapter 3 as part of a sidequest, having heard the rumours that there are two of her running around.
- Curtains Match the Window: Has green hair and green eyes.
- No Name Given: Her name is only revealed in one of the loading screen lore tidbits. In the actual game, she's just called "Teacher".
- Stalker with a Crush: Desuhiko continuing to act like Desuhiko while disguised as Hana results in the school's music teacher reciprocating "Hana's" advances and stalking the real one. Yuma manages to cover up Desuhiko's involvement by claiming the music teacher must have mistaken an expression of platonic affection as romantic. Hana plays along with the lie, even though she knows she said nothing of the sort.
- Tormented Teacher: Desuhiko impersonates her so he can investigate Aiko's death with Yuma, dealing with the consequences of a Stalker with a Crush as a result, and as revealed in the final Deduction Denouement, her original self oversaw the blood sampling of the academy's students and witnessed the homunculi kill those students as the homunculus clones of Kanai Ward's residents went on a murderous rampage.
The Resistance/Anti-Establishment Organization
- Even Beggars Won't Choose It: Despite Amaterasu Corporation making absolutely everything in Kanai Ward and the Resistance being forced to live in the slums, they refuse to accept anything actually from Amaterasu Corporation as a means to fight for their goals. Especially Margulaw. The safe Iruka uses for her gun may be an exception to this, but it's hinted that she's reluctant to use it too, especially when she finds out about the delay lock.
- Hates Rich People: The whole reason the Resistance was formed was because they despise Amaterasu Corporation's carelessness for the unending rain in Kanai Ward and how they, as the elite, look down on the poor. Well, everyone except for Icardi, that is, who is secretly willing to sink to the same lows.
- Jerk with a Heart of Gold: With the exception of Icardi, the other members are aggressive and won't hesitate to pick up a fight, but they genuinely believe in Shachi's ideals.
- No Full Name Given: The members of the Resistance don't have their surnames revealed, only being known by their given name.
- Put on a Bus: After you briefly encounter Servan Margulaw and Iruka at the beginning of Chapter 4, they’re never seen or even mentioned again.
- La Résistance: Exactly What It Says on the Tin, fighting against Amaterasu Corporation in the slums. The concept is deconstructed when Icardi kills the leader for a bank heist to flee from the city due to disagreeing with the idealism in a resistance.
- Theme Naming: Aquatic animals in Japanese. We have Shachi as the orca (shachi), Icardi as the squid (ika), Servan as the mackerel (saba), Margulaw as the tuna (maguro), and Iruka as the dolphin (iruka).
Voiced by: Kenjiro Tsuda (Japanese), Edward Bosco (English)

The leader of the Resistance against Amaterasu.
He is the victim of the third chapter, shot by Icardi in order to frame Yuma as a terrorist.
- Ambiguous Situation: Just how much he knew about the homunculi. Uniquely among the Kanai Ward populace, he indicates he knows homunculi currently live (something even Yomi and Huesca are implied by Makoto to not be aware of), as he states they exist and are in Kanai Ward. He further says he knows more, but as he decides to only reveal this to Yuma as payment for completing the job, and he is murdered before he can give said payment, we never find out just how much he knew, if he was only aware of the mindless homunculi in the Restricted Area or if he perhaps even knew he himself and everyone else was a homunculus. His resurrected self is no help in the matter, as he is as mindless as most others.
- Boom, Headshot!: Icardi kills Shachi by shooting him through the temple at point-blank range.
- Death by Genre Savviness: On many levels. He starts the Resistance against Amaterasu Corporation because he knows that the corporation is a force of evil, unlike most of Kanai Ward's residents. This leads to the other members joining, including a faking Icardi. When the Peacekeepers discover the hideout and Yomi attempts to arrest him and his team, he escapes them by running up to the roof and locking the door so the Peacekeepers can't reach him... only for Icardi, who was planning to betray him, to be on the roof with him, which is what ends up killing him.
- Friend to All Children: Shachi mentions how he sees children victimized as a result of corruption and it’s one of the reasons he’s fighting against the Peacekeepers and Amaterasu Corp.
- The Killer Was Left-Handed: Inverted. It appears Shachi committed suicide when Yuma finds his body on the rooftop, but Yuma proves that it's actually murder because the murderer put Shachi's gun in his right hand, not knowing that Shachi is left-handed, and the gun was made to accommodate that.
- Large and in Charge: He leads the Resistance against Amaterasu, and is also the bulkiest and most muscular team member.
- Large Ham: Everything about him is very exaggerated, from his loud voice to his energetic expressions.
- Nice Guy: He's one of the kindest characters in the entire game, being portrayed much more of a father figure for Yuma than Yakou was.
- Sheep in Sheep's Clothing: Played straight twice in the same chapter.
- Shachi gives the first impression of a friendly gentleman who wants to oppose the corruption of Amaterasu, but there are hints that he's a terrorist that will kill Yuma if he refuses. When Shachi is given a gun, Yuma and Shinigami think he's going to kill the former, but he just simply asks Yuma for help with a task in exchange for information while respecting his decision not to join the resistance.
- While it appears that Shachi set Yuma up to be framed for terrorism and committed suicide, Margulaw confirms that Shachi isn't the type of person who would take his own life, and Yuma comes to same conclusion because Shachi doesn't seem to be the type to be rash enough to kill himself without making sure that the Peacekeepers have him cornered. When Icardi tries to claim that he did all of his crimes for the sake of the Resistance and that Shachi agreed to die for it, Yuma doesn’t buy it for a second because Shachi has confirmed to him personally that he prefers to resolve conflict without violence.
- Too Good for This Sinful Earth: He was a jolly old fellow who, despite leading the Resistance against Amaterasu, enforced a strict no-kill policy, as doing otherwise would make them no better than their enemies. And despite ordering Yuma's kidnapping, he doesn't hurt him and even lets him go after Yuma refuses to join them. What more needs to be said about his life expectancy in this kind of story?
Voiced by: Kentarō Itō (Japanese), Ezra Weisz (English)

A member of the Resistance.
He is revealed to be the culprit of Chapter 3, killing Shachi to frame Yuma in order to rob from Kanai Ward's bank and flee the city.
- All for Nothing: He planned to kill Shachi, frame Yuma for terrorism, and rob the bank to fund his escape from the city. Killing Shachi created a Mystery Labyrinth with his soul at the center. Getting Yuma involved in the mess pushed him into a corner and forced him into it, resulting in his own death. Even if he had managed to get away with everything, the second he stepped out of Kanai Ward and into the sunlight, he would have frenzied and eventually dropped dead, unable to enjoy any of his ill-gotten gains.
- Asshole Victim: Yuma and Shinigami kill him via Mystery Labyrinth, but considering exactly why they had to kill him in the first place (betraying and killing Shachi due to his cynicism, framing Yuma as a terrorist, and siccing the Peacekeepers on him), there is no reason to sympathize with him by the end.
- Bait the Dog: When he introduces himself to Yuma, he apologizes to him for the rough kidnapping, thus giving off the initial impression of being not too bad of a person. He ultimately turns out to be worse, being a shameless traitor who's willing to throw the Resistance under the bus so long as he alone benefits from it.
- Bitch in Sheep's Clothing: When introducing himself to Yuma, Icardi acts friendly towards him and finds him to be impressive for being a detective, even apologizing for being rough on him when kidnapping him. Not only is he quick to turn on him as soon as he disagrees, he's deceiving the entire Resistance, as he was planning to murder Shachi, then frame Yuma as a terrorist and make him his scapegoat to distract the Peacekeepers.
- Character Tic: When outraged, though it's mostly shown in the Mystery Labyrinth only, Icardi balls up his fists and stomps around as he glares at who he's talking to.
- Chekhov's Skill: It’s been explained to Yuma that he's an accomplished swimmer and diver. This is how Yuma identifies him as Shachi's killer, since the killer would have to be a skilled diver in order to escape the rooftop by jumping into the flooded storm drain.
- The Cynic: Icardi hated Shachi’s idealism and saw fighting the Peacekeepers as a lost cause, so he conspired to rob the banks and escape Kanai Ward.
- Death by Materialism: His murder plot entirely revolves around stealing large amounts of money from Kanai Ward's banks and trying to get as much money as he can to escape, and it creates a Mystery Labyrinth that eventually results in his death. Nothing but materialism is what killed this man. Halara even points it out following said death.
- Didn't Think This Through: His Mystery Phantom tries to argue that the flooding incident was Shachi's idea and that exposing the truth would mean the Resistance's struggle was pointless. Putting aside the fact that Mystery Phantoms deliberately try to bury the truth, Yuma had spoken with Shachi personally and knew the man didn't want to use violence of any kind, which would include flooding. Yuma was so enraged he put aside all pretense of guilt over causing Icardi's death and vowed to expose the real truth without hesitation.
- Dirty Coward: He has no problem leaving anyone to die so long as he comes out with treasure.
- Failed a Spot Check: Icardi sees Shachi take the revolver from Iruka with his left hand for himself, yet still makes the mistake of thinking Shachi is right-handed when framing his death as a suicide.
- False Friend: Became one to the Resistance after he grew tired of Shachi's idealism and became disillusioned with the city. He uses them to rob Kanai Ward's banks and then flee to the outside world. He ends up murdering Shachi and framing Yuma for the alleged "terrorist attacks", becoming the culprit of Chapter 3.
- Fish People: His Mystery Phantom takes form that vaguely resembles a hulking fish-like humanoid being in a diving gear.
- Foreshadowing: Icardi repeatedly snarks about Shachi's ideals and even says that money is better than "claiming you'll fight but not actually doing it" before Yuma's given the assignment to set up surveillance around Kanai Ward from Shachi himself. This would obviously foreshadow his materialistic murder plot in the second half of Chapter 3.
- Hate Sink: Unlike many culprits who are either sympathetic or have redeeming features, Icardi has few to no redeeming qualities to his character. The only thing he is motivated by is escaping the city he despises by getting safes of money from the bank. He does it by flooding part of the city after Yuma planted the bombs intending to frame him as a terrorist. He even killed Shachi when on the rooftop to frame Yuma as the culprit. Even after being outed, he still deflects the blame from himself, instead choosing to blame the city, the Peacekeepers and the pointlessness of fighting them for his faults. Overall, he is one of, if not the least sympathetic culprit in the entire game, with even his death being completely well deserved. It's no wonder why Yuma shows no hesitation in defeating him in the Mystery Labyrinth, even though he knows full well it will result in his death.
- Hypocrite: Icardi's Mystery Phantom reveals that his reason for killing Shachi and framing Yuma as a terrorist, and constantly ratting him out to keep the plot going, was due to hating that the Peacekeepers made Kanai Ward into a horrible place to live in, and he had lost hope that peace could be brought back, something of which Shachi promoted constantly. Despite this, his whole scheme revolves around using the blind corruption of the Peacekeepers themselves to serve his agenda by using the secondary plot of framing Yuma as a terrorist to distract them from Icardi's bank robbery scheme by flooding one of Kanai Ward's districts, in turn making him no better than the despots the Peacekeepers are.
- It's All About Me: He selfishly prioritizes saving his own skin by fleeing Kanai Ward over helping the Resistance bring down the Peacekeepers' tyrannical rule, not caring of the others suffering under their rule.
- Jerk Jock: Him being a professional athlete swimmer with a bad attitude who killed a guy in a ploy to escape from Kanai Ward, he's certainly one of these.
- Karmic Death: Yuma and Shinigami kill him - Yuma being fully committed to doing it when he attempts to lie about Shachi's intentions as a Mystery Phantom - after he frames Yuma as a terrorist and encourages the Peacekeepers to chase after him as a distraction.
- Mad Bomber: His plan to escape Kanai Ward involves bombing specific areas and using the chaos to pull off a series of bank heists in order to set himself for a new life outside the city.
- Manipulative Bastard: It's subtle, but he tells Shachi to carry the revolver Iruka gave him around on his person for Shachi's convenience. This would later turn out to be to Icardi's convenience, as he would later take the revolver from Shachi and place it in his (right) hand to fake his suicide after betraying and murdering him.
- Not-So-Well-Intentioned Extremist: When cornered, he tries to claim that the flooding of Marunomon District was a message to the city's elite and that Shachi agreed to die so the Peacekeepers could be framed for it. In truth, he was just trying to rob a bank and flee the city.
- Playing the Victim Card: After being outed as the culprit, Icardi's Mystery Phantom still continues defending himself and excusing his actions by claiming that the city of Kanai Ward and the Peacekeepers are to blame for everything, and that Shachi's cause wouldn't have resolved anything, refusing to acknowledge that anything he did was morally wrong."It's this city that's wrong... This rotten place..."
- Rapid-Fire "Shut Up!": When he is accused of betraying Shachi's ideals by flooding the city by Yuma, he desperately deflects his arguments with a repeating "Shut up!" before his true motive is revealed.
- Reused Character Design: He looks near identical to Kazuichi Soda from Danganronpa 2: Goodbye Despair.
- Revealing Skill: Yuma is able to identify Icardi as the culprit because the only way to escape from the roof after killing Shachi was by jumping off it, and the only way to safely land was through water, allowing him to make the connection and conclude the culprit was able to swim and swim confidently, the only Resistance member having that ability being Icardi.
- Screw This, I'm Outta Here: Icardi hated living in Kanai Ward and saw the fight against the Peacekeepers as a lost cause, so he conspired to rob the banks and use the money to set a new life outside the city. This also leads him to murder Shachi and frame Yuma for terrorism as part of his plan.
- The Sociopath: A much lesser example than Yomi, but Icardi is clearly incapable of empathy or understanding people and is only concerned for himself. This makes him stand out in how unsympathetic he really is as one of the story's murder culprits.
- Sore Loser: His profile states his dislike as "losing". This seems to carry over to the main story when his Mystery Phantom is furious over being exposed as killing Shachi for self-serving reasons than to aid the Resistance.
- Treachery Is a Special Kind of Evil: Yuma is noticeably outraged when he finds out that Icardi betrayed and murdered Shachi, to the point that he has no problems exposing the truth with the Mystery Labyrinth despite knowing that this will kill Icardi.
- With Us or Against Us: Says this word-for-word when Yuma tries to leave the Resistance to find the other detectives.
- Your Terrorists Are Our Freedom Fighters: His Mystery Phantom's extremely flimsy counterargument when Yuma identifies him as the culprit, claiming that flooding the city was to "unite the rich and the poor" and that it's "what Shachi would've wanted." Yuma has none of it.
Voiced by: Shota Hayama (Japanese), Derek Stephen Prince (English)

A member of the Resistance.
- Ambiguously Related: He and Iruka have the same hair and eye colour as well as the same birthday, which seems to hint they're related.
- Butt-Monkey: Poor guy is put through the wringer throughout the chapter and it's not entirely his fault. Fortunately, he manages to patch things up with his surviving teammates.
- Bystander Syndrome: Whereas Iruka, Icardi, and Margulaw act aggressive toward Yuma when he has doubts about joining the Resistance, Servan acts indifferent toward the tense scene, wanting them to take it outside so that none of his machines get accidentally damaged.
- Conveniently Timed Distraction: After Guillaume captures him as the true culprit's accomplice and attempts to give him and the dead Icardi over to Yomi, Yomi, Bad Boss as usual, scolds her out of rage due to Makoto letting the NDA get away, allowing the two Peacekeepers to be distracted during their argument and giving an opening for Servan to escape and hide away from the Peacekeepers in the Resistance hideout.
- Curtains Match the Window: Has dark blue hair and dark blue eyes.
- Forced into Evil: Icardi threatens him into building the bombs, though Servan is kept in the dark about his plot to kill Shachi and rob the bank by flooding the district. Icardi later has him accompany him during his bank robbery in the flooded district, only for both men to be caught by Yakou and the Master Detectives with him.
- Mission Control: He instructs Yuma on where to set up the cameras when helping the Resistance out on spying on the Peacekeepers. It goes downhill when Icardi begins his plan and the cameras were secretly bombs.
- Nonstandard Character Design: He looks nothing like most of the other characters of the game, sporting a set of protruding lips and a blue afro.
- The Smart Guy: The brains in the Resistance and the one in charge of all of their machine-related matters. He also set up their surveillance system that helps them keep an eye on the events all over Kanai Ward.
- Welcome Back, Traitor: Although Icardi coerced him into building the bombs and kept him in the dark about his plot to murder Shachi and commit a bank heist, Servan still betrayed the Resistance by doing so. Margulaw admits to Yuma that while he did consider turning him over to the Peacekeepers, he chose to help him go into hiding instead because he still saw the members of the resistance as his family.
- Why Did It Have to Be Snakes?: Due to a bullying incident as a kid in which he almost drowned, he has an intense fear of the water, which clears him as the murderer since there's no way he would have ever escaped the crime scene by diving into water like the culprit did.
Voiced by: Tomomichi Nishimura (Japanese), Jake Eberle (English)

A member of the Resistance.
- The Alibi: He has an airtight one for Shachi's murder, clearing him of suspicion.
- Everyone Has Standards: Margulaw states that as much as he wants revenge on Amaterasu, he would never manipulate anyone to do the dirty work for him. According to him, revenge must be taken with your own hands or it’s meaningless.
- Frame-Up: Was framed by the Peacekeepers for embezzlement.
- Grumpy Old Man: To be fair, he's been bitter with Amaterasu having a hand with his family's murders.
- Revenge: Used to work in accounting for Amaterasu, but was accused of embezzlement, which caused his whole family to be falsely arrested. His family later became sick and died in jail, which left him as the sole survivor, and now he wants to destroy Amaterasu.
- The Team Benefactor: When Yuma interrogates him about Shachi's murder, he explains that he provides the funding and resources for the Resistance as proof of his innocence.
- Team Dad: Implied to be this after Shachi's death.
Voiced by: Chinatsu Akasaki (Japanese), Karen Strassman (English)

A member of the Resistance. A former Olympic marksman in training.
- Action Girl: She loves weapons and won't hesitate to jump into a fight.
- Ambiguously Related: She has the same hair colour, eye colour, and birthday as Servan, which hints they're related.
- Ax-Crazy: Subtle, but it's there. She loves fighting and will happily involve herself in battles without any regard for anyone else.
- Blood Knight: She is willing to kill anyone who disagrees with the Resistance's cause just for the exhilaration of using her weapons on someone, but she is ultimately a heroic person despite that since she is doing it to fight Amaterasu Corporation, and she tones it down when Shachi dies because of this obsession.
- Broken Smile: Her smiling sprite (pictured) is one of these.
- Butt-Monkey: A non-physical example, but judging from her very first words, she was not winning the card game she was playing against the other Resistance members prior to Yuma's arrival.
- Creepy Red Herring: Iruka is a sadistic Gun Nut who repeatedly stresses her preference for violence over Shachi's peaceful methods. Then he turns up dead. It turns out her gun obsession actually clears her of the crime, as she made his custom left-handed revolver, and therefore wouldn't have placed it in the wrong hand if she'd killed him.
- Curtains Match the Window: Has dark blue hair and dark blue eyes.
- Everyone Has Standards: Iruka may be willing to kill anyone who gets in her way, and has no issues using people as targets for her gun obsessions, but she isn't treacherous like Icardi, as her Mystery Phantom claims.
- Expy: A Blood Knight with a ponytail and fairly revealing outfit that is much more insane than the rest of her male teammates with a fair knowledge of weapons? Hmm…
- Gun Nut: She's absolutely obsessed with firearms, and invites Yuma to join her for target practice. When Yuma explains that he's never held a gun and therefore probably wouldn't make a good shooting partner, she clarifies that she wasn't asking him to be her shooting partner, she was asking him to be the target. She starts to downplay this trope after the Resistance collapses, particularly after she receives Shachi's final gift — a toy gun, with a message from Shachi emphasizing the symbolism of it not being able to kill anyone — and vowing to try to do things more the way he would have wanted.
- Intimate Marks: Has a tattoo on her left breast.
- The Lad-ette: Iruka is violent, aggressive, eager to fight other people who challenge her, and isn't one for tact.
- Revolvers Are Just Better: Seemingly her reason for choosing Shachi's signature gun as a revolver.
- Sadist: Iruka very clearly prefers to use violent tactics for things to go her way.
- The Smurfette Principle: The only female Resistance member.
- Thousand-Yard Stare: Her default expression invokes this, and combined with her unsteady, strained speech patterns gives the impression that she is not exactly fully stable mentally.
- Tomboyish Ponytail: Naturally, she has a neat ponytail to define her tomboyishness.
- Troubling Unchildlike Behavior: She was first gifted a gun on her birthday when she was four, and continued to get one every year after that, each one bigger than the last, with her promised next birthday gift being an anti-tank cannon.
- Unwitting Instigator of Doom: "Unwitting" is an understatement. Iruka creating the gun for Shachi allowed Icardi to falsify his murder of Shachi as a suicide, albeit with the wrong hand, since the revolver is for a left-handed user, and Icardi used Shachi's right hand, as well as to frame Yuma as a terrorist, causing all of the chaos in Chapter 3.
Other Characters
A governing body that nearly spans the whole world.
- Apocalyptic Gag Order: The UG covered up evidence of their homunculus research in an attempt to create an immortal army of them from the world because the population would no longer have faith in them if they knew otherwise. Makoto threatened to release it to the public because they threatened to flatten Kanai Ward when Amaterasu's research ended up in catastrophe, but the UG doubled down and let Makoto isolate Kanai Ward instead, as to prevent any outsiders from entering the city, let alone knowing it even exists.
- Didn't Think This Through: Their attempt to create an immortal army of homunculi is halted because of their creation of Makoto, a perfect clone of the WDO's Number One, which was intelligent enough to become self-aware enough of what it is to realize what conspiracy the UG was partaking in too. The clone worked, but was intelligent enough to also be an unrestrained, independent schemer, and the first thing that clone did was turn their own research back on them as a means to blackmail them into isolating Kanai Ward.
- Greater-Scope Villain: Alongside Dr. Huesca, they are also responsible for the homunculus research that causes Makoto to do what he does as the main antagonist. However, they have much more direct influence on the plot, as the UG are the ones who created him in the first place.
- Hoist by Their Own Petard: Pretty much the entire plot of the game happens because of their creation of Makoto Kagutsuchi, their homunculus clone of Number One, turning their own research back on them through blackmail.
- The Man Behind the Man: They are the ones responsible for the bad things that happen in Kanai Ward by proxy of pushing the Amaterasu Corporation to do homunculus research as competition against their own, being the reason Dr. Huesca conducted his research in desperation to catch up, the ones who created Makoto using Number One's DNA in the first place (and allowed him his position as CEO), which by proxy also makes them responsible for Makoto bringing the detectives to the city and instigating the game's plot, complied with the city's isolation in exchange for keeping Makoto quiet about their research, and are the ones who threatened to destroy Amaterasu Corporation in the backstory, which also urged Makoto to blackmail them into simply isolating the city from the rest of the world instead.
- One World Order: Run by a parliament consisting of elected representatives from each ward or region.
- Slave to PR: Unusually for a government with the amount of power they are implied to wield, they are evidently very dependent on staying in the good graces of the average citizen. In particular the consequences of the inhumane elements of their homunculi experiments becoming public knowledge are so dangerous for them that Makoto (the result of said experiments) can blackmail the entire world government with just the threat of exposing them. While not the only reason they cooperate with him (it is cheaper for them to let him handle things in Kanai Ward, and he is able to assure them the homunculi won't be a threat to the rest of the world), loss of public faith in them seems to be the biggest concern.
- Skeleton Government: We don't see or hear much of how they are run. They apparently have military ambitions, but the UG are also way more benevolent and democratic than Amaterasu, according to the people who resist the latter's corporate rule. But after the failure of Amaterasu's homunculus research, the UG initially intended to destroy Kanai Ward to get rid of the homunculi until Makoto convinced them to settle for isolating it.
- What Measure Is a Non-Human?: They were planning to flatten Kanai Ward and permanently erase the defective homunculi created by Dr. Huesca once their homunculus research went awry. Makoto Kagutsuchi and his blackmail using said research prevented them from doing this.
Strange beings that appear in Mystery Labyrinths and manifest the labyrinths' mysteries.
- Eat the Camera: Sometimes, as part of transitioning between scenes in a labyrinth, a Q appears, and the camera zooms into its mouth.
- Fusion Dance: Qs gather together and transform into Mystery Phantoms.
- Mascot Mook: Are the primary face of opposition in the game while in Mystery Labyrinths.
- Meaningful Name: They are either spherical or cube-shaped, with a long tongue hanging out at an angle, making them look like upper-case letter Qs.
- Non-Malicious Monster: As Shinigami points out, while they do attack you as Mystery Phantoms and construct the puzzles and traps in a Mystery Labyrinth, they have no will of their own - Phantoms are copies of people trying to derail investigation completely independently of them, and the puzzles are aping the mysteries in the real world; they're echoing everyone with actual agency. The basic form of Qs seem to like Fubuki somehow.
Immortal artificial humanoid beings inhabiting Kanai Ward.
- Alien Blood: The only physical way to tell the difference between a homunculus and the human their DNA sample came from is the fact that homunculi have neon pink blood. Mystery Phantom Makoto suggests that the pink blood was to differentiate the homunculi from their original human selves.
- Blessed with Suck: Being able to heal from any injury, even fatal ones, is pretty great! Doing so without your mind intact—meaning you'll probably wind up as a mindless zombie—as well as having a severe ultraviolet allergy that could turn you into a murderous monster at any time is... less great. Less restricting but still notable, they cannot sustain themselves on normal food, requiring either human flesh or specially formulated food at least once every two days to stay comfortable.
- Born as an Adult: The homunculus clones of all of the characters who receive one are born the same age as their original selves.
- Came Back Wrong: All of Kanai Ward's dead over the past three years to the present day when they were first replaced with the defective homunculi that have Resurrective Immortality all end up as mindless flesh-hungry zombies upon revival.
- Clone Degeneration: Of the Flawed Prototype variety. Aside from Makoto, who is a clone of the protagonist and functions perfectly, the homunculus clones of Kanai Ward are outright dubbed "defective" by Dr. Huesca himself, since unlike Makoto, they can't go out into sunlight, or they go on a murderous rampage until they eventually die, and when they die, they revive as mindless flesh-hungry zombies.
- Death of Personality: After they die, they are after a day resurrected into usually mindless zombies that no longer resemble their original selves. The "lucky" ones retain some vestiges of their former selves, some ability to speak, etc. but are still noted to not really be the same as the people they were before. Shinigami notably remarks that despite having resurrected they do not really "feel" alive to her, and she later refers to them as dead despite their bodies still moving about.
- Eat the Evidence: Unwittingly so. The meat buns that the residents of Kanai Ward eat to sustain themselves contain human flesh from the death row inmates that Makoto Kagutsuchi has been kidnapping as part of the story’s Ontological Mystery, essentially meaning they’re accidentally disposing of the only external evidence of his kidnappings that the detectives would otherwise have, if not for Makoto sending Yuma to the restricted area where the meat buns are made.
- Everyone Has Standards: As Kurumi states in the epilogue, the people of Kanai Ward quicky lost their love for meat buns once they learned what they're actually made of.
- Evil Doppelgänger: All of the homunculi seem to be naturally inclined towards villainy, compared to the original counterparts that they were cloned from (aside from the characters who are villainous regardless of whether they're defective homunculi or not), since the defects in Kanai Ward lapse into violence once subjected to sunlight, a flaw that led to them slaughtering their original selves by eating them down to their bones like mindless zombies, and Makoto Kagutsuchi, who is the homunculus clone of the heroic Yuma Kokohead/Number One, just happens to also be a villain by his own accord, which isn't obvious regarding either party at first. Regarding the "killing the original self" ordeal, Makoto tries to do the same thing to Number One in Chapter 5 as the final determiner of Makoto's plan to permanently hide Kanai Ward's truth, except he actually has the conscious ability to back down from the plan and does it while fully in control of himself, unlike the others.
- Failsafe Failure: What the defects' ineffectual Resurrective Immortality amounts to. Since their revival powers cost their intelligence, dying and then reviving turns them into a mindless zombie, as opposed to reviving them like normal.
- Flesh-Eating Zombie: What they become after resurrecting, since they lose their intelligence in the process of dying. There are few exceptions, but the majority turn out like this. It is at first believed that the Nocturnal Detective Agency get Devoured by the Horde due to this trait of theirs, though they turn out to have never killed them in the first place.
- Greater-Scope Villain: The homunculi are the motive for Makoto Kagutsuchi and why he's an extremist for Kanai Ward, which makes them greater than Dr. Huesca to some capacity. Albeit, not by much, since Huesca is still the one who created the defects and accidentally did so as part of his own agenda.
- Hero Killer: Subverted. When searching through the factory in Chapter 5, Yuma comes across the remains of what is believed to be the Master Detectives of the Nocturnal Detective Agency (Desuhiko, Halara, Fubuki, Vivia), being eaten alive and Stripped to the Bone during research on the homunculi and Kanai Ward. It turns out that it was Makoto framing the defective zombie homunculi and they didn't actually kill them after all. Makoto simply locked them up in Kanai Tower when they were no longer useful.
- Hidden in Plain Sight: A significant chunk of the game consists of the detectives fruitlessly searching for information on homunculi, all while every single person around them actually is one, and all the original residents of Kanai Ward have been long gone. Yomi and Dr. Huesca, along with seemingly the WDO and the UG, are unaware the defects in Kanai Ward are the city's mystery itself, and are the cause of Makoto creating said mysteries in regards to keeping them protected. Everyone eventually learns the truth in the end when Makoto confesses everything about them upfront.
- Horror Hunger: The defective homunculi require a specific combination of nutrients in order to keep their bodies functioning, a combination they instinctively can recognize and happens to be readily accessible in human flesh. Those that have resurrected into zombies will instinctively and ravenously attack humans if they have gone at all hungry, though they will still prioritize non-living food with the right nutrients if it is available, and the degree of aggression scales with the level of hunger (with even hungry ones often not attacking unless a human interacts with them first). The defective homunculi with still intact minds seem to have their human values and morals block any recognition that they desire human flesh and thus their hunger is normally no danger to people, but the instinct for the nutrients remains and will be directed at what their minds accept as a "safe" food (upon finding out the meat buns were made of human flesh, their desire for them vanished and attached to the specialized ramen that offered the same benefits). Judging by Kurumi's example, they require some amount of this nutrient combination at least once every two days. What results if they are unable to feed like this is unclear, and given what happens with resurrected homunculi who go hungry nobody seems to want to find out.
- I'm a Humanitarian: Turns out the meat buns they were eating the whole time contained human flesh from real people, of whom were killed and mass produced into a food product by Makoto Kagutsuchi. Who knew? The homunculi themselves were unaware of this, and once they were informed of this by Makoto after Chapter 5, they obviously stopped doing this.
- Inconspicuous Immortal: An unwitting example. They appear to be mortal humans at first glance due to continuing to live like humans, but they are actually artificial humanoids with Resurrective Immortality and everyone except Makoto is unaware of this. The defective homunculi in Kanai Ward revive as mindless zombies upon "dying", which would break the illusion of mortality, so Makoto conspires for them to be dumped into Kanai Ward's restricted area to prevent this from being witnessed.
- Kill and Replace: The defective homunculi which escaped from the lab three years ago performed an accidental version of this, slaughtering and devouring the original population of Kanai Ward and then- when Makoto's rain cloud generator restored their sanity- having no memory the slaughter happened and slipping into the roles of their DNA donors while trying to ignore how wrong the whole situation felt.
- Mental Shutdown: When the defective homunculi in Kanai Ward are killed, they lose their intelligence and turn into mindless Flesh-Eating Zombies, with some being able to partially retain their intelligence enough to communicate as Yuma discovers.
- Missing Time: The Blank Week, an incident where an entire week passed and everyone in Kanai Ward forgot what happened during it. In truth, all of them had only been alive for about a week and spent it killing the humans in the city due to sunlight driving them berserk before Makoto put a stop to it. The reason they thought time had jumped forward was due to sharing their human counterpart's memories. Not knowing what happened, they decided to simply move on with "their" lives and made the subject a taboo matter.
- Our Homunculi Are Different: In this setting they are a product of fantastical science rather than magic, specifically clones grown straight from blood samples with no need for a surrogate womb or other typical real world cloning techniques. They appear identical to the person they were cloned from, matching their age, personality and memories up to the point that the blood sample was taken (though their blood is intentionally made a bright pink to make it possible to distinguish them from normal humans). Through unknown means they also possess Resurrective Immortality (though in almost all cases going through this process still effectively results in the mental and spiritual death of the person they were), and they do not age past adulthood or (for those who are already adults) past the physical age their genetic donor was at the time of the sample was taken. The lack of any babies in Kanai Ward also implies the homunculi are sterile. Unintentionally, almost all homunculi also suffer from a fantastical version of an allergy to UV light as well as a need for a specific combination of nutrients (the same found in human flesh) to keep their bodies functioning, and in turn they instinctively seek out a source for these nutrients.
- Resurrected Murderer: Fake Zilch, the priest and worshiper, Yoshiko, Waruna, Kurane and an unseen Karen, Icardi, and Yakou are resurrected as homunculus zombies and dumped into the restricted area after Shinigami reaps their souls, returning in Chapter 5 as they chase after Yuma and Kurumi. The only completely Friendly Zombie is Yakou.
- Resurrective Immortality: The homunculi are supposed to have this, with the idea being that, following a fatal wound, the homunculus will wake up 24 hours later with their bodies and minds fully restored. Unfortunately, the ones inhabiting Kanai Ward only got the physical healing part down. At best their resurrected state has a vestige of their original mind/personality and limited speech, with most not even having that. The UG's initial plan to destroy Kanai Ward and the homunculi with it implies that their regeneration has limits, i.e. there needs to be enough body left to regenerate.
- Super-Strength: When berserk the homunculi are implied to possess some level of this, given how even as a mob it should have not been possible for them with human strength to force open the sturdy metal doors that kept them contained in the secret lab, let alone to do so in such a manner that the doors were peeled away. This also explains why no one survived their rampage, no matter how fortified their hiding place may have been. When we briefly see some of the revived homunculi going berserk, their movements exhibit a great deal more speed and power than their usual shambling behavior, a dark aura even erupting as their bodies violently react to the sunlight.
- Unusually Uninteresting Sight: While they hadn't existed long enough yet to notice the lack of physical aging in adults (and perhaps the same goes for the lack of death from illness and age), the people of Kanai Ward had to go through quite a bit of mental gymnastics to keep themselves believing they were the original humans of Kanai Ward, or human at all for that matter. This included them ignoring or rationalizing away the fact they all bleed pink blood, everyone forgetting the same week of time, and everyone having a particular type of meat bun be their favorite food that they instinctively felt the need to eat every couple of days at least. Even the city having been wrecked with no explanation simply became part of the taboo of the Blank Week Mystery that everyone was too afraid to try to find out much about. Kurumi even relates how most people somehow largely ignored the destruction.
- Verbal Tic: After learning the truth about the constant rain in their city actually protecting them, the residents of Kanai Ward coin the phrase "Good rain to you." as a local expression.
- Walking Spoiler: Mentioning that homunculi have relevance to the game's plot is already a spoiler for the end of Chapter 2. The main twist of the game is that every single person in Kanai Ward is a homunculus, including Makoto, Yomi, and Dr. Huesca, who are the overall main antagonists, and Yuma is led to believe they're only "immortal monsters", an ambiguous term that can mean anything, until Chapter 5, when they're revealed to actually be humanoids who look like humans and are created from someone else's DNA, unless the player is already aware of what homunculi actually are.
- Weakened by the Light: Played for Horror and as a Plot Allergy. Their weakness to UV light is the very reason the defectives in Kanai Ward killed their original selves, and as a result, led Makoto to create a Weather-Control Machine to create artificial clouds to block sunlight, creating the rain and constant darkness in Kanai Ward, as well as to isolate Kanai Ward from the rest of the world so its people would not leave the safety of the cloud cover. By the end of the game the horror aspect is downplayed as sunscreens and UV-blocking clothing are revealed to be enough to allow homunculi to safely be in sunlight for at least a functional amount of time.
- What Happened to the Mouse?: With regard to the undead homunculi. Even after Makoto has begun to make amends for his misdeeds and deception, it's never directly said whether anything has been done about the undead homunculi, as not a single character in the epilogue makes any mention of them.
- A Wolf in Sheep's Clothing: The people of Kanai Ward seem like your average city folks, but all of them are actually defective homunculi. If they die, within a day they turn into mindless zombies craving human flesh. Exposure to sunlight also drives them into a berserk frenzy, which was the reason they unknowingly killed all the humans in Kanai Ward. Unusually for this trope, they're not the ones pulling the wool. That honor goes to Makoto, who built the cloud machine and isolated the city from the rest of the world so they could live normal lives without discovering the Awful Truth.
Voiced by: Asuna Tomari (Japanese), Ryan Bartley (English)

The son of the accused in Chapter 1.
- Clear Their Name: Acts as Yuma's first cilent and asks him to clear his father's name.
- No Name Given: He never introduces himself with his name, and his profile simply calls him "Boy", but one of the loading screen tips reveals that his name is Kei Colan.
A clockmaker and repair man who was arrested on suspicion of being the Nail Man.
- Frame-Up: Is the victim of one since the Peacekeepers are keen to frame him as the Nail Man, to the point that they withhold certain details in officially released information such as his occupation.
- Why Did It Have to Be Snakes?: According to his son, he has a fear of heights. While he handles it professionally when it comes time to repair the clock in the clocktower every year, he always makes quick work of it and would not have been able to escape in the way the culprit did.

Voiced by: Katsunori Okai (Japanese), Sean Chiplock (English)
An infamous assassin operating in Kanai Ward who boasts an impressive 100% success rate in killing his targets.
- Attention Whore: Yomi accuses Fink of wanting to be the center of attention upon receiving "his" death threat regarding Dr. Huesca. That would be true, if Fink was the one sending death threats in the first place. Not only does Fink not send death threats, but Yakou was the one who actually sent it under Fink's name as a lure for Yomi.
- Black Cloak: He obviously wears one, mostly to conceal his identity.
- Calling Card: A knife with the letter F engraved on the hilt, left in his targets to prove to his clients that he was the one who killed them. Of course, such an infamous calling card is easy to fake...
- Dark Is Evil: A local hitman-for-hire in Kanai Ward with a 100% success rate who enshrouds himself in a dark, black cloak and hides in the shadows.
- The Faceless: His entire face is never seen, the upper half always obscured by his hood.
- For the Evulz: Implied. He says in Chapter 5 that he "couldn't refuse" his agreement to Chief Yakou's complicated plot to kill him after he subjects himself to Dr. Huesca's deadly gas, which is basically him saying that he couldn't pass up another opportunity to kill someone again."I knew...it'd be...a tough job from the start...but I couldn't refuse..."
- Frame-Up: Invoked. Yakou intentionally uses his name as a means to frame Fink as Dr. Huesca's and Yakou's killer to divert attention away from Yakou's actual goal of killing Dr. Huesca, and it works as planned.
- In the Hood: He wears a flowing black cloak with a hood that obscures much of the upper part of his face with its shadow.
- Killed Offscreen: Makoto killed him off after he finished the job. His death was never seen, but his zombie form does show up in the following chapter.
- The Killer Becomes the Killed: Fink is Killed Offscreen by Makoto after assisting Yakou in his Suicide by Assassin.
- Last Episode, New Character: Last murder case, more specifically. He's introduced in Chapter 4 as the key element within Yakou's plot, and that plot just happens to also be the game's last murder case before Makoto steps up onto the pedestal and finally shows his true colors.
- Professional Killer: Not only is he an assassin for hire in Kanai Ward, he boasts a 100% success rate of his jobs to boot.
- Psycho Knife Nut: His signature weapon for his successful murders is a knife with an F engraved on the hilt.
- Punch-Clock Villain: Fink is indeed a vicious assassin and is indeed someone who will follow through with any murder task, but will only do jobs he's hired for (a fact of which is hidden up until Yakou is revealed as Chapter 4's true culprit) and is Affably Evil outside of murder tasks, as shown when his zombie form confesses to Yuma that Makoto is guilty for what happened to Chief Yakou by introducing him to Fink in the first place without putting up much resistance. A little detail that confirms this is that, despite Yuma being right next to him after he kills Chief Yakou, Fink doesn't kill him alongside the chief despite him being a witness to Fink's crime and leaves the scene after completing the job he was assigned to do, that being to target only Yakou as Yakou himself hired him to do.
- Red Herring: His whole purpose in Chapter 4 is to serve Yakou's agenda to kill the doctor and frame Fink for it, making Fink out as the culprit. In reality, the true culprit is Yakou, and Fink is only a willing pawn in his scheme.
- The Scapegoat:
- Even worse than Dr. Huesca being one for Yomi, somehow. He's the one who enabled Chief Yakou's plot to kill Dr. Huesca and undeniably attacked Yakou personally, but he was only pushed to being responsible when Makoto covertly introduced Yakou to him, allowing Makoto to kill Dr. Huesca without doing the dirty work of killing him himself. Along with this, Yakou himself uses Fink as one by framing him as the overarching threat against Dr. Huesca in Chapter 4 to divert attention away from Yakou's own plot.
- Yuma makes him into one for a brief moment during Chapter 5's investigation, shouting at his zombie self for killing Chief Yakou. That is, despite Yuma already being well-aware that Yakou was bound to die long before Fink stabbed him, and Yakou arranged for Fink to stab him in the first place to cover up what he was dying from, that being the gas from Dr. Huesca's security system, therefore nullifying Fink having any real malicious intentions towards what he did during Chapter 4's murder in the first place since it was only under Yakou's (and Makoto's) command rather than of his own volition.
- Small Role, Big Impact: He only appears in Chapter 4 by name and by rumor, only appearing as a death threat and his additional physical appearance when escaping after killing Yakou, but he essentially serves as the trigger for Yakou's plot to kill Dr. Huesca and then himself, which allows Makoto the opening to indict Yomi and kidnap the NDA once Chief Yakou dies.
- Tom the Dark Lord: Let's be honest, Fink probably isn't the first name that you'd associate with a tall, ominous, cloaked killer that never fails. Probably why he felt the need to go so overboard with his title.
- You Have Outlived Your Usefulness: After assisting Yakou with his Suicide by Assassin, Makoto has him killed as well to keep his mouth shut about the fact that Makoto was the one who introduced him to Yakou in the first place. Ironically, he ends up becoming one of the few zombies who retain enough of their faculties to speak, so that didn't quite work out.
Voiced by: Shun Horie (Japanese), Brian Timothy Anderson (English)

The real Yuma Kokohead, who quit his job as detective trainee.
- Badass Bystander: A detective in training who managed to get past Amaterasu’s active efforts to kill all incoming Master Detectives - only five of whom survived among an implied dozens or more - and survive in the city long enough to build a life for himself as a ramen salesman. He even manages to develop ramen that provides adequate nutrition to the homunculi without the need for them to eat human flesh.
- Boring, but Practical: His special ability simply being that he's really good at cooking might seem like a letdown compared to the outright superpowers the Master Detectives have. But it proves to be invaluable when solving the matter of finding another source of nutrition for the homunculi that doesn't involve cannibalism and mass murder.
- Chekhov's Gun: It's mentioned that his ramen at first was considered terrible by the residents until he took inspiration from the popular meat buns, which then turned into a sensation. After it's revealed that the meat buns were actually human flesh, his ramen became a better substitute for Kanai Ward's nutrients.
- Chekhov's Gunman: Double subversion. A cloaked figure following Yuma around from near the start of the game certainly seems like an extremely transparent setup for this, a major ally or antagonist, but his true identity is ultimately a loose end for how Number One snuck into the city, and they never interact in any major capacity. Then, in the epilogue, turns out his cooking skills were vital to keeping the citizens of Kanai fed without the need for human flesh. The more or less happy ending could not have come nearly as cleanly as it did without him.
- Goofy Buckteeth: He has these along with his general goofy design, perfectly fitting for someone with a name like "Kokohead" in any other kind of story.
- Nice Guy: Aside from his manners and willingness to help the residents, he's also nice enough to agree to the real Number One's deal to use his identity after quitting from the WDO, and even followed him over to Kanai Ward to check on his progress. After confirming that Number One had settled in nicely, he proceeds to open his ramen shop and start a new life.
- No Name Given: Given that Number One was borrowing his name, and is implied to have adopted it permanently at the end of the game, we have no idea what this guy calls himself now.
- Supreme Chef: His specialty is cooking. After quitting his job as a detective, he opened a ramen shop in Kanai Ward and eventually developed a recipe that the homunculi could both enjoy and provided them with the nutrients they needed to survive.
DLC Characters
Voiced by: Hana Tamegai (Japanese), Kimberley Anne Campbell (English)
A reporter wishing to interview Desuhiko about his arrest of the Nine-Tailed Cat. In actuality, she's the aforementoned phantom thief.
- Always Someone Better: To Desuhiko as far as being a hero adored by the general public goes. Not that that's a particularly high bar to clear.
- Everyone Has Standards: Even though she manages to get her hands on the real ring, she doesn't sell it, instead simply returning it to the museum.
- Just Like Robin Hood: She steals various expensive items from around Kanai Ward and sells them. That money then goes straight to charitable causes such as funding hospitals. It's the reason the people of Kanai Ward consider the thief to be a hero.
- Phantom Thief: The Nine-Tailed Cat steals without leaving a trace behind aside from their signature Calling Card. At the end of the story they leave one behind when returning the stolen ring to the museum, which Desuhiko feels spited by.
- Samus Is a Girl: The rumors of the Nine-Tailed Cat being a tall man with red hair and eyes were started by her as a means of sowing confusion. She didn't expect it to work as well as it did on the detectives.
- They Look Just Like Everyone Else!: Since no one has seen the Nine-Tailed Cat, many have wondered what the thief looks like, with the rumor being spread that the Nine-Tailed Cat is a tall man with red hair and eyes, which makes it quite a surprise when the real thief turns out to be just an ordinary-looking mildly attractive bespectacled woman, something she uses to her advantage when she proceeds to present herself as a reporter to "interview" Desuhiko.
A girl who requests the Nocturnal Detective Agency to investigate her father's death, which the Peacekeepers covered up.
- Nice Girl: She is sincerely a friendly person and has no ulterior motives beyond wanting to avenge her father's death.
Tetra's fiancé.
- Hate Sink: He pretends to be a loyal fiancé to Tetra, but in reality, it turns out he's a traitor and her father's true murderer, having killed him so he could inherit her father's property upon marrying her, with no redeeming qualities whatsoever. He proceeds to threaten to kill Chief Yakou upon being found out, and Halara promptly kicks him squarely in the face as karma to save the chief from him.
- Villain of the Week: He is the murderer in Ch. Halara: Raining Cats & Dog.
The owner of Kanai Ward's casino.
- Fixing the Game: The owner runs his casino by tricking the players into losing, and the fortune teller works with him on this goal. Halara makes a bet with him to force him to confess to said rigging using Fubuki's Time Rewind Mechanic ability, and he loses the game when he gets distracted upon seeing Desuhiko disguised as one of his plants and Halara moves one of his die to ensure his loss.
Voiced by: Riho Sugiyama (Japanese), Erica Mendez (English)
A suspicious woman in a red coat with whom Vivia is trapped in an elevator. In actuality, she is a ghost who lingers on this earth to stop people riding the elevator from committing suicide by jumping off the building's rooftop, though she has failed every time.
- Dead All Along: The episode first makes her look as if she were a living person, but once Vivia reveals that she was the first person to commit suicide, she appears as a ghost for the rest of the episode.
- Foreshadowing: In Vivia's flashback of his first encounter with her, Ryo walks right in front of a car that never even tries to stop for her, as if it never saw her in the first place. That's because she's a ghost, already having died and only being an apparition.
- Good All Along: It's implied she might be a malevolent spirit guiding the depressed into committing suicide, only for it to turn out she was actually trying to stop those tragedies from happening by, unsuccessfully, talking them out of it.