The Triforce Wielders Recurring: Goddesses and Allies, Villains and Enemies, Races Main Series: The Legend of Zelda, Zelda II: The Adventure of Link, A Link to the Past, Link's Awakening, Ocarina of Time, Majora's Mask, Oracle games, Four Swords, The Wind Waker, Four Swords Adventures, The Minish Cap, Twilight Princess, Phantom Hourglass, Spirit Tracks, Skyward Sword, A Link Between Worlds, Tri Force Heroes, Breath of the Wild & Tears of the Kingdom Spin-Offs: Philips CD-i Games, Hyrule Warriors, Cadence of Hyrule, Hyrule Warriors: Age of Calamity
These are the characters in The Legend of Zelda: A Link Between Worlds.
WARNING: All spoilers are unmarked.
Main Characters

The hero of our story. At the start, he is but a mere blacksmith's apprentice, sent on an errand to deliver a sword to a Hylian knight captain who had left it at the blacksmith's shop. However, upon tracking down the captain, he finds himself face to face with a terrible evil who has been terrorizing the land. Now swept up in the order of events, Link must save both his homeland of Hyrule and its counterpart, Lorule, from the encroaching darkness by inheriting the legacy of the previous hero of Hyrule.
This Link reappears in The Legend of Zelda: Tri Force Heroes, now resembling Toon Link thanks to an Art Shift and a change of clothes.
- All-Loving Hero: Link befriends practically everyone he meets, and even forgives Hilda by the end.
- Armor Is Useless: Link goes to save the world wearing clothes that he wore to bed the night before the game starts. He can obtain the blue and red mails later on, which make him able to withstand more damage, but they're still mails, and even without them, Link in a plain green tunic is much more resistant than your average armor-wearing soldier.
- Badass Adorable: Like his predecessor, he's cute enough to give Toon Link a run for his money. At the same time, the final boss battle has him fighting Yuga, who has absorbed the powers of Ganon, Hilda, and two pieces of the Triforce. And if you believe the theory that Gramps is actually the Link from A Link to the Past, then this Link can also be the only Link to actually defeat another Link.
- Bow and Sword in Accord: Once he rents the bow, he can pair it with his sword. In the final battle, he receives the Bow of Light from the imprisoned Zelda.
- The Champion: He is Hyrule's, as usual, which grants him the power of the Triforce of Courage. In a sense, he becomes Lorule's Champion as well because by his actions, he helps Ravio find his own courage to stand up and talk Hilda down from her plan.
- The Chosen One: A new incarnation of Link, who is destined to pick up the Master Sword and the Triforce of Courage.
- Cool Sword: He obtains the Master Sword, and he can get it reforged twice to make it stronger.
- Cursed with Awesome: Is turned into a painting through Yuga's magic. Normally this would be a case of And I Must Scream, but thanks to Ravio's bracelet, Link can not only still move while a painting, but he can shift between human and painting at will.
- Elemental Powers: His four magic rods (Fire Rod, Ice Rod, Tornado Rod, and Sand Rod).
- Empowered Badass Normal: Thanks to Ravio's bracelet and Yuga's magic, Link can turn into a painting at will.
- From Zero to Hero: From an average blacksmith's apprentice to the savior of two worlds.
- The Hero: He is The Chosen One destined to wield the Master Swors and defeat Ganon once again.
- Heroic Mime: As per usual, he doesn't speak a word.
- Identical Grandson: Looks identical to the Link of A Link to the Past.
- Infinity +1 Sword: The Master Sword can be upgraded twice, to the Golden Sword.
- Informed Attribute: The thieves say he has a "fetching" voice, but we never hear him speak outside from his usual vocalizations.
- Kid Hero: He's a young teenager at the very oldest.
- Kleptomaniac Hero: He starts the game off by taking the Captain's sword for his own.
- Legacy Character: The Link following A Link to the Past's incarnation. And if we're gonna be technical, he's this for the Link in the first two games.
- Living MacGuffin: When the Triforce was split into three pieces, the Triforce of Courage found its home in Link's spirit. Though unlike the other two parts, Link, Zelda, and even the villains do not have any knowledge the third part is within him, nor can Link utilize it. It takes the exploits of saving all the sages and everyone acknowledging his heroic destiny to finally awaken it.
- Magic Knight: Link wields four spell-casting rods in this game.
- Multi-Melee Master: Link, as usual, is packing a Hyperspace Arsenal, including his standard sword and board, a bow, a hookshot, a boomerang, a hammer, bombs, and four different elemental spellcasting rods.
- Nice Guy: As per usual, Link is a helpful and friendly boy who jumps at the call to heroism.
- Not a Morning Person: He has a lot of difficulty arriving for work at the Blacksmith's early.
- One Head Taller: With Zelda, but she is the one who is taller.
- Selfless Wish: He and Zelda wish for Lorule's Triforce to be restored, thus saving their twin world from utter destruction.
- Significant Double Casting: Link has the same voice actress as Ravio. This is not a coincidence.
- Spin Attack: He starts with a basic version of the attack. If he collects all 100 Maiamai, he receives an upgrade to that.
- Sword of Plot Advancement: Acquires the Master Sword a third of the way through the game.
- Sympathy for the Devil: He and Zelda end up taking pity on Hilda and her kingdom, resulting in them wishing to restore their Triforce.
- Unwitting Pawn: To Hilda. His advancement in reclaiming the Sage Paintings will help him retrieve the Triforce of Courage, which is what Hilda needs for her own plans.
- Voluntary Shapeshifting: He can turn into a painting throughout the game thanks to a bracelet Ravio gave him.


The enigmatic shopkeeper who suddenly decides to convert Link's house into a place to sell his wares. Link is surprisingly okay with this, and in return gets to buy many items that become very useful in his quest. He is accompanied by Sheerow, a strange birdlike creature who is his faithful companion. He is Lorule's version of Link, a former comrade of Hilda and Yuga who abandoned them for Hyrule after finding their desperate scheme too sinister to go along with.
- Adam Smith Hates Your Guts: He rents and sells items crucial to saving both worlds for fairly steep prices, despite Link letting him live at his house rent free and letting Ravio renovate of his house into a shop and the fact that he explicitly came to Hyrule to aid Link in defeating Yuga and Hilda.
- Alternate Self: He's Link's Lorulean counterpart.
- Arc Hero: While not obvious at first, he turns out to be this for A Link Between Worlds. He's Link's main companion and the one discreetly guiding him towards defeating Yuga and saving Lorule. Adding to this, the game's conflict is resolved by Ravio returning to Lorule and facing his fears.
- The Atoner: Part of the reason he provides his items (particularly the bracelet) to Link is to make up for his own inability to confront Hilda and Yuga out of fear. At the end of the game, he ends up returning to Lorule in a last-ditch attempt to get Hilda to see the error of her ways. Luckily, it works.
- Anti-Mutiny: He abandoned Hilda, yes, but he did so because he was loyal to the ideals she and their kingdom abandoned first. The idea of sacrificing another world to save their own was something he couldn't stomach.
- Cartoon Creature: Just exactly what species is his pet Sheerow, anyway?
- The Champion: He was supposed to be this role for Hilda in Lorule like Link for Zelda in Hyrule; however, when Hilda and Yuga plan to steal Hyrule's Triforce to save their dying world at Hyrule's expense, he abandons the role and defects to Hyrule to assist and pass the role to Link because he didn't have the courage to stop them himself.
- Co-Dragons: With Yuga. That is, until he realized Yuga had evil intentions for Lorule.
- Conscience Makes You Go Back: After fleeing Lorule due to his own cowardice, Ravio returns to his world at the end of the game in an attempt to save Hilda from her own arrogance and atone for his abandonment, even if he has to die with the rest of the kingdom.
- Cool Mask: For a certain definition of cool, he wears a purple rabbit cowl.
- Cowardly Lion: By his own admittance, he's not cut out for adventuring and is more comfortable standing in the sidelines while other more competent people get things done. But once the chips are down, Ravio proves his worth through his innate desire to do good and becomes a key player in saving both Lorule and Hyrule.
- Dark Is Not Evil: Just like Hilda is Zelda's opposite, he's Link's opposite. He lacks courage and makes a profit off of Link, but he's still a nice guy that strives for righteousness. He wanted to help Link fight for Hyrule, even at the expense of Lorule, and eventually helps Hilda realize that trying to condemn Hyrule for the sake of Lorule is exactly the type of thing that the sages were trying to prevent when they destroyed the Triforce.
- Defecting for Love: Implied by his diary entries. He cannot bring himself to confront his Princess. He cares about Hilda deeply and wants to save her from despairing over their world's imminent destruction, but refuses to doom another world in the process, so he leaves her.
- Defector from Decadence: Along with Yuga, he served Princess Hilda loyally, but when they instigate a plan to steal Hyrule's Triforce to save their dying world, at the expense of Hyrule's stability, he abandons them. He defects to Hyrule in the hope of assisting a hero in stopping their mad plot.
- Deuteragonist: As Link's primary supplier and Lorulean counterpart, Ravio winds up being the second most significant character in the game.
- Dramatic Unmask: At the end of the game, he rips off his hood to reveal that he's Link's doppelganger.
- Dragon with an Agenda: From his perspective, at least. He wants to serve Hilda, but does not share her horribly misguided plans.
- Dub Name Change: He's called Lavio in French and Italian.
- Empathy Pet: His bird Sheerow imitates all his emotions, reactions, gestures, and responses.
- Excellent Judge of Character: As evidenced in his dairy, Ravio suspects that Yuga is in on the plot to steal Hyrule's Triforce solely for his own purposes, rather than to restore Lorule like Princess Hilda is. He is ultimately proven correct when Yuga betrays Hilda and reveals that his true intentions were to conquer everything, all along.
- Face Death with Dignity: In the end, he convinces Hilda that if saving Lorule would mean ultimately destroying Hyrule, it would be better to face their own destruction than to walk down the very steps that their ancestors worked to prevent.
- Foil: His cowardice contrasts him with Link, whose defining trait is his courage.
- He and Yuga are both cowardly manipulators who rely on magic items, but Yuga lacks any of Ravio's redeeming qualities.
- Hero of Another Story: Subverted. He's supposed to be Lorule's destined hero, but was too scared to go against Hilda/Yuga, so he fled to Hyrule to look for a hero in his place. The guy's also got a full inventory, what does that tell you?
- Incorruptible Pure Pureness: Ravio loves Lorule, and wants to restore it to its former glory, but unlike Hilda and Yuga, will not give into the temptations of stealing Hyrule's Triforce and its powers for himself. He treasures both worlds and their wonders equally, and refuses to save one, at the cost of the other.
- It Has Been an Honor: At the ending, he warmly shakes his friend Link by the hand, telling him it was a pleasure to meet someone so courageous and noble.
- Kleptomaniac Hero: I'm sorry, were those ceramic pots in your home yours?
- Lazy Bum: To the point that, after selling all of his stuff, he says that his true calling in life is retirement.
- Loyal Animal Companion: His white bird, Sheerow, follows him around everywhere.
- Magic Knight: His items, unlike Link's from previous games, all run on a magic meter that replenishes itself indefinitely.
- Mr. Vice Guy: Greed and cowardice are two of his most defining traits, but he's still a good person who refuses to restore his home world to its former glory if it means condemning another to his world's fate.
- Mythology Gag: This isn't the first time that Link's alternate universe self resembled a bunny.
- Nice Guy: Greed and cowardice aside, Ravio is genuinely friendly, helpful, and appreciative towards Link, and even goes out of his way to talk down Hilda after everything she did.
- Non-Action Guy: Ravio is not a fighter and never once pretends to be so, instead being a shopkeeper who arms another.
- Obfuscating Stupidity: He pretends to be an aloof fool, but he is really hoping to shape and make Link into the man who could stop Yuga, but also have the compassion to understand Hilda's reasons.
- Only in It for the Money: For the most part, that is, until The Reveal.
- Only Sane Man: From Lorule at least. He's the only one who is aware that stealing Hyrule's Triforce would serve to doom Hyrule and he opposes Hilda and Yuga's plan.
- Purple Is Powerful: Inverted. He wears more purple than any other main character from Lorule, and he's the only one without any real power of his own.
- Refusal of the Call: Ravio openly admits he's a coward at heart, and lacked the courage to face down Yuga and Hilda together.
- Significant Double Casting: He and Link share the same voice actress… because they're the same person.
- Stealth Mentor: He provides Link with the bracelet necessary to go up against Yuga and provides him with more and more gear as he gains more Rupees along the adventure. Ravio is covertly preparing Link to become a hero, all without Link even realizing it. And if he gets to make a little profit, so be it.
- Suddenly Voiced: Yes, it's primarily through text, but this Link definitely does more talking than any mainline Link. Which is rather a bit of
 Fridge Brilliance since Link is normally a Heroic Mime, so of course his opposite would be a chatterbox.
 - Talking the Monster to Death: His timely return to Lorule during the finale allows him to talk Hilda out of attacking Link. He eventually convinces her to give up her plan altogether, as it would mean condemning another kingdom.
- The Thing That Would Not Leave: Hilariously, Ravio becomes more and more imposing within Link's home as the game progresses. He goes from a mere guest, to shoving all of Link's belongings up against the walls, opens up a shop (and for whatever reason seems to think renting you his items is an adequate substitute for paying you rent), steals the wood stacked outside to build a fancy sign on the roof with his face on it, and even replaces the sign outside that displays "Link's House" to "Ravio's Shop". And once you buy all of his goods, he cheers over how he's made enough money to move out and then...doesn't.
- Trickster Mentor: Ravio seems to be nothing more than a greedy cowardly merchant. In actuality, at a rental fee, he's guiding and training Link to become Hyrule's hero.
- Unflinching Walk: You know what they say? Cool guys don't look at explosions. Ravio's item description of his rental bombs have the explosive detonating and Ravio just standing there like a badass.
- Welcome Back, Traitor: He reveals his true identity to stop Hilda and Link from fighting any further. Hilda is appalled at his betrayal, and even moreso when she understands Ravio wanted Link to defeat her. After talking some sense into his princess, she realizes he has been, and always will be, her friend and confidant.
- You Are Better Than You Think You Are: After Link buys all the items, Ravio gets philosophical, revealing he used to regard himself as worthless, that his life and death didn't matter in the grand scheme of things. He was one sole tiny person in a vast vast world that would go on without him after he was long gone and forgotten. After seeing Link's unwavering determination to change the world for the better, Ravio's outlook on life improves dramatically and he sees his own self-worth. He still spends his time slacking in Link's house after this, though.
- You Can't Go Home Again: Ravio's journal implies that he is prepared for this trope; he knows that whatever sorcery he's using can get him to Hyrule, but it might not be enough to get him back. He proves himself wrong when he manages to get back to Lorule and interrupt Link and Hilda's stand off.

The Princess of Hyrule. At the outset, she is warned by Link of a great coming evil, but unfortunately, she does not act fast enough and ends up trapped behind the walls of Hyrule Castle with it. Luckily, she did think ahead...
- All-Loving Hero: She finds it in herself to forgive Hilda for kidnapping her and threatening Hyrule, even using her one wish to restore Lorule's Triforce.
- Big Good: As always, Zelda is ruler of Hyrule, the one who sends Link on his quest, and the wielder of the Triforce of Wisdom.
- Damsel in Distress: She's turned into a painting this time.
- Decomposite Character: Zelda was one of the Seven Sages in Link to the Past, and in Ocarina of Time there were six Sages the player needed to rescue before entering Ganon's Castle, implying that the era's Zelda (referred to as their leader) was still the seventh. This Zelda is, for some reason, not a Sage at all.
- Hair of Gold, Heart of Gold: She's blonde and a rather caring princess.
- Identical Grandson: Looks identical to her ancestor from A Link to the Past.
- In Love with Love: The gossiping man in the forest says that he witnessed Zelda have a nightly ritual in which she would gaze intently at a painting of a previous Link and Zelda (possibly from a recent generation) cuddling romantically. The gossip attributes this to Zelda becoming old enough to want a romantic attachment of her own. This also puts the final shot of Link and Zelda gazing at a painting of the two of them together in a different light.
- Lady and Knight: The Lady to Link's Knight.
- Living MacGuffin: Both as the bearer of the Triforce of Wisdom and as the leader of the Seven Sages.
- Nice Girl: Part of why she's so beloved by her people is because of her incredible kindness.
- "Not So Different" Remark: She notes that she and Hilda have the same motivation, but Hilda merely lost sight of her wisdom in pursuing it.
- One Head Taller: She is this with Link.
- Reasonable Authority Figure: Supportive of Link when everyone else thinks his story of Seres and the captain of the guard being turned into paintings is crazy. To be fair, her Psychic Powers let her know Link's story is accurate.
- Royalty Superpower: As usual, Zelda's heritage has blessed her with many magical powers, one of which allows her to grant Link the Bow of Light.
- Psychic Powers: Like many Zeldas, she has Telepathy and visions of the future.
- Princesses Rule: Zelda appears to be the reigning monarch of Hyrule despite her title.
- Selfless Wish: She and Link wish for Lorule's Triforce to be restored, thus saving their twin world from utter destruction.
- Sealed Good in a Can: She is sealed within a painting for half of the game.
- Sympathy for the Devil: Sympathizes with Hilda's plight, as she too understands what it's like to have an entire kingdom on her shoulders.
- Vague Age: Some sources indicate she is the same Zelda who appears in Super Smash Bros. Ultimate. It is obvious she has grown from this appearance, but in both cases her age is rather ambigious.
- The Wise Princess: Which of course imbues her with the Triforce of Wisdom's power. This is also shown in more subtle ways, as you enter her office at one point in the game; it's a study, with a desk and numerous books and everything.

The mysterious Princess of Lorule, a counterpart kingdom to Hyrule that exists in a parallel dimension, and the Lorulean counterpart to Zelda. On account of her world crumbling to bits thanks to an ancient catastrophe, she is a rather somber individual, contrasting with her more upbeat Hyrulean double. She guides Link as he treks across Lorule.
- 0% Approval Rating: She is blamed by the Loruleans for their world's current state, including her royal guard.
- Affably Evil: Despite her manipulation, Hilda's politeness towards Link is genuine and her intentions are noble.
- Alas, Poor Villain: Despite manipulating and betraying Link and attempting to destroy Hyrule, Zelda can't help but pity Hilda due to her motivations and her own betrayal by Yuga. Link agrees, and the two decide to help her out one last time.Zelda: How terribly sad for Princess Hilda… to be driven to such desperation! Her kingdom was in such a sorry state. She and I aren't as different as she thought.
- Alternate Self: She's Zelda's Lorulean counterpart.
- Anti-Villain: She plots to awaken Ganon and abduct Hyrule's seven sages in order to steal its Triforce, but her actions stem from a desire to keep her own kingdom from crumbling apart.
- Authority in Name Only: She's the princess of Lorule and the only member of the royal family shown, but since her country is literally falling apart and getting overrun by monsters, there's nothing for her to rule over.
- The Bad Guy Wins: With a twist. Her ultimate goal was to regain a Triforce to support her kingdom, only rather than forcibly taking one from Hyrule, her own is restored thanks to Link and Zelda's wish.
- Barrier Warrior: Her most used ability is to create magical barriers.
- Big Bad Duumvirate: Is the mastermind behind the plot to steal the Triforce, with Yuga working alongside her. At least, initially…
- Big Bad Wannabe: While she is the ruler of Lorule who set the plot in motion, she’s ultimately being played by Yuga, who has his own plans for the Triforce.
- Big Good: Subverted and deconstructed. Hilda sincerely believes that she's this, insisting that saving Lorule is her responsibility and that she must achieve that goal by any means necessary. From Link's perspective, however, she comes across as a desperate, yet delusional little girl willing to sacrifice another world for her own ends.
- Character Catchphrase: "So say I, Hilda of Lorule..."
- The Chessmaster: She passed herself off as Link's ally to trick him into bringing the Triforce of Courage right to her.
- Dark Is Not Evil: While her methods are impure, and she was easily tempted by envy for Hyrule's prosperity, her underlying motives were nothing but the improvement of her kingdom and the lives of her subjects.
- Death Glare: Let's just say the look she gives Link when she demands his Triforce of Courage is...rather unsettling. The red eyes don't help, and neither does the fact that she's staring directly at the screen.
- Don't You Dare Pity Me!: When Zelda tries to reason that she and Hilda are not that different from each other, Hilda rebuffs her, pointing out that she could never understand Hilda's duty when she hails from such an idyllic kingdom as Hyrule.
- Easily Forgiven: Even after everything in the game she was responsible for, Link and Zelda decide to grant her wish for a new Triforce to sustain Lorule.
- Et Tu, Brute?: She is shocked and taken completely off-guard when Yuga betrays her.
- Even Evil Has Loved Ones: Aside from her kingdom as a whole, Hilda has a special affection for Ravio. His intervention is what provokes her Heel Realization.
- Evil All Along: She spends the second half of the game acting as a mentor to Link, but towards the end she reveals that she had been manipulating Link in order to restore Lorule to its former glory by stealing Hyrule's Triforce, since Lorule's Triforce was destroyed by her ancestors, then sends Yuga to kill him. Fortunately, Ravio comes back in time to make Hilda realize what she had done.
- Evil Cannot Comprehend Good: She believes that stealing Hyrule's Triforce, letting it fall apart, is a necessary evil to save Lorule. She's shocked that Ravio was scheming to stop her plan, not understanding how anyone could choose self-destruction over destruction.
- Evil Counterpart: Hilda serves as a dark reflection of Zelda, showing what the titular princess could become if she lost sight of her wisdom.
- Evil Is Not a Toy: She never thought to question Yuga's loyalty even after Ganon's power came under his control.
- Evil Laugh: She gives a good cackle as she summons Yuga to attack Link.
- Face Death with Dignity: Ravio manages to convince her that this is better than condemning another kingdom to save their own, and so she allows Link and Zelda to return with their Triforce to Hyrule. It's subverted, though, when they wish to bring Lorule's Triforce back into existence.
- Fallen Hero: Was once Lorule's benevolent ruler, no different from Zelda herself. However, her desperation to save her own kingdom drives her to threaten another.
- Foil: To her Hyrulean counterpart. Whereas Zelda was always known for being rational-minded and wise, Hilda was too foolish to see that her actions would condemn Hyrule and became blinded by the might of the Triforce and her own envy.
- Freudian Excuse: She is a young girl who was placed in charge of a dying kingdom that she has no way of saving. Naturally, when she learns of her Alternate Self, who rules a thriving kingdom with a Triforce of its own, Hilda is overcome with envy and desperation, driving her to take Hyrule's Triforce for herself.
- Freudian Excuse Is No Excuse: On the other hand, as Ravio points out, her desperation to save her kingdom from decay does not justify dooming another to the same fate through no fault of their own.Ravio: I wish the best for our kingdom. But by ruining Hyrule...?
- Green-Eyed Monster: Judging by her monologues to Zelda while she was a painting and her Don't You Dare Pity Me! response when Zelda tried to reason with her, it's not difficult to see there's a hidden layer of jealousy fueling her actions.Hilda: Lorule was just like Hyrule. So very beautiful. So very… promising.
- Good Cannot Comprehend Evil: For a given value of "good," she found herself relying on Yuga to save Lorule, believing that even someone as cruel and selfish as him would at least be pragmatic enough to save the world he came from. She's completely blindsided by his declaring that he’ll just use the Triforce to wipe out both Hyrule and Lorule to make a world of his own.
- Heel Realization: Thanks to Ravio, she realizes that her plan to bring peace back to Lorule would cause Hyrule's downfall. Unwilling to make them go through the same ordeals she and her people did, she makes a Heel–Face Turn.
- Heel–Face Turn: After Ravio helps her see the error of her ways, Hilda returns the Triforce to Link and Zelda and helps them return to Hyrule of her own free will.
- Hidden Disdain Reveal: A subtle one during one of her monologues to Zelda's painting. She unwittingly admits her jealousy of Hyrule and frustration for having to rely on another kingdom's hero:Hilda: We had legends. We had heroes. Lorule had hope. But all that is gone. Lorule has only me now. And YOUR hero, of course…
- History Repeats: By starting a war against Hyrule to steal their Triforce, Hilda unknowingly repeats the exact events that led to her ancestors destroying their own Triforce.Ravio: Don't you realize? The reason your noble ancestors destroyed our Triforce... was to STOP such chaos!
- Horrible Judge of Character: She thought Yuga was working with her to help restore Lorule. She realizes her mistake all-too-late to rectify it.
- I Did What I Had to Do: Everything Hilda does, she does under the impression that it's what is best for her kingdom. It takes Ravio spelling out her own Moral Myopia for her to finally realize that what she's doing is wrong.
- I Have You Now, My Pretty: After completing a dungeon, you'll get treated to a scene of Hilda with the trapped Zelda fawning over her beauty and her kingdom.
- Knight Templar: She justifies her plan to steal Hyrule's Triforce and leave its kingdom to rot as being for the greater good of her people.Hilda: As the Princess of Lorule, it is my duty to save my kingdom. So I mean it with the best of intentions when I say... I must have your Triforce of Courage!
- Laughing Mad: She lets out an unhinged, maniacal laugh as she summons Yuga Ganon to battle Link.
- Leitmotif: In addition to her full theme which plays in her first appearance, a three-note flute melody plays whenever she contacts Link via telepathy.
- The Man Behind the Man: She was the one who ordered Yuga to find and kidnap Zelda and the Seven Sages, in order to resurrect Ganon, and make Link fight against him. This way, she could obtain all three pieces of Hyrule's Triforce, and use them to restore peace to Lorule.
- Manipulative Bitch: Manipulates Link into saving the Seven Sages and getting the Triforce of Courage for her own goals.
- Moral Myopia: She is so determined to save Lorule, she fails to see any problem with her own methods dooming Hyrule to oblivion until Ravio spells it out for her.
- My God, What Have I Done?: Becomes regretful when Ravio makes her realize just how far she has fallen, how she would bring Hyrule into ruin if she took the Triforce, and that what she's doing is the exact reason her Triforce was destroyed in the first place.Ravio: Look around you... This is EXACTLY what happened with our Triforce...!Hilda: Oh, no...
- Mythology Gag: Hilda resembles Zelda as she appeared in the now memetic Japanese A Link to the Past commercial
 .
. - Necessarily Evil: She sees the theft of another world's Triforce as a necessary act to save her own. It isn't until she is reminded that this sort of action is why her world destroyed their Triforce that she realizes that her actions were truly horrific.
- Not So Stoic: Begins to gradually lose her composure as her plans unravel.
- Perpetual Frowner: She rarely, if ever, smiles. And considering all she has to go through, she doesn't have much reason to.
- Princesses Rule: Like Zelda, she appears to rule over the kingdom despite being a princess.
- Redemption Earns Life: Her Heel Realization leads to Link and Zelda sympathizing with her plight and using their wish to restore Lorule's Triforce, saving both her kingdom and her life.
- Royals Who Actually Do Something: Although she was willing to doom another kingdom in the process, Hilda wanting to take Hyrule’s Triforce was to save her kingdom from destruction.
- Sanity Slippage: If the state of her chambers is any indication, she hasn't exactly taken the state of Lorule as well as her usual composure might indicate. Not to mention the evil/insane laughter she lets out when she reveals herself to be the villain.
- Shout-Out Theme Naming: When paired up with Zelda, their names become a reference to Sabrina's aunts from Sabrina the Teenage Witch.
- Staff of Authority: Which doubles as a Magic Staff.
- The Stoic: When Link first meets her, she is very calm and collected about the entire affair.
- Tears of Joy: Hilda wept with joy when Lorule's Triforce was restored.
- Tragic Villain: Hilda truly isn't an evil person, but her desperation and her misguided desire to save her kingdom at all costs lead her to commit many evil acts.
- The Unfought: Although she attempts to attack Link twice, she gets interrupted both times. First by Yuga's betrayal, then by Ravio's return.
- Unwitting Pawn: She never realized until the middle of the final boss battle that Yuga never cared for Lorule's survival and was using her as a means to claim the Triforce for himself.
- Utopia Justifies the Means: Her entire motive is to restore Lorule to its former glory… at the cost of all of Hyrule.
- Villainous Breakdown: A gradual one over the course of the Final Boss with Yuga. She starts out Laughing Mad as she summons Yuga, then begins yelling and berating him after he loses the first phase, before finally plunging into a Don't You Dare Pity Me! rant towards Zelda upon being freed.
- Villainous Princess: She is revealed to be a Well-Intentioned Extremist who sent Yuga to kidnap Zelda and the Seven Sages as part of her plan to steal the Hyrulean Triforce and save her kingdom from ruin. She does a Heel–Face Turn after Ravio reveals stealing Hyrule's Triforce would destroy Link and Zelda's world, much to Hilda's horror.
- Walking Spoiler: It's impossible to talk about her without spoiling the game's big twist.
- Well-Intentioned Extremist: A partial example: her ulterior motive was to regain a Triforce to restore her kingdom. What she didn't consider was that she'd just be subjecting another kingdom to this same fate.
- With Great Power Comes Great Insanity: As she said herself:Hilda: Princess Zelda, I have been led astray, tempted by the power of your Triforce.
- Woobie, Destroyer of Worlds: At the end of the day, the Hilda is just a little girl placed in charge of a dying kingdom, and her desperation to save it is what drives her to nearly destroy Hyrule.
Villains

A mysterious sorcerer who serves as the main antagonist of the game. With the ability to turn others into paintings, he goes about Hyrule kidnapping the Seven Sages for his own sinister purposes.
- Agent Peacock: Very effeminate and flamboyant, but incredibly dangerous nonetheless.
- Ambition Is Evil: Just like Ganon in Ocarina of Time, Yuga is an Evil Sorcerer who's secretly scheming to take over his kingdom and remake it in his own image. While he's much better at hiding his treachery, Yuga never gets the chance to really succeed at conquering anything.
- And I Must Scream: He inflicts this on his victims by turning them into paintings. The victim cannot move and they are implied to be fully aware of everything. Downplayed, as, unlike most examples, the condition is shown to be reversible.
- Arch-Enemy: To Link this time around, as Yuga personally kicks off the plot and kidnaps Link's friends, on top of going out of his way to insult the young hero in every interaction.
- Badass Boast: After absorbing Hilda and the Triforce of Wisdom.Yuga: I shall soon take my rightful place among the gods! And then the beauty of destruction shall rain down upon this world!
- Badass Bookworm: Manages to defy Hijacked by Ganon by pulling a Grand Theft Me on the King of Evil.
- Badass Cape: He wears a Cape, and is the Big Bad.
- Big Bad: The main villain whose actions drive the plot. While he was supposedly working under Princess Hilda, it becomes clear at the end of the game that he was playing her the entire time and only ever cared about usurping the Triforce for himself.
- Boring, but Practical: He has one major spell, the beam that allows him to transform people into paintings, but it's more than enough against all enemies and targets except for Link, who was given Ravio's Bracelet.
- Boss Remix: The music that plays in his first and second fights is a remix of his Leitmotif. The first half of the final battle incorporates snippets of his theme into an arrangement of the Ganon battle music from A Link To The Past, while the second half fully remixes it again.
- Bright Is Not Good: His colorful Magic Staff contrast his villainous nature.
- Casting a Shadow: After absorbing Ganon's power, the shadow pulls back to reveal the fusion's result.
- Catchphrase Insult: Calling Link a worm seems to be one of his. He keeps it all the way up to the Final Battle!Yuga: Now, I'll be taking that last piece of the Triforce from you, worm! How far you've wriggled! But at last you know your true destiny — to give me what's MINE!
- Clothing Damage: After going One-Winged Angel, his clothing is in tatters due to his muscle mass.
- Contrasting Sequel Antagonist: Unlike every other villain that acts as The Heavy or Big Bad to The Man Behind the Man or a Greater-Scope Villain, Yuga remains in control of the plot as the main antagonist. He also becomes the first villain to appear in a game with Ganon and NOT get Hijacked by Ganon.
- Creepy High-Pitched Voice: As part of his effeminate design, Yuga has a high-pitched, androgynous voice to go with it. Once he fuses with Ganon, this goes right out the window.
- Dark Is Evil: After fusing with Ganon and absorbing Hilda, his skin takes on a darker coloration. Even beforehand, Yuga is pretty spooky looking.
- Despotism Justifies the Means: He aims to remake and rule Lorule in his own image, and takes advantage of Hilda's goals to achieve this.
- Devil's Pitchfork: Turns his staff into a gold trident when he hijacks Ganon for his One-Winged Angel.
- Diegetic Soundtrack Usage: He hums part of his theme song as he transforms Seres into a painting and kidnaps her.
- Dimensional Traveler: Aside from his ability to turn himself and his foes into paintings, this is his other signature power. This is presumably why Hilda sent him to steal Hyrule's Triforce, as he's among the few Loruleans capable of even reaching Hyrule in the first place, along with Ravio.
- Dirty Coward: In his first two boss fights; both times Link beats him at the end, Yuga just runs away.
- Doppelgänger Attack: Creates two duplicates of himself during the second fight, much like Agahnim. If Link hits the wrong one, it will turn into a soldier enemy. Look for the glowing tip on his staff.
- Dragon-in-Chief: He serves as the direct threat, even though Hilda is The Man Behind the Man of the game and eventually betrays her to take the Triforce for himself and remake Lorule in his own image.
- Dragon Ascendant: Overthrows and absorbs Hilda to be the Final Boss of the game.
- Enemy Summoner: He can create paintings of Soldier mooks which then come to life.
- Evil Cannot Comprehend Good: At the climax, he wields both the Triforce of Power and Wisdom, believing victory is assured as he'll use their combined power against Link (empowered by the Triforce of Courage) and crush him. Yet he still gets his ass royally handed to him by the hero in the final battle.
- Evil Counterpart:
- He turns out to be this for Ravio. Both are less-than-loyal advisors to Hilda, but Ravio fled out of moral concern while Yuga just wanted to use her to remake the two worlds in his image. Ravio stays out of fighting but supplies Link with weapons, while Yuga relies on his painting-based spell to make up for his own weakness as a fighter. And while neither can really measure up to their Hylian counterparts, Ravio works with Link while Yuga schemes to steal Ganon's power.
- In a similar vein, he serves as one to Impa. Both are the advisers for their respective princesses, but while Impa is The Good Chancellor who yields to all of Zelda's decisions, Yuga is The Starscream who eventually throws Hilda aside for his own ambitions.
- Eviler than Thou: During the middle of the Final Boss, Hilda demands that he give her the Triforce of Power, but Yuga instead traps her in a painting and takes the Triforce of Wisdom for himself, revealing that he was using her all along and intends to use the Triforce to remake Lorule in his own image.
- Evil Is Not a Toy: Averted. He manages to successfully merge with Ganon and remains in complete control, as Ganon makes no effort to take control of Yuga. However, he does serve as this trope to Hilda, who realizes this all too late to do anything about it.
- Evil Laugh: He has a very distinct laugh. It usually comes when his motif plays.
- Evil Makes You Ugly: He's absolutely obsessed with beauty, but ironically loses it after fusing with Ganon. Surprisingly enough, however, he takes it in stride.
- Evil Redhead: He has red hair and is easily the most evil character in the game. He even pulls a reverse Hijacked by Ganon on the Trope Namer!
- Evil Sounds Deep: After merging with Ganon, his voice goes from high-pitched and effeminate to a deep, bestial roar worthy of a Demon King.
- Evil Sorcerer: He is a very capable magician, from turning people into paintings, himself included, to traversing the realms.
- Expy: His flamboyant design and personality, clown-like appearance, and especially his cruel sense of humor and desire to usurp the Big Bad and become a god all seem to be taken from Kefka Palazzo. He even has the same laugh!
- Facial Markings: Purple lines under his eyes.
- False Friend: To Hilda. He only swore loyalty to her as part of his plan to usurp her.
- Fatal Flaw: His pride. Yuga is an effective schemer and can handle himself in a fight, but his pride causes him to overlook minor details that can unravel his plans.
- Faux Affably Evil: He acts refined and regal, but is nonetheless a smug and condescending prick who can't finish a sentence without insulting someone.
- The Fighting Narcissist: It might all come from his staff, but Yuga is no pushover, and he doesn't lose a shred of his haughtiness while doing so.
- Final Boss: It seems subverted when Hilda tells him to give her the Triforce of Power, but he takes her Triforce of Wisdom and maintains the spot.
- Flunky Boss: He summons soldier enemies during his first two fights.
- Foil: Just as Hilda and Ravio are opposites to Zelda and Link, respectively, he is one to Ganodnorf/Ganon. The fact that he relies on trickery, magic, and needs Ganon to become powerful shows that unlike Ganondorf, he lacks Power. He only has one One-Hit Kill spell to Ganon's myriad magical abilities and his magic paintbrush is weaker than Ganon's trident of power. His appearance is a campy clown with a high-pitched voice in direct contrast to Ganondorf's Rated M for Manly appearance and deep baritone voice.
- Fusion Dance: Does this with Ganon, merging with him to take his power.
- Godhood Seeker: He wishes to absorb Ganon's essence (which contains the Triforce of Power) so that he can obtain "true beauty" as an all-powerful being. At the climax of the game, he double-crosses Princess Hilda so he can steal her Triforce of Wisdom and tries to steal Link's Triforce of Courage in order to "take [his] rightful place among the gods".
- Grand Theft Me: He fuses with Ganon, but he remains in complete control.
- Hate Sink: Even by the standards of the franchise's villains, this guy is a piece of work. He is an utterly depraved, smug, cowardly, self-entitled asshole who will take any opportunity to inflict pain on anyone he meets, whether or not it's necessary for his mission. He ends up backstabbing Hilda and abandons any pretense of trying to save Lorule, declaring that he will instead reshape it and Hyrule in his own image.
- Hero Killer: His ability to turn his opponents into paintings is incredibly effective, and it allows him to instantly defeat any opponent. Thanks to Ravio's bracelet, Link becomes the only one immune to this ability, and thus the only one who can stand up to Yuga...until Yuga fuses with Ganon, at which point he can now use his ''physical'' abilities to mop the floor with Link, at least until endgame.
- Hijacking Cthulhu: He performs this on Ganon, fusing with him and taking control of his power while remaining firmly in control of their shared body.
- Hijacked by Ganon: Defied: Ganon never even gets a chance to hijack Yuga — rather than the old villain taking over from the new guy, as is usual in the franchise, Yuga possesses Ganon before the latter has the chance to do anything of note, thus keeping his role as the primary antagonist of the game.
- Humans Are the Real Monsters: Apart from the magic paintbrush he carries, Yuga appears to be a fairly normal human. He also happens to be an Omnicidal Maniac seeking to steal the Triforce for himself, even using the demonic Ganon as a pawn.
- Hypocrite:
- Yuga criticizes the Priest of the Sanctuary for being quick to "stoop to petty insults" after the latter calls him a fiend for threatening his daughter, Ceres. Not only did the Priest have a damn good reason to call Yuga a fiend, but the number of times Yuga himself opens his mouth to not insult everybody else can be counted on one hand.
- I Have You Now, My Pretty: When turning Seres, Zelda, and Hilda into paintings, he goes on at some length about how lovely they are and admires the paintings he turned them into.
- In the Back: During the Final Battle, Link needs to attack the Triforce shape on Yuga's back while they're both merged with the wall. The final time requires shooting the Bow of Light backwards so that it loops all the way around the room and shoots Yuga's weak spot.
- In Their Own Image: His ultimate plan after betraying Hilda is to watch destruction raining down upon Lorule and then remake the world in his own image.
- It's All About Me: Hilda wanted the Triforce to restore her kingdom. Yuga wants the Triforce to take over everything.
- Jerkass: Taken up to eleven; the number of times he actually opens his mouth without insulting everyone around him can easily be counted on one hand.
- Jerk with a Heart of Jerk: He's supposedly loyal to Hilda who wanted to save her world despite his actions, but in reality, he wants the entire Triforce for himself with no regard to what happens to Hyrule or Lorule.
- Kick the Dog: In his introduction, Yuga literally kicks an unconscious Link out of the way for no real reason.
- Lack of Empathy: Feels no regret for all the harm he's caused and flat out tells Hilda he doesn't give a damn about Lorule, even mocking her for thinking he wasn't using her all along.
- Lean and Mean: Until he goes One-Winged Angel and fuses with Ganon, after which he becomes a Top-Heavy Guy.
- Leitmotif: He has three. Yuga, Yuga's Plan, and Yuga's Acquisition Tour.
- Let No Crisis Go to Waste: He isn't responsible for Lorule's slow and painful march to doomsday, but he ultimately uses Hilda's desire to stop it to ascend to godhood.
- Mad Artist: He sees transforming people into paintings as a form of art.
- Magic Staff: He wields one that resembles a cross between a paintbrush and a torch when glowing, and which he uses to turn people into paintings.
- Meaningful Name: Yuga (油画) is Japanese for "oil painting"; yūga (優雅) is Japanese for "elegance", perfectly reflecting his abilities and his obsession with beauty; yugamu (歪む) is Japanese for "warped", which fits his bizarre beauty-obsessed world-view and lust for power. There is another meaning to it, when you read the name with Hinduism in mind. In this case, Lorule can be seen as a universe, which is in its last epoch, the Kali Yuga, as it is headed to its imminent destruction. In addition, almost all Loruleans have lost their virtues, which is also a marking for the last era of the cycle, as humanity starts absolutely virtuous in the first era and declines through the four Yuga ages to a World Half Empty, which is destroyed at the end. After the Kali Yuga has passed, the universe will be created anew in a new yuga cycle.
- Mighty Glacier: Becomes this after merging with Ganon. His trident attacks hit like a tank and he moves as fast as one, though he makes up for this by teleporting frequently.
- Monster Clown: His white skin and jester-like outfit gives him a clownish appearance, and his laugh is like that of a court jester.
- Narcissist: To the double-digit nth degree. Yuga regularly praises himself and his beauty, loves hearing himself talk, and looks down on everything and everyone around him.
- Nice Job Fixing It, Villain: Turning Link into a painting would prove to be a fatal mistake, as it ends up activating his bracelet, giving him the ability to turn into a painting at will.
- Not-So-Harmless Villain: Downplayed. While he's never exactly "harmless," Yuga's also a complete fop who relies too much on his magic paintbrush and who seems to be the Red Herring for the real villain, ala Aghanim, Ghirahim and Zant—which seems to come true when he's revealed to be The Dragon to Hilda. Except Yuga breaks this convention; not only does he successfully betray Hilda, he also manages to possess Ganon himself and completely invert the Hijacked by Ganon trope in the series most known for it.
- Not-So-Well-Intentioned Extremist: Unlike Hilda, he's not interested in saving Lorule. He's helping her to help himself to the Triforce.
- Obviously Evil: He's an Evil Sorceror who resembles an effeminate Ganondorf. Thus, his reveal as The Starscream is less surprising as a result. In-Universe, Ravio suspected all along that he was hiding more sinister ulterior intentions—as his diary evidences—and is proven correct.
- Ominous Latin Chanting: In his second battle theme. Fitting his narcissistic nature, his own name is said twelve times during one round of the lyrics.
- One-Winged Angel: Does a Fusion Dance with Ganon to become a creature resembling a similar Pig Man. Then absorbs Hilda and takes the Triforce of Wisdom to get another form.
- Personality Powers: A Mad Artist and Evil Sorcerer with the ability to become a painting and turn others into paintings.
- Phantom-Zone Picture: He has the ability to turn people into paintings.
- Pig Man: He becomes a huge humanoid boar after he merges with Ganon.
- Pitiful Worms: Refers to those around him as worms and insects on more than one occasion, particularly Link.
- Practically Joker: Yuga is an incredibly vain Mad Artist with mostly purple clothing and clown-like makeup. He has no detailed backstory, although he is eventually revealed to be Princess Hilda's right-hand man and advisor. Although he supposedly acts to save Lorule from destruction, his actual end goal is to annihilate both it and Hyrule so he can make new worlds in his own image, just because thinks of both as "hideous".
- Progressively Prettier: Inverted. After merging with Ganon, he becomes every bit as beastly as he was. But played straight in his mind.
- Prophet Eyes: Once he fuses with Ganon, his eyes become a soulless, pupil-less white.
- Pungeon Master: As a Mad Artist, he just can't resist making artistry-based puns.Yuga: You've forced my hand. I must brush you aside!
- Recurring Boss: He's fought three times: He's the first dungeon boss, a second time in Hyrule Castle, and the third in his Fusion Dance with Ganon.
- Shock and Awe: His Signature Move is to fire lightning bolts from portraits.
- Shout-Out: His mention of the "beauty of destruction" resembles Hitomi Ishigami's view of "shining brightest at the moment of extinction".
- Sissy Villain: An extremely vain and effeminate Evil Sorcerer who is obsessed with beauty.
- Small Name, Big Ego: Let's just say he has a very high opinion of himself. He's extremely arrogant, even more so than an Evil Vizier normally is. He treats literally every other character besides Hilda as disposable and eventually even becomes Eviler than Thou when he takes over Ganon's body and says he was never loyal to her to begin with. All of this is implied to be part of his character even before he gained this position, having only joined up with her for the sake of enacting that plan.
- Smug Snake: Yuga may very well be the poster child for this trope, being a massively arrogant and condescending prick who can't open his mouth without insulting everyone and everything around him. Despite that, he proves to be more dangerous than he looks considering he's the first Zelda villain to defy Hijacked by Ganon by possessing Ganon and effectively remains the Big Bad when he betrays Princess Hilda, who was working with him.
- The Sociopath: The biggest difference between him and Hilda is that while she wants to restore Lorule to its former glory, he just wants the power to remake the world in his image and he doesn't care who he hurts as long as he achieves this goal.
- Spikes of Villainy: After taking the Triforce of Wisdom, Yuga's body becomes covered in dark thorns, and he gains a pair of Bowser-like spiked bracers to go with them.
- Squishy Wizard: Whereas Ganondorf is a mighty Magic Knight even without the Triforce of Power, Yuga relies on magic and trickery. Although he was clearly underestimating Link, he was forced to turn him into a painting after being beaten in their first fight and was forced to retreat during their second encounter or Link could have defeated him.
- The Starscream: He betrays Hilda and takes the two Triforce pieces for himself.
- Suspiciously Similar Substitute: Yuga can be considered a Suspiciously Similar Substitute to many previous Zelda villains.
- He looks like a female version (except he's not, of course) of Ganondorf's Gerudo form.
- Storywise, however, he seems to be one of Agahnim, and personality-wise, he resembles Ghirahim. However, unlike Agahnim and Ghirahim, whose positions as Big Bad were Hijacked by Ganon, Yuga keeps his even after Hilda is revealed to be The Man Behind the Man. Plus, while Agahnim and Ghirahim were fanatically devoted to their masters Ganon and Demise respectively, Yuga doesn't care about Ganon in the slightest, only seeking to revive him in order to gain his power.
- He also resembles Chancellor Cole, and again another resemblance to Ghirahim due to having albino skin and both proving to be far more dangerous and cunning than their smug and arrogant personalities would imply. And much like Chancellor Cole, he eventually betrays his Anti-Villain ally.
- Tactical Suicide Boss: He would be completely invincible in the second phase of the Final Battle if he didn't try to play Dead Man's Volley. It's especially suicidal on Yuga's part because he's just obtained the Triforce of Wisdom.
- Teleport Spam: Loves doing it in all phases of the Final Battle. After taking enough damage, he will use this to dodge all ranged attacks.
- Tennis Boss: During the Final Battle, Link must reflect his shots with his sword to stun him. In a bit of a twist from other games of "Dead Man's Volley" in the series, the last portion of the battle has him firing two shots at you in rapid succession, and both must be successfully deflected for it to count.
- The Pen Is Mightier: He wields a paintbrush-like magical staff.
- Turns Red: In his first two boss fights, he'll throw a tantrum after taking enough damage and begin to warp faster and use stronger attacks.
- Underestimating Badassery: Constantly belittles Link and never sees him as a genuine threat, which backfires spectacularly when he beats him for good.
- Voluntary Shapeshifting: Like Link, he can turn himself into a painting and back at will.
- Voices Are Not Mental: After taking over Ganon's body, Yuga retains the deep voice of the former even as he continues ranting about "true beauty" and his plans for Lorule.
- Wake-Up Call Boss: Yuga has quite a few different attacks for a first boss, and in this first fight he is impossible to hit unless you use the Bow and Arrow; simply chasing him around with your sword will get you killed by his onslaught very quickly. On the other hand, only using the Bow makes the fight a joke. For people whose first Zelda game was Skyward Sword, this ends up being a mean curve ball; Yuga follows the series norm of "use dungeon item to defeat boss", but Skyward Sword's Ghirahim does the opposite and literally slaps you across the face for using anything but the sword on him. People mindlessly trying to stab Yuga thinking he'd respond like the previous game's Big Bad (a forgivable mistake, given their similarities) were met with a nasty surprise.
- Warm-Up Boss: He's fought as the first boss of the game, and specifically serves as something of a forced tutorial on using the painting form.
- When All You Have Is a Hammer…: Until he fuses with Ganon, Yuga's entire "fighting style" boils down to using his paintbrush staff to summon up hazards or seal people away.
- Would Hurt a Child: He kidnaps Gulley, one of the sages who is still a young child.

The main villain of Ocarina of Time, A Link to the Past and the "Oracle" games. Deceased, but his presence is known in this game, being the first time since the original two games that he is introduced to the player from the start. Hilda wants to revive him to further her goal.
- Ancient Evil: Terrorized Hyrule centuries ago, and is remembered as the vile Demon King who stole the Triforce.
- Demoted to Extra: Ganon himself, at least. The instant he is revived, Yuga merges with him and remains in control. Ganon himself doesn't get to do anything.
- Devil's Pitchfork: He still has his skull-decorated trident from A Link to the Past, which has now been recolored with a golden shine. Yuga uses it once he takes control of Ganon.
- The Dreaded: Being Hyrule's resident Big Bad who has brought the kingdom to ruin twice over, Ganon is naturally feared by all who know of him.
- Full-Boar Action: As tradition, he looks like a gigantic boar.
- Fusion Dance: Yuga fuses with him immediately upon reviving him, resulting in a being visually resembling Ganon with Yuga's hair but with Yuga firmly in control.
- Generic Doomsday Villain: Thanks to both a botched resurrection in a previous game and him being controlled by Yuga in this one, Ganon is given little character development outside of being Hyrule's greatest threat.
- Glowing Eyes of Doom: His eyes are very much this.
- Greater-Scope Villain: Though Hilda seeks to revive him, she only does so for his Triforce of Power, and nothing else. She and Yuga remain the main villains of the game. Ganon doesn't even get any speaking lines.
- Hijacked by Ganon: The Trope Namer himself. However, in a surprising twist, this is inverted, as Ganon himself gets a taste of his own medicine when Yuga takes over his body to use his power against Link.
- Living MacGuffin: Averted since he's deceased. Nevertheless, the Triforce of Power was sealed away with him upon his defeat and thus resurrecting him is vital for the villains' plan.
- One-Winged Angel: After Yuga fuses with him, then after Yuga Ganon absorbs Hilda and the Triforce of Wisdom. Link's dream in the prologue implies that, if the Triforce of Courage were taken, Ganon would have taken an even more powerful form.
- Pig Man: He's still in the form of a giant blue Moblin, rather than his human form, the Gerudo King Ganondorf. This is due to his use of the Triforce's power.
- Spikes of Villainy: As shown in the image here. But he loses them when fused with Yuga.
- Villain Decay: Ganon has lost his former intelligence after he Came Back Wrong in the Oracle games, resulting in him being nothing but a mindless pawn who can be easily hijacked by Yuga.
- We Hardly Knew Ye: He gets only a few minutes of screentime before Yuga merges with him. He doesn't talk and appears to have no control over the resulting fusion.
Margomill

The boss of the House of Gales, Margomill is one of the two bosses fought in Hyrule and guards the Pendant of Wisdom.
- Blow You Away: Literally. Margomill will shoot jets of air from the holes around its body in an attempt to blow Link off its platform.
- Go for the Eye: It will only take damage when Link attacks its giant eyeball.
- Platform Battle: Margomill is fought on a platform over a bottomless pit, and will attempt to push Link off the edge and into the void.
Moldorm

The boss of the Tower of Hera, Moldorm looks and fights the same as its A Link to the Past incarnation. The other boss fought in Hyrule, it guards the Pendant of Power.
- Chasing Your Tail: Moldorm's weak point is its tail. Hit it anywhere else, and Link will be sent flying backwards.
- King Mook: To the smaller Moldorms also found in the Tower.
- Palette Swap: While the main one is yellow, the one in Lorule Castle is purple.
- Platform Battle: Link has to fight it on a platform with multiple holes, and if Moldorm hits him he can end up being knocked off to the level below.
- Recurring Boss: It's fought once more as a Mini-Boss in Lorule Castle.
- Segmented Serpent: Like its inspiration in A Link to the Past, it resembles a set of four uncannily hamburger-like segments ending in a bright red, vulnerable globe.
Arrghus

A cyclopean jellyfish fought in the Swamp Palace. Arrghus is largely identical to its A Link to the Past predecessor, and guards Oren's painting.
- Flunky Boss: It protects itself with small jellyfish called Arrgi.
- Oculothorax: It's essentially a giant fleshy eyeball with tentacles on its underside.
- Palette Swap: The Arrghus fought in the Swamp Palace is orange with yellow tentacles, while the one in Lorule Castle is yellow with blue tentacles.
- Recurring Boss: It's fought again as a miniboss in Lorule Castle later in the game.
- Turns Red: Once all of its jellyfish are destroyed, Arrghus' eye turns green and it becomes much more aggressive.
Dharkstare

A one-eyed mass of tentacles found at the bottom of the Ice Ruins, where it guards Rosso's painting. Dharkstare is the game's counterpart to Kholdstare from A Link to the Past.
- Elemental Barrier: It is coated in ice that Link must chip away with the Fire Rod. Unlike Kholdstare, Dharkstare is still mobile with the armor, and it even regenerates.
- "Get Back Here!" Boss: It tends to move out of range of its weakness the Fire Rod, forcing Link to chase it down in order to melt its icy armor, and once you do melt it Dharkstare bounces away from you until it regenerates his armor; chasing it in this phase is more troublesome because of the arena's slippery floor.
- An Ice Person: Dharkstare protects itself with a shield of ice and attempts to freeze Link solid during their battle.
- Platform Battle: It's fought in a o-shaped arena.
- Turns Red: After enough damage is dealt to it, its eye turns red, its tentacles go from black to purple, and it begins shooting out six icy orbs per volley instead of three.
Gemesaur King

A saurian beast encased in crystalline armor, the Gemesaur King is the boss of the Dark Palace and guards Gulley's painting. It serves as a counterpart to the Helmasaur King.
- Attack Its Weak Point: Link has to aim for the red organ on its forehead, which it protects with a mask that must first be broken off.
- Beware My Stinger Tail: It swings its tail like a whip in its battle.
- Broken Armor Boss Battle: Masses of rock and crystals cover every part of its body, and all of its armor needs to be blasted off with bombs before Link can attack the weak spot in the monster's forehead and actually cause it damage.
- Carbuncle Creature: It's giant reptilian beast whose helmet hides a red, gem-like organ embedded in its forehead. This is the creature's only weak spot, and Link must break off the helmet in order to expose it and be able to damage it.
- Dub Name Change: It's called the Maskenkönig — "Mask King" — in German.
- Gemstone Assault: It can attack Link by firing crystals from its mask at him, and later from its tail when its mask is destroyed.
- Giant Animal Worship: Some Loruleans have forsaken their homes and duties to Hilda to follow it, and revere it as a god.
- Glowing Eyes: Its eyes glow faintly in the dark, which is the only way to track it when it plunges its room into darkness.
- King Mook: It serves as a unique, giant-sized boss variant to the smaller Helmasaurs found in the Dark Palace.
- Money Spider: It's a giant helmasaur with gems buried in its armor. As such, every time you hurt it, you get rupees. Lots of them.
- Step into the Blinding Fight: After its forehead gem is hit several times, the Gemesaur King roars and snuffs out every torch in the room, plunging the arena into darkness. Link must then relight the torches while dodging the beast's attacks, temporarily stunning it before it snuffs out the light again.
Grinexx

A fiery tortoise fought in Turtle Rock, Grinexx guards Impa's painting. It's a Lorulean counterpart to A Link to the Past's Trinexx, although it only has one head.
- Attack Its Weak Point: When it's on the platform, Grinexx is only vulnerable in the head.
- Elemental Rock-Paper-Scissors: Link must use the ice rod to stop Grinexx's lava attack and damage it.
- Magma Man: Grinexx attacks Link by venting jets of lava from the crater in its shell.
- Platform Battle: Link fights Grinexx above a large Lava Pit, while the turtle moves around underneath him and attacks with its eruptions. In the battle's second phase, Grinexx jumps onto the platform to fight Link directly and will often attempt to spin into Link and knock him into the molten rock below.
- Turns Red: After a certain amount of damage is dealt, it jumps onto the platform with Link and starts attacking him more directly.
Knucklemaster

A giant armored hand with an eyeball in its palm, Knucklemaster is the boss of the Skull Woods and guards Seres' painting.
- Deadly Dodging: Link has to stun him by having Knucklemaster ram into him just before Link merges with a wall.
- Dub Name Change: It's called Panzerhand — "Armor Hand" — in German.
- Eyes Do Not Belong There: Knucklemaster has a single giant eye in the middle of its palm.
- King Mook: It's an armored, supersized version of the Wallmasters found in its dungeon.
- Go for the Eye: It will only take damage when Link attacks its giant eyeball.
- Turns Red: After a certain amount of damage is dealt to it, its flesh turns purple, and it ditches its punching routine and starts violently slamming the ground to crush link.
Stalblind

The skeletal leader of Lorule's thieves, Stalblind is the boss of the Thieves' Hideout and guards the Thief Girl, the only person who knows where Osfala's painting is hiddem. It's essentially a skeletal version of Blind the Thief, its counterpart A Link to the Past.
- Dem Bones: It's a giant floating skeleton, carrying the Stal- prefix such creatures have in the series.
- Floating Limbs: The bones of its arms are disconnected from both its body and each other, instead floating in the positions a normal arm would be in.
- Luckily, My Shield Will Protect Me: It carries a giant shield, which it uses to block Link's attacks. This can prove its undoing, however, as the shield is broad enough for Link to turn into a painting upon it and emerge behind it when Stalbind tries to figure out where he's gone.
- Platform Battle: It's fought on a platform over a bottomless pit, and its attacks may send Link off the edge and into the void.
- Spin Attack: In its battle's second phase, Stalblind may perform a variant of Link's Great Spin attack where it rotates wildly around the stage while slashing out with its sword.
- Technicolor Fire: He can breath black flames.
- Turns Red: Twice. Stalblind begins the battle in a very defensive mode, moving fairly slowly and protecting itself with its shield. After enough damage is dealt, it will throw its shield aside and become more aggressive. If it sustains enough damage in this phase as well, it will send its head flying at Link while its body relentlessly attacks him.
Zaganaga

A monstrous desert plant, Zaganaga is fought in Lorule despite its dungeon being in Hyrule — the pit of quicksand it lives in is only accessible through a paint fissure in Hyrule's Desert Palace, itself only accessible by passing through Lorule's Misery Mire. Either way, it gives up Irene's painting when defeated.
- Boss-Arena Idiocy: Even though it is a Get Backhere Boss, Zaganaga still tends to spawn on a platform that just one cast of the Sand Rod would be enough to reach.
- Breath Weapon: In its Turns Red phase, it blows a powerful gust of sand.
- Flunky Boss: Throughout its battle, Zaganaga attacks Link by spawning large numbers of smaller Peahats to send flying at him.
- Foul Flower: A large, rather pretty cactus flower fought as a dangerous boss.
- "Get Back Here!" Boss: Zaganaga is constantly moving around, popping in and out of its stage's platforms and never staying in one spot for long before heading off to another. Most of its battle will be spent chasing it around the arena in a giant game of whack-a-mole.
- Platform Battle: Zaganaga is different from the other bosses, in that its battle takes place in a giant field of quicksand dotted with stone platforms. Link must balance on these while using the Sand Rod to create raised paths between them to reach the creature, with little wiggle room in either direction before he'll fall off and into the quicksand. All the while, Zaganaga will spawn hordes of flying Peahats to run into Link and knock him around.
- Turns Red: After taking enough damage, Zaganaga will flare its petals to reveal its eyes, start moving and spawning Peahats much more quickly, and will begin shooting streams of sand at Link.

A pair of fiery salamander-like beasts fought as the miniboss of the House of Gales.
- Dual Boss: The Heedles are fought as a pair, requiring Link to keep track of two speedy, fire-trailing foes at the same time.
- Fiery Salamander: They resemble bulky, salamander- or lizard-like beasts with fire-hot hides.
- Wreathed in Flames: The Heedles' hides are normally red-hot. In order to attack them, Link needs to temporarily extinguish their flames with Ice or Tornado rods.

Paintings of armored guards brought to life by Yuga's magic.
- Artifact Mook: They're once again enemy units in the game in spite of the Hyrulean forces not being Brainwashed and Crazy as in A Link To The Past. This is Handwave by their being conjurations made by Yuga to keep the kingdom distracted, but it's not explained why he chose to make enemies based off the old Hylian guard uniform.
- Art Initiates Life: They're paintings brought to life.
- Elite Mook:
- Some soldier variants have stronger armor and weapons, with the strongest wielding Epic Flails and serving as minibosses rather than rank-and-file enemies.
- The Lorule Soldiers are much stronger than the regular kind, having more health and dealing more damage.
- Epic Flail: Some soldiers fought as minibosses wield long flails that they can send spinning towards almost every corner of the rooms they're fought in.
- Faceless Goons: Unlike friendly soldiers, who have their faces exposed, theirs are always covered by their helmets.
- Horns of Villainy: Stronger Soldier variants typically wear horned helmets.
- Incendiary Exponent: Some ball-and-chain soldiers wield maces with flaming heads.
- Law of Chromatic Superiority: It's easy to tell how strong a given Soldier is by the color of its armor — green-armored Soldiers are the weakest, blue ones are stronger, red ones stronger still and gold ones strongest of all.
- Luckily, My Shield Will Protect Me: Some soldiers carry large shields. While they cannot attack while their shields are raised up, this will also deflect any attacks from Link, requiring him to either wait for them to go back on the offensive or to sneak around them and attack them from the back.
- Sorting Algorithm of Evil: Soldiers appear in a strict ascending order of threat presented. The first to be seen are the weakest, green-armored varieties wielding simple weapons; stronger, blue- and red- armored types and ones wielding more exotic weapons like bombs only show up by the mid-game, and Link only encounters the strongest, most dangerous types very late in his journey.
- Underground Monkey: Soldiers come in several varieties distinguished by using different weapons or by being themed around different environments.
- Basic soldiers, beyond the basic, dagger-wielding variety, can be armed with swords and shields (which increase their reach and allow them to hold Link at a distance), spears or bows (which turn them into ranged attackers), bombs, and balls-and-chains.
- Lorule Castle is home to a stronger variety of Soldiers distinguished by dark, menacing armor fitting Lorule's darker appearance.
The Seven Sages
The descendants of the Seven Wise Men who originally sealed Ganon prior to the events of A Link to the Past. Like their ancestors, their magical power is deeply linked to the Triforce, and they play a key role in Yuga's plot to revive Ganon.
- All Your Powers Combined: The Sages' chief responsibility in this timeline is protecting the Triforce of Courage. They can only summon it by combining their magical powers willingly, and it takes all seven of them together to do it—if even one is missing, the piece can't be taken from its hiding place.
- Alternate Self: Conspicuously averted — none of them have a counterpart in Lorule, likely because Lorule no longer has a Triforce for the Sages to protect.
- Barrier Maiden: Seven inheritors of magical power who are necessary to awaken the Triforce of Courage and seal Ganon — and who, if captured, can be used to bring him back.
- Call-Back: They all seem to take after the sages of Ocarina of Time, right down to residing in what appears to be the Temple of Light after being rescued.
- Chekhov's Gunman: You get to meet all of the Sages at least once before they get kidnapped, and you might not always come to realize that they are Sages (besides Impa and Osfala, who are specifically mentioned to be Sages) until you see them together as paintings.
- Colour-Coded for Your Convenience: Each Sage has a dominant color pattern in their clothing/on their body that later matches up to the painting which imprisons them: Rosso is red, Queen Oren is orange, Osfala is yellow, Gulley is green, Seres is cyan, Irene is blue, and Impa is violet.
- Colorful Theme Naming: All of their names reference their assigned colors (with the exception of Impa, whose status as a Legacy Character means that her name predates the theme).
- Continuity Snarl: Building on the one already surrounding the previous incarnations of the Seven Sages. The Sages from A Link to the Past are portrayed as elderly human men and their descendants as young human girls, yet when Ocarina of Time showed the Sages in what seemed at the time to be the original Imprisoning War against Ganon, only Rauru is elderly, three are unambiguously nonhuman, and only two are men. With the revelation of the "Hero Defeated" timeline, fans assumed that these were separate Sages from the ones in the backstory for A Link to the Past...except this game has one nonhuman Sage and one maybe human, maybe Goron Sage. This is further complicated by the fact that there has been no explicit explanation of how (or if) interbreeding between the various species of Hyrule works.
- The character designer and script writer for Ocarina of Time said in an interview that the Sages of the Imprisoning War are intended to be the same Sages during the events of Ocarina of Time. The wording in Hyrule Historia also seems to imply they are one in the same. Breeding between species would have to be the only explanation for the Hylian appearance of all the Maidens in A Link to the Past and of most Sages here, but it's still odd that there's one group of descendants who are all dominantly Hylian and another group chronologically following them that has dominantly Zoran and possibly Goron blood in two of the lines.
- Damsel in Distress / Distressed Dude: They're all turned into paintings, courtesy of Yuga.
- Dark Is Not Evil: The traveling witch is also a sage.
- Foreshadowing: When you meet each Sage, their text boxes are the same color as the respective paintings that imprison them (and in turn different from the text boxes of other NPCs), suggesting there's something unique about them.
- Legacy of the Chosen: They're the latest incarnations of the Seven Sages, who first began appearing in A Link to the Past.
- Nominal Importance: They get names, but aside from Sahasrahla and Zelda, none of their relatives or other people they are affiliated with get names.
- Phantom-Zone Picture: They all get trapped in one of these by Yuga.
- Telepathy: They often send Link psychic messages.

Zelda's elderly handmaiden and adviser. She is most likely descended from Impa, the Sage of Shadow, from Ocarina of Time.
- Ambiguously Brown: Her features (slightly darker skin than the other characters, purple hair, and red eyes) imply a Sheikah ancestry, which would make sense since she's a descendant of the Impa of Ocarina of Time.
- Foil: To Yuga. Both are the advisers for their respective princesses, but while Impa is The Good Chancellor who yields to all of Zelda's decisions, Yuga is The Starscream who eventually throws Hilda aside for his own ambitions.
- The Good Chancellor: To Zelda. She brings Link's claims of people becoming paintings before her despite his lack of evidence, and only mildly objects when Zelda gives Link the "charm".
- Reasonable Authority Figure: She is willing to listen to Link's claims when the soldiers were laughing at the prospect.

A gentle priestess who works with her father at the Sanctuary, she is the very first Sage to be kidnapped and turned into a painting by Yuga. Her connection to the Sages of Ocarina of Time is the most complicated, but it's most likely that she's descended from the Zelda of that age (see below).
- Continuity Snarl: Seres gets hit with this the hardest. Ocarina of Time featured six Sages, each of whom had a particular color (yellow, green, red, blue, purple, and orange) and race (Hylian, Kokiri, Goron, Zora, Sheikah, and Gerudo); therefore, it's not as clear which Sage she's supposed to be descended from. The best guess is that she's connected to the Zelda of that era, who was the leader of the Sages and had a connection to the color light blue (in the Time Blocks and Ocarina of Time itself), just as Seres does.
- Dub Name Change: She's called Cérèsse in Canadian French, Célès in European French, and Zeres in Spanish.
- Flat Character: Unfortunately, because Seres is kidnapped so early in the game, she doesn't get the same level of characterization that her fellow Sages do.
- Implied Love Interest: She and the Captain are implied to have some level of interest in each other, but we never get to see enough of them to really know one way or the other.
- Suspiciously Similar Substitute: Out of all the Sages who appear in this game, she most closely resembles the Maidens from A Link to the Past. This can also double as a sort of Red Herring, because people who have played that game might be led to believe that the rest of the Sages will also look something like her.

The son of the blacksmith whom Link is apprenticed under. He appears to be descended from Saria, the Sage of Forest, from Ocarina of Time.
- Angst? What Angst?: In-universe, the little fellow invokes this when you rescue him from the Palace of Darkness: when you first encounter Gulley in the Chamber of Sages, he acts frightened, stammering and asking where his parents are...then he laughs and tells you that he's completely fine.
- Cheerful Child: To the point where he is even able to make his father's threats toward Link sound somewhat less intimidating.
- Composite Character: Of both the Flute Boy (dresses in green, hangs out in the secluded grove, gets taken into the other world) and Colin (son of a swordsmith who is Link's boss/mentor, serves as a surrogate younger brother for Link). He also bears a strong resemblance to the Kokiri from Ocarina of Time, due to his green outfit, being a Friend to All Living Things, and being a longtime friend of Link.
- Dub Name Change: He's called Gree in Japanese, Goulli in Canadian French, Guly in European French, Gri in German, Grì in Italian, and Guri in Korean and Spanish.
- Friend to All Living Things: You find him in the secluded grove surrounded by animals, much like the Flute Boy in A Link to the Past. When the animals run from Link upon his approaching the stump, Gulley expresses wonder at why they do that with everyone else but him.
- Malaproper: Due to his youth, he isn't quite sure what a sage is and he refers to himself and the others as a "Sevensage".

A haughty scholar who serves as Sahasrahla's apprentice. He's most likely descended from Rauru, the Sage of Light, from Ocarina of Time.
- Achievements in Ignorance: For whatever reason he decided to tackle the Eastern Palace with the Sand Rod of all items. He somehow managed to get to the end of it anyway.
- Break the Haughty: When first encountered, he's incredibly egotistical and self-confident. Then Yuga kidnaps him and transforms him into a painting. Once he's freed, he solemnly accepts that he was never meant to be the hero.
- Chekhov's Gun: His Sand Rod, which he rented from Ravio. He returns it after he is saved by Link, allowing the player to rent or buy it in turn.
- Dub Name Change: He's called Aṣfar in the original Japanese, Asphar in European French, and Asfal in Italian.
- Foil: Like Ravio, he is one to Link but for different reasons. Link was the humble apprentice of a blacksmith while Osfala was the haughty apprentice to a sage. Link's first item from Ravio was one of actual practical use, a bow, while Osfala took the useless Sand Rod because of overconfidence. Link is given the role of hero and receives Ship Tease with the princess while Osfala tries to be the hero and, judging by the photos on his desk, has a crush on her. Link embraces the role given to him while Osfala reluctantly accepts he was never meant to be anything more than a sage.
- Graceful Loser: Ultimately becomes this with Link, admitting that his duty is to help the boy as a Sage rather than rescue Hyrule himself.
- Heroic Wannabe: He is intent on becoming Princess Zelda's personal hero too.
- Hopeless Suitor: The photos on his desk reveal he has a crush on Princess Zelda. Since the two are never seen together, it's possible she doesn't know and likely doesn't reciprocate this.
- Jerk with a Heart of Gold: Comes to realize that helping to save the kingdom any way he can is more important than being The Hero and pursuing his unrequited crush on Zelda, and thus accepts his role as a Sage.
- Magic Wand: Tried to use the power of the Sand Rod to become the hero and stop Yuga on his own. It eventually becomes part of his painting.
- Meaningful Name: In Japanese, he's called called Aṣfar, which means "yellow" in Arabic.
- Missed the Call: He firmly believes that he is meant to save Zelda. How wrong he is.
- Vague Age: His white hair causes some confusion as to his age in-universe.
- Wrong Genre Savvy: He initially believes he's the hero of the story. He's not. Exemplified also when he brings the Sand Rod to the Eastern Palace which he believes would aid him. Not only is the Sand Rod the wrong tool to solve the various puzzles in the Eastern Palace, but it's also a tool that can only be used in desert sections and nowhere else.

A young witch who befriends Link after hearing a fortune saying that she must "take care of green" or else she will face grave danger, and serves as his mode of fast transportation around Hyrule and Lorule. She is probably descended from Nabooru, the Sage of Spirit, from Ocarina of Time (although Nabooru's color was orange).
- Anti Poop-Socking: Play for long enough and she'll comment that you look tired, suggesting you should take a break.
- Cannot Spit It Out: Downplayed. While the game doesn't imply a romantic interest from her otherwise, she joins the list of women throughout the series that interrupt themselves in embarrassment before saying something to Link.
- Cute Witch: This is more apparent with the game's chibi artstyle◊, while the official art downplays this by showing her sarcastic demeanor.
- Deadpan Snarker: Almost always has a sarcastic remark up her sleeve.Irene: What…? Want more thanks? Tell you what, Link. Save all seven of us Sages, then I'll write a big, long thank-you letter.
- Defrosting Ice Queen: She initially only helps Link to avoid the danger that the fortune says will happen to her if she doesn't, and is openly resentful toward Link for it. But when you talk to her grandmother after she gets kidnapped, you find that she had already considered Link a friend. When you rescue her, she is reluctantly grateful, and she also expresses concern about Zelda and her grandmother. She continues to be somewhat abrasive throughout the rest of the game, but makes it clear she's happy to be in contact with you.
- Dub Name Change: She's called Airene in Japanese and Korean, Arinne in Canadian French, Aëline in European French, and Airín in Spanish.
- Flying Broomstick: Her broom is used by Link to fast travel.
- Foreshadowing: Before you enter Hyrule Castle to fight Yuga for the second time, ringing the bell will result in her broom flying down with no one on it, suggesting she's among the kidnapped Sages.
- Generation Xerox: It's implied her grandmother is Maple from A Link to the Past, having taken up her grandmother Syrup's role as potion saleswoman, with Irene having taken up Maple's role as errand girl.
- I Just Want to Have Friends: She doesn't outright say it herself, but it's implied by her grandmother, who states that she was delighted to have finally found a friend in Link.
- Inept Mage: Probably not all the time, but during the credits, she's seen botching a potion.
- Jerk with a Heart of Gold: Despite her aggressive and snarky attitude, Irene is a genuinely good person who quickly comes to view Link as a friend, and jumps at a chance to help him whenever possible.
- Overly Narrow Superlative: Exactly how many other witches are there in her generation, anyway? The only other witch to appear in the game is her grandmother.
- Present Absence: After she gets kidnapped by Yuga, her broom still comes by to transport you across the map if you ring the bell. The game even highlights her absence by giving the broom Visible Silence whenever you call it. After you save her, her broom still comes alone since she's at the Chamber of Sages by this point, but she starts talking to you again through telepathy.
- Small Name, Big Ego: She claims to be the "best witch of my generation" with nothing to show for it. Granted, she appears to be the only witch of her generation.
- Suspiciously Similar Substitute: Of Maple, another young witch with a similar outfit.
- Tsundere: She can go from complaining about and chewing out Link to thanking him and worrying about his safety, sometimes in the same sentence.
- Warp Whistle: Her main purpose.

A rough-spoken miner living right at the foot of Death Mountain and who supplies Link with the Power Glove. He is most likely the descendant (both in title and bloodline) of Darunia, the Sage of Fire, from Ocarina of Time.
- Ambiguously Human: He looks awfully human, yet he also looks awfully Goron. Not at all helped that the symbol on his belt the same one Gorons have on their bodies, and that his predecessor — and thus possibly his ancestor — was an actual Goron.
- Chekhov's Gun: Rosso's Mine plays an important part, as the location to a Lorule portal leading to the Ice Palace.
- Gonk: He seems to be heavily inspired by Gorons, and as such possesses a broad face, flat nose and very large ears that make him cartoonishly homely.
- It Seemed Trivial: He always knew he was a descendant of one of the Sages, but just never thought it was important.
- Nice Guy: He's friendly to Link right off the bat, giving him the Power Glove for free when he learns Link can't lift stones.
- Stout Strength: He's a big, heavily-built buy who loves nothing more than lifting heavy rocks.

The reigning Queen of the River Zora who gives Link a pair of flippers after helping her retrieve her Smooth Stone. She is most likely descended from Ruto, the Sage of Water, from Ocarina of Time.
- Beautiful All Along: Although it's not made clear which form is her true form.
- Big Eater: Seems to be one side effect of her Smooth Stone being stolen; she is seen gulping a fish down whole and immediately bulking up even more as a result.
- Body Horror: She got enlarged so badly that she could barely fit ito her pool
- Clothing Appendage: She has skirt-like fins protruding from her hips and covering her legs, much like Queen Rutela from Twilight Princess.
- Dub Name Change: She's called Aurène in Canadian French, Orlène in European French, and Oreen in German.
- Ear Fins: Exaggerated large fins on either side of her head, which the sea zora do not have.
- Fish People: As a River Zora, her fishlike attributes are more prominent than they are with the post-Ocarina of Time Sea Zoras, though she's not quite as fishlike as her subjects.
- Gonk: Without the smooth stone, she bloats up like a vaguely humanoid balloon.
- Meaningful Name: "Oren" is the Welsh word for "orange", the color motif of her clothes and her painting frame.
- My Species Doth Protest Too Much: According to her, River Zoras are technically allies of the Hylians, but are usually very territorial and will attack anyone inside said territory despite her giving them orders not to attack Hylians. This also explains the River Zoras' hostility compared to the Sea Zoras.
- Non-Mammal Mammaries: Granted that Zoras, being a fantasy species, don't necessarily have to conform to real life biology, it's still odd to see breasts on a fish woman, especially as River Zoras have always been the more fishlike of the two kinds.
- Pokémon Speak: Subtle example, but while she is Speaking Simlish, when you first meet her in her bloated form, she can be heard saying "Zola! Zola!"
- Power Limiter: The Smooth Stone serves as this for her. The other Zoras say that her "bloating" is a result of the excessive power build-up and Super-Power Meltdown resulting from the Stone being stolen.
- Seashell Bra: She uses a pair of scallop shells to cover her Non-Mammal Mammaries.
- Temporary Bulk Change: After her Smooth Stone is stolen, she turns into a massive Brawn Hilda, to the point that she is unable to get out of her fountain throne.
- Token Heroic Orc: The only one of the sages whom we know for sure isn't Hylian (Rosso's species being ambiguous). Also of note is that Zoras are usually enemies in the 2D games (and this one is no exception).
Other NPCs
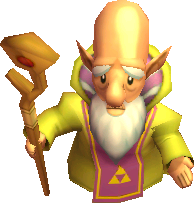
The elder of Kakariko Village. His ancestor was the original Sahasrahla who aided the Hero in A Link to the Past.
- Alternate Self: His Lorulean counterpart is the head of a strange cult that wear monster masks to dissuade people from thievery. Mumbo jumbo, mumbo jumbo...
- The Bus Came Back: Sahasrahla comes back from one Long Bus Trip, his last appearance being in A Link to the Past.
- Identical Grandson: He is the spitting image of the Sahasrahla from A Link to the Past.
- Legacy Character: The descendant of the original Sahasrahla from A Link to the Past.
- Mission Control: For the Hyrule portion of the game.
- Senior Sleep-Cycle: You first meet him having dozed off.

The local gravedigger.
- Alternate Self: "Dampé(?)" of Lorule.
- The Bus Came Back: He hasn't appeared in a Zelda game since The Minish Cap, the last 2D Zelda game prior to A Link Between Worlds.
- Gonk: He's an Igor-like figure with a sloping and pointed forehead, protruding brows, and flat teeth that protrude from his closed mouth despite most of them being missing.
- Legacy Character: He's a recurring character in the series, having appeared in multiple games since his debut in Ocarina of Time.
- Shipper on Deck: He seems to support the idea of the Captain and Seres getting together.
- Third-Person Person: He constantly refers to himself in third person, unlike other iterations of the character.
- Why Did It Have to Be Snakes?: If you disrupt any of the graves around him and a spirit pops out, he'll start violently trembling until you kill it. Doubles as a Funny Background Event.

A strange octopus-snail creature who resides in a cave near Lake Hylia. Her babies have gone missing, all 100 of them have been scattered across Hyrule and Lorule. For every ten Link finds, she will upgrade an item to its "Nice" version, but only if Link owns it as opposed to renting it.
- But Now I Must Go: After returning all of her babies and talking to Ravio, she'll announce you that she and her babies will leave for another dimension, and thank you again for your efforts and kindness. You don't see her leaving, but you do see light and hear a warping sound when you leave.
- Dub Name Change: She's called Meilles in Canadian French, Dalpi in Korean and Ti'gorneaux in European French.
- Funnel-Mouthed Cephalopod: Although she has a snail shell on her head, and her children just look like snails, she has cephalopod-like features, and a funnel-shaped mouth instead of a realistic octopus mouth.
- Gratuitous English: Replaces a few words with their English equivalent in the French version.
- I Choose to Stay: After Mother Maiamai leaves for another dimension, you find that one of her baby Maiamai is left behind in her place. Apparently it is the 72nd one you've collected and she wishes she'll grow up to be just like her mother.
- Punny Name: Maimai is "snail" in Japanese.
- Ridiculously Cute Critter: The baby Maiamais. Possibly Mother Maiamai as well.
- Side Quest: All 100 of her babies have gone missing and you need to find them, much like the Gold Skulltula Sidequest from Ocarina of Time.
- Super-Empowering: For every 10 babies you return to her, she will upgrade one of Link's weapons from the inventory.

Gulley's parents and your employer. The Blacksmith is usually annoyed at Link for being lazy while his wife is a kind caring woman. They become greatly distraught when Gulley goes missing. They also have counterparts in Lorule who don't seem to have children.
- Alternate Self: Their Lorulean counterparts are almost their opposites. The Blacksmith is a sullen, Brilliant, but Lazy Henpecked Husband while his wife is cold and brash.
- The Blacksmith: He can make the Master Sword stronger if you have two pieces of Master Ore on you. His Lorulean counterpart can make it even stronger still with two more pieces of Master Ore.
- Child Hater: The Lorulean counterpart to the Blacksmith's Wife doesn't seem to like children and really doesn't like the name "Gulley" if she had to name one.
- No Name Given: Neither the Hyrule nor Lorule verions have names outside of "Blacksmith" and "Blacksmith's Wife".
- Ultimate Blacksmith: The Blacksmith claims to be the greatest smith in the world, and is the only one who can temper the Master Sword into its strongest second form. Having done that, he remarks that he will likely never make another weapon so fine in his life, and that it could only be improved by someone even better at smithing than he — but, again, there's no finer smith in the world. He's in fact correct, since Link needs to go to another world to find someone who can further temper his blade — the Smith's own Lorulean counterpart, who won't spare more than a contemptuous glance at the Master Sword until it's improved by his counterpart, whose work is the only one fine enough to get him excited at the prospect of smithing again."That sword is my masterpiece! That blade couldn't get any sharper. No way, no how. Well, maybe if there was someone better at this than me. But I'm the best blacksmith in the world. So that's that."
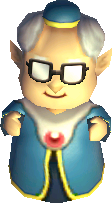
The curator of the sanctuary and Seres' father.
- Alternate Self: In Lorule, you meet his counterpart who's only known as "the Philosopher".
- No Name Given: He and his Lorulean counterpart don't have names outside "the Priest" and "the Philosopher".
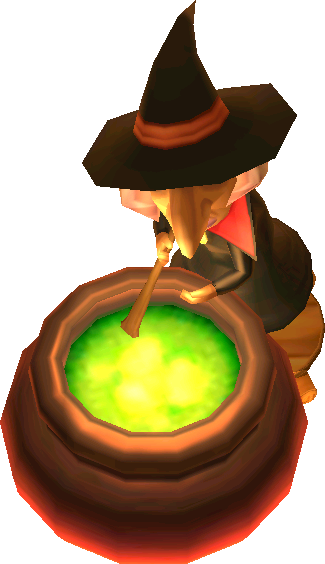
An old witch who lives in the northeastern part of Hyrule. She can brew four kinds of potions if you have the right monster parts, heal your hearts with a Red Potion sample when you talk to her, and even buy any parts you may have. She's also teaching her granddaughter, Irene.
- All Love Is Unrequited: Apparently she had a crush on the Fortune Teller, but never mustered the courage to tell him. When she asked for him to read her fortune he told her she was unlucky, for the man she was interested on her didn't even realize her presence.
- The Bus Came Back: The fact that her Lorulean is referred to as "Mapes" implies that she's supposed to be a grown up Maple, who hadn't been seen since 2001 (2002 if you count the Link to the Past remake).
- Dub Name Change: Or Dub Naming, in this case — she doesn't have a name beyond "Witch" in Japanese, but is called Mamie Magie ("Granny Magic") in the European French dub.
- Generation Xerox: It's implied that she's actually Maple (either the one from the Oracle games or the A Link to the Past GBA port) now taking on the same role as her grandmother Syrup.
- Retired Badass: It's implied that she used to be a monster hunter in her youth. Irene tells Link that she told her it's "good to go on walks" to "pick up monster parts", implying she used to collect her potion ingredients by slaying monsters herself. If her current short supply is any indication, however, she's not as good at it as she used to be.
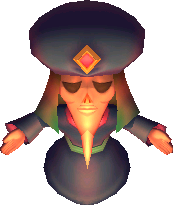
A fortune-teller located at the north of Kakariko. He gives Link hints about where to go next for 20 Rupees.
- Doppelgänger: Like many other NPCs he has a counterpart with an opposite personality in Lorule. While his Hyrule incarnation doesn't catch the Witch's advances at all, his Lorule Incarnation and the Witch are Sickeningly Sweethearts.
- Oblivious to Love: He completely misses out on the witch's infatuation with him, despite having been able to divine that she's in love with someone who isn't aware of it.

A girl you encounter in the Thieves' Hideout in Lorule. You need to help her to escape because she knows where the boss of the dungeon has kept the painting of Osfala. Unfortunately, she's unarmed, but she's useful for some of the puzzles.
- Call-Forward: After rescuing her and later finding her in a cave, she gives you 100 rupees and says, "How about we just keep this a secret to everybody", in reference to the "It's a secret to everybody" Moblin from the original The Legend of Zelda, set a long time after the events of A Link Between Worlds.
- Cool Mask: After rescuing her, she puts on a cool-looking fox-like mask in order to conceal her identity from the thieves.
- Escort Mission: After traversing down to the dungeons, Link must get her out without being captured by enemy monsters.
- He Knows Too Much: The reason she was imprisoned was because she discovered the location of the Sage Painting.
- Master of Unlocking: The whole point of Thieves' Hideout is actually to rescue the Thief Girl, and not to obtain a Sage Painting. Instead, the Thief Girl will take Link to a cabin near the outskirts of town, which only she can unlock. That's where the painting really was.
- Red Herring: In A Link to the Past, Link saves a girl in the Thieves' Hideout and escorts her to the end of the dungeon, the she turns out to be Blind the Thief in disguise. This girl is exactly what she claims to be.
- Shout-Out: She's based on Ghanti, the Tsundere thief girl from Akira Himekawa's A Link to the Past manga who starts out as a minor antagonist, but later becomes a friend.
- You Don't Want to Know: She wonders what's up with Link's Wall Merging abilities, but decides to drop the subject because she thinks knowing too much is always dangerous, having been the reason she was imprisoned in the first place.

A Hinox found hiding in a cave behind a waterfall in eastern Lorule. Link can shake him down for money in exchange for keeping his hidey-hole secret, but it doesn't pay to get too greedy...
- "Begone" Bribe: When encountered on its cave, it begs Link to spare its life and the player can choose how much to blackmail it for. Ask for too much, and the Hinox attacks you.
- Call-Forward: If you talk to him after he has bribed you, he asks you to "keep this a secret to everybody" so as to protect his reputation. This is a reference to the "It's a secret to everybody" Moblin from the original The Legend of Zelda, set a long time after the events of A Link Between Worlds.
- Cave Behind the Falls: It lives in a rather well-furnished cave hidden behind a waterfall in Lorule's mountains.
- Token Heroic Orc: Default Hinoxes are hostile monsters that attack Link on sight. This one just wants to be left alone in its hiding spot... as long as you don't try to extort it, at least.
- Video Game Cruelty Potential: After it begs for its life and gives you five rupees to make you not tell anyone where he's hiding, you can continue to extort him and the amount of rupees he gives increases. However, if you extort him too much, he will call you a monster and try to kill you. Unlike the Cuccos, you can't unpress this Berserk Button by simply leaving the cave and going back in, as he'll still want you dead.

An old man who lives in Kakariko Village and happens to be in charge of StreetPass functionality.
- Achilles' Heel: A weird example, as he's not vulnerable to the item itself, but it makes him easier to hit nonetheless. As shown in this video, you can use the Boomerang to attract him to you, and if you prepare a spin attack, you can cause him colossal damage.
- Legacy Character: Is clearly based on the Old Man from the original game.
- Previous Player-Character Cameo: While it's never directly stated in-game, there are several hints that imply him being the Link from A Link to the Past like the fact that he's the only other character in the game wearing a green tunic, him having copies of all of your weapons, and the Credits Medley specifically playing the series' main theme while showing him.
- Superboss: You can fight him once you gain all 50 Challenge medals. He has upgraded versions of all your items, all your equipment, and the ability to use Great Spin Attack.
- World's Strongest Man: He's the most powerful character in the game, and he set up the Shadow Link battles in order to find someone stronger than him. The Rumor Guy states that he's seen him do one-fingered handstands.