The Warrior of Light (Tank Classes | Ranged DPS Classes | Melee DPS Classes | Caster Classes | Healer Classes | Limited Jobs)
Scions of the Seventh Dawn
Nations of Hydaelyn: The Eorzean Alliance | Ishgard | Dragon Hordes | Othard and Hingashi | Sharlayan and Thavnair | Tural
Other Realms: The Void | The First | The World Unsundered (Pandæmonium) | Ultima Thule
Garlond Ironworks | Hildibrand Allies | Other Allies (Hydaelyn | G'raha Tia)
Antagonists: Ascians (Emet-Selch) | Garlean Empire (Gaius van Baelsar | Zenos yae Galvus | Bozjan Garleans)
Primals | Raid Antagonists (Omega | The Twelve) | Other Antagonists
Class and Job Questlines: Disciples of War (Tank | Melee | Ranged) | Disciples of Magic | Disciples of the Hand | Disciples of the Land
Races: Playable Races | Beast Tribes
Seasonal Event NPCs
A character page for Final Fantasy XIV antagonists that appear in Raids and Alliance Raids. They are organized by expansion, with Raids coming before Alliance Raids.
Due to the story's advancement and the fact some articles would otherwise be all white, there are Unmarked spoilers below, you have been warned.
A Realm Reborn
Binding Coil of Bahamut
Crystal Tower
- Dem Bones: Throughout the fight it will summon waves of skeletal Platinals to harass the Alliance. Ironically, the Bone Dragon itself is not a skeleton.
- Dracolich: As its name implies, it is an undead dragon which needs to be killed multiple times before it will stay dead.
- Flunky Boss: The Bone Dragon isn't much of a threat on its own, but the many skeletons which spawn throughout its boss fight can cause problems for an unwary party.
- Resurrective Immortality: The Bone Dragon will reanimate itself the first two times it is killed. It stays dead upon being killed for a third time.
- Flunky Boss: He keeps the players busy by summoning many Nemeses and Sandmen throughout the boss fight.
- Helpful Mook: There are three Magick Pots in Thanatos's room. These Pots will tether to one Alliance and grant its members the Astral Realignment status, allowing that Alliance to harm Thanatos. Thanatos and his minions will try to kill the Pots to stop them from doing this, so the healers will need to keep the Pots alive.
- King Mook: Thanatos is essentially a boss version of the Dullahan enemies found in certain areas.
- Nigh-Invulnerable: Thanatos is intangible, and players cannot harm him unless they are under the effect of the Astral Realignment debuff.
- Blow You Away: Its Charybdis attack creates a whirlwind centered on a random player's location.
- Damage Over Time: The arena floor is electrified, making players take constant damage throughout the fight.
- Meteor-Summoning Attack: It can attack by calling down comets and meteors.
- One-Hit Kill: Ecliptic Meteor kills any player who isn't taking shelter behind a comet when it touches the ground.
- Tactical Suicide Boss: It will always use Comet before it uses Ecliptic Meteor, ensuring that players will have somewhere to hide from the imminent instant-death explosion.

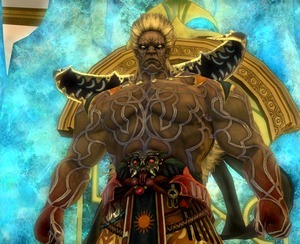
A mighty warrior, and revolutionary, who sought to oppose the rule of Allag in the twilight years of their rule. This would-be liberator of the people, however, was captured by Amon, and subjected to torture and hideous experimentation. What is left of the once-proud man now stands a constant vigil over the innermost reaches of the Labyrinth of Ancients.
- Boss-Arena Idiocy: There are three pads on the edges of the room. If enough people stand on all three of them, it will create a force field which can contain Ancient Flare's deadly explosion.
- Defector from Decadence: Sought to find a way to bring down the Allagan empire, and may have even been part of the Goddess Sophia's plot to burn the capital to ashes with Bahamut's aid. However, he was captured and changed before his plans could come to fruition.
- Dub Name Change: Was named "Titan" in the Japanese, after the enemy of the same name in Final Fantasy III. Obviously, the English translation couldn't bank on the name's slightly different pronunciation to differentiate him from the primal Titan, so he was named "Acheron", after one of Titan's palette-swaps in the same game. That worked well until the Syrcus Tower raid was released, and it turned out that one of the enemies there was also named "Acheron" in the Japanese. This character's name was quickly switched to "Phlegethon", and a hand-wave was added, suggesting that the in-game researchers misread his name.
- Fallen Hero: Was once a revolutionary against Allag's cruel expansionist empire, but Amon's experiments broke his mind and turned him into a slavish defender of the Labyrinth.
- One-Steve Limit: Suffered from this a few times in the game's development and translation. See Dub Name Change, above.
- Playing with Fire: His strongest attack is Ancient Flare, which can only be survived by containing the effected area within a massive force field.
- The Speechless: Phlegethon does not speak at all during the battle against him, a rarity among humanoid bosses and a possible indicator how severe his brainwashing is—he can do naught but follow orders.
- Total Party Kill: If there aren't enough people standing on the pads while Phlegethon is casting Ancient Flare, the resulting explosion will kill everyone in the room.
- Your Size May Vary: The Allagans made him their titan based on research of the growth abilities of Sephirot of the Warring Triad.

A powerful magician and canny scientist of ancient Allag. Born into an age of decline, he sought to usher the Allagan Empire to a new golden age by resurrecting its first Emperor Xande though his cloning technology.
- Actually a Doombot: It turns out the Amon that the Warrior of Light fought during the Crystal Tower raid series was really a clone of the original Amon. The original Amon was recruited by the Ascians due to being the reincarnation of Fandaniel. He created a clone of himself so that nobody would realize he had left.
- Agent Peacock: He acts extremely foppish and dresses very garishly but he is both a powerful sorcerer and intelligent scientist.
- Bewitched Amphibians: He can turn players into fire-breathing toads with one of his spells.
- Boss-Arena Idiocy: His instant kill Curtain Call is only blockable by the ice blocks he spawns. During the fight with the real Amon in The Aitiascope in Endwalker, he tries to do it without summoning the ice blocks to give you no way to survive, only to be foiled by ghost Ysayle's Shiva powers last minute.
- Breath Weapon: His basic cleave is to breathe fire on the raid members in front of him.
- Chekhov's Gunman: A one-off raid boss with little role outside the lore of the dungeon who ultimately turned out to be the reincarnation of the man who incited literally everything that has ever gone wrong in the setting.
- Expendable Clone: The Amon fought as part of the Crystal Tower raids is in reality this. When the real Amon, aka Fandaniel, was approached by Emet-Selch as the Allagan Empire neared its demise, he convinced him to create a clone of himself so as to watch the fall.
- Expy: He is based on the boss monster Sorcerer Hein (specifically his Palette Swap Amon) from Final Fantasy III.
- Fire, Ice, Lightning: His three primary attacks are Firaga, Blizzaga and Thundaga Forte.
- Greater-Scope Villain: Amon's decision to resurrect Xande, to spur Allag into conquering ambition again, had major impact on the world for a long time. This act led to Allag's war with Meracydia, the capture of the Warring Triad, the summoning of Bahamut, the creation of Dalamud, the pact with the Cloud of Darkness, and the fall of both Allag in the Fourth Umbral Calamity, all due to the twisted ideals of the Xande clone he created. The eventual return of Dalamud and Bahamut would also result in the destruction of Bozja and the Seventh Umbral Calamity. In the Crystal Tower story itself, he takes a back seat to Xande, despite his fingerprints being all over the events leading up to the Raid. Endwalker would reveal that the Amon found in the Tower was not even the original; the real Amon was taken in by the Ascians, and given the title Fandaniel. As Fandaniel, the man who was Amon poses an even greater threat to the world; to say nothing of the influence of his original self, Hermes.
- Flunky Boss: He can summon enemies (Complete with spotlight) to aid him.
- Having a Blast: He summons Experimental Byproducts to himself to generate explosions, and can attach magical explosives to raid members with his Pyrotechnics spell.
- Large Ham: He treats the fight like a stage performance.
- Mad Scientist: Cloning, genetic tampering, Living Weapons, explosives, this guy had a hand in developing all of the marvels and horrors in the Crystal Tower.
- Musical Theme Naming: His raid wiping attack is called Curtain Call.
- Mythology Gag: To the an optional boss of the same name appearance in Final Fantasy III
- Small Role, Big Impact: Amon's work is what paved a path for many of the issues that plagued Hydaelyn centuries later, not the least of which was proving cloning was possible causing Garlemald to research it themselves. He also shut down the research of a young man on the verge of a cure for tempering and had him expelled from the academy when he protested. This was due to Amon being a sundered portion of Fandaniel; it was far more beneficial to the Ascians to ensure tempering exists, as it furthers their primal plans.
- Sizeshifter: He can cast Mini on your characters, though you can turn this against him and use the spell to shrink his minions instead.
- Skeletons in the Coat Closet: The character he was based on Hein was a Lich with a Skull for a Head but Amon himself merely wears a skull shaped mask.
- Undying Loyalty: He has this to Emperor Xande for seemingly drawing their empire out of its stagnant state once more.
- We Have Become Complacent: Amon saw how the Allagans only lived for pleasure after their rule was secure, leaving their technology to run their lives. To free his people from this stupor, Amon knew that they needed a powerful leader and so set out to resurrect Emperor Xande.
- Attack of the 50-Foot Whatever: Emperor Xande towers over everyone. It would later be revealed that his new size was granted by Amon using a formula synthesized from the power of Sephirot the Fiend.
- Composite Character: While his design and most of his backstory is taken from the Final Fantasy III antagonist, he also takes on some aspects of the Emperor from Final Fantasy II, being the Emperor of an ancient empire that died and was resurrected (in a sense). While Xande in III could cast Meteor, the XIV Xande has Starfall, the Signature Move of the Emperor.
- Deal with the Devil: He made a covenant with the Cloud of Darkness which pretty much sells the whole world out to her when his bloodline ends.
- Degraded Boss: A clone of Xande appears in the World of Darkness raid as a Mini-Boss. It uses a simplified version of his moveset and is much weaker overall.
- Dishing Out Dirt: Ancient Quake and Ancient Quaga which are raid wide earthquakes that can deal damage or potential kill those without Float.
- The Emperor: The first and last Emperor of ancient Allag, only those with his Royal Blood can nullify his pact with the Cloud of Darkness.
- Evil Sorcerer: He is a gigantic evil sorcerer and mastermind of the Meteor spell that Nael sought to cast to destroy Eorzea.
- Expy: He is based on the character with the same name in Final Fantasy III.
- Gravity Master: His Imperium will try to kill a raid member with gravity if you don't share the pain, but doing so will leave behind an area with float allowing you to evade Ancient Quaga.
- Ground Punch: Knuckle Press which blasts back all melee ranged attackers from him. He also punches the ground to cast Ancient Quake/ga.
- Having a Blast: He can cause Aetherchemical Explosions for one of his attacks.
- Kamehame Hadoken: He has one called Aura Cannon which is predictably a giant beam of doom.
- Kung-Fu Wizard: For a certain value of Kung Fu, while Xande is primarily a mage, he has several attacks where he just takes advantage of his massive size and tries to pound you into oblivion.
- Magic Staff: He wields one as a weapon and like in his home game it is used exclusively for spell casting when he decides to hit you he tosses it aside and uses his bare hands.
- Meteor-Summoning Attack: His raid-wiping attack Starfall drops a massive meteor on the party if you don't destroy the magic circle that sustains it first.
- Mythology Gag: Is basically the same character with the same motives from Final Fantasy III with slightly altered goals.
- Omnicidal Maniac: Xande after his death, Came Back Wrong and sought to drag everyone down to death with him again when he died once more.
- Playing with Fire: Burning Rave generates giant bursts of flame and if they are overlapping they can be extremely dangerous for anyone not quick enough to get away.
- Sealed Evil in a Can: He and the Crystal Tower where frozen in time after causing the Fourth Umbral Calamity by trying to use Dalamud to open the Voidgate
- Small Role, Big Impact: In the initial Crystal Tower raids, he just serves as the final boss of Syrcus Tower, the second raid of the series. However, his nihilistic outlook ends up kickstarting the return of the Final Days, as said outlook affected his servant Amon very deeply. And Amon turned out to be the reincarnation of Fandaniel, an Ascian and one of the Convocation of Fourteen. Because of this, Fandaniel never truly took to the Ascians' cause, and as soon as the Ascian leadership was all taken care of by the Warrior of Light, he puts into action his own plans to bring about the world's end.
- Star Power: Can cast Starfall with small satellites that need to be destroyed by the party.
- Straw Nihilist: Xande became one after returning to life, ultimately seeing everything that was being built as futile because nothing is immortal.
- Suddenly Voiced: Four expansions after his initial debut, Xande finally gets voice acting posthumously in Endwalker.
- Suicidal Cosmic Temper Tantrum: After his clone was instilled on the throne, Xande realized the impermanence of everything, even himself and his empire. To this end he made a deal with the Cloud of Darkness that his death by any means would be an implicit deal to break into Hydaelyn and draw the planet into the void.
- White Hair, Black Heart: Xande's stark white hair stands out sharply against his dark skin and does nothing to detract from his nihilism.
- Damage-Increasing Debuff: Double Vision afflicts all party members with either Brand of the Ireful (from standing in the red area) or Brand of the Sullen (from standing in the blue area). Standing in the same area makes the effect stack, making you take increasingly large amounts of damage each time Angra Mainyu uses this attack. Fortunately, they don't stack with each other, so alternating between the red and blue areas will minimize the damage you take.
- Deadly Gaze: Mortal Gaze afflicts anyone who looks at him with Doom.
- Eye Beams: His tankbuster is a powerful laser fired from his frontal eye.
- Mythology Gag: It is based on Ahriman, an optional boss from the World of Darkness dungeon of Final Fantasy III. His name is an alternate translation of the Zoroastrian God of Evil: Ahriman. Since "Ahriman" is now a term used for a variety of monsters, "Angra Mainyu" serves as a more intimidating version of the name.
- Oculothorax: Its body is basically a winged sphere dominated by a giant eyeball, with a second eyeball on the backside.
- One-Hit Kill: Level 150 Death kills all players in its blast radius, but only if the sum of their levels (which are synced to 50) is divisible by 150. Roulette will likewise kill any players standing in whichever quadrant of the battlefield that it stops on.
- Situational Sword: His Level 100 Flare and Level 150 Death spells only work if the total levels of the players caught in the blast radius are divisible by that number.
- Action Bomb: If the Poison and Toxic Slime adds aren't killed quickly enough, they will explode, inflicting heavy damage and Silence to the entire raid.
- Breath Weapon: Its main head's White Breath attack inflicts heavy damage to all players in a cone.
- Dragons Are Demonic: This dragon is a powerful voidsent.
- An Ice Person: One of its attacks creates gradually expanding patches of ice. Anyone who touches that ice will be frozen solid until the ice thaws.
- Multiple Head Case: As the name implies, it has five heads. The heads can be targeted and destroyed while it charges up its Discordance attack, though they will grow back as soon as the attack resolves.
- Mythology Gag: It is loosely based on the Two-headed Dragon from Final Fantasy III. It was an optional boss which could be fought in that game's version of the World of Darkness.
- Poisonous Person: One of its heads can spew poison. This will create a poisonous pool on the floor, from which Poison Slimes will spawn.
- Shock and Awe: One of its heads can strike a random player with a lightning bolt. This will kill the target instantly unless they stack with other players to split the damage.
- Bragging Rights Reward: You can obtain Cerberus as a four-seater mount by clearing the Delubrum Reginae (Savage) raid.
- Canis Major: This vicious hellhound is larger than most Primals and quite a few dragons.
- Dash Attack: Hound Out of Hell has Cerberus face a random direction and lunge after a short delay, hitting everyone in his path for heavy damage.
- Eaten Alive: Cerberus will eat any player who becomes restrained in the purple Slabber puddle. Shrunken players will end up in its stomach in one piece, while non-shrunken players will just die.
- Hellhound: It is a voidsent in the form of a monstrous hound.
- Hoist by His Own Petard: Players can exploit the Mini status inflicted by Cerberus's Gastric Juice and the fact that it eats anyone who steps into the Slabber to go inside the beast. They can then pummel the monster's stomach walls until it collapses from the pain, giving the people outside a chance to chain the beast up and prevent a wipe.
- One-Hit Kill: Standing in the Slabber without getting shrunk first is a death sentence, as you will instantly die when Cerberus comes to eat you.
- Shed Armor, Gain Speed: Cerberus is chained up and muzzled at the start of the fight, but eventually it will break free of its bonds. It becomes more mobile in this state and starts gaining stacks of Haste, and if not stopped, its basic attacks will start hitting hard enough to be a One-Hit Kill. To avoid a wipe, players need to find a way to stun Cerberus long enough to chain it up again.
- Shock and Awe: It can summon orbs of ball lightning that shoot off in random directions.
- Shrink Ray: Its Gastric Juice releases pulses of energy which inflict the Mini status on nearby players.
- Super Spit: It can hock up puddles of purple Slabber, which spawn Wolfsbanes and trap any players that stand in them. It can also spit up spheres of Gastric Juice which release shockwaves that shrink nearby players.
- Tail Slap: Cerberus has a long and muscular tail. it sweeps its tail through the space behind it at regular intervals, damaging and pushing away any players standing there.
Heavensward
Alexander
- Buffy Speak: Like most goblins.
- Dub Name Change: In Japan, the organization is called the Blue Hand, which is why their logo is a blue hand, and why several songs within Alexander have lyrics about a blue hand.
- Evil Is Petty: Though some of their apparent acts of pettiness serve to ensure none of their bigger secrets like the Alexander Project get out, others simply boil down to petty revenge or proving they "are not nearly as incompetent as everyone now thinks."
- Filler Villain: Prior to the Alexander questline, their appearances were little more than silly distractions. In the end, they're not even apart of the Alexander Ultimate Trial, even though they were the antagonists of the raids.
- Steampunk: The Sharlyan ruins they inhabit have been converted to suit this theme.
Discipline: Machinist
The leader of the Goblin Illuminati. Cunning and ruthless, he plans to use Alexander to create a utopia for his group which he would rule over as king.
- Dirty Coward: As Mide revealed, While Quickthinx was always able to read the Enigma Codex, at its full power Alexander could overtake and consume whoever tried to command it. He was too craven to risk his own life, and so kidnapped Roundrox to be used to access the Codex. It wasn't until he was backed into a corner that he finally took things into his own hands.
- Full-Conversion Cyborg: He has so little flesh remaining, he can survive a bullet to the brain. That's not a mask, that's his face.
- I Am Not Left-Handed: After the party rescues Roundrox, whom the Illuminati kidnapped since she could read the Enigma Codex and therefore command Alexander, everyone assumed the Illuminati would be unable to use the Primal. Quickthinx counters by showing that he can also read the Codex.
- I Let You Win: He allows the Warrior of Light to shut down the Gordian and Midan cores and feigns falling for Wedge's (rather obvious) ruse in order to lure the heroes into delivering the real final piece of the Enigma Codex to him within Alexander. Once the Codex is complete, he immediately uses Alexander's time magic to undo the damage done to the cores.
- Killed Off for Real: Though his cybernetic implants allowed him to brush off a being shot in the head at point blank range as "a flesh wound", he ultimately met his end when Alexander rebelled against him and killed the Goblin Cyborg for good.
- Not So Harmless: When the Illuminati is first encountered, they're laying siege to a community over a cheese recipe. When you finally meet Quickthinx, you learn that this action was to preserve the secrecy of the Enigma Codex (where the recipe came from) and the knowledge gathered from it; including Project Alexander. As the story continues, Quickthinx quickly establishes himself as a genuine and calculating threat, almost in a stark contrast to the general perception players have for goblins.
- Power of Love: A rare villainous example. The sense of true, undying love that he receives from his cat, Shanoa, greatly motivates and empowers him in battle. Allowing this true love to reach him will significantly increase his damage output for a time.
- Right-Hand Cat: Shanoa, a black courel kitten with a red ribbon around her neck.
- Robotic Reveal: While Cid figured the Illuminati were all part mechanical, he was completely caught off guard by how much of Quickthinx's biology had been replaced with machina, allowing him to brush off being shot in the head. As Cid points out, Quickthinx was more machina than Gobbie after his "betterbody upgrades."
- Seers: Quickthinx claims to be able to perfectly see the future and is able to easily predict what the Warrior of Light and their allies will do with perfect clairvoyance. In reality, he only knows this because he picked up the journal of one of the goblins helping the Warrior during the raids on Alexander when it went back in time three years ago.
- Spider Tank: He pilots a four-legged flying tank during his boss fight.
- Tempting Fate: On his last legs, Quickthinx commands Alexander to, "let ignorant and unworthy feel divine judgment!" In the end, Alexander judged Quickthinx unworthy and killed him.
- Unwitting Pawn: He is one to Alexander, as everything he did was part of a plan by Alexander to isolate himself in a time loop to protect the world from the Primal's apocalyptic need to consume aether.
- Villainous Breakdown: After Alexander refuses to follow Quickthinx's orders, he quickly becomes furious and insults the Primal, demanding that it listen to him.
- You Have Failed Me: When you first meet him, he is preparing to kill one of his underlings for talking too much and revealing bits of his plan to the player and Mide.
- You Have Outlived Your Usefulness: He kills one of his spies who was posing as Brayflox Alltalks after she reports back to him towards the end of the Gordias segment of Alexander. Cid and Mide are utterly sickened by how casually he "rewarded" his own.
Discipline: Alchemist
- Fluffy the Terrible: Possibly the least threateningly named antagonist in the entire series, and yet a careful look around his lab and his experiments easily makes him one of the most terrifying.
- Mad Scientist: And to prove it has has experimented on several goblins, turning them into horrible chimeric mutants.
- Make My Monster Grow: He is able to change from a normal sized goblin to a Goblin version of The Incredible Hulk.
- Puzzle Boss: In his Hulk-like form, he will pound the ground to send damaging and disrupting shockwaves across the entire arena as well as throw highly damaging bombs with a huge AOE. The only way to dodge them is to allow yourself to get zapped by the rod in he center of the arena. This will activate two machines on opposites sides of the arena that produce pools of magical liquid. Stepping in the purple pool will turn you into a bird that's immune to the shockwaves. Stepping in the red pool will turn you into a gorilla with the ability to swat the bombs to the other side of the arena, allowing the party to dodge it by moving to the opposite end.
Discipline: Gladiator
- Disney Villain Death: Upon his defeat, he tries to back away from the party, loses his balance, and falls off the platform they're fighting on.
- The Gambler: His FATE in Eureka Pyros claims he's this, and you can acquire a set of rigged dice from him.
- Not Quite Dead: He later reappears as a Notorious Monster in Eureka Pyros.
- Only in It for the Money: Probably Quickthinx's only minion who isn't racist against non-Goblins, however he'll gladly kill them without a second thought if offered enough jinglyshine.
- Revenge: Getting him to spawn in Eureka involves killing his horrifically mutated minions en masse.
- Trap Master: He fights in an arena with a wide variety of traps which he can activate mid-fight.
- Honor Before Reason: He is deployed in a last ditch effort, after several failed reclamation and revenge attempts, to prove that he and the rest of the Illuminati "are not nearly as incompetent as everyone now thinks."
- Meaningful Name: Schrodinger is named after the physics researcher Erwin Schrodinger and his famous thought experiment, and also refers to her being in two places simultaneously
- Robotic Reveal: Is in fact a clockwork robot, explaining how it could be with Quickthinx for three years old and still remain a kitten.
- The Dog Was the Mastermind: Turns out to be a clockwork coeurl run by Alexander itself and used to preserve the flow of time in ways both subtle and direct.
- The Power of Love: Turned against the heroes. The True Love between the feline and Quickthinx is enough to buff him Total Party Kill levels if it reaches him.
Shadow of Mhach

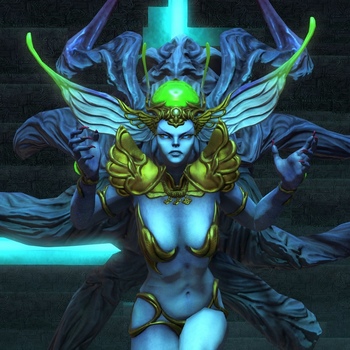
- Bright Is Not Good: It's definitely not, this is Ozma.
- Colony Drop: After being sucked into Ozma, the alliance has a limited amount of time to reach and destroy the Ozmashade before it finishes casting Doomsday and wipes everyone out.
- Domain Holder: There is a serene landscape within Ozma, visible in its cube and tetrahedron forms. "Black Hole" pulls the entire alliance into this dimension, which they must escape from by defeating the counterpart Ozmashade within before it calls down a meteor on them.
- Energy Weapon: The cube form continuously fires lasers at the players with the highest enmity.
- Holy Hand Grenade: It can use Holy on the alliance to cause moderate damage and knockback, though it seems to be different from the traditional magic based Holy spell since the sound effect sounds more organic or mechanical than magical.
- Lotus-Eater Machine: Has shades of this as part of the "Black Hole" phase. The alternate dimension that Ozma sends the Alliance to after using Black Hole, and displayed on its mirror like surface sometimes is called "The Twelvesfold". It appears as an idealistic version of Heaven, with floating islands above the clouds and soft angelic singing in the background. The Ozmashade which sits on a lower platform appears as an orb that looks like the night sky and uses an attack called "Assimilation". Anyone looking at Ozmashade at that time are hit with a debuff, described as having become enthralled by all the sights, and losing the desire to escape from the false-dimension. In the process, they become trapped in a crystal prison.
- Meteor-Summoning Attack: One of these serves as a time limit for Ozmashade's phase of the battle. If time runs out and any of the players somehow survive the meteor's impact, it'll just pelt them with smaller meteors until they die.
- Mythology Gag: The infamous Superboss of Final Fantasy IX returns to challenge us again.
- Ring Out: It's entirely possible to fall off of the ring shaped platform on Ozma and to your death. Unlike most examples however, healers can revive anyone who died this way. It may be implied that you fall in some sort of black hole because after Ozma is defeated, the pit becomes a solid floor and is harmless.
- Sheathe Your Sword: Ozma has a debilitating debuff that, when afflicted, the victim must do nothing. No movement or action can be taken, if you do, you suffer a powerful hit that will most likely one-shot a non-tank class.
- Sinister Geometry: Ozma has three forms; a sphere, a cube, and a tetrahedron, all of which are dangerous and deadly.
- Status Infliction Attack: During the fight Ozma can hit players with a stacking Bleed debuff, removing portions of health over time. Healers need to remove these debuffs quickly before they overwhelm the player. If a player gets hit by Ozma's laser attack after it transforms into a pyramid, they'll suffer from Minimize, Slow, and Heavy.
- Unrealistic Black Hole: Halfway through the battle, Ozma will use Black Hole to suck everyone inside and transport them to another dimension. The attack only sucks in the players and nothing else apparently.
- Unstoppable Rage: If by some fluke of mechanics a player manages to survive Doomsday touching down (Which is VERY rare as it ignores immunity abilities like Hallowed Ground), Ozma gets mad and constantly, unstoppably pelts the party with smaller meteors until everyone is dead.
- Voluntary Shapeshifting: Ozma changes between its forms freely, each one having a different attack pattern and dangers.
- Wave-Motion Gun: The tetrahedron form's first attacks are three simultaneous laser blasts aimed at the rectangular portions of the ring surrounding it.
- Bear Trap: Calofisteri's "Lurking Locks" will dig into the ground and leave behind a purple circle. If a player steps into this circle, the trap will spring and trap the player and anyone around him. The victims are completely immobilized and will be killed by the trap unless the rest of the party can destroy it quickly.
- Blood Magic: Calofisteri is a Mhachi voidmage who attained a demonic form and a measure of immortality through the ritual consumption of voidsent blood.
- Mythology Gag: Calofisteri is a boss returned from Final Fantasy V, and the green orb she carried with her has been re-imagined as the Nullstone. Her Signature Attack, Dancing Mad, takes its name from the soundtrack of Final Fantasy VI.
- Power Floats: She never touches the ground willingly in her fight.
- Prehensile Hair: The crux of Calofisteri's entire moveset. She can morph her hair into virtually any shape, from axes to hammers to bear traps.
- Sickly Green Glow: The Nullstone imbedded in her forehead is a neon green color. She also creates several similarly glowing orbs around herself to regenerate.
- Signature Attack: Dancing Mad. After consuming green magic to regenerate her power, Calofisteri fills her hair with several axe blades before attacking in mad swings in every direction.
- What Are You: If the party survives Dancing Mad, Calofisteri will be baffled. Citing that she has the power of Voidsent, she questions just what ungodly power flows through your veins.
The prototype of the Ultima Weapon. Rarely seen patrolling the skies of Azys La whenever Prey: Online appeared. Later shows up as a mini-boss in the Dun Scaith raid.
- Boss in Mook Clothing: Inverted. Proto Ultima comes with nearly all of the trappings of an Alliance Raid boss and has somewhat complex mechanics, but ultimately is just a miniboss meant to trick players into believing that apparent Big Bad Scathach is the final boss of Dun Scaith rather than the penultimate one, as all Alliance Raids come with four main bosses.
- Drone Deployer: Much like the Ultima Weapon itself, Proto Ultima loves to deploy laser-shooting bits.
- Giant Space Flea from Nowhere: Replaced the succubus mini-boss in Dun Scaith after patch 3.55 and quite literally appears out of nowhere to everyone's surprise, both in and out of universe. The goblins in Idylshire theorize some explanation for his sudden presence in Dun Scaith afterwards, but his presence is still given next to no build-up unless you talk to said goblins before entering Dun Scaith.
- Leitmotif: "Ultima", which is Ultima Weapon's theme in its second battle. Proto Ultima's skips the long buildup at the beginning to start directly at the main portion of the music.
- Limit Break: Supernova.
- Meaningful Name: Aside from it being the Prototype Ultima Weapon, the boss it replaces in Dun Scaith used to summon flan minions called "Foobars", which means placeholder.
- Mistaken Identity: Its surprising appearance in Dun Scaith is attributed to it confusing the more powerful voidsent with Eikons. Considering the origin of the Void, it is understandable that it could make such a mistake.
- Super Prototype: While it might be attributed to Gameplay and Story Segregation, Proto Ultima can deal significantly more damage than the full Ultima Weapon (also accounting how much stronger the Warrior of Light became between the Praetorium and Dun Scaith) and requires a much larger party of heroes to take it down.
Stormblood
Interdimensional Rift
Alte Roite
The first challenge of the Deltascape. A powerful wizard who has taken on the form of a feathery-winged serpent.
- Blow You Away: Breath Wing and Downburst. In addition to pushing players around, it also displaces the fireballs spawned by his Flame attack.
- Composite Character: Named after a boss from Final Fantasy V, but is otherwise based on said boss's transformation, Jura Aevis.
- Early-Bird Cameo: His first appearance is chasing Alpha out of the Interdimensional Rift.
- Fire, Ice, Lightning: Flame and Blaze for Fire, Thin Ice for Ice, and Twin Bolt and Levin Bolt for Lightning.
Catastrophe
The second challenge of the Deltascape. A tentacled eye beast with an affinity for gravity.
- Dishing Out Dirt: Casts the powerful Earthquake spell.
- Gravity Master: Uses 100Gs repeatedly throughout the fight to bring floating players back down to the platform. Later on, he'll use -100Gs to fling the raid into the air.
- Oculothorax: Its body is a lumpy sphere, with a single large eyeball taking up most of its front.
- Taken for Granite: His Demon Eye is an attack that petrifies players who are looking at him.
Halicarnassus

A fictional character from an old story dating back to the Fourth Umbral Era. Omega created a real version of her for his experiments in the Deltascape.
- Combat Compliment: Passing her "match the panels with the correct player role" mechanic and quickly escaping the desert she sends you to will have her praise you for being very clever. In Savage, she even rewards you by filling up one Limit Break bar if the entire party wins her first game, and the full three if they win the second.
- Critical Hit: She has an attack in Savage that is literally called "Critical Hit", which is an already-powerful tank buster with a passive 100% crit rate.
- Dance Battler: In Name Only since it just uses her casting animation instead of an actual dance, but one of her main gimmick attacks is called "The Queen's Waltz".
- Forced Transformation: Halicarnassus will use the spell "Ribbit" to turn her victims into frogs, a mechanic brought over from her original boss battle in Final Fantasy V. In her Savage encounter, she will also use Oink and Squelch to turn the party into bipedal pigs and chickens, respectively.
- Gender Flip: The original Halicarnassus was said to be a man, referred to as "king" in V and appearances in other games confirming his gender, though he disguises himself as a woman at one point as part of a trick. This version is a woman from the outset.
- Geo Effects: Many of her abilities are based on altering the combat area's floor in various ways, making positioning an important part of the fight. She only uses two of these effects in Normal, but in Savage she actually has four different arenas and a different gimmick attack for each one, along with a final fifth arena that mixes tiles from the previous four and forces players to respond depending on what tiles she lands on.
- God Save Us from the Queen!: She is the antagonist of an old folktale.
- Hotter and Sexier: Her features are far more feminine and her outfit more revealing compared to her original look from V.
- It Amused Me: The Queen treats the fight like a series of games and views the party as merely her playthings to alleviate her boredom.
- Magic Knight: Most of the queen's spells are cast in tandem with her swordsmanship, many of her spells listed as "Spellblade".
- Red Baron: "Queen of the Dimensional Castle".
- Royal Rapier: The Queen's weapon of choice.
- A Sinister Clue: Halicarnassus uses her left hand for swordplay.
- Tea Is Classy: Afternoon tea time comes up during the battle. Halicarnassus sends the party to another dimension (based on the Desert of the Shifting Sands from FFV) so she can enjoy her tea in peace. She'll praise you for solving her puzzle quickly before she could finish her tea, even granting buffs to those who solved it in around the minimum time and she'll scold you if you take too long, stating that she already finished her tea and how it is rude of you to make her wait.
Exdeath

The main antagonist of a legend about of group of heroes, made real by Omega as a part of its experiments. In the legend, Exdeath was once a great tree which was possessed by thousands of wicked spirits until the pure malevolence reshaped the tree into a powerful armored warlock.
- Absurd Phobia: Turtles according to the wind-up minion based on him. A reference to his hatred of Ghido, talking turtle that aided Bartz and his party in Final Fantasy V. Ghido is also available as a minion from the Sirensong Sea.
- An Ice Person: He can cast Blizzard III. Depending on if he draws on the Void or not it can either be a targeted attack on certain party members or a room-wide attack that freezes anyone who stands still during the spell animation.
- Anti-Frustration Features: Defeating Exdeath on Savage difficulty and triggering his transformation into Neo Exdeath causes all subsequent wipes to reset the fight to the beginning of Neo Exdeath instead of pre-transformation Exdeath.
- Battle Theme Music: A remix of The Decisive Battle, his first battle theme from Final Fantasy V.
- A remix of The Final Battle begins once he transforms into Neo Exdeath.
- Be Careful What You Wish For: Seeing as we're dealing with what is essentially Exdeath reborn his lust for the power of the Void continues to knows no bounds. And, quite appropriately, just like in Final Fantasy V when defeated instead of vanishing like all the other bosses before him, the Void backfires and engulfs Exdeath once again. On Savage difficulty this happens at 60% health and causes him to transform into Neo Exdeath for a whole new fight.
- Beef Gate: In Savage, Exdeath serves as a glorified Faust from Alexander, needing to be pushed below 60% HP before his attack pattern finishes. Failing to meet this harsh DPS check has him wipe the party and prevents you from reaching Neo Exdeath.
- Blow You Away: Vacuum Wave is a blast of wind that knocks players away from him. Neo Exdeath gains access to Aero III.
- Confusion Fu: His spells behave very differently if he draws on the power of the Void while casting them.
- Damage-Increasing Debuff: The tank buster version of Thunder III applies a Lightning Resistance Down debuff. This necessitates a tank swap or an invulnerability cooldown in Savage, as he'll cast it twice in a row.
- Damn You, Muscle Memory!: Players who make movement decisions based on Exdeath's cast bar like any other boss are in for a rude surprise, as Exdeath will sometimes draw power from the void portal during the spellcast and alter its properties. Every spell in his repertoire can be two radically different moves.
- Eldritch Abomination: True to his origins, Neo Exdeath is a writhing mass of demons and monsters that have been fused together into a single entity.
- Elemental Powers: As is the way of things with Exdeath, he has powerful magic at his fingertips and makes extensive use of it during the battle with him.
- Evil Is Not a Toy: Just like in his original game, he loses control of the void upon being defeated and is seemingly consumed by it.
- Having a Blast: He can cast Flare. The targeted player(s) must run away from the rest of the party to minimize the damage they'll take from the explosion.
- Holy Hand Grenade: He can cast Holy.
- Light Is Not Good: He wears pastel blue armour and can cast Holy. And given that this is Exdeath we’re talking about, he’s definitely not a good guy.
- Magic Knight: His fighting style takes more after his conflict in V where his sword and armor are mostly for show and he instead fights with extremely powerful magic, rather than his defensive turtling Barrier Warrior style in Dissidia.
- Meteor-Summoning Attack: He can cast Meteor, hitting the whole party for unavoidable damage.
- Mythology Gag: Beyond his very presence in the game, his Holy and Flare spells visually resemble their versions from Final Fantasy V more than they do XIV’s versions.
- Names to Run Away from Really Fast
- No Fair Cheating: Thought you could skip the cutscene in Savage when Exdeath becomes Neo Exdeath by jumping off the platform? Not so: as many unfortunate players discovered, attempting this forces you to fight regular Exdeath again.
- One-Winged Angel: Once his health is depleted enough on Savage difficulty history repeats, the Void consumes Exdeath, and Neo Exdeath is reborn.
- Phlebotinum Overload: In the Savage mode version of his fight, Exdeath eventually attempts to draw an especially large amount of power from the Void at once in order to strike the party down. If you didn't do enough damage to him beforehand, he succeeds and wipes everyone out with an empowered Meteor... but if you did, this proves to be his undoing when the void lashes back out and draws him into itself.
- Playing with Fire: He can cast Fire III. Depending on if he draws on the Void or not it can either be a targeted attack on certain party members or a room-wide attack dealing damage and inflicting players with a debuff that causes damage for any action they take for the duration.
- Power of the Void: He wouldn't be Exdeath without it. In battle he draws power from the void to greatly power up his magic. Cid even compares him to Emperor Xande over this.
- Rapid-Fire Fisticuffs: If the party takes too long to defeat him, Neo Exdeath will become enraged and start spamming Frenzied Fist—an attack in which he repeatedly punches the ground and creates shockwaves that damage the whole party—until either he or the party is dead.
- Ring Out: His first use of The Decisive Battle will destroy the safety rails around the edge of the battlefield, making it possible to fall off (or be knocked off by his Vacuum Wave attack).
- Self-Deprecation: Nero gets in a bit of snark before unlocking Deltascape v4.0 about the fact that Exdeath's backstory is that of originally being a tree, as though to ask "Who Writes This Crap?!"
- Shock and Awe: He can cast Thunder III. Depending on if he draws on the Void or not it can either be his tank buster or a circular area of effect attack with himself at the center.
- Signature Attack: The Decisive Battle. Exdeath vanishes and then bursts out of the ground in his tree form, dealing proximity-based damage to the whole party. He then exhales a cone of zombifying gas in the direction of his current target before returning to his normal form. He’ll also try to swat the party with his roots on every use of this attack after the first one.
- As Neo Exdeath he goes for Exdeath's major signature attacks: Almagest and Grand Cross. He always opens battles with the former dealing raid-wide damage and an intense DoT while Grand Cross deals raid-wide damage and inflicts status afflictions that cause various problems for the players.
- This Cannot Be!: He reacts with disbelief to being defeated and subsequently losing control of the void.Exdeath: Why!? The void was mine to command! (The void starts to suck him in) How could it-—Arrrgh!
- Unrealistic Black Hole: His Black Hole spell summons a dozen small black holes. They’re dangerous, but only if you touch them; you can stand within five feet of one and be perfectly fine, and they don't even suck you in. In Savage mode some of the black holes will remain stationary while others will tether to players and follow them around for several seconds, forcing the party to stay on the move.
- When Trees Attack: Though Nero suggests the Warrior of Light simply disregard that detail of his backstory. About midway through the fight, he uses an attack called The Decisive Battle (Named after his battle theme) which causes him to briefly assume his tree form.
Phantom Train
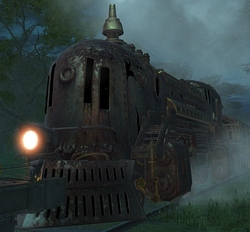
The first challenge of the Sigmascape. The Phantom Train is a steam train that carries the souls of the recently deceased to the afterlife.
- Afterlife Express: Full of ghosts and zombies.
- Ascended Glitch: In Final Fantasy VI, a glitch caused Sap status to damage the undead instead of healing them as intended, and some undead in that game had Sap automatically applied to them that would eventually kill them. In the Savage mode fight, ghost adds intended to be fought by healers have a strong bleed debuff on them and the goal is to stay alive until their bleed eventually kills them.
- Bedsheet Ghost: All of the ghosts that assist the Phantom Train, referencing the temporary ghost party members the player could recruit in Final Fantasy VI.
- Easter Egg: Normally if you touch a ghost, you are transported to a train cabin where you must kill it by yourself to return to the fight. But randomly, instead of there being a ghost in the cabin, you will find Siegfried, the thief from FF6 who claims to be a master swordsman, yet goes down in just a few blows.
- High-Speed Battle: The players are constantly being chased by the Phantom Train.
- Hunter of His Own Kind: The Phantom Train is undead, but Blue Mages can learn Saintly Beam from it, an attack that deals quintuple its normal damage when used on the undead.
- Light 'em Up: Shines spotlights on players that follow them, then eventually stop and intensify to deal high damage to players standing in it (as well as destroy any ghosts caught in it). Diabolical Headlamp fires a huge beam of light across the entire platform.
- Mechanical Abomination: A train that is effectively the physical personification of death itself, carries souls to the afterlife, and is capable of moving to other sets of train tracks whenever it wants, regardless of how the tracks are set up.
- Non-Human Undead: It's an undead steam train.
- Ramming Always Works: Phantom Train will occasionally back off, then ram the platform, dealing damage and knocking players away. The closer the player is to the impact point, the more damage they take.
Chadarnook
The second challenge of the Sigmascape. Chadarnook is a Demon that has possessed a painting of a beautiful Goddess. Both the Demon and the Goddess are bosses, but only the Demon can be attacked.
- Art Attacker: Chadarnook attacks by possessing the various paintings littered around its art gallery lair.
- Art Initiates Life: The goddess in the painting is brought to life by Chadarnook’s possession, and she assists the demon in various ways, particularly in Savage. The players must also use a magical paintbrush to bring various paintings to life in order to mitigate several of Chadarnook’s attacks.
- Assist Character: Goddess Chadarnook. In Normal mode, she merely damages the Tank who isn't Demon's primary target every so often. In Savage mode, she joins Demon Chadarnook in possessing paintings and has mechanics of her own. In both instances, she cannot be targeted.
- Doppelgänger Attack: Of a sort. After a few rounds of possessing the elemental paintings, Demon Chadarnook will create a Haunt duplicate of himself to create the effects of two paintings simultaneously. Like Goddess, the Haunt cannot be attacked.
- Elemental Powers: Each painting is associated with an element - Fire, Water, Earth and Wind. The Fire painting incinerates the entire arena, forcing players to douse themselves in water from a sketch; the Water painting creates a tidal wave, forcing players to create a large boulder to hide behind; the Earth painting causes an earthquake, forcing players to ride an Air Force mount to float over it; and the Wind painting creates feathers that eventually explode into wind, forcing a single player to use Typhon to sneeze the feathers away from their teammates.
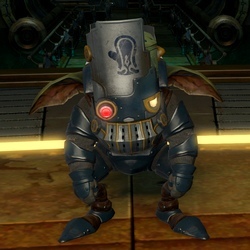
Guardian

- Badass Normal: By the standards of Sigmascape, anyways. Other enemies in this tier of the Raids include a demonic train, a possessed painting, and a clown who has become God of Destruction, none of which are anything like the Warrior of Light has fought before. The Guardian might be another world's magitek, but it's still just magitek... and puts up no less of a fight for it.
- Combat Tentacles: It can make giant tentacles erupt from the ground when running the Ultros program.
- Degraded Boss: The Guardian can summon Ultros and the Everliving Bibliotaph, which previously appeared as a trial and a dungeon boss respectively, to act as its flunkies.
- Flunky Boss: It periodically creates simulations of the creature whose program it is currently running to act as backup. The Bibliotaph program takes it up a notch, as the players will have to fight strong demons in addition to the Bibliotaph simulation if they screw up the mechanics.
- More Dakka: After Air Force gets summoned into the arena, Guardian takes to the air and barrages an area of the platform with bullets.
- Painfully Slow Projectile: The Missiles it summons while running the Air Force program. The Guardian tends to use them to make it harder to avoid its other attacks.
- Powers as Programs: Quite literally. The Guardian can duplicate the abilities of various creatures by running programs based on their data, allowing it to spray ink and summon tentacles (Ultros), release explosive bursts of chakra (Dadaluma), deploy missiles and time bombs (Air Force), and summon demons (Bibliotaph).
- Wave-Motion Gun: Magitek Ray fires a big laser beam in the direction that the Guardian is facing.
Kefka Palazzo

A mad jester who serves as the final opponent of the Sigmascape. The villain of another long-lost tale made manifest by Omega, it is said that he managed to obtain the power of the gods, which he used to turn a once thriving star into a world of ruin.
- Alliterative Name: A majority of Kefka's spells are:
- Blizzard Blitz
- Flagrant Fire
- Thrumming Thunder
- Aero Assault
- Ultima Upsurge
- Revolting Ruin
- Timely Teleport
- All Your Powers Combined: After transforming, Kefka stops casting his Fire, Ice, Lightning spells and begins using Celestriad, which casts said spells in quick succession.
- An Ice Person: Blizzard Blitz, which can either be a relatively small, circular AoE centered on Kefka… or a gigantic ring-shaped AoE that covers the entire battlefield except for a small circular safe spot centered on Kefka. And this is without taking the fact that Kefka can invert his tells into consideration.
- Anti-Frustration Features: Like Exdeath before him, once he transforms into his God of Magic form, all subsequent wipes restart the encounter with Kefka already transformed.
- Beef Gate: As with the previous final Savage fight in the tier, Kefka must be pushed below sixty percent of his HP before you can see his final form. If you don't, you're dead.
- Blown Across the Room: Aero Assault, a powerful blast of wind centered on Kefka that inflicts knockback, making it similar to Exdeath’s Vacuum Wave attack.
- Confusion Fu: Occasionally inverts his tells, causing the attack to hit everywhere but the indicated area. He also occasionally follows up Timely Teleport with Aero Assault instead of Revolting Ruin in an attempt to knock the players who gathered behind him off the platform. The shockwave-generating orb that his Graven Image ability creates will sometimes jump to the opposite side of the arena from where it spawned before it goes off.
- Drop the Washtub: Hyperdrive, his tank buster attack, drops several of them on the Tank's head.
- Evil Laugh: The same one from his debut game, at that. He gives off this laugh upon the battle starting, and in the intro cutscene. In Savage, he also does this laugh three times in a row upon reaching the "God Kefka" phase of the fight.
- Finger Gun: His intro has him doing this in time with the Fight Woosh, which makes it Leaning on the Fourth Wall.
- HP to One: Once he turns into his god form on Savage difficulty, Kefka will start using Heartless Angel to reduce all players to 1 hit point. He also uses a more powerful variant, Heartless Archangel, which not only reduces everyone's HP to 1, but also inflicts a status ailment that prevents afflicted players from being healed until it wears off.
- Kaizo Trap: Unlike Exdeath, Kefka's transition from Beef Gate to Final Boss actually does damage. This will typically happen after he's used a hard-hitting party-wide attack, so if the healers get complacent when the transition begins, you can wipe to the transition and have to fight regular Kefka again.
- Knockback: Kefka can inflict this in two ways. His Aero Assault spell blasts enemies away from him, and the first tier of his Graven Image can conjure orbs that release a powerful shockwave whenever he channels power into it.
- Leitmotif: Dancing Mad returns in full force. Notable in that it actually remixes the entire song rather than just the final phase like most of Kefka's cameos do.
- Light 'em Up: He adds Light of Judgment to his repertoire of attacks on Savage difficulty.
- Light Is Not Good: Savage mode plays up this aspect of Kefka’s character, giving him multiple light-themed attacks with religious symbolism and having him turn into a six-winged angel in his final phase. He even alludes to this trope the first time he casts Light of Judgment:“Are you afraid of the dark? Hah! ‘Tis light’s glare that will strip you bare!”
- Monster Clown: Much as in his original game, Kefka's a Straw Nihilist who puts on clown makeup and a colorful robe.
- Mythology Gag: According to the Wind-Up Kefka's description, Kefka's world is most likely an alternate dimension rather than folklore as absolutely no history records, fables or tales in Hydealyn have any record of the wicked jester... save one remark from Y'shtola who claims the image is "eerily familiar." While more have appeared since, when the Sigmascape was released Y'shtola was the only XIV character to appear alongside Kefka in crossover titles like Dissidia or Theatrhythm, and she personally faced off with him in the story mode of NT.
- One-Winged Angel: Like Exdeath before him, Kefka transforms into his angelic god form once the party depletes enough of his health in Savage mode.
- O.O.C. Is Serious Business: Once Kefka transforms, he gives up most of his spells and the ability to switch up his attack AoEs. The few spells he does retain change to be more serious: Ultima Upsurge becomes simply Ultima, while Hyperdrive loses the washtub effect.
- Playing with Fire: Flagrant Fire, which can either be a powerful AoE that requires players to stack up and split the damage between them, or a series of smaller, weaker AoE targeting several players.
- Rhymes on a Dime: Kefka likes to throw together rhymes as he brings out new spells.
- Shock and Awe: Thrumming Thunder, which has Kefka rain down lightning bolts in two narrow parallel lines, unless his tells are inverted.
- Shoo Out the Clowns: Of a sort. In the Savage fight, after he transitions to his god form, his attacks lose a lot of their former goofiness. He no longer will attempt trickery with the his tells, and the spell names no longer have the added alliteration applied to them. It comes across as Kefka's demeanor changing to something more dangerously serious after ascending.
- Sinister Geometry: His god form's Trine spell places several triangular AoEs that explode into more AoEs at the corners.
- Super Boss: His second form is exclusive only to the Sigmascape (Savage) series, and it is one of the hardest fights available in Stormblood.
- Sphere of Destruction: Ultima Upsurge, which hits the whole raid with a rapidly-expanding energy ball that engulfs the entire platform.
- Suddenly Shouting: Just as Kefka has the tower cast either Indolent Will or Ave Maria.Kefka: Are you looking? Why are you looking? YOU SHOULDN'T BE LOOKING!
Chaos

- A God Am I: He considers himself one, and says as much while charing his Bowels of Agony attack:Chaos: Tremble before the might of a god!
- Blow You Away: Cyclone. Chaos creates a vortex in the center of the platform that deals damage to players standing in it, while occasionally flaring up to push players off the platform.Chaos: Despair at your hollow fate! The winds will strip away your skin!
- Composite Character: Has the four-armed appearance and Slouch of Villainy of the Dissidia incarnation of Chaos, but the color scheme and use of a dark crystal from Final Fantasy I.
- Dishing Out Dirt: Earthquake. Chaos covers half the platform in Earth-aspected sludge. During this phase he periodically creates landslides to push players toward the sludge.Chaos: Hark, wretched creatures! The earth itself rumbles of your doom!
- Kill It with Fire: Blaze. Chaos covers the platform in flames, leaving a tiny circular safe area in the direct center. During this phase, players must alternate between spreading out or stacking up for Delayed Explosion effects.Chaos: Grovel in terror! The flames hunger for your flesh!
- Making a Splash: Tsunami. Chaos covers two sides of the platform in water, leaving a narrow segment safe to stand on, while also placing Delayed Explosion effects on players.Chaos: Scurry and flail, little mortals! The raging tide will claim you all!
- Megaton Punch: Chaotic Dispersion, a two-fisted haymaker which serves as Chaos’s tank buster.
- Multi-Armed and Dangerous: He has four extremely muscular arms.
- Mythology Gag:
- One of his attacks is named "Knock Down", referencing Garland's infamous line from the first Final Fantasy.
- His battle music is the generic Final Fantasy random battle music, referencing the fact that the original NES version didn't have special music for boss fights and used that one theme for every encounter. His model is also based specifically on his original NES sprite rather than the design used in the game's remakes and later Dissidia.
- Chaos having four arms and being the (pen)ultimate encounter of a multidimensional, high-stakes fighting circuit to empower another greater foe goes back to his design and role in the Dissidia games on the PSP. Several of his quotes when attacking are similar to Chaos' in Dissidia, with particular mention going to his quote when using Bowels of Agony ("Tremble before the might of a god!") that is a paraphrase of what he says when using Utter Chaos in Dissidia ("Shiver before the power of a god!"). And just like in Dissidia, the quote comes as Chaos leaps out of the arena and prepares his equivalent of a Limit Break that culminates with him blowing up the arena. Said Limit Break here shares its name with Garland's EX Burst, Soul of Chaos. On top of that in Dissidia Chaos was ultimately manipulated by, and later empowered by Shinryu. Here, not only was this version created by Shinryu's usual arch enemy, but the following fight is against the dragon who inspired XIV's version of Shinryu.
- Pillar of Light: His Big Bang attack causes several of these to erupt from the ground. They start out small, but cover increasingly larger areas every time he uses this attack.
- Shrouded in Myth: The only information Cid managed to gather about Chaos was that he opposed the first heroes. Everything else is up to speculation.
- Signature Attack
- Soul of Chaos. After blasting the battlefield with dark energy using Bowels of Agony, Chaos leaps onto a nearby platform and begins gathering energy for a Sphere of Destruction. Once he has enough power (or once the players have destroyed his Dark Crystal), Chaos hurls the sphere at the raid for massive damage.
- Chaos retains his signature elemental attacks from Final Fantasy: Blaze, Cyclone, Earthquake, and Tsunami.
- Who Dares?: His reaction to the party shattering the Dark Crystal:Chaos: The crystal... destroyed?! YOU DARE!
Return to Ivalice
- Action Bomb: His Ice Azer minions will explode a few seconds after they die, heavily damaging anyone caught in the blast radius.
- An Ice Person: Mateus begins the fight by whipping up a blizzard, and almost all of his spells and attacks involve manipulating ice to attack the party in some way, whether by summoning Ice Azers or casting Blizzard III on random party members.
- Flunky Boss: Part of the difficulty in Mateus’s fight comes from the sheer number and variety of adds that he summons to back him up, all of which can easily screw the party over if they aren’t taken out quickly. Ice Azers blow themselves up when they die, Flume Toads drop bubbles that are necessary to survive the Breathless debuff, and the Azure Guards must be tanked far apart from each other so that their defenses don’t get buffed through the roof.
- Forced Transformation: One of his abilities can turn raid members into literal snowmen, who will then bunch up to try and hit untransformed players with overlapping AoEs.
- Making a Splash: When Mateus casts Unbind, he’ll create an icy spiral pattern on the floor with numerous balls of water, three Aqua Spheres, and three geysers floating above the pattern. The smaller balls will explode when players walk through them, dealing water damage, while the Aqua Spheres and geysers do nothing. If they are not destroyed, the balls will become Ice Slave adds and the geysers will turn into Blizzard III pillars when Mateus’s unbound goddess skates through them as she traverses the spiral. Failing to kill the Aqua Spheres before the goddess freezes them will leave the raid with few safe spots when Mateus later casts Blizzard IV.
- Mythology Gag: He’s an exact copy of the Esper from Final Fantasy XII.
- Poisonous Person: One of his abilities covers the arena in a toxic fog that gradually makes it impossible for the player character to breathe. The only way to cleanse this debuff is by stepping into the bubbles left by dead Flume Toads, and if not removed the toxins will kill the player.
- Power Crutch: Mateus charges up his Frostwave Signature Attack by accumulating aether from the three Azure Guard minions that he summons while casting it. If you don’t kill the Guards quickly enough, Frostwave will wipe the raid.
- Prongs of Poseidon: He's a fishlike being with power over ice and water, so naturally he wields an elaborate trident as his weapon of choice.
- Signature Attack: Frostwave. Mateus flies out of the arena and hurls his trident at the ground, causing a geyser to erupt from the point of impact. The geyser then freezes solid and shatters.
- Western Zodiac: Represents Pisces, as a Water-elemental being who wields a trident.
The renegade IVth Legion summons a new version of Hashmal during the Bozjan campaign. This "4th-make" Hashmal can be fought as a Critical Engagement boss in Zadnor and is much tougher than the original.
- Absurdly Sharp Blade: His arm-blades can slice through thick stone pillars with ease.
- Dishing Out Dirt: Many of his abilities involve manipulating earth, rock and sand to attack the party in various ways, such as by casting Quake IV or summoning Sand Spheres.
- Instant Runes: A giant circular glyph forms behind him when he uses Landwaster.
- Mythology Gag: He's an exact copy of his Final Fantasy XII counterpart.
- Order Versus Chaos: He's obsessed with bringing order to the world and stamping out chaos. Naturally, he considers the party chaotic.“The land seeks order. It will not suffer the chaos you peddle. Nor will I!”"To defy order is to defy creation itself!"
- Playing with Fire: His Extreme Edge attack has him engulf one of his gauntlets in flame before charging across the arena, with a fiery shockwave erupting from the gauntlet to blast everyone on that side of him as he charges.“Come! The cleansing flame will seal all wounds!”
- Power Crutch: Hashmal charges up his Landwaster Signature Attack by accumulating mana while standing on top of his Command Tower. If you can’t bring his Tower down before he’s fully charged, Landwaster will wipe the raid.
- Rewatch Bonus: During the boss fight, Hashmal has a couple of attacks that involve summoning giant pillars. In 5.4 Fandaniel, Hashmal's opposing Scion of Light summons a bunch of giant pillars too.
- Self-Duplication: The 4th-make Hashmal can summon copies of itself. These copies will use Extreme Edge to cut down the pillars created by the main Hashmal, forcing players to avoid both the fiery shockwave and the subsequent toppling of the pillars.
- Signature Attack: Landwaster. A giant rune forms behind Hashmal, and boiling lava covers the ground as he charges up an energy ball between his hands. Hashmal then leaps into the air and slams one of his hammers down, shattering the ground and dousing the raid with magma.
- Western Zodiac: Leo. Hashmal is visually lion-like and his ultimate attack is Fire-elemental.

- Casting a Shadow: His Dark Geas ability plunges the battlefield into pitch darkness and inflicts Bleed on all raid members. Players will need to banish the darkness by interacting with magical circles scattered across the floor to avoid a wipe.
- Doppelgänger Attack: He can summon up to four copies of himself, which will charge across the room at lightning speed in order to run players over as part of his Maverick attack.
- Jousting Lance: A demon knight wields a jousting lance as his weapon of choice.
- Mythology Gag:
- He’s a reference to a
 Dummied Out Lucavi from Final Fantasy Tactics.
 - The attack animations for Weapon Break and Helm Break are copied from how they appeared in Final Fantasy Tactics.
- He’s a reference to a
- Our Centaurs Are Different: His humanoid torso grows out of the hindquarters of a monstrous warhorse—a warhorse which happens to have a gigantic snake tail and a pair of spiked wheels in place of its hind legs.
- Power Crutch: Rofocale charges up his Heavenly Submission Signature Attack by accumulating Aetherial Acceleration while his three Archaeodaemon minions are alive. If the daemons aren’t killed before Rofocale gets a full gauge of Aetherial Acceleration, Heavenly Submission will wipe the raid.
- Religious and Mythological Theme Naming: He takes his name from Lucifuge Rofocale, a high-ranking demon in the Grand Grimoire.
- Signature Attack: Heavenly Submission. Rofocale flies high into the air, shining brightly as he circles the arena. After a short delay, Rofocale swoops down and charges through the center of the room, bowling over everyone in his path.
- Western Zodiac: Sagittarius, presumably. His Dummied Out Tactics counterpart was associated with the Sagittarius auracite, and Rofocale himself resembles a centaur (though not an archer).

- Action Bomb: His Shade flunkies will start trying to blow themselves up if they aren’t killed quickly enough.
- Animated Armor: Argath's body is basically a floating suit of armour with white light glowing within the various pieces and nothing to hold them together.
- Back from the Dead: His human form should logically be dead as he lived thousands of years ago. There's no attempt at explaining how he exists in the present day, the only hint was that he was somehow resurrected the same way Ajora did in Tactics.
- Brainwashed and Crazy: Implied. Argath's smug attitude about "common rabble" and his superiority over them is nearly the same as it was in Final Fantasy Tactics. Unlike in the original game where he was defiant to the end, he realizes what horrors he committed after coming to his senses and begs Ramza to save him. Whether or not he genuinely was horrified by what he had done or was being a coward and begged to be saved remains a mystery.
- Combat Tentacles: He has six bladed tentacles coming out of his pauldrons, which he uses to stab the ground for some of his attacks.
- Demonic Possession: Averted. Unlike in Tactics, the auracite don't cause their bearers to become possessed. Instead they mutate their owners and multiply their desires and fears..
- Dying as Yourself: Argath seems to come to his senses in his final moments, expressing horror at his own actions and begging Ramza to save him as he disintegrates.
- Evil Sounds Deep: Argath is the first raid boss to have actual lines of recorded dialogue, and accordingly he has a deep and cruel voice.
- Floating Limbs: None of the pieces of armour that make up his body are physically connected to each other. His head and limbs simply float in the air, with metallic orbs where joints like the elbows and knees should be.
- Forced Transformation: Any player who gets three stacks of the Unnerved debuff will transform into a chicken and run away from Argath. Players who touch the blue fire that borders the arena from the second phase onward will instead turn into zombies, who attack nearby party members before dropping dead.
- Geas: His Divine Commandment attack forces each member of the raid to either look away from him or scatter, inflicting massive damage if they fail to do so. If he wears the dark mask while using Divine Commandment, players must instead do the opposite of whatever he commands them to do—looking at him when he tells them to look away, or staying put when he tells them to scatter—to avoid taking damage.
- Glowing Eyes of Doom: The eyeholes of his two masks glow white by default, and change colour when he puts one of them on to perform his Divine Commandment ability. The dark mask’s eyeholes glow red, while the white mask’s glow blue.
- I Am the Noun: He makes several boasts of this sort when he uses Divine Commandment:“I am the truth from which you run!”“I am the lies on which you sup!”“I am Revelation!”
- Interface Screw: His Gnawing Dread ability inflicts the Temporary Misdirection debuff, scrambling the player's directional inputs so that you will move in whatever direction a spinning hand icon above your head happens to be pointing.
- Mask of Power: He has two masks—one white and angelic, the other dark and demonic—that he puts on whenever he uses Divine Commandment. The white mask represents truth while the dark mask represents falsehoods, and which one he puts on determines whether players should obey his commands or not during Divine Commandment.
- Me's a Crowd: Argath’s Royal Blood ability summons at least a dozen “Shades” of his human form, each of whom will lock onto a player and chase after them. These Shades will buff each other if they’re too close to one another, and will eventually start blowing themselves up.
- Multi-Armed and Dangerous: He has four “arms”, three on his right side and one on his left, in addition to his six Combat Tentacles..
- My God, What Have I Done?: He utters his as he is dying, seemingly coming to his senses… given how this is Argath however it’s ambiguous if this is genuine or just an attempt to garner pity so that he’ll be spared.
- Mythology Gag: He shares his name with a minor noble from Final Fantasy Tactics, although that Argath was never the host of a Lucavi nor made any claim to be king of Ivalice. His form also slightly resembles Ultima's true form in the same game and sharing the same battle theme as well.
- One-Hit Kill: His Coldblood attack will instantly kill anyone who isn't standing within a very small safe zone when it goes off, and usually comes right after the aforementioned Gnawing Dread.
- Playing with Fire: He can cast Fire IV.
- Power of the Void: His Empty Soul ability summons many Shards of Emptiness that will gradually empower Argath by filling up an Emptiness gauge. If the Shards aren’t destroyed quickly enough and the gauge is completely filled, Argath’s Dark Ultima attack will wipe the raid.“You do not belong in my world. Step into Nothing!”
- Rage Helm: His “head” is a horned helmet carved in the likeness of a fleshless demonic skull.
- Signature Attack: Dark Ultima.
- Spikes of Villainy: Several pieces of his armour have wicked spikes shaped like teeth and thorns adorning them.
- Voice of the Legion: His voice has a noticeable distortion that makes him sound inhuman and demonic. The distortion fades as he dies, letting his host’s natural voice be heard for a few seconds.
- Western Zodiac: Taurus. Duma, the Lucavi he becomes, was caused by the Taurus auracite, and was a Dummied Out Taurus Lucavi in Tactics. Argath himself meets the Taurus traits of being practical, stubborn, and luxury-loving.
- Action Bomb: Famfrit summons three Dark Rain adds that will explode if the party doesn’t kill them quickly enough. Having one or two explode is survivable; having all three explode will kill everyone but the tanks.
- Making a Splash: Most of his attacks involve drawing water into vessels, then unleashing a torrent upon the raid.
- Mythology Gag: Based on the Esper from Final Fantasy XII.
- Signature Attack: Tsunami. Unlike most instances of this trope, it isn't his ultimate attack during his fight.
- Western Zodiac: Aquarius. An armored being who fits the description of "water-carrier".

As with Hashmal, the IVth Legion summons a new version of Belias during the Bozjan campaign. This "4th-make" Belias can be fought as a Critical Engagement boss in Zadnor and is much more dangerous than the original.
- Call-Back: Summons versions of the Belias-egi from the Summoner quest line, though they're called "Gigas" here.
- Kill It with Fire: Has a very fire-based moveset.
- Mythology Gag: In the Ivalice Alliance games, Belias replaces Ifrit as the Fire-elemental summon. Here he shares Ifrit's Hellfire mechanics.
- Rewatch Bonus: In Final Fantasy XII Belias was a Fire-elemental esper, but here in Final Fantasy XIV Belias also has a bunch of Time Master abilities. Just like the namesake of the his opposing Scion of Light: Loghrif.
- Signature Attack: Hellfire. Belias leaps into the air and drives his staff into the ground, fracturing the floor as flames erupt from the cracks.
- Time Master: Has several time-based abilities at his disposal. Time Eruption divides the battlefield into a 3x3 grid of squares, each of which has either a slow- or fast-spinning clock on it: these clocks explode after a short delay, with the fast ones exploding first, creating safe zones for players to step into before the slow ones go off. The Hand of Time summons several crystals that tether to random players, and when the ability finishes casting, those tethers will freeze any player that comes into contact with them, while the tethered players become massively slowed if they did not move far enough from the crystals.
- Western Zodiac: Aries, as a Fire-elemental ram demon.

- Beam Spam: Dispose. Construct 7 stands in the center of the room and start firing lasers from his torso while rotating in place. Players will need to stay behind him to avoid getting hit.
- Disproportionate Retribution: Failing mathematical equations in his presence is met with dire consequences.
- Easter Egg: He notes that he's suffered 95% system damage after being defeated and enters safe mode. Returning to his arena after defeating Yiazmat reveals he's fine enough to dance following your battle.
- HP to One: Subjects the raid to a math problem that involves reducing everyone's Max HP to a random single-digit number. After the "attack" ends, everyone's Max HP returns to normal... but their current HP remains the same, which means healers need to start healing everyone up fast.
- Mythology Gag: He’s a reference to an optional boss from Final Fantasy Tactics. The dance he does, while not identical, brings to mind Ramza's first command for Construct 8 in that game.
- Destroy, Dispose, Compress, and Pulverize are all attacks Constructs 7 and 8 could use in Tactics. The animation for Dispose is a recreation of its Tactics counterpart.
- Puzzle Boss: The aforementioned math problem. In addition to reducing all players to single-digit HP, Construct 7 demands that they align their hit points with prime numbers or with multiples of a certain number. Players will have to adjust their hit points by stepping onto one of four numbered platforms, adding the designated number to their hit points. Anyone who makes two mistakes during the puzzle will be instantly killed by his follow-up Incinerate attack, while every correct answer adds a stacking buff to the player's damage output.
- Robo Speak: SPEAKS IN ALL CAPS. TERSE SENTENCES. PARAMETERS ACCEPTABLE.
- Super-Powered Robot Meter Maids: A powerful robot with built in laser weaponry. It is also apparently a math instructor and a competent dancer.
- This Is a Drill: One of its attacks involves its arm turning into a drill, then crashing it into the floor to make the ground erupt in flames.
- Turns Red: After the raid escapes from his black hole, Construct 7 boots up “Annihilation Mode” and starts glowing red hot. His attacks become more powerful, his AoEs are more numerous and come in more complex patterns, and he introduces prime numbers to his math puzzle.Construct 7: SUBJECT DISMISSAL FAILED. SUBJECT TERMINATION APPROVED. BOOTING ANNIHILATION MODE. WARNING! WARNING! RESEARCH STAFF: EVACUATE TO SHELTERS IMMEDIATELY.

- An Ice Person: Yiazmat’s White Breath attack covers the entire battlefield in ice, except for a small safe spot around his legs.
- Attack Its Weak Point: The glowing orb in Yiazmat’s chest contains his heart, and the heart becomes exposed while he charges up Solar Storm. Destroying the heart is necessary to survive Solar Storm, and doing so will also take off almost half of Yiazmat’s total hit points and render him more vulnerable to harm.
- Blow You Away: Yiazmat can summon Wind Azers to attack the raid, and his Cyclone ability sweeps up the entire party to blow them around the arena. Several of his attacks also involve blasting players with wind magic AoEs and creating tornados that slowly travel across the room, damaging anyone who comes into contact with them.
- Breath Weapon: Two variants. White Breath is an ice-based breath weapon that hits the entire arena except for a safe spot under Yiazmat’s body, and his petrifying breath is an unmarked cone-shaped AoE that hits everything in front of him when he rears up on his hind legs.
- Bullfight Boss: Yiazmat’s Rake attack has him charge across the arena until he reaches a wall, pivot to the left or right, charge again, pivot again, and charge again. Every step he takes is a separate hit, and anyone who doesn’t get out of his way will rack up massive damage as he tramples them.
- Large Ham: His English voice work is very dramatic and aggressive. Every line he speaks is practically screamed. Just look at his character quote at the top.
- Magnetism Manipulation: His Magnetic Lysis ability polarizes the floor so that half of it becomes positive and the other half negative, and gives every player in the raid either a positive or a negative charge. Players who stand on the same polarity will start levitating, becoming more vulnerable to some of Yiazmat’s attacks, while those who stand on the opposite polarity will stay grounded.
- Mythology Gag: He’s based on the infamous Marathon Boss from Final Fantasy XII. The first couple phases of the fight even retain the original's Damage Sponge properties before the party finally strikes its weak point, damaging the dragon's armored hide.
- Our Dragons Are Different: This version of Yiazmat is a mechanical dragon whose wings, head, and the first third or so of its spine aren’t physically connected to the rest of its body, with a sunlike glass orb floating in the empty space between its two body segments. It also has Hard Light wings and a pair of mantis-like claws in addition to its four legs.
- The Power of the Sun: Yiazmat has a distinct sun motif thanks to the glowing orb in his “chest”, and his ultimate attack is called Solar Storm.
- Ring Out: Any players that screwed up the Magnetic Lysis mechanics will be flung out of the arena to their deaths when Yiazmat casts Cyclone.
- Signature Attack: Solar Storm. After building up his mana, Yiazmat bombards the arena with blinding pillars of light.
- Taken for Granite: The Breath Weapon that Yiazmat uses when he rears up on his hind legs will petrify anyone hit by it for seven seconds.
- Turns Red: When his health gets low, Yiazmat will use Growing Threat to boost his attack power and give himself extra hit points, glowing a fiery shade of orange in the process.
- Western Zodiac: Taurus again, since he uses the exact same stone Argath used, the Duma.
Ancient spirits that have kept watch over the Orbonne Monastery for centuries. In life they were compatriots of Ramza Beoulve, and helped him to seal away Ultima the High Seraph. In death they guard her prison, awaiting the arrival of one who can destroy Ultima for good. Three of them challenge the Warrior of Light’s party to assess their worthiness, serving as bosses in the raid.
- Adaptational Wimp: In this canon, Ramza's party failed to defeat Ultima, with most of the party falling in battle and the few survivors shedding their physical forms to watch over the sealed Ultima and test any adventurers who would face her. In Final Fantasy Tactics, they are able to defeat Ultima on their own.
- The Cavalry: They intervene to save the party in the battle against Ultima, slaying her Lucavi minions and conjuring a barrier to shield them against her Ultimate Illusion spell.
- The Chooser of the One: By testing the opponents they choose the champion who will eventually challenge Ultima.
- Hero Antagonist: The Zodiac Braves want to stop Ultima just as much as the Warrior of Light does, but they also take their duty very seriously and will only let the player pass if they can prove themselves strong enough to face the challenges ahead.
- Mythology Gag: They're clearly based on their counterparts from Final Fantasy Tactics and many of their attacks are from there as well.
- One-Winged Angel: Before their fights they assume more monstrous forms using the Zodiac Stones in order to test the party.
- Purpose-Driven Immortality: They remain bound to this world to watch over Ultima’s prison and to await the coming of someone who can destroy her. Once Ultima is defeated, the Zodiac Braves are able to pass on.
- Threshold Guardians: The only reason the Zodiac Braves fight against the Warrior of Light is to determine whether the Warrior is strong enough to defeat Ultima, and they will kill the Warrior if his or her party isn’t up to the task.
Mustadio Bunansa

- Anti-Frustration Feature: Last Testament can not kill players who are facing the correct way, as it functions as a Percent Damage Attack. This saves healers and other roles with their own forms of healing the trouble of trying to frantically heal their party while also positioning themselves. Also any player who died between casting Analysis and using Last Testament will still be hit by it, but they will not gain a ring around them. This means that when Mustadio hits, he simply reduces their health 1 and nothing more, since a revived player would likely miss Analysis and thus it would be a bit unfair to instantly kill them with no way to survive the attack.
- Battle Theme Music: Tension 1.
- Blown Across the Room: If you fail to position yourself correctly to defend against his Last Testament attack, it performs a One-Hit Kill on you while sending your body flying across the arena.
- Calling Your Attacks: The first time he uses "Last Testament", he almost calls out his attack by name as he pulls the trigger. Doubles as a Pre-Mortem One-Liner if players fail to turn to the correct facing and suffer instant death as a result.Mustadio: Let this be your final testament.
- Cold Sniper: Monotone, cunning, and can land heavily damaging shots when he snipes from a distance.
- Confusion Fu: As seen with more frequency in Stormblood content, Mustadio does not display a telegraph field until the last second when charging his "Left/Right Handgonne" weapon skill attacks. Players must instead pay attention to his facing and him preparing to use the attacks and move to the opposite side. His "Analysis/Last Testament" Signature Attack also seeks to trick players via player complacency, because the ring that appears implies you want to keep the highlighted facings towards him to avoid the instant death strike. Instead, players have to expose the gap in the ring to the muzzle of his sniper rifle, as that's the facing he did not scan.
- Crosshair Aware: When first preparing his Last Testament attack, the battle briefly pauses to show Mustadio taking up his sniping perch, with a brief view of the battlefield through the scope of his rifle.
- Guns Akimbo: He wields a pair of handgonnes as his primary weapons.
- Machine Monotone: His voice is heavily filtered to sound electronic, and he speaks with a flat monotone.
- Multi-Ranged Master: He has a pair of pistols and a Sniper Rifle as part of his bossfight.
- Robo Speak: More obvious in the Japanese version where he says single words instead of sentences.
- Signature Attack: Last Testament. Mustadio analyzes everyone in the raid to determine their weak points. He then positions himself atop a small cliff overlooking the battlefield, draws his sniper rifle, and fires a shot that hits everyone simultaneously for massive damage. If a player positions themselves incorrectly, the attack becomes a One-Hit Kill to them.
- Technopath: His Maintenance ability magically reactivates the constructs lying around his arena so they can attack the party.
- Western Zodiac: His machine form wields a pistol in each hand, and when he reactivates the constructs dotting his area, it's always evenly. Thus he likely represents his Tactics counterpart's sign of Libra.
- His ability to analyze the alliance for weakness also ties into this: The Libra spell of past games does exactly that.
Agrias Oaks

- Absurdly Sharp Blade: One of her fight’s core mechanics. Agrias will drop circles where players can pick up a magical sword as a Duty Action. They must use these swords to instantly kill certain enemies, like the Halidoms, which must die quickly and can't be burned down conventionally.
- Battle Theme Music: Antipyretic.
- BFS: Her sword is as long as she is tall, if not longer.
- Crystal Prison: Consecration scatters the members of one alliance and traps them in Halidom crystals. Other players must use the sword Duty Action to shatter the crystals before the trapped players get hit with Northswain’s Strike.
- Good Is Not Nice: She's a holy knight and is testing you to see if you are capable of taking on Ultima, but she's not going to half-ass it by easing up.
- Light 'em Up: Many of her attacks are Holy-elemental.
- Light Is Good: She’s a Holy Knight who transforms into an angel, wields powerful light-based magic, and is firmly on the side of good despite opposing the player’s party.
- Luckily, My Shield Will Protect Me: Invoked as a core mechanic of her fight. During the fight she will drop a circle that gives you a shield as a Duty Action. As soon as it appears, the player needs to use it while facing her to avoid being damaged, knocked back, and afflicted with a Vulnerability Debuff.
- One-Handed Zweihänder: She wields a sword the length of her own body in one hand.
- Our Angels Are Different: Her angel form has metallic skin and feathers.
- Shock and Awe: Her Hallowed Bolt spell rains purple lightning down on the battlefield.Agrias: I call out to the skies and tremble as the brilliance of a thousand bolts blind mine enemies and tears their flesh asunder!
- Signature Attack: Heavenly Judgment. After building up her power, Agrias summons a Storm of Blades which rain down and then explode in a burst of holy light.
- Western Zodiac: Her "Lucavi" form has feet ending in points, and her armor is designed in a way that look like she has more legs and giving her a crab-like appearance, tying into her Tactics sign of Cancer.
- Worthy Opponent: Supplies the party with mystic swords and shields to defend themselves from some of her more powerful attacks.
Cidolfus Orlandeau, The Thunder God

- Badass Boast: He makes this boast while charging up his Signature Attack, Balance Asunder:The Thunder God: I have been called the god of thunder. You will now know why! Upon my holy blade the very world lies in balance. And now the scales will tip!
- Battle Theme Music: A Man Consumed.

- Body Horror: He twists himself into a gigantic monstrosity to fight the parties. Notably, his tail has a demonic face at the end, which he uses to hold one of his swords.
- Casting a Shadow: Shadowblade targets three to six players with rapidly expanding spheres of dark energy. Letting any of the spheres overlap with one another will inflict a powerful Bleed effect on the entire raid.
- Confusion Fu: All of his attacks that directly involve swinging his sword are named "T.G Holy Sword", you need to read his body language's telegraphs to know how to reactnote . Also, after the halfway point he'll do a sword attack where he moves the telegraph for which section he's going to bury his sword in, it can be random between any of his three swords, and he'll then hit each of the platforms he pointed out in reverse order, while also hitting the other two platforms he was pointing at normally, this is easily his hardest attack to dodge.
- Cutlass Between the Teeth: The head at the end of his tail carries his third sword this way.
- Damage-Increasing Debuff: "Crush Helm" applies four stacks of Slashing Resistance Down to each of the tanks before hitting them all with a tankbuster. The healers can cleanse these stacks before the attack goes off if they act quickly.
- Feeling Their Age: Averted. It may have been centuries since Cid last saw battle, but he mocks the party for hoping his skills had decayed.The Thunder God: Were you expecting a modicum of rust?
- HP to One: His opening attack, Cleansing Strike, reduces the entire raid to 1 HP and inflicts a Doom debuff that can only be removed by healing the afflicted to full hit points.
- An Ice Person: "Crush Accesory" covers most of the floor with harmful ice. It also summons three Icewolf elementals which must be killed before they self-destruct.
- Large Ham: Spouts a ton of dramatic lines at regular intervals throughout the entirety of the fight, to the point of drowning out the chatbox and there frequently being a dialogue box in the middle of the screen. The impressive part is that he almost never seems to repeat a line.
- Multiple Head Case: He has a second, demonic-looking head at the end of his tail.
- Mythology Gag:
- His Hyuran appearance bears a passing resemblance to XIV's own Cid nan Garlond. The robes add in another layer, recalling Cid's time as the amnesiac Marques, itself a reference to Cid del Norte Marquez from Final Fantasy VI. Montblanc even briefly mistakes Cidolfus for their Cid when the party first sees him.
- His sword attacks are all named "T.G Holy Sword", T.G standing for Thunder God, which reflects how Tactics managed to work his title into the text limit as "T.G Cid".
- His usage of three swords, one being wielded by a demonic face on his tail, alludes to the fact he wielded the three special sword abilities of the Holy Knight, Dark Knight, and Divine Knight class. Being as Holy Knight was Agrias' job in Tactics, he also shares some of Agrias' attack vocalizations.
- His boss theme was also used as the Final Boss theme for Romeo Guildenstern, the Big Bad of Vagrant Story.
- Red Baron: He was known as the Thunder God in life for being a One-Man Army who could smite nearly any foe. His boss title refers to him exclusively as "The Thunder God".
- Religious and Mythological Theme Naming: An added bit of characterization from Tactics, The Thunder God's appearance looking like an Eastern Demon calls to mind the Shinto God of Thunder, Raijin. His arena is even shaped like Taiko drums associated to Raijin, which he'll "play" when he slams his swords down for one of his T.G Holy Sword attacks.
- One-Handed Zweihänder: His swords are massive even in relation to his gigantic size. He wields one in each hand, and holds a third one between his second head’s teeth.
- Signature Attack: Balance Asunder. Drawing power from his Ephemeral Knights, the Thunder God creates a magic circle that channels vast amounts of power into his three swords. He then reclaims his blades and unleashes a mighty swing that shatters the platform in a blast of brilliant energy.
- Spell Blade: He can imbue his swords with lightning magic.
- Spell My Name with a "The": The game consistently refers to him as The Thunder God.
- Western Zodiac: Since Cuchulainn is a voidsent in this universe and not a Lucavi, Orlandeau takes his place in representing Scorpio. The Thunder God triple-wields swords, with one on his tail, much like a scorpion's two claws and stinger.

- A God Am I: She declares herself to be the only god while casting Ultimate Illusion.
- Advancing Wall of Doom: During her second phase, Ultima can force the entire raid to navigate a maze while a Giant Wall of Watery Doom slowly floods the room, killing anyone who can’t outrun it.
- All Your Powers Combined: Summons Belias, Famfrit, and Hashmal to perform attacks from their individual fights during the first phase of her fight.
- Ancient Astronauts: Some characters in game believe she originated from another star, which may explain how she and the Lucavi aren't classified as voidsent.
- Anthropomorphic Personification: She is the personification of Ruin, from which the spell Ultima is derived. It is theorized by some characters that the "primal" Ultima came into being out of worship of the powers of ruination from the spell.
- Anti-Frustration Features: If you reach Ultima's second phase of her fight (after the transition phase) and the whole alliance is defeated, you can restart the fight from the second phase rather than the very beginning.
- An Ice Person: Most of her unique attacks are Ice-elemental.
- Battle Theme Music: Ultima's Transformation in Phase 1, Ultima's Perfection in Phase 2.
- Big Bad: To the whole Ivalice story arc. Her attempts to take over the world is stopped by Ramza's Heroic Sacrifice. She bides her time waiting for a new vessel suiting her to come around, which just happens to be the Warrior of Light.
- Clap Your Hands If You Believe: Ultima was shaped by the fear and worship of the spoken races she was destroying, not unlike how primals are shaped by the belief of those who worship them, leading her to be described as a "living primal". This in turn led her to develop a god complex.
- Composite Character: Though primarily based on Ultima from the Ivalice Alliance, she shares some backstory traits with Jenova from Final Fantasy VII. Both are aliens who crashed into their worlds and began rampant destruction and both are able to corrupt other lifeforms into monsters; Jenova through her own DNA and Ultima through auracite.
- Confusion Fu: In the final phase of her fight, she can cast Eastward or Westward March to move an attack that's about to launch a set distance in the chosen direction.
- Dying Curse: She uses her last words to tell the party that they’ll regret destroying her:"Consign me unto darkness and your light will be forever lost!"
- Fantastic Nuke: Her Ultimate Illusion spell levels the Necrohol once she unleashes it, leaving nothing but blasted waste in its wake. Only the spirits of the Zodiac Braves save the party from being annihilated with everything else. The Pandæmonium raid reveals that she is the source of the Heart of Sabik and the spell that bears her name, meaning that she's responsible for spell that reduced the Praetorium and Castrum Meridanum to a flaming ruin.
- Final-Exam Boss: Reuses mechanics from Belias, Famfrit, Hashmal, and Rofocale.
- Gemstone Assault: Grand Cross drops three enormous auracite shards on the battlefield. These shards will flatten anyone standing underneath them when they land, and then shoot laser beams in the cardinal directions for good measure.
- Generic Doomsday Villain: She descended from her plane of existence to slaughter the spoken races as a mindless force of destruction.
- Grand Theft Me: Set in motion the entire return to Ivalice raid series to lure the Warrior of Light to her to become her vessel.
- Greater-Scope Villain: In a twist, she's implied to be the fundamental cause of the Pandæmonium Raid series in Endwalker: Athena discovered the Heart of Sabik, which is actually an extremely powerful auracite that originates from 'outside the world', and as Auracite amplify the desires and emotions of those who hold them, she was eventually overwhelmed by her already present thirst for godhood. It's never outright confirmed, but one of the Warrior of Light's dialogue choices can namedrop her if they completed the Return to Ivalice questline beforehand, adding credence to this. The connection is all but made explicit in the Savage version of Athena's boss fight: the battle music changes to an orchestral rendition of Ultima's Perfection, Athena begins quoting Ultima's "denizens of the Abyss" summoning incantation, and she begins summoning the same Dominion minions that Ultima summoned.
- The Heart of Sabik being implied to stem from her also implies her to be this for part of A Realm Reborn, with the remnants of the Heart of Sabik being used to fuel the Ultima Weapon, as well as the Weapons questline of Shadowbringers in Garlemald's efforts to recreate it
- Ground Pound: Her Dominions have an attack where they drop out of the sky at great speed, producing shockwaves that inflict massive damage unless someone intercepts the Dominions before they land. Any player that intercepts one will become Fearless, gaining a minute-long damage buff.
- I Am the Noun: Her final words preceding her Dying Curse."I am your mother. I am your maker! I. Am. Ivalice!"
- Instant Runes: Three intricate diamond-shaped glyphs form behind Ultima when she casts Ultimate Illusion.
- Light 'em Up: The rest of her unique attacks are Holy-elemental.
- Light Is Not Good: Despite her Holy attacks and angelic appearance, Ultima is very much not a force of good.
- Mythology Gag:
- She’s based on the recurring entity from the Ivalice Alliance, particularly her Final Fantasy Tactics incarnation. Both of her battle themes come from the final boss fight of Tactics, and the minions that she summons look identical to Tactics Ultima’s first form.
- The incantation that she chants to summon her minions is taken, word for word, from Tactics Ogre.
- Her need of a vessel almost mirrors her original incarnation from Final Fantasy Tactics where she pulled this off on Alma. In this version, she wants the Warrior of Light as her vessel.
- Her tankbuster attack, Redemption, is the same ability she used in her Final Fantasy XII incarnation. Likewise, Grand Cross originates from her skill set in Final Fantasy Tactics, but it causes weakened defenses in the raid rather than the nasty stacks of status ailments that the original form used.
- The phase transition attack, Ultimate Illusion, begins with an incantation based on the one used for her All-Ultima spell in Final Fantasy Tactics.
- No Ontological Inertia: Subverted. The heroes hope that the threat of Ultima's auracite would die with her at the end of the raids. But the auracite she has already created remains fully functional even after her defeat. This auracite ends up in the hands of the IVth Legion, who turn the auracite's powers against the Bozjan Resistance during the Save the Queen questline.
- Our Angels Are Different: From the waist up, she’s an eerie but angelic-looking humanoid with brightly-coloured wings. From the waist down, she’s a grotesque thing with far too many fins, tentacles, and gnashing maws full of sharp teeth.
- Red Baron: She was also known as the Angel of Blood.
- Sequential Boss: In her first phase, she’s stuck in a wall and cannot move. After losing half of her health, she’ll free herself by destroying the entire chamber with Ultimate Illusion, recovering all health and gaining new attacks in the process.
- Signature Attack: Ultimate Illusion. A constant blast of energy that destroys all but a small portion of the arena, damages the party every second for 30 seconds, then finishes off by destroying the last portion of arena, sending the raid into another area.
- Summon Magic: She can conjure invincible “Demi-” versions of her Lucavi minions to assist her in battle. In her first phase she’ll summon Famfrit, Belias, and Hashmal. In her second phase, she’ll summon Dominions instead.“Denizens of the abyss! From ink of blackest night, I summon you! Darkness to me!”
- Time Abyss: While its left ambiguous exactly where Athena got the Heart of Sabik from, given that its an auracite it is postulated to have potentially come from Ultima herself. This would make Ultima one of the only beings to have been around since at least the time of the ancients—and that's just in terms of how long she's been on Etheirys.
- Villainous Legacy:
- In the Save the Queen storyline, a sequel to Return to Ivalice, the sword Save the Queen that is integral to the plot was crafted from her auracite. Later in that same storyline we also meet a cult that worships her and uses auracite, working for Garlemald's IVth Legion.
- In the Pandæmonium storyline, the Warrior of Light and Claudien both theorize that the Heart of Sabik which caused Athena's obsession originates from her. This would also make her indirectly connected to the Sorrow of Werlyt storyline, as the Weapons use artificial copies of the Heart of Sabik.
- Voice of the Legion: Her voice echoes whenever she speaks.
- Western Zodiac: Virgo.
Shadowbringers
Eden
The Idol of Darkness

- Damage-Increasing Debuff: "Unjoined Aspect" inflicts a debuff that makes all party members more vulnerable to either light or dark damage, switching each time they get hit by an attack of the opposite element.
- Flunky Boss: The Idol is surrounded by a massive flock of bird-like Sin Eaters that do most of the attacking for it, though only occasionally are the Sin Eaters active targets. The Idol itself is the only target that matters for clearing the fight.
- Hearing Voices: Is likely the "Faerie" that Gaia says she sometimes hears talking to her. It told her her name and bade her seek out Eden.
- Magic Is a Monster Magnet: The Idol is a being of Darkness, but it is able to use its dark magic to attract and somehow direct Sin Eaters. Possibly by relying on their instincts to follow the darkness and eat it.
- Meaningful Name: The instance the battle with the Idol takes place in is called 'Iconoclasm,' which is a term used to describe the representational importance of destroying icons, symbols, and monuments. Considering the Idol is both a literal symbol, and what it represents narratively (being the 'Fairy' that guides and controls Gaia), it's an apt description for what you're doing by destroying it.
- Signature Attack: Empty Flood. The Idol sends two flocks of Sin Eaters (named Idolatry) to occupy the party while it builds up its Darkness. Once ready, it creates an explosion of darkness and light that engulfs the entire battlefield.
- Tele-Frag: In Savage, the Idol can create thick crystal walls before casting "Away With Thee". If players don’t position themselves correctly before "Away With Thee" finishes casting, they can end up inside a wall, instantly killing themselves.
- Wave-Motion Gun: "Unshadowed Stake", the Idol’s tankbuster attack, fires a beam of darkness at the main tank. They need to position themselves so that the beam doesn't hit the rest of the party.
- Weaponized Teleportation: It can open Voidgates that will conduct flocks of Sin Eaters from one portal to another, to continue their attacks. The spell "Away With Thee" will force the players through a portal of their own, requiring them to position themselves carefully to avoid being teleported directly off the edge of the arena.
- Wrong Context Magic: As with the Voidwalker before it, the Idol commands significant Dark magic and can open Voidgates on the First. It can even send flocks of dark-element creatures at you that look the same as the Sin Eaters it commands. Whether these are Voidsent in the same shape, or Sin Eaters somehow corrupted by Darkness, it's not normal for a threat on the First.
- Yin-Yang Bomb: The Idol attacks with its own darkness and the light of its amassed Sin Eaters in equal measure. Eventually, it will apply debuffs to the party that require them to alternate between being hit by light or by darkness to avoid dying.
The Shadowkeeper

- Animalistic Abomination: Has the appearance of a scraggly black wolf with eight eyes and six mouths.
- Antihero: It's in her title. It becomes more apparent if you've completed all of the Role Quests.
- Casting a Shadow: She's the Shadowkeeper, what did you expect? In addition to using darkness magic, she also literally casts shadows that affect where her other spells hit.
- Damage-Increasing Debuff: "Umbra Smash" hits the Shadowkeeper's target four times, with each hit applying a stack of Slashing Resistance Down. She then follows up with a slashing-based or a magic-based shared tank buster for massive damage.
- Foreshadowing:
- A literal example assuming the player is figthing this before they learned the original Shadowkeeper's true identity. When casting shadows to determine what direction an attack is facing, the shadows take on the shape of Cylva's sillouette.
- In addition to this, the Shadowkeeper wields an oversized version of the Deepshadow Sword, a Paladin weapon. Now, what class was Cylva again?
- Mythology Gag: Many of the Shadowkeeper's attacks—namely "Giga Slash", "Umbra Smash", "Implosion", and "Deepshadow Nova"—take their names from abilities used by the Shadow Lord of Final Fantasy XI.
- One-Winged Angel: The Shadowkeeper was this to Cylva, as their normal form was a mundane elf who had dark magic but was otherwise unimpressive. This form that she turned into with the aid of Mitron and Loghriff was lethal enough to be the Climax Boss of Ardbert's group's adventure, before they would go on to kill Mitron and Loghrif.
- The Shadow Knows: The Shadowkeeper may be a monstrous wolf, but her shadow is an elven woman's silhouette, hinting at her true nature.
- Stance System: The Shadowkeeper regularly swaps between a quadrupedal stance and a bipedal sword-wielding stance, with each having a different set of attacks and mechanics.
A chimeric entity based on Ryne's greatest hopes and fears. It takes the form of a fusion of Thancred, Ran'jit, and Innocence. See the Primals page for more information.
Eden's Promise

The Ascian Prime created by Mitron forcibly fusing with Gaia creates an entity determined to create a perfect utopia, one where inconvenient memories of the past and desires for a different future are extinguished.
- Ability Mixing: In the second phase Eden's Promise will start combining the Primals' powers to launch two attacks at once, giving the party much less room for error when dodging them. It will use any combination of Garuda, Ifrit, Leviathan and Ramuh except for Garuda + Ifrit, as that combination has no safe spots for players to avoid damage.
- All Your Powers Combined: It draws upon memories of the primals summoned in the effort to restore the Empty (sans the Cloud of Darkness) to attack players.
- Damage-Increasing Debuff: In Savage, its Formless Judgment tankbuster applies Slashing Resistance Down to the main tank and Piercing Resistance Down to the off-tank. It hits each tank twice, forcing a tank swap to avoid getting insta-killed by the second hit.
- Death of Personality: It is trying to do this to itself. Mitron wants Gaia to regain her memories of being Loghrif, and he tries to do so by purging her of all her recent memories so that she'll forget the distractions of her most recent life. In the Savage version of the fight, he succeeds, causing Gaia to become the True Final Boss.
- Eye Beams: It blasts the last of Gaia's treasured memories with green lasers fired from its eyes.
- Final Boss: Of the Eden raid series.
- Final-Exam Boss: Every Junction it uses involves each of the mechanics not just from the Source Primals, but also the Eden Primals as well.
- Frictionless Ice: When it junctions the memories of Shiva and casts Diamond Dust, the floor will be covered in slippery ice for a short time.
- Living Statue: For the add phase, Eden's Promise summons animate marble sculptures to attack the party.
- Multi-Armed and Dangerous: It has eight arms, six of which sprout from its hips rather than its shoulders.
- Multiboobage: Its chest is covered with dozens of breast-like growths, not unlike the Ephesian interpretations of Artemis, a goddess associated with fertility among other things. The growths on the Ephesian Artemis have been speculated to be everything from actual breasts to testicles to gourds, all of which have been considered symbols of fertility by various cultures.
- Mythology Gag: To Final Fantasy VIII's Draw and Junction systems. In VIII, players who Drew spells from enemies could Cast them immediately, or Stock them into inventory. Eden's Promise can likewise draw power from a Primal crystal and Cast it right away; in the third phase, it can draw and Stock the spells for later use. Additionally, Eden's Promise can directly Junction Shiva or Titan and use their repertoires for a short while, much like Junctioning a Guardian Force in VIII would grant you access to their exclusive skills.
- Original Generation: Like Ravana, Eden's Promise is a completely new, original threat to FFXIV. According to Yoshi-P, this was done intentionally to surprise players, as he felt it had become a bit too predictable after having the past raids end with the bosses they're named after. Though also like Ravana, it has a basis in popular mythology as it's based on a statue of the Greek Goddess Artemis.
- Plant Person: Its skin resembles tree bark, and it has a small tree growing from the top of its head.
- Power Copying: Most of its attacks are copies of the Primals' signature moves: Judgment Jolt for Ramuh, Temporary Current for Leviathan, Ferostorm for Garuda, Conflag Strike for Ifrit, Earthen Fury and the bomb boulders for Titan, and Diamond Dust for Shiva.
- Puzzle Boss: When it draws on the memories of the Primals to cast their associated spells, the cast bar won't tell you what those spells are: you'll have to look at the six crystals floating in the background to tell what spells are about to go off. It may also decide to hold onto those spells and launch into a set of complex mechanics before finally casting them a minute later; if you forgot which spells Eden's Promise was holding onto, Hydaelyn help you.
- Royal "We": Eden's Promise refers to itself with plural pronouns, reflecting its nature as a fusion of two people.
- Self-Duplication: In the Savage version Eden's Promise will create a gigantic invulnerable duplicate of itself once its health reaches a certain threshold. This clone periodically launches hard-hitting attacks which the party must deal with on top of everything else.
- Sizeshifter: It grows to titanic size while attacking the crystalline manifestations of Gaia's memories. After using its ultimate attack, Paradise Lost, it reverts to its normal size.
- Why Won't You Die?: Like many of the game's villains, it reacts this way after the party survives its ultimate attack, Paradise Lost:Eden’s Promise: Why will you not disappear?
Gaia, Oracle of Darkness

With Gaia's memories of Ryne shattered and having witnessed Mitron's death following the failure to kill the Warrior of Light as Eden's Promise, Gaia's memories and power as an Ascian return to her. Declaring herself Loghrif once more she attacks the Warrior of Light, serving as the true final boss to the savage version of the Eden raid series.
- Casting a Shadow: Her mere presence is enough to envelop the entire area in darkness. She also uses spells like "Dark Water III" to damage the party, and she intends to envelope all of the star in darkness.
- Evil Costume Switch: The Oracle wears a variation of Gaia’s normal outfit which bares a lot more skin, incorporates elements of an Ascian robe, and features both Fluffy Fashion Feathers and a metal halo.
- Having a Blast: Shockwave Pulsar creates a big magical explosion for heavy raidwide damage.
- HP to One: Hell's Judgment drops the whole party to 1 hit point. This is usually followed by raid-wide blast mechanics, making Hell's Judgment an extremely dangerous move.
- Humongous-Headed Hammer: She continues to wield the hammer she had as Gaia. Her "Darkest Dance" attack has her target the player furthest away from her with an enormous overhead hammer smash.
- Instant Runes: She covers the floor with an intricate magic circle resembling a watch whenever she casts one of her Relativity spells.
- Mythology Gag: She's essentially a FFXIV lore-friendly version of Ultimecia.
- Shockwave Stomp: Cataclysm has her jump to a random cardinal point and strike the floor with her hammer, producing a shockwave which covers an enormous portion of the battlefield.
- Roaring Rampage of Revenge: It's Gaia reawakened to Loghrif...immediately after her beloved Mitron is killed. The outcome should be obvious.
- Spin Attack: Darkest Dance has her jump to the player furthest away from her and then spin around while swinging her hammer. This produces a shockwave which pushes all players away from her, potentially to their deaths.
- Superboss: Like all Savage fights, it isn't canon to the main story of Eden; this fight can be safely ignored if the player just cares about the story. The only reason to fight her is for the What If? side of the story, some cool gear, and the challenge of it.
- Time Master: Even moreso than when she was still Gaia, fittng as she is a wholesale reference to Ultimecia. She uses "Spell-in-Waiting" to start a mechanic, then intentionally delay it until more of them go off.
- True Final Boss: Of the Eden raid series, though only fought in Savage difficulty.
- Weaponized Teleportation: Her Relativity spells inflict the Return status, which makes each player drop a teleport beacon at their current position before stunning them and warping them back to that spot a few seconds later. In and of itself this is harmless, but it forces the party to coordinate their movements very carefully to avoid hitting each other with the various AOE spells that are going off at the same time.
- What If?: The Oracle is a result of the embellished reports submitted for review by Gaia following the aftermath of Eden; the Oracle is never actually fought over the course of the ordeal. The battle against her in Eden's Promise: Eternity (Savage) is what would have happened if things went sour.
YoRHa: Dark Apocalypse
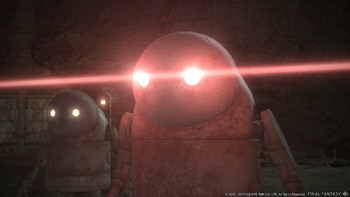
- And I Must Scream: The machine lifeforms encountered in the Copied Factory have been hacked by 9S, and are not acting of their own accord. Despite this, at least some of them remain aware of their circumstance, and plead for help and mercy even as they are being forced to attack you.
- Black Comedy: Any time a machine lifeform explodes, the game refers to it as "Convenient Self-Destruct". 9S even comments on how convenient it is that they even have this ability when he pulls a You Have Outlived Your Usefulness on them, suggesting it was deliberately programmed into them for that purpose.
- Energy Weapon: Many of the machine lifeforms can fire spherical energy bullets and high-powered laser beams.
- Mecha-Mooks: Natch.
- Outside-Context Problem: The idea that machines can be considered a form of life is alien to the people of the First. 2P explains that they have sentience and will, although the will of the machines they encounter in the ruins is not necessarily their own...
- Painfully Slow Projectile: The weaker machine lifeforms fire energy bullets that travel very slowly. Said bullets inflict massive damage if they manage to connect.
- Red Eyes, Take Warning: Their eyes flash red when they go on the offensive.
Serial-jointed Command Model
The first machine lifeform encountered in the Copied Factory, the Serial-jointed Command Model is a medium-sized biped with long, multi-jointed arms. It serves as the first boss of the raid.- Battle Theme Music: Song of the Ancients (Atonement).
- Degraded Boss: 9S summons three physically identical but weaker Serial-jointed Service Models during the DPS check of his fight.
- Extremity Extremist: Its arms are several times longer than the rest of its body. Naturally, most of its attacks involve smacking people with them.
- Flunky Boss: It can call in backup from invincible airborne flunkies. These flunkies will fire energy bullets and laser beams into the party from the edges of the battlefield, and will also conduct bombing runs.
- Shockwave Stomp: It can create shockwaves by slamming its arms against the ground. "Forceful Impact" deals moderate damage to the whole raid, while "Shockwave" inflicts damage and Knockback.
Hobbes

- Action Bomb: The crate dropped by the wall-mounted left arm contains four bomb-toting machine lifeforms, each of which will lock on to one party member and rush up to them before exploding.
- Battle Theme Music: Song of the Ancients (Atonement).
- Beam Spam: "Laser Sight” and "Laser-resistance Test" both involve Hobbes blasting its targets with numerous laser beams.
- Cores-and-Turrets Boss: Hobbes is the core, being a stationary target hanging from the ceiling in the middle of the room. The wall-mounted arms and flamethrowers are the turrets, being untargetable hazards that the party must deal with while trying to bring Hobbes down.
- Death from Above: The wall-mounted left arm drops a giant metal crate on the center of whichever platform it’s currently above. Anyone directly underneath the crate when it lands, or underneath one of its panels when it unfolds, will be instantly killed.
- Eye Beams: It uses this to attack, but spins around so much that it hits everything.
- Fire-Breathing Weapon: One of the hazards present in the fight is a set of wall-mounted flamethrowers, which will torch a large chunk of one platform when Hobbes activates them.
- Inconveniently-Placed Conveyor Belt: Alliance B’s platform is covered in conveyor belts that periodically activate, shunting players several feet in a given direction. The edge of the platform becomes lethal while the belts are active.
- Original Generation: It's not based on any specific boss or enemy from NieR: Automata.
- Shock and Awe: Alliance A’s platform is a mesh grid covering several rows of machine lifeform heads. These rows will periodically activate, electrocuting anyone standing over them.
- Shout-Out: Hobbes appearance, purpose of running and overseeing tests, and his sardonic attitude all seem to mirror that of Portal's antagonist GLaDOS.
- Spam Attack: "Laser-resistance Test" has Hobbes blast the entire party with lasers multiple times in a row.
- Why Won't You Die?: Hobbes grows increasingly irritated with the party’s continued survival as the fight wears on, and ramps up the lethality of its tests in an effort to kill them."Results far exceeding expectations logged. Subjects confirmed as irregular.""Alert: Subjects advised that failure to follow instructions will be punished. High Alert: Subjects advised that failure to be punished will be punished.""Danger: Subjects advised to die faster.""Flagrant disrespect for science detected. “How dare you?” queried."
Engels
A massive Goliath-class machine lifeform encountered in the depths of the Copied Factory. It serves as the third boss of the raid.
- Battle Theme Music: Bipolar Nightmare.
- Beam Spam: "Diffuse Laser" blasts the party with dozens of laser beams.
- Chainsaw Good: Its hands are bucket-wheel excavators, but they effectively function as buzzsaws.
- Charged Attack: It uses a supercharged version of its "Diffuse Laser" attack for the DPS check instead of busting out a unique, one-off Signature Attack.
- Confusion Fu: “Marx Smash” can be one of several attacks, none of which display a telegraph field. Players must pay attention to Engels’s body language to figure out what it’s going to do: if it draws an arm back, it’ll throw a punch that hits that entire side of the arena; if it lifts its arms high, it’s going to smash the back half of the arena and then rake the sides; and if its arms are low, it’ll smash the front half of the arena before raking the middle.
- Flaming Sword: Its arms burst into flame whenever it’s about to attack with its bucket wheels.
- Humongous Mecha: It's the size of an office building, and far and away the largest boss faced in the game. For perspective, its arms are bucket-wheel excavators, some of the largest machines that exist in real life.
- Macross Missile Massacre: Several of its attacks launch various types of missiles at the party.
- Mascot Villain: It appears behind the Warrior of Light and 2P ominously for the promotion for YoRHa: Dark Apocalypse.
- Megaton Punch: One version of "Marx Smash" is a slow, telegraphed punch that covers one entire side of the battlefield, and it will kill anyone that doesn’t get out of the way.
- Wave-Motion Gun: One of its attacks fires a gigantic, sustained energy beam down the middle of the platform.

A mysterious android who controls the machine lifeforms inhabiting the Copied Factory. He’s hell-bent on killing 2P, and will gladly mow down the party for standing with her. He serves as the final boss of the Copied Factory raid.
- Action Bomb: After the party defeats his Goliath Tanks, 9S will order one of the tanks to self-destruct. The party must take cover behind the wreck of the other tank to avoid the explosion, then get away from the second tank before it explodes as well.
- Battle Theme Music: Weight of the World (Prelude Version).
- Beam Spam: Several of his attacks fire large quantities of laser beams at the party, such as "Dual Flank Cannons" and the aptly-named "Laser Saturation".
- Character Development: Is as bitter and violent as he generally is by the end of any Automata ending, but has retained his sanity; he's become ruthless, but noble and dedicated to protecting all non-Machine life, and not wanting people to suffer the way he has.
- The Cracker: 9S can hack into machine lifeforms to take control of them, just like in his home game. He uses these hacking abilities to try and murder you in various ways.
- Death from Above: He’ll periodically take to the skies in his flight unit and strafe the battlefield with lasers. His hacking also allows him to pick up two-to-three Engels arms and drop them on quadrants of the battlefield like meteors.
- Death Glare: He shoots 2P a look of sheer hatred as he plummets to his apparent death. Something noticeable however, is the fact that his eyes are blue, not red, which means he's not infected by the Logic Virus - he just hates her for being a Manipulative Bastard.
- Disney Death: Even though he fell from the platform into the mineral dust bellow, he is revealed to have survived, but now unconscious. He is taken back to the shelter in order to decide what to do with him.
- Disney Villain Death: Subverted. 2P knocks 9S off the platform to his apparent death, but when the Warrior of Light returns to the area afterward, they discover that 9S managed to climb back up before passing out.
- Fallen Hero: As in canon, so he is here. Not very far though; he's in a much better mental spot mentally than he is in most endings of Automata, and is acting only to protect the First from YoRHa.
- Good All Along: Well, for a given value of good, given his ruthlessness, but 5.3 reveals that he was actually trying to prevent 2P from unleashing the YoRHa Duplicates on the First all along, and played completely Straight in 5.5 as he’s revealed to be as polite as ever once the misunderstanding is cleared up and you’re no longer on 2P’s side.
- Macross Missile Massacre: For his DPS check 9S begins hacking every missile he can get his connection on. Failing to kill all his reinforcements in time allows him to hack all of them and makes the attack a total party kill.
- Outside-Context Problem: While many elements of the Yorha: Dark Apocalypse storyline qualify as this, 9S is presented as one of the biggest cases as it is noted that the very idea of a machine that is so lifelike and even sentient is considered an impossibility to the people in the First. And that's not even getting into his abilities as a powerful hacker, capable of controlling most of the machines in the facility.
- Poor Communication Kills: A lot of grief could have been avoided if he had warned the Warrior of Light about 2P's true goals instead of immediately attacking them.
- Red Eyes, Take Warning: Defied. After defeating 9S, players of Nie R Automata will notice in a lingering shot of 9S's uncovered face that he does not have the red eyes indicative of Logic Virus corruption. This is a subtle Foreshadowing that there is more to his seemingly antagonistic actions than the player knows at the time.
- Rogue Protagonist: As his obsession with killing 2P and an entire hidden room of dead 2B bodies attests, this appears to be 9S post-Sanity Slippage. Except it turns out not really. He's still as ruthless as he was at the end of Automata, but he's actually a Hero Antagonist, as 2P is secretly planning to unleash YoRHa upon the First, and 9S was one of the obstacles in her way that you helped take out. Whoops.
- Signature Attack: Total Annihilation Maneuver. 9S hacks a nearby Engels, making it fire a dozen ICBMs at the party.
- Spider Tank: You don’t fight 9S directly, instead taking on the spider-like Walking Fortress that he controls.
- Tank Goodness: Beyond piloting a Spider Tank for the entirety of his boss fight, 9S will summon a pair of Goliath Tanks to back him up at certain points.
- Took a Level in Kindness: While he's still ruthless, he's revealed to regain his sanity that he lost in Automata and is back to how he was in Routes A and B, complete with him showing no animosity towards 2B
- Turned Against Their Masters: 9S had an upbringing that humans are meant to be his masters and he should protect them. However he indicates that if they stand with 2P, he won't hesitate to cut them down. The achievement after defeating him acknowledges this which is named "First Law." This is because he is saving more people by stopping 2P at all costs, so he is serving humanity in the long run.9S: "So you're with 2P? Don't think I won't kill you too."
- Well-Intentioned Extremist: He was actually trying to stop 2P from dragging the First into the Forever War in his home dimension.
- Why Won't You Die?: He'll shout this at the raid party as well as 2B during his second strafing run."Die already!"
- Bullet Hell: The last leg of the Puppets' Bunker forces the party to run down a narrow corridor while being shot at from all directions. They'll need to deal with several waves of enemies while weaving between energy bullets and dodging lasers.
- Conservation of Ninjutsu: The three Light Artillery Units encountered at the start of the Puppets' Bunker have a lot more health than the eleven Heavy Artillery Units encountered at the end of it.
- Evil Counterpart: To the regular, black clad YoRHas.
- Evil Knockoff: They're really Machine Lifeforms made in the image of YoRHa androids - as is their base.
- Light Is Not Good: They're clad in white, but they're just as homicidal as other Machine Lifeforms.
- Lightning Gun: "Maneuver: Volt Array" has the Light Artillery Units blast the whole raid with electricity. If the Tanks or Ranged DPS don't interrupt this attack, it will inflict heavy damage and a long-lasting Paralysis debuff.
- Mythology Gag: Their Light Artillery Unit mechs bear a strong resemblance to the Niflheim Empire’s Magitek Armors from Final Fantasy XV.
- Walking Tank: Their Light Artillery Unit mechs are humanoid only in the vaguest sense, with long spindly limbs and arms that end in blades rather than hands. The Heavy Artillery Units aren't humanoid at all, instead being squat six-legged Spider Tanks.
813P-operated Aegis Unit
A futuristic war machine guarding the approach to the Puppets' Bunker. It serves as the first boss of the raid.
- Battle Theme Music: Grandma / Destruction
- Beam Spam: "Maneuver: Diffusion Cannon" has it spin in place while spraying dozens of lasers in all directions.
- Dash Attack: It periodically calls in support from flight units, which will deploy force fields before charging across the arena to knock players off the platform.
- Drone Deployer: It deploys laser-shooting drones for some of its attacks, including its tankbuster.
- Knockback: Its cannons will push players away from the boss and toward the edge of the platform. There's no railing, and the platform is very narrow, so you will go flying off the edge if you get hit and aren’t positioned correctly.
- Magic Music: Life’s Last Song attacks the arena with a spreading wave of deadly music, which resembles the apocalyptic song sung by the final boss of Drakengard’s Ending E or Drakengard 3's Ending D.
- Starfish Robots: It vaguely resembles a palm tree, with five "wings" radiating from the top of a cylindrical fuselage.
- Stationary Boss: The Aegis Unit floats over a hole in the middle of the platform and does not move beyond rotating to aim its cannons.
Superior Flight Units A-lpha, B-eta, C-hi
A squadron of modified flight units piloted by 724P, 767P and 772P. They serve as the second boss of the Puppets' Bunker raid.
- Armor-Piercing Question: As 767P dies, it asks if killing is fun for the Warriors, as it is for them.
- Attack Pattern Alpha: They occasionally form up to perform synchronized attacks against the entire party.724P-operated Superior Flight Unit (A-lpha): Attention, 767P and 772P: please begin synchronous assault.
- Battle Theme Music: "Bipolar Nightmare", which they share with Engels.
- Dual Boss: You fight all three of them at once, with each alliance taking on one flight unit.
- I'll Kill You!: 724P will scream this at the party if she’s the last pilot left standing.724P-operated Superior Flight Unit (A-lpha): Kill… ene— You killed 767P and 772P! I’ll kill you!
- Laser Blade: Their flight units can project a blade of pure energy from either arm. They bring these out whenever they’re about to do a synchronized Dash Attack.
- Macross Missile Massacre: They have several attacks which launch dozens of missiles at the party.
- Meta Mecha: Each flight unit is docked with a much larger weapons platform resembling a military aircraft.
- Moral Myopia: 724P is furious about you killing her comrades and they all try to make you feel guilty for fighting them.....Which would hold a lot more of a punch if they hadn't just finished killing a bunch of innocent dwarves just to make an entrance.
- No-Sell: When the fight starts, they apply shield protocols which make them immune to attacks from anyone that isn't a member of the flight unit's designated alliance. Once one of them goes down, the remaining flight units lose this selective invulnerability.
- Wave-Motion Gun: "Maneuver: High-powered Laser" fires an energy beam thicker than the flight unit. Players must stack up to split the damage while also making sure that they don’t aim the beam at another alliance, because it will hit the other players.
905P-operated Heavy Artillery Unit
A war machine encountered in a secret chamber behind the wrecked satellite’s command room, installing an Operator 21O and having it take over the core to help it fight. It serves as the third boss of the Puppets' Bunker raid.
- Ace Custom: There's a hallway full of generic Heavy Artillery Units right after this boss, and they're visibly smaller and less heavily-armed than 905P's model.
- Battle Theme Music: End of the Unknown
- Death Cry Echo: 905P lets out a bloodcurdling scream when she dies - weirdly, it's 21O's scream.
- Evil Knockoff: Already was the case for the other duplicates, but 905P is exaggerated, as she seems to be a replication of 21O's personality as well, with images of the original android flashing on the control room she uses as her arena, her quotes being attributed to the "21O Self-Consciousness Data", and imitating attacks by Pods. Given how she's found at the heart of a recreation of the YoRHa Bunker, this raises questions about what 2P was trying to do.
- Ground Pound: It has an attack where it rapidly jumps to three places in a row, inflicting heavy damage to anyone caught underfoot.
- Hard Light: The boss can summon holographic Pods. They attack by firing lasers straight ahead, or by smashing the immediate vicinity with giant holographic hammers.
- Having a Blast: It can synthesize an explosive compound. Players must stand in the columns of light that appear to prevent the compound from detonating and inflicting heavy damage to the whole party.
- Lightning Gun: It can discharge electricity for several of its attacks.
- Puzzle Boss: Several of its attacks operate under this. You have to pay attention to either the attack name, or certain animations on it to tell what it's doing. For example, its room wide laser attacks require looking at both the floor patterns, and where the lasers are aiming (up or down). If it's up, it means the entire platform will get hit versus down meaning its going to slowly hit the entire platform.
- Spider Tank: It’s a tank-like mech with six legs.
- Wave-Motion Gun: Its tank buster fires two laser beams in quick succession, each one targeting one of the tanks. These lasers will cut a bloody swath through the party if the tanks aren’t positioned correctly.
The Compound
Check 2P's folder in Allies here.- Continuity Cavalcade: Not only to NieR, but even going all the way back to Drakengard.
- Ominous Visual Glitch: They all flicker with static at regular intervals, reflecting the fact that you're essentially fighting programs in Cyberspace.
- Outside-Context Problem: By the end of the raid, it's made clear that the events that occured are the result of Alien Invasion from the "actual" NieR and Drakengard reality/universe, rather than just simply an FFXIV-styled retelling of another game's story.
- The Unintelligible: The Knave of Hearts and Hansel and Gretel all speak in garbled hexadecimal.Knave of Hearts: 696E2■6469737■616E74206D■■■D6F7279
- Wrong Context Magic: Applies to both sides in the raid, especially when the alliance is inside the Cyberspace portions of the tower where "reality" can be reshaped on a whim, including transforming the alliance members into digital ships to combat a hostile program. And that's before it even gets into the mind-bending complexity of the origin of the NieR 'verse's magic and Magitek. On the flip-side, the Terminals aren't safe from Aether-based magic and skills either.
Knave of Hearts

- Battle Theme Music: Emil - Despair.
- Breath Weapon: It spits energy bullets for its basic auto-attack, and one version of "Colossal Impact" has it exhale a storm of such bullets in a wide line.
- Bullet Hell: It lays down bullets worthy of its home series.
- Casting a Shadow: Its raid-wide damage attack, "Roar", blasts the entire battlefield with an eruption of dark energy.
- Enemy Summoner: It can summon invulnerable Spheroids which will fire salvos of energy bullets at the party before disappearing.
- Me's a Crowd: It creates clones of itself that can't be targeted, but will lay down additional AOEs that require paying attention to the animation to understand how it will attack the arena.
- Megaton Punch: The other version of "Colossal Impact" has the Knave throw two simultaneous punches which hit everything in the outer two-thirds of the battlefield.
- Ring Out: Lunge blows people off the boss arena unless their back is against the blocks it blows them to.
- Shockwave Stomp: "Light Leap" has it jump onto the platform, releasing a proximity-based shockwave from each foot.
- Shout-Out: Before transforming into the Knave of Hearts, 901P talks about how he will live and die, over and over and over, but trails off before saying why. This could be a reference to Adam, the machine-android who was fixated with understanding humanity and put his life on the line to understand mortality, and payed for it with his life.
Hansel and Gretel

The final YoRHa imposter, 875P follows her ally in being morphed into a new form to protect the Tower, this time taking the form of a pair of Shades that still prove how unbreakable their bond is eons later.
- Battle Theme Music: Song of the Ancients (Atonement), which is shared with Serial-jointed Command Model and Hobbes.
- Combination Attack: They have a number of these in their arsenal, all of them prefixed with "Tandem Assault".
- "Breakthrough" has them move to opposite sides of the arena and charge at each other, crashing their shields together for a proximity-based shockwave while simultaneously cleaving one side of the arena with a lethal Sword Beam.
- "Passing Lance" has them move to one end of the arena, link the heads of their lances together, and charge forward to the other side. They pass through a line of magical spheres along the way, which detonate in their wake.
- "Bloody Swep" has them move to one side of the arena and face inward, charging up a Sword Beam that will hit all but a small portion of the battlefield. They may swap positions with each other just before the attack goes off, changing the location of the safe spot.
- Counter-Attack: "Upgraded Shield" causes one of them (or both, if the tanks don't spread them out) to counter any attack taken from any direction other than the front with a hard-hitting energy blast.
- Dual Boss: As in their home game, the two of them have to be fought at the same time.
- Make Me Wanna Shout: Their raid wide AoE attack is a damaging Wail.
- Mythology Gag: The way 875P and her ally talk about being together forever and how if one of them dies, the other goes berserk resembles Devola and Popola, two sister androids who fall into despair if they can't emotionally support each other.
- Stance System: The one at higher health will use Upgraded Lance to increase its damage while the one at lower health will use Upgraded Shield and counter any attack from its sides or its rear, and if they aren't physically separated, they will share the effects of their current stance with each other. It's technically possible to continue attacking the one in shield stance, but it's generally a better use of your time to focus on the one in lance stance.
- Switch-Out Move: As they get lower HP wise, they will use a powerful AOE that hits all but a single space, but beforehand will switch positions. Avoiding it requires paying attention to the direction their weapons are aiming, as they will attack that side of the arena.
- Sword Beam: They can unleash destructive waves of energy just by swinging their lances.
- Turns Red: If one of them dies, the other one will stand still and cast Lamentation over and over, doing heavy raidwide damage and player-targeted AoEs until it's finished off.
The Red Girl

What appears to be a malevolent little girl found within the network of the tower, she is in fact the avatar of the Terminals, the controlling intelligence of the machine network. With the last of the fake YoRHa androids dispatched in digital space, she promptly replaces their remains, confronting the party as the third boss of the raid.
- All for Nothing: She boasts that the Warrior of Light, 2B and 9S's alliance will change nothing in the end.
 while this is true for 2B and 9S it is not the case with the Warrior of Light.
 - Battle Theme Music: The Sound of the End.
- Big Bad: She's this to the Machine Network, and to NieR: Automata. But she's not this to the "YoRHa: Dark Apocalypse" storyline as a whole.
- Bullet Hell: Her clones bring down a spreadfire if you're unlucky enough to be in front of one.
- Dueling Hackers: She tries to infect 9S with a Logic Virus partway through her boss fight. The players are forced to counter this with an Automata-style Hacking Minigame, with lethal consequences for any alliance that fails to eradicate the virus in time.
- Enfant Terrible: It may look like a little girl, but make no mistake: this thing is as powerful, dangerous, and evil as any other villain the Warrior of Light has fought.
- Face–Heel Turn: While never particularly good-natured to begin with, their last known whereabouts in a peaceful “ark” indicate that something put them back on the war-path during their journey through space.
- The Fourth Wall Will Not Protect You: Her face briefly covers the screen when she uses "Sublime Transcendence", sneering at the player.
- Hijacked by Ganon: While the Terminals oversee all actions the Machine Network takes, it could've been reasonably assumed that they were cut off from the XIV world and that the 2P units were acting on their own. In truth, the 2P units are more like a physical avatar for the Terminals, and once they're wiped out, the Red Girl takes centre stage and makes no attempt at subtlety.
- Jump Scare: During one of the transitions, her face appears, sporting her signature Slasher Smile, as if to say "I see you."
- Legacy Boss Battle: Not this time. In Nier: Automata, the Red Girls were a Trick Boss. In XIV however, there's no trick — the player must face the Red Girl head-on, and she brings an original moveset like nothing seen in either game.
- Me's a Crowd: At 55%, she summons clones to rain down a circular Bullet Hell.
- Meteor-Summoning Attack: She can drop in meteors that can only be blocked by hiding behind their respective color barriers.
- Nightmare Face: She has a grand total of two facial expressions: a plain and stoic look, and a creepy Slasher Smile.
- Only Known by Their Nickname: As in Automata, she's never referred to by her proper designation "N2" in XIV.
- Pillar of Light: Her tankbuster, "Manipulate Energy", makes a laser erupt from the floor directly underneath each tank.
- Puzzle Boss: She creates barriers of blocks that are white or black, and casts spells that are also black or white, such as lasers, player-targeted AoEs, or even Ecliptic Meteor strikes. If a spell hits a barrier of the same color, it is blocked. If the spell and the barrier are different colors, it destroys the barrier and hits anyone hiding behind it. The issue is keeping track of which direction the lasers are firing from, whether they will pierce through the barrier you're standing behind, and having to figure out where to hide when a black and a white meteor is falling at the same time when over half of the barriers were already destroyed by the laser beams.
- Self-Duplication: She can create multiple copies of herself. They come in two sizes: small ones, which turn in place while spraying energy bullets in wide arcs; and gigantic ones, which use Child's Play to reposition the smaller copies in the middle of their attack patterns.
- Unexpected Shmup Level: At <40%, the fight turns into having to clear out the Logic Virus infecting 9S. As befitting the segment, the music also becomes Chiptune.
- Virtual-Reality Warper: The digital space of the Tower's network is her plaything. She can create barriers, arrows, bombs, and meteors to harass the players, alter her size, duplicate herself, and force players to march in a direction of her choice. Her end goal is to use the Seed of Resurrection to drop the "Virtual" part and become a proper Reality Warper.
Xun-Zi and Meng-Zi
Two spherical Goliath-class machine lifeforms which attack the Warrior of Darkness's party during the lengthy elevator ride to the top of the tower.
- Cyber Cyclops: Unlike most machine lifeforms, they each have a single eye dominating the front of their bodies.
- Dual Boss: You fight both of them at once.
- Elevator Action Sequence: It's a Mini-Boss fight on an elevator.
- Macross Missile Massacre: They have missile launchers built into their sides, which they use to bombard large chunks of the arena for one of their attacks.
- Mythology Gag: They are based on the bosses Ko-Shi and Ro-Shi from NieR: Automata, having the same model as the former, following a similar naming schemenote , and fulfilling a similar role as the penultimate boss (or Mini-Boss, in this case) of the tower.
- Sword Beam: They can electrify their front legs and swing them to discharge the energy, striking either a straight line in front of them with a vertical swing, or the entire battlefield with a horizontal one.
The False Idol/Her Inflorescence


At the apex of the Tower, the Terminals' plan in activating the Seed of Destruction reaches its conclusion, merging with the apocalyptic sphere and becoming the reincarnation of the final song responsible for the tragedy spanning multiple worlds and the final boss of the raid itself: the Grotesquerie Queen.
- Adaptational Wimp:
- She is still every bit the world-ending Eldritch Abomination she was in her original incarnation. But unlike her original form, she can be physically damaged by anyone instead of requiring a dragon.
- She is a Watcher, and an amalgamation of every tragedy to ever take place on the NieR and Drakengard timelines. Throughout each of those series, it's taken all of the efforts from each of the protagonists just to try and stall Her Inflorescence; even then, that effort has barely had an impact on her. In this raid, all it takes is 24 Warriors of Light wailing on Her Inflorescence with handheld weapons and magic spells to send her packing. Though it's unclear whether or not the Warriors of Light kill her, Her Inflorescence still goes down with far less effort than any NieR or Drakengard title.
- Battle Theme Music: "Possessed by Disease" for the False Idol, and "Kainé (Final Fantasy Main Theme Version)" for Her Inflorescence.
- Body Horror: The top half of the Red Girl's head is sticking out of the neck of Her Inflorescence. Also, she has visible cube-like protrustions sticking out of various body parts. It's a way to show that Her Inflorescence is a Humanoid Abomination.
- Boss Banter: Unlike previous incarnations of the Grotesquerie Queen, she has many things to say. Some of what she says has some disturbing implications regarding the lore of Drakengard and Nier.False Idol: "You will be the first to see the new world... But we still have some time. Why not enjoy it?"
Her Inflorescence: "All memory lives within me."
Her Inflorescence: "So many dreams slumber here..."
Her Inflorescence: "You would render all this meaningless?" - Boss Subtitles: Similar to the Compound of the Puppets' Bunker, it comes with its own hexademical code, which, when translated, becomes "Aberration". If the language is set to Japanese, it translates to "Igyo," which means "Variant." If the language settings are toggled to German, however, the code translates to "Grotesquerie".
- The Bus Came Back: Her Inflorescence, due to being the reincarnation of the Grotesquerie Queen, is the first time players have gotten to fight a Watcher in person since the original Drakengard.
- Car Fu: It can summon passenger trains for one of its attacks. Woe betide any player who gets run over, as it's a One-Hit Kill.
- Creator Cameo: Played with. The building Her Inflorescence throws at you is the Square-Enix office from Japan.
- Composite Character: Her Inflorescence is an amalgamation of numerous elements from the past games. It falls out of a portal in the skies above Tokyo much like the original Grotesquerie Queen, its hair is adorned with Lunar Tears reminiscent of Kainé's own beloved flower, the flowers themselves bring to mind the queen-beast's connection to the original Flower and Zero, and 2B's head is perched atop the body, with the Red Girl's sticking out the top.
- Eldritch Abomination: Her Inflorescence is the Eldritch Abomination of Yoko Taro's works. Setting aside the implications of its mere existence in the First, the design of Her Inflorescence is humanoid, yet utterly alien at the same time.
- Evil Laugh: During the boss fight against Her Inflorescence, she'll say "ah ♪ ah ♪ ah ♪ ah ♪" in a broken-formatted text box once in a while. And this is while she's pelting the Warriors of Light, 2B, and 9S with hard-hitting attacks.
- Final Boss: Of The Tower at Paradigm's Breach and the YoRHa: Dark Apocalypse storyline as a whole.
- Flower Motifs: Her Inflorescence has white glowing flowers in her hair, seen most visibly when she descends from the sky onto the battlefield. Also, the word "inflorescence" refers to the entire flower of a plant.
- Giant Space Flea from Nowhere: Depending on who you are. Players who are only familiar with NieR: Automata are likely to see this boss as such, since it has little reference to Automata itself. Long time fans of Yoko Taro, on the other hand, will understand the gravity of what they're seeing as an amalgamation of every tragedy to ever take place on the NieR and Drakengard timelines with the Grotesquerie Queen at its core.
- Greater-Scope Villain: It's this to the entire Drakengard and NieR franchise, even across time, space and other franchises.
- Humanoid Abomination: The False Idol and Her Inflorescence both take on a partial similarity to young human women, but they're also grotesque Eldritch Abominations that are clearly not human. The False Idol has red and black parts of her body being corrupted or eaten away, and parts of her legs appear to be fused into a huge sphere. Her Inflorescence has four arms, has what looks like a second head growing out of the side of her neck, and has visible cube-like protrusions all around her body. Also, both of them are pure snow white from top to bottom, including their hair. In both cases, each of them are incredibly powerful threats, capable of ending the world.
- Kill the God: Her Inflorescence is an absurdly powerful Eldritch Abomination, and a Watcher in the worlds of NieR and Drakengard. The Warriors of Light still manage to defeat Her Inflorescence and exile her from the First. While the Warrior of Light has defeated godlike entities before, Her Inflorescence is the Greater-Scope Villain of the NieR and Drakengard games, so it's still defeating a divine being.
- Leitmotif: "Kainé: Final Fantasy Main Theme Version" uses bells to signal the arrival of a Watcher, as well as the deadly notes of the Mother's Song, from Drakengard. It also mixes in the main theme to Final Fantasy on a violin. While the music is somber, it's ultimately more hopeful, since this is a fight that the Warrior of Light can actually win.
- Magic Music: Many of her attacks (Screaming Score, Rhythm Rings, Lighter Note, Darker Note, and Distortion) have a musical theming to them. Many of them use the rings of angelic script that represented the Queen Beast’s world-ending Song in Drakengard.
- Meaningful Name: The word "inflorescence" refers to the entire flower of a plant.
- Multi-Armed and Dangerous: Her Inflorescence has four arms. She uses the inner pair to cast spells, covers the outer pair in sheathes of debris to perform hard-hitting AOE attacks, and sends out heavy attacks with all four arms.
- Mythology Gag: Its final battle is fought over Tokyo, just like it was during Drakengard's Ending E all those thousands of years ago. It also uses black and white rings that have to be matched up to the same colors or you take massive damage. The Battle Theme Music for its second phase opens with the tolling bells from the final boss of Drakengard, before transitioning into a variant of Kaine's Theme.
- One-Hit Kill: Her Inflorescence has a few.
- At one point, she'll summon train tracks along with red lights and green lights. Trains will eventually rocket through any track that has a green light; if the train hits a Warrior of Light, it does enough damage to kill them instantly.
- The building that Her Inflorescence launches from beneath the floor will catapult unwary players into the air and over the sides. If the attack hits, then no matter where the player was standing, it will fling them in such a way that it's a guaranteed KO from a Ring Out.
- One-Winged Angel: Her first form is a Stationary Boss, plastered against the north side of the arena. Once her health is low enough, she transforms into the Grotesquerie Queen, which is smaller but moves across the playing field.
- Ring Out: Her Inflorescence can inflict this in two distinct ways.
- Her pillars produce shockwaves when they first hit the floor, potentially flinging players off the edge from the tremendous Knockback. Players need to stand in such a spot where they'll take damage, but won't fall off.
- The building that Her Inflorescence launches from beneath the floor will catapult unwary players into the air and over the sides. If the attack hits, then no matter where the player was standing, it will fling them in such a way that it's a guaranteed One-Hit Kill.
- Sequential Boss: The False Idol is a two-stage fight. She starts out as a Stationary Boss and remains that way until she reaches 50% health, at which point she transforms into Her Inflorescence, regaining all health, becoming mobile, and drastically changing her attack patterns.
- Stationary Boss: The False Idol is stationed at the north end of the arena where you fight her, and doesn't move. Her Inflorescence averts this, since she can move freely across the arena after the scenery changes.
- Turns Red: The False Idol will eventually turn into Her Inflorescence when the players have reduced the False Idol's HP low enough. When this happens, the False Idol projects a light into the sky, and Her Inflorescence descends through a portal.
- Yin-Yang Bomb: She can use light and dark magic in equal measure. One of her attacks also surrounds the Warrior of Light with a ring that's half-black, half-white. A pillar then comes down from the middle of the arena, sending out shockwaves that can only be blocked by facing the pillar in such a way that the colors match — black with black, and white with white. If the colors match, the Warrior takes no damage; if the colors don't match, the Warrior gets blasted by the shockwave.