The participants of this very death game, all abducted and thrown into this hellish situation, forced to survive.
open/close all folders
First Trial Survivors
General Tropes

The survivors of the First Trial
Twelve people of varying ages and occupations make it out of their dangerous first trial alive. Scared, lost and confused the group of victims are forced to cooperate with one another to survive. Together the main characters work to solve puzzles, maneuver through traps and uncover all sorts of dark truths about themselves and the death game as a whole.- Anyone Can Die: Every single character has a path or Non-Standard Game Over where they are killed, some of which can get quite graphic, especially during the attractions. Thus far, Joe, Kai, and Professor Mishima are all doomed to die in Chapter 1, Q-Taro and Nao can only survive (and escape) in Non-Standard Game Overs in Chapter 2, note , and Reko and Alice and Kanna and Sou are Mutually Exclusive Party Members in more forms than one (since Kanna's survival is needed for either of the former two to make it past Chapter 3's murderer game), making Sara, Keiji, and Gin the only players who can't die in any of the main routes
- Defiant Captive:
- Though they're all forced to participate in the death game, the survivors all have varying degrees of rebellion against their captors, from insulting the floor master to their faces (Gin and Reko), to dying on their own terms instead of awaiting execution after getting the majority vote (Kai and Sou), to downright physically assaulting the floor masters or fighting them one-on-one (like Q-Taro, Alice and Keiji).
- The ending where Nao survives can also be seen as this for Sara in Chapter 2-2 since she wasn't planned to make it out of the first trial alive (with one floor master outright getting himself killed to try and have her executed as soon as possible), so despite the negative consequences of Sara choosing her, she drills a hole through ASU-NARO's rules and statistics by escaping alone with Nao.
- Determinator: Every single one of the main cast is this to a degree; despite the moments of despair or weakness they may have, they are always quick to pick themselves off and push forward.
- Dwindling Party: Due to the nature of this game, not all of them will make it out alive. Their ranks shrink with each passing chapter. Sure enough, by the end of 3-1B, you'll be left with either four or five people - Sara, Keiji, Gin, and (depending on how you voted in 2-2) either Kanna and Reko, Kanna and Alice, or Sou.
- Dysfunction Junction: By virtue of most being practical strangers to one another, the group's interactions were very strained with one another, everyone being willing to snap, lie, and outright scheme against each other in order to survive. However, over the course of Chapter 2, they become True Companions.
- Easily Forgiven: Generally played straight but justified.
- For the most part the survivors are forced to cooperate with each other regardless of their personal feelings, in order to have the best chance of at least one of them living. They just don't have time to hold grudges, especially not for something they might have done themselves if the situation were reversed. The characters that do avert the trope (Sou/Shin, and Ranmaru on a certain story path) aren't forgiven because their actions are consistently against the group as a whole and focused on their own survival above everyone else's.
- During the first two main games, both Joe and Nao attempt a Batman Gambit on the rest of the team after picking the sacrifice role with the intended goal of saving themselves and Sara at the cost of everyone else. When both of them fail, nobody holds their actions against them, knowing that it was the only chance they had to survive.
- Everyone Has Standards: In the 2-2 Main Game, absolutely everyone is horrified at Nao's announcement that she and Sara can escape the game if Sara votes for her. But if the player actually chooses to go through with it, then no one directs their anger at Nao herself; they direct it at Sara for casting the vote that makes it possible, recognizing that while Nao's gambit was literally the only chance she had to live and thus born out of desperation, Sara choosing to vote for her is just Sara choosing to condemn them all to die so she can escape. If the player doesn't vote for Nao, then Nao herself even says that she didn't want to have to betray everyone, and the other survivors are understanding.
- Fire-Forged Friends: Applies heavily here, a lot of the storyline is centered around strangers becoming allies and even close friends.
- Forgotten Fallen Friend: Defied. Despite the cast dying off since Chapter 1-1, there's somewhat frequent mentioned of the deceased, making it known they are far from forgotten.
- Humans Are Good: Every one of the main cast are flawed people, and all of them have lied to each other at least once during their predicament as part of the game. Despite this, they're all good at their core, and genuinely want what's best for everyone even if they show varying degrees of reluctance to putting themselves in danger for the safety of others (which is understandable when the price to pay for losing a game is usually a Cruel and Unusual Death). Before their respective execution, both Joe and Kanna defend even Sou as a good person, and he can either prove them right in Kanna's route, or muddy the waters a lot in his own route.
- Ragtag Bunch of Misfits: The participants of the Death Game are a very eclectic group, made up of several teenagers and children, a college student, two members of the police, a job-hopping hacker, a high school teacher, an office worker, a baseball player, a boxer, a singer, a baker, and even a convict. And all but four of them are listed as "candidates," not simply participants.
- Smarter Than They Look: Despite many having rather unassuming professions and acting not unlike ordinary people, the whole group is a lot more mentally capable than it would seem, and they constantly pull one over on their captors.
- True Companions: What the group eventually turns to be, despite their many differences, the circumstances that brought them together only lead to them being considerably close-knit. Come to the time of Main Game of chapter 2-2 and they explicitly state this as the biggest change from Chapter 1.
- Undying Loyalty: They gain this over the course of Chapter 2, as they spend several days working together and getting to know each other, and they cement it in Chapter 3. The exception to this is Sou, in the route where he lives and Kanna dies during the second Main Game. While he cooperates with the group in order to take out Midori, he openly states that he's going to personally kill anyone responsible for Kanna's death, starting with Sara.
- We ARE Struggling Together: Generally defied, as the group knows full well that the best chance they have to at least save one of them is for everyone to work together.
- Played with on the route where: Sou lives to Chapter 3 and Kanna doesn't. Sou will almost completely withdraw from the other survivors, but is willing to put in enough effort to help them take down Midori, their common enemy.
Sara Chidouin
Sara Chidouin

One evening, Sara stays back at school late. Due to Sara being stalked by an unknown individual, Joe came back from his first date with Ryoko to walks Sara home. Upon their arrival, they find Sara's home broken into and Sara's mom sprawled unconscious throughout the floor. Joe tries to dial for the police, while Sara goes upstairs to see if her dad's okay... and the last thing she remembers is several hands gliding behind her back, pulling her into the darkness of her room...
When she wakes up, she finds herself alongside Joe in what seems to be the same deathtrap, and the two only have five minutes to escape before the table they are strapped to folds on them and crushes them to death. After a narrow escape, the two regroup and eventually find themselves alongside nine other people who have been brought here and gone through similarly harrowing "First Trials", as Sara recalls the electronic announcer declared. Regardless of such, Sara soon finds herself in a life-and-death situation, and with almost everyone looking up to her for guidance, she soon finds herself responsible for preserving the lives of everyone present to the best of her ability.
- Adaptation Relationship Overhaul: Downplayed. While the game makes it pretty clear that Joe and Sara see each other as best friends, the manga heavily implied that Sara is romantically interested in Joe, though she has no complaints about him dating their mutual best friend, Ryoko.
- Adaptational Wimp: In the manga adaptation, she takes a noticeably more passive role within the group. For example, when Gin's trapped in the mirror room, Sara stands back and lets Keiji, Q-taro and Reko do all of the heavy work. She's much more easily shaken and struggles with the position of leader a lot more than her role in-game.
- The Ace: Despite being an Ordinary High-School Student on paper, she shows a remarkably sharp wit and major charismatic air to herself, and this causes her to frequently lead the discussions in the Main or Sub-Games while only being matched by Sou and Keiji in her deductions. Which could explain why she's statistically-proven to be the most likely candidate to win the Death Game out of anyone else.
- All-Loving Heroine: Deconstructed horribly. As it becomes quickly apparent, being a Magnetic Heroine with a care for everyone trapped in a game that will have people die is not a good combination for one's mental health, especially when Sara personally blames herself for every single death that happens, even when logically she shouldn't blame herself for things that are very often beyond her control. This seeps into eventually causing permanent damage after Joe's execution, where Sue Miley's sadistic act of baiting Sara into saving Joe from his Cruel and Unusual Death by only prolonging his suffering destroys her utterly, and causes her to develop a series of nasty psychosis problems up to and including mass hallucinations, potential PTSD and further hallucinations of a demonic version of Joe blaming her for making him suffer.
 Ouch. Even after fracturing entirely, she still holds this quality and tries her best to be there for all of the survivors, usually at the cost of herself. Depending on her actions in Chapter 2-2, this can result in things getting somewhat better for the time being... or much, much worse.
 - Ambiguously Evil: At times during the game, she is plagued with selfish thoughts about saving herself and sacrificing other contestants for her safety, but either recovers or is snapped out of it before she's able to profess her thoughts and continues her conviction to save everyone. This becomes more muddied after Midori reveals that during the simulations run by ASU-NARO before the events of the death game, the Sara AI who doesn't have anyone to support her always becomes obsessed with survival to the point where she's able to use the others' deaths as a manipulation tool, granting her even more sway over her fellow players. This side of her begins to surface during the route where Sou lives, as she forgets about Joe and begins having strange, calculating thoughts that get either Reko or Alice killed, though she's genuinely horrified upon finding out what happened to them.
- Anti-Hero: She's an Ordinary High-School Student who is kidnapped by a vile organization and forced to play death games that could end in her own death. Throughout these games, the player can have her sink to varying lows and have her act more focused on her own survival at the expense of others, occasionally adopting a chillingly cold and calcularing demeanor as she ponders on it, which comes to a head in Chapter 3-1 when she can optionally manipulates Ranmaru into picking off the others after learning that the death game will only be won by one person. Despite this, Sara still has a conscience that motivates her to continue carrying on for the others' sake, as in either of the Chapter 3-1 routes she still chose to continue struggling with the others over escaping with Nao in Chapter 2-2.
- Bitch in Sheep's Clothing: Revealed in Chapter 3-1B as one of the reasons for her high victory percentage rate. In the simulations played with the AI versions of the candidates, she would have a tendency to cause the deaths of other participants and use them in order to increase her own standing within the group. Joe was specifically brought in as a handicap to curb this part of her so that the other participants would have a more equal chance of winning.
- Break the Cutie: Chapter 1-2 and Joe's execution wasn't very kind to her. At all. She so utterly breaks that she becomes a disheveled mess of self-loathing and Survivor Guilt, to which from then onwards the game's genre shifts from a mere Deadly Game Visual Novel to outright Psychological Horror; she needs to keep her Sanity Meter from going too low, otherwise she'll go completely mad from grief and self-loathing at feeling directly responsible for Joe's death.
- Broken Ace: Even given her social and deductive intelligence, it still doesn't change the utter brutality her mind goes through by virtue of feeling responsible for the deaths of Joe and everyone else who died, and she develops herself into an utter mess of psychotic problems that could be the very thing that either helps her win or stops her from snapping entirely.
- Broken Bird: Whatever confidence she once had is destroyed utterly after prolonging Joe's suffering during his execution, simultaneously destroying her sanity in the process and leaving it on a very, very fragile balance. Fail to find a balance in that, and she'll either end up with permanent brain damage from too many mind wipes or outright go insane from pure grief.
- Character Development: Even after becoming emotionally brutalized due to Joe's death, she still copes with her trauma as best as she can given the situation she's in, and more often than not is slowly becoming the unofficial leader of the group through her magnetic charisma and decision skills. Where this takes her remains to be seen, but frankly one could already summarize from Chapter 2-2 that it will either get gradually better (for now)... or much, much worse.
- The Chosen One:
- She is considered to be the most likely person to win the death game by the significant margin of 15.5%, which is heads above anyone else.note Though given how much of a mess she win up becoming thanks to trauma, she isn't particularly thrilled about this.
- In the second Main Game, Gashu actually does refer to Sara as "the chosen one" in those exact words, after she figures out that he rigged the card trades in an attempt to ensure that Nao was killed.
- The Corrupter: She's the one who ends up turning Ranmaru into a ruthless killer, both motivating Ranmaru's resolve to put blood on his hands for their survival and doing nothing to quell signs of his murderous desires, keeping quiet about his potential targets.
- Deconstructed Character Archetype: Of the Ordinary High-School Student trapped in a circumstantially life-and-death Deadly Game and eventually becoming the unofficial leader of the survivor group by virtue of their magnetic personality and status as a Hope Bringer, in a similar vein to Makoto Naegi from Danganronpa: Trigger Happy Havoc and Junpei from Nine Hours, Nine Persons, Nine Doors. Only what happens instead is different; the trauma of losing the ones she loves as well as her lack of the emotional fortitude required to deal with the deadly circumstances surrounding her and the pressure of leading others to safety causes her to completely lose it, and depending on your choices, outright go permanently insane from grief and self-loathing. Of course, if you play your cards right, Sara can reconstruct this archetype, pull herself together after Sou's sacrifice and stabilize herself as a result. Whether it sticks remains to be seen, but it's definitely a step-up from her going mad from grief in the worse outcomes. This takes an even deeper shade with The Reveal that Sara is actually dangerously willing to full on betray and manipulate others for her own survival, as shown by her results in AI simulations, and it was only Joe's influence that prevented her from doing so in the game itself.
- Dude Magnet: She's strongly implied to have the affections of Keiji, Gin, and Ranmaru.
- The Empath: Despite being more logical than her best friend Joe, she's still highly emotive and often in-tune with others' suffering, feeling a sense of responsibility to look after them and protect them from danger, which is best shown in her attitude towards Kanna and and any of the survivors. Arguably, this causes her far more harm than it does good, due to having empathy yet lacking the emotional intelligence to understand every death that happens isn't necessarily her own fault, especially in a Deadly Game that is quickly revealed to have rigged almost everything about it. Because of this especially, it's a major reason why Joe's death breaks her utterly, and can send her careening down a path of self-destruction.
- Even the Girls Want Her: She can mention in an optional conversation with Kanna that a younger girl once sent her a love letter.
- Exhausted Eye Bags:
- In Chapter 2-1 onwards, she sports these to demonstrate just how physically, mentally, and emotionally exhausted and traumatized she is after the events of Chapter 1-2. This is to show how much of a visibly grieving wreck she is between the guilt of Joe's death in particular and the hallucinations caused by said guilt.
- She also sports these in Your Time To Shine if she's too hungry or too heavily injured. They indicate that Sara is one hit point away from death.
- Fashionable Asymmetry: Some of her bangs are long enough to cover the side of her face, while the rest are cropped short right above her other eye, with the rest of her hair pulled back in a high ponytail.
- Fatal Flaw: Her strong empathy, lack of emotional maturity and tendency to blame herself for the deaths of everyone else. She will quickly internalize each potential death as her own fault without stopping to realize she's not at fault for something that's clearly the engineering of the Death Game's masterminds than anyone else, and this mentality can and will destroy her if she doesn't let go of her grief and try to prove responsible for the survival of everyone around her. In fact, part of why Sou ended up creating AI Joe revolves around that knowledge Sara can't stand back up on her own two feet without her being reassured that what happened wasn't her fault - something that nobody could get through to her except Joe.
- Femme Fatale: Can descend into this for at least a moment in the route where Sou lives. When the "red-text" Sara, implied to be her highly active survival instinct taking over, subtly encourages Ranmaru to kill the others so that the two of them can live, she steps very close to him, using body language to convey her meaning even as her words maintain plausible deniability.
- Foreshadowing: She gets increasingly desperate very quickly when she's given the Sacrifice in 2-2. Her thoughts become very clouded and much less focused on the group as much as they are on her own survival. While initially it seemed like this was just pure desperation, it turns out that this is how she genuinely thinks without Joe around. Even before that, in 1-2, she can have a chilling thought about how her own survival is important, rather than the group's, and when she receives the Sacrifice card in 2-2 she wastes no time in running to Reko/Alice's body in the hopes of gathering enough tokens to trade the card away.
- Forgotten Fallen Friend:
- Deconstructed, as the reason Sara can't forget her fallen friends is because she's tortured by guilt and hallucinations blaming her for their deaths. It's then played straight if you vote for Kanna in 2-2; afterwards, Sara has an encounter with a hostile Joe AI activated by Sou, and the trauma is so great that she completely forgets about Joe. She does eventually remember that she had a best friend.
- Also happens in one of the game overs. Safalin's memory-wiping machine is intended to erase Sara's hallucinations of Joe, but using it too many times causes her to forget him completely.
- Freak Out:
- At the end of Chapter 1, she completely breaks down after Joe's death, and begins suffering extreme hallucinations of him. It's made worse by Sue Miley rubbing it in her face.
- During the middle of Chapter 2-2, upon being given the Sacrifice rather suddenly, Sara has a panic attack and immediately tries to get the tokens from either Alice's or Reko's body. Upon finding out there were no tokens to get, she nearly loses her mind before Gin pulls her out of it.
- At the end of Chapter 2, if you vote to kill Kanna, Sou activates a hostile Joe AI who angrily mocks her for being a "murderer" out of spite, triggering an emotional breakdown that wipes her memories of Joe entirely.
- Genius Ditz: Downplayed, as Sara is undeniably smart for her age, but as expected as a relatively normal school girl, she can be a bit silly from time to time. Her dialogue options often reflect this, as she'll often have some sensible choices paired with an outright ridiculous one.
- Giftedly Bad: Your Time To Shine reveals that Sara is a rather terrible artist, it's so bad that Joe and Ryoko- who will not hesitate to tease her on any number of things- just refuse to even comment on it. To this point, she asks Mishima for help not to make her a good artist, but just enough so that someone will say something about it.
- Heal the Cutie: If she chooses to execute Sou, his last action is to finish the Joe AI so that it can help Sara work through her trauma and stabilize her mental state.
- Heroic BSoD: To say this is her reaction to Joe's death is the Understatement of the century, to the point it could very well have caused permanent damage.
- Heroic Self-Deprecation: She's unable to see herself as anything but cowardly and useless after her best friend Joe Tazuna's death, despite being ultimately trusted and seen as the heroic leader by nearly everyone. Even worse, she personally blames herself for every singe person who died in the Death Game so far, which quickly proves to be an extremely toxic mentality for someone trapped in a Deadly Game, and quickly contributes to her gradual degradation in mental health.
- Her Own Worst Enemy: By far the biggest threat to Sara isn't even the Death Game (though that's very much a second-place concern), but her own ability to come to terms with her Heroic Self-Deprecation and realize that she can't save everyone or even most of everyone, which in turn proves to be a massive reason for her mental breakdown after Joe's death. Whether or not she grows to be able to accept that what happened to her wasn't her fault would mean the difference between life and death.
- Hope Bringer: What Joe and Kai believe her to be, although she herself doubts it very much. She doubts this even moreso after Joe's death, which stomps out any self-esteem she had left.
- It's All About Me: Not often, as she is very much an All-Loving Heroine, but signs of it do show up. Especially when in immediate danger, she defaults to how she's going to get out of a situation before clearing her head and taking others into consideration. In simulations where she didn't have anyone to support her mentally, she goes up to eleven, focusing on her own survival by way of manipulating and killing others until she was the last one left.
- It's All My Fault: Due to her attempts to prove responsible for the survival of everyone around her, this comes at the very real cost of her blaming herself for each and every death that inevitably happens. This is what ends up destroying her so utterly in the event of Joe's execution, something she couldn't have controlled given a.) it was both impossible for her to persuade everyone to vote for Joe after she deduced that he was the Sacrifice, b.) Joe was a Dead Man Walking by drawing the Sacrifice Card, and c.) even if by some miracle Joe survived the first Main Game, him alongside Kai, Kugie and Nao were not even being considered as candidates, meaning he was inevitably going to die anyways since all four of them were extra luggage the masterminds of the Death Game actively wanted dead, presumably for the assumption of knowing too much. Either way, Sara shouldn't blame herself, yet her extreme Survivor Guilt and resultant self-loathing still makes her due so out of feeling responsible for having protected him.
- I Let Gwen Stacy Die: Because of her strong empathy for everyone else trapped in the Death Game and almost everyone looking to her for guidance, she will blame herself in the potential advent of their deaths. This quickly proves more than capable of potentially destroying her, as the building Survivor Guilt and especially Joe's death as an important friend causes her psyche to become irreparably damaged. If she doesn't come to recognize it isn't her fault, this will destroy her sanity outright.
- Laughing Mad: If her Sanity Meter gets too low in Chapter 2-1, one of the bad ends has her go completely insane following the mother of all Freak Outs, and is reduced to laughing madly and hysterically as the trauma becomes too much for her to bear.
- The Leader: Reko outright calls her the group's leader in Chapter 1-2 when Alice accuses her of being untrustworthy, and only Sou disagrees with this notion.
- Magnetic Hero: Downplayed and Deconstructed. While she can still sway others to her side, this doesn't always work as well as she'd like, she blames herself when things go horribly wrong, and some of the other participants distrust her specifically because it seems like the others are putting too much faith in a seemingly ordinary high school girl.
- My God, What Have I Done?: Takes the progression of the game and people who die very personally, feeling no short supply of pain for all she's forced to do even when it's not her fault. This can get so bad that it eventually ends in her going completely insane or suffering permanent brain damage from too many mind wipes within Chapter 2-1's bad ends, and even after dodging those fates there's no guarantee that it's an end to her many, many emergent mental problems.
- Mysterious Past: Much of her past is up in the air and is often called into question. From what can be gathered, her adopted father may be someone who's working with and/or masterminding the Death Game, which only raises more questions as to what is so important about her involvement in it and why it is.
- Nerf: An unusual in-story example. Joe was placed into the game with her to stunt her development of her survival instincts and balance her chances of survival.
- Nervous Wreck: A lot of Chapter 2 has her as a neurotic, emotionally-damaged young woman who is quite literally a single stone's throw away from completely losing it... something that's even reflected in gameplay, given her increasingly erratic and messy behavior the lower her Sanity Meter goes, contributing in her outright snapping entirely in some of the bad ends.
- Nice Girl: Though dialogue options can make her come off as more or less caustic or distrustful, at the end of it all she's consistently someone with the best interests of the group at heart, no matter what happens. This quickly earns her the trust of most of her party members, and both Kanna and Gin see her as a big sister figure to lean on.
- Not So Above It All:
- She's confessed that she based her decision on where to go for high school purely on how cute the uniforms looked.
- She also once sat on (and fell off of) a traffic cone, which embarrasses her greatly.
- After using paint to solve a puzzle in 3-1 via painting a picture, her immediate thought is about her efforts towards the painting she did have gone to waste once the picture opens up.
- O.O.C. Is Serious Business: The aftereffects of the memory-wiping device have Sara almost giddy at the lack of pain she obtained from forgetting about Joe a little, to an extent it's rather unsettling. By the time Sara has gone to Safalin twice to use the memory erasing device, she's noticeably desperate for the mental relief and it culminates in a Bad End as she's mentally broken and addicted, subject to Safalin's whims.
- Red Baron: In a discussion, Joe claims that Sara's known as "The Godfather of Sonobeno", to her exasperation. This title may or may not be a joke.
- Replacement Goldfish: Kanna impresses on Sara because of her resemblance to her deceased big sister. Noticeably interesting that Kanna conflates Sara and Kugie more when Sara has the option to be more nasty or rude to Kanna. Becomes deconstructed if Sara chooses to kill Kanna in Chapter 2-2, where the two's emotional attachment to one another and Kanna's relationship with Sou causes him to retaliate by reprogramming AI Joe to emotionally torture her instead of heal her, which has devastating consequences.
- Sanity Meter: As part of the Genre Shift that happens after Joe's execution in Chapter 1-2, Sara begins developing a meter that shows how much she's hallucinating and how badly the hallucinations are tearing apart at her sanity. Chapter 2-1 then becomes a balancing act of preventing the Sanity Meter from reaching 130, which is easier said than done given the wrong dialogue choices can and will result in that meter decreasing. You can go to Safalin in order to mind wipe her and restore her sanity back to normal, but do this too many times and it will cause permanent brain damage - either instance, her Sanity Meter reaching 130 or using Safalin's machine too many times, gives you a Non-Standard Game Over.
- Sanity Slippage: She starts off fine at the start of the game, but then Mishima, Joe and Kai die in that order and their deaths - especially Joe's - causes her to exhibit serious emotional damage and become a dysfunctional wreck as a result. This can be improved temporarily if one chooses to execute Sou... or get much, much, much worse if she executes Kanna, provoking Sou's retaliation and her sinking so deep into self-hatred that she requests a mind wipe of her forgetting Joe completely to prevent her from completely going mad from guilt and self loathing.
- Savvy Guy, Energetic Girl: Inverted. She's the savvy girl to Joe's energetic guy.
- She's Back: If Sara votes for Sou instead of Kanna, Sou uses his last moments to let Sara meet a Joe AI, letting her finally come to terms with her grief and guilt. Whether this sticks, however, is something that remains to be seen.
- Super Drowning Skills: By her own admission in Your Time To Shine, she can't swim. In fact, she's so bad at it, she claims to simply sink to the bottom of a pool when trying to swim.
- Survivor Guilt: Reinforcing her emotional trauma, Sara ends up internally coming to believe she should have died instead of Joe, having so little self-respect and confidence in herself as a result of Joe's execution that it could very well result in her spiraling further if the player lets it.
- Teen Genius: For someone who's only in her second-year of high school like Joe, she quickly shows her chops as someone who's really good at persuasive arguments and deductive reasoning, outright keeping up with some of the smartest members of the survivors such as Keiji and Sou. Thankfully, while her mental well-being degrades most everywhere else, her sharp intellect does not diminish one bit.
- Terrible Artist: First mentioned in Your Time to Shine. She's so bad at drawing that her friends won't even make fun of her, and even Mishima is surprised when she draws a lion in the sand. In 3-1, she paints over a required puzzle with wavy, uneven lines that drip: stunning Ranmaru into silence. When Gin suggests drawing with her, she hesitates to agree and hopes he won't cry when he sees her drawings.
- This Is Unforgivable!: Briefly attempts to kill Midori after he tells her the truth on why Joe was brought into the Death Game whether she remembers him or not.
- Tragic Keepsake: Before they were that close, Sara gave Joe a dog keychain that Ryoko had won from an arcade for his birthday. Eventually, it becomes one of the only things Sara could remember Joe by, after he dies.
- Trauma Button: Between her strong emotional bond with Joe and his execution being engineered in a way to break Sara utterly, anything that comes to remind her of Joe in any way sends her into traumatic hallucinations. Meeting Joe’s AI in Kanna's route snaps her out of this though as the closure lets her finally be able to remember Joe without hallucinations.
- Trauma Conga Line: The whole game is one giant Trauma Conga Line for her! She ends up being kidnapped and put into a Deadly Game that already resulted in nine other people's deaths from it merely beginning, she went on to witness Joe's Cruel and Unusual Death and unknowingly helped contribute to prolonging it, goes nearly insane from grief and ends up being haunted by hallucinations of Joe and the rest of the deceased, all of which can and will degrade her sanity until she snaps entirely, and everyone still looks to her as a leader for the survivors. She just can't catch a break, can she? Thankfully, this seems to be alleviated in the route where Kanna lives... but if she dies, prepare for it to get much worse overall.
- Trauma-Induced Amnesia: In Chapter 2, if she votes for Kanna, the malicious Joe AI traumatizes her so much that she forgets about him entirely.
- Virtue Is Weakness: The masterminds of the Deadly Game believe that Sara's greatest weakness is her friendship with Joe. They went as far as to take him into the game specifically to hold Sara back from developing a ruthless instinct for self-preservation, and to make the win rates more equal since Sara has the highest change of winning by a decent margin. If you're on the route where Sou survives the vote and reprograms the Joe AI to maliciously torment her, Sara completely forgets about Joe; she subsequently starts to become more self-centered to the point of provoking Ranmaru into murdering the surviving Yabusame.
- Villain Protagonist: She becomes one in Sou’s route when she manipulates Ranmaru into killing the surviving Yabusame … while that’s the worst she does in Sou’s route in chapter 3-1 she is slowly descending more and more into becoming self-serving. Thankfully averted in Kanna’s Route as the memories of Joe and words of encouragement from his AI bring her back to her kindhearted empathetic self.
- Walking Spoiler: It's basically impossible to really talk about her character in any great detail without bringing up her going mad from grief after Joe's death in Chapter 1-2.
- Woobie, Destroyer of Worlds: Like Sou, Sara does not deal well with the pressure of the death game as well as she would like to believe. After Gashu Satou completely obliterates her chance of escaping with everyone in the second final game, she completely loses her mind in two out of three outcomes, and she will promptly either vote for Nao and doom everyone else to die to escape with her, or she will vote for Kanna and start Slowly Slipping Into Evil. Subverted if she votes for Sou, whereupon he will program a Joe AI to give her support before expiring, which will give Sara enough of a confidence boost to continue.
- Would Hurt a Child: Two potential outcomes for the second Main Game are voting for Kanna, which is the deciding vote that gets her executed, or voting for Nao, which results in everyone being executed except for Sara and Nao, who get to leave the game.
- Young and in Charge: Despite effectively being a high school student, Sara's deductive skills and Magnetic Heroine characteristics has almost everyone looking to her for advice and leadership. This quickly shapes up to be a Deconstructed Trope, however, as Sara's high intelligence yet still-developing emotional maturity means she'd inevitably feel responsible for each and every death that happens to everyone. It's to the point Sou openly questions and even distrusts her for how everyone can put their faith in someone so young, and he's not wrong, either.
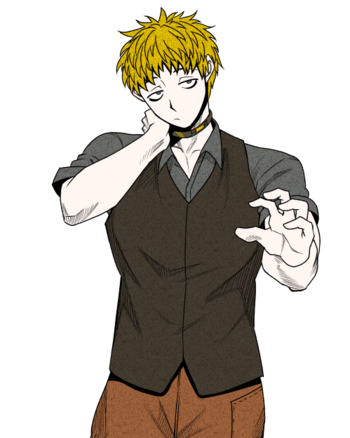
Jou "Joe" Tazuna
Joe Tazuna

After using his quick thinking to help himself and Sara escape their First Trial in one piece, Joe soon finds himself alongside 9 other people and Sara in a facility deep below the surface, trapped in a Deadly Game, and resolves to continue to protect Sara at all costs, or die trying.
- A.I. Is a Crapshoot: Possibly Inverted. If Kanna doesn't survive Chapter 2, Sou presumably outright edits AI Joe to be incredibly abusive as opposed to comforting her like he does on Kanna's route. The end result ends up causing Sara to have a Freak Out so bad she forgets Joe entirely.
- All for Nothing: Possibly the worst part of his Batman Gambit was that it didn't actually keep Sara safe like he wanted it to. In fact, the end result of Joe's death was that it broke Sara so utterly that she would've been in a worse state than what Joe could've foreseen, effectively rendering his original motive for his last gamble basically moot. It could be further rendered for nothing in any of the bad endings after Chapter 1-2, or this could thankfully be subverted for the most part if Sou carries through with programming AI Joe, which in turn helps stabilize Sara's downward spiral.
- Always Save the Girl: Joe was willing to put himself at massive risk of death if it meant ensuring Sara's safety. Which is why he came up with his Secret Test of Character: either the other participants stay true to their word, to which he would die but Joe would place faith in the survivors looking after Sara, or they would break their promise and vote for Joe, to which Joe would take Sara and leave everyone else to die. Regardless of the outcome, Joe felt like Sara would remain unharmed, and that's something Joe was fine with dying over. Which only made what happened to Sara after Joe's death all the worse.
- Ambiguously Bi: Kai's final Fondness event with him in Your Time to Shine has him question Joe about flirting, leading to Joe confessing that he'll talk to anyone regardless of gender. When Kai asks if he has no leaning based on gender, Joe doesn't deny it.
- Ambiguous Situation: The Joe AI that, based on the route, is either much more like the real him and comforts Sara, or torments her to the point where it makes her forget he existed. Which was he initially intended for? Sou had every reason to want to hurt and traumatize Sara on the route of his survival, but other elements in the game, such as Midori, have shown a willingness to tamper with AI and expressed an active desire for Sara to revert to her behavior in the game without him there. Did the dying Sou spend his last moments turning what was meant to be a trap for Sara into a final gift that the resentful Sou didn't give a damn about or simply turned on? Or did the dying Sou just activate it as-was while the resentful, living one tampered with it?
- Animal Motifs: Dogs. He wears dog-related charms on his person, and is every bit as friendly, loyal and energetic as one. Additionally, if he's briefly brought back as an Benevolent A.I., he says to Sara that "I'll always follow ya. Y'know... like a dog!".
- Anime Hair: One wonders how much hair gel he uses to keep his spiky hairstyle sticking up. In one of his fondness events in Your Time to Shine, he even states that it caused his classmates to think that he worked at a Host Club. He later reveals that this is a justified example: His hair isn't naturally like that, his friends (Ryoko, Sara, and presumably others) convinced him to style his hair like that, and he simply continued with it because they got a kick out of it.
- Back from the Dead: Sort of. He's still dead, but Sou programs an AI version of him to be able to comfort Sara given all she's went through or to guilt her and torment her for betraying his wishes.
- Batman Gambit: How he ultimately comes to his final conclusion. He claims to be the Sage to the others under the circumstance that everyone promises not to vote for him, and then he'd vote for himself. If they went against their word and voted for him, it would have proven in his mind that the majority were bad people, leading to him taking Sara and escaping the game. When they don't and keep their word, it allows him to accept that they're good people, and trusts them to look after Sara even though they're the reason he's going to die.
- Benevolent A.I.: If Sou doesn't survive Chapter 2, this is how he's briefly brought Back from the Dead. Sou programmed AI Joe beforehand to give Sara a much-needed pep talk that clears her head of the hallucinations tormenting her. Of course, whether or not Sou stays true to his objective is something that depends on if he's voted to be the sacrifice of the second Main Game.
- Beware the Nice Ones: Hoo boy. Despite being one of the nicest people in the entire cast, if not the nicest person full-stop, he shows just how clever he is and almost pulls off a Secret Test of Character gambit to get all the cast sans him and Sara killed. The only reason he didn't succeed was him not wanting to kill everyone for nothing, especially if they turn out to be good people, so he puts himself at serious risk if it means them proving to them he can trust their judgement.
- Big Little Brother: Mishima asks him to take on the role of Kanna's younger brother, despite the fact that Joe, as a high school student, is obviously older than the middle school-aged Kanna. Joe understandably complains that he's supposed to be the older brother.
- Boy Next Door: Pretty much fits this character archetype to the letter. He's friendly and down-to-earth, and exhibits a surprising amount of emotional and social intelligence, but has only known Sara since high school. Despite this, however, he's hardly anything resembling one who completely wears his heart on his sleeve; he can and has showed a lot of cunning and forethought in the past, as well as possessing a surprisingly tough composure when presented with a dangerous situation.
- Collateral Angst: He gets killed pretty gruesomely at the end of Chapter 1 so that Sara, his best friend, gets some wicked trauma over it.
- Crucified Hero Shot: The manga adaptation's depiction of his Cruel and Unusual Death has him dangling from the Wrigglers in mid-air with his arms outstretched. And much like Christ, he died as a sacrifice.
- Cruel and Unusual Death: He gets Impaled with Extreme Prejudice by wriggling, metal tubes that drain all the blood out of him. As if that weren't bad enough, it's also very much psychological torture for poor Sara as well; Miley makes it seem that Joe can be saved if Sara presses the wriggler's deactivation switch fast enough to regurgitate blood to his system, but even this is just to serve as a nasty Hope Spot designed in mind with breaking Sara outright. And as a final insult to injury, Sara's desperate attempt to save Joe just prolongs his death and makes him suffer more.
- Decoy Protagonist: He’s playable in the first puzzle of the game and is initially portrayed as the games Deuteragonist … however he ends up dying in Chapter 1-2.
- Dead Man Walking: It's revealed in Chapter 2-2 that by virtue of them having been brought into the Death Game as unintended extra baggage, Joe, Nao, Kugie and Kai were practically doomed from the start, and the masterminds behind the Death Game actively wanted those four removed from the picture at all costs. Which is why the Floor Masters actively manipulated events to ensure that they would either be voted off as a sacrifice or manipulated to obtain the Sacrifice Card. The exact reason for their arrival isn't too clear but a given reason is that they were brought in to [[spoiler:equalize the percentages. An additional factor being that their presence in the Death Game supposedly meant they saw too much about it period and needed to be eliminated as a result.
- Didn't See That Coming: Type 2, of the Known Unknown variant. He knew he was most likely going to die the second he drew the Sacrifice card, so he pulls a last-ditch gamble to have the other players vote for him so he can take Sara and get the hell out of dodge. Unfortunately, he proves unable to really let himself be responsible for the deaths of nine people if he doesn't know they're good people or not, so he stages a Secret Test of Character to knock out two birds with one stone: either they stay true to his desire to not vote for him (meaning he'll most certainly die, but that would prove to Joe the survivors are good people and he can trust Sara's well-being with them), or they go against his word and vote for him, which would prove they're mostly bad people and give him reason to leave with Sara. Either way, Sara is kept safe, but one thing he doesn't adequately plan for is how Sara would respond to his demise, and he assumed that the cast would be there to watch after Sara in what he knew what was going to traumatize Sara. He didn't expect, however, how bad it would be, nor how his execution was designed from the ground up with torturing Sara emotionally with a nasty Hope Spot then gaslighting her to make her feel like she only prolonged Joe's death. Either way, his efforts to ensure that Sara is safe ends up being All for Nothing, solely because something he knew was a risk wasn't something he could accommodate in the short time he came up with his plan.
- The Empath: Very similarly to his best friend Sara; Mishima says to the effect that he's a "people's person," and he instinctively knows how to understand how people act and appeal to their better nature. However, something that separates him from Sara is Joe having a shocking amount of emotional maturity by comparison, and by extension shows he's more than capable of channeling bad events into positive energy.
- Face Death with Dignity: For someone who's about to die a very, very messy death, Joe handles his impending demise pretty damn well, accepting his fate as the sacrifice and reassuring Sara that he loves her, and that he couldn't see anyone in their group as bad people. Seemingly subverted once his execution begins, clearly being in pain and struggling to hold onto dear life.
- For Want Of A Nail: His decision to come back to check on Sara after he walked her back home pretty much shapes Sara's entire interactions and decisions for the rest of the game.
- Friendly Target: He has been Sara Chidouin's best friend since high school and is a chipper and peppy young man always willing to help her out. Not only does he end up as the Death Game's second official victim, but he also gets one of, if not the most brutal deaths of the lot.
- The Gadfly: Downplayed. He's a sweetheart, but he's absolutely Not So Above It All. His first act when Sara would pass out before coming to meet up with the other nine players is obfuscate not knowing Sara just to see how she'd react.
- The Heart: One of the most personable people in the game, being generally upbeat and encouraging, even despite his initial misgivings of the others. Your Time To Shine emphasizes this, as when Jou rests, he has a chance to increase the fondness of everyone (including himself) by one.
- Heroes Love Dogs: Has a dog charm poking cutely out of his breast pocket and a bone-shaped charm on a necklace looped loosely around his right arm. Fittingly, he has the personality and cheer of one.
- Heroic BSoD: Sara catches him in one soon after finding the Sacrifice card. He hides it pretty well and shakes it off once she prods him a bit about it.
- Hidden Depths: Seems like a cheerful young boy who acts his age, but he is far, far more clever than he lets on.
- He's generally the first before almost anyone else to notice when something's off emotionally speaking, owing to an extremely high amount of emotional intelligence. He's the first one who brings up the possibility of a traitor in their midst, a deduction that becomes correct given Kai's task of scouting out and bringing each participant in the Death Game to the facility. He also shows himself as extremely cunning and more than capable of lying if he needs to, having fooled nearly everyone in the first Main Game that he's the Sage except some of the most perceptible candidates (such as, fittingly, Sara), before only losing his clout due to his empathy making him unable to truly manipulate people he wants to have faith in.Mishima: I suppose you've more interest in people than in knowledge, Joe.
Joe: Huh... Never thought about that before.
Mishima: That's why you can befriend many people,and why you're loved. - Plus, just because he's not exactly as sharp knowledge-wise as Sara, Keiji and Sou does not mean he's stupid. You actually control him during the First Trial as you have to figure out a way to save Sara from the death trap she's strapped to and canonically manages it.
- He's generally the first before almost anyone else to notice when something's off emotionally speaking, owing to an extremely high amount of emotional intelligence. He's the first one who brings up the possibility of a traitor in their midst, a deduction that becomes correct given Kai's task of scouting out and bringing each participant in the Death Game to the facility. He also shows himself as extremely cunning and more than capable of lying if he needs to, having fooled nearly everyone in the first Main Game that he's the Sage except some of the most perceptible candidates (such as, fittingly, Sara), before only losing his clout due to his empathy making him unable to truly manipulate people he wants to have faith in.
- Killed Off for Real: He finds Sou's Sacrifice card prior to the first main game, which as Sue Miley explains, will seal his fate unless he gets the majority vote. Though he tries to pull a Batman Gambit on the group by pretending to be the Sage, the only votes he can amass on both the preliminary vote and the final vote are his own two votes (since the Sacrifice gets to vote twice) and Sara's if the player so wishes it (that's a maximum of 3 out of 12 votes), so he won't make it out of the second floor without being stabbed by wrigglers and drained of his blood. Sue then hands Sara a button which if pressed repeatedly can slow down the device, but the ensuing Button Mashing will only serve to prolong his suffering regardless of how fast the player is.
- The Lancer: Quickly buddies up with Sara at the start of the Death Game to act as both her assistant and main number two, and in many ways right down to the ways both he and Sara are similar and different, they reflect off of each other quite well. Sadly, it doesn't last.
- The Millstone: His true purpose in the death game is to balance Sara's chances of survival by giving her a friend to hold her back and stunt her development of ruthless survival instincts.
- Morality Chain: Chapter 3-1B reveals that this is why he was chosen and not Ryoko - without him to keep her in check, Sara would begin manipulating the others in order to win.
- Nice Guy: Easily one of the nicest characters in the game, if not the nicest. A genuine, loyal friend to Sara, Sou programming AI Joe to be true to his original personality comforts Sara and all but says she's better than she thinks she is and that he has zero hard feelings about what happened. This especially extended to how he was in his final moments of life - the reason why he didn't go all-in with becoming a Manipulative Bastard in order to save himself and Sara? He didn't want to do that if everyone here wasn't a bad person, especially if the survivors turn out to be genuinely good people. Which is the full reason why he established his Secret Test of Character in order to see whether or not he can trust them with Sara's well-being; if they were good people, they wouldn't go against his word, and when he's proven right, he has zero hard feelings and doesn't hate anyone for what's happened, even when he knows that means he'll die.
- No Good Deed Goes Unpunished:
- Had a date with Ryoko, but returned to the school so he could walk Sara back home, since he was aware of her stalker situation. During the subsequent attack, he tries to help and gets knocked out and kidnapped for his troubles. Though he has a Doll counterpart and AI as well, which brings up the question of whether or not he was an intended target...
- Doubly so given his decision of giving everyone a chance to be true to their word. The whole reason why he began his gamble in Chapter 1-2 is because he wants to ensure that Sara's safe more than anything, but doesn't want to go all-out if it means the people he'd be convincing to vote for himself weren't bad people. So he ends up pulling off his request for everyone to not vote for him as opposed to the opposite, all because he wanted to make sure he could trust them with Sara - which, of course, had the effect of killing him off as a result.
- Oh, Crap!:
- He has a muted example of this when he ends up obtaining the Sacrifice Card: he hides it well enough when Sara inquires what the problem is that he brushes it off like it's nothing, despite knowing full well he's doomed if he doesn't trick everyone into voting for him.
- You can see the exact moment in the first Main Game when he realizes he's effectively a dead man. His expression immediately scrunches up and gets exceedingly dark and nervous
 ◊, as if knowing full well what the consequences of him losing are. Surprisingly enough, he at least fakes a rebound well enough to reassure Sara he loves her and that he trusts the group to look after her.
- Only Known by Their Nickname: His legal name is Jou Tazuna, but the phonetic similarity between the Japanese Jou and the English Joe often lead to him being nicknamed as such. This persists throughout vgperson's translation, and Joe seems to have no qualms with his nickname in the slightest.
- Platonic Declaration of Love: He gives one to Sara just before he dies. He says it again later on as an AI on the route in which Sou dies."Sure enough... It's hard for a guy and a girl to say this sorta stuff to each other, huh...? I love ya, Sara! You're my best friend!"
- Platonic Life-Partners: He and Sara love each other dearly as best friends, being a somewhat inseparable trio before the game alongside Sara's other best friend/Joe's girlfriend.
- Power Limiter: He technically is one, he's inserted into the game because without Joe present, Sara is projected to coldly wipe out the other contestants at a frightening pace. It's unclear if having somebody close to her outside of the game makes her feel too ashamed to kill without compunction or if Joe is simply cheerful and upbeat enough to stabilize her darker nature.
- Sacrificial Lion: Joe's death has a catastrophic impact on the plot and shows that nobody is safe from getting killed, and if you're lucky enough to not be among the death toll, you're certainly not getting out unscathed emotionally either. It's because of Joe's death that sets Sara off on a spiral of self-loathing and trauma, and effectively establishes what this visual novel is all about.
- Sadistic Choice: When Joe ends up entering the Main Game with the Sacrifice card, he has exactly two choices: trick everyone into voting for him so he can escape with Sara at the cost of everyone else's lives, or go along with whatever the other survivors vote and end up getting brutally executed himself. He reluctantly goes with the first option and sets up a remarkably impressive Batman Gambit that nearly works, only falling apart in the final minute or so before the vote.
- Savvy Guy, Energetic Girl: Inverted. He's the energetic guy to Sara's savvy girl.
- Small Role, Big Impact: Joe is, in chronological order, the second one to die, and as such generally didn't have as much screentime as some of his other compatriots. Still, Joe's death proves to be exactly what kickstarts Sara's psychosis and the stakes being established as life-and-death, and the impact of his death affects the story's plot all the way to the present.
- Smarter Than You Look: Comes off as silly and carefree, but demonstrates a downright shocking degree of foresight and consideration towards Sara's distress over her stalker pretty early on. It gets even more impressive in the first Main Game, where he shows just how cunning he is by being able to manipulate everyone into thinking he is the Sage so that they would vote for him, at least until Sara figures out he's lying at the last minute.
- Smashing Survival: Invoked and Subverted. As he's being sacrificed, Sara is handed a button that is supposedly able to slow down the device and has a slim chance of saving him. The player is then given the option to repeatedly press the button in hopes of saving Joe, but this will inevitably end up being futile as Joe slowly slinks over and bleeds out, with each press of the button only serving to prolong his pain.
- Spell My Name With An S: While vgperson primarily uses Joe, Sara also mentally refers to him as Jou during his introduction.
- This Is Gonna Suck: As noted in Oh, Crap!, his reaction upon losing the Main Game wasn't panic, but a gradual, deathly-silent realization he's doomed, and then resignation over the fact that he's going to die.
- The Unchosen One: He alongside Nao, Kugie and Kai were not supposed to make it past the First Trial, or to the first Main Game. They weren't even supposed to be there, because they'd have likely saw too much regarding the Death Game's leaders when they weren't supposed to be there, and were likely engineered to die as soon as the Floor Masters could find a way that'd work while still not expose the blatant rigging of the game.
- Un-person: Downplayed in the scenario that Sou survives Chapter 2, causing him to edit AI Joe into a malicious force out of petty revenge. Sara doesn't remember him, but does recognize his Tragic Keepsake and eventually realizes that she had a best friend she's forgotten, and everyone else (e.g. Keiji and Ranmaru) remembers him.
- Would Hurt a Child: While he clearly wouldn't want this to be the case, his Batman Gambit would have doomed the young Gin and Kanna to their deaths had it succeeded.
Keiji Shinogi
Keiji Shinogi
Introducing himself to Joe and Sara as a "friendly neighborhood police officer," Keiji quickly shows he has what it takes to keep up with the brightest minds of the Main Games and Sub-Games, despite it being inevitable that his past will catch up to him.
- Accidental Murder: During a police pursuit, someone claimed that the criminal had a weapon and were about to shoot. As it turns out, the claim was made on false pretenses and Keiji ended up killing his childhood hero, Mr. Policeman, something that very much haunts him to the present day. The next time someone died because of him, it was... far less accidental.
- Aloof Ally: Very similarly to Kai, though he's still distinct from him by virtue of Kai being the person who wounded up stalking Sara solely to serve as her guardian while at the same time wound up as a pawn in the masterminds' plan, while Keiji seems to be pretty much on Sara's side from the beginning. Mostly. Either way, he's content to let the others do what they want while he does his own thing, and further unlike Kai, he's more willing to cooperate when the time comes, though he prefers to take a backseat to things.
- Ambiguously Bi: In Your Time To Shine, a fondness event between himself and Mishima, he states that he used to drink a lot, and ended up seducing a fair amount of women when he did so. Mishima categorizes him as a "seducing drunk", which Keiji immediately responds by giving a couple flirtatious comments, but the event ends before anything is made explicit.
- Ambiguously Evil: It's really hard to talk where he places on the moral spectrum exactly, especially after Chapter 3-1-A. Given he was the reason why Megumi was murdered alongside his take on how Mr. Policeman die directly contradicting with Midori's take, and Keiji legitimately being traumatized while Midori's an unambiguous liar, it suddenly becomes a mess to sift through his allegiance or even to confirm what he said lined up with the truth of the matter, especially given the other two related to the incident are dead and the information regarding them have likely died with them, given Keiji's own biased account on the matter and Midori being very unlikely to share the truth of the matter. Either way, the circumstances behind Megumi's murder and the death of Mr. Policeman are very hard to properly figure out without leaving more questions than there are answers. It remains to be seen whether or not Keiji is telling the truth or something else, given we haven't heard Megumi's story on the matter... so far.
- Ambiguous Situation: We have no idea what really happened during the shooting that took the life of Keiji's childhood hero, Mr. Policeman, nor do we know what the lead-up to the events were or even what the facts were beyond the accounts of two highly unreliable and mutually-contradicting narrators. Why did Midori/Sou Hiyori stage the situation in the first place? How much did Mr. Policeman's life fall apart and what happened between Keiji's first meeting with him and him being fired? Was he even fired like Keiji thinks he was? Could it even be Mr. Policeman and not a look-alike? Was she in the right, or was just being a Dirty Cop because the officer knew too much? And most importantly, why did Keiji leave Megumi for dead in their First Trial, why were they even abducted together, what was their real relationship and was Megumi even the person Keiji thought she was? There's frankly way, way too many questions compared to the answers, which are doubtful if they are even that truthful to begin with since both of the individuals recounting their side of the story were both Unreliable Narrators of the highest caliber.
- And Now for Someone Completely Different: You temporarily assume control of him during the back half of Chapter 3-1 as he is separated from Sara and goes on his own separate adventure with Q-taro and Mai.
- The Atoner: Despite clearly having an incomplete take on the circumstances otherwise, his guilt over what happened over Mr. Policeman is very real, given he wouldn't have reacted with such visceral trauma to guns, and genuinely wants to do better to make up for it given it still affects him to the present. In addition, we also don't know what the full reason why his captain made the deal to get him off the hook for the shooting he caused, which Keiji implying that it left him with some kind a debt to her, while his flashback suggested she had a personal fondness for him of some kind.
- Beauty Equals Goodness: He's a very handsome man, and despite his laziness, seems to have a great head on his shoulder and remains a firm ally to Sara. Still, it becomes very hard to know just how much he's being honest and how much he's simply lying.
- Becoming the Mask: At first it's clear Keiji is flirting with Sara as a diversionary tactic, in order to avoid questions. Later, however, he genuinely seems to start to care about her, and the flirtatious dialogue tends to be less motivated by hidden agendas and be more genuine. He prioritizes Sara over all the other characters for good or worse. Ultimately, in 3-1-A, Keiji shows that he's unwilling to sacrifice Sara for himself, stating that it's the last thing he wants to do.
- Believing Their Own Lies: If he's not telling the truth about the circumstances of Megumi's death or even the full picture, it can definitely be noted that it's possible the trauma from what happened to Mr. Policeman ended up really hurting him in the scheme of things, and he's shown to be incapable of actually telling the truth, which can be seen by how much he didn't even bother to talk about Megumi's murder at his hands.
- Berserk Button: As Midori learns, telling Keiji that you're responsible for engineering his trauma is not a good idea. At all.
- Birds of a Feather: Subverted. Even though Kai is revealed in Your Time To Shine to be a teasing, stoic, downplayed gadfly not unlike Keiji, the two have great difficulty carrying conversations or even agreeing on subject matters. Although these issues seem to come from Keiji's laidback attitude clashing with Kai's more serious one, and of course, them both being secret keepers.
- Borrowed Catchphrase: Seems he picked up the tendency to call himself 'Mr. Policeman' from his childhood hero.
- Brilliant, but Lazy: The man is a downright genius when it comes to social and intellectual deduction, being only matched by Sara and Sou when it comes to how fast he realizes circumstances, which when combined with his keen eye for smaller details means he could've easily solved a lot of the details if he wasn't just so lazy. Which, to some extent, actually makes perfect sense if you think his side of the story is the truth: of course he wouldn't be nearly as inclined to help out, given he certainly has a mess of issues that make him far more hesitant in intervening without bad memories coming to the forefront.
- Broken Pedestal: Megumi Sasahara, his captain and trainer as an officer, made an unspecified backroom deal to get him out of trouble for shooting an unarmed man, with implications that this was done to put him under her thumb. Furthermore, he also realized that she was the one who ended up firing Mr. Policeman and sent him down his path to death, which disgusted him enough that he left the force, and when they reunited kidnapped during the first game, he deliberately allowed her to die. Of course, one has to remember that Keiji gives a very biased account of the events, and it's kind of hard to know just what the hell he's talking about or if he's even telling the truth. We don't even know much about Megumi other than information recounted by other people, both of whom have proven to have agendas with the truth as opposed to actually pursuing it. This means it becomes far more difficult to effectively decide whether or not what's the truth and what's not, especially given that he still facilitated the murder of another woman, if by indirect action.
- Cooperation Gambit: Completely dumbfounds Sou with one in the Second Main Game due to teaming up with Q-taro.
- The Cynic: In a similar vein to Sou Hiyori, he's definitely one of the most deadpan and pessimistic members of the entire group, but the difference between the two is that Keiji seems much more able at making a place for himself within the group.
- Cynicism Catalyst: The whole deal with him shooting his childhood idol and Megumi being involved in a dirty deal twice has eroded what little idealism he had left after the shooting, causing him to quit the police force altogether.
- A Day in the Limelight: Chapter 3-1-A focuses pretty much exclusively on him and his relationship with Sara.
- Deadpan Snarker: He can definitely have some absolutely biting sarcasm depending on the circumstances.
- Defective Detective: Unlike the other example of this trope who fits the criteria, Sara, him fitting this trope does not come from him being a driving force in each of the social and intellectual deductions they make (though there's plenty of that too), but him actually being a detective and cop by his own metrics. Him shooting his childhood hero seriously screwed him up, and while his trauma is far, far more well-managed by contrast compared to Sara, he still has a major trigger when it comes to guns.
- Defrosting Ice King: Downplayed. He's pretty aloof and obscures his intentions, but hardly outright cold. That said, though, he certainly warms up to Sara and to a lesser extent, the other survivors as the story continues onward.
- Delinquent Hair: A flashback reveals that his hair is naturally darker than the blond he keeps it at in the game.
- Deuteragonist: The most prominent and active participant after Sara herself, as well as the one who gets perhaps the most Character Development in the game. You even play as him for a part of 3-1.
- Dirty Cop: Albeit not willingly... sort of. He genuinely wanted to be a good police officer, but ended up getting his childhood hero killed by his hands and after taking several levels of cynic, he ends up leaving the person who got him off the covering this murder, to die.
- Dirty Coward: Downplayed. His response to not being able to hear Gin's voice anymore during their search for him on the first floor? Time to book it. Upon hearing Sara's refusal, however, he quickly changes his mind.
- Does Not Like Guns: Ironic, given his supposed occupation, but he admits to being afraid to use the things. He reveals that this is because he once shot and killed what he shortly afterwards discovered was his own childhood hero, an action made even more traumatizing by his status. While he doesn't completely freak out at using a gun during his fight with Midori, at least as much as Sara would freak out when Joe's brought up, it still is something that could even cause him to vomit if he doesn't end the fight quickly enough.
- Dumb Muscle: Very quickly proven wrong. He's in physically great shape for a ex-cop, and his wit is just as good as someone with his past would necessitate.
- Exhausted Eye Bags: It's subtler than Sara's eye bags, but there's a clear notion just from his level of energy that he's more than a little bit messed up in the head as well.
- Face of a Thug: Downplayed. With his lemon-bright blond hair, small pupils and somewhat offputtingly laidback demeanor, several other participants distrust him at first. It’s yet to be seen whether or not they’re right to, but he is certainly legitimately shady. Despite this, however...
- Fair Cop: ...he's a Rare Male Example of this trope, being very much a Hunk and an outwardly attractive man.
- Freak Out: It's a lot more subtle compared to Sara's Freak Outs, but he driven to such a state of rage and hopelessness that he immediately begins screaming how he'll kill Midori after his part in Keiji's traumatic past is revealed.
- Friend to All Children: He's usually a lot more gentler with his words with Gin or Kanna. Though there are several moments where he seemingly prioritizes himself and Sara over their well-being. This includes voting for Kanna over Sou, despite openly stating his hatred for the latter.
- The Gadfly: He isn't above lightly teasing Sara and the others, claiming to be amused by their reactions.
- Genius Bruiser: He's pretty damn well built overall, being a reasonably fit and firm man relative to his age. But what's by far his best asset is not just his strength, but his incredible intelligence and perceptive skills - he's one of the only people among the 11 players left from the First Trials who can keep up with either Sara or Sou as a direct result of whatever conclusions they both come to. It certainly explains the fact his rate of winning the Death Game according to the simulation results are at an impressive 9.5%, making him the third most likely of any of the game's participants to be able to win it outright, and higher than the resident Dumb Muscle in Q-taro.
- Get a Hold of Yourself, Man!: He very often proves to be an anchor of sanity for Sara whenever her hallucinations get really bad, and it's a major why the two end up developing a bit of a friendship as a result. When he ends up having his own brand of a panic attack after Midori digs up his past trauma, the favor's returned by virtue of Sara and everyone else who survived up to this point helping him win his duel against Midori.
- Hand Behind Head: Typically has one hand resting on his neck or rubbing the back of his head.
- Handsome Lech: Described as a ladykiller in the main story, and admits to successfully hitting on a bunch of women when drunk in the side game, though onscreen he’s yet to go past the somewhat questionable tendency to consistently call Sara cute and call their investigations dates.
- Heroic BSoD: Has one when Midori shows him the gun he was traumatized over after using it to shoot an unarmed criminal dead (that turned out to be the former policeman who inspired him into joining the force as a child) and collapses on the ground, with a series of flashbacks to boot. This very quickly turns into a Roaring Rampage of Revenge.
- Hidden Depths: Despite being the epitome of Brilliant, but Lazy, he clearly wasn't always like this: he's completely genuine when he tells Sara about his desire to join the police force, and on top of showing a remarkable intelligence, he also was initially hard-working and possessing a strong desire to prove himself as a good police officer... all of which changed for the worse after the mess that led to him shooting his childhood hero.
- Hypocrite: For much of the Death Game, Keiji claims to put a lot of trust in Sara and has her take his words at face value, in reality, he's shown to struggle with telling her the truth or trusting her. Both Sara and Sou point out how unfair it is. Thankfully, he grows to be more genuine as time goes on.
- I'll Kill You!: Shouts this word-for-word when Midori the reveals that he tricked him into shooting not only an unarmed criminal, but that said unarmed criminal was the policeman who Keiji admired when he was a boy.
- Insistent Terminology: Has a tendency to refer to himself as 'Mr. Policeman' or 'your friendly policeman' note . While this is probably meant to reassure the others, it seems to come off as False Reassurance to them at times...
- It's Up to You: Serves as a way of reinforcing this; a Running Gag is him encouraging Sara to take the lead, even when it comes to tasks he seems better suited for.
- Jerk with a Heart of Gold: Technically not even a completely straight example, given his jerkish qualities are only shown whenever his past is brought up, and he's generally a lot more aloof than he is just mean.
- The Lancer: After Joe bites it, Keiji steps in to act as Sara's biggest investigative assistant and her Number Two. Unlike Joe, it seems to be sticking for the time being.
- Meaningful Name: Though he uses different kanji to spell his name, 'Keiji' can mean 'Detective'.
- Moral Myopia: He holds feelings of guilt and hatred over having been the one to kill his personal childhood hero, but he shows minimal qualms with leaving Megumi to die out of a desire for vengeance, despite her desperate pleads for rescue. This highlights how much of a mess he's become and how far he's fallen, as well as his struggle to acknowledge what he did, instead of pretending like nothing's happened.
- Murder by Inaction: What his First Trial boiled down to. Both he and his former boss Megumi were trapped in a Death Trap and Keiji made his escape while Megumi couldn't. After weighing the actions for whether or not to leave Megumi alive or feed her to the wolves, the trap activates thanks to his inability to act.
- My God, What Have I Done?: This is Keiji's feeling on shooting his childhood hero. To this day, he feels like he should've been punished for it, but Megumi pulling strings to bail him out permanently embittered him on the idea of justice.
- My Greatest Failure: Accidentally killing his childhood hero.
- Nerves of Steel: Keiji very rarely outright loses his apathetic attitude in the face of imminent danger. Which makes any prolonged emotion a sign something bad is going to happen.
- Non Conformist Dyed Hair: A flashback of his past shows that Keiji had black hair when he was young and dyed it sometime into his adulthood.
- No Sympathy: Keiji has absolutely no sympathy for Megumi in the moment, primarily due to her past actions. Despite her life being in peril Keiji laughs at her helpless position in a belief that he had a score to settle, and acts like he wasn't responsible for a murder not long before he meets up with the rest of the survivors. Partially subverted as its revealed that Keiji shouldered immense guilt for failing to take the trial seriously, letting her die a gruesome death.
- Not So Above It All: Despite his stoic behavior, Gin reveals that Keiji has asked to hold Mew-chan before, and is ready to take him up on the offer should it arrive.
- Number Two: Makes himself this to Sara when the group dynamics are barely starting to form, which everyone naturally finds strange and suspicious, but even if he does have a lot of highly questionable moments, so far he's pretty consistently seemed to be on the right side.
- Oh, Crap!: Keiji almost never loses his composure even during extreme situations, and if he does, he's generally quick to bounce back to it and resume his jokey tone even in the face of danger. So when he loses his composure and cannot switch it back on, it's a sign something has gone very wrong. As far as we know, this only happened three times: once when he has a Freak Out after realizing he killed Mr. Policeman, the other when Midori gladly reminds him of his trauma, and the other if you vote for Nao and get everyone except Nao and Sara killed by virtue of Nao having the Sacrifice card.
- O.O.C. Is Serious Business:
- While there are moments he's prone to anxiety when he relives trauma, Keiji's generally still laidback and relaxed, and able to bounce back quite quickly. However, when Midori taunts him by revealing he actually fooled him into shooting an unarmed criminal, who turned out to be the same policeman Keiji admired as a child, Keiji snaps into an angry rage shouting he'll kill him.
- This also happens if you vote Nao during the second Main Game. Keiji's reaction is a mixture of Stunned Silence and a general air of "I-cannot-believe-you-would-actually-do-that".
- There are times where Keiji will drop his act as The Gadfly and take a situation completely seriously, like when Ranmaru confronts Keiji on the suspicion that he's The Mole for ASU-NARO, he doesn't even laugh at the accusation and instead attempts to get the teenager to calm his head.
- Odd Friendship:
- A cynical, jaded police officer making friends with an studious and emotionally traumatized teenager is definitely the kind of relationship that'd raise eyebrows, and much of the cast comments on it.
- The calm and snarky Keiji ends up forming a noticeable friendship with the loud Cowardly Lion Q-Taro, they even trade jokes and gambits between one another.
- Police Are Useless: Zig-zagged. Keiji and what other officers we've seen are by no stretch of the imagination useless when it comes to doing their job, but if his side of the story is to be believed, they were however, very corrupt. Either way, his experiences as a police officer seriously embittered him on the very idea of the police being there to protect and serve.
- "Rashomon"-Style: Without Megumi and Mr. Policeman's input, it's impossible to know what the truth is of what happened during the shooting, given of the four people involved in it, two of them are dead and the other two are highly Unreliable Narrators, and both of their take-aways from the incident have contradictory facts to each story. This makes perfect sense though, given Keiji himself was heavily traumatized by the incident and can't really give a very nuanced take on the matter, while Midori is a notorious liar and possibly even more of an Unreliable Narrator by contrast.
- Red Eyes, Take Warning: When Midori reveals that he was the one behind the incidents which got his Mr. Policeman killed, Keiji eyes turn red.
- Roaring Rampage of Revenge: He gets over his Heroic BSoD when Midori reveals that he was behind the voice encouraging Keiji to shoot the criminal. Keiji immediately declares that he'll kill him and flies at him in a rage... which doesn't bode very well when Midori ends up trapping him in a coffin.
- The Smart Guy: Possibly one of the smartest, if not the smartest, people of the entire cast. Which makes obvious sense, since he is a cop, and by no means an incompetent one. Just a really screwed up one.
- Sour Outside, Sad Inside: Despite presenting himself in a lackadaisical air and generally as someone who's very carefree and apathetic, he has a lot of deep-seated issues and deliberately self-sabotages himself out of fear of screwing up again. Which makes sense: two of the biggest mistakes of his past were a direct result of his own recklessness.
- Stepford Smiler: See Sour Outside, Sad Inside. Just because he can be quite the Deadpan Snarker doesn't mean he doesn't do a good job at faking a carefree and friendly attitude despite his feelings of failure.
- Straight Man: Despite being a bit of a snarker himself, he usually finds himself reacting to the antics of some of the wackier party member's in any one of the game's brief moments of levity.
- This Is Unforgivable!: The second Midori reveals himself as the one who helped trick Keiji into murdering Mr. Policeman, Keiji goes ballistic, swearing up and down that he's a dead man for what he did.
- Trauma Button: Seeing the gun that he was using when he was manipulated to killing his childhood hero is enough to drive him into a panic and later a rage.
- Trauma Conga Line: Let's see... ended up being responsible for his childhood hero's death, was bailed out with a dirty bribe despite not wanting to be, left the force out of disgust only to then be kidnapped for a Deadly Game that can most likely result in his death, and his past coming back to haunt him in the form of the person who help make him murder said childhood hero, and on top of that has to use the very said weapon that killed said hero... yeah, Keiji really had it rough.
- Unreliable Narrator: It's strongly implied, if not outright noted by Midori, that the account Keiji gave for his side of what happened is very much one-sided and not the full picture of what happened - though given Keiji refuses to hear it and how Midori himself is a Consummate Liar and a fellow Unreliable Narrator, it's impossible to tell if either of them are telling the truth. If they are, though, then it's very possible that what happened that led Keiji to shoot his childhood hero is recounted in wildly different perspectives from each other, each one irreconcilable from one another.
- Unusually Uninteresting Sight: At one point while you play as him for a brief period in Chapter 3, he'll see a hallucination of Mr. Policeman that looks a lot like the red-hued, black-eyed hallucinations of Joe that haunt Sara throughout Chapter 2. When someone asks him what he's looking at, he casually brushes it off—implying he sees them so often that it's not even notable to him at this point.
- Would Hurt a Child: Out of all the cast members who vote for the final candidate in 2-2 (and thus plays a part in causing a tie), Keiji is the only one who votes for Kanna to die without much visible regret.
Kanna Kizuchi
Kanna Kizuchi
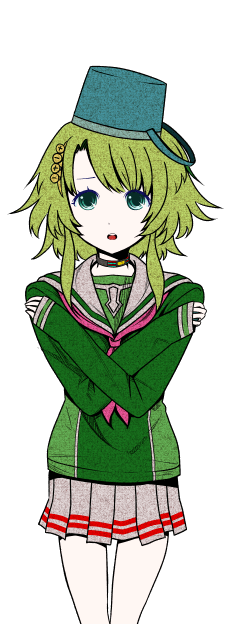
Having been adopted from an orphanage at a young age, Kanna is not blood-related to Kugie, though she still considers her a sister - despite the fact they initially did not get along very well and Kugie refused to even call Kanna her little sister, and one day the fraught relationship between the two caused Kanna to run away from home for a bit and cry to herself in a park. This is where she would find her signature bucket, crying into as an extension. She was visited by a boy who tried to talk to her, but Kugie ended up going directly to Kanna and ended up thinking that the boy was bullying Kanna - and at the time, calling Kanna her 'little sister' for the first time ever. The incident would caused their relationship to morph into something far healthier, and the two wounded up being far closer overall.
- The Atoner: Desperately sees herself as this, trying to make up for her failure to save her big sister to the point of offering her life to safe both Sou and "Big Sister Sara".
- Bring My Brown Pants: Wets herself after witnessing Mishima's brutal demise, with Sue Miley cruelly pointing it out and mocking her for it.
- Bucket Helmet: Has a blue bucket on her head. Gin is the only one to point it out, using it as the basis of his nickname for her. It gets played for laughs in some of the fondness events in Your Time To Shine.
- Character Development: If she isn't executed at the end of Chapter 2, Sara will note how it seems like she's become stronger and less timid, and she disavows her previous heroic martyr mindset. Kanna becomes significantly more active in contributing for everyone, becoming one of the most useful members in the party whenever she's able to assist.
- Cruel and Unusual Death: If she's the one who gets the most votes at the end of Chapter 2, she's executed by having seeds implanted in her, which grow rapidly and burst out of her body, implicitly shattering her internal bones and organs. Despite Safalin's insistence that it will be painless, she's quite clearly shrieking in agony before she slumps over and expires. Averted if Sou is sentenced to death in her place.
- Declaration of Protection: Surprisingly the one to make this declaration herself, vowing that it was her turn to "protect her big sister". The meaning of this declaration becomes a major point in the 2nd Main Game.
- Didn't Think This Through: She believes that, since Sou's skills can be far more useful than her own, everyone should vote for her to have him continue to help. However, she doesn't take into consideration that Sou, who has grown deeply protective of her, might not want to help them after they've voted for her to die.
- Embarrassing Damp Sheets: In a flashback, her sister says that she still wets the bed. Kanna refutes it, but her nervous stutter implies it might be the truth.
- Exhausted Eye Bags: Has these when first met.
- Face Death with Dignity:
- She tries to do this, but she dies painfully and screaming all throughout.
- Should you choose to vote to save Nao at the cost of everybody else’s lives, she’s by far the most accepting of her fate.
- Failure-to-Save Murder: Blames herself and struggles with a Guilt Complex over not being able to solve her First Trial and prevent her big sister's death. This is not helped by Sue Miley going out of her way to emphasize the notion that she could have done so.
- Happily Adopted: Double subverted. When she was first adopted, Kugie mercilessly bullied her, and Kanna simply smiled through it because she didn't want to make any trouble or upset her new family. Eventually, though, Kugie did indeed act like a proper big sister, but it wasn't easy.
- Happily Failed Suicide: She tries to trade the Sacrifice away from Sara onto herself in Chapter 2, and later asks to be voted for instead of Sou, thus implying suicidal thoughts. If she survives the second Main Game, she subsequently states that she doesn't want anybody else to die, herself included.
- Heroic Sacrifice: Attempts to arrange this in Chapter 2 by attempting to trade for the Sacrifice card and spare Sara from it, as well as spare Sou from killing her by proxy. Later tries to rally the remaining players to vote for her for the sake of 'logic', seeing herself as a liability. Deconstructed as it’s clear there’s little heroic about this; she’s a Death Seeker with a martyrdom complex brought about by immense Survivor's Guilt. Her death does a great deal more harm than good, traumatizing Sou and Sara further, which even indirectly leads to getting Reko or Alice killed due to Sara’s darker, more manipulative sides coming out.
- Insistent Terminology: Despite it clearly being a bucket on her head, Kanna will always insist it's a hat.
- Last Request: Should Sara vote for her, her very last request to Sara is to get a hug from her.
- The Load: Sees herself as this, playing into her guilt and martyr complexes until she's convinced that she can serve the group best through self-sacrifice.
- Martyr Without a Cause:
- Shows shades of this constantly, demonstrating an almost pathological guilt complex over her big sister's death. It's to the point that she willingly tries to offer herself as a sacrifice (as well as The Sacrifice) to protect Sara and Sou at her own expense. In fact, Sou chastises her for exactly this during chapter 2-2.Sou: You really are a kid, Kanna. A thoughtless kid with a backwards notion that if she dies it'll solve everything!
- That said, she starts turning away from this mindset if she survives to Chapter 3.
- Shows shades of this constantly, demonstrating an almost pathological guilt complex over her big sister's death. It's to the point that she willingly tries to offer herself as a sacrifice (as well as The Sacrifice) to protect Sara and Sou at her own expense. In fact, Sou chastises her for exactly this during chapter 2-2.
- Morality Pet: Has a habit of being this for people. Reko is unconditionally kind to her at all times, acting protective towards her. Then, she sort of takes on Sara as a surrogate older sister, naturally prompting this as well. She also winds up being this for Sou, the entire impetus for his dramatic character change at the end of chapter 2, after spending much of the game as his lackey.
- Mutually Exclusive Party Members: In Chapter 2-2, she becomes this with Sou. If you vote for Kanna at the end of the second Main Game, Safalin oversees Kanna's execution, consisting of her becoming a human plantstem. If you vote for Sou instead, he manages to defuse his collar and escape, only to be mortally wounded by the security systems.
- Nervous Wreck: Starts off in a bad way due to how poorly her First Trial went, given how her sister was killed by it.
- Nice Girl: Pretty much the nicest participant in the game, all things considered. It makes what she goes through all the more awful.
- Not Quite the Right Thing: When the second Main Game's vote comes down to either her or Sou, she believes that she should be the one to die since Sou's skills are too valuable for the group to lose. However, she doesn't seem to take into account that Sou himself might not want to help the people who just voted out his Morality Pet while he was begging them to vote for him instead.
- Please Wake Up: Should she survive in Chapter 3 1-B, she'll be devastated by Kurumada's death should he dies from earlier injuries, pleading with his body to wake up and hold on a little longer.
- Smarter Than You Look:
- Despite her easily-abused naivete and childishness, she recognizes that Mishima, Joe and Sara are lying to her and calls them out on it at first, though they manage to convince her to trust them.
- She also figures out that the cellphone message she's shown in Chapter 2 is a fake meant to encourage her, and not from her sister. From that same chapter it's also revealed that she figured out the password for the laptop using her own resourceful thinking when Sou wasn't able to.
- Shrinking Violet: Due to her trauma. This may factor into why her potential death in 2-2 involves creeping vines.
- Spanner in the Works: Her attempt to trade for Sara's Sacrifice card ends up revealing a gigantic discrepancy that reveals Gashu's attempts to rig the Main Game and kill off Nao.
- Story Branch Favoritism: Chapters 2-2 and 3-1 become far more optimistic should she still be alive instead of Sou; Sara finds genuine closure with Joe, Ranmaru does not engage in Jumping Off the Slippery Slope, therefore sparing the Yabusame that he would have killed, Kanna and Sou's blood relation is made explicit, and even Sou dies at peace and with no regrets.
- Suicide by Cop: Attempts this twice in Chapter 2-2, first attempting to trade her own Commoner card with Sara's Sacrifice card, and when that fails tries to convince Sara to vote for her instead of Sou. Actually indulging in her death wish does not end well.
- Third-Person Person: She tends to speak in third person often. While this a common trait of child speech in the Japanese language, it comes off as unnatural in English.
- Toxic Friend Influence: Played With. Sou does in fact, use her to help him after earning her trust. However, he does actually care for her significantly, listens to her suggestions and tries his best to keep her safe.
- Trauma Conga Line: Poor girl's already in the middle of a Heroic BSoD when Sara first meets her, and the game (and Sue Miley) is far from kind to her...
- We Hardly Knew Ye: Not Kanna herself, but she certainly feels this way towards Sou in her version of 3-1. She laments that she barely got to truly know him, and asks to see his journal when it shows up in the chapter.
Q-taro Burgerburg
Q-taro Burgerburg

- Always Second Best: By his own admission in Your Time To Shine, this is why he's second string; he simply can't compete with pro-baseballers no matter how hard he tries, though he still wants to reach a point where he can surpass them.
- The Atoner:
- An interesting case, but he's this to Kai. Being one of the people to vote and ensure his death, Q-Taro is by far the most driven to know more about Kai and what his plans were, feeling immense guilt about the whole thing.
- Another layer of this is revealed in the second Main Game: part of Q-taro's First trial was to distribute the role cards for the first main Game, and he thus feels responsible for Kai picking up the Sage card, even though he had no way of knowing what the cards meant at the time.
- Bad Liar: When he nears his goal of escaping via Me-Tokens and approaches Sara to get the last little bit he needs, he's so obviously suspicious about it that Sara immediately realizes something's wrong.
- Bait-and-Switch: His flashback in 3-1B reveals he got in an accident that completely totalled his body, unable to walk or functionally use one eye, to which Midori promises to pay for an operation that would completely fix his body. This, combined with the amount of punishment he goes through throughout the game, seems to indicate that he's some sort of cyborg or Doll. Him removing an arm at the end of the Banquet seems enforce the idea for a moment, only for it quickly be revealed he was 100% human.
- The Big Guy: Towers above the rest of the cast, and is much more physically muscular than them too. It's remarked that he looks more like a pro wrestler than a baseball player.
- Big Guy Fatality Syndrome: Survives a lot of punishment, but he ends up the casualty of Chapter 3-1B, dying from being burned alive in Keiji's coffin.
- Career-Ending Injury: Suffered what would have been one of these in the past, had it not been for ASU-NARO offering him extremely effective experimental treatments in exchange for signing a sheet that, as it would turn out, would be what brought him into the death game. By how he put it, he was in a deep depression after this injury, unwilling to be seen in this weak state by children and even implying to Keiji that he'd been contemplating suicide at the time.
- Cooperation Gambit:
- Completely dumbfounds Sou in the Second Main Game with Keiji, having planned to swap his Keymaster with Keiji's Sage in the second to last trade.
- Pulls another in Chapter 3-1B, being able to free Keiji from the coffin, and allying himself with him and Mai to find a way to deceive Midori.
- Character Development:
- Gradually goes from one of the more selfish people in the Main Game to one of the most selfless ones, taking into consideration the needs of others over his own, and willing to look past previous transgressions to ensure their safety. He even gives his life to save Keiji and Gin's, bringing down Midori in the process, a huge step from the man who once abandoned everyone to die.
- His stance towards dolls also changes dramatically from Chapter 2-1 to Chapter 3-1. In the former, he's one of the few characters to actively encourage Sara to sacrifice doll Reko to save Gin and himself. In the latter, he's the most sympathetic (only tying with Kanna if she's alive) towards the predicament of the dummies, and is very understanding and supportive with Mai even after she fatally stabs him in the back, which makes her and the others have a Heel–Face Turn. His Heroic Sacrifice is also partly motivated by avoiding any further bloodshed, be it human or doll (though by the end only one doll survives the banquet).
- Cowardly Lion: For all his fear and desire to protect himself first and foremost, Q-taro also has moments where he throws all caution to the wind, such as tackling Miley at the end of their first Main Game, Taking the Bullet for Gin in the Final Attraction if he has to, and threatening Safalin at gunpoint if Kanna is chosen to be executed. This is largely before his Character Development to boot, which absolutely ramps up the lion and kills most traces of the coward.
- Cruel to Be Kind: In the first Main Game he attempts to do this by outing Nao, Kanna and Gin as the weakest members of their group, and theoretically the easiest ones to vote off without knowing their roles, he soon shows that he wanted them to defend themselves and prove him wrong. However, since his targets are two children and a horribly traumatized college student, he's quickly considered a bully than someone who was trying to help.
- Dead All Along: The final moments of Chapter 3-1B reveal that the Q-taro we've been following during the Banquet was actually a doll prepared by Safalin; the real Q-taro died before the Banquet began as a result of Mai's stab wound being fatal all along, he chose to cut whatever time he had left short by burning himself alive in Keiji's coffin.
- Deconstructed Character Archetype: Fills the role of The Big Guy in the death game with his impressive size and physical strength, like characters such as Sakura Ogami and Seven. Unlike them, however, who are mainly defined by their nobility, Q-taro is defined by his skittishness and Dirty Coward streak, even leaving the entire cast to die in a bad ending. Reconstructed however, as he gradually becomes more heroic through Character Development, ultimately dying heroically engineering a plan which saves Keiji and Gin's lives, and allows Midori to be taken down.
- Didn't Think This Through: During the first vote, he calls out the younger and quieter participants (Nao, Kanna, and Gin) for not being as useful compared to everyone else and demands that they justify why they shouldn't get the majority vote. What he's trying to do is get them to stand up for themselves and prove that they have just as much value as the rest of the group. Unfortunately, to the others it comes off as him being a bully, especially since two of the three people he addresses are horrifically traumatized children.
- Dirty Coward: Despite his size, he's extremely quick to be hesitant or distrustful of others, willing to screw them over for his own safety and benefit. In chapter 2-1, Gin needs to be hit with deadly venom twice in order for Q-taro to finally intervene on his behalf, and even then only if you fail to finish the final argument section in time. That same chapter also has a bad ending achievable wherein he allows everyone to die to escape the game alone. He's not completely without nobility, and his Character Development brings more of it out of him by the second part of Chapter 2, but this is a defining trait of his for much of his part in the game. Ultimately, the cast doesn't give him much flack for this, understanding that even his lowest of moments aren't meant out of any malice, but a desire to survive that every single one of them shares.
- Disappointed in You: Keiji expresses this notion when Q-Taro gives up Kai's laptop for Kanna's Me-Tokens, berating him while doing so. Q-Taro, well aware of how selfish he had been, can't say much to defend himself. On the flipside, Q-Taro has a similar moment with Keiji the instant he chooses to vote Kanna over Sou.
- Eagleland: Subverted. He's a big, muscly, boisterous sportsman literally named after burgers and BBQ, but he really isn't all that stereotypically American, and says that he's Japanese. It's implied he may be mixed race of some kind.
- Everyone Has Standards: Despite him obviously not wanting to die, Q-taro doesn't really want to sacrifice others, either. Take his behavior during 1-2's Main Trial: while he suggests the weakest members of the party as potential candidates, he also pushes for them to defend themselves, becoming extremely upset at Kanna's Martyr Without a Cause behavior. And while he points out that the Sage is an easy target, that doesn't mean he wants to vote for them. One of the bad endings subverts this horrifically: if he gets enough tokens to buy the escape ticket, he will ultimately choose to do so, which dooms everyone else to die.
- Eye Lights Out: His doll shutting down at the end of 3-1B is represented by his eyes gradually fading to black.
- Fiery Redhead: He has red hair and is the most overtly confrontational and aggressive character in the first episodes, even picking a verbal fight with Gin during the first main game. He Downplays this trope in chapter 3-1A, whereupon he mellows out a lot and even serves as a key peacemaker between the participants and the dummies.
- Friend to All Children: Played With. He doesn't make many attempts to befriend Kanna or Gin, and can argue with the latter a few times, but he makes it known that he frequently visits the kids at his old orphanage, in fact, he lets it be known that what made him want to be a baseballer was that he could inspire other orphans that they could make it big in the world. Ironically, his decision to (optionally) betray everyone is partially motivated by seeing those orphanage kids again.
- Go Out with a Smile: Twice, first with his real self as he explains his plan to Mai, and then a peaceful one to Gin as his doll runs out of power.
- Heroic Sacrifice: In Chapter 3.1B, seeing as his stab wound will more than likely do him in at any point, he decides to enter Keiji's coffin to trick Midori into believing Gin was inside it instead of allowing Keiji to risk getting executed for tampering with the rules of the game by placing in Midori's collar with the same purpose. Though as a result, he's promptly Cooked to Death when Midori ignites the coffin, his plan goes off without a hitch thanks to Sara cleverly tricking Midori into choosing said coffin during Russian Roulette, saving Gin from the game and Keiji from execution.
- Hesitant Sacrifice: Fearing death, he hesitates twice to take the shot of venom to save Gin. He goes through with it if Sara fails to push the fake Reko off the platform. He and Gin both survive.
- Hidden Depths:
- He's not the brightest member of the cast by any means, but he's extremely far from the Dumb Muscle he might come across, able to be very clever when he needs to be. This is best exemplified first in the bad end of chapter 2-1 where he manages to gather 200 tokens to escape alone while still having 40 of his own (and is only either 10 or 20 away when he approaches Sara for the last of them, depending on if you made an earlier trade with him) and second during chapter 2-2's main game, completely convincing the cast that he's the keymaster when he's actually the sage, the single most vulnerable role in the Main Games.
- 3-1B reveals that after his Career-Ending Injury, Q-Taro had serious suicidal thoughts, feeling that without being able to be a pro baseballer, he had failed the kids in the orphanage he grew up in and his life was no longer worth living.
- Hypocrite: In chapter 2-2, he tells off Keiji for voting for Kanna during the second final game, shocked that he would sacrifice a kid for the benefit of the adults. However, in the previous chapter he will reluctantly doom everyone to die (including the children) when he's given a chance to escape the death game himself. Of course, canonically, Q-Taro wouldn't know he would've had it in him to do that either, as he didn't think about the consequences of his choice until Ranger flat-out told him in the last second.
- Jerk with a Heart of Gold: Even when he starts the game out as a very openly self-centered, pragmatic person, this doesn't mean he lacks the capacity to care about others, demonstrating this repeatedly throughout the first chapter and a half before his Character Development kicks off into high gear and even the "jerk" part fades.
- Jerkass Has a Point: While Q-taro's actions in the first Main Game's discussions aren't exactly the best received by the others, he's absolutely right to point out that letting the time before the vote pass in complete silence would be a much worse plan, since like it or not, they have to vote for someone. He also calls out Kanna, Gin, and Nao as the "weakest" members of the group and thus the ones who might be potential voting targets, but he only does it in order for them to defend themselves and prove him wrong. During his ensuing debate with Gin, the only way to move the conversation forward is to agree with Q-taro and prove Gin wrong.
- Made of Iron: He takes a lot of abuse in stride over the course of the game. Getting struck with poison, tased, and stabbed all in a very short span of time, none of these things seriously afflict him, and in the latter's case, he's still able to pull off vital physical assists against Midori not long after. He attributes ability to take an injury to how much he works out. And then subverted; the stab wound ultimately does him in.
- Manipulative Bastard: Surprisingly, he can be this. In 2-1 he manages to get all the tokens he needs to buy the secret path to escape without anyone sans Sara being suspicious (and even then, that was because he was acting very shifty near the very end) which then promptly dooms everyone else once he leaves. It's shown again in 2-2, he counters Sara with an elaborate lie about dolls to avoid being thought of as a suspicious traitor over his first trial.
- Murder by Cremation: This is the way Q-taro ultimately dies, taking Keiji's place and getting burned in his coffin. Even though he had the option to die a relatively peaceful slower death from Mai's fatal stab wound, he chose to suffer a painful and abrupt demise of coffin cremation for the sake of his gambit to protect everyone. Hinako notes a voice coming from the coffin while it was burning, confirming his demise in there.
- My Greatest Failure: He seems to deem voting for Kai to be this, as he quickly become the most determined person out of the cast to understand his motivations and what he was up to before his death. In 3-1, he also reveals that he deeply regrets having tried to earn the tokens to escape alone in 2-1, even without the knowledge gained on that path that this would kill them all.
- Never Got to Say Goodbye: A noted tragedy of his death. Because of his choice to sacrifice himself to a painful death by a cremating coffin, he cut the time he had left short. As a result he never got to have any last words to Gin and the others. At the very least his doll managed in his stead.
- Odd Friendship:
- He ends up forming one with the snarky and sly Keiji over the course of Chapter 2; the two are able to get along very well despite their many differences, they even trade jokes and perform gambits that requires trust in one another.
- With Mai. She gets very close with Q-Taro across the course of 3-1. At first, this is a ruse for the sake of getting a chance to kill him, but it becomes extremely genuine after she's subdued and forgiven, the two working together with an extreme degree of closeness and trust to his dying moments and beyond.
- O.O.C. Is Serious Business: Sara figures something's up with him because he's acting very shady and suspicious during a trade for ten of her Me-Tokens for forty of his. She's right.
- Parental Abandonment: Never knew his parents, with the caretakers at his orphanage being the closest he's ever known.
- Punny Name: When written out, his name is shortened to B.B. Q-taro. Aka BBQ. Becomes a very dark Brick Joke in 3-1, when he dies letting himself be burnt alive to save Keiji.
- Shout-Out: His name and physical appearance (huge mixed-race guy with a hat) are references to Jotaro Kujo, specifically to an arc in the manga where he used "Qtaro" as an alias.
- Smarter Than You Look: Downplayed. Q-Taro does legitimately have moments of short sightedness and occasionally needs things pointed out to him, but he's not dumb; he's able to pull off some gambits without practically anyone suspecting a thing. If the player trades with him at the right moment, he can even win the game.
- Sole Survivor: A prolonged Nonstandard Game Over occurs in 2-1 should Sara make a suspicious final trade with him when prompted to. He manages to acquire enough tokens to leave the game, and when told doing so would kill everyone else, despite Sara's pleading, he goes through with escaping anyway. Though not a numbered ending like Nao’s half a chapter later, this marks the first time it's possible for someone to win the game.
- Suspiciously Specific Denial: When debating over who should be the Challenger for the Russian Roulette game, he makes a point of declaring that he "ain't thinkin' a single thought about keepin' my own hide safe."
- Taking the Bullet: A major indicator of his Character Development can potentially come on the route where you fail the argument (or succeed and refuse to push the doll) in 2-1, taking a decent-sized shot of venom in Gin's place to end the game. If this happens, he only wishes he'd done it sooner.
- Thanatos Gambit: Pulls one in Chapter 3-1B where he arranges with Mai to get his doll to deceive Midori while going into Keiji's coffin himself, knowing fully well he was going to die either way.
- Took a Level in Badass: Chapter 3-1B has Q-Taro become surprisingly insightful, and more willing to sacrifice himself for the sake of his friends. Ultimately, he comes up with a plan that nobody saw coming or even suspected until after it had come to completion.
- Took a Level in Kindness: He spends much of the game being surprisingly cowardly and quick to distrust or throw others under the bus, but acts much nicer in Chapter 2-2 after he and Gin's lives were at risk. Makes sense if he just had to throw his life on the line for him, but it seems the incident was affecting enough that the development sticks whether he needed to or not. Highlighted wonderfully in chapter 3-1, wherein he's the one to deliver a massive speech to the group about the Power of Trust, and refusing to betray and kill one another for the sake of the game.
- Tragic Dream: He wants to become a pro-baseballer to show the kids at his orphanage that it doesn't matter what one's origins are, they too, can make it big. Your Time To Shine shows that he also wants to be a teacher to help the kids at the same orphanage. Sadly, as of 3-1B, neither of these things will ever happen.
- Trauma Button: Played for Laughs. He's got severe issues with Koshien after losing his chance to go national due to being on the wrong end of a heavily one-sided game. As a result, he immediately yells if anyone (including himself) says the name.
- Undying Loyalty: He's incredibly loyal to his orphanage, visiting it often to entertain and inspire the kids there. He's so loyal in fact, he can leave everyone else to die in 2-1 to go back to it. This only causes him distress when he realizes that the organization that runs the Death Game and his orphanage have the same name. He later gains this for the main group as well, as he gives up his own life for their sake.
- Unskilled, but Strong: In Your Time to Shine, he has the highest fighting stat but also the lowest crafting stat.
- Unwitting Instigator of Doom: His First Game was a much easier one than the rest of the cast's: deliver a box to the central area, and then distribute a bunch of seemingly-innocuous cards around for the cast to find. Having no way of knowing the significance, he managed to get the Sacrifice card to Sou, which in turn enabled his manipulation of Kanna and Joe ultimately winding up the Sacrifice card's true holder.
- What the Hell Is That Accent?: Lampshaded; this is actually one of the first questions you can ask Q-taro when you meet him. He has an odd way of speaking and says it's probably a mix of several different dialects, since his orphanage was home to people from several countries.
- What You Are in the Dark:
- In 2-1, when given the option to leave the Death Game early (which would kill everyone else immediately) or have the two hundred tokens he gathered refunded, he chooses the former.
- In 3-1B however, he makes a complete turn around, choosing to sacrifice himself and the time he had left so that his friends could succeed against Midori. It works out in the end.
- Would Hit a Girl: He tackles Miley in 1-2, which buys Kai enough time to get out his last words. Threatens to shoot Safalin in an attempt to protect Kanna if the player votes for her, and later knocks Mai unconscious when she tries to kill him.
- Wouldn't Hurt a Child: His justification for the final vote he throws in Chapter 2 is that sacrificing a child (Kanna) for the sake of adults (Sou) is "demonic". It both showcases his Character Development, since before this point he makes Gin stand up for himself and argue for why he shouldn't be voted out, something he'd proven to be all talk by ultimately being willing to end up Taking the Bullet in 2-1. Ironically, he can do just this in his Non-Standard Game Over, but his justification is that he's doing this to be able to meet the orphans that looked up to him.
- Younger Than They Look: He's called old at certain points, much to his protest. With Mishima the oldest participant at thirty, he's actually in his mid-twenties.
Sou Hiyori
Sou Hiyori

- The Aloner: Sou's cooperativeness takes a harsh nosedive in chapter 3-1, as he's not very forthcoming with any information, often goes off on his own, and makes it known that Midori's only a road bump until he gets revenge on Keiji and Sara for voting for Kanna.
- Always Second Best: No matter how hard Sou tries to best everyone to ensure his own gambits work, he ends up being outplayed by Keiji and Sara. Keiji in particular can see through Sou's deception very easily, which makes sense considering he's an experienced police officer.
- Anti-Hero: Sou is very self-centered, manipulative, and downright ruthless with the people he hates, and is quick to give up on "the riff-raff" when they don't listen to him. Despite this, he's still one of the most useful participants in the death game, and is as motivated to survive as everyone else, which makes for a great ally if he can be successfully prompted to cooperate. He also has a Morality Pet in the form of Kanna, whom he's willing to die for. In Chapter 3-1, if he's still alive, his grief over Kanna's death and his hatred for Keiji and Sara puts him in a more grey area, though he's still willing to team up against Midori, and does still harbor some affection for Gin.
- Asshole Victim: He knows that when someone votes for him, it's because he's a manipulative schemer whom few people can trust, so he always tries to weasel his way out of getting the majority vote to ensure his survival... until it's Kanna who is in danger, whereupon he starts appealing to the others' hatred for him to garner their votes and ensure her survival. If Sara elects to break the tie by voting for him, Sou remarks that he knew she hated him and wanted to see him die, and she actually agrees with him. Despite this, he eventually elects to prove her wrong in the last second by using his last minutes alive to access the Joe AI to give Sara some closure, leaving her with a positive last memory of him.
- Balance Buff: An unusual in-story example. The creators of the game deliberately told him about his projected 0% survival rate and provoked him into adopting a more hostile attitude in order to increase his aptitude for the game.
- Beware the Nice Ones: He seems like a relatively affable, and weak-willed guy for most of chapter 1, if a bit shady, until the Main Game where it promptly becomes clear he's easily the most tricky and dangerous member of the group.
- Big Brother Instinct: While Sou initially simply abuses Kanna's naivety to act as a pawn for him, his feelings quickly develop into this for her. Although his unwillingness to trust the others leaves a wall between the two of them and everyone else, he does end up trying his best to look out for her in his own way. This takes on a additional layer when it turns out he is Kanna's older brother by blood, though tragically she never learns this until he's already dead.
- Character Development: An interesting case. Sou eventually learns over the course of Chapter 2 that he needs to trust other people and be open with the rest of the group since they're all victims, and attempts to reconcile halfway into 2-2 which is an initial ploy to trick Sara and get information he otherwise could not, but becomes somewhat genuine during their escape attempt, being much more honest and open about things he never would have before. He even volunteers himself to be voted for in the Main Game, when previously he had manipulated and lied to have Kai die instead of him.
- Consummate Liar: This is heavily paired with Compulsive Liar. It turns out that Sou lies constantly from small white lies to major twists of the truth to outright fabrications, it gets to the point that the main group just assumes whatever Sou says is a lie to begin with until it's clarified that it is not.
- Cooperation Gambit: Pulls a beautiful one on the fake Mishima A.I. with Nao in 2-2.
- Create Your Own Villain: Arranging for Joe's death to strike at Sara, and possibly even altering his AI to taunt her so bad she loses her memories of him, are very bad ideas. It turns out that he was placed in the game very specifically because his friendship was a counterbalance to the very ruthless, manipulative schemer nature that he feared her to be capable of, so with him increasingly removed from the picture, she's poised to grow more and more problematic for the dwindling survivors, especially after her early ventures were genuine in leaderly optimism. When Sara tries to confess to manipulating Ranmaru into killing the second Yabusame on his route, she's so well-liked by that point - and prone to blaming herself for other people's deaths - that basically nobody takes her word at face value.
- Cruel to Be Kind: He's quite quick to write off Kanna in the second Main Game, citing to vote for her because she's a liability. However, it's later revealed he was only doing this because he believed she was the Sacrifice (which she would have been had Gashu not interfered) and was effectively attempting to save her. Once he realizes she doesn't actually have the card, he berates her willingness to sacrifice herself, though is more than willing to be voted for in her place.
- Dead Man Walking: Despite being a candidate unlike Joe, Kai, Nao and Kugie, Sou's survival rate is a whopping 0.0%, suggesting that his AI has never survived a single simulation. Depending on who you vote for in the Second Main Game, he may prove the organizers right.
- Dead Person Impersonation: Alice killed the real Sou Hiyori over two years before the start of the game, and Shin Tsukimi took up his name. In Chapter 3-1, this is subverted when "Midori" is confirmed to be the real Sou Hiyori.
- Death Equals Redemption: Should you condemn him to death in 2-2's climax, he's mortally wounded by the security system during his escape attempt. He uses his last moments to set up the Joe A.I., granting Sara the courage necessary to continue moving forward.
- Deconstructed Character Archetype: He's a raging, uncooperative jerkass in the vein of similar characters from other visual novels like Byakuya Togami in Danganronpa: Trigger Happy Havoc or Dio in Virtue's Last Reward. Then it's revealed that the organizers performed several simulated games with AI before the main show, and his initial kindhearted personality resulted in him dying in every single one of them, prompting them to give him a 0.0% chance to survive; this has led to him adopting the jackass demeanor as a defense mechanism. Ironically, it's his departing from this deconstruction to become more cooperative and noble that can potentially lead to his death, and he double downs on this trope if he survives 2-2, turning from simply uncooperative and on his own side, to actively scheming and planning to betray the group he remains with.
- Do Not Call Me "Paul": If he survives Chapter 2, he refuses to retake his real name and continues to go by "Sou".
- Dying Alone: It's entirely possible for him to die this way in 2-2. After being shot at by the facility's security system and rendered head-to-toe in his own blood, he spends his last moments heading towards the Room of Rubble and activating AI Joe, just before he bleeds out from his injuries. By the time Sara finds him slouched over a keyboard, it's already too late.
- Easily Forgiven:
- In a sense. Despite being the reason Kai, Joe, and Mishima are killed, no one actively holds it against him. It may be because it's ultimately the Floor Masters who do the deed, and Sou was acting for the sake of his own survival rather than maliciously targeting them, but even so, it's looked past pretty easily.
- Sou himself defies this trope if you vote for Kanna. He swears revenge on everyone responsible for Kanna's death and becomes almost entirely unwilling to cooperate with the group from that point forward. The only person he doesn't seem to hold a grudge against is Gin, since he saw for himself that Gin didn't vote for Kanna willingly.
- Everyone Has Standards:
- After the first Main Game: After Joe spends some of his last words insisting that Sou must be a good person (despite Sou having voted for Joe and possibly having ensured he got the Sacrifice card in the first place), there's a shot of Sou looking very guilty, and when Kanna questions him about it later he's unable to answer.
- He can be mean to the point of cruelty, but he will not let Kanna believe that her sister died cursing her like in the forged message found on the room of the first trial, and changes it to a Dying Declaration of Love before letting her see the phone. He's also disgusted with Sara believing that it was her who wrote the message.
- During the second Main Game: If Kanna is voted out, Sou will angrily swear revenge on everyone who played a part in it. The one exception to this is Gin; he's clearly concerned for Gin during the banquet and even tries to convince Midori to let him go. This is most likely because he saw firsthand that Gin didn't want to vote at all, not even for Sou, and only voted for Kanna because Sara told him to.
- Chapter 3: If Sou is alive at this point, he openly admits that he wants to personally kill everyone who voted for Kanna, starting with and especially Sara. He sets this aside while the characters are dealing with Midori throughout Chapter 3, since Midori is the more immediate threat. That said, he also makes sure to tell Sara that she's next on the list once Midori is defeated.
- He admits to being shocked when Ranmaru kills Reko/Alice in his route, since they had voted for him instead of Kanna, so he harbored no ill will towards them.
- Evil Cannot Comprehend Good: Or 'Wild Cards don't understand the Power of Trust', as he gets incredibly pissed off when the others rise to Sara's defense.
- Evil Gloating: Makes a point of taunting Sara and Joe during Chapter 1-2's Main Game, as well as gleefully mocking Kai after he's sacrificed.
- Epic Fail: Sou is significantly weaker than Kanna, who is a shy, scared girl in her early teens while he is in his twenties. Carries over to Your Time To Shine, in which his Fighting stat is the lowest of the entire group, including both Kanna and Gin.
- Face Death with Dignity: Like Kai before him, he will not allow the floor master to execute him their way if he gets the majority vote in the second main game, instead removing his collar and making a run for the exit before being shot down by the security system. When it becomes clear he's a dead man, he spends his last few minutes alive programming a Joe AI to motivate Sara going forward.
- Face–Heel Turn: If Kanna gets the majority vote in the second main game instead of him, he snaps and proclaims that he will kill all remaining floor masters and survivors in her name, and psychologically torments Sara with a twisted version of the Joe AI. Despite this, once Chapter 3-1 starts, he still decides to team up with the others against Midori, though he doesn't waste time in reminding them that they are not allies anymore, and that he will kill them once they're done with his former friend.Sou: “...I'll kill you... Worthless... It's all worthless... The Floor Masters... Sara... Every one of the riffraff... I'll kill every one of you who killed Kanna...!! That's right... and first... will be Sara... ”
- Fatal Flaw: His unwillingness to trust others. He's cunning, but his adamant refusal to believe in other people leads him to jump to negative conclusions, even if the answer has made itself obvious and not as negative as he was lead to believe. In turn, he makes things far more tense and needlessly complicated for everyone involved.
- Freak Out: He had one offscreen as a result of his First Trial, where Miley revealed that he was calculated to have a 0% chance of survival. A horrified Shin abandoned his own identity to adopt a more ruthless persona as Sou.
- The Friend Nobody Likes: Kanna is the only person who really has any fondness for him at all. Everyone else thinks he's really shady and unreliable at everything but computers. His unpopularity is probably why, statistically, he's said to have a zero percent chance of surviving the game.
- Go Out with a Smile: If he obtains the majority vote in 2-2's Main Game, the final CG shown before he passes away has him staggering towards the Room of Rubble with a Tearful Smile, dying at peace knowing that a child wouldn't be sacrificed for his sake.
- Heroic Sacrifice: He can potentially do this in 2-2, successfully getting the majority vote to save Kanna once he realizes she didn't have the Sacrifice like he believed for almost all of the Main Game.
- Hero Killer: Does this indirectly multiple times, all out of a desire to ensure his survival. His actions get Mishima,note Joe,note and Kainote killed.
- Hesitant Sacrifice: Despite wanting to be voted for in place of Kanna, he doesn't actually want to die. He makes his best attempt to live, but it's all for naught. He tries to make the best use of the time he has left.
- Holding Your Shoulder Means Injury: His death CG has him grasping his left shoulder with a Tearful Smile, right after being subjected to a Multiple Gunshot Death.
- Hypocrite:
- He proudly considers himself the most logical of the group, but everything he does in Chapter 2-2 onward is completely driven by emotion, namely his love for Kanna. Ironically, Kanna herself defends Sou by claiming that voting her is "the logical thing to do", while Sou only tried to appeal to everyone's hatred of him to sway the votes in his favor (a notion he had previously dismissed as foolish in the first main game) and save her life. If Sou is saved, he only becomes less rational in the following chapter.
- He's enraged if Kanna gets the majority vote in the second main game and is killed instead of him, and becomes driven by vengeance against his former allies. This is extremely petty coming from someone who was similarly responsible for the deaths of Mishima, Joe and Kai in the previous games, even taunting Kai as he was being outed.
- I Lied: He lies a lot, sometimes to seed mistrust among the other players or just to compensate for his natural unpopularity in the group. Sometimes he admits to it fairly easily, like when admitting he lied about getting amnesia in Part 2. Given his track record, Sara and the others suspected as much anyway. This adds a level of ambiguity to his misremembering of the second Main Game in his version of 3-1, because while he’s pulled exactly this before, by now the player has seen Sara’s trauma make her outright forget Joe.
- Jerkass: Once his true personality is revealed, it's shown that Sou is very self centered, a nearly compulsive liar, and willing to manipulate others to his own ends as often as possible if given the opportunity. His AI suggests that he wasn't always like this, however.
- Jerkass Façade: Though his trust issues are real, as are the hostilities that come of it, it is heavily implied at points that he’s doing somewhat of a bit in the game, made even more apparent when we meet who he took the name off and see how he influenced him. If alive to that point, Shin makes his utter contempt of Midori clear, too. All around, it’s pretty apparent that he’s trying hard to be someone he’s not because he knows that he’s supposedly guaranteed to die.
- Jerkass Has a Point:
- While he's extremely mistrustful and outright suggests Sara planted it, he makes a good point about Kugie having neither the time nor ability to write a hateful message to Kanna on her phone in the middle of their trial, hence why he writes it off as a forgery.
- After the details of his first trial is revealed, where the survival statistics were gruesomely explained in excruciating detail to him, it would make sense that as the person least likely to survive he would be most suspicious of the person with the highest chance to survive: Sara.
- Jerk with a Heart of Gold: Admittedly, it's buried deep down at first, but it's there. It especially makes itself apparent all throughout Chapter 2, where he shows his protectiveness over Kanna, and that after he gets past his fear of being betrayed and discarded, he makes a point of working with the others.
- Karma Houdini Warranty: Sou initially suffers no negative reprocussions for getting Joe, Mishima and Kai killed in the first main game. However, in the second he either ends up getting shot and bleeding out, or going through the same trauma of losing his Only Friend Kanna, like Sara lost her best friend Joe.
- Kick the Dog: His constant taunting of Kai as it becomes more and more clear they'll vote for him.
- Logical Weakness: Trust. As it turns out, Sou is such a pathological liar and so paranoid of other people that he absolutely cannot see the truth of the situation until it is spelled out for him because of this. This allows him to be temporarily Out-Gambitted by Q-taro and Keiji, when the former trusted the latter to carry out their plan together.
- Manipulative Bastard: Spends much of Chapter 1 and 2 using almost everyone for his own gain, effectively throwing a wrench in many of Sara's and Keiji's plans.
- Meaningful Name: There's a simple but Significant Anagram in his name: Sou = Uso, or 'Lie'. In addition, Hiyori means 'Sunny weather', while Shin means 'Truth' and Tsukimi means 'Moon viewing'.
- Meaningful Rename: He abandoned his real name, Shin Tsukimi, to take up the persona of a cold jerkass in the hopes of surviving.
- Morality Pet: Played With at first, played straight later. Kanna is initially used as a lackey by Sou, albeit one he treats kindly. As time goes on, this becomes a much more genuine relationship with her, and tries to watch out for her due to his suspicion of all the others in the group.
- Mutually Exclusive Party Members: In Chapter 2-2, he becomes this with Kanna. If you vote for Kanna at the end of the second Main Game, Safalin oversees Kanna's execution, consisting of her becoming a human plantstem. If you vote for Sou instead, he manages to defuse his collar and escape, only to be mortally wounded by the security systems. By the end of 3-1, his survival route makes him this with the other Yabusame too, though a bit more prolonged of an example.
- No Sympathy: He's very pleased when Kai is voted to die in the first main game instead of him, since he had Nao beat him up with a pan and as far as Sou knew he was one of the kidnappers.
- Older Than They Look: He looks to be around Sara's age, but he's actually over 20 as his name is on the list of names to drink.
- Only Friend:
- Kanna's the only person who really gets along with him or gives him the benefit of the doubt.
- A horrifying case with the real Sou Hiyori. While it's never outright stated, it's heavily implied that Sou was the only person who spent any time with him outside of his parents. Even more so considering the Shin AI admits to being unnerved by him, but still missed him.
- The Only One Allowed to Defeat You: This is his ideology in Chapter 3-1 if he's alive. He's interested in getting back at Keiji and Sara personally; he even objects to Meister killing Keiji on the grounds that he can't be killed before he gets his revenge.
- Pathetically Weak: Sou is often presented as this. When Sara tries to forcibly take away a phone from Sou, she notes that his resistance is extremely feeble. In Your Time to Shine, he has the lowest fighting stat out of everyone in the cast, with even Gin, an elementary school student, being stronger than he is. Exaggerated and Played for Laughs in the Twitter sketches, which depict him being blown away by Kanna sneezing and struggling to hold a 2kg controller while Kanna manages to lift Q-taro with one hand and punch a noticeable hole in a wall.
- Pet the Dog:
- Regardless of his intentions, he managed to give Kanna the strength to continue by erasing the possibly faked message from Kanna's big sister cursing her, and replacing it with an encouragement to live on. Downplayed as it results in Kanna resolving to sacrifice herself for him and Sara instead, but this clearly wasn't what he wanted.
- Can get another moment of this at the end of Chapter 2, depending on how you vote. If Sara votes for him, his dying act is to activate the Joe AI so that Sara can meet her best friend again.
- Playful Hacker: He's the resident computer expert when he's feeling helpful.
- Properly Paranoid: His uncooperative actions with the reasoning that he'll be betrayed doesn't fall so flat when he (and others) can be betrayed by Q-taro, Nao and Sara herself (in two separate situations no less!). Furthermore, if he survives to 3-1, the player gets to witness firsthand that his overt distrust of Sara has the capacity to be extremely warranted.
- The Resenter: While he openly displays his distrust of Sara and the others in 1-2 onward, he becomes this in his version of 3-1.
- Signature Headgear: He always sports a beanie. Reko often derogatorily calls him "beanie guy" because of this.
- The Social Darwinist: An interesting variation: Sou wholeheartedly believes that the strong will discard the weak when they deem fit, and considers himself to be one of the weak. This stops him from working with the likes of Sara and he uses his wits and trickery to attempt to stay on top of the game for this not to happen.
- Squishy Wizard: He's extremely smart mentally, being capable of lying through the skin of his teeth in order to manipulate people, able to quick hack into advanced computer systems, and being shown to have found a way to defuse his collar. Unfortunately, he is also one of the frailest participants, quickly proving himself incapable of opening a cabinet door, and Your Time to Shine having him unable to do even a single push-up.
- Story Branch Favoritism: Chapters 2-2 and 3-1 heavily nudge you towards killing him off, as Sara only manages to get proper closure with Joe should Sou be killed. In addition, Kanna goes through a Cruel and Unusual Death (and it's made rather clear that she was in pain the whole time), whereas Sou peacefully succumbs to his wounds with a smile on his face. And to make it even more obvious, Sou's death is what prevents Sara from manipulating Ranmaru into killing off the surviving Yabusame.
- Terrible Trio: Defied. Sou very briefly forms a trio with Q-taro and Kanna in Chapter 2-2, with them acting as the go-getters for his plans, which would have been a contrast to Sara's Power Trio with Gin and Keiji. However, Q-taro has no interest in siding with Sou and leaves the group when he realized he was used as a tool to get at Sara; while Kanna pushes Sou to attempt to work with others and occasionally acts as a middleman for him so the others can give him a chance.
- This Is Unforgivable!: Says this and a mix of I'll Kill You! should you vote for Kanna, as he had been desperately begging for you to vote for him instead of her, and deciding to actively work against the group instead of helping the others like he had done so earlier and Kanna had hoped.
- Token Evil Teammate: A subversion as well as a deconstruction of the underlying behavior of one. His misbehavior and treatment of others has him constantly distrusted and alienated by the rest of the cast, openly cautious of him even while aware they're in the same boat. In truth, though? He's not entirely malicious, he's terrified, well aware that he's in a game he's been calculated as unable to win, molded into taking on the behavior and identity of an emotional abuser for the sake of sheer desperation not to die. He isn't anything that can truly be called evil, though this is subverted if he is saved over Kanna. He chooses to cement himself as a terrible "teammate" that'd go as far as weaponizing Joe's death against Sara.
- Took a Level in Jerkass: If he survives Chapter 2-2, though he still elects to work with the other survivors to beat the murderer game, he's far more openly hostile towards them, especially Sara, blaming them for Kanna's death and professing that he will get his revenge on them.
- Tragic Keepsake: While "tragic" might not have been the right word, he kept the real Sou Hiyori's scarf and wore it after he suddenly disappeared. Even though he was unsettled by him, he couldn't help but miss him in some way.
- Ungrateful Bastard: If Sara votes for Kanna in the second Main Game. Sou is enraged and proclaims that he will kill Sara and Keiji in Kanna's name, with special emphasis on Sara. Despite being well aware that ASU-NARO and the floormasters were behind everyone's suffering alongside the cruel vote to begin with. Instead of directing his vengeance against a common enemy, Sou immediately targets the group and blames them for trying to survive just like he was. He presumably hacks into the AI of Joe, making it so that Joe will blame Sara for everyone's deaths, traumatizing her to the point of amnesia.
- Unmoving Plaid: Unlike Gonbee's stripes, the pattern on his scarf never moves.
- Unwitting Instigator of Doom: Of all the things he intentionally does, the one thing that throws a wrench into everything is his faked message from Kanna's big sister. If not for that message, Kanna may not have resolved to sacrifice herself in Chapter 2-2, leading to the Sadistic Choice. Him causing Sara to forget Joe entirely when not voted leads her to start developing thoughts of self-preservation like her AI simulation counterpart, who had no support like Joe. This leads to her beginning to manipulate Ranmaru, who ends up killing the surviving Yabusame (one of the few people who had nothing to do with Kanna's death). The full extent of this is yet to be seen however.
- Used to Be a Sweet Kid: Shin used to be a very meek, helpful, joyful person, as his A.I. shows to the other survivors. This contrasts heavily from the snide, snarky, cynical and paranoid Shin in the Death Game.
- Villain's Dying Grace: While it is quite unwise to refer to him as a bonafide villain, he does serve as the main antagonistic force within the group for the first two chapters. Nevertheless, if he's voted for on his request in Chapter 2, he's shot to death by the facility's security system for a subsequent escape attempt, and activates AI Joe for Sara's sake in his last moments. He even refers to it as his "final present".
- Walking Spoiler: He cannot be talked about without exposing his true personality in in the First Main Game, and his true identity in the Second Main Game.
- Wants to Be Hated: He seems to actively try to get people to dislike him - especially in the end of Chapter 2’s main game when he tries to get himself voted out and killed for Kanna's sake.
- Weak, but Skilled:
- In Your Time To Shine, he has by far the weakest fighting stat of any character (even lower than Kanna and Gin's) but makes up for it in his high foraging stat and decent crafting stat.
- He's shown to be pretty physically weak, struggling to open a cabinet door and being out of breath afterwards in 1-1 but is incredibly good with technology.
- What Kind of Lame Power Is Heart, Anyway?: His ability in Your Time To Shine is incredibly circumstantial: the chance not to starve to death. On top of this being only a chance, it means that if this doesn't happen, Sou DIES.
- Wild Card: For most of the game, it's never quite possible to tell whose side he's on beyond "his own." The ending of Chapter 2-2 can either have him die doing some good for the cast so Kanna may live, or declare his hatred for them all and become their permanent enemy should she die in his place... Though he does continue to work with them in 3-1 to survive.
- Willfully Weak: In a sense. While his lack of physical strength is genuine, Kanna's route shows that Sou knows how to take off the Explosive Leash everyone has, and will do so in his attempt to escape. However, in Sou's route, he neglects to tell anyone or do this himself, likely waiting for the right moment to do such a thing.
- Wouldn't Hurt a Child: He abandons his overriding self-preservation in a bid to save the life of, even if he doesn't know it, his 14-year old sister. If it fails, then Gin, an elementary schooler, is the only one of Kanna's indirect murderers that he forgives to the point that he spends the entire Banquet attempting to save his life, most likely because he saw firsthand that Gin only voted for Kanna because Sara told him to.
Reko Yabusame
Reko Yabusame

- The Ace:
- In the minigames during 2-1, Reko is one of the best choices due to her great reflexes and memory being a great asset and decreasing the difficulty of many of them.
- It is revealed in 2-1 that she is considered an ace in regards to music as well, even before she made it big with her first band. She was quickly labeled a child prodigy, which she ended up resenting.
- Ambiguously Gay: While she doesn't make a comment one way or the other was to what she likes, her Does Not Like Men attitude and her rather strong attachment to Nao that's formed shortly after meeting her, significantly indicates she may be into girls. A way Keiji annoys her is by claiming they were on a date when Sara asks about the two being together. Not to mention she can end up Together in Death with Nao.
- Character Development: An interesting case, as we meet Reko after it had already happened. Before her brother's imprisonment, Reko was harsh on everyone, men and women alike and even resented her brother for his act of murder. Her doll counterpart demonstrates this best, being generally more selfish and hostile to those around her, while also showing some insecurity of how others perceived her. However, two and a half years later (when we first meet her) she has seemingly mellowed out, as she's not nearly as bad as she used to be, and is much more understanding of those around her.
- That said, she does go through a bit of character development on her own, as her Does Not Like Men quality decreases significantly to the point it nearly drops completely, though she'll still make an occasional comment about it.
- Further demonstrated in 3-1B. If Reko isn't killed by her doll nor doomed to a cruel fate by Ranmaru, she has a moment of reflection before the banquet. If spoken to, Reko will tell how much she's changed, becoming a lot more abstract and capable in a battle of wits. She shows her growth by actively being a useful asset in logical deductions during the group discussion: a change from prior chapters where she struggled to keep up.
- Child Prodigy: Used to be regarded as one; started writing music while still in elementary. Things started going downhill for her once she was labeled 'gifted', though...
- Cool Big Sis: Though Kanna imprints more on Sara, she's the one who acts more to her like this. She in general has this towards the younger participants, treating them kindly and watching out for Kanna, Gin and Sara. She even gets pissed if Keiji (jokingly) claims him and Sara are on a date.
- Cruel and Unusual Death: If she's alive in Sou's route of Chapter 3-1B, she ends up killed by Ranmaru via strangulation, and her body ends up so mutilated she hardly looks like she was human.
- Cruel to Be Kind: She makes a point of being kind to the younger participants, but she's not above doing what's necessary. Such as smashing the Mishima A.I. to help Nao.
- A Death in the Limelight: Chapter 2-1 places extremely heavy focus on Reko, her backstory and feelings on her brother, and status as a reliable rock for the group, and can conclude in her death. Interestingly, it’s able to be an example of this in part because she’s replaced by a double midway through and not actually there.
- Determinator: She's noted by Sara to be a rather determined person, doing her best to stay strong no matter what the situation.
- Does Not Like Men: Downplayed, but she admits to being more distrustful of and quick to judge them, on top of holding them up to a high standard. She feels a bit guilty about this, regretting that she insulted Mishima and labeling him a "nutty professor" before his death.
- Dropped a Bridge on Him:
- Her death in the version of 2-1 where she dies is remarkably abrupt and unceremonious, especially compared to the deaths of other main characters. After showing up for the first time in quite a while, she briefly argues with her doppelganger over which of them is the real Reko before a knife is dropped in front of them. The fake Reko quickly grabs it and stabs the real one, killing her instantly.
- Another in 3-1 should she and Sou still be alive, when she's very suddenly murdered by a psychotic Ranmaru.
- Dying Alone: In Sou's route of 3-1B, Reko is killed by Ranmaru when she's completely alone, and by the time the others are even aware she's in danger, it's far too late.
- Empty Eyes: After her brother's death in Chapter 2-2, Reko's eyes become pupil-less and empty. In turn, she becomes more aimless and consumed by grief.
- Everyone Has Standards: Despite Mishima's A.I. asking for Reko to destroy him in an effort to help Nao, she fully admits she can't point a weapon at Nao's beloved teacher. She opts to use her fists instead. This actually ends up becoming a plot point; it's one of the ways you can differentiate between the real Reko and her doll version.
- Gameplay and Story Integration: If you buy Reko's personal info, her AI will mention that she has a great memory. In practice, this makes her the best partner for the Memory Dance attraction; she makes the game easier by memorizing chunks of the enemy's moves.
- Heroic BSoD: With Alice dead in Chapter 2-2, Reko shuts down and becomes very depressed and aimless. She still interacts with the others in a kind way, but her mind is mostly somewhere else.
- I Just Want to Be Normal: If the player buys her Personal Information, it's suggested that she feels this way by her AI, who states she may have been harsh towards her brother because she resented him for being 'normal' and not having to deal with the pressures of everyone's expectations.
- It's All My Fault: Cries out that her brother's death, as well as her brother murdering someone, was all her fault after his death in Chapter 2-2.
- It Was a Gift: Her "precious bongos" were a joke gift from her brother but after he got arrested, she held onto them. Unfortunately, the Fake Reko will destroy them in disgust towards Alice once he works together earning them back and unknowingly presents it to her.
- Jerk with a Heart of Gold: An aggressive punk girl in personality who has a very soft side for the weak and vulnerable, while being critical and harsh on the strong. As such, she's very quick to call out Keiji, Q-Taro and Sou on their behavior or actions, but is also very defensive of Sara, Nao and Gin.
- Lady Swears-a-Lot: A minor case. She's got one of the most foul mouths in the cast, guys or gals, but she keeps the swears to when she's annoyed or upset (considering where she is, this is often).
- Meaningful Appearance: The fingerless gloves. Sara accidentally pulling one off in the Room of Lies is a major hint that the Reko who exits said room with a pair is a fake. If the real Reko dies in the ensuing chapter, Alice and Nao each take one as a Tragic Keepsake.
- Mutually Exclusive Party Members:
- In Chapter 2-1, she becomes this with Alice. If you fail to figure out how to save Gin or refuse to push the fake Reko to her death, the fake confronts the real Reko and murders her in a rage when Ranger decides to execute her. If you do push the fake to her death, Ranger tricks Alice into thinking he killed her and then kills him when he attacks him in a blind rage.
- In Chapter 3-1, she becomes this with Sou; if the latter was spared in the second Main Game, Ranmaru will brutally murder her.
- The Nicknamer: Downplayed, but has a tendency to refer to others by nicknames, such as calling Mishima 'nutty professor' and Sou as the 'beanie' guy.
- Nice Job Breaking It, Hero: Downplayed. Her precautionary measure of keeping the door open in case an escape is needed ultimately hides the rules of the practice vote that were detailed behind it, escaping everyone's notice until it's too late and resulting in Mishima's ultimately avoidable demise. None of the other participants blame her for this, though, with Kai even pointing out that the room was laid out in such a suspicious way that the kidnappers almost certainly planned for that.
- Please, I Will Do Anything!: She essentially says this word for word to Midori upon hearing that he was actually innocent of murder, tearfully begging him to do something to help her brother.
- Red Oni, Blue Oni: Forms this with Nao due being the more cool headed of the two. She's also the blue to Alice's red.
- Reformed Bully: That aforementioned soft side apparently only came into existence within the last couple years; she used to be cruel and harsh towards everybody, weak or strong, as well as much more selfish. She's long past that by the time of the game. The Fake Reko highlights this difference fantastically during her time present in 2-1, going so far as potentially killing her true self in a futile attempt to survive.
- Stage Name: Combined with Spell My Name With An S; vgperson's translation compromises by saying she goes by Reco when performing.
- Story Branch Favoritism: Although Reko has less explicit plot revelations and a sweet scene with Nao after her death, the game appears to favor her survival over Alice's. Similar to Kanna, her route is much more uplifting and intertwined with other characters. In contrast to Reko learning to embrace her brother's memory no matter how painful, Alice's storyline is bleaker, remaining a broken man whose grief is skipped over with Safalin's machine. As a result even the creator himself paired Reko's route with Kanna's as the "default" storyline multiple times.
- Super-Senses: Her hearing is exceptionally good, perhaps owing to her status as The Ace in the music industry, which helps her make some important discoveries and assist with puzzles later on.
- Team Mom: By far the most protective of the group, she watches over the younger participant and tries to tend to others emotional and psychological needs of the others.
- Together in Death: Potentially can do this with Nao in 2-2 if she died in 2-1.
- Why Did It Have to Be Snakes?: If chosen for the Spirit Shutter minigame, Reko would say that she doesn't handle ghosts well. This really comes back to bite her in Kai's route of Your Time To Shine, who delights in telling her ghost stories and causes her immediately run away before he can get going... which in turn causes Kai to chase her while STILL telling the story.
- Your Makeup Is Running: The heavy mascara around her eyes naturally starts streaking when she cries, as her Doll counterpart demonstrates.
Nao Egokoro
Nao Egokoro

- Alas, Poor Yorick: When Miley is cleaning up Professor Mishima's corpse, Nao becomes incredibly protective of Mishima's decapitated head, and runs away with it. She proceeds to hide with his head, refusing to give it to anyone in her temporary insanity.
- Ambiguously Bi: While Nao shows possible signs of attraction towards Mishima in Your Time To Shine, she also shows some signs of this through her strong connection to Reko, the two often attempting to look out for each other both through emotional means and occasionally physical ones. Reko will only allow Nao to stay with her while she grieves her brother's death. When she dies, the two most important people to her can be shown: The similarly deceased Mishima and Reko. She also shows this a good bit to Sara in the Massacre Ending, talking about living together and how she'll take care of all of Sara's needs while holding her.
- Apologizes a Lot: Repeatedly and frantically apologizes after the Kai vote, since she was one of the ones who voted for him.
- Bring My Brown Pants: Blink and you miss it, but she wets herself as she is getting her chest crushed in by a vice.
- Buxom Beauty Standard: Her personal information as seen in Chapter 2 makes a comment about her large bust. Sara, if she reads it, understandably sees it as sexual harassment.
- Character Development: She goes from being heavily dependent on others and skittish to being independent, and brave.
- Cooperation Gambit: Pulls a beautiful one on the fake Mishima A.I. with Sou in 2-2.
- Cruel and Unusual Death: Her execution involves her body being gradually crushed to a pulp by a vice. The worst part is that when Sara tries to make her suffering end, Nao refuses and instead decides to endure the excruciating pain that she is going through.
- Declaration of Protection: Declares that she'll do the hard decisions for Sara near the end of 2-1. In the Massacre ending, she also declares that she will bear the guilt of their shared decision to let everyone else die so they could escape the game.
- Eccentric Artist: Downplayed; her appearance is more eccentric than her personality, and while she has her quirks, they're pretty overshadowed by her Trauma Conga Line.
- Face Death with Dignity: As the Sacrifice of Chapter 2-2, Nao knows she's going to die. After a brief attempt to convince Sara to vote for her, she accepts it, thanks the others for being her friends, and says she's stopped shaking and wants to see the professor again...only to spend her last moments begging not to die and refusing to let Sara hit the Mercy Kill button.
- Good Is Not Soft: While one of the nicer participants, she's very protective of Professor Mishima, and can prove herself perfectly willing to push the Fake Reko to her death.
- Heroic BSoD: Hit extremely hard by Mishima's death, especially as she feels responsible for it. Much of her character development from there involves overcoming that incident, even as new horrible happenings are piled on.
- I Gave My Word: After using the Mishima A.I. as a crutch for a good portion of 2-1, she realizes she can't continue to be dependent on him, and vows to leave and not return. The Mishima A.I. accepts this, and has Reko destroy him for her sake so she wouldn't be tempted to go back on her promise.
- Meaningful Name: Egokoro means having a natural aptitude for art, or good artistic taste.
- Messy Hair: Has long, cardinal red hair that spikes out rather like a hedgehog's.
- Nervous Wreck: She's easily one of the characters that take to the game the worst at first, running off and hiding after the first death in the game.
- Nice Job Breaking It, Hero: By choosing the real Reko to save, she causes the Fake Reko to stab her alternate and then die soon after.
- Odd Friendship: Despite her initially finding Alice scary, she manages to get him to help her with Clear chips, and she is the one who can bond with him and help him move forward from Reko's optional death. If Alice sees a painting of Nao's execution, he says while he regrets being Sou's killer, he'd gladly do it again.
- Out-Gambitted: Nao can outgambit every other member in her group in the Second Main Game, while it's discovered that Gashu cheated to give Nao the Sacrifice when it should have rightfully gone to Kanna, Nao votes for herself, and during the tie that promptly occurs, she can potentially convince Sara to vote for her, and as a result, the two survive while everyone else dies.
- Please Wake Up: Does this with Mishima after his death.
- Red Oni, Blue Oni: The red to Reko's blue, being far more emotional than the latter, though Reko is rather outspoken herself, she manages her emotions better.
- Relieved Failure: At the conclusion of the Second Main Game, Nao comes up with a plan to get herself and Sara out of the game at the cost of everyone else's lives. If Sara doesn't go with Nao's proposal, Nao is relieved that neither of them will have to live with the guilt that it would have caused them.
- Screw Destiny: The death game's organization writes Nao off as one of the people to die in the first trial. Come 2-2, and she can actually win it if her gambit pays off.
- Smarter Than They Look: Nao's one of the most frazzled people in the Death Game, and very unassuming, but she is deceptively clever.
- Spot the Imposter: The very first one in-game to notice that Reko is acting distinctly different than she normally does. While she can't quite figure what happened, she's absolutely right; the Reko they spent the last few hours with is a doll of her from a few years back.
- Teacher/Student Romance: Onesided, but their interactions in Your Time to Shine make it extremely obvious that Nao desires this with Mishima. He ranges from oblivious to uncomfortable depending on the situation, trying to navigate something so blatant with the fact that he does still care for his student deeply and not wish to hurt her.
- Together in Death: Unless she's voted for as the sacrifice, she gets a small scene being together with Mishima and potentially Reko.
- Took a Level in Badass: She goes from spending most of Chapter 1-2 terrified to personally pushing the Fake Reko, cooperating with Sou to perform a very believable gambit to manipulate and delete the fake A.I. trying to manipulate her and can potentially win the game by way of having priority in a tie as the Sacrifice.
- Tragic Dream: Wishes to paint a portrait and present it to Kazumi as thanks.
- Tragic Keepsake: In the path that Reko dies, Nao keeps one of Reko's gloves and gives the other to Alice.
- Trauma Conga Line: The game really isn't kind to Nao in particular, who seems to have to undergo something horrible and traumatic every single half-chapter.
- The Unchosen One: Like Joe, she was not one of the candidates that were supposed to make it past the first trial. The fact that she had made it to the Second Main Game is such an affront to Gashu that he cheats to ensure that she has the Sacrifice card even after she trades it away.
- What You Are in the Dark: She gets this twice over. She can show her ultimate desire to live, voting for herself (instead of breaking the tie between Sou and Kanna) and then pointing out that if Sara chooses her, she wins. If this works out, she does her best to comfort Sara, continuing her Declaration of Protection and saying she'll shoulder all the blame and hardships. If it doesn't work however, she'll do her best to show how much she's grown and attempts to face death with dignity.
- Woobie, Destroyer of Worlds: After being unfairly given the sacrifice card entering the second main game, she attempts a Zero-Approval Gambit to be voted so that her and Sara can survive, even though this would've come at the cost of everyone else's lives. If she succeeds with the latter's help, she assures Sara that they will both carry the burden of what they've done together. It should be noted that nobody holds this against her regardless of whether the gambit works or not, since it was the only chance she had of living.
- Zero-Approval Gambit: Absolutely no one feels good about Nao's gambit to be picked as the sacrifice and win the game. Nao's relief at living another day is mixed with her regret at the circumstances. She reassures Sara that despite her guilt, she will shoulder all the blame and guilt for them both.
Kai Satou
Kai Satou

- Aloof Ally: Deconstructed. While he is generally helpful to the group, he's so obviously suspicious and distant in his behavior that nobody fully trusts him. As such, he gains the majority vote and dies. Everyone is more and more heartbroken with every subsequent revelation of just how Good All Along he was, being the most important person to their quest to escape the game even posthumously.
- Ain't Too Proud to Beg: His last, painful attempt to not be voted for is him begging everyone to vote for Sou instead of him. It fails.
- Because You Were Nice to Me: His entire reason for helping Sara's Dad and their family for real instead of merely being a spy as intended. Not that the bar was set very high to begin with.
- Becoming the Mask: He was initially sent to the Chidouins as a spy, but the kindness he received from Sara's parents made him genuinely attached to them.
- Better to Die than Be Killed: Slits his wrists after seeing Joe's Cruel and Unusual Death and realizing he's next.
- Birds of a Feather: Subverted. Even though Kai is revealed in Your Time To Shine to be a teasing, stoic, downplayed gadfly not unlike Keiji, the two have great difficulty carrying conversations or even agreeing on subject matters. Although these issues seem to come from Keiji's laidback attitude clashing with Kai's more serious one, and of course, them both being secret keepers. To emphasize this point; while most of the characters' Fondness events are used for Character Development or many a Friendship Moment, Kai's Fondness events with Keiji only serve to highlight how completely incompatible the two are.
- Cannot Tell a Joke:
- While examining some mannequins with liquid-filled heads, he suggests that their kidnappers might intend for them to use them as a source of hydration. Sara takes the comment seriously, leading him to apologize.
- The manga and Your Time To Shine shows that all of his humor is delivered extremely dryly, leading those he jokes with to never know he's joking until he clarifies. In his route, he ends up scaring a few people off due to this very inability.
- Creepy Good: He's noted to be off putting by several characters, but is ultimately Good All Along.
- Dark and Troubled Past: He's been raised as an assassin since he was young, with a horribly apathetic father- he rightfully considers being a househusband and bodyguard to be wonderful in comparison. His route in Your Time To Shine adds further hints about just how bad it was: He was forced to swallow poison, withstand electrical shocks and see how long he could hold his breath, all of which are implied to be the very tip of the iceberg. Further more, he would vomit from these experiences, and he was unable to complain about his treatment.
- Defector from Decadence: He was part of the organization running the Death Games and was embedded with the Chidouin family specifically to get close to Sara, but her father's affection for him led him to devote himself to the family genuinely and try to protect Sara from the game.
- Defiant to the End: His last words: “This is... resistance. Our lives toyed with to our enemy's whims, we are unable to save even a single person... As we die off, this is... my feeble... resistance. But it is one large step... toward counterattack...! It is a step I was able to take... because you bought me time. It is surely... not futile. I entrust them to you...! Our regrets...!! Our hopes...!! I... am satisfied.”
- Face Death with Dignity: Due to going out on his own terms, Kai is able to die satisfied after attempting to encourage Sara to keep pushing forward.
- Friend to All Children: Not as pronounced as others, but Your Time To Shine shows that Kai is much less willing to mess with Gin and Kanna than he is the other participants, even claiming to Kanna surprising him with a tackle would result in "counter hugging" her.
- Frying Pan of Doom: Carries kitchen utensils around at all times, but his trusty frying pan is the one he seems most attached to and proficient in.
- The Gadfly: Surprisingly so, Your Time To Shine has shown Kai to frequently get entertainment out of teasing and confusing others for their reactions. This includes him telling Blatant Lies, scaring off his conversation partner or leaving while they are confused, telling Non Sequiturs and claiming his more disturbing comments are just jokes. Ironically, he doesn't get along with the other gadfly in the group: Keiji.
- Good All Along: Despite all the hints to him as a villain, he turns out to have been one of the most heroic characters in the game...though this tragically only becomes truly clear after he's gone.
- Go Out with a Smile: Gives a pained smile as he goes out defying the death game.
- Hidden Depths: He confesses to Reko that he's a fan of ghost stories because of their ability to make him feel fear. He also admits that despite being The Stoic, he does not believe emotions can be suppressed, just distanced from one's self.
- Ineffectual Loner: His attempts to find a solution to the death game is ultimately hindered by his own lack of support and gets him killed, while the main casts gets further and lasts longer as they rely on each other.
- It Was a Gift: His apron is a gift. It was from Sara's Dad.
- Irony: He spends much of Chapter 1 completely silent about his intentions, refusing to say anything about his actions until he's verbally cornered in the First Main Game, largely due to his lack of trust as a gambit to do things himself and throw a wrench in the organizers' plans. It's entirely due to this decision not to trust anyone that he cannot get the trust of anyone else when he needs it, which directly leads to his death and leaves the Death Game largely unhindered.
- Killed Off for Real: Due to him being Sara's stalker, being acquainted with the kidnappers, and having threatened the already unstable Nao into attacking Sou when he had decoded his laptop, Kai becomes the least trustworthy of the group by far, which ensures he gets the majority vote in the first main game once Sara exposes him as the sage (one of two roles who won't end in massacre upon being chosen). Regardless of whether the player votes for him or not, half the cast (Sou, Q-Taro, Nao, Keiji and Alice) will choose him to be the victim, forcing him to slit his wrists with the stolen kitchen knife as a final act of defiance against his sadistic captors.
- Laser Guided Tyke Bomb: Defied. He had been trained as an assassin since he was a child, though he failed to be willing to take another life. He eventually becomes a house husband instead.
- Long-Haired Pretty Boy: Whose Curtains Match the Window, as both his hair and eyes are a stark, cool black.
- Not So Stoic:
- When he breaks down during the first Main Game, pleading with the others to vote for Sou instead, as he freely admits that he doesn't want to die.
- We also see him with a panicked expression when Sara flashes back to the night she was kidnapped and realizes in retrospect he was trying to warn her.
- Out-Gambitted: This happens to him twice. He's out gambitted by Sou, who ends up casting enough doubt on him to get the majority to vote for him. The second had him get outgambitted by the organization that set the Death Game in motion, he tries to pose as their contact, but they easily see through his attempt and mock him for it.
- Poor Communication Kills: By being quiet about vital information due to his lack of trust. He is voted by the majority due to the fact no one quite trusts his intentions.
- The Quiet One: Easily the quietest of the main cast, often not speaking unless spoken to, which goes along with his stoic nature.
- Screw This, I'm Out of Here!: A Running Gag of Kai's in Your Time To Shine is that either he, or someone he is talking to, would run away from the conversation that was taking place. It's particularly exemplified with his interactions with Reko, who he scares off by beginning to tell her scary stories... only to chase after her while continuing to tell the story.
- Shared Family Quirks: Despite opposing him, Kai is a lot like his father Gashu. They position their arms similarly, come off as inscrutable and strange to the cast, and are willing to die without a second thought rather than give in when they're cornered.
- Spiteful Suicide: When he is all out of luck for surviving, he decides to go out on his own terms to keep Miley from having the satisfaction of killing him.
- Stalker without a Crush: He is in fact the stalker Sara is so afraid of, and he often watches her from the shadows, though it's not due to romantic intent. He was given responsibility of protecting Sara by her father, though since neither divulge this information, she assumes the worst.
- Story-Breaker Power: Being a trained assassin, a former member of the Death game's organization, and having previous knowledge of the layout of the building makes Kai a potentially extremely powerful asset. Sadly, he seals his own fate by refusing to let the others know about any of this, and ultimately cannot win the trust of the majority. It's later revealed that Kai's past had him swallowing poison and enduring shocks, which would have meant he'd be a better equipped member when it came to 2-1's Final Attraction and 3-1's attempt at collar defusal respectively.
- Sure, Let's Go with That: Says this word for word when Sara points his stalkerish behavior as evidence he must have a crush on her. While it's clear Kai's saying it so he doesn't have to reveal any information about himself, Sara ends up embarrassing herself due to the "revelation" and runs away.
- Supreme Chef: He's noted a few times to be a rather good chef, making a few comments on what dishes he'd like to prepare during the Death Game. Your Time To Shine reveals he's significantly defensive of his status as this. Unsurprisingly, this is further emphasized in his route, with several characters either commenting or needing his expertise for their personal situation.
- Tears of Joy: He hides it behind his frying pan, but he's very evidently crying when Sara's father gave him a new apron.
- Thou Shall Not Kill: Despite being raised as an assassin from a young age, he could not find it in himself to kill someone else. However, that doesn't mean he wouldn't threaten or injure others if he had to.
- The Stoic: One of the most reserved participants, maintaining his cool in the face of various unpleasant developments.
- Tranquil Fury: Remains deathly calm even as he bashes Sue Miley over the head with his frying pan.
- The Unchosen One: Much like non-candidates Nao and Joe, Kai was never supposed to make it past his first trial, let alone make it to the First Main Game.
- Walking Spoiler: It's very hard to talk about Kai without revealing his role in the story.
- Would Hit a Girl: Has absolutely no problem whacking Miley over the head with a frying pan.
Gin Ibushi
Gin Ibushi

- Adorably Precocious Child: He may have moments of Troubling Unchildlike Behavior, but he's mostly a young, energetic child who tries his best to be as helpful as he can be.
- Amazingly Embarrassing Parents: Some dialogue with him in the bar indicates that his step-father drinks too much, which is a fact that annoys him. Despite AI!Gin claiming to generally like his step-father, his opinion of him seems to be generally derisive. According to him, when his step-father is drunk, he often causes trouble, and always gets yelled at by his mom and apologizes. Gin says that it's pathetic and that he doesn't have any dignity as an adult.
- Ambiguous Situation: Does Gin have a Slave Collar around his neck? It's hard to say seeing how he is the only Participant who has an item constantly concealing the collar around his neck from view from the player, one might be forgiven to suspect that he has no collar to wear at all- but there's plenty of evidence to believe he does have one as well, such as briefly getting hanged to the magnetic ceiling in the locker room alongside Hayasaka. But without explicit confirmation, it's left up in the air for the time being.
- Animal Motifs: Cats, and dogs to a lesser extent. In addition to his clothing and Verbal Tic, he tend to act like one when investigating
- The Baby of the Bunch: The youngest participant of the Death Game, being only in elementary school.
- Born Lucky: Despite having the third-lowest survival rate (a measly 1.3% chance), Gin scrapes himself out of far more situations than he has any right to. On top of surviving the events of 2-1 due to Sara saving both him and Q-Taro, he survives two more scenarios in 3-1 that could've killed him and is spared of the Sadistic Choice at the end by virtue of the other contender, Q-Taro, having already died.
- Brutal Honesty: Tends to be very blunt with others and doesn't mince words, such as when he responds to Sou introducing himself as a 'job-hopper' by declaring that he lives hand-to-mouth. Ironically, he then promptly adds that Sou should have lied and claimed to have steadier work.
- Cooldown Hug: He can give one to Sara when she's on the verge of a breakdown again.
- Companion Cube: Mew-chan, his cat cushion.
- Dramatic Irony: During the final event in 3-1B, Gin volunteers to be the challenger on the basis that he wants to save someone since he's been in dire situations twice now. He ends up being helpless and the Dummies are all killed (beyond one) during the group's attempts to save him.
- Everyone Has Standards: Despite his open dislike of Sou, he doesn't want him to die, and he can't bring himself to vote for Sou when the opportunity arises. He only reluctantly votes for Kanna because Sara reasons that Gin's vote won't cause anyone to die, since it brings Sou and Kanna to a tie and leaves Sara herself to cast the deciding vote.
- From the Mouths of Babes: While he insists that he doesn't hate his step-father, he's very frank about disliking how he gets drunk and 'causes trouble' and thinks of his excessive apologies as 'pathetic', and worries about his mother overworking herself.
- Hollywood Autism: An extremely strong aversion; Chapter 3-1B reveals Gin is formally diagnosed with autism. While extremely fond of dogs and cats, intelligent for his age, and certainly not without his eccentric behavior, Gin doesn't fall into inaccurate stereotypes in his depiction, and he's overall happy, confident, well-adjusted, and affectionate. The rest of the cast near-universally takes his relatively strange behavior in stride, and when a disguised Midori once tried to goad him into agreeing to have it cured, Gin didn't even consider it, instead opting to have ASU-NARO treat his mother's implicitly fatal illness.
- Improbable Infant Survival: The youngest member of the cast, elementary-aged Gin, is one of three who will always survive through 3-1B.
- Just a Kid: Bristles at any implications of this, getting upset if others seem condescending or dismissive towards him just because of his age.
- The Medic: During the minigames of 2-1, Gin will be the only member of the cast that can heal Sara.
- Nice Guy: While he can give Brutal Honesty now and again, he is easily one of the more nicer characters in the game and tends to try to stay positive and optimistic despite the situation he is in.
- The Nicknamer: Refers to nearly everyone with nicknames pertaining to some aspect of their appearance or personality.
- The Nose Knows: His is pretty strong. It's even a mechanic briefly in one chapter.
- Precocious Crush: Clearly has a developing crush on his 'Big sis Sara'. His AI promises to sweep her off her feet when he grows up, and there are various moments in his negotiation events where he can talk about playing using Sara, or retroactively having her do whatever he wants as a result of his winning a game of tag, (though Sara protests she never promised such a thing and he agreeably lets it pass). This also complicates matters during the first Main Game, when he tries to avoid revealing some evidence he believes might incriminate her.
- Security Blanket: His clothes and cushion actually function as this; wearing and carrying them help him feel more confident.
- Verbal Tic: Frequently peppers 'meows' and 'woofs' into his speech.
- You Called Me "X"; It Must Be Serious: One of the only times that Gin doesn't call someone by a nickname is when he's sobbing in the arms of the dying Q-taro doll. "Mr. Q-taro!"...
Kazumi Mishima
Kazumi Mishima
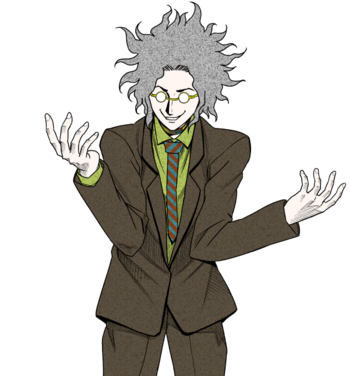
- All for Nothing: His Thanatos Gambit during the second trial to ensure Nao's survival tragically doesn't accomplish anything in the grand scheme of things since not only was said trial a practice round that everyone could survive, but Nao was never chosen as a candidate and was only kidnapped to help balance his chances of survival, so the third floor master then attempted to cause an incursion to kill her off as soon as they could. Subverted in the "Massacre" Ending, when Nao can out-gambit the third floor master and win the death game with Sara, albeit at the cost of everyone else's lives, allowing her to have a future like Mishima wanted (and finish her portrait of him).
- Astonishingly Appropriate Appearance: Subverted and lampshaded. Many people assume that Mishima is a Mad Scientist, or upon learning he is a teacher, assumes he teaches some form of science. In truth, he's teaching art and Japanese.
- Bad Liar: His attempts to hide the fact he smokes are rather poorly hidden, as noted by Sara. He's also bad with hiding that he drinks when offered a bottle by Keiji.
- Break the Haughty: In a Flashback, he describes his younger self as 'more conceited than the average person', saying that he got quite the reality check by failing his college exams.
- Contractual Purity: In-Universe: As a teacher, Kazumi decries the practice of smoking, and stammers unconvincingly when Sara suggests that he wants to smoke the cigar he found. The narration also notes that he cuts open the cigar with practiced ease. He also holds the same sentiment when it comes to drinking, as he initially turns down Keiji's offer to do so in Your Time To Shine.
- Cool Teacher: An all-around nice guy who looks out for the rest of the cast, especially his former student, Nao. He also doesn’t have any problem with gay or transgender people, as revealed in Your Time to Shine.
- Creepy Good: He's noted by several characters to be creepy for his eccentricities, but is ultimately as good as Nao insists.
- Cruel and Unusual Death: His collar heats up so much it agonizingly burns through his neck, it doesn't take long to kill him, but it's clear every moment was torture... what's worse this is the least graphic execution... it gets far worse than this.
- A Day in the Limelight: While Your Time to Shine serves as one for all of the characters, his route was the first to be finished and made available in the game's test version, thrusting him into the spotlight.
- Everyone Has Standards: In Your Time To Shine, Nao will show obvious signs of attraction to Mishima, but seeing how he's at least twice as old as her and she was his student, he tries to very gently avoid the topic to neither encourage her advances or hurt her by turning her down.
- Face of a Thug: Mishima looks incredibly creepy, with his wild poof of gray hair, tiny, shiny glasses that hide his eyes, constant smile and exaggerated gestures, but seems to be nicer than he first appears.
- Former Teen Rebel: Your Time to Shine expands upon the main story’s implications, revealing outright that he was a bit of a "hoodlum" growing up.
- The Glasses Gotta Go: By
 Word of God, Mishima is actually very handsome when his eyes are shown, which is why all his sprites have Scary Shiny Glasses. And indeed, the one that can be found in the game's files results in his face seeming far more natural and relaxed.
 - Good Smoking, Evil Smoking: It's heavily implied that he smokes, and craves a chance to do so when presented with a cigar, though he unconvincingly tries to hide it.
- Hidden Depths:
- Your Time To Shine shows that Mishima is actually insecure about his ability as a teacher, feeling it doesn't quite compare to his own teachers' popularity or style.
- Likewise, he's also a bit sensitive about his appearance, noting that his wild appearance can lead to sour first impressions and students avoiding him.
- The Hyena: Prone to chuckling a lot in a rather 'Mwahaha' sort of fashion.
- Killed Off for Real: Regardless of who you vote for in the second trial, Mishima will secretly garner two votes for himself (Nao's and his own), which adding Sou's vote will ensure that he is chosen to die, and in a rather brutal fashion at that.
- Meaningful Name: His surname comes from Mishima, Japan, and a style of ceramic pottery associated with the region, fitting for an art teacher.
- Messy Hair: Like his student, Mishima's hair is wile and messy, being compared to a mad scientist's hair than anything else.
- Milking the Giant Cow: His portraits generally have him doing this at all times.
- Nice Guy: Eccentric and a bit creepy, Mishima is one of the most reasonable and kind people from the very start of the Death Game.
- Noodle Incident: He tells Sara he once broke his wrist with a chalkboard eraser, when and how this happened isn't elaborated on.
- Not Quite the Right Thing: An unintentional master of this. His attempt to help Kanna by lying about the nature of their shared First Game only makes things worse when Sue Miley reveals the Awful Truth to her immediately after his death. It's later revealed that he convinced Nao to vote for him as part of a plan to ensure her safety, but accidentally left her saddled with immense guilt over helping cause his death.
- Not So Above It All:
- Mishima may be one of the nicest and understanding members of the cast, but he won't hesitate to playfully jest with the other participants in Your Time To Shine.
- Despite making a big deal out of Sara holding a cigar, a lighter, and a cigar cutter, and claiming that a proper teacher shouldn't smoke, his intentions when confiscating them clearly were to smoke it himself when Sara left the room, and was visibly disappointed when the cigar turned out to be fake.
- Off with His Head!: A postmortem example. Once his collar burns through his neck, Nao attempting to wake him leads to his falling off his body.
- Oh, Crap!: He's rather confident when talking to Sue Miley, believing the practice vote to be nothing serious and jokingly insulting her, the realization that his collar is burning through his neck quickly causes him to panic.
- Posthumous Character: Appears in an early bit of 2-1 as an A.I., much to Nao's relief. However, when she eventually breaks off contact with him to move forward, he asks Reko to be Cruel to Be Kind by destroying him to ensure Nao couldn't go back on her word.
- Reasonable Authority Figure: One of the most level headed characters of the main casts, he tries to watch out for both the younger participants and his former students.
- Running Gag: A particularly dark example. A version of Mishima dies every Chapter. Chapter 1 has the original die, then Chapter 2 has two A.I.s of him perish, and finally Chapter 3 has another version of him be struck down.
- Sacrificial Lamb: He's the only one of the main cast to die within Chapter 1-1, largely to establish just how much the Death Game doesn't mess around. Thankfully though, it also partially subverts this trope by having there being a real impact from Mishima's death, right down to the scars it winds up inflicting on everyone else, including Kanna and especially poor Nao.
- Scary Shiny Glasses: His eyes only become visible during his death.
- Senseless Sacrifice: During the first pre-trial, he manipulates Nao into voting for him and then votes for himself, ensuring that he be the one to be sacrificed. Soon after his death, the group learns that the game could've ended with everyone alive if the vote had come to a draw, meaning that all he accomplished was to drill Survivor's Guilt into his poor student. Granted, he would've died anyway since Sou had voted for him as well, but at least Nao wouldn't have suffered as much of a Freak Out over his death.
- Smoking Is Not Cool: Insists as much, though it's heavily implied that he has experience with cigars.
- Teacher/Student Romance: Defied in Your Time to Shine, in which he gently but firmly shuts down Nao's advances.
- Team Dad: Highlighted most in his interactions in Your Time to Shine; he takes quite naturally to this role as the oldest player. He was trying to be this in the main story, but wasn’t really around long enough for it to take.
- They Killed Kenny Again: A definitely unfunny example: his human self gets his head burned off in Chapter 1, then two A.I's of him are destroyed and deleted in Chapter 2, and yet another A.I. based on him is killed off in Chapter 3.
- Verbal Tic: Occasionally ends his laugh with a "Mwahaha..." Further contributing to the evil scientist look he has.
- We Hardly Knew Ye: While it really cannot be said he doesn't have a clear-cut personality compared to everyone else, his death in Chapter 1-1 means he has by and large the least amount of screentime compared to the rest of the main cast. Thankfully, though, it seems to subvert them being forgotten, as there's a very real impact Mishima's death has on the story and especially to Kanna, Gin and Nao.
- What Happened to the Mouse?: Nao flees with his head in a box, but when Keiji and Sara finally get a chance to check it, the head is gone, and the first Main Game brings no answers as to what happened to it, something that Keiji points out to Hayasaka in Chapter 3-1. Midori even claims that the head wasn't recovered, so what that means is an even bigger mystery.
- Younger Than They Look: Despite his grey-hair and rather mature personality, as the oldest member of the main cast, Mishima has been confirmed to be around 30 years old.
Gonbee Yamada
Gonbee Yamada

- Accidental Murder:
- Chapter 3-1b reveals that Alice did not actually complete his First Trial and simply left, which led to the death of his unknown partner, the real Hinako. This in turn led to the two of them becoming perpetrator and victim, which meant the real Hinako couldn't be used as a Dummy later.
- If he survives to 3-1b, it also shows a flashback depicting his "killing" of Sou as this, shoving him over a railing and seeing his head impaled... With no blood whatsoever, as he didn't really die, a fact which was removed from his memory.
- The Aloner: After his interrogation, he mostly keeps to himself and refuses to cooperate with the group, although he also doesn't try to impede them in any way. He is willing to approach people if he needs something from them specifically, such as going to Keiji to find out who “Sou” really is, or going to Sara to get his sister’s precious bongos back, but otherwise he'll really only work with the group if absolutely necessary. This ends up being averted post Chapter 2-1 if Reko dies, as Alice becomes much more active and cooperative once Safalin erases the negative memories of his deceased sister.
- Aloof Ally: He makes it clear upon being released that he won't assist the group but also won't hinder them in their escape. He only speaks up when his sister is being accused of being a murderer. He becomes a lot more helpful in Chapter 2-1, though at least part of it is due to Reko being a key contender during the final attraction.
- Ambiguous Gender Identity: Your Time to Shine has him reveal that his mother raised him as a girl until he confronted her about it. It is left unclear whether this means he was Raised as the Opposite Gender or is Transgender.
- Atrocious Alias: "Gonbee Yamada" is pretty much immediately remarked on as an extremely weird, fake-sounding name after he blatantly makes it up on the spot. In fact, "Gonbee" is more or less the Japanese equivalent to "John Doe," referring to an unidentified person, while "Taro/Hanako Yamada" is commonly used as the Japanese equivalent to "John/Jane Smith".
- Being Good Sucks: Good lord does he have it rough. So in addition to simply wanting to be a good brother to Reko, Alice has developed a noticeable protective streak of his little sister, which ultimately causes him to find out Midori's been stalking and taking information of her and many other people. He gets in a scuffle in an attempt to get answers, and ultimately accidentally ruins Midori's doll. For his attempt to save his sister, he's imprisoned on false charges that he believed he did for years, his sister becomes estranged with him, and he's left to rot for at least three years. He then either has the choice of dying or seeing his beloved sister killed.
- Berserk Button: Do not threaten Reko Yabusame's safety to his face. This is manipulated in his backstory to get him wrongfully arrested, and can potentially kill him in 2-1.
- Big Brother Instinct:
- Does not take Reko's hostage situation well in Chapter 2-1 after finding out. This can either lead to his death or his grief at the loss of his sister being so great he has to erase negative memories of her.
- And the reason he killed Sou Hiyori (or thought he did)? He found out Sou had been collecting photos and documents about Reko. When he confronted him over it, he wound up pushing Sou off a terrace and onto a jagged fence.
- If he survives to the second Main Game, he can tell that Sou and Kanna have a sibling-like relationship (and this is before Sou and Kanna are revealed to actually be biological siblings), and he votes for Sou because he can't bring himself to vote for someone else's little sister.
- Butt-Monkey: You can hit him all you want during his interrogation, and he's so pathetic at acting tough that Sara can't help but feel pity for him. The reveal that he fainted at the sight of a 17-year old girl because he assumed she was out to kill him doesn't make him look any better. Things only get worse for him in the later chapters, but it's definitely no longer as funny.
- Cold Ham: Mixes this with Large Ham; he has a rather refined way of speaking compared to the rest of the group, and yet he lapses into Suddenly Shouting quite often.
- Cooperation Gambit: By the end of Chapter 1, after Alice reveals his murder of Sou Hiyori, Alice and Keiji can be seen teaming up behind the scenes, despite their being a criminal and a police detective respectively. An alliance of mutual convenience to discover who Shin Tsukimi truly is.
- Cowardly Lion: Of a nobler sort than Q-taro. Though far more easily frightened than he likes to let on, he's shown time and time again that he's perfectly willing to use violent force against the various Floor Masters. This is especially prominent both at the end of 2-1, either immediately leading to his death or in the aftermath of Reko's, and in his variant of 2-2, wherein he attempts to attack Gashu more than once.
- Cruel and Unusual Death: In Sou's route of Chapter 3-1B, he ends up killed by Ranmaru via strangulation, and his body ends up so mutilated he hardly looks like he was human.
- Death by Irony: In Sou's version of Chapter 3-1, he is killed by Ranmaru by activating a trap in the locker room that hangs him by the collar, which is ironically the way he accidentally got Hinako killed by leaving his first trial without believing the audio recording detailing what he had to do.
- Delusions of Eloquence: Lapses into a fancier speech pattern at times.note
- Does Not Like Guns: He's certainly even more frightened of them than the rest of the cast. Consistently, a threat at gunpoint has been the easiest way to get him to back down from something, and at first he fears and distrusts Sara specifically because she's carrying one.
- Dramatic Irony: He's utterly convinced that Reko is the real deal because of her very harsh and cold treatment of him...which would be correct three years ago, but Reko has gone through some serious Character Development since then.
- Dreadful Musician: By his own admission, he was only in a band to fill up space. But on the other hand, he had written songs that were very well received, implying that he's a lot better at writing music than playing it.
- Dropped a Bridge on Him: Is abruptly murdered by a psychotic Ranmaru on Sou's version of 3-1 should he still be alive.
- Dying Alone: In Sou's route of 3-1B, Alice is killed by Ranmaru when he's completely alone, and by the time the others are even aware he's in danger, it's far too late. This can count as an ironic death, as this is the very same way he (accidentally) ended up killing Hinako.
- Everyone Has Standards:
- Despite his general unwillingness to work with the others, he does agree to help Nao with obtaining Clear Chips when she asks him.
- After the first Main Game, he looks shocked and guilty when Joe spends some of his Final Words insisting that Alice has to be a good person.
- In the second Main Game, if Alice is alive to vote, then he votes for Sou instead of Kanna because he can't bring himself to vote for someone else's little sister.
- Exhausted Eyebags: He's very drained from the loss of his sister, his messy hair and eye bags reflect this extremely well, even after his initial grief at her loss. They only go away once Safalin erases his negative memories of her.
- Foreshadowing: When asked for his name, he starts with "Ya-" before pausing and giving his full name, hinting that this is not his true name.
- Frame-Up: Chapter 3-1b reveals that he didn't kill the real Sou Hiyori, but a doll version of him instead. This was, however, unplanned on the Sou doll's part, as Alice found out he had a briefcase full of photos of Reko and documents about the Death Game and, when confronting him about it, wound up accidentally shoving the doll off of a terrace onto a wrought iron fence. This still landed Alice in prison, but Sou took advantage of it to get him to sign a consent form for his participation in the Death Game, hoping for a shot at revenge.
- Full-Name Basis: Pointedly refers to Sara with her full name to emphasize his distrust. He'll also refer to other participants by their full names, owing to his dramatic nature. The exception to this is Q-Taro; he refuses to call Q-Taro anything other than "Cubetaro Hamburger" in retaliation for Q-Taro making fun of his name when they first met.
- Gender-Blender Name: It's less pronounced to a Japanese audience, but the rest of the group nonetheless gets confused when Reko confirms the sibling named Alice is her older brother.
- Go Out with a Smile: After being fatally injured by the exploding doll head and passing out, he wakes up briefly, just in time to see Reko is still alive. When she says she wants the two of them to be brother and sister again, Alice smiles before finally dying.
- Hair-Trigger Temper: It's pretty easy to piss him off, that said, it's also pretty easy to get him to cower away if something to frighten him happens.
- Heroic BSoD: Reko's death hits him extremely hard, to the point he needs his negative memories of her to be erased to truly move forward.
- Hidden Depths:
- He may be a bit of a dumbass Paper Tiger, but he's an extremely emotionally sensitive person under that, able to extend his protective streak beyond just Reko to other members of the cast.
- By his own admission, he's not very good at singing. Chapter 3-1B however, shows that he can potentially sing well enough that others enjoy it and join in.
- Irony: He was wrongfully put away for a murder he didn't commit, and when he wakes up in the Death Game, he accidentally commits an actual murder without him being any the wiser about it.
- Jerk with a Heart of Gold: He acts as hostile, intimidating, and distrustful as one would expect a hardened criminal to be, but under that he's not a bad guy at all, showing quite a compassionate side when he does come to respect and trust members of the group. Must run in the family.
- Made of Iron: Subverted. While he manages to survive longer than a person should with a massive gaping hole blown out of his stomach, it still ultimately kills him.
- Malicious Misnaming: In vgperson's translation of the game, he refers to Q-taro Burgerburg as "Cubetaro Hamburger" early on in order to get back at him for calling his alias old-fashioned.
- Manchild: A downplayed variant, but he has a habit of acting quite childish from time to time. He refuses to eat the meal Safalin provides due to not liking "the green bits", and demands she eat them instead. And should Mishima attempt to make shoes for him, he'll complain that they first don't have stripes like the rest of his outfit, and then that the stripes are the wrong direction.
- Manly Tears: He quietly sheds a few tears when his attempt to reconcile with Reko goes horribly wrong.
- Mauve Shirt: If killed in Chapter 2-1, he will be the least developed participant in the death game up until that point, even moreso if you don't do his sidequest to retrieve Reko's treasure, as most of Sara's interactions with him are optional. Subverted if he survives, as he will then become a much more active participant in the death game.
- Mutually Exclusive Party Members:
- In Chapter 2-1, he becomes this with Reko. If you fail to figure out how to save Gin or refuse to push the fake Reko to her death, the fake confronts the real Reko and murders her in a rage when Ranger decides to execute her. If you do push the fake to her death, Ranger tricks Alice into thinking he killed her and then kills him when he attacks him in a blind rage.
- In Chapter 3-1, he becomes this with Sou; if the latter was spared in the second Main Game, Ranmaru will brutally murder him.
- My Greatest Failure: Considers the crime that got him imprisoned, murdering Sou Hiyori, to be this. He knows he deeply hurt the victim's family, his own family and possibly most importantly, his sister. He spends much of his time in 2-1 trying to make it up to her, though he's aware she has no reason to forgive him.
- Downplayed if he survives long enough to meet Midori/the real Sou Hiyori; after learning the monster that Midori is and that his murder charge was actually false, he remarks that while he isn't proud of actually being a "murderer", he would kill Midori again and again if he could.
- Non Conformist Dyed Hair: Bright blue bangs paired with a magenta and lime green-dyed buzzcut. It's shown from a childhood flashback with Reko that the magenta and lime color are not his natural hair color.
- Odd Friendship: Despite her initially finding Alice scary, Nao manages to get him to help her with Clear chips, and she is the one who can bond with him and help him move forward from Reko's optional death. If Alice sees a painting of Nao's execution, he says while he regrets being Sou's killer, he'd gladly do it again.
- O.O.C. Is Serious Business: Soon after his sister's death, Alice is despondent for nearly the rest of the chapter. The fact that he accepts Safalin's treatment and immediately brushes off Reko's death like it was nothing is a big indicator something's wrong.
- Paper Tiger: He acts very tough, but he's not as much of a threat as he tries to make himself out to be. To the main cast at least.
- Pet the Dog: Despite his initial attitude of not trusting the other participants and mainly being The Aloner, he does make an effort to be kind to Nao. When he initially approaches her to fish for information about Reko's tokens, he notices that she's terrified of him and awkwardly tries to reassure her; later, he agrees to help her obtain Clear Chips when she asks him.
- Red Oni, Blue Oni: The Red to Reko's blue, being the more hot headed and impulsive one of the two.
- Stock Costume Traits: Found dressed in a black and white striped jumpsuit, complete with handcuffs dangling off one wrist. This naturally makes him look more suspicious. He lampshades that Japanese prisoners don't normally even dress like this.
- Story Branch Favoritism: Alice dying over his sister appears to be the favored choice. It's shown by the amount of detail that went into his demise to the point of having an optional scene where he reconciles with Reko once and for all, dying happily. Reko continues on with a bright future ahead of her, atoning for her misdeeds while growing stronger and much more capable. Alice on the other hand, would have lost everything at this point if he were to survive. He becomes a broken vengeful man with a grim future after the police force ruined his life. Alice had to resort to using Safalin's machine in order to continue living, a choice discouraged by the game.
- Super-Senses: While it's not as pronounced as Reko's, Gonbee's hearing is ridiculously good, able to catch just about anything the other survivors can not. Which may be why he was able to write music that sounded great, but was unable to play it.
- Sympathetic Murderer: After he starts trusting the group, he admits his crimes and shows a great deal of remorse. The crime he was convicted of was an Accidental Murder of a man he caught stalking his sister. He deeply regrets his actions until he realizes that his victim was an asshole and he was set up.
- Tragic Keepsake: In the path that Reko dies, Nao gives Alice one of his sister's gloves. Also applies to the bongos broken by the Fake Reko.
- Unreliable Expositor: His explanation of how he ended up separate from the other participants is clearly slanted to some degree, with a touch of Self-Serving Memory.
- Walking Spoiler: Absolutely none of the main cast are even aware he's around until chapter 1-2, and his true name serves as a major clue during the First Main Game.
- Wouldn't Hurt a Child: If he's around to participate in the second Main Game vote, he will vote for Sou over Kanna, saying that he can't bear to vote for someone else's little sister.
- Why Did It Have to Be Snakes?: He's terrified of guns, running and hiding at the sound of gunfire, and fainting once Sara finds him with her gun still on hand. He's also scared of ghosts.
First Trial Victims
The Dummies (Chapter 3-1 Spoilers)
General Tropes

The victims that died unknown.
Though twenty people originally entered the game, eight of them did not survive their respective versions of the Saw-like First Game, and are only known about through information learned about them later on. Six out of eight are brought back in Chapter 3-1A onwards, and this folder contains many spoilers involving them.Tropes that apply to the Dummies as a whole:
- Back from the Dead: Sort of. All of them except for Kugie and Megumi are "revived" as dolls in the third chapter and partnered up with the survivors.
- Bloodless Carnage: Due to being Dolls, they don't have any blood if they die a second time. Though they can still go blue with shock and blush.
- Breakout Character: Despite appearing pretty late into the game's development, they proved popular enough to appear in Your Time To Shine after Kai has been added.
- Character Focus: While Chapter 3-1A is their introduction, the focus is more on Midori and Keiji. 3-1B however, focuses heavily on them.
- Cruel and Unusual Death: Suffered by each and every one of them.
- Developing Doomed Characters: Due to their low charge times, none of them are expected to last past the Death Game. In truth, none of them are even meant to last past the Banquet. All of them barring Hinako can die before then, and of those, only one of Kurumada, Mai, or Hayasaka can be spared death and simply need a recharge instead.
- Dropped a Bridge on Him: All of the Dummies can potentially suffer a rather sudden, yet cruel, death during the banquet. Before that, all of them (barring Hinako) can die rather jarringly.
- Dysfunction Junction: The group includes a cynical boxer with trust issues, a stubbornly fatalistic middle schooler who has no problems causing violence, a woefully nervous pushover office worker, a delightfully sweet baker who seems ignorant of the dangers around her, a brutally honest high schooler, and a woefully incompetent high schooler.
- Dwindling Party: Just like the human players, the nature of being trapped in a Deadly Game makes this inevitable. All of them but Hinako can die before the Banquet if you fail certain puzzles throughout the chapter, and even once you make it there, most of them can't be saved regardless of the player's choices. The only Dummies that you have any chance of saving are Kurumada, Hayasaka, and Mai, and only one of them; none of the rest can make it out of the Banquet alive. Even then, the surviving Dummie immediately shuts down when their battery runs out, which is more or less dying for them unless the survivors are able to recharge them later.
- Establishing Character Moment: They're all given this upon being brought back in 3-1A.
- Exposition Fairy: When they're brought back, they must give most of the information that Midori told them to the main cast, as Midori thought it'd take too much time to relay that information again.
- Face Death with Dignity: Most of the Dummies that make it to the banquet end up resolving to let their lives be thrown away so Midori can be stopped. True to form, they're all scared when their time comes, but most stick with the decision. Averted with poor Anzu and Mai, who are screaming and crying in terror.
- Foreshadowing: Before the player learns about any of their fates, their names all appear on the board indicating who is and is not allowed to drink.
- Gender-Equal Ensemble: Three guys and three girls are revived for the group.
- Honorary True Companion: While 3-1A has them bordering on Teeth-Clenched Teamwork with the survivors due to unfamiliarity and unease from both sides, 3-1B has them firmly become this to each other and the survivors, willing to watch out and protect one another.
- In-Series Nickname: To differentiate them from dolls, they're given the nickname "Dummies". In Your Time To Shine they are instead referred to as "Sunnies", due to the sunny Beach Hut that they reside in.
- Minion with an F in Evil: Technically, they are Midori's minions (as well as the Death Game's as a whole) but most are actually quite nice to their partners. Downplayed however, as their survival depends on their partner staying close to them. Even when it is revealed their true roles are to kill their partners before Midori is killed, they don't outright turn against them as much as they do nonviolently hamper their attempts to kill Midori, and even then, most of them aren't exactly happy about it. Roughly half-way through the banquet, most of the surviving Dummies are encouraging Sara to sacrifice them in order to kill Midori and save Gin.
- Posthumous Character: Naturally, they're all not in the game because they all died, but we do get to see or learn about them anyway.
- Red String of Fate: Non-romantic example, but a literal take on this example is how the pairs are made with the humans and the dummies.
- Ridiculously Human Robots: When revived, they are near indistinguishable from humans, down to even having skin that feels the same. Hayasaka even complains that he feels like he's being strangled, even though as a machine he does not need to breathe. The only noticeable difference is that the Dummies don't bleed.
- Screw Destiny: Despite being told what they're made for, the Dummies spite ASU-NARO by working with the survivors and trying to help prevent them from falling into their enemy's trap. Not only did the Dummies rise above their status as gimmicks and get remembered as human allies, they indirectly saved one from certain death, killing Midori in the process, and uncovered a secret exit. All because they clung to their humanity and dragged out the subgame to make these outcomes possible.
- Sole Survivor: During the Banquet, it's only possible to save either Hayasaka, Kurumada, or Mai; whichever one of them lives will become this. Averted if you get all of the Dummies killed before reaching the Banquet; the only Dummy you'll be left with is Hinako, who is scripted to die if she's made it to this point.
- Support Party Member: Midori brings them back with this express purpose of them being this.
- The Un-Reveal: All the dummies have a certain piece of information to give their partners, Ranmaru'snote , Hinako'snote , Kurumada'snote and Hayasaka'snote are all revealed. But when the Banquet comes to an end and effectively shuts them out of the story, Anzu's and Mai's information goes unrevealed.
- Walking Spoiler: Considering they were all killed during the First Trial, it's hard to talk about them without spoiling that all but two come back in 3-1 and what roles they had before and after.
- We Cannot Go On Without You: The Dummies are forced into a variation of this: If they go too far from their human partners, it is their heads that will fly off, and the humans will be fine and continue without penalty. This is to encourage them to stick close and work with their partners. It's also so they can have an excuse to be near their partner while contemplating whether or not to kill them.
- We Hardly Knew Ye: Sara even bemoans the fact that, good or bad, she'll never get the chance to know these people. Later on, she does.
- What Measure Is a Non-Human?: Subverted. They are quickly considered to have just as much value as human lives by the main cast, everyone treating them no different as if they were human. Ultimately the Dummies and the players play this straight during the Banquet, most of them deeming Gin's life more important than their own and accepting their death. Though part of this is due to the fact that if Gin dies, Midori gets to live.
- Your Days Are Numbered: Midori claims that the dolls have a limited charge time, and the dummies fear their personalities will be erased if this happens. However, it's later started they can simply be recharged without worry. The problem is that the drill used to kill them in the Banquet completely destroys their bodies, rendering them unable to come back.
Ranmaru Kageyama
Ranmaru Kageyama

- Alone Among the Couples: In the official artbook, one of his dislikes is revealed to be happy couples, showing resentment toward them.
- Big Bad Wannabe: On Sou's route, he begins to enact a plan to callously kill every other player so he and Sara can survive alone. He gets far enough to off the remaining Yabusame, only to be outed, and after that the only thing villainous he's able to do is assist Maple in her second battle before the banquet, where he's scripted to die if he's made it there. Even had he been able to survive that, or even prevent the Banquet entirely, it's almost certain his batteries wouldn't have lasted long enough to catch everyone.
- Bitch in Sheep's Clothing: He becomes a bitch in sheep's clothing in Sou's route, as well as a murderer.
- Brutal Honesty: He's surprisingly blunt whenever he speaks up, often saying what's on his mind rather casually.
- Butt-Monkey: Not as much as Hayasaka, but he's still on the receiving end of teasing by both Sara and Kurumada.
- Circle of Shame: He was bullied by his classmates when he went to school with his ninja necklace, thinking it was cool. He eventually decided to continue going with it to seem careless.
- Corrupt the Cutie: On Sou's route, a few words from Sara take him in a very dark direction.
- Crazy Jealous Guy: Even though he never qualifies as a Yandere. In Sou's route he could become this trope of crazy and jealous, even played for laughs in certain sketch depictions of Ranmaru. However, in Kanna's route he's implied to be very clingy. Both versions of Ranmaru feel some kind of envy toward Keiji as he's the one who supports Sara most.
- Death of Personality: He attempts to invoke this on himself in the Kanna route by trying to implant the Joe AI into his own body, his logic being that if he can't save Sara himself, the least he can do is give her some version of her best friend back. He's interrupted before he can go through with it, though.
- Easily Forgiven: Very subverted. In contrast to Mai's stabbing of Q-Taro being forgiven, Ranmaru is viewed in an extremely negative light after his murder of the remaining Yabusame sibling in the Logic route. The reason for this is due to not only callously murdering someone with plans to kill others, but it's a massive betrayal after he himself made the effort to bridge the gap between the Dummies and the Survivors. As such, no one trusts him or respects him from that point forward.
- Endearingly Dorky: He can be a very awkward boy sometimes, owing to him being Sara's age and in a very unfamiliar situation. Sara can even it take it upon herself to tease him occasionally.
- Expository Hairstyle Change: After killing the surviving Yabusame, his hair becomes messier.
- Gaining the Will to Kill: Initially rejected by Ranmaru's coping mechanism of refusing to take death seriously. After being shown his death multiple times, Midori's attempts to nudge him to attack his partner, being forced to accept that he's truly a doll made in a dead boy's image, having an idea planted by Maple that him and his partner could survive and watching Kurumada (potentially other dolls too) suffer fatal experiences, Ranmaru reaches a breaking point. He stops believing in the group's ability to escape and considers killing everyone to "win" the death game. Depending on the route chosen, he could back out of this idea and remain a loyal ally until the bitter end or he'll make things significantly worse.
- Handwraps of Awesome: Has these, as well as wraps around his entire torso.
- Heroic BSoD: He really doesn't take it well when he realizes he can take his hand off to replace with a steam-firing upgrade, fully confirming his status as a living doll. Logically, he knew it was true, but emotionally, this was what it took for it to really hit him.
- Holding Hands: Sara initiates this with him in order to open the Discussion Room, much to his embarrassment and confusion. This later gets spun into a darker context when, if Sou/Shin is alive in the route you're playing through, Ranmaru takes her hand again to stop her from being suffocated by her collar—temporarily sacrificing himself as "it" in Midori's game of tag.
- Hope Spot: If he makes it to the Banquet, his coffin winds up, luckily enough, one of the 'non-glowing' ones, seemingly leaving him out of any potential risk of dying the others have. Then, when it turns out Midori was in one of those, he's unfortunately certain to lose the ensuing coin toss.
- Irony: In Sou's route, despite being the one taking the most steps to work towards cooperation with both groups, he can be the one to betray both groups for his own selfish desires.
- Jerk with a Heart of Gold: Seems to be his default. Though he can be quite standoffish or snarky towards those who aren't Sara, and can sometimes do shady things, he's ultimately really not all that malicious. He gets better on Kanna's route, and much worse on Sou's.
- Jumping Off the Slippery Slope: All it takes is spending some time with Sara and a few words from her that Ranmaru can go from helping the survivors to actively trying to murder them.
- Kick the Dog: In the Logic route, he kills the remaining Yabusame sibling in order to win the game for Sara and himself.
- The Leader: Downplayed. While he doesn't take charge as much as he leads by example and attempts to keep his head in the game, both Your Turn To Die and Your Time To Shine have Ranmaru as the de facto leader of the group.
- Major Injury Underreaction: Doesn't seem to feel any pain at all during his death, something he remarks on even.
- Meaningful Name: "Kageyama" translates to "shadow mountain", and fittingly enough he hides the darkest personality of all the Dummies.
- Murder Is the Best Solution: If Sou Hiyori survives the second Main Game, Ranmaru eventually adopts this belief to save himself and Sara, even saying that he can kill any of the others except her. He shows signs of believing this on Kanna's route too, but he's kept fairly in control and the worst he does is knock others out from a misunderstanding.
- Oh, Crap!: If the attempt to disable Ranmaru's collar fails, Midori will promptly have the Murderer Game come to an end and kill Ranmaru for being "it". He's only given a few seconds notice before this happens, and he panics when he realizes he can't be saved- murderer or not.
- Pet the Dog: On Kanna's route, Ranmaru, completely unprompted from anyone, would try to download the Joe A.I. into himself simply to give Sara a version of her best friend back.
- Sarashi: His entire torso is bandaged up to his neck.
- Ship Tease: With Sara. This takes a decidedly horrifying turn should Sou be alive.
- Shut Up, Hannibal!: Destroys Sara's ASU-NARO consent form and tells Midori that they aren't going to succumb to his whims and that they'll free Keiji another way.
- Spanner in the Works: Unintentionally. He shocks and locks Keiji up due to a mixture of jealousy and unfounded suspicion that he might be a traitor. This causes the police officer to be absent for the time everyone is to be rounded up for the Banquet, causing his actions and whereabouts to be unknown. This, combined with Q-Taro's gambit, allowed Sara to defeat Midori once and for all.
- Team Killer: If Sou Hiyori survives the second Main Game, then Ranmaru ends up murdering whichever Yabusame was still alive in 3 1-B.
- Token Evil Teammate: In the Sou Route. He takes Mai's place as this after she sides with the survivors for real, killing the surviving Yabusame sibling and hindering them against Maple. Since the others don't have the equipment or the time to deal with him, he gets away with this until Midori kills him or the Banquet.
- Took a Level in Badass: In the Logic route he goes from being just another victim of the game to being an active schemer that can trick Sara, subdue Keiji and kill one of the Yabusame siblings. Heavily subverted in two different ways. If the collar minigame is failed, it'd take what would've been a badass transformation into a scene that's borderline comedic as he instantly reverts back to his regular design and blows up. And the second more unavoidable subversion is how he dies a pitiful anticlimactic death in the Banquet shortly after his character shift.
Hinako Mishuku
Hinako Mishuku

Click here to see the girl with black hair

- Brutal Honesty: She won't hesitate to insult or criticize anyone when she feels the need to, even calling them stupid when they act on their emotions rather than logic.
- Combat Sadomasochist: Seems to be, as shown in her action sprites—she can get rather...disturbingly cheerful expressions while attacking Obstructors, despite the fact that she mentions that all she wanted was to die in her First Trial. This turns out to be a hint that the Hinako from the First Trial and the Hinako the cast knows might not be the same person.
- The Cynic: The most distrustful and cynical Dummy of the group, openly criticizing Ranmaru and the other dolls for choosing to help the humans. She also spends a brief amount of time critiquing Sara's suggestion that her group and theirs are not diametrically opposed foes. Even when she chooses to cooperate, Hinako never dares to put anyone else's safety over her own. She outright uses a secret trick with cocoa to have her coffin be distinguishable from the rest.
- Death of a Child: Hinako is one of the youngest participants; she's also one of the first victims. Likewise, the imposter Hinako doesn't make it far into the Banquet before she's killed as well.
- Death Seeker: Admits to having been one to Ranger when she fails her First Trial, absolutely enraging the doll.
- Dull Eyes of Unhappiness: Her eyes are completely monochrome, with Exhausted Eye Bags.
- Exhausted Eye Bags: Much like Keiji, Hinako's eyes look dead and tired, which makes it amusing when they are paired up.
- The Fatalist: Seems to have this mindset, believing whatever happens, happens. That said, she still worries about her own life.
- Foreshadowing:
- An observant player may notice that Hinako is by far the most openly obtrusive of the Dummies, acting seemingly only in interest of obfuscating progress even after the others start working with the survivors. Sure enough, it turns out she's not who she says she is.
- A very observant player might notice that Hinako's collar is different than her fellow dummies; it's a collar that only the other human survivors have, which indicates to her not at all being the doll she's believed to be. Of course, considering Fake Reko also had a human collar, it's very easy to overlook.
- Gaining the Will to Kill: Subverted. Surprisingly enough, even though Hinako is an ASU-NARO agent given a similar task for murder, she could never go through with it. Not only is she paired with the most perceptive and distrustful man from the group of humans, but even the survivors' behavior start to wear down Hinako's grim beliefs. Hinako chooses to cooperate with the survivors despite it not benefiting herself or Midori at all, she could've left Keiji to be burned in a coffin but her actions and info make saving him possible.
- Gory Discretion Shot: She dies in the goriest way in the entire game, especially since she's the only fully-human character to suffer such a fate, but it's obscured from view by the coffin she's trapped in, and even the drill that kills her is completely clean by the time it's visible.
- Human All Along: Unfortunately for her, this is revealed when she's killed during the banquet.
- Impersonation-Exclusive Character: Because she technically has a connection to Alice, she is not made into a Dummy. The "Hinako" we meet is an imposter.
- Imposter Forgot One Detail: Going by her painting in the gallery, the real Hinako had black hair, but her impersonator's hair is pink.
- Killed Offscreen: We don't even see what killed her, or the details of her First Trial, aside from the fact that Ranger was there. This turns out to be a big clue.
- The Mole: Is actually an unnamed spy sent by ASU-NARO to impersonate the real Hinako Mishuku, who couldn't be revived due to her connection to Alice.
- No Good Deed Goes Unpunished: She becomes a lot more forthcoming, trusting and helpful throughout 3-1B despite working for ASU-NARO and meant to hinder them. For her efforts, she is suddenly and brutally killed by Meister and Midori. Though how much she was genuinely siding with them and how much she was simply The Mole is not revealed due to her dying rather suddenly.
- No Name Given: We never learn the name of Hinako's imposter, since we only learn there even is one after she's dead.
- Odd Friendship: Potentially one sided. It's implied Hinako has a soft spot toward Ranmaru more than anyone else. Despite heavily criticizing him, occasionally poking fun and faking her status as a doll this whole time, Ranmaru has shown to motivate her the most. When Ranmaru is tagged and on the verge of giving up, it moves Hinako enough to try and save him: revealing an important source of info she kept hidden the entire time. Alongside her sympathies for Ranmaru, when having to pair up she immediately chooses him to accompany her. She used a trick with her cocoa to not only make her coffin stand out in the Banquet, but actively went out of her way to do the same to Ranmaru's, making it a lot easier for him to survive far in the game.
- Psycho Pink: She has bright pink hair, is the youngest yet most cynical and uncooperative member of the dummies, and is very enthusiastic about violence.
- Troubling Unchildlike Behavior: Despite being one of the youngest participants, she not only accepted her demise but seemed to welcome it. On the flip side, she demonstrates disturbing enthusiasm for violence, which Gin remarks upon. The girl posing as Hinako is also a spy working for the organization that runs the death game, despite presumably being around the same age as the real Hinako.
- Vague Age: While she looks around Kanna's age, and the person she's impersonating is a middle schooler, her status as a spy for ASU-NARO has her actual age up in the air. Noticeably, despite everyone else getting their ages confirmed in the art book for Your Turn To Die, her age is left unknown and her personality even has her described as being 'adult-like'.
Naomichi Kurumada
Naomichi Kurumada

- Ain't Too Proud to Beg: When he sees Keiji with the spare Midori head and figures out he plans to kill the Floor Master with the information Kurumada gave him, he pleads with him not to do it, not for the sake of his own life, but for the sake of the Dummies' lives.
- Ambiguously Brown: The only dark-skinned member of the cast.
- Atrocious Alias: Apparently, he went by "The Convertible Of Destruction"; Anzu rightfully asks if he was bullied.
- Black Dude Dies First: He's the only one of the initial 20 to have dark skin. He was also one of the first 8 to die. He's always in the first coffin that's not revealed for the Banquet, and therefore potentially can die first.
- Blood Knight: He's extremely quick to resort to violence when the opportunity presents itself, and is the most eager to fight the Obstructors.
- Boxing Battler: He's a boxer, and he puts his skills to good use against the Obstructors.
- Character Development: He goes from one of the most stubbornly untrustworthy Dummies to being one of the most protective and selfless of them after he's spared of Maple's wrath.
- The Cynic: The second most skeptical and distrustful of the Dummies after Hinako.
- Determinator: His resolve is just as strong as Sara's herself, letting absolutely nothing keep him down. Should he die of his injuries just before the Banquet, Sou/Kanna and Sara will comment on how long he managed to last, saying he was long past his limits by the time he shut down.
- Dying Declaration of Hate: Made one to the captors as he was dying, saying he would kill all of them.
- The Gadfly: He enjoys riling up others by either giving them teasing and dismissive nicknames or outright messing with them for the sake of doing so.
- Gaining the Will to Kill: Subverted. Despite being a cynical man that originally wasn't against using and throwing people away for his own gain alongside being prone to bursts of violence, his inner humanity kept him from ever attacking his partner even when they're alone together often. Whether his partner is an innocent kid or a weak man full of malice, it doesn't make a difference to him. Most of the time he's bothered or shaken when people are breaking down or at risk of death. In the end Kurumada ends up being one of the most caring for both groups even if he has trouble showing it.
- Heroic Sacrifice: Subverted. He tries to separate from the group so he can get Maple to kill him, since the previous Obstructors were "satisfied" with only killing one Dummy and left the rest of the group alone afterwards. However, Kanna can convince him not to, and he never actually goes through with it either way.
- Hidden Heart of Gold: It's buried significantly deep down, but it's there. Case in point, he only starts acting kind after he's nearly killed and believes himself a dead man.
- Hot-Blooded: While he's fairly laid back, he makes no attempt to hide he's got a rather hot head and can make impulsive decisions.
- Irony:
- The papers that Sara finds list him as, statistically, the second most-likely person to survive the game. He's killed before he can even meet anyone else in the group.
- When he becomes kinder, he very much considers himself a dead man walking and becomes firmly convinced that he's not worth trying to keep alive over the other dolls. He can potentially be their Sole Survivor, and thus the only one to be potentially reactivated later, even after spending the entire second half of the chapter with a massive hole through him.
- Jerkass: He's easily one of the most abrasive people around, second to only Ranger. He's openly dismissive, sarcastic, and condescending. However, unlike Ranger, he does get nicer over time.
- Made of Iron: Though some of it comes from being a robot, Kurumada still manages to survive a wound none of the rest seem capable of when he gets a massive hole blown through his torso. He can die from it if the first Maple battle is failed, but even this is an extremely prolonged process that still has him last most of the chapter.
- Never the Selves Shall Meet: His unique information is that if a Floor Master meets their doppelganger, they'll die.
- Punny Name: "Kuruma" is Japanese for "car". Kurumada was known as "The Convertible Of Destruction" in the ring.
- Smarter Than You Look: He seems like a meathead upon first impressions, but you don't get to be the second likeliest to win the game by being stupid; he outranks people like even Keiji and Q-taro.
- Squashed Flat: His First Trial saw him having to somehow press a button before the walls between him crushed him to death. He just barely failed.
- Team Dad: He becomes pretty protective of the Dummies as the Death Game goes on, even if he chides or teases them at times.
- Too Dumb to Live: While he doesn't immediately die due to it (and completing the fight ensures he never does), he gets himself severely injured attempting to restrain Maple on the basis that since she has tentacles coming from her back, she can't possibly attack from the front. He gets a huge hole through his torso for his troubles.
- Torso with a View: Maple blows a giant hole in his chest. Unlike Alice (the other potential victim of such a fate) though, Naomichi manages to last an extremely impressive amount of time afterwards.
- What You Are in the Dark: To cement Kurumada's newfound kindness as genuine, he prioritizes the other dummies over himself. When Keiji meets him alone, he gives him the information that was previously missed, and when Keiji brings Midori's head in a plan to kill the Floor Master, he desperately and tearfully begs him not to, crawling towards the police officer in an attempt to stop him. In Kanna's route, he quietly attempts to sacrifice himself to Maple on his own to try and protect the others after being severely wounded. He only stops because the formerly like-minded Kanna convinces him it wouldn't solve anything.
Mai Tsurugi
Mai Tsurugi

- Beneath the Mask: As it turns out, Mai is not The Tease and The Cutie as she made herself out to be. In truth she's more the Genki Girl who's reasonably concerned about her situation and panics quite easily, though she's quite caring to her newly made friends.
- Body Horror: As the group learns during the Banquet, the reason her doll counterpart lacks the original Mai's gloves and her fingerprints can access files is because they're real human hands. Specifically, they're Midori's hands.
- Boom, Headshot!: Had to choose between two guns to fire at herself in her First Trial, and chose wrong.
- Crippling Overspecialization: Mai reveals in Your Time To Shine that she can make anything that's bread or pastry related, but that's where her expertise ends.
- Didn't Think This Through: Her suggestion during the library puzzle is to use the handheld fireworks that Gin found, which will set the entire library on fire and lead straight to a Non-Standard Game Over.
- Easily Forgiven: Beyond knocking her out and optionally chastising her, Q-Taro and the other survivors forgive her for her murder attempt on the former, though it's done so because they understand if their positions were flipped, they may have done the same thing.
- Evil Chef: She's the first one of the dolls to attempt to murder their partner, stabbing Q-taro and admitting she was always thinking of when to do it. That said, she's still far from evil, and very much Easily Forgiven due to the dolls being desperate to survive.
- Face Death with Dignity: Subverted painfully if she makes it to the Banquet and lasts long enough to know her life is in danger there. Should that occur, she'll go from bravely encouraging the others to take the risk to, when she knows she's doomed, panicking and begging Midori for her life to the last moment.
- The Fake Cutie: She seems fairly nice and adorable, keeping a chipper smile and squeeing at most things at the first opportunity, but the truth is she's probably the least stable of the Dummies.
- Gaining the Will to Kill: Due to her status as the most unstable of the Dummies, Mai is quick to gather her resolve to try and kill her own partner after being shown her own death. She takes advantage of opportunities the other dolls don't, managing to sneakily take the lava room puzzle's knife at some point in time under everyone's noses. Mai stabs deep in her partner's back, but is ultimately swayed to the humans' side. Unfortunately it's far too late at that point as she's the main reason Q-taro dies.
- Genki Girl: Her true personality: Upbeat, energetic and determined. When the difference in her earlier personality and the later one is noted, she swaps back, but by then it's clear it was merely a facade.
- Hero Killer: Ultimately caused Q-Taro's slow death, though she's already come to deeply regret the action long before it was shown to be a fatal wound, as it was done in a gambit to survive.
- Huge Guy, Tiny Girl: Even with her large hat, she doesn't even come up to Q-Taro's shoulders.
- In the Back: Attempts to kill Q-taro this way.
- Odd Friendship: She gets very close with Q-Taro across the course of 3-1. At first, this is a ruse for the sake of getting a chance to kill him, but it becomes extremely genuine after she's subdued and forgiven, the two working together with an extreme degree of closeness and trust to his dying moments and beyond.
- Red Herring Mole: 3-1 really likes to make you think that she, in particular, is something more than she lets on, being the first doll to outright act against her partner, her fingerprints strangely allowing access to files nobody else's could, and her conspicuous lack of the gloves seen in her First Trial, which all gets thrown back in her face should she live long enough to learn there's a human among the alleged dolls... Though, per the trope title, these all resolve in other ways.
- Redemption Earns Life: Possibly; like the rest, she has her opportunity to be killed off before the chapter's end, and can also die unceremoniously at the Banquet. The initial most antagonistic of the dolls, outright stabbing Q-Taro in what would result, over a prolonged period, in his death, after finding herself forgiven, she dedicates herself earnestly to trying to cooperate and escape together. In particular, she cooperates with Q-Taro on a plan to use his body to entrap and defeat Midori at the banquet, saving Gin's life and putting a permanent end to the bastard, even at the risk of a life she's terrified to lose should she be killed. Should she come out as the Sole Survivor of the dolls, she urges the others to reactivate her when they have a chance, feeling that she owes it to Q-Taro and those lost to live her life.
- Southpaw Advantage: Played with. Her First Trial suggests that the gun in her left hand was the one which would have ensured her life. Unfortunately for her, she picked the gun in her right.
- Sweet Baker: Is a baker, and has a bubbly, cheerful personality.
- The Tease: She likes to do this often, much to other's discomfort (especially Q-taro's) due to the tense situation they are in.
- Technicolor Eyes: Her eyes stand out not just due to their bright, amber hue, but with how the borders are darker than the rest, lacking visible pupils.
- Took a Level in Kindness: After seeing how she's Easily Forgiven by both Dummies and Humans alike after her murder attempt on Q-Taro, she becomes a lot more genuine as a person, dropping The Cutie and The Tease act entirely and acting more like a downplayed Genki Girl with honest empathy for her group.
Anzu Kinashi
Anzu Kinashi

- Beware the Silly Ones: She's a bit of a useless clown throughout chapter 3-1, but places sixth overall in terms of likelihood of victory.
- Big Eater: Kai's sidequest in Your Time To Shine reveals Anzu is a very hungry girl, constantly snacking on food that the Sunnies are supposed to be selling to their customers; likewise, it's very common to have Anzu be a judge of Kai's cooking.
- Butt-Monkey: Suffered through an especially gruesome and stressful First Trial, and died horribly when she couldn't figure out how to escape. Her distinctive hood was then stolen by Ranger. Later, in Chapter 3-1, she's the first potential victim of the new round. She's essentially volunteered to have the most important job of calming down Maple, and she ends up being specifically targeted by Midori when he can't choose Gin. And most damningly, the one most scared of her incoming demise.
- The Ditz: Her suggestions aren't much help at any point of the chapter she's introduced in.
- Forgetful Jones: Her Establishing Character Moment is forgetting the piece of exposition that she's supposed to tell the main cast.
- Gaining the Will to Kill: Subverted. Not only does her joke character status prevent her from being an effective or sneaky assassin but she doesn't even have the heart to do it from the very beginning. Anzu openly declares she can't kill any of the humans for being so nice, she never wanted anyone to die.
- Hope Spot: If she makes it to the Banquet, her coffin is so mangled that it's extremely identifiably her, and thus, neither Sara nor Midori has reason to target it. Then, when Midori is forced to waste a turn to grant Sara's 'wish,' this makes her the clear 'safest' choice he could make to kill.
- Impaled with Extreme Prejudice: Her First Trial involved being chained at the ankles to the floor, and when she failed, she was stuck from all sides with sharp objects and left to bleed out.
- Joke Character: Anzu's functionality is next to zero when it comes to solving puzzles, and many of her suggestions outright fail in execution. She may be a Lethal Joke Character given she's not at the bottom in terms of survival rates.
- The Load: Is completely useless in all of 3-1A's puzzles, with her contributions only wasting time if you go with them. This gets an exception in 3-1B if she's still alive to see it; she'll be pressed into taking on the role of calming Maple down in her first fight with the group and helps take electrical currents to save Ranmaru's life.
- Nice Guy: She's a little nervous and snarky, but she's very friendly to other Dummies and humans alike.
- Non-Ironic Clown: She has a side job as a clown, though she seems a bit insecure about it and immediately asks Sara if she thinks it's weird.
- Out of Focus: Compared to the other Dummies she falls under this trope. She doesn't get as much screen time and development as Ranmaru, Kurumada, and Mai. Her backstory doesn't get too much focus nor does she form a bond with a survivor like Hayasaka and his bond with Gin. Chapter 3-1B revealing the fake Hinako to be The Mole, makes this trope even stronger than originally before. That said, she does at least get a mini-episode focused on her backstory, even if it's probably the most comedic and least story-informative of the ones initially released.
- Replacement Goldfish: Has some elements of this for the surviving Yabusame sibling when she's paired up with them on the third floor.
- Undignified Death: No matter which way Anzu dies, her human self, her death in 3-1A or her death in 3-1B, she always goes out confused, scared, and begging for her life.
- The Unreveal: We never find out what her "unique info" for the survivors was supposed to be, because she forgot what it was.
- We Hardly Knew Ye: If you fail the first minigame in Chapter 3-1A, she dies at the end of the scene when the dolls are first met, mere minutes after being properly introduced. Subverted if she manages to survive, however.
- White Mask of Doom: Her clown mask looks remarkably like one.
Shunsuke Hayasaka
Shunsuke Hayasaka

- Beware the Nice Ones: A pretty affable guy, even perhaps a mild Butt-Monkey who winds up proving to be quite subservient very quickly, but interestingly enough, the fifth likeliest to win the game.
- Butt-Monkey: Is always targeted first by Obstructors, nearly gets killed in a reactivated trial, can get killed by books, and gets pushed around quite easily. Despite this, he can also potentially become the Sole Survivor of the dummies.
- Defiant to the End: Should he die in the Banquet, he'll keep his resolve, encouraging the others to save Gin, and dies a rather fearless death, which could not be said about all of his allies.
- Dying Declaration of Hate: Makes one in his Victim Video to both his captors and to Sara, promising to curse their names from hell.
- Easy Amnesia: Discussed, but ultimately subverted. When Sara tries to question Hayasaka about the Death Game, he tries to invoke this by pointing out that their captors likely wouldn't have let him keep any inside information his original self had. While this is definitely true to an extent, it's also very easy to tell that he still knows something. At the very least, he remembers what his own role in setting up the Death Game was.
- Extreme Doormat: He gets pushed around very easily, going with what most people tell him.
- Face Death with Dignity: Should he make it to the Banquet and last long enough to learn his life is in danger, he'll bravely declare that he's fine with gambling his life on a chance to finally kill Midori. Should this kill him, all he does is urge the others to keep Gin safe.
- Gaining the Will to Kill: Subverted. Even though Hayasaka was brought back as an assassin of sorts to backstab the human survivors, he never has the guts to go through with it. Especially when his partner is a child. As the chapter goes on, Hayasaka becomes more and more convinced to work with the humans directly.
- Nervous Wreck: Not to the extent of Nao, but Hayasaka is very easily rattled and flustered by things that happen around him, often fumbling when things go remotely wrong.
- Nice Guy: He's a very good-natured, generally helpful person who quickly takes to allying with the survivors for real.
- Pendulum of Death: His First Trial involved one of these; he didn't make it.
- Replacement Goldfish: Keiji implies that he's become this to Gin for Mishima, who had worked and bonded with him during the very first half-chapter of the game briefly.
- Small Role, Big Impact:
- Doesn't survive the first game and is only briefly seen via recording in Chapter 2-2, but he seems to know even more about Sara's mysterious greater part in this game than she herself does.
- 3-1 does reveal another major part he played: he provided ASU-NARO with the medical records for every player in the game, providing detailed information that likely allowed them to tailor all sorts of things to the cast.
- The Smart Guy: He's good with technology and knows how to collect medical information easily, and replaces Sou, should he be killed.
- Throw the Dog a Bone: Despite his tendency to get the short end of the stick when facing Obstructors, he is one of the three dolls who can survive the banquet.
- Took a Level in Badass: He becomes less of a pushover as time goes on, and ultimately can be one of the bravest survivors around, very confidently taking a stand against Midori, knowing full well it could mean his own life in the process.
- Weak-Willed: He's incredibly easy to push around, owing to his meek and nervous personality. Even Gin, a elementary student, is more assertive than him. Over the course of the Death Game, however, he grows to be more composed and confident. Should he get to the Banquet and survive long enough, he is the most composed and defiant in the face of death, which is the opposite of how he originally died.
- Wouldn't Hurt a Child: Heavily implied. Even before the Dummies true roles are revealed, Hayasaka seems nervous at the fact his partner is a child. Even when the truth is exposed, he regretfully and calmly stops Gin from trying to get involved. He later expresses relief that he never hurt Gin.
Other Players
Kugie Kizuchi
Kugie Kizuchi

- Big Sister Bully: Used to pick on Kanna after her parents adopted her. Even when they reconciled, she still blamed Kanna for it, claiming that her acting cheery creeped her out.
- Big Sister Instinct: She learns to be protective of her sister after she believes that she was being bullied (the "bully" in question was actually trying to cheer her up because of how Kugie treated her), and she prioritizes Kanna's safety over her own.
- Bury Your Gays: Kanna confirms in Your Time to Shine that Kugie is attracted to women. Kugie didn't even manage to survive the First Trial and is one of only two first trial victims not to get brought back as a doll.
- Jerk with a Heart of Gold: She was apparently able to be quite mean to her younger sister sometimes, but ultimately did care about and defend her from others. During the First Trial, the same type as Joe and Sara's, she even freed her before saving herself.
- Not Quite the Right Thing: It's reasonably likely that, had she freed herself first, there was a likely possibility that she could have saved Kanna as well as herself. Choosing to save Kanna first left the younger girl far too terrified to save Kugie in time.
- Relationship Reveal: Kanna mentions to Mishima in the side game that her older sister was asked out by a kind-looking adult woman and was only going to reject her if Kanna herself had objections.
- Satellite Character: Gets the least focus and characterization out of all the Death Game participants and mostly just exists as part of Kanna's backstory. What little we do know about her is mostly related to her relationship with Kanna. Justified since she didn't make it past the First Trial and none of the other participants knew her beforehand apart from Kanna.
- Straight Gay: It's never brought up in the Main Game, but Your Time To Shine confirms that she's attracted to women.
- The Unchosen One: Along with Nao, Joe and Kai, Kugie was never supposed to make it past the First Trial, let alone make it to the Main Game, and of the four, she's the only one who didn't.
- Younger Than They Look: She seems to be a young adult woman, with Kanna's comment about getting a confession from an adult woman seemingly like they were close in age. Turns out she's sixteen at the oldest, making her one of the youngest participants overall.
Megumi Sasahara
Megumi Sasahara

- Ain't Too Proud to Beg: When she's being crushed by chains, she begs Keiji to press the button needed to save her. He refuses, believing that settling his score with her will be the only way to ease his hallucinations.
- Ambiguous Situation:
- It's currently unknown why she made the deal to get Keiji off the hook for the shooting he caused, with Keiji implying that it left him with a debt to her, while his flashback suggested she had personal fondness for him of some kind. 3-1, meanwhile, lends greater credence to her poor character by showing her regarded with fear by the rest of the police force, firing anyone that attempted to expose a darkness in the police.
- Chapter 3-1B opens with a flashback to a conversation she had with Keiji, revealing that she became a cop because she was "looking for something". Whatever it was (or if she ever found it) hasn't been revealed.
- Asshole Victim: Downplayed. She's the only one of the participants to fit this trope, being a corrupt cop who stood to blackmail Keiji while he was on the police force. However, leaving her to die doesn't bring Keiji any closure. Sara and Nao are also visibly horrified when they see her victim video, and in the second main game, at least two group members vote for Keiji to die following the revelation that he deliberately got her killed.
- Broken Pedestal: To Keiji, having made a backroom deal to completely cover up his shooting of a person. This was enough of a blow that, when they reunited for the game, he allowed her to die.
- Dirty Cop: A detective who made shady dealings to protect her subordinate. Though if 3-1 is any indication, Keiji was hardly anything special. She was always used to viciously corrupt dealings.
- The Dreaded: A younger Keiji was warned at the station not to mess with her.
- Fair Cop: For a police inspector implied to have spent years on the force, she's rather fresh-faced, youthful and easy on the eyes, A pity her beauty did not match her integrity.
- Satellite Character: She is a Posthumous Character who isn't revived in Chapter 3, and her plot relevance revolves entirely around her role in Keiji's backstory.