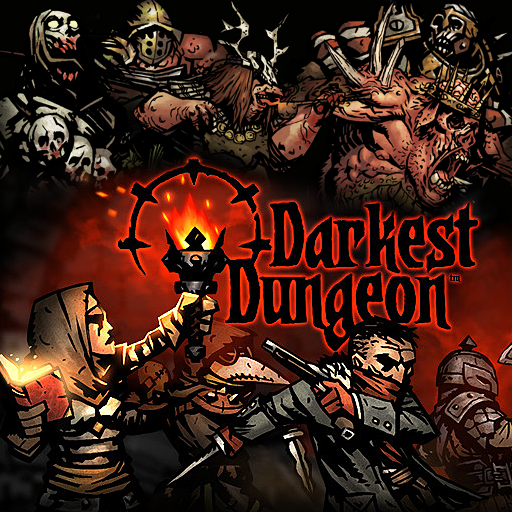
Darkest Dungeon is a challenging Gothic Horror Dungeon Crawling RPG about the stresses of dungeon crawling, developed by Red Hook Studios. You are the heir of a former noble family, damned due to the actions of a hedonistic forebear who spent the family fortune excavating an ancient portal underneath the family estate and inadvertently releasing an untold number of Eldritch Abominations. Your goal is to drive back these horrors and redeem the family name.
You will send out teams of recruited heroes on a perilous side-scrolling descent, dealing with a prodigious number of threats to their bodily health, and worse, a relentless assault on their mental fortitude! Five hundred feet below the earth you will not only fight unimaginable foes, but famine, disease, and the stress of the ever-encroaching dark. Darkest Dungeon focuses on the humanity and psychological vulnerability of the heroes and asks: What emotional toll does a life of adventure take?
Visit their website here.![]() On February 3, 2015, the Steam version was released as an Early Access title. The game was fully released on January 19, 2016 for Microsoft Windows and OS X computers, with a Linux release on April 26th, 2016, and a release for PlayStation 4 and Play Station Vita consoles on September 27th, 2016. A paid DLC expansion named The Crimson Court was released on June 19th, 2017 for computers, and on August 22nd, 2017 for consoles. A second DLC, named The Color of Madness, was released on June 19th, 2018. The iPad version was released on August 24th, 2017, and The Crimson Court is scheduled to be released later. A Nintendo Switch version was released on January 18th, 2018.
On February 3, 2015, the Steam version was released as an Early Access title. The game was fully released on January 19, 2016 for Microsoft Windows and OS X computers, with a Linux release on April 26th, 2016, and a release for PlayStation 4 and Play Station Vita consoles on September 27th, 2016. A paid DLC expansion named The Crimson Court was released on June 19th, 2017 for computers, and on August 22nd, 2017 for consoles. A second DLC, named The Color of Madness, was released on June 19th, 2018. The iPad version was released on August 24th, 2017, and The Crimson Court is scheduled to be released later. A Nintendo Switch version was released on January 18th, 2018.
On April 2020 they announced a new free DLC pack for the game, The Butcher's Circus, which features a new biome and player vs player combat. It was released on May 28, 2020.
The sequel, Darkest Dungeon II, was announced![]() in February 2019. After four years in Early Access on the Epic Games Store, it finally released on Steam on May 8th, 2023.
in February 2019. After four years in Early Access on the Epic Games Store, it finally released on Steam on May 8th, 2023.
Mythic Games held a Kickstarter campaign to fund![]() Darkest Dungeon: The Board Game miniature game in late 2020.
Darkest Dungeon: The Board Game miniature game in late 2020.
Not to be confused with Dark Dungeons, the original comic book by Jack Chick and its film adaptation.
In time, you will know the tragic extent of these tropes:
- 24-Hour Armor: Due to the limitation of sprites, no character changes their outfit. This means the Crusader, Leper, Arbalest, Man-at-Arms and Bounty Hunter never take off their armor.
- Absurdly Spacious Sewer: The Warrens; filthy, abandoned caves filled with corpses, sinister altars and etchings, and literal piles of ancient, dried filth. Worse, when the light gets low, you can sometimes hear squealing in the distance...
- Achievement Mockery: There are many achievements for losing heroes under certain circumstances.
- To begin, there's an achievement each for losing a hero, losing a Level 6 hero, having one succumb to a heart attack, getting a Total Party Kill, and a Total Party Kill to a boss.
- You can lose heroes to hazards outside combat. This includes hunger, traps, and choosing to clear obstacles by hand. There are achievements for those too, and often they require heroes at Death's Door outside combat (an already precarious position) to occur.
- An achievement exists for losing a hero to a very weak Maggot.
- An achievement exists for losing a hero to Wilbur. The Swine King himself can deliver very powerful hits that can instantly put your heroes at Death's Door, followed by Wilbur's squealing landing a Deathblow to add insult to injury.
- The Crimson Curse DLC adds a couple more achievements for ways your heroes can die. One such achievement involves a hero with the Crimson Curse killing a teammate.
- Action Bomb:
- The "thrall" enemies in The Cove dungeon make one standard attack, but on their second turn, they explode, hitting all party members for heavy damage.
- The first phase of "The Sleeper" in the Color of Madness DLC summons and grows exploding crystals that deal heavy damage and apply status effects.
- Adam Smith Hates Your Guts: All town services rise in price as heroes level up. For some services, an increase in price makes sense (for instance, the blacksmith charging more to make a fancier weapon). For others, less so, such as the tavern and abbey, especially the abbey's "cloister" service.
- A.I. Roulette: In lower-level dungeons, enemies use random attacks on random characters. But enemies in higher-tier dungeons start to break away from this trope and begin to prioritize heavily injured or highly-stressed party members.
- The Alcoholic: A hero can become afflicted with the "Dipsomania" or "Tippler" quirks. "Tippler" forces them to only reduce their stress by drinking at the tavern and can be randomly acquired by heroes spending time at the bar. "Dipsomania" can force an interaction with curios that contain anything drinkable (Yes, the hero is so desperate for a drink that they'll drink from a tide pool in the vain hope that it might contain alcohol).
- Alcohol-Induced Idiocy: A random effect of drinking at the tavern makes a hero lose a trinket.
- All Deaths Final: There's no resurrection magic save for a very rare town event that revives one dead character. If your favorite hero that you've invested lots of money in dies, that's it.
- All There in the Manual: There are several hints about the heroes' pasts in-game, but more backstory on each hero can be found in short comics available to read on the game's website
 .
. - Amazon Brigade: Due to each actually being a single specific character in-lore, each hero class is either Always Male or Always Female. Beside the obvious (and ill-advised) solution of a monoclass party, you can create a relatively balanced women-only party by combining an Arbalest, a Hellion, a Grave Robber, a Vestal, and/or a Plague Doctor. The game will even acknowledge you've done so with the party name "The Femme Fatales" or "Valkyries".
- Ambidextrous Sprite: The game generally averts this by always showing the party's traversal of corridors as walking from left to right — trying to walk left makes the characters walk backwards instead of turning around. However, the game does slip up in two places:
- When the Siren mind-controls one of your characters, they are moved to her side of the battlefield and turn to face the party. Their battle sprite is simply mirrored, although the boss fight will probably distract you from noticing that.
- Each character has one sprite showing them sitting by the campfire, slightly from the side. To create an illusion that characters are sitting in a circle, sprites on the right side of the campfire are mirrored. It's usually very hard to actually notice, since the characters are resting and seldom doing something that would ex. show them using their dominant hands, but it does become slightly eerie when you have two characters of the same class sitting opposite on the opposite sides — they'll appear as perfect mirrors of each other. And it's glaringly obvious in the case of the Man-at-Arms, since his eyepatch switches eyes.
- Ambiguous Ending: Given the Through the Eyes of Madness and Unreliable Narrator elements of the game, nothing is ever entirely clear. As the game points out before the final battle begins, the Heart is a deceptive monster, and the scene where the Heir is implied to kill themselves could just as easily be one of their forebears, so there's at least some question if the Heart of Darkness really will inevitably return or the Heir was the one who killed themselves. It doesn't help that the Transcendent Terror and its line, "Time — an endless cycle! Ia! Iaaa!" all but states outright that the entire estate is trapped in an endless loop.
- American Gothic Couple: The dour man with his pitchfork and daughter appear during the random "Bumper Crop" event in the Hamlet, standing in the center of town along with their harvest.
- Anachronism Stew: 14th century crusaders, knights, crossbow archers, and flagellant monks stand shoulder-to-shoulder with 17th century highway robbers and plague doctors, and clothing fashions run the gamut from early medieval to the 18th century. The nature of the Hamlet may have something to do with this.
- Anti-Frustration Features: Despite having several elements from roguelikes, the game still throws a few lines of mercy to the player.
- Although All Deaths Final is largely in place, your heroes hitting 0 HP isn't immediate death. Instead, they are at Death's Door, where the next instance of damage has a chance of dealing a death blow to them and killing them for good. Any amount of healing will lift Death's Door.
- Should your hero(es) die, you have the opportunity to scavenge their trinkets if you win the fight. You still need the inventory space to carry them back to the Hamlet. Boss trophy trinkets can never be lost — if a hero dies while holding it and you can't retrieve it, they will automatically return to your trinket inventory when you return to the Hamlet.
- If you lose either (or both) of your heroes in the tutorial, worry not — the game will hand you replacements (in addition to the healers) when you reach the Hamlet so that you will have a full party for your first proper expedition.
- Heroes who have finished a mission in the Darkest Dungeon will refuse to enter it again. However, they will not take space on your roster, leaving you with extra space to train up another team without forcing you to delete them. If you take those heroes on normal expeditions, the team that accompanies them gets a Resolve experience bonus so you can quickly train up new members for the next foray.
- If you disagree with some difficulty features, you can always opt to turn them off in the menu while in town. Your only penalty is losing the "Strict" achievement for that run. This ability is not available on Stygian or Bloodmoon.
- Attacks that both harm the enemy and buff your hero will still provide the buff even if the attack misses.
- The game doesn't give you any hints as to which inventory items interact (be it positively or negatively) with which curio. However, once you've tried a specific item on a specific curio, the game will put a little icon next to the item when you interact with that curio moving forward. As a result, you don't have to remember that, say, a torch does nothing on coral, while a torch on a stack of books will shoot your stress way up.
- Anti-Grinding:
- Dungeons have three different difficulty levels (1, 3, and 5), which correspond roughly to a difficulty intended to match the stats of a party of the same average level. To avoid the player gaining easy experience, estate items, and money by farming low-level dungeons over and over with an overpowered party, a level 3-4 hero will refuse to venture inside a level 1 dungeon, and a level 5-6 hero will only accept entering a level 5 dungeon. This can cause serious problems if the early dungeon bosses are not killed in a reasonable timeframe — if all your heroes are level 3 or above and you don't have any space in your roster, the only way to progress in the game is to dismiss some of your higher-level characters so you can recruit more cannon fodder to try and do it before they too outlevel the boss! The only ways around this are playing on Radiant mode, which allows heroes up to level 4 to enter Apprentice level expeditions and anyone of any level to go on a Veteran level mission, and the Helping Hand town event that completely removes level restrictions for one dungeon foray.
- During early access, torchless runs were quite popular, as with the right party composition, the additional treasures gained outweighed any actual risks. The developers responded by introducing a small chance, whenever the party walks in total darkness, that one of the Superbosses randomly appears and attacks the expedition.
- Level design discourages the player from picking too many fights or loitering in dungeons. A completed quest will always give the same amount of resolve XP regardless of how many enemies the heroes fought, and simply walking around the dungeon causes gradual stress buildup, wears down the torch, and may trigger more hunger checks. The temptation of more loot becomes the remaining factor to convince a player to stay in a dungeon, and there's only so much loot that the player can carry.
- Anti-Hero: Assuming their names are not just window dressing, the Highwayman and the Grave Robber will no doubt have done some less than pleasant things in the past. What's more, just about every character can become one through negative afflictions, assuming they weren't in the first place.
- With the release of the backstory comic for the Highwayman, he's not only this, but The Atoner as well due to accidentally murdering a woman and her son during a robbery. It is shown in the other comics that several other characters have done unsavory things in their pasts as well: no one comes to the Hamlet a saint.
- The achievement for bringing Dismas and Reynauld (the initial Highwayman and Crusader) on the final mission to the Darkest Dungeon is "On The Old Road We Found Redemption", implying that both the thief and the righteous warrior have secret, unsavory pasts they are trying to atone for.
- With the release of the backstory comic
- Antidote Effect: Because of the Inventory Management Puzzle and the secondary use of basic supply items to "unlock" curios, Darkest Dungeon takes the Antidote Effect to new levels. You'll be tempted to take an character who can cure ailments like a Plague Doctor to remove your need for Bandages and Antivenom, but you'll frequently end up in situations where that character is not available, so there's also a reason to have a good stock of both on you. This factors into a Sadistic Choice: Would you save the ailment-curing items for combat, would you use them on curios, or would you discard them to make room for loot?Ancestor: Packs laden with loot are often short on supplies…
- Apocalypse Cult: The Cultist enemies. Both vicious berserkers fighting for the old gods and mages trying to break your characters' will while summoning tentacles to mess up your unit order.
- Apocalypse How: The opening of the portal seems to be a Regional Disruption. While the spreading of corruption is wreaking havoc on the area surrounding the manor, there's no evidence to suggest that it has spread out beyond that. However, the way the ancestor speaks about it, there is a potential for a much greater-scale catastrophe if it is not contained quickly, possibly being a Planetary Extinction of humanity or a Physical Planetary Annihilation.
- Apocalyptic Log: Two kinds, accessed by visiting the Ancestor's statue.
- The Ancestor's memoirs that play when you start a boss mission. There's a third of each memoir for each level (one for Apprentice, one for Veteran, and one for Champion).
- An after-release update added journal pages that you can find in curios or after battles. Mostly they detail the thoughts of someone from a doomed expedition, or backstory for a certain class. You can read it from the inventory, and if you finish the mission with it in there, you can read it at the Hamlet any time you like.
- April Fools' Day: On April 1st 2020, they announced a new DLC pack with copious amounts of Stylistic Suck. Subverted the following day, with the proper announcement of The Butcher's Circus.
- Arbitrary Gun Power: The Highwayman's or any of the Brigands' guns take hit points instead of outright killing and are actually weaker than some melee weapons to balance their longer range.
- Arbitrary Headcount Limit: No more than four heroes at a time in a dungeon. Also, the number of heroes coming to be hired and the total number of heroes you can have in the town are determined by the upgrades to the stage coach. With all the upgrades, the roster normally has a maximum size of 28; playing on the easiest difficulty adds an extra 2 slots, while having the Shieldbreaker DLC adds another.
- Arc Symbol: An arc (pun intended) with five evenly placed lines on it, used to represent stress in the game. It also appears on the game's logo, smeared on walls, on the gates on the Weald, on the crests collected as loot (thus being part of the Estate's coat of arms), on the Necromancer's robe collar, as decoration above the cultists' helmets in the same fashion as the symbol appears on your heroes' heads when they get stressed, constantly in the background and in the artwork, and in many, many other places, including Vvulf's gigantic shield. It is as if whatever this symbol represents had gnawed its way into reality. Or perhaps, as you eventually discover, the other way around is more accurate…
- Arc Words: "Ruin has come to our family". They're the first and last spoken words of the game, firstly as the opening to the Ancestor's letter begging you to return home and right his innumerable wrongs, and lastly as a grim condemnation that mankind is doomed to a Vicious Cycle due to the nature of the Heart as both our progenitor and our inevitable destroyer.
- Armor-Piercing Attack: The Bleed and Blight damage effects are not affected by the protection statistic. Several attacks, like the Shieldbreaker's Pierce or the Grave Robber's Pick to the Face, also ignore enemy protection.
- Artificial Insolence: Various factors will cause your heroes to act unpredictably and can endanger your run. Making decisions to mitigate this trope makes up part of the challenge.
- When your units' Stress hits 100 they may become Afflicted, which drastically changes their behavior in and out of battle. Paranoid ones may refuse to accept buffs or healing, while Selfish ones may treat only themselves. Masochistic ones may jump out of formation or goad the enemies to attack them, while Abusive ones will insult or even attack their companions. The Flagellant has his own unique Affliction, Rapturous, and while he gets a few buffs with that he also goes completely crazy and may act and attack at random.
- High-level heroes will, by default, refuse to enter low-level dungeons, deeming those quests as "beneath them".
- Several negative quirks on your heroes will affect their behavior in town or during your journey. Quirks like Kleptomaniac, Curious, Egomania, or Dipsomania can cause the hero to interact with certain curios as soon as you encounter them, without using any item that would make it safe to interact. Quirks like Faithless, Known Cheat, or Witness will prevent them from using certain Stress relief facilities while in town.
- Artificial Stupidity: While the AI tries to prioritise useful moves (at least at higher difficulties), the game's mechanics are complex enough that it still sometimes ends up undermining its own actions; e.g. pulling a hero to the front and then pushing them back to their original position on the next move.
- Artistic License – Medicine:
- Your heroes can contract rabies. It is randomly contracted when being hit by a rabid dog, its effects (more damage inflicted, lower accuracy rating) are shown immediately, it won't kill the character by itself no matter how long it stays uncured, and can be cured at any time. In real life, rabies manifests itself several weeks after receiving an infected wound (the virus must reach the brain after travelling along the nerves), doesn't necessarily turn you into a berserker, kills you after a couple of weeks, and can't be cured when the symptoms have appeared.
- You can also catch hemophilia from having a Swine vomit on you, or syphilis from
 examining an animal corpse, investigating a shallow grave, or even studying a weird bit of architecture. Or catch the plague from reading a book.
 - Generally speaking, diseases don't ever progress or get worse, and they're not contagious outside of the Crimson Curse.
- Ascended Fanboy: To recognize his contribution to the game's growing popularity, Youtuber Baertaffy, who had been playing the game on his YouTube channel from its earliest alpha to well past its release, was called upon to voice several of the roles in the Crimson Court.
- Ascended Meme: Red Hook Studios took notice of the "Dankest Dungeon" meme and made a Twitch notification spoken by Wayne June himself in their release day Twitch notification pack for a donation of 4 dollars and 20 cents in American currency.
- Attack Failure Chance: The percentage for an attack to land is determined by a character's Accuracy versus an enemy's Dodge chance, which can be increased or decreased by a variety of buffs, debuffs and equipment throughout the game. Normally an attack has about a 90 or 95 percent chance to hit, but if that chance is higher or lower due to influencing factors then it will be displayed instead.
- Auto-Save: The game automatically saves often, denying a player the possibility of simply reloading his save if an expedition goes wrong.
- Downplayed on the Xbox One version, where one method of turning the console off allows you to reset a battle.
- Ax-Crazy: Heroes with the Masochistic affliction become obsessed with throwing themselves at the monsters in the dungeon, rejecting offers of help from their allies and reveling in the pain and horror that surrounds them to the point of stabbing themselves on occasion.
- Back from the Brink: You begin the game lost and with only two heroes to control, and the Hamlet is nearly in ruin. It is up to you to bring back your estate to its full condition.
- Badass Boast:
- Heroes that become virtuous have a tendency to make them, sometimes even inspiring the other party members and giving them a buff."You will survive. I judge it so."
- The "Terror and Madness" trailer follows a party of heroes who enter in a dungeon while boasting "We are the flame, and the darkness fears us". It… doesn't turn out very well for them. You can potentially subvert this in-game if you form the same party (which is even named "The Holy Flame") and make sure they all return to the hamlet alive and victorious.
- Heroes that become virtuous have a tendency to make them, sometimes even inspiring the other party members and giving them a buff.
- Bag of Sharing: During an expedition, the four heroes share an inventory. The slots are few, creating a trade-off between the need to take that one treasure to finance future expeditions or hold on to potentially needed supplies for the expedition.
- Balance Buff: The game is regularly tweaked. The June 2018 patch, for example, gave substantial bonuses to critical hits.
- Ballistic Bone: Ghouls can use Skull Toss at backline heroes. It's a triple whammy: it hurts a lot, stresses the target out, and has a considerable stun chance. A Critical Hit can turn a decently-faring expedition into a retreat.
- Barrier Maiden: Now that the Ancestor has awoken the monstrosity beneath the manor, after it's defeated and sent back through the gate, they are forced to keep watch over it, lest it break out again and the world not be so fortunate to have an Heir that came to the manor to reclaim their heritage.
- Bayonet Ya: Bone arbalests wield crossbows equipped with bayonets. They tend to be placed in the back lines at the beginning of a fight, but if they find themselves closer to the front row, they'll attack the heroes with bayonets instead of shooting bolts, dealing minor damage and moving themselves back.
- The Beastmaster: The Houndmaster, quite suitably, fights with a large dog.
- Bedlam House: Subverted Trope — one of the nine buildings in the hamlet is a Sanitarium, where you can spend a week and a big chunk of gold getting rid of diseases and personality quirks. Despite a few dialogue lines of a bit of a fearful nature from looking at what it has in store for them, heroes that get sent there will simply lose the targeted quirk/disease as advertised. The quirk and disease treatment were later separated into two different wards in an update. The medical ward isn't even regarded with the slightest bit of fear (apart from the hero's somewhat dark joke about putting faith in gnarled, warty hands or questioning why a knife is needed to treat a rash).
- Beef Gate: On the very entrance of the final dungeon's first stage, you'll encounter two rapturous cultists who will endlessly heal and guard each other (without actually attacking your party), making it impossible to progress forward for underleveled heroes. (Their non-aggressiveness isn't much consolation, since one hero will die while retreating from the Darkest Dungeon.)
- Beneath the Earth: You explore both the elaborate tunnel system of the Warrens and the flooded caverns of the Cove.
- The Berserker: Aside from the Hellion, any hero can become a minor example of this thanks to the "Rabies" quirk, which increases damage done by 20% while inflicting a massive accuracy penalty.
- Berserk Button: You might assume that targeting Wilbur, the Swine Prince's Target Spotter, is a good idea. It really isn't - injuring him will cause his bigger friend to immediately retaliate (even ignoring Stuns) with a powerful party-wide attack. Actually killing Wilbur will prompt the Swine Prince to absolutely flip his shit, fly into an Unstoppable Rage, and begin using this party-wide attack every turn until either a Total Party Kill occurs or he goes down.
- Blessed with Suck:
- If a character would gain a sixth positive quirk, it will instead replace one random existing quirk on that character. It's entirely possible to have a useful combat quirk be replaced by a situational dungeon quirk, or a boon that's completely irrelevant to the character.
- A shorter quest is typically easier, as you have less to do to fulfill the main objective. However, a Short quest also means you get no firewood and don't get to set up camp for buffs or stress relief. This works against you in a couple of boss missions.
- Big Eater:
- Due to the game's mechanics, it's possible to bloat a character with food to get as much food healing as possible, only to have the character complain that he's getting hungry just seconds later.
- Certain diseases or trinkets can cause a character to consume more food than they normally would.
- Bittersweet Ending: There's two lighter ways to interpret the Downer Ending below, if you believe the Heart of Darkness is lying through its teeth simply because it lost.
- A: You realize that nothing can stop the Heart from awakening, but by killing yourself, you trap it in a Stable Time Loop to prevent it from ever escaping.
- B: In New Game Plus, you meet a ghost who mentions how History Repeats, which implies that this is the ghost of the first heir and that you're now controlling a second heir taking up the first heir's duty to guard against the Heart, with their spirit staying to help guide you.
- The second game more or less turns the ending of the first into this rather than an outright Downer Ending. The Heart Of Darkness might not truly be ever destroyed, being either the creator of humanity or a personification of one of their worst flaws, the Hamlet is (probably) doomed to rot in spite of the Heir best effort, who may or may not have ended their own life, as the truth about his ancestor and the history of the land was ultimately too much to bear and the world will soon turn to shit as revealed in the sequel, on top of who knows how many people died or went mad to achieve this "victory"? But at the same time, the Heart of Darkness was undoubtedly defeated, the apocalypse delayed until humanity is ready again to face what lurks beneath the manor and many of the Heroes ultimately survived to carry on the Flame and continue the good fight against the darkness.
- Bloody Bowels of Hell: The Darkest Dungeon itself isn't quite hell, but it's close enough, and there certainly is a lot of blood down there.
- Body Armor as Hit Points: None of the hero classes have any inherent PROT; heavily armoured classes like Crusader and Leper have more hit points instead.
- Body Horror:
- Several of the enemies invoke this. It's no wonder that the heroes’ sanity lowers so quickly.
- You witness brief flashes of this occurring to everyone in the Hamlet once the first floor of the Darkest Dungeon has been breached.
- The creatures in the Darkest Dungeon itself include unlucky, deliriously happy humans afflicted by eye-studded tumors and cultists given body-altering transformations. The Cultist Priests have been so extensively transformed that the game designates them as Beasts instead of Humans. As you progress deeper, you begin to encounter more parts of the gestating Eldritch Abomination as you face polyps, cysts, and bits of its immune system.
- Book Burning: When inspecting the pile of books curio, you can use a torch to burn the books. Do not do it, as it will fill your entire stress meter, ensuring a resolve check that might ruin the expedition.
- Book Ends:
- The very first line of the game, "Ruin has come to our family", is also the very last one. The opening cutscene itself is like this, since the second line, "You remember our venerable house, opulent and imperial", is also used as one of the last lines of the opening cutscene for contrast.
- One achievement, "On the old road, we found redemption", encourages having Dismas the Highwayman and Reynauld the Crusader, the two very first characters you have, survive to the end of the game and participate in the final battle. They're also the first characters you get in a New Game Plus, as part of the Vicious Cycle.
- A more bitter one in the party composition: at the very beginning of the game, you will have only two heroes in your party. Barring the extremely good plays required to skip the final boss' One-Hit Kill attacks, you will finish the game with two at most. Bonus points if they are the aforementioned Reynauld and Dismas.
- Boring, but Practical:
- Your “go-to” teams can become this. When all other teams find ways to get slaughtered, the ones that remain are the ones that get the job done.
- In red-level dungeons, simply hitting and not being hit tends to dictate a lot of the dungeon run’s success. A simple feather stone + accuracy boost trinket combination tends to trump even some of the rarest and most advanced gear in the game.
- In some situations, a low-rarity trinket is more valuable than a rare one due to the lack of any drawback it imposes on a character.
- Effects that improve your scouting chance have little effect on the flow of battle, but getting additional scouting prompts goes a long way in ensuring a successful expedition, because you get to plan for a simpler route, anticipate encounters, disarm traps, and ration your supplies better.
- Any camping skill that prevents ambushes. This really should speak for itself.
- Boss Corridor: During the last expedition, you walk through a twisted hallway which resembles the void of the cosmos while the Ancestor's ghost himself (maybe) confronts your party.
- Break the Badass:
- If you don't have ways to keep your heroes' Stress in check, expect this to happen on a regular basis. Even your strongest warriors are susceptible to fear, paranoia, insanity, hatred, hopelessness, masochism, and selfishness if they reach the breaking point; some of the monsters will spend their turns and sacrifice their lives just to screw your party's brains, and it works.
- The Darkest Dungeon itself does this to your heroes to a greater extent. The ones who succeed on their expeditions are so traumatized that they will refuse to ever enter the Dungeon again. Other dungeons are still fair game, just not that one. On Radiant difficulty, however, this is downplayed — heroes can re-enter the Darkest Dungeon, but take a major stress hit immediately on entry and a substantial drop in their chance of becoming virtuous.
- Breeding Slave: The Siren is explicitly stated to be "the queen and the slave" of the Pelagics, and was once a village maiden who the Ancestor handed over to the Pelagics to stop her from stalking him. Presumably, she is a queen in the same sense as a queen ant or queen bee — her main function is to give birth to more Pelagics. And given that all the other Pelagics we see are male, you can see where this is going...
- Broke Your Arm Punching Out Cthulhu:
- It is a possibility in this game. You reach the end-boss for the particular dungeon or even accomplish the dungeon objective, but at the cost of your party, or be afflicted with some insanity. Very much the case in the ending. If what the Ancestor says is true, history is damned to repeat and render your sacrifices meaningless.
- This is 99% enforced by the final boss, if you reach it with more than two living heroes. It will always use its Come Unto Your Maker attack to force you to choose which of your heroes bites it, leaving only two alive at best when it finally goes down unless you use an extremely specific strategy to One-Hit Kill it before it can perform this move.
- Brown Note: This game's dark, eldritch settings have many sanity stressors. Preserving sanity against stress effects is a major game mechanic.
- Brown Note Being: The player class "Abomination" causes stress on other characters witnessing his transformation, whether he wants that or not. Bosses like the Shambler cause mental stress damage just by existing, and others, like the shrieker crows, inherently cause damage through senses such as sound.
- Bunny-Ears Lawyer: The developers have stated that it's intended for all of your heroes to be flawed in some way by their traits rather than Min-Maxing being the standard method of procedure. As your heroes are extremely liable to get even more quirks and afflictions as they survive and gain experience, it seems like the game is probably set to render all high-level characters to fit this trope in some way.
- Came Back Wrong: A rare town event can allow you to resurrect one hero (out of three, chosen randomly), letting you recover a lost favorite. However, while their Resolve level is intact, they come back with all skills and equipment upgrades reset to level 1 and may even have a Disease on top.
- Cannon Fodder: The level 0 heroes that arrive on the stagecoach every week can be this if you wish — you can send them in with no supplies, training, or equipment upgrades just to grab as much loot as they can before fleeing. Even if they succeed in a mission, chances are they'll be so stressed and psychologically damaged that it's better to just dismiss them and recruit a new set than treat them afterwards.
- Cartoon Bomb: Historically accurate for at least some part of the eras which inspire the game's setting, brigand incursion boss Vvulf employs these as his main means of inflicting damage.
- Cast from Sanity: Some otherwise positive abilities lower the morale of the party when used.
- Casting Gag: Wayne June, the voice of the Ancestor, has lent his voice to a number of acclaimed audiobooks of the works of H. P. Lovecraft and Edgar Allan Poe. He got to work with Red Hook precisely because he loves Lovecraftian fiction.
- Catch-22 Dilemma: Quirks where only one type of stress relief activity can be done are not mutually exclusive with quirks that can also prevent that one activity anyways. This usually means that this hero will require a sanitarium visit before anything else.
- Central Theme:
- What is the emotional and psychological toll of an adventurer's life?
- Achieving the smallest of victories, no matter the cost.
- Cessation of Existence: When hero reaches Death's Door, the Narrator usually remarks something about imminent oblivion, abyss, or similar. The characters also claim to see only darkness.Narrator: Perched at the very precipice of oblivion.
- Character Level: Heroes can level up from 0 to 6 Resolve level as they undertake expeditions. Gaining a level allows them to unlock better gear and abilities, as well as increasing their inherent resistances.
- Cherry Tapping:
- Prior to the Fiends and Frenzy update, every offensive action, even debuffs, did at least 1 damage. So if a creature (or one of your heroes) was at one hitpoint or less, you could kill them by having the Hellion shout at them, for example.
- Egregious with Wilbur, who can stun-lock — and potentially kill — your party just by squealing at them!
- Clap Your Hands If You Believe:
-
 A Tweet from one of the game's developers states that The Light is "Humanity's faith in delusions of their own making".
 - Many of the trinkets are implied to work in this way as well. Though some have practical uses, many don't actually provide protection or strength to your heroes. Rather, the hero believes that they do, and this in turn gives them strength to face the horrors.
-
- Cloud Cuckoolander:
- The Irrational Affliction, which causes the afflicted character to sometimes behave in very bizarre ways, such as rejecting magical healing because the healer didn't wash their hands, skipping a turn because they're busy concentrating, or using a random ability on a random target because they saw something shiny. It'd be rather funny if it didn't run the risk of getting them and the rest of your party killed.
- Even when he's sane, the Jester strays into this territory as well.
- Color-Coded Item Tiers: The color of the border of your Trinket indicates its rarity. Common ones are grey, Uncommon green, Rare blue, Very Rare orange, and Ancestral red. The Trinket's rarity also correlates with the difficulty and length of the quest which yields it. For instance, short Novice quests only give common Trinkets, while long Champion quests will yield the Ancestral ones. One-of-a-kind Trophy trinkets, earned by beating the strongest difficulty of each dungeon's boss, have a light brown border.
- Combat Exclusive Healing: Healing abilities don't cost anything but the turn your healer spends performing them, but the only ways to restore HP out of battle are food (which restores very little and won't count for staving off hunger if you don't eat it while already hungry) and camping. Dragging the encounter out to heal is a matter of balancing risks — you can restore some much-needed health to desperate heroes, and in the right circumstances it can be worth the risk, but after a certain point, the party will start taking stress damage (saying "Let's finish this rabble already!") or the foe may receive reinforcements, and even a single weak enemy can get lucky crits in (causing more stress), and characters have to do something each round (even if only switching position) to avoid a stress hit.
- Combat Sadomasochist:
- The "masochist" affliction combines this to some degree with Nightmare Fetishist. Some classes whine if another hero gets attacked because they want to show off their self-healing skills, others want to see just how deep the rabbit hole goes.
- The Flagellant is especially crazy in this regard, even while sane. Since he benefits off being at low health, some of his skills have him hurt himself to enable this. Of note, he has a higher-than-normal Deathblow resistance to keep him at Death's Door, and doesn't suffer from the usual quest-long debuffs after being healed out of Death's Door.
- The Computer Is a Cheating Bastard: The Siren boss in the Cove possesses the ability to charm one of your characters to her side. While charmed, that particular character can use their full range of combat skills against you, despite being normally limited to four.
- Continuing is Painful:
- Contrary to most roguelikes, you don't need to keep your party alive to succeed, and even a Total Party Kill isn't a game overnote , as new heroes are free to hire and there are usually several teams available anyway. But unless you got Experienced Recruits, the new heroes are hired at level 0 without any upgrades, so replacing heavy losses (especially high-level ones) makes you lose trained skills and upgraded weapons/armours.
- A party can leave a dungeon with the loot at any time. The problem is that doing this before completing the mission you set out to accomplish gives a lot of stress. Using this tactic to play safe and farm gold and items isn't advised, as you may end up having to spend more gold than you gain to balance the effect of this gain of stress.
- Cosmic Horror Story: The final scene, and especially the truth about the Heart of Darkness, reveals the entire thing to be this. The Heart is humanity's creator and destroyer, an Eldritch horror against which the Ancestor claims there is no way to win - sooner or later, it will wake up to cause The End of the World as We Know It, and the most the Heir can do is killing themself and summoning another of their family to the Estate in a desperate attempt to keep it contained. (Or possibly trap themself and the Estate in an endless time loop, condemning the Heir and their heroes to an endless war against the Darkest Dungeon.)
- Crate Expectations: Crates are one of the more common curios and can be found in nearly every dungeon.
- Crapsack World: The Darkest Estate and the Hamlet are in ruins, corruption is spreading, horribly disfigured monsters are rampaging unchecked, and all of this because of your Ancestor's selfish desires. Attempts to fix it can also go horribly, horribly wrong, with your heroes dying or being driven to madness. None of this is helped by the game's overall very grim art design and tone.
- Crazy-Prepared:
- It often pays to play like this. Even when you might be coasting through dungeons with a team of fully-upgraded level 6 heroes, you never know when the game will take the RNG and beat you over the head with it like a baseball bat, which means that bringing along some extra supplies and planning your moves carefully can make the difference between you coming home with a bunch of loot, or coming home with a few less heroes.
- This counts in-combat too in Champion or level 6 quests. Preemptively using defensive abilities, holy water, stress heals, and buffs, as well as the right debuffs for certain enemies (or just killing them early), can blunt a bad series of overwhelming attacks by the enemy team. At those levels, if you haven't prepped at the start of a battle, it is not uncommon for normalcy to turn to horror as you watch helplessly when 2-3 enemies get back-to-back turns to pummel and kill one of your best heroes with multiple critical hits and a bleed/blight before you get to even do anything about it. The veteran large units and champion elite units are specially designed to overwhelm an unprepared player.
- Creepy Crows: A crow is part of the Estate's coat of arms. There's also the Shrieker, a giant eldritch-warped crow that will steal your trinkets past a certain point in the game; the update page that introduced it even draws comparisons between the two.
- Critical Existence Failure: Averted Trope: once a hero hits 0 health and is at Death's Door, they aren't dead yet (and in fact can potentially survive several more hits if the Random Number God smiles upon you), but they'll have a significant stat penalty, and the potential for one more blow to do them in forever and undo all your hard work in building them up means that you will not want to press your luck.
- Critical Hit: A very big mechanic in this game — in addition to doing more damage, critical hits by the player characters can reduce the party's stress, while critical hits from enemies can cause stress even if the attack doesn't normally do so. Causing more critical hits is also an upside of letting the torchlight get lower (which makes monsters become stronger and increases their own critical hit chance) in addition to finding more loot. After the Fiends and Frenzy update, even healing skills can crit, and in their case, the targeted hero gets 4 stress relieved in addition to healing for twice the health (enemies can crit-heal too, but they only benefit from the increased health gain). With the Color of Madness update, it now also provides a buff lasting a couple of rounds.
- Crystal Dragon Jesus: The Light and its followers appear to fill this role. A cross with a circle in it seems to be its symbol, appearing in the Abbey and on the Vestal's tome and skills. Abandoned confessional booths appear in the Ruins, and holy water can be used to cleanse curios. The Vestal, in some circumstances, recites what appears to be some kind of scripture similar to the Bible. Though possibly unintentional, the faith of the Light also bears a certain resemblance to Zoroastrianism: several bits of dialogue reference the holy flame, and there seems to be a strong emphasis on physical and spiritual cleanliness.
- Crystalline Creature: "The Color of Madness" DLC introduces the Farmstead, an Eldritch Location where time and space are warped due to the presence of a crashed comet containing an infant Eldritch Abomination. Everyone who was there when it crashed was warped into creatures partially made of crystal that only vaguely remember their original lives and exist to serve the comet's will.
- Curious as a Monkey: A hero with the Curious or Compulsive quirks has a high chance of putting his or her hands on a dungeon curio without being prompted because they want to see what it is, how it works, or what's inside. That's never a good thing (especially if you've brought along an Antiquarian, as you won't get Antiques and Rare Antiques from curios if she specifically doesn't interact with them). Unlike any of the other "-mania" quirks, Curious and Compulsive don't have a specific curio type that the hero is fixated on; they'll muck around with literally everything.
- Cursed with Awesome:
- Some of the negative quirks, while disadvantageous, can be beneficial to the right class. A Jester having rabies gets 20% increased damage for instance, with -10 ACC, which he can negate with his Battle Ballad buff.
- The Flagellant, once he reaches 100 Stress, will always attain the Rapturous affliction. Unlike other afflictions, which are generally undesirable, a Rapturous Flagellant gains significant perks like increased damage and speed, which stack with his passive Critical Status Buff. He can still act erratically like with any other affliction, but this can all work out to be a blessing in disguise.
- The "Never Again" trait is either this trope or Blessed with Suck, depending on the player. All heroes who have successfully completed (not attempted, for whatever reason) a mission in the Darkest Dungeon will refuse to ever go back. However, they won't take up space on your roster, and sending them on an expedition will cause the rest of your active party to gain additional resolve XP. These heroes are useful to grind money in high-level dungeons to help foster their replacements up to level 6. You can have an effective roster size of up to forty mercenaries, but you still must invest the time and gold into shaping up the replacement heroes to send into the final dungeon.
- Curb-Stomp Battle:
- The game is built and maintained to avert this trope, as obscenely high-level heroes will refuse to enter easy missions. This is obviously made to prevent people from grinding the easy dungeons for easy loot.
- However, the game won't prevent you from doing the inverse. In fact, an achievement encourages you to bring a team of level 0 heroes into the final dungeon. Aside from said achievement, there's literally no reason to do this.
- Damage-Increasing Debuff:
- Several debuff skills reduce enemy protection stats, allowing your team to deal more damage to a normally armored enemy.
- Skills, both friendly and hostile, can mark targets. Marked enemies take more damage from certain skills like the Bounty Hunter's Collect Bounty or the Arbalest's Sniper Shot. Marked heroes not only are more likely to be targeted by the enemy mob, but can take additional damage from certain attacks.
- Damage Over Time: Bleed and Blight status effect will drain hit points every turn. When effects stack, it can become a disaster in a hurry.
- Dark and Troubled Past: The general trend of the hero origin comics shows that all of the heroes have this in some form, otherwise they wouldn't be wandering around as mercenaries for hire in the first place.
- Dark Fantasy: Dark, muted colors? Yes. Death is a regular occurrence where anyone can die? Yup. Insanity and stress abound? Oh, you'd better believe it!
- Dark Is Evil: Used for a gameplay mechanic for venturing deeper into the dungeons — better loot is found as your party trudges lower… while their torch struggles more and more to actually provide light. As the light gets lower, monsters get faster, hit harder, and are more likely to surprise the characters and less likely to be surprised themselves, and characters will get more stressed.
- Dark Is Not Evil: The Occultist Hero is a master of dark and forbidden magics. He's also one of the best healers and an extremely powerful support.
- Darkness Equals Death: The darker it gets, the more dangerous the enemies are, the more likely they are to get the jump on you, and the faster your heroes will break; however, the enemies are also more vulnerable as your crit chance increases and the loot is proportionally better, making the risk worth it if you can manage it. However, being in pitch blackness means that you can stumble upon one of the deadliest enemies in the game.
- Dead Man Writing: Sort of. The Narrator, which is the only voice you'll ever hear in the game, is dead before you arrive on the scene, yet provides commentary for just about all your actions.
- Decadent Court: When the Ancestor was young, he ran one of these, legendary for its debauchery and orgies. It got worse when a strange woman arrived in court…
- Deconstruction: The game seems to generally be made as one for the dungeon crawler genre. Supplies are a factor, the terrifying enemies wear on your characters as they probably would to actual people, and the Affliction System makes for flawed individuals in your party instead of a bunch of One Man Armies.
- Defend Command: Crusader's Bulwark of Faith or Leper's Withstand give a long-lasting PROT boost, but costs a turn.
- Dem Bones: Undead enemies of various stripes are common enemies in the Ruins, though they have a slight chance of appearing elsewhere. They can range anywhere from heavily armed, axe-swinging brutes to courtiers who splash your heroes with goblets of burning acid. The Crusader really likes cleaving through them, getting bonus damage against Undead/Unholy enemies with most of his abilities. One of their main strengths is their complete resistance to bleeding effects: their 200% resistance is so high that even debuffs that increase the chance of inflicting bleed can't reduce it enough to provide even a slight chance of bleeding them. (After all, they don't have any blood in the first place.)
- Despair Event Horizon: The Hopeless affliction; heroes who suffer this breakdown will frequently flee, seize up and do nothing, injure themselves to get it over with faster, and proclaim The End Is Nigh, stressing out the rest of the party.
- Determinator:
- It's possible for a character to become Virtuous when their resolve is tested, reducing their stress drastically and giving them huge stat increases, as well as making them immune to Affliction for the rest of the dungeon crawl (though they can still suffer a heart attack at max stress). Considering what they've had to go through to get to that point, not undergoing a Heroic BSoD certainly makes them this.
- It's possible for heroes on Death's Door to never actually be killed, due to death being a random chance each time a hero on death's door is struck.
- The Gibbering Prophet is definitely one, considering how many times the Ancestor tried to kill him and failed.
- If you are wiped or retreat from an expedition in the Darkest Dungeon, the surviving heroes in the hamlet will gain double resolve Experience for the next week, making getting a new party ready to retry that expedition faster. Even knowing (or not knowing) the horrible fate of their predecessors makes them all the more determined to put down the horrors of the Dungeon once and for all.
- Developer's Foresight: Normally in the tutorial, the chest at the end is trapped and the trap always triggers when opened. If you somehow, e.g. via modding, manage to have a skeleton key to disarm the trap, however, you can loot it for a decent amount of money and trinkets.
- Devil, but No God: Played with. While we don't directly see any entities that mortals would call benevolent, the genuine supernatural abilities of various Light-following characters, the holy visions heroes can receive while praying, and the powers of certain shrines of the Light imply that there is at least one benevolent being opposing the darkness, despite the Ancestor's skepticism. A Tweet from one of the game's developers states that The Light is "Humanity's faith in delusions of their own making", which means humanity's collective belief made a God.
- Difficult, but Awesome: A "dancing" party — one filled with combatants with movement skills — can be difficult to pilot. A tightly planned strategy to keep rotating the combatants back to their ideal positions can go horribly awry the moment someone acts out of turn, or if anyone gets shuffled or stunned. The non-moving characters must also not end up in positions where they can't do anything but move. With the right skill loadout, though, a dancing party can become very resilient to shuffles, and may even be ideal against the Shambler, Fanatic, Shuffling Horror, and other enemies that screw with your formation.
- Disaster Dominoes:
- If a hero breaks under the strain, very often their reactions cause stress in their companions, who can then break, in turn causing more stress — you can end up with all four of your heroes severely compromised by afflictions, which can quickly lead to a Total Party Kill.
- This becomes more apparent with critical hits: If a hero is hit with a critical hit, the surrounding heroes become more stressed out; if multiple (or even all) heroes are hit… well, you can guess where that is going. This, however, can work in your favor as well, as the same rules apply to your enemies (just that it relieves your stress instead of increasing it).
- Disk One Nuke: Some of the teams can become this.
- Special consideration goes to “The Gatling Gun” team, which consists of a vestal, grave robber, and two highwaymen who spam Point-Blank Shot over and over to destroy the enemy frontline. They can curb stomp pretty much all green areas and bosses. They become less effective in the yellow and red areas, where there are several Boss in Mook's Clothing. Even with that said, having two riposte-able heroes makes this one of the few teams that can stand its ground against the Fanatic.
- Two shieldbreakers and a priestess in the ruins, cove, or courtyard will generally have this effect.
- Femme Fatales also qualify. Vestal, Plague Doctor, Grave Robber, Hellion. Three can stun, two can stun half a team. Two can blight, two can bleed. Two have high crit, if not the highest. One is arguably the best DoT, another is the best consistent healernote , yet another is a backup healer who can easily negate DoT effects being applied to you. One has the highest dodge and trap skills. Not quite as easy to master as the above two teams, but this group can carry the game by crippling enemy teams, stacking DoTs, best healing, and critting.
- Double-Edged Buff: The Leper can use Revenge to raise his accuracy, damage output, and crit rate, at the cost of reducing his dodge rate and augmenting the damage he receives. The effect lasts until the end of the battle.
- Downer Ending: "Victory. A hollow and ridiculous notion". If you believe what the ending depicts, mankind is naught but an aberrant growth of the flesh of the Heart of Darkness, meaning as long as we exist, it will be free to feed and reform from us forever, until it ultimately "hatches" in earnest, shattering the planet like an egg. Faced with this knowledge, the Heir appears to commit suicide like those before them, taking up a pointless vigil as another ghost trying to turn away the next "heir" from coming to the Estate to start all this again.
- Dreadlock Warrior: The Hellion's hair on the sides of her head is arrayed into cornrows. The Arbalest has her dreadlocks pulled back into a ponytail.
- Driven to Suicide:
- Your relative shoots himself in the head after sending the letter. From his dialogue, it seems he did this to prevent his own capture when townsfolk were storming the manor to make him answer for his misdeeds. Your heroes, too, can succumb to this if they become afflicted with Hopelessness or Masochism.
- In the final cut-scene, after the Ancestor explains the horrible truth behind the Heart of Darkness, you are implied to succumb to this fate, as you are unable to bear the knowledge that all of your sacrifices were ultimately meaningless in the face of humanity's final inevitable extinction, though it's not confirmed if it was you or if the scene was a flashback of the Ancestor's final moments.
- Depending on the Affliction, your Afflicted heroes may damage themselves. This can also result in a Deathblow.
- Drowning My Sorrows: Alcoholism is a means of stress relief. Severe cases of this (represented by a specific quirk) can result in characters only drinking to relieve stress.
- Dug Too Deep: The reason everything went to hell. Turns out exploring and uncovering the dark cellars of the manor wasn't a smart idea.
- Dungeon-Based Economy: The player inherits a hamlet beset by horrors unleashed by their ancestor and hires parties of adventurers to delve into their lairs and recover loot and family relics, used to upgrade buildings in the town.
- Dungeon Crawling: Explore the hostile areas of a destitute estate to scout them, look for treasures, and clean it of monster presence.
- Dungeon Town: Occasionally, the Brigands will raze the Hamlet, leading to a dungeon crawl to retake it and kill their leader, the bomb-flinging Vvulf.
- Dysfunction Junction: When the quirks start to pile up, your characters will end up like this unless you sink a lot of time and money into treating them. Any hero that has went through more than three expeditions is almost certain to have some sort of mental trauma.
- The extra materials such as the comics and the character lore make it clear they aren't that better off when they step off the stagecoach. "Dysfunctional" ends up not even beginning to describe it.
- There are a couple of achievements for finishing a quest or boss fight with a team full of Afflicted heroes. The latter is even named "Dysfunction".
- Early Game Hell: Your lack of supplies, funds, upgrades, and good trinkets makes the first few expeditions rather trying unless you strike it big with great loot early on. Things become a lot better once you start upgrading your skills, weapons, and armor. It also doesn't help that the learning curve can be pretty high, making potential Disk One Nukes easy to overlook without a thorough understanding of the mechanics.
- Easter Egg: A hidden room can be found along the long winding Boss Corridor to the Final Boss. Within is a single chest containing a message from the developers, wishing the player best of luck in the coming fight.
- An Economy Is You: You and your roster of heroes, anyway. All interactive buildings in the town are here to recruit, take care, and upgrade heroes. Some of the quests do mention carrying out missions to protect the Hamlet's economy, with the Cove missions being to protect maritime shipping while the Weald quests help keep the roads clear so supplies can be brought in.
- Elaborate Equals Effective: Weapons and armors becomes more elaborate as the Blacksmith levels them up, but the only noticeable difference is in the statistics they bring.
- Eldritch Abomination: The game's setting is partly inspired by Lovecraftian stories, with eldritch horrors erupting across the family's ancestral estate. Including a cosmic abomination deep within the earth which may or may not be the very progenitor of humanity itself.
- Eldritch Location: The Estate itself is an otherworldy environment, with new arrivals commenting that it feels almost dreamlike. Reality seems strangely malleable in the area, to the point that dead heroes can randomly be resurrected. It is further implied that the entire Estate is trapped in a permenant "Groundhog Day" Loop due to the presence of the Heart. This goes even further when one approaches the Farmstead, which has been corrupted by the reality-distorting effects of the Comet.
- Electric Jellyfish: The Deep Stingers found within the cove attack with "Shocker" to paralyze a character and deal weak damage.
- Enemy Summoner:
- This is the Necromancer's entire gimmick every time he attacks he summons some skeletons
- Every fight with Ectoplasms is basically a struggle to finish them off before they use their Cytokinesis ability.
- The Brigand Cannon boss summons brigands to fight alongside it and a special "matchman" who will fire the cannon to devastating effect if he's not taken out by the end of the round. When the Cannon's not firing, the only thing it does is call in reinforcements to fill out dead crew members.
- The Drowned Crew's Captain can summon another crew member to lock down your front row character during the battle.
- Really nasty examples are The Collector and Shambler, both of which waste no time summoning support and wrecking player teams in short order.
- Equipment Upgrade: The Blacksmith in the Hamlet is responsible for upgrading the heroes' weapons and armors.
- Establishing Series Moment:
- The first loot chest you encounter (during the tutorial) is always booby trapped and, unless a defeated bandit just happened to drop a key (extremely unlikely), there's no way to safely open it — a very pointed lesson that this game is not generous to you at all.
- It's quite possible (and not particularly unlikely) to get defeated during the tutorial. If this happens to you, it should also give quite a good idea on what to expect from the game.
- If you make the decision to extinguish the torch and are especially unlucky, the game can sic The Shambler on you for a skirmish during the tutorial, which will almost certainly crush your small, unprepared party. You have to do this on purpose, of course, but it certainly shows that death is never more than one bad decision away.
- Everything Trying to Kill You: As is standard in video games, dungeons are incredibly hostile environments. Any hallway and room is an occasion for exhausting fights, harmful curios, and traps.
- Evil Is Bigger: Invoked by the Announcer Chatter whenever the player's party kills a King Mook (medium-sized enemies, but not bosses).The Ancestor: Monstrous size holds no intrinsic value, unless inordinate exsanguination be considered a virtue…
- Exclusive Enemy Equipment: Defeating the hardest difficulty of each boss yields a special trinket called a Trophy that often comes in the form of something they wore or wielded in battle, with a select few being body parts like the Prophet's Eye. The Madman and Bone Courtier also have their own specific drops revolving around stress defense, with special mention for the latter, since the heroes pilfer his Tempting Goblet wholesale. The Collector also has associated trinkets, though those can sometimes be found in secret rooms. The Shrieker also has its own trinkets, which are simply its own body parts. Finally, there is a set of special trinkets associated with the Thing from the Stars.
- Experience Booster: The Ancestor's Portrait multiplies the experience earned by a hero by 50% at the cost of an increase in stress damage. Failing a quest in the Darkest Dungeon will cause your next quest to give double Resolve experience. Taking a hero who's completed a quest in the Darkest Dungeon into another expedition will give the rest of the active party a 50% experience boost.
- Expository Gameplay Limitation: The first few times you access the Hamlet, many of the interactive buildings are closed down so that new players can focus on one gameplay mechanic at a time. The first unlocked building will be the Stage Coach to introduce the player to recruiting heroes, then the Abbey and Tavern for stress relief after an expedition, then the Guild and Blacksmith to upgrade heroes as they level up, then the Sanitarium after heroes have developed quirks, and finally Nomad Wagon and Survivalist for the more advanced Trinket and Camp Skill mechanics.
- This goes on with the hero selection: The tutorial always hands you a Crusader (tank) and a Highwayman (damage dealer). And while the selection of the Stage Coach is usually randomized, the first one arriving will always contain a Vestal (healer) and a Plague Doctor (debuffer). Thus, you are guaranteed to have a balanced party for your first true foray into the dungeon.
- Delaying the Sanitarium this far and forcibly granting Reynauld the Kleptomania quirk induces a type of Teaching Through Accident on the concepts of quirks. As a majority of quirks have very subtle effects that aren't noticed immediately, a player may not even realize the harmful effects of their heroes' quirks until it begins to negatively affect their performance without them knowing why. After a couple of expeditions with Reynauld, it's almost guaranteed his Kleptomania will deprive the player of loot at one point, prompting the player to pay attention to the quirks in their heroes' character windows and how to fix them.
- Eyepatch of Power: The Man-At-Arms wears one.
- Eye Scream: The "Prophet" boss tore out his own eyes when the Ancestor showed him what lay beneath the manor. Worse, he now carries them in his hand…
- Eyes Do Not Belong There: The Darkest Dungeon itself is home to some of the most… "sightly" disturbing monsters. Some of which have eyes scattered around their bodies.
- Face Death with Dignity: Some of the classes — most notably the Man-at-Arms, Occultist, and Leper — are very accepting of being utterly destroyed by the Final Boss' one-hit-kill. Others, not so much.
- Failed a Spot Check: Thanks to the RNG deciding how the party reacts when meeting enemies, it is possible to be surprised by a group of four humanoids standing in the middle of a fully lit corridor.
- It goes both ways; groups of monsters are more likely to be surprised by you sneaking up on them with your torch at maximum brightness.
- Fantasy Character Classes: Most of classes fit well into a fantasy class archetype, though they don't have the most common stereotypical name.
- Featureless Protagonist: The player is the owner of the estate, attempting to uncover the portal's secrets and redeem the family's name; the tutorial involves them being escorted to the Town by a Crusader and Highwayman.
- Festering Fungus: The Weald has been invaded by mushrooms that grow everywhere. Corpses are taken over by the fungus, which controls them to a degree, and even Giants have mushrooms growing out of their back.
- Fighting Your Friend: The Siren Boss can enthrall one of the party members to temporarily fight by her side.
- Final Boss, New Dimension: When you begin the final battle, you are brought into another dimension which looks like a Womb Level after strolling through the cosmic void.
- Fixing the Game: Having the quirk "Known Cheat" forbids a hero from gambling in the tavern. Heroes can start with this quirk or randomly acquire it by gambling.
- Fish People: The Pelagics of the Cove. They seem to have a semblance of civilization, as some of them are Shamans, but they are mainly trying to kill the party, and their lore indicates that they are hostile to humanity by default.
- Flunky Boss: If a Boss doesn't occupy the entirety of the enemy ranks by himself, chances are that it will summon some common enemy to better fight the party. Special mention to the Shambler, whose spawns keep getting stronger the longer they are present, making killing them quickly a necessity.
- Food Slap: Bone Courtiers have the ability "Tempting Goblet", which involves throwing their cup of wine in a hero's face. Considering that this causes physical injury on top of upsetting them (stress damage), it must be some really bad wine (who knows how many centuries out of the bottle; being irradiated by the concentrated awful pouring off the local Eldritch Abomination might have something to do with that, by the way).
- Forced Tutorial: The tutorial is the prologue of the game, when you lead a Crusader and a Highwayman through a forest to the town, followed by the arrival in the town, which also gives some gameplay explanations.
- For Doom the Bell Tolls: Whenever a character reaches Death's Door, a deep, booming bell tolls as a warning. Also, the Vestal's "Judgement" ability has the sound effect of a bell toll.
- Foreshadowing:
- In the launch trailer, the Ancestor claims that the Heir and their heroes will soon become "a part" of the Darkest Dungeon "as [he has]". As it turns out, the Big Bad ends up using the Ancestor's body as its vessel during the final battle.
- Also, there's a ghost that urges you to turn back, a "Transcendent Terror," as the Ancestor calls it, as the Heir goes to the Manor. It's you. The Ancestor's tone is also pointed, "You will go to the winding road," "You will be beset by brigands…" as if the whole thing has been done before…
- When the Town Crier is taking up one of your Cloister slots, if you hold your cursor over him, his dialogue reads "Gods and men…Gods are men…Gobs of men…" The one confirmed God of the world, the Heart of Darkness, spawned humanity and is able to reabsorb parts of it into itself ("gods are men"), leading to the lower reaches of the Darkest Dungeon being a horrible nightmare meatscape inhabited by equally horrible fleshy mutants ("gobs of men").
- Four-Fingered Hands:
- Especially apparent when the Occultist casts a Vulnerability Hex or a Weakening Curse.
- Zig-zagged with the affliction and virtuous portraits. Some of them have four-fingered hands, while most of them have five-fingered hands.
- Freeze-Frame Bonus: The silhouette in the carriage in the epilogue is the same as the Heir's in the prologue.
- Friend-or-Idol Decision: The game can actually force the player into this situation. There's a limited amount of space in your inventory, and sometimes you might need to choose between a valuable bauble or important supplies. On that note, you only need to keep one hero alive to make it out with all the treasure you've collected…
- Game-Breaking Bug:
- On the technical side, Darkest Dungeon doesn't have an in-game option to adjust V-Sync, making the computer reach up to a thousand frames per second, and subsequently causing crashes, overheating, and shutdowns after prolonged gaming on machines that do not support manual V-Sync or frame limiter options. Considering the rate at how the game auto-saves progress, data corruption is very likely.
- If you leave one of the Iron Crown rooms in the third-to-last mission, Lighting The Way, without using a Hand of Glory quest item on it, you won't be able to get back, and you'll have to retreat from the quest. Given how retreating from the Darkest Dungeon works, it's especially painful.
- Game Mod: Due to the game engine, making mods is pretty simple, but the tools provided by the devs allow modders to implement very complex systems of their own, as long as you have the know-how. Things are only limited by creativity and artistic skill, and many in-depth mods have been made, ranging from very high quality Class Mods with completely custom assets such as Marvin Seo's collection, to complete overhauls like Pitch Black Dungeon which ramp the Nintendo Hard difficulty up to eleven.
- Gameplay and Story Integration:
- The Ancestor no longer does color commentary when the party faces the final boss. It's because you're facing him, or at least some remnant of him absorbed by the Heart of Darkness.
- The game launched with and still contains a negative quirk called "Flagellant," which makes the afflicted in question only willing to relive stress through the Abbey's flagellation service. Later, DLC introduced the Flagellant hero class; sure enough, he will only relive stress through the flagellation service.
- Gameplay and Story Segregation:
- Hunger is a semi-random event that disregards how much food you've already eaten, meaning it's possible to eat all your food to restore HP, then have it strike.
- Even good meat can be made bad when in contact with putrefaction. See I'm a Humanitarian below.
- The name for the Vestal class is apparently just a name, since it's entirely possible for them to have a sexually-transmitted infection when you hire them and go to brothels thereafter.
- The torchlight mechanics are basically a way to manipulate risk/reward ratio and don't make a lot of sense if you think about it:
- Somehow, it's easier to find more stuff when the characters can barely see what's in front of them. One of The Narrator's quotes seems to Hand Wave it by saying that it's easier to notice glinting gold — but nothing would glint in complete darkness.
- Conversely, it's easier to surprise enemies if you carry a blazing light with you — even if normally it would make you visible from a much larger distance while crippling your ability to see anything beyond the illuminated area.
- When walking backwards through a corridor, characters will often express worry that someone will ambush them like that. However, it quickly becomes obvious that the game is not programmed to have an encounter where the enemies attack you from the back. The characters being stressed is the only penalty.
- Some curios require the heroes to wrap their hands in bandages before touching them… even though about half the heroes are already wearing gloves.
- The Leper, despite having a deadly, contagious disease, can freely visit the Brothel.
- A Hero may develop a Quirk where they will only visit the Brothel. It's called "Love Interest," implying they've fallen in, ahem, "love" with one of the prostitutes… but upon visiting it, they can still do the "I'll take you, you, AND you" line. Maybe they have a thing for swinging?
- In gameplay, you may have multiple characters of a given class each with a different name, such as multiple Vestals with names like Mortemer, Sassiet, Buron, etc. In lore, however, the classes each represent a single specific person with a specific given name (such as Junia in the Vestal's case).
- Certain monsters (such as the fleshy growths in Darkest Dungeon itself) can be affected by move effects despite being physically rooted to the ground.
- Giant Enemy Crab: The Uca Major appears in the Cove on Veteran and higher difficulties. They have a thing for your heroes' arteries.
- Giant Mook: Each area has a unique one, as well as two common to all areas: Brigand Bloodletters (all), Ghouls (all), Unclean Giants (Weald), Bone Captains (Ruins), Swinetaurs (Warrens), and Uca Crabs (Cove). All of them have high health and can hit very hard, and usually have an ability that hits all party members.
- Go Mad from the Revelation:
- Tomes, artifacts, and occult scrawlings occasionally impart knowledge of Things Man Was Not Meant to Know to the character that interacts with them, increasing their stress and bestowing potentially harmful quirks. Breaking a bas-relief with a shovel is a particularly bad idea, as the resultant revelations will instantly call for an affliction check.
- The "Prophet" boss also has this in his backstory — after failing to dispose of him through numerous methods, the Ancestor showed him what lay beneath the manor and told the Prophet his intentions, driving him to tear out his own eyes in madness and flee to the Ruins as a deranged, broken man.
- This is also the fate of the Heir, as they are Driven to Suicide upon learning the secret of the Darkest Dungeon.
- Guide Dang It!:
- While the tutorial does brief you on the basics, a lot of the content is left for the player to discover, which can lead to this. One example is the availability to use certain items on specific objects found in the dungeons, some of which aren't obvious.
- A particularly cruel example of this is the fact you can escape from battles. The game doesn't tell you this until after you have lost a party member. In addition, the button for it is small and non-obvious.
- The game doesn't disclose the passive abilities that the Antiquarian has on the expedition's inventory. Said abilities being the main reason to bring her on missions.
- The attacks and behavior of the bosses can be this, particularly when they are compared to one another. For example, against the Brigand Pounder, you always want to target the Matchman first. Knowing this, and facing the Swine Prince for the first time, you might think you should take out the little one marking all your heroes before going after the big guy. DON'T.
- The ability to call up backer heroes, especially early in the game to fill out a roster or avoid bringing heroes with bad quirks in the early game. This one is distinct because there's no in-game hint at all that you can do this, and the backer heroes themselves are a bit of an Easter Egg.
- Hard Mode Perks: Played with in the light system:
- At high light levels, your party can see further in the dungeons, are more likely to spot enemy formations, loot, and traps from further away, have a better chance to ambush enemies/avoid being ambushed themselves, and stress gain is reduced.
- When the light gets low, enemies move faster and hit harder, ambushes are more likely, the party is less likely to spot objects of interest from further away, and stress climbs much faster; however, the party also gets higher crit chances and loot drops become worth much more. Low light is extremely risky, but also offers greater rewards, and good use of the boosted crit rate can kill enemies much faster and keep stress down, helping mitigate the drawbacks somewhat.
- Also, some trinkets give benefits depending on the level of the light source, giving high-damage/low-defense traits, or some alternative thereof.
- Harmful Healing: The Occultist has a healing skill, called Wyrd Reconstruction, that heals a random amount and has a chance of inflicting Bleed. Depending on how much the Random Number God hates you, this can result in a character getting healed for 1 point of damage and then immediately losing it on their next turn and then some later on, or alternatively, getting healed for about 10 HP and resisting the Bleed condition entirely. If the RNG is merciful, you can even get a 40-point critical heal, which will bring anyone back from the brink no problem. Worst possibility is, the action heals for 0 and makes the targeted hero on Death's Door bleed, killing them on the next turn.
- Healer Signs On Early: The Vestal and Plague Doctor are your guaranteed third and fourth recruits, thus your first quest will have a healer and someone able to cure blight and bleed.
- Healing Spring: The Brackish Tide Pool in the Cove can Stress heal and give back a small amount of Hit Points… provided you use an antivenom on it. Otherwise, it gives you either a terrible resistance debuff or a disease.
- The Hedonist: The older relative/narrator, whose actions bankrupted his family and brought about the corruption. Though he has come to regret his actions.
- Hell Is That Noise: As torchlight fades, the background music becomes more oppressive and dire, while ambient noise get louder and more distinct, full of whispers and other wicked things. It does not make a soothing song.
- Heroes Love Dogs: The Houndmaster's dog nuzzling up to any of the heroes results in a massive stress reduction and reduction of stress for more battles in the future.
- Heroic BSoD: When a hero's stress reaches 100 for the first time in each quest, his or her resolve is tested. Failing that test results in a negative affliction on the hero that causes extremely negative effects towards the party and themselves. Possible afflictions are paranoid, selfish, irrational, fearful, hopeless, abusive, and masochistic, each with their own unique negative effects. Afflictions can only be cured by using a stress relief activity in the Hamlet or by completely reducing the hero's stress to zero (which is possible, but very difficult, to do while still questing).
- Heroic Mime: Sometimes. The narrator is the main voice of the game and is always legible. Many human enemies grunt as they attack or get hit but don't actually say anything. The hero classes which you control make no audible grunts but frequently speak in text bubbles.
- Heroic Sacrifice:
- If you retreat from an expedition in the titular Darkest Dungeon, a random hero will have to stay behind to fend off the horrors of the dungeon while the rest escape, effectively pulling one of these.
- The Journal of Darius, Highwayman ends with him writing as he is bleeding to death after trying to hold off what was apparently the Shambler, with one of the two fleeing survivors of his party having lost an arm and constantly yelling "Shambler!"
- Enforced in the final battle. You need to choose who will sacrifice themselves. Some characters are more willing to sacrifice themselves than others.
- Heroic Spirit:
- Sometimes, when a hero's stress is maxed, their resolve comes back in full force, giving them a virtue instead of an affliction. This will give them tremendous boosts to stress and all stats, and makes them completely immune to heart attacks.note Depending on the virtue, they may buff allies or heal their stress gradually by shouting a Badass Boast, or heal themselves from damage or stress. Stalwart heroes, for example, heal their own stress so effectively they rarely need stress relief in the Hamlet after the mission.
- A hero at zero hit points can still take a potentially unlimited number of hits as long as they keep passing their deathblow resistance checks.
- He Who Fights Monsters: A Trampled Journal describes a Man-at-Arms whose party with a Highwayman, an Occultist, and a Crusader were progressively killed and left him alone, starved and half-mad, seeking revenge for his allies as he stayed in the ruins' house without any light to ambush the cultists and brigands from the shadows.
- Hidden Eyes: Literally every person in the game. Clearly an intended style choice for the game's artwork. The game's director's would explain this as making the world seem hopeless. The only characters with visible eyes are some of the monsters and the Gibbering Prophet, who has visible eyes due to holding them in his hand.
- Hide Your Children: Children are referenced a few times by the narrator, but, like most of the Hamlet's citizens, are not seen in-game. The Abomination does express fear that a child may have gone missing during his transformations. This is averted during the Highwayman's comic, where he accidentally kills a child.
- Hint System: Tips, unless disabled, will appear the first time you're confronted to the related situation, such as a hero becoming Afflicted. The game also takes pleasure in indicating to new players that a party can flee a fight or a dungeon only after a hero dies.
- History Repeats: Heavily implied, by both the narration and the cutscene, to be the ultimate fate of the world when fighting this darkness.
- Hoist by His Own Petard: The party has a chance to be surprised when meeting an enemy party, thus altering the party's formation and its combat usefulness (each ability is useful in a specific position inside the formation). Mooks have abilities which disturb the formation, too; sometimes, using them against a party whose formations have already been disturbed can send the heroes back to their optimal position.
- Hollywood Heart Attack: Let a hero get to 200 Stress, and a heart attack will knock your hero down to Death's Door and pull their stress back to 170. If they were at Death's Door or they hit 0 hp + 200 stress simultaneously, however…
- Holy Water: The Holy Water item causes minor damage to heroes suffering from the Crimson Curse, and provides uninfected heroes with a buff.
- Hooker with a Heart of Gold: There is a quirk that will make it so that a hero can only visit the brothel to relieve stress. Its name? Love Interest.
- Hope Spot:
- Whenever a hero's resolve is tested and they succeed in gaining a Heroic Second Wind, it doesn't mean that you'll sail smoothly to victory. Likely, you'll still have to fight tooth and nail to get yourself out of whatever situation nearly put your hero over the edge in the first place. And if you don't… Special mention goes to the Flagellant, who grows in power the closer to death he gets. It's not terribly unusual to have him at Death’s Door and completely stressed out, and suddenly have have him crit-killing everything in the room.
- The Terror and Madness trailer shows the party confronting a group of enemies, the Highwayman doing heavy damage at a Bone Soldier and a proto Man-at-arms encouraging his party as a strong start to a fight, only for a Bone Spearman to crit the poor sod and one-shot him, throwing everyone into despair.
- Hub City: The hamlet allows recruiting additional heroes, and for characters to upgrade, and rest at the Tavern or the Abbey to keep their stress in check. The hamlet boasts 9 buildings, eight of them with an Upgrade Tree of its own, and an illustrated Vendor and background.
- Hyperactive Metabolism: Downplayed. You do get health back from eating food, but the amount is negligible to the point of not being worth it unless you bloat yourself, which will come back to bite you in the ass when the party gets hungry; it is possible to heal a higher amount of health while camping by eating a copious meal. You also cannot heal yourself with it in combat.
- Hyperspace Arsenal: Very Downplayed — the sixteen slots provided to the party's inventory is very limited. However, a less-than-full party will apparently heft the extra bags anyway, since inventory slots don't go away as the party loses members, and heroes with the Kleptomaniac or Egomaniac quirk may randomly steal loot from curios and keep it for themselves… somehow, even if the party's inventory is completely full and they randomly end up taking a lot of stuff (stealing more than a few busts certainly beggars belief).
- I Call It "Vera": The final weapon and armor upgrades for each hero gives their equipment a unique name.
- Abomination: Damnation's Gift / Inhuman Bondage
- Antiquarian: The Sarcophagus / Timurik's Bottomless Bag
- Arbalest: Millicent / Survivor
- Bounty Hunter: The Widowmaker / Death's Head
- Crusader: The Long Crusade / Zealous Conviction
- Flagellant: The Burden / The Testament
- Grave Robber: The Razor's Edge / Shadowlace
- Hellion: The Wolf's Tooth / Wolf's Pelt
- Highwayman: Thunder and Lightning / The Uncatchable
- Hound Master: Lawbringer / Gendarme's Pride
- Jester: Slash and Solo / The Cruelest Crown
- Leper: The Broken Blade / Indomitable
- Man-at-Arms: Bludgeon / The Bulwark
- Musketeer: True Shot / Champion's Regalia
- Occultist: The Mentor's Skull / Dark Inquisition
- Plague Doctor: The Bubonic Herald / The Malignant Mantle
- Shieldbreaker: The Adder's Fang / Sirocco
- Vestal: The Hand of Light / The Blessed Bulwark
- Idiosyncratic Difficulty Levels: The game has three difficulty levels, named "Radiant" (easynote ), "Darkest" (normalnote ), and "Stygian" (hardnote ). The Crimson Court renamed "Stygian" to "Bloodmoon".
- I Don't Like the Sound of That Place: The default name of the town is "The Darkest Estate". You can replace it with anything you want (though it will be "The X Estate").
- Improbable Accessory Effect: Many trinkets are small objects implied to be enchanted in some way, but still, a coin that increases the speed of an Antiquarian or a helmet that increases scouting chance can be a little egregious.
- I Need a Freaking Drink:
- Drinking at the Tavern is very much an option to relieve Stress, and after some harrowing encounters, your heroes could very well use one.
- The Dipsomania quirk is a negative version of the trope, as it sometimes forces heroes to investigate certain Curios (regardless of whether it's desirable or safe to do so) because they might contain alcohol.
- Inelegant Blubbering: Your heroes can be reduced to this through negative afflictions.
- Inexplicable Treasure Chests: In addition to actual treasure chests, many curios hold treasures provided you use the right type of supply item when examining them. Some of these stashes include old tree stumps, corpses, or wheelbarrows full of rotting bodies.
- Infinity +1 Sword: Two classes of these:
- Trophy trinkets are one-of-a-kind trinkets obtained by beating Champion-tier bosses. They impart great bonuses without saddling their user with a downside like the Very Rare trinkets, cannot be sold, and if they are lost, they simply reappear in the player's trinket inventory on returning to the Hamlet.
- Ancestral trinkets are also one-of-a-kind, usually obtained either by completing long Champion-tier dungeons or by defeating a certain Optional Boss. They also confer incredible bonuses, counterbalanced with a slight increase in Stress taken by their user, and can also be sold or lost.
- Informed Equipment: When you upgrade the equipment, their icons change into prettier versions of themselves, but the character sprites don't change to reflect that.
- Informed Flaw: A number of quirks can have little to no effects on certain heroes. For example, the Jester and Leper (who only have melee attacks) are completely unaffected by quirks that affect ranged skills, and the Arbalest is similarly unaffected by melee-affecting quirks. Since a character can only have five quirks of each type, this ironically means a chronic Informed Flaw can be quite valuable since it takes up space that could otherwise contain a genuine flaw and can never be replaced by a new negative quirk, while an Informed Attribute is a drawback.
- Inheritance Backlash: The game begins with the player inheriting their (now cursed) family estate after the death (by self-inflicted gunshot) of their antecedent. They must now send parties of (likely doomed) adventurers deep into the ruins in order to uncover the truth and redeem their lineage.
- I'm a Humanitarian:
- The Swines instantly come to mind.
- At first glance, the people of the Estate would appear to fall into this as well. If you use medicinal herbs on a Dinner Cart in the Warrens (a carriage full of various human carcasses, that looks remarkably like a feeding trough), you get food that can be eaten with no drawbacks whatsoever. All heroes, including the Vestal (a nun for all intents and purposes), may say a victorious line upon retrieving food from it.
- Some of the Hellion's barks suggest she prefers to eat her enemies.
- Interchangeable Antimatter Keys: The keys sold before venturing into dungeons are named "skeleton key" and can indeed open any locked chest or cabinet found in the dungeons. It doesn't explain why they disappear after being used (especially if you tried to use a key on an object which didn't need it).
- Interface Screw: After completing the first Darkest Dungeon quest, icons will randomly show eldritch abominations when you interact with them.
- Inventory Management Puzzle: You have a limited amount of space for loot in dungeons. Items and treasure do stack, but only to a limited degree. Your starting supplies also count against this; this can force you to decide between, for instance, leaving behind a valuable treasure or that antidote you were hanging onto just in case (and you can't return for anything you left behind later).
- Iron Maiden: One of the curios that heroes may encounter in the Ruins. Interacting with it can range from simply swinging open and revealing nothing but foul smelling air to trapping the hero inside it, having a chance of giving them a claustrophobia quirk and stressing them out or exposing them to tetanus with a low chance for a random disease. Heroes with the bloodthirsty quirk can be compelled to open maidens on their own.
- It's All About Me:
- The Selfish affliction a character can receive from a Heroic BSoD. This causes them to steal loot from curios, ignore commands during battle, make various comments at times that stress out their comrades, refuse to use camping skills, and generally cause trouble.
- The Egomania quirk is described as "obsessed with self-worship". Though not as severe as the Selfish affliction, it still can lead to a Hero interacting with certain curios and stealing its loot if applicable.
- It's Up to You: The older relative, having become insane and burdened with guilt, leaves the redemption of the family name to you in his will, hoping that you can uncover the portal's secrets, reclaim your birthright, and take the estate back from the madness that he unleashed.
- Jerkass: Heroes with the Abusive affliction become this. No matter what the rest of the party does, the Jerkass will insult or belittle them for it (even if they kill an enemy that was about to attack them!), and will dish out harsh insults to their allies like candy. They'll also do things like insult (and then ignore) your commands in battle, move about the formation, block an ally from changing positions, or even attack an ally. Unsurprisingly, this is a very dangerous affliction, and can drag even a stable party into Disaster Dominoes quickly.Ancestor: Frustration and fury — more destructive than a hundred cannons.
- Jump Scare: After completing at least one phase of the Darkest Dungeon, the images of various townsfolk in the hamlet will periodically flicker into images of Eldritch Abominations and back. It might not be so startling if it wasn't abrupt, unpredictable, and likely while you're thinking pretty hard about other matters.
- Keystone Army: For the most part, once a Flunky Boss is defeated, any summons or obstacles that accompany them will vanish. There are exceptions to this, most notably the Swine King, the Shambler, and the Shuffling Horror — and this can lead to a Pyrrhic Victory if the main boss is defeated (fulfilling the objective) but their flunkies kill the party.
- Kleptomaniac Hero: Appears as a negative character quirk; your starting Crusader, Reynauld, will always begin with this. It has two effects, the first causing the hero to have a random chance of automatically opening any loot containers the party findsnote , even if it might not necessarily be the best idea; second, the hero will claim for themselves any loot found this way, denying potential supplies or valuables.
- Know When to Fold 'Em: You can't just Save Scum when someone dies like in many other games with characters who can die, so knowing when to flee a battle or cancel a quest that is going poorly will save you a lot of dead heroes.Ancestor: The sin is not in being outmatched, but in failing to recognize it.
- Last Chance Hit Point: The Death's Door mechanic; basically, once a hero takes fatal damage, they're put into a "dying" state, even if the damage exceeds their current HP. At this point, any further damage has a chance of killing them off, but any healing will reverse the effect and give them the Last Chance Hit Point back. Of course, with how sparse healing is...
- Leeroy Jenkins: Thrice-Damned Mizir from the journal "The Blackest of Fates", who stuck his torch into a Shambler Altar and got himself and nearly every other member of his party killed.
- Leitmotif: Every region has its own soundtrack while exploring and in combat. The exploring tracks gets progressively tenser while the party has less and less light, which is highly fitting given how much more difficult any enemies you fight will be.
- Light Is Good: The Vestal (and to a lesser extent, the Crusader) use the power of light in battle, offering healing, buffing, and debuffing with the added perk of slightly strengthening the torch. To say nothing of the party's torches themselves — you should really light a new torch as the light for the party dims unless you're really sure you can deal with much more accurate, damaging, and stress-inducing monsters.
- Loading Screen: Happens every time you go from one location to another, such as from the Hamlet to a dungeon. Although ordinary expeditions will only have a picture of the dungeon and a tip, boss expeditions have a more flavorful drawing of the boss and the Ancestor narrating his history with them.
- The Lost Woods: The Weald is a sprawling forest whose rotted boughs host a hideous kind of fungi.
- Lovecraft Lite: Zigzags between this and a true Cosmic Horror Story — they can be beaten, they can be fought… but there are always more. The ending leans strongly toward the latter, ending with the Heir apparently committing suicide after discovering that the Final Boss was a mere fragment of the embryonic Eldritch Abomination gestating within the world, and within humanity.
- Luck-Based Mission: Basically, delving into any dungeon floor is invoking this, as the life of a hero or even the success of the mission itself can hinge on an (un)lucky critical hit, or a boss using a certain set of powerful moves that can completely wipe out the entire party. Randomized floor layouts can also determine whether you can finish the quest before you even explore half the rooms, or are forced to do a painful amount of backtracking.
- The penultimate quest takes this up to eleven. While marked as Exhausting in length, the random teleportation caused by some of the major roadblocks in the level can either force you into plenty of backtracking… or can plant you on a fast track to the level's goal. When this teleportation happens is also random, so you can be anywhere from barely starting the fight to nearly finishing it before it triggers. It's possible that one would finish the level only after burning through all four firewood given, or clear it without needing to camp even once.
- Madden Into Misanthropy: Ironically subverted with the Hatred of Mankind quirk, as it's considered positive because it causes the hero to deal extra damage to human enemies with no gameplay drawbacks. As a result, it isn't considered a result of madness.
- Magikarp Power: Combat buffs and debuffs. Players in the Apprentice difficulties will probably find most enemies are guaranteed to go down in one or two attacks after a few weapon upgrades on their heroes and those that can't can just be stunned, and see little reason to bother debuffing these enemies. In later difficulties, however, there will be tougher enemies that appear much more frequently that simply cannot be reliably dealt with so easily, making buffing your heroes or debuffing your enemies much more certain to be worth the time. You also access stronger buff skills at later levels, and their effects would be worth the turn spent setting them up.
- Marathon Level: The penultimate quest in the Darkest Dungeon is the only level marked "Exhausting". You get four Firewood for this quest; long ones usually give you two.
- Maximum HP Reduction: Several quirks and diseases can reduce the maximum health bar of a hero.
- Messy Maggots: Maggots are very weak but come in fours and have an attack that can hit anyone, can stun, has a high critical rate so the hero will receive critical damage and stress, and worse, inflicts diseases.
- Mighty Glacier: The high-health melee characters, namely the Crusader and Leper. The Crusader has the lowest base speed of all the heroes, and the Leper has substandard base accuracy in addition to low speed.
- Mind Screw: The end of the game really does present some incredibly screwy questions due to the ambiguity.
- Was it all an illusion? Was the entire town Dead All Along and the travelling adventurers a motley of undead spirits unknowingly wearing biological monstrosities? Were your faithful companions and fellow townsfolk actually constructs of the final boss all along, their torment and sacrifice a ritual to feed the eldritch beast at the center of the world? Is humanity itself a horde of disgusting monsters made of blobs and eyes and teeth that literally see themselves as mere men? Or have you simply gone insane from daring the actual Darkest Dungeon, the most intense mind-fuck-fest of your entire life?
- Is time really passing in the Hamlet? Is the Schizo Tech of your adventurers natural or are they being brought from multiple points in time? How can you have multiple of the same kind of adventurer, with the same backstory? Are you trapped in a "Groundhog Day" Loop, eternally fighting the Heart of Darkness? Is the strange time-warping of the Farmstead limited only to that place, or has it transformed the entire Estate into an endlessly-looping nightmare of eternal bloodshed that feeds the Heart or the Comet?
- Money Spider: Played straight most of the time as undead corpses, actual giant spiders, or cultists carry around treasures to loot. The one exception are slimes, which are fairly easy to kill but give no loot.
- Moon Logic Puzzle: Good luck trying to figure out how to safely interact with some of the objects found in the dungeon, especially since misusing an inventory item completely wastes it. We'll give you a bit of help:
- Keys can be used on treasure chests, left luggage, locked sarcophagi, and locked cabinets to disable installed traps. But already unlocked strongboxes are impossible to make safe.
- Shovels are normally used to clear obstructions in corridors, such as thorny thickets and stone rubble, but they can also be used to dig up shallow graves, clear off barnacle crusted chests, smash open locked display cabinets, locked strongboxes, and locked sarcophagi at cost of destroying some of the contents, or prop open giant oysters… but do not use them on bas reliefs or decorative urns.
- Bandages are obviously used to treat bleeding, but they can also be used as protective handwraps, allowing for the safe exploration of spider webs, old corpses, and blade racks.
- Holy water can be used for temporarily improving a hero's resistance to blight, bleeding, disease, and debuffs, or for rituals involving assorted religious objects, such as confessionals, fountains, and altars. But it can also be used to dissolve the diseased ashes in funerary urns or cleanse piles of bones, cleanse troubling effigies to give a positive quirk, and draws the ire of the Elder Gods if used on occult scrawlings.
- Medicinal herbs can remove combat debuffs. As well, they are used to disinfect myriad objects, such as alchemy tables, iron maidens, food carts and dinner tables. Most importantly, cleansing coral of all things can remove negative quirks.
- Would you expect that pouring precious anti-venom onto an old stump would yield treasure? Well, it does by neutralizing and dissolving away the toxic sap covering it. Anti-venom also disarms the poisonous traps within stray luggage in the Weald.
- In addition to lighting your path, torches can be used at an alchemy lab to completely refill your light. They can also be used to burn piles of eldritch scrolls to remove a negative quirk or summon a Shambler at a Shambler's Altar, but burning stacks of books stresses your heroes horrendously.
- Dog Treats are great for buffing your Hound's combat effectiveness mid-battle, but they're not the only ones who love them. Giant Oysters bestow a dodge buff if you use one.
- Morale Mechanic: Stress is a core gameplay element of Darkest Dungeon. All heroes have stress bar that fills naturally as they spend time in a dungeon and suffer attacks. If that bar is filled to 100 Stress, heroes will potentially break down and you will partially lose control of their behaviour, which is a catastrophe in the middle of an expedition. If the bar is filled once more (to 200), the hero has a heart attack, putting them on Death's Door, or killing them outright if already at Death's Door. It is up to the player to keep the heroes' stress down with ability or stress relief in the Hamlet.
- Muck Monster: The Formless Flesh is a barely-sentient pile of leftover pig goop from The Ancestor's experiments with the Swine. One day it came alive (probably from all the demonic energy coming off those pig parts), and now it's your job to kill it before it gets out of control.
- Music Soothes the Savage Beast: It's a popular strategy to pair the Jester with the Abomination and let the former repeatedly use Inspiring Tune to mitigate the latter's passive stress gain, so that players can take advantage of the Abomination's enormous power while transformed for extended periods without worrying about a Resolve check.
- Mutually Exclusive Party Members:
- Up until the Color of Madness patch, Crusaders, Lepers, Flagellants, and Vestals would refuse to participate in an expedition with an Abomination because their religious faith makes them abhor the monster within the Abomination.
- Flagellants will refuse to join an expedition with other flagellants, because "the burden of suffering cannot be shared".
- Nameless Narrative: While the heroes have randomly generated names to keep them separate from each other for gameplay purposes, the characters do not.
- Narrator All Along: The Final Boss has possessed your Ancestor, like some infernal Meat Puppet, and has been the entity providing colour commentary all this time… according to it, at any rate. The actual Ancestor has lines after the boss, and he's still the same bleak individual, and it's hinted that the Heir becomes an actual ghost, so it's also entirely possible this is a subversion.
- Neat Freak: The "Ablutomania" negative quirk theoretically turns a hero into this, the ingame description being "Obsessed with cleanliness". In the game, it makes him/her uncontrollably use curios tagged to interact with the quirk (fountains and pools of brackish water). It is one of the less impactful quirks due to the rarity of these curios and lesser drawbacks from not using supplies on them.
- The Need for Mead: The inn provides three different services to allow heroes to recover from their stress: drinking, gambling, and visiting prostitutes.
- Necromancer: The boss of the Ruins, the Necromancer, an undead magic user capable of raising the dead.
- Never Trust a Trailer:
- The "Terror and Madness" official trailer contains a shot of five heroes in a dungeon's corridor instead of the four who can be controlled, the Crusader and the Man-At-Arms doesn't look like their definitive versionnote (those point could be just minor change in the art, though, since the trailer was uploaded in the end of 2013), the video shows a map of the dungeon which is way more complex than what is created in proper game, there is a shot of a very long corridor filled with a long stream of enemies (you never fight more than four enemies at once), and the Highwayman is shown scoring three successive attacks in the same round.
- The "House of Ruin" official trailer is more or less the opening cutscene, in which some of the animated scenes have been replaced by gameplay extracts assorted to an altered narration to fit the new scenes. The result implies that the Highwayman (who is shown to be the last survivor of a party) is the narrator, that the letter he is writing in the cutscene is a Framing Device. The game is actually set after the player (a relative of the narrator) receives the letter, and no hero is supposed to be the player character.
- In one of the screenshots featured on the Steam store, the map of the Estate shows the Weald and the Warrens being both unlocked, while the Ruins isn't. It probably means that, at the point the developers took the screenshot, the dungeons were progressively unlocked in a different order.
- The "Terror and Madness
- New Game Plus: In older builds, defeating the Final Boss and trying to load that save file can let you commence a new game + where you start again from scratch, but square off against tougher enemies and have to finish within 86 weeks or before losing 13 heroes. These features have now been separated into the Stygian difficulty on which you can start a fresh file, and loading a completed file now will always let you continue on to tie up any loose ends you're missing.
- Nice Job Fixing It, Villain: Enemies' AI is fairly scant, almost entirely doing skills based on chance out of their list of skills, so it's hardly unlikely for a party to suffer an ambush that ruins their heroes' positioning and then seeing an enemy skill moving them back into their desired position before they take their turn anyway.
- Noodle Incident: Characters undergoing stress relief will occasionally get banned from or swear off certain activities after something goes wrong. The details are never revealed, but one can speculate based on the name and description.They haven't let me in since "the incident".
- Nothing Is Scarier:
- Every so often, the Hamlet must endure the Miserable Dark; a shadowy presence that reduces stress relief and drives all the villagers indoors. What exactly the Miserable Dark is, we don't know, but the Ancestor warns gravely:
"Windows and doors will be bolted... Tonight, something haunts the dark..."- The in-game description for the event doesn't help: "... As one man put it, "Somethin' ain't right with them shadows - movin' and twistin' as they do". Residents are advised to stay indoors until daybreak".
- Also, the event image shows the village square with glowing, inhuman eyes watching from every shadow.
- Thanks to the RNG, it is perfectly possible to explore half of a dungeon without a single encounter.
- Searching tents can lead to the searcher increasing their stress, because "The fate of the tent's occupant is revealed...".
- The Witness quirk, which can be inflicted from praying in the Abbey is also described vaguely as "after seeing troubling behavior, will not take part in the Prayer activity in town". One could use stereotypes of deviant and hypocritical church activities to guess it themselves, or possibly the abbey secretly houses a coven of mad cultists worshipping the Eldritch Abomination hidden in the manor. Which one of those two possibilities is worse? Both of them.
- When starting "Hell is in the Heart", the final quest in the game, the Ancestor is completely silent during both the loading screen and the first room. He has always had something to say in every single boss and Darkest Dungeon quest, but not even the loading screen tips give you anything. This makes entering the final dungeon much more terrifying than anything he could've possibly said.
- Not-So-Innocent Whistle: A hero with the Kleptomaniac quirk suddenly making a whistle as the party gets to an easy treasure container (e.g. sacks, crates, backpacks) is something to dread. Hope there wasn't anything too valuable in it!
- No Casualties Run: Nearly impossible as of the current version. Even if you are lucky and skilled enough to reach the final boss without getting a single hero killed, you will almost always lose at least two heroes to its insta-kill attacks. It is possible to beat it without anyone dying, however.
- Non-Health Damage: Stress damage, which primarily acts as a character's inverted Sanity Meter. It can be applied through events or certain enemy attacks, like Swine Wretch vomit, which applies 10. Accumulate enough of it, and your character runs the risk of an Affliction that has the potential to hose the rest of your party. Accumulate too much, and your character suffers a heart attack, which puts them on Death's Door — and if the character is already on Death's Door, they die instantly. While Health is restored immediately upon returning to town, Stress remains until it is healed at either the Chapel or the Tavern. Sending high-Stress characters into another dungeon run without providing them with some relief is a recipe for bad times.
- No Party Like a Donner Party: When adventuring in the Warren, it's entirely possible to get large quantities of valuable food by using medicinal herbs on a swine dinner cart, which are full of butchered human corpses. Shockingly, this doesn't stress the party at all.
- No Self-Buffs: Camping skills that can target allies generally can't target the user.
- No-Sell: The Shieldbreaker DLC introduces the "Aegis" effect (Latin for shield) which will block the next attack, but does not stop any accompanying effects, including blight and bleed. However, it is only available via combat skills to the eponymous character. (Even the Man-at-Arms does not possess it, in spite of using a much larger shield.) Other characters can only gain it by using the Aegis Scales, which are only dropped from the Snake enemies that only appear in Shieldbreaker's Nightmares, or in the rare random encounters after all of her Journal pages have been collected.
- Obvious Rule Patch:
- The Brigand Pounder used to have a monstrously high PROT rate, since it's literally Made of Iron. After the Armor Piercing attribute was introduced, this high PROT was split into a slightly lower PROT, alongside a permanent damage reduction buff which cannot be bypassed by Armor Piercing.
- It was possible to cheese The Shrieker by having a single Grave Robber spam Shadow Fade, making her untouchable and lasting enough turns to finish the quest. This was doable even with a Level 0 Grave Robber without any Trinket assistance. A patch in December 2018 eliminated this exploit by letting the Shrieker (and various other enemies) have the ability to bypass Stealth with some attacks.
- The overuse of stalling tactics to heal up mid-battle led to significant changes in the Color of Madness update that made it much harder to stall a battle via stunning.
- The Old Gods: Cultists rend for them. In the final dungeon, this is inverted, as the cultists-turned-abominations follow a New God.
- One-Hit Polykill: Several abilities can hit several mooks/heroes simultaneously, like the Highwayman's Grape Shot Blast (a gunshot that scatters through up to three enemies in the front); targeting a group of very weakened enemies with one of those attacks can have interesting results. Conversely, many enemy attacks can hit multiple characters at once — if you have more than one at Death's Door, you could lose them all.
- Special mention goes to the Shieldbreaker in the Ruins. She has a whole party attack, which does base damage comparable to Grape Shot, plus poison. If the initial hit doesn’t kill all the mobs immediately, it's still possible for them all to die before they get a chance to attack.
- Optional Boss: Theoretically, you only need to defeat the Final Boss to complete the game, and it's possible to finish without engaging any of the dungeon bosses (albeit at the cost of some good loot). Still, there are some bosses that not every player will encounter normally:
- The Shambler, which can normally be fought by using a torch on a randomly-appearing altar which clearly says that bad things are going to happen if you interact with it. The battle is brutal, mainly because it's rather bizarre compared to normal bosses, requiring different tactics for survival, and prone to spiralling out of control if you make any misplays:
- It always begins the battle by surprising your party, forcing heroes out of ideal formations and forcing you to waste a turn or two re-positioning them.
- The Shambler's attacks deal very little damage — but they all target the whole party and afflict them with very high levels of blight, bleed, and stress, which stack very quickly. And thanks to the shuffle, this makes it very difficult to apply party-wide heals.
- It also summons minions, which start very fragile and weak, but get stronger with each turn. If you decide to ignore them and go after the boss, you'll soon find they're one-shotting your characters, while you can barely scratch them. Leaving them alive also allows it to shuffle your party again, potentially ruining your hard work repositioning them.
- The Shrieker only shows up in its own quest, and is a Time-Limit Boss to boot. Simply surviving long enough until it flees completes the quest, which either yields your lost Trinkets or some very rare ones, on top of bestowing the combatants with unique quirks. Breaking its nest within the turn limit yields high-value treasures. The only reward for killing the Shrieker is an increased chance at getting its related positive quirks.
- Brigand Vvulf only shows up during the Brigand Incursion mission, in which he acts like a strange hybrid of the Prophet and the Brigand Pounder. Confronting him is completely optional, though he will destroy three of your Hamlet upgrades if you don't at least try the mission, and killing him ensures he will never re-appear during that playthrough, whereas the other Optional Bosses can be refought.
- The Shambler, which can normally be fought by using a torch on a randomly-appearing altar which clearly says that bad things are going to happen if you interact with it. The battle is brutal, mainly because it's rather bizarre compared to normal bosses, requiring different tactics for survival, and prone to spiralling out of control if you make any misplays:
- Organ Drops: Slaying the Formless Flesh grants you its Heart. The Collector has a chance to drop organs that aren't his per se, namely the Heads of those under his control.
- Our Centaurs Are Different: The Swinetaurs are fat, diseased, have a badly deformed arm and are porcine from the waist down, rather than equine.
- Our Vampires Are Different: Mosquito/Human hybrids. The more power a Vampire has, the more hideous it becomes... Other "bloodsucker"-style enemies include corpses controlled by huge fleas.
- Our Founder: A rather depressing version. There is a statue of the Ancestor in the middle of the Hamlet. Clicking on it will allow the player to replay to the Ancestor's memoirs, presented with the quote "In time, you will know the tragic extent of my failings".
- Our Gargoyles Rock: Literally... which makes them highly resistant to regular attacks and bleed, and a real pain to try and stun. Fortunately, they're also undead, so the Crusader can tear them apart and the Plague Doctor can blight them.
- Our Ghouls Are Creepier: They're of the zombie variety, gigantic and like to adorn themselves with skulls.
- Our Liches Are Different: The Necromancer (and variations) were necromancers that the Ancestor summoned from overseas to teach him the art. When he felt that he had learned what he could, he killed them, and reanimated their corpses with their minds intact. They were quite happy with their new state.
- Our Ogres Are Hungrier: Though they're called giants, they're only about half again as tall as the heroes (although they admittedly have terrible posture). They also have toxic fungus growing from their backs.
- Painting the Medium: After the Siren uses her signature Song of Desire move, a quiet One-Woman Wail can be heard for a while, singing in tune with the battle theme.
- Pamphlet Shelf: The Ancestor's Journal pages are items you can sometimes find in dungeons. Each of these narrates a little story from the point of view of a hero.
- Permadeath: For the most part, once a hero dies, they're gone for good. There is a rare town event that can bring back one fallen hero, but they are raised with an additional illness, and their skill and equipment levels reset to level 1.
- Pig Man: The Swine of the Warrens.
- Player Mooks: Zig-Zagged. On the one hand, each hero has their own personality and backstory like a traditional RPG character. On the other hand, each hero is a character class, and nothing's preventing the player from having more than one of the same hero in the party (much less the roster). They have the name and palette customization one would expect from more bog standard player mooks in other games.
- Plunder: The second and most profitable way to make money after expedition rewards. Plundering the corpses of your enemies or hidden treasures will give you extra cash to spend on taking care of your heroes, and is actually necessary because expedition rewards often don't even reimburse the cost of supplies
- Point-and-Click Map: The quest selection screen shows an overview of the map, and the player is spared the journey to the dungeon when the mission is validated.
- Poison Is Corrosive: Ambiguously. Despite not having a circulatory system, skeletons can be blighted, and in fact have very low resistance to it. Then again, it's not really clear what "blight" is actually supposed to be, and skeletons are stated to be immune to bleeding precisely because they have no circulatory system.
- Posthumous Narration: The older relative is long dead, but joins the game to give commentary on the events and occasional bits of exposition.
- Power Equals Rarity: The more powerful Ancestral Trinkets, Heads, or Music Boxes give better buffs but are rare drops from uncommon monsters.
- Primal Fear:
- The negative quirk of "Thanatophobia" (fear of death) is randomly gained when looking into an opened sarcophagus. It grants a higher stress gain when health is low… which can make things go from bad to worse.
- The lower the ambient light is, the more quickly stress is gained.
- Punctuated! For! Emphasis!: A few of the Ancestor's quotes are quite aggressive in this fashion, such as after you defeat an enemy.The Ancestor: Continue the onslaught! DESTROY! THEM! ALL!
- And later:The Ancestor: You still consider yourself an entity separate from the whole. But I know better. And I. Will. Show you.
- And later:
- Puppeteer Parasite: The Weald is full of parasitic fungus that turns its infectees into contorted zombies.
- Pyrrhic Victory: If the player suffers a Total Party Kill after a boss has been defeated (e.g. Wilbur squealing your party into submission after defeating the Swine King), the mission is still won. However, while you receive the mission rewards, you neither keep the spoils in your inventory nor any of your party members.
- Random Number God: Notable even by roguelike standards; critical hits can happen completely at random, either for you or your enemy, and both the damage and the stress impacts they have on your party are significant, heroes at breaking point could go insane and receive anything from a minor affliction to a horrible one, or might even bounce back entirely, and so on. It's entirely possible for your maximum level Leper (who have the highest Hit Points of any class) with top weapons, armour, and protective trinkets to take a single crit that sends them to Death's Door and then get immediately killed by another enemy or the blight/bleed damage that accompanied the hit before you get a chance to save them.
- In the middle of a great run, approaching the final boss of the dungeon with a full complement of heroes at 100 percent health with no stress at all? Lovely, but if the game decides to throw The Collector at you right before the boss chamber, all of that work can be ruined.
- Ragtag Bunch of Misfits: While some characters are trained warriors seeking glory or mercenaries trying to earn their pay, other possible classes include crazed jesters, lepers, grave robbers, highwaymen and other folk usually not associated with heroism. All of them are the only force that can stop the horrors of the estate from spreading.
- Rare Random Drop: Ancestral Trinkets, which provide extremely powerful effects, some of which border on game-breaking. While you are guaranteed to obtain them from long Champion dungeons or through certain fights, there's a slim chance you can get them from random loot. In the same way, the very powerful Music Boxes Trinkets are very rarely dropped by the Madmen, as are the Goblets by the Bone Royalty.
- Recurring Boss: The eight regular Bosses can be fought three times, each time an upgraded version of the previous iteration.
- Refusal of the Call: Sort of. If a hero has ever participated in a successful expedition in the Darkest Dungeon, they will refuse to go back in under any circumstances."I've seen enough of the Darkest Dungeon to last a lifetime."
- When playing on Radiant mode, heroes get to re-enter the Darkest Dungeon once they've participated in a successful expedition, but they immediately suffer a large amount of stress and have an extremely small virtue chance — meaning they're almost guaranteed to become afflicted.
- Refused Reunion: In The Crusader's backstory comic, he left behind both his life as a farmer and his wife and son in order to serve in the Crusades. A few years after his gruesome tour of duty, he passes by the farm on the return trip. His wife and son wave to The Crusader. He hesitates, before turning around and riding away.
- Renovating the Player Headquarters: The game sees the player character inheriting a run-down hamlet from their Ancestor at the start of the game, which can be upgraded with facilities to relieve your heroes' stress, strengthen their abilities, teach them survival skills, and buy items. The Crimson Court and Color of Madness DLCs add Districts, a special kind of town building which offer hero-specific incentives and an insanely expensive monument which does absolutely nothing besides give you an achievement for building it.
- Run or Die: A strategic retreat when the party starts getting overwhelmed is often the best course of action, especially if a hero has already been killed. It's simply very difficult to defeat enemy parties without a full complement on your side, and if your entire party is killed, you lose all the loot they picked up in the dungeon. By contrast, if you successfully flee the dungeon, your heroes will haul back all of the loot and heirlooms they've already acquired. They will pick up additional stress as a result of their failure, but it's absolutely possible for a failed mission to bring back enough gold and heirlooms to be a net positive for your financial status and allow you to further upgrade the hamlet and your surviving heroes.
- Ruins for Ruins' Sake: The Cove shelters the ruins of former huge buildings, but why they are here isn't explained.
- Rush Boss: The Brigand Cannon needs you to kill the Matchman every turn or it fires for heavy damage (unless you get lucky). Fortunately, since the cannon itself can't fire without the Matchman, it won't attack you on its own.
- Sadistic Choice: The Heart of Darkness is polite enough to let you pick the target for its One-Hit Kill attack.
- Sanctuary of Solitude: Characters can go to the hamlet abbey to reduce stress via meditation, praying or flagellation.
- Sanity Slippage: Thanks to the Affliction System, characters' stress levels respond dynamically to virtually every occurrence in the dungeon, both positive and negative. If the pressures of their circumstances become too overwhelming, their resolve is broken, and they will become afflicted with a myriad of psychological conditions.
- Sanity Meter: Called 'Stress' in-game. Characters will suffer 'stress damage' from attacks, random events and so on. If their stress bar fills up their resolve is tested and they either break down (which can damage the sanity of other party members) or get motivated to kick more ass and inspire others. If it fills up again, then they either die of a heart attack (if Afflicted), or lose their Virtue (if Virtuous, although this also has the effect of removing all their stress). Stress is lowered gradually over time when heroes are inactive in the hamlet, and can be healed in larger amounts by paying for activities at the Abbey and Tavern. Reducing stress in the middle of a dungeon is trickier, but it can be done with many classes' camping skills, certain classes' combat skills, or by scoring critical hits or heals.
- Scenery Porn: The town event "The Miserable Dark" may be negative in nature, but the way it puts the Hamlet under a stunning starlit night sky certainly isn't.
- Schizo Tech: Though the setting's technology draws mostly from the late Renaissance, with cannons and muskets and pistols alongside heavy plate armor, there are anachronisms in the technology, such as the Arbalest using a crossbow, the Bounty Hunter wearing scale mail (which would have lost favor at the turn of the millennium), and the Crusader wearing early Renaissance-style plate armor. The Crimson Court, meanwhile, go in the opposite direction, having weapons and clothing that wouldn't be out of place in the mid 19th century. Considering how strangely time seems to pass around the Estate, this might actually make some sense…
- Score Screen: At the end of each mission, a two-fold score screen shows the reward/loot your party has earned and then the status of the party members.
- Scratch Damage: Some debuff skills will do one damage if they hit, even if they just involve the hero shouting at the enemy. This used to be the case for every debuff, but an update patch eliminated the damage component for some skills.
- Screw This, I'm Outta Here: A gameplay point. It is possible to flee a fight (though it has a failure probability). Also, you can abort the current expedition and go back to the hamlet, keeping your inventory but gaining stress. When you suffer from your first party member's death in a dungeon, the game shows some text reminding the player of the existence of both features.
- Schmuck Bait:
- At the end of the tutorial there's a chest clearly labelled "Bandit's Trapped Chest". You can guess what happens when you open it. Thankfully it's at the end of the mission so it doesn't actually matter, and you can also open it safely if the miniboss fought beforehand happens to drop a key.
- There are strange and eldritch altars that can be occasionally encountered during an expedition, and its description pretty much outright tells you what horrors happen if you activate it. Naturally, it is difficult to resist doing just that.
- New Game Plus adds an addition to the tutorial in the form of the Transcendent Terror implied to be the first Heir haunting the grounds replacing the campsite in front of the Brigand Bloodletter's room.Surely nothing good can come of a dialogue with the dead?
...
"Time — an endless cycle. Ia! Iaaaa!"
Dismas/Reynauld's Resolve is Tested...
- Self-Deprecation: One of the occult altars you can find in the Warrens is shaped like Red Hook Studios' logo.
- Shell-Shocked Veteran: Any experienced hero will become this as they gain more and more afflictions. Those who emerge from the Darkest Dungeon are even worse off, having crossed the Despair Event Horizon; while their status makes them inspiring to the others, their idle dialogue is generally macabre and doom-laden.
- Shoot the Mage First:
- Enemies in the back row are usually fragile, have stress-inducing attacks, and prefer to attack your back row characters. Therefore, it's generally wiser to take them out first.
- The Brigand cannon boss fights make this concept extremely important. If you don't take out the Matchman each turn, he'll light the cannon and BOOOOOOOOOM! About three quarters of your party's health is gone in a flash. Unless it misfires, but only a fool would rely on that in the slightest.
- Subverted in the Swine Prince fight. When the battle starts, you're pitted against two enemies: The Swine Prince himself, who does 99% of the fighting; and Wilbur, who will sit in the back, mark your characters, and cause them to take extra damage from the Swine Prince's attacks. Wilbur is by far the easier of the two to kill, but if you do, the Swine Prince will get a little annoyed and start pummeling you with a much more dangerous attack that hits every character, every turn.
- Shout-Out: Many a party nickname can be seen as a veiled reference to something of pop culture if it isn't descriptive of how the party functions. Similarly, backer hero names may involve pop culture references.
- Side View: Gameplay in a dungeon is only viewed from the side as the combat system is based on positioning heroes at the frontline or the back.
- Sigil Spam: The spiked arc "Iron Crown", shows up all over the place in the game. Firstly, it appears over a torch for the game's own icon, it is seen within the crest used for the Estate's coat-of-arms, it's going to appear over your heroes a lot to indicate them gaining stress or becoming afflicted, and the symbol or its silhouette appears in much more subtle places for much of the rest of the game or many of the heroes' comics. The name for it comes from an objective in the second map of the Darkest Dungeon, which has the same visual appear over it when activated. It even frequently appears within the heroes' comics.
- Situational Sword: A lot of Trinkets bestow bonuses under certain conditions, like bonuses against enemy types or under different light levels. Some of them exaggerate the trope by protecting against one particular dangerous attacknote or being beneficial against one specific enemynote .
- Skill Slot System: All heroes have seven potential skills to unlock and upgrade, but only four slots to use them in combat. It allows for some flexibility in strategy when choosing heroes for an expedition.
- Snow Means Death: The first teaser for the sequel shows a snow-covered mountain. It's Darkest Dungeon. There is going to be death.
- Sole Survivor: The Blackest of Fates collection of journal pages describes an individual of a party, possibly a Hellion given they flew into a rage and used a weapon described as an axe, who seems to have slain a Shambler after their Occultist, "thrice-damned Mizir", used a torch on the Shambler's Altar to summon one. The Shambler easily killed their Arbalest and their Crusader, while the (probably insane) Occultist seemed to offer himself as tribute to it and was unceremoniously torn apart.
- Sprint Shoes: Some trinkets grant a small speed buff to the hero who has it, most commonly the Speed Stone.
- Space Compression: In real-time, exploring a small or medium dungeon takes less than a hour, and the corridors doesn't seem to be longer than hundred meters. Since the party gets hungry several times during a raid, and the in-game clock advances of one week when you leave a dungeon, the maze is obviously supposed to be a lot bigger than it looks.
- Squishy Wizard: The Brigand Lighter/Matchman during the Brigand Cannon boss fight. He has very low health and is very easy to take out, but let him live unstunned for a single turn and he'll fire the cannon for massive damage and high stress damage to your party unless it misfires.
- Stat-O-Vision: During fighting, the bottom of the screen feeds you statistical informations such as the resistance of the enemies, or the probabilities to hit and crit, enabling you to think your move ahead.
- Status Effects: Bleeding/Blight chip away at your/enemy health every round until removed or they expire. Stun makes enemies lose their next action, but when it wears off they gain a temporary resistance to it, preventing one from being trapped in a stun lock.
- Status Effect-Powered Ability:
- The Marked status effect powers up the skills of several different heroes, allowing them to deal majorly increased damage against targets suffering the debuff. Those that can both Mark a target and Combo with the resulting damage next turn include the Arbalest, Bounty Hunter, and Houndmaster. While they have no way of applying the Marked status effect, the Highwayman and Grave Robber both have attacks that deal increased damage to Marked foes as well.
- Uniquely, the Grave Robber's dagger throw deals extra damage if her target is Blighted, and the Bounty Hunter's Finish Him deals bonus damage against Stunned targets.
- STD Immunity: Averted. Visiting the brothel has a small chance of giving syphilis to a hero.
- Stealthy Mook: With the introduction of the stealth mechanic, some of the monsters like the Bone Soldiers or Brigand Fusilier begin a fight stealthed and thus untargetable except by a few abilities that bypass/cancel stealth and area attacks. Stealth wears off on its own after a couple of turns.
- Stone Wall: The three characters who can raise their own PROT by significant amounts (Crusader, Man-At-Arms, Leper) mix this with a side of Mighty Glacier by having high health, low speed, good melee damage, and typically must spend time setting up these PROT buffs. This can be escalated with the Tough Ring trinket, which raises PROT and HP at the cost of DMG. Put them all in a party (supported by a Vestal) and the game acknowledges this by calling it "The Wall".
- Tactical Suicide Boss: Vvulf can guard his minions with Tower Shield, plausible given his Stone Wall nature. However, he is the keystone of the brigand invasion, and the Tower Shield doesn't offer any protection to him at all, so all it does is make it easier to kill him.
- Take a Third Option: The final boss lets you choose who dies from its One-Hit Kill attack. There is a way to avoid this: managing to kill it before it even gets the chance to use it.
- Take Your Time: Played straight in Radiant or Darkest difficulty. Your end goal is to purge the Darkest Dungeon and you can take your sweet time upgrading every hero to the fullest before undertaking Darkest Dungeon expeditions. Averted in Stygian and Bloodmoon, where you have a time limit of 86 and 100 weeks respectively to defeat the Final Boss.
- A Taste of the Lash:
- One of the possible methods of removing stress involves flagellation. There is a negative quirk called "Flagellant" which makes flagellation the only way to relieve stress in town.
- Also used as a weapon hitting several targets at the same time, or one for more severe damage, by the Bloodletter mini-bosses. Unlike the example above, it increases stress.
- The Flagellant hero uses a lash with three balls-and-chains as his main weapon, and can only heal stress by either performing a camping skill (that involves whipping himself) or visiting the Penance Hall for flagellation. Naturally, the Flagellant will not accept any other town activity for stress relief.
- The Teetotaler: Heroes with the Resolution quirk are this, refusing to drink at the Bar for stress relief.
- Tempting Fate: Some heroes who are fresh off the wagon will naively claim that the worst is behind them or that the hamlet doesn't seem as dangerous as they thought.
- There Are No Tents: Averted, as long expeditions where heroes will be worn down by several fights will allow the usage of Firewood in order to rest, cure ailments and buff yourself in the middle of the expedition. You can also be ambushed as you camp as the games wants expeditions to be constantly challenging, but camping skills preventing ambushes are plenty.
- 13 Is Unlucky: Death Blow resistance is maxed at 87%, meaning that no matter what quirks or items you have a hit while at Death's Door has at least a 13% chance of killing you.
- Those Two Guys: You always start the game with two party members: A Crusader named Reynauld and a Highwayman named Dismas. They can make it all the way until the end of the campaign or die horribly early on, depending on how the RNG treats you. There is even an achievement for getting both of them to the final expedition. Reynauld always has the Kleptomaniac and God Fearing quirks, while Dismas is always a Known Cheat.
- Timed Mission: Playing on Stygian difficulty (formerly named New Game Plus) turns the whole game into one: The player has 86 in-game weeks to defeat the Final Boss or they are issued a Game Over and their save file erased. Getting 12 heroes killed will do the same. If the player has the Crimson Court DLC in place, Stygian difficulty is replaced with Bloodmoon difficulty, which extends the time limit to 100 in-game weeks to accommodate the additional bosses, as well as a limit of 16 heroes dying.
- Title Drop:
- The last sentence of the opening cutscene:Narrator: I beg you, return home, claim your birthright, and deliver our family from the ravenous clutching shadows...of the Darkest Dungeon.
- Several trailers of the game actually ends with the Narrator namedropping "the Darkest Dungeon".
- The Very Definitely Final Dungeon in the game is called the Darkest Dungeon.
- The last sentence of the opening cutscene:
- Tomboyish Ponytail: The Hellion's hair is put into a large ponytail, as is the Arbalest's.
- Too Dumb to Live:
- The effects of the some afflictions include occasional refusal of receiving healing (through spells or items), even if the character is dying, blighted, or bleeding (or all of this in the same time).
- Even sane Heroes can fall subject to this if they develop a negative behavioral quirk, such as a fascination with the dark arts driving them to read unspeakable secrets written in Black Speech on tanned human skin or a fixation on food compelling someone to eat the rancid, decaying meat found on a dinner cart in the Warrens. This can lead to keyboard-breaking moments such as when one of your heroes decides to open a locked item and triggers a trap when you had a key in your inventory.
- The narrator too. Squandering your family's wealth then digging deep under your estate based on ancient texts speaking of sealed evil is pretty much asking for death or insanity.
- There's an infinite stream of adventurers traveling to the Darkest Dungeon for a chance at fame and fortune. They're either uninformed or very stupid, or perhaps they have nothing left to lose.
- Took a Level in Badass:
- While the Brigands weren't exactly pushovers, they were still a Wacky Wayside Tribe and the only boss that they got was a tutorial boss turned Degraded Boss. The Fiends and Frenzy update, however, introduced a full fledged Brigand boss: a giant cannon.
- They take another huge level in badass with the Everything Burns update, which added town events. This includes the "Wolves at the Door" event, where the Brigand leader Vvulf leads a raid on your hamlet. This mission is on par in difficulty with the Darkest Dungeon itself!
- Took a Level in Jerkass: Used as a gameplay mechanic, no less! Each time a character gets too stressed, their behavior may be heavily affected, making them Selfish, Paranoid, Hopeless, or outright Abusive to the other party members.
- Total Party Kill: The game's intro text warns you this will likely happen more than once throughout the game, so try not to get too attached to any one character. There are even achievements for losing an entire party: one for a party wipe, and another for a party wipe against a boss.
- To the Pain: Sadistic heroes are fond of dishing these out to the enemy. Not only do enemies never react to them, it serves to disturb the rest of the party, raising their stress.
- Trauma Inn: Downplayed. Bigger dungeons will allow you to camp in them, the number of times depending on how much firewood you have. While camping you can heal, buff, and reduce the stress of your party, but each of these actions takes up points of time, which you have 12 of. You can also be ambushed while sleeping, which can very quickly offset any gains if you are unlucky. Played a bit more straight with The Hamlet, as all of your heroes will be healed when you return there and you can use its faculties (including an inn) to reduce the stress of anyone that needs it.
- Tulpa: According to Word of God, the Light is one resulting from humanity's faith in a benevolent God. Essentually a Good Counterpart to the Idea of Evil. Said faith created a very potent holy power capable of Holy Burns Evil among other things.
- Turn-Based Combat: Characters and enemies take turns fighting by decreasing speed order.
- Tutorial Failure: When you complete the tutorial mission, the pop-up text tells you to "click the crest" to go to the Hamlet. Unfortunately, one of the items in the game is called a crest, and many first-time players think it meant those crests instead of the seal icon the interface actually wants you to click. Fortunately, this isn't as bad as most examples, as completing the quest gives the player a large window with two buttons with tooltips that clearly state what they do (end the quest or continue adventuring) and if the player chooses to keep going, the icon in the upper left corner will begin glowing, indicating it can be clicked on to end the quest.
- Überwald: The Estate and its surrounding environs.
- Uncleanliness Is Next to Ungodliness: The Swine Folk are not the cleanliest people, and they're also the most morally bankrupt of your adversaries.
- Underground Monkey: All enemies, including bosses, have upgraded versions whose appearance differs, at most, by a subtle palette swap.
- Uniqueness Rule: The game prevents you from putting more than one Flagellant in your party at a time. The gameplay reason for this is to prevent multiple Flagellants from using Suffer on each other to pass Bleed and Blight between each other in a loop to prevent them from ever dealing damage. When trying to put another Flagellant in your party, he says "the burden of suffering cannot be shared".
- Universal Poison: The status effect blight remains the same be it caused by giant spiders, fungi, eldritch abominations or humans' Poisoned Weapons. Of course there's an universal antidote to cure it.
- Unreliable Narrator: The Ancestor may be a complicated case of this; while he initially seems to be giving you sound advice and encouragement pushing you to confront and overcome the horrors of the Estate, when you raid the deepest layer of the Darkest Dungeon, he manifests as an enemy there suggesting that he is/was either absorbed by The Heart of Darkness or was a projection of it all along manipulating you into sacrificing heroes to strengthen it. This puts the horrifying revelations and Breaking Speech of the ending cutscene into a more questionable light, albeit not enough to prevent the Heir from committing suicide. Of course even if it wasn't the Heart all along, the Ancestor is still a completely insane, monstrous, and not entirely bright person; not exactly the kind one would call reliable to begin with.
- Unusual Halo: When a character's Sanity Meter runs out and they become Afflicted, the game's Arc Symbol of a black arc with five evenly-spaced lines pointing downwards appears above them as a halo while the game announces what flavor of madness the character has been cursed with. On the rare occasions that the Sanity Meter runs out and the character instead becomes Virtuous, a golden Holy Halo appears above them instead.
- Useless Useful Spell: Some skills or trinkets can fall into this trope, sometimes from being excessively situational, and sometimes due to tweaks to other skills making them a lot less useful. For instance, the Debuff chance bonus from the Vestal's Crimson Court set became far less useful after her Hand of Light skill was tweaked to give her a buff rather than saddle its target with a debuff, leaving her one source of debuffs as the weak Illumination.
- Variable Mix: The background music becomes more intense as the light level drops, starting with a simple droning background beat before adding in "Psycho" Strings once the shadows start to close in to help you feel the same stress as your expedition party. Battle music also becomes more dramatic as your party gets into more and more dire straits or if the battle is fought in the dark.
- The Very Definitely Final Dungeon: The Darkest Dungeon is very visible due to being the highest building perched at the top of a cliff and the red expedition icon. Which you can send an expedition to any time you wish, even as the first thing you do when reaching the town. Not that it is the best decision...
- Vicious Cycle: The tail-end of the ending cinematic leads into the carriage scene at the start of the game. Worse, you've also got New Game Plus, with Those Two Guys again (Reynauld and Dismas) no less, driving forward the idea that the Heir has done this numerous times, with the same terrible results.
- Video Games and Fate: The game uses the fact that when you finish a game, all there is left is to begin again, to imply that the Heart of Darkness is manipulating your lineage to feed itself out of the suffering the cyclical ebbs and flows of the Estate creates.
- Video Game Caring Potential: Played with. While you should keep the heroes alive, train them, and try to maintain their sanity, the system of quirks and afflictions combined with the roguelike-nature of the game will make completing a "Everybody Lives" objective very challenging. And almost impossible since, assuming that you lose no one up to the final boss, it uses an unavoidable attack that requires you to sacrifice a party member.
- Video Game Cruelty Potential:
- There's quite a few achievements based around getting your heroes killed, but the crowning moment for cruelty is the achievement for sending a team of Lv 0s into the Darkest Dungeon. An area where heroes are recommended to have a max level.
- There’s some bitter pragmatism in the early game, when the mortality rates are at their highest, to just send random teams into the dungeons, grab loot, escape, and then discard the heroes you don’t plan on paying to heal afterwards. You can easily slide into “traumatized vet production plant”.
- Discarding heroes doesn’t stop being practical towards the end game either. If your roster is mostly level 6 heroes, all you’ll have access to are the champion level dungeons. If you still want access to veteran dungeons for guaranteed successful runs, then you need to get rid of some of your level 6’s, and replace them with 3s from the carriage. Since leveling at that stage tends to go fairly quickly, you’re effectively encouraged to do high-risk suicide runs with poorly equipped heroes to thin the ranks and profit at the same time.
- Lost trinkets (due to Alcohol-Induced Idiocy noted above, or heroes dying in a battle you fled from) will be collected by the Shrieker, creating an opportunity to fight it once you've lost 8 or more. If you lost a very valuable trinket, there's nothing stopping you from sending an army of Level 0 Red Shirts decked out in low-value trinkets to their death so that you can reclaim what you've lost next week. Similarly, sending a party of Level 0 heroes is the best way to handle Vvulf if you don't think you've got a group up to defeating him, as taking on the quest but failing/retreating from it (the latter of which will randomly kill one of the surviving party members) still prevents the bandits from damaging your building upgrades.
- Viral Transformation: The Blood Soaked Pages Torn From A Journal bunch of pages depict an individual that was bit by one of the Pelagic monsters in an ambush. Their flesh secretly fell off to reveal scale and membrane and then they murdered their accompanying sleeping party under the belief the party suffered some sort of transformation, which left them shocked and disgusted by the party's soft flesh, close-set eyes and warm blood, before going to the sea, unable to remember out why they ever left it.
- Wacky Wayside Tribe: The Brigands used to be this, randomly mugging the party in the depths of monster-infested dungeons, but as of the Fiends and Frenzy patch, it is revealed that the Ancestor hired them as mercenaries to intimidate the restless Hamlet denizens into submission and were probably... affected to stay being around the place when the Eldritch Abominations came out in full force.
- Wallet of Holding: Averted. The gold found in the current dungeon occupies slots (there are 16 slots) in the party's inventory. Each slot can be filled with up to 1,750 units of gold (with an extra 750 for each Antiquarian in your party, capping off at 4,750 per stack in a 4-Antiquarian party).
- Was Once a Man: A prevalent aspect of the monsters is that they are often former humans corrupted by the local evil power. The Unholy soldiers and courtiers from the Ruins are skeletons raised into undeath by the Necromancer, the Fungi Men in the Weald were people infected by the mushroom that invaded the forest, a note indicates that the Pelagic creatures are potentially former humans having undergone transformation. Only the Swinefolk weren't former humans as they are creatures trapped in pig corpses.
- Weapons Kitchen Sink: The adventurers have equipment spanning centuries: from full plate armour and longswords to duster coats and flintlocks, Renaissance garb and gas grenades to furs and a glaive.
- Interestingly, the Crusader's longsword appears to advance with historical usage, gaining a side-ring after the second upgrade like late medieval/early-renaissance swords.
- Weapon-Based Characterization: Each hero has a specific weapon:
- The Abomination: Chains and bile in human form, teeth, claws and horns in beast form.
- The Arbalest: A massive crossbow.
- The Antiquarian: A magically enchanted censer and a small, weak kukri.
- The Bounty Hunter: An axe and a hook.
- The Crusader: A longsword, wielded in two hands.
- The Flagellant: A flail.
- The Grave Robber: Daggers (mêlée and thrown), poisoned darts, and a pickaxe.
- The Hellion: A glaive.note
- The Highwayman: A flintlock pistol and a dirk.
- The Hound Master: A cudgel and his trusty attack dog.
- The Jester: A dagger, sickle and lute.
- The Leper: A massive but broken executioner's sword.
- The Man-at-Arms: A mace and kite shield.
- The Musketeer: A long rifle and sidearm pistol.
- The Occultist: A sacrificial dagger and ceremonial skull.
- The Plague Doctor: A dagger and various grenades.
- The Shieldbreaker: A throwing spear in her good hand with a shield strapped to her other arm.note
- The Vestal: A spiked mace and holy book — most of her direct attacks actually blast foes with the Light.
- We ARE Struggling Together: A party of Afflicted heroes generally devolves into this, with everyone insulting and interfering with each other — bonus points if they're all Abusive, Paranoid, or Selfish.
- Wham Line: "The great family of man". Turns out when The Ancestor was talking about how "ruin has come to our family", he was thinking a little bigger...
- When you start a game on Stygian, the tent is replaced by a new curio called the "Transcendent Terror". It consists of a ghost with its arm ominously outstretched towards Dismas and Reynauld, as though it's beseeching them to turn back. As interacting with it reveals, the ghost is warning the heroes that the horrors of the estate have happened before and that they're about to happen again...
Afflicted Hero: "Time — an endless cycle! Ia! Iaaa!" - Where the Hell Is Springfield?: The estate has a vaguely European feel, but that's pretty much as concrete as it gets.
- Why Did It Have to Be Snakes?: The "Fear of X" or "X Phobe" negative quirks give a stress resist debuff against a particular type of enemy or dungeon.
- Becomes almost literal with the Shieldbreaker's nightmares, which plunge the party into a fight with snakes while camping. Such is her fear that she will begin those battles with an incurable 6 turns of Horror, which is almost guaranteed to induce a Heroic BSoD if the battle drags on long enough.
- With Great Power Comes Great Insanity:
- The whole shtick of the Abomination, his beast form is incredibly powerful, but it comes with the penalty of stressing out your party when he transforms and a constant stress gain every turn for him as long as he stays in it.
- Certain afflictions will actually offer buffs to your character's stats, eg. an abusive hero will get extra damage, a fearful hero will get extra speed, etc. Though to be fair, this would be more a case of "With great insanity comes great power", and the negative stat effects will outweigh the positives.
- With This Herring: Played with. The starting characters and new recruits come with the most basic armor and weapons that are explicitly described as "worn" or otherwise substandard. As soon as the blacksmith is working and upgraded you can equip new recruits with better weapons & armor if you choose, but it's often not worth making the investment until they've survived a couple of missions since you lose all the gold you invested in them if they die.
- Wizard Needs Food Badly: At some point during the dungeon run, your party may feel hungry. You can then choose to either eat, which restores health and consumes food as usual, or let your characters starve and take a severe hit to their hit points and stats, which is what will happen if your food supplies run out. This can be very frustrating, as it appears to be randomly triggered rather than timed. It's entirely possible to do two similar-length missions: one where the party never gets hungry, and another where they want three meals, making it hard to judge how much food to carry. You can also manually feed your characters food to recover health. However, the game does not take this into account when deciding your characters want a meal, meaning it's possible to feed a character your last food to save them, only for the game to immediately declare the party is hungry and you not having food to comply.
- Womb Level: The third venture into the Darkest Dungeon is this, as all of the walls are comprised of organic nightmare-inducing matter and some of the enemies are labeled as cysts and white cell stalks.
- A World Half Full: Along with the darkness, small fragments of hope are planted. Your heroes can overcome their hardships and emerge even stronger, you can rebuild the hamlet and turn it from a borderline ghost town to a thriving one, the Narrator can remark how he is seeing hope in the eyes of people for the first time, and your heroes can meet the horrors of the land, match them blow for blow, and strike them down. The narrator puts it best."As the fiend falls, a faint hope blossoms."
- It turns out that all of the Heir's efforts are for naught. At least a couple heroes (and probably many more, given the difficulty of the game) are dead. The doomsday clock set by the Heart of Darkness has been turned back, but will eventually go off, destroying the entire planet. The Heir is implied to commit suicide.
- It can also be considered a victory in that you've bought the world more time. Sure, maybe right now there's no way of stopping that thing at the heart of the world, but time marches on, people get smarter, learn more, and create new things. They're already at the cannons and gunpowder stage in game: Who knows what may be accomplished in a few centuries? If the creature's avatar can be killed, heck if it can be afflicted by Bleed and Blight, that means that its master isn't invincible, just really, really big and tough. In addition, the Light, while a product of humanity's belief in 'delusions', is in its current form capable of very real holy powers that are effective against the Heart and its forces, meaning humanity is effectively creating a Good Counterpart of the Heart from their faith alone.
- You Are Already Dead: A variant: bleed and blight damage happens at the start of each turn, so if an enemy has more bleed/blight damage incoming than their remaining hit-points, they'll sit pretty until their turn comes around and then promptly die. It can still be worth killing them directly, though, as direct kills/crits have a chance to reduce stress whereas damage over time kills don't. Conversely, it can be better to avoid killing them in hopes that your character with heal or stress reducing skills will get their turn first, or just not allowing them to leave a corpse. This would apply to the heroes, too, if it wasn't for Death's Door (though it can still apply to heroes on Death's Door).
- You Have Outlived Your Usefulness:
- You can perform this trope by dismissing heroes in your roster when you're out of space and cannot afford to manage their stress or quirks.
- The ancestor, in his pursuit for knowledge, learned from a number of visiting scholars. After he had mastered their teachings, he killed them while they slept.
- The ship crew that brought him his various Artifacts of Doom were similarly done away with once he could no longer pay them. He might have chosen a slightly less potent curse to do it, though.
The Crimson Court DLC provides examples of:
- Aristocrats Are Evil: The humanoid Bloodsuckers showed this vibe as well-dressed courtiers and aristocrats in state of Body Horror, or their servants. And they were like this before they were vampires.
- Animalistic Abomination: The Crocodilian, the result of a crocodile getting infected with the Crimson Curse, serving as a recurring mini-boss for the DLC. It's mosly a crocodile still, but with insectoid legs and a bizarre mosquito-like posture."A hideous mutation, unnatural and abhorrent!"
- Anti-Frustration Features: Torches are not required in the Courtyard except to clear up some roadblocks and giving a small temporary boost. Since the boss dungeons are massive, this means you don't have to use most of your inventory space to carry torches.
- Autocannibalism: One of the cinematics shows that consuming the blood caused the Ancestor's guests to eat themselves alive.
- Bloodier and Gorier: Blood and Vampires are the main theme of the Crimson Court DLC, which of course openly features blood. The monsters of the Courtyard are dripping with blood from their mouths, the Flagellant himself has blood dripping from his hand. Even your torch gets in on the act when fighting in the Courtyard, dripping blood at the top of the screen with 'Bloodlight', a light effect that decreases bleed resistance.
- Body Horror: Bloodsuckers are partially mutated into giant bugs. With the bosses and Chevalier enemy, the mutations are complete, turning them into grotesque bug-human hybrids or just big bugs.
- Booze-Based Buff: Party members suffering from the Crimson Curse can drink The Blood, which is some combination of blood and wine, to greatly boost health and speed, but only while suffering from the Craving condition. Drinking it while Wasting just returns them to normal, and drinking it while the Curse is dormant only provides a minor buff and does nothing to keep the Curse dormant. Making normal heroes drink a combination of blood and wine has unpleasant effects as well.
- But Thou Must!: Once the first Courtyard quest becomes available, you will receive a town event that reduces the stress healed from utilizing the tavern or abbey. And unless you have other DLC installed that mandates certain events, you will continue to get this event every week until you do the quest and unleash the Crimson Curse upon the Hamlet. The only instances where you can avoid it is by doing quests that will trigger other events upon completion.
- Curse That Cures: The Crimson Curse counts as a disease in and of itself, but acquiring it doesn't stack with other illnesses. A hero with the Curse is completely immune to all other diseases, and will in fact be purged of them if they had any before contracting the Curse. After defeating the Countess and making the Curse treatable in the Sanitarium, it's not too terrible an idea to deliberately get heroes cursed before sending them to disease-heavy locations like the Cove and the Warrens if there are no heroes with "remove disease" camping skills in the party.
- Cursed with Awesome: If you don't mind the drawbacks or erratic behavior of the Crimson Curse, it can be exploited to great effect. Several trinkets give significant boons to heroes with the Curse (some only affect certain stages of the Curse), and triggering Bloodlust with a vial of the Blood grants the hero a great damage and speed boost.
- Deadly Game: Pay attention to the background, and it's easy to see you are absolutely surrounded by blood suckers, but you don’t encounter more than four at a time. It's because the ones in the background are watching you fight and kill for their entertainment. The four you fight are the ones who think they can take you. Nobody in the audience comes to their aid if it looks like their friends are about to die.
- The first real boss fight plays out like a shell game with lethal stakes - you have to find the "shell" the boss is hiding in to reveal and wound him, while the others contain enemies intended to slow you down.
- Decadent Court: The titular Crimson Court. From the cinematics, it's clear they were always decadent, but their transformation into vampires has made them far worse than before.
- Does This Remind You of Anything?: The aristocrats are insane celebrities and the curse operates a lot like a cocaine addiction.
- Friendly Neighborhood Vampire: The Wizened and Hooded Shrews of the Courtyard are the only Bloodsuckers who aren't immediately hostile, and are willing to pay handsomely for The Blood rather than take it by force. Of course, it's still unwise to bother a vampire without an offering.
- Harder Than Hard: When you enable the Crimson Court while starting a new run on Stygian, you get Bloodmoon difficulty where you have an extended time and death limit (100 weeks and 16 deaths from 86 and 13 respectively) to account for the time-consuming Courtyard content.
- Horror Hunger: Heroes affected by the Crimson Curse will thirst for The Blood like they hunger for food. As their cravings mount, they may become increasingly erratic, to the point of potentially attacking their allies. Actually consuming The Blood when craving sends them into "Bloodlust", a temporary affliction-like state unrelated to stress that'll make them act erratically in exchange for a number of buffs. If they remain Craving for too long, they'll become Wasting, and so weakened by their thirst that consuming The Blood only brings them back to normal, without Bloodlust.
- Humans Are the Real Monsters: Played straight. The aristocrats were already sadistic, gluttonous and hedonistic well before the outbreak of the Crimson Curse. It's heavily implied the curse itself did nothing to their personalities other than guide their focus.
- Locked Door: One of the new features exclusive to the Courtyard is that sometimes, the way to the end is locked by an iron gate, whose color-coded key you must retrieve in one of the far rooms. A fair few are mandatory, but others are optional and only hide rewards like trinkes or high-value loot.
- Marathon Level: Moreso than every other dungeon, the Courtyard offers the possibility of exploring a level literally made of dozens of corridors and rooms◊ in order to access the bosses of the level, while most dungeons barely go above twenty rooms. The levels are so vast that the game offers you the opportunity to leave the mission unfinished and return at the exact same spot. In later levels, with the right curio interaction, you can even loot firewood to set up camp multiple times.
- Money Sink: The new Districts feature allows to have new buildings in the Hamlet, which give various positive effectse.g.. Building them requires a blueprint, a heirloom dropped by bosses, and scores of heirlooms. And then there's "The Red Hook", which has an obscenely high cost of 50,000 gold and 750 crests and... no practical purpose.
- Mugging the Monster: The first cinematic for the DLC shows a young Ancestor trying to stab one of the ladies partying at his home. But as he approaches for the kill, the Countess reveals her monstrous nature. He actually manages to wound her enough that he can harvest her blood, which he then feeds to the Court. This was how the Crimson Curse started.
- Must Be Invited: Inverted. After you complete the first Courtyard mission, the heroes' access to the Bloodsuckers' lair is forbidden until you obtain an invitation from killing Gatekeepers, Metal Slimes that start showing up when infestation is high on other quest areas.
- Mystical Plague: The Crimson Curse has elements of this. Upon infection, it immediately uproots any other diseases suffered by the victim, and upon defeating one of the Court's major nobles, it will suddenly vanish from any heroes currently infected with the disease, indicating that it's supernaturally linked to to powerful Curse-born creatures. Furthermore, it's very heavily implied by The Crimson Court cinematics that the disease is somehow connected to the Heart of Darkness.
- Nintendo Hard: Even more so than the base game. The Crimson Court causes the appearance of new enemies, the Bloodsuckers, which can spread the Crimson Curse to your party, and the Curse in itself will add another layer of resource management. Its own dungeons are large enough to require several sessions to completenote , and the bosses are suitably difficult. When choosing to activate the DLC, the game gives an additional prompt to confirm if you're sure, while also discouraging you from activating it if you're new to the game.
- Non-Indicative Difficulty: Melding the Crimson Court with the Stygian difficulty rules gives Bloodmoon mode, which operates almost exactly like Stygian, except you have more generous time and death limits to accommodate the Crimson Court. However, because your ultimate goal is still to clear The Darkest Dungeon, you can ignore the Crimson Court entirely to enjoy the easier Game Over conditions. The drawback is that you're settled with a persistent overriding town event that slightly reduces Stress relief from town activities, which is very negligible if you're very good with Stress management.
- Not Using the "Z" Word: It's pretty clear that those infected by The Blood are vampires, but instead the game refers to them as "bloodsuckers".
- Our Vampires Are Different: In a clever piece of originality, their Animal Motif is the mosquito rather than the bat, and they also wear clothes reminiscent of 18th century nobility, including elegant dresses and powdered wigs. They are apparently the end stage of the Crimson Curse, a disease that, if untreated, will eventually turn the subject into a hybrid of human and insect, though even its early stages induce a vampiric hunger and greater ability if well fed with blood. On another note, it's not just any regular blood that sates the cursed's thirst: it has to be The Blood, with capital letters, which appears to be a combination of both blood from the Heart of Darkness and wine, as it can only be acquired from crates of Winemaker's Reserve, the Sanguine Vintners district, or as random loot.
- The Plague: The Crimson Curse is a Mystical Plague that dominates the Courtyard and can very easily be spread to your heroes by its infectees.
- Set Bonus: Crimson Court Trinkets bestow an additional bonus if the full set is equipped.
- Shout-Out: The Fanatic's outfit looks like it was ripped straight out of both versions of Warhammer. Specifically, the costume resembles a cross between an Inquisitor and a Warrior Priest, and when his flail is held onto his back, it takes on the appearance of an Iron Halo from 40,000.
- Splash of Color: The Crimson Court cinematics are portrayed in monochrome, with the only color being vivid red.
- Stealth Pun: The nobles are described as being depraved and plagued with vice even before their vampirification; even before the curse, they were blood-sucking parasites.
- Swamps Are Evil: The Courtyard has become a swamp as time passed, and its wildlife has also been infected by the vampiric curse.
- Useless Useful Spell: Crimson Court Set Trinkets are generally useful, but a few of them (or their sets) have questionable drawbacks or conditions.
- The Abomination's individual Trinkets are good all-around, but the set bonus only applies while he's at the forefront of the party, where you cannot use his ranged skills that benefit from the Osmond Chains. No matter the situation, you'll be losing part of the set's benefit.
- The Crime Lords' Molars offer the Bounty Hunter stacking bonus damage on enemies stunned, marked, and/or bleeding, but comes at a hefty cost of -10 Dodge. That is frequently too big a drawback to warrant its conditional bonuses.
- While the Chipped Tooth is undeniably good for the Flagellant, the Shard of Glass has a questionable reduction in his Bleed resistance and can spell an untimely death if he takes too much bleed at once. The Set bonus of a raised Deathblow resistance can already be provided by the Eternity Collar or Martyr's Seal, both of which offer more upsides to boot.
- The Tyrant's Fingerbone for the Jester only kicks in while he's at the forefront of the party, usually to help his survival right before he fires a Finale. The Tyrant's Tasting Cup is comparable to his Bright Tambourine in amplifying his Stress relief skills while ironically increasing the Stress he takes. The set bonus only amplifies his camping skills, so no matter what, the Jester is losing out on at least one of the set's perks.
- The Atonement Beads for the Vestal amplify her melee damage and crit rate. She only has one melee attack, and putting her in a position where she can use it denies her primary healing skill. This also comes at the hefty cost of a reduction in Virtue chance. The full set bonus does offer a nice Stun bonus, but the Debuff bonus only affects one situational skill.
- The Virus: The "Crimson Curse" acts as one. It has a chance to be contracted when a hero is attacked by a monster of the "Bloodsucker" category and decreases the hero's resistances while slightly increasing their speed and making them immune to any and all diseases (it also does away with any that the Cursed hero might be bearing before). In addition, the Crimson Curse can pass onto other heroes if they are sharing the same Hamlet facility at the same time. If the hero goes too long without drinking The Blood, they will perish, requiring your estate to have a constant supply of The Blood for heroes with the Crimson Curse. Thankfully, it's treatable: defeating a Courtyard boss automatically cures all afflicted, and after defeating the Countess, the Sanitarium develops a method for treating the Curse like a normal disease.
The Color of Madness DLC contains examples of:
- Action Bomb: Corpses can turn into Crystalline Aberrations, which explode if allowed to get to their turn. You get a little bit of healing if you kill them, though.
- Animalistic Abomination: One of the new enemies is a horrible Color-ified plough-horse.
- All the Worlds Are a Stage: Almost every single base game enemy and a majority of the bosses can appear during a run through the Endless mode, including enemies from the Darkest Dungeon and Brigand Invasion, though it's random which ones you might encouter. The only exclusions from the pool are the Final Boss, a few unique enemies and, with the exception of the Crocodillian, any of the bosses or enemies from the Crimson Court and Shieldbreaker DLCs.
- Amazing Technicolor Battlefield: Starting a new wave has the light from the broken Mill change to a different phase, covering the surroundings in new eerie colors and causing different effects, for good or ill.
- Arc Symbol: The seal on the wall holding in the results of the Ancestor's newest screwup is in the shape of the stress symbol, with a glowing ring... until you take it out, anyway.
- Bad Boss: According to the Ancestor, the whip-wielding Foremen were all hired by the Ancestor to be as brutal and cruel as possible to the workers.
- Be Careful What You Wish For: The Miller asked for help when the harvest came in blighted. Unfortunately, the person he asked for help was the Ancestor, personal motto "When All You Have Is Things Man Was Not Meant To Know...".
- Body Horror: To the surprise of exactly nobody, the people and creatures of the Farmstead have clearly had a miserable time of it, turning into crystallised, broken wrecks with bits held on with otherworldly power. The Farmhand enemy, for example, has a great big jagged gap in his upper torso that's easily visible in any close-up, such as an attack or dodge animation, and he's one of the least horrible transformations - most of his body is at least technically held together save for that huge gap, a few parts of his face and his left leg.
- Came from the Sky: The Color came from a comet which fell into the Miller's windmill.
- Death Is Cheap: In contrast to the rest of the game, any heroes that die in the Endless mode will show back up at the Hamlet a few weeks later, albeit afflicted and without their trinkets. The most you'll have to do is pay for their stress relief and fight The Shrieker to get the lost trinkets back.
- Eldritch Location: The impact of the comet has turned the Farmstead into this, a place where all living beings are turned into crystallized husks and time and space as we know them no longer exist.
- Endless Game: Unlike all previous missions, the Farmstead only involves you to send a team to quell the hordes of monsters coming from it and eventually slay the monster at its heart. It is literally unwinnable and you can only measure your success by how long your party has held their ground before being inevitably repelled. Interestingly, because the right parties could kill monsters in the thousands, Red Hook studio had to buff the Farmstead by forcing more debuffs over time and making better monster teams.
- Global Currency Exception: The Jeweller only trades in shards, which can only be gotten from Farmstead enemies. Shards can also be used for new Districts, with the exception of the Mill, which requires Memories — which require you to repeatedly do Endless Mode. (Although its effect — immunity to random Hunger checks — is really nice.)
- Magic Meteor: Full of eldritch horror, as one would expect from Darkest Dungeon.
- Multi-Mook Melee: Darkest Dungeon's first foray into horde mode.
- Obvious Rule Patch: Shard Dusts are powerful consumables that give you an offensive buff and refresh your limited use skills, but they add stress and lower your Virtue chance. Virtuous heroes aren't allowed to use them since it would practically make its downsides moot.
- Power Floats: Some of the enemies, like the Foreman and Scarecrow, hover above the ground.
- Rock Monster: You do not exactly fight monsters of flesh and blood this time. It is the eldritch crystal which has invaded the bodies of everybody in the Farmhand you are fighting. It can be quite unnerving to see the crystal pulse as if it was organic.
- Scary Scarecrows: One of the new enemies type is an animated Scarecrow specializing in dealing Stress damage.
- Sealed Evil in a Can: Even the Ancestor didn't want to leave the results of this particular screwup running around.
- Shout-Out: The basis of the DLC is an actionised version of Lovecraft's The Colour Out of Space.
- Unexpected Gameplay Change: The Farmstead is centered around wave-based combat, rather than dungeon exploring. Therefore, camping skills or trinkets that increase scouting chance or affect the likelihood of monsters or your party being surprised have no use there.
- Unnaturally Blue Lighting: The Farmstead is bathed in ethereal blue lighting, which is made all the more remarkable because all other colors seem to have been sucked off from the place, replaced with grey and black. It is implied to come from the Comet and reflected by all the crystals around.
- Was Once a Man: Enemies in the Farmstead are predominantly people, things and animals from a harmless farmland, all of which were then transformed by the Comet.
- With Great Power Comes Great Insanity: Shard Dust is a new provision you can buy with Comet shards. Consuming it gives buffs to speed and attack power and will refresh limited-use skills, but it also takes an increasingly severe and lingering toll on the user's stress and Virtue chance.
The Butcher's Circus DLC contains examples of:
- Action Initiative: Daze is a new ailment introduced in this game mode, replacing stun in certain characters' skill sets. While it doesn't rob a character of their turn like Stun, it forces them to be among the last to take their action.
- Circus of Fear: The name implies this is the setting of the DLC, but it's more of a gladiator arena in practice.
- Cruel and Unusual Death: Strongly suggested by the hero corpses added in the DLC. Most of the corpses are covered in gore with slack jaws open, appearing as though they died screaming in horror. The Crusader, Shieldbreaker, and Jester have been impaled with their own weapons. The Houndmaster's dog survives, but stands depressed over her erstwhile master. Only the Leper avoids this by being posed regally against his sword with a placid expression on his mask, giving the impression that he is peacefully sleeping.
- Damage Over Time: Most Stress/DoT comps work like this. Their upfront damage is minimal at best, but they do their work through inflicting ailment damage and hefty amounts of Stress, with the aim of wearing down the opposition while weakening them through debuffs and Afflictions. Once one is hanging on Death's Door, even the slightest Scratch Damage can become a Deathblow.
- Divergent Character Evolution: The Arbalest and Musketeer in the base game are essentially Moveset Clones of one another, with slight differences in the Trinkets they get. In the Circus, while their main forms of attack remain similar, their support skills (and some of their Trinkets) are distinct enough to warrant using one over the other. For instance, the features of Flare were split across both characters — the Arbalest's Flare clears Marks, Daze, Stun and debuffs, while the Musketeer's Skeet Shot provides Stress relief and a small buff.
- Loud of War: You get an achievement for winning a match using only Stress attacks. This means relying on skills like Bellow and Terrifying YAWP! which don't do any damage at all — Scratch Damage from skills like the Occultist's Curses will disqualify you. The achievement title is "Shouting Match".
- Moveset Clone: While the Arbalest and Musketeer do have enough differences to be distinguishable, their main form of attack (sniping marked targets at range) remains identical. But this similarity means you can effectively run two snipers in your party, since the Butcher's Circus only allows you to run one copy of an individual class in your team.
- PVP Balanced: Various elements have been reworked for the PVP environment.
- Of note is that several skills now cause Stress damage and you can opt to kill by inducing Heart Attacks.
- Some skills that used to Stun now inflict Daze, which forces the unit to go last in the turn until Daze expires.
- Damage Over Time ticks don't contribute to Deathblows, so you have to land the killing blow yourself rather than let the ailment do it for you. Conversely, this means your healers can always save themselves from Death's Door while affected by such ailments.
- Since all combatants have Deathblow resistance, several skills are given a higher chance of causing Deathblow to give a reason to run them.
- To even the playing field you use a standardized pool of trinkets and your Heroes don't have Quirks.
- All units have a base Virtue Chance of 0%, so a Stress party is guaranteed to trigger Afflictions unless the opponent has the foresight to buff their Virtue Chances.
- Both the player's and the opponent's units leave behind corpses when they die, so losing a unit doesn't disrupt the formation that badly.