Protagonists | Hallownest (Groups, Assorted NPCs, Historic Characters, Bosses) | Pharloom | Expanded Universe
Bosses of Hallownest
The many not-so-friendly faces and tough foes that the Knight encounters on its journey throughout Hallownest. Entries here are grouped under the area where they can be initially encountered.- Alien Blood:
- Since a lot of them are infected, they spurt out orange blood when hit.
- The rest who are not infected (i.e. the Mantis Lords, Dung Defender, Warrior Dreams, etc.) bleed the usual white blood of bugs instead.
- Ambidextrous Sprite: All bosses flip sideways depending on your position, thus switching their handedness. But this is especially obvious to those with asymmetry in their sprites, like the Hollow Knight's scar and arm, Grimm's cloak, and Zote's horns.
- Anti-Frustration Features:
- Although every Boss Rush battle at Godhome culminates in a fight against a brand new boss, merely encountering them is enough to make them appear at the Hall of Gods, allowing you to practice against them at your leisure.
- Dying while in the dream world has far fewer consequences than dying in the normal world. You don't have to collect your shade (and thus don't lose your money) and the three Fragile charms don't break, allowing you to use them without fear (which especially comes in handy in Godhome). The only exception is the True Final Boss battle against The Radiance, presumably because, as a Physical God and leader of a tribe who excelled in mucking about with dreams, she knows exactly how to truly kill you in one.
- Battle Theme Music: "Decisive Battle" is the standard boss theme, "Dream Battle" is used for Warrior Dream bosses (save for No Eyes, who sings her own song), minibosses usually use the heavier Variable Mixes of their dungeon themes, and major bosses have unique themes.
- Boss Subtitles: All bosses get a subtitle/namecard on the lower-right area of the screen, with the exception of one (Soul Warrior). There are two bosses that instead get a fullscreen title card just before they appear.
- Contractual Boss Immunity: Most large bosses are immune to knockback.
- Kaizo Trap: Downplayed. Any stray projectiles, or backup mooks that remain after you defeat a boss can still damage and kill you. Fortunately, the game auto-saves the state and acknowledges that you have killed that boss, so all you need to do when you die in this manner is to backtrack to the boss stage to receive your rewards and slay your shade.
- Leitmotif: Major bosses have unique tracks when you fight them or their respective dream variants, but these are essentially just alternate versions of their original themes.
- Loophole Abuse: Bosses who commence their battle with a Mighty Roar are rendered as hostile entities as soon as it starts. The Knight is unable to do anything until it ends, but companions like the Weaversong spiders and the Grimmchild are free to attack while the boss is standing there yelling.
- Memorial Statue: The Hall of Gods is a large room that contains a statue for each and every boss you encounter.
- Mighty Roar: How most major bosses announce their presence. You're immobile while it lasts.
- One-Hit Kill: The Radiant difficulty for any boss in the Hall of Gods turns all enemy attacks and environmental hazards into this.
- Turns Red: Many bosses will use new moves when their health reaches a certain threshold.
- Unlockable Difficulty Levels: In the Hall of Gods, each boss has three difficulty levels. The first two start out unlocked, but Ascended difficulty must be beaten to unlock Radiant difficulty.
Base Game
Forgotten Crossroads Bosses
Gruz Mother

A large fly-like being that's found sleeping within the Forgotten Crossroads. You can later fight two slightly stronger Gruz Mothers simultaneously within the Colosseum of Fools' Trial of the Warrior.
- Bullfight Boss: One of its attacks involves the Mother charging towards the Knight's position from above.
- Chest Burster: Her baby Gruzzers burst out from her body as a swarm once she dies.
- Conservation of Ninjutsu: In the Forgotten Crossroads, the Gruz Mother is considerably tough. Once she dies, several Gruzzers will burst out from its body, but these just have the typical amount of health that all other Gruzzers have.
- Cruelty Is the Only Option: The Gruz Mother is merely a parent carrying all of its young inside its belly. This act seems to exhaust her, which is why the Gruz Mother is first seen sleeping on the floor. Unfortunately, she's also sleeping near a gate. And then, the player Knight has to kill the mother and her children in order to advance through the area.
- Degraded Boss: Two Gruz Mothers reappear in the Colosseum of the Fools as regular enemies.
- Dual Boss: Two of them are fought simultaneously inside the Colosseum of Fools.
- Early-Bird Boss: She only poses a threat since the player can fight her before obtaining any abilities or upgrades. But if you leave her until later and come back with the Vengeful Spirit, Gruz Mother is a pushover.
- Flunky Boss: A weird variation, where her children burst out of her body after she dies and have to be fought separately. This only happens during the first encounter, though.
- Giant Flyer: A giant version of a regular Gruzzer, large enough to crush enemies with her bulk.
- King Mook: A larger version of the regular Gruzzers you find within the game.
- Monster Is a Mommy: As is obvious from the name.
- Optional Boss: Like all encounters in the Colosseum of Fools, the second two Gruz Mothers aren't necessary for beating the game.
- Unique Enemy: Only the Gruz Mother encountered in the Forgotten Crossroads spawns Gruzzers bursting from her chest when she dies. The Gruz Mothers in the Colosseum of Fools and in the Godhome do not have this mechanic.
False Knight / Failed Champion


A maggot who inhabits a stolen armored shell. He guards a room in the Forgotten Crossroads.
Later in the game, you'll learn more about the kingdom's deeper backstory, including the identity of the Knight who originally wore that armored shell before the maggot. The owner's specific tropes can be found here under the Hegemol entry.
- Acrofatic: Despite being absolutely huge and rotund, the False Knight can easily jump several times his own height. And his dreamy counterpart, Failed Champion, is a straight-up Lightning Bruiser.
- Ambiguous Situation: The False Knight's armor is actually Hegemol's. But it wasn't clear how Hegemol lost his armor to that maggot. Was it simply stolen? Was Hegemol killed by that maggot? Or is he still alive but went into hiding?
- Anti-Villain: After defeating his Dream Boss version, you'll find out that he wasn't actually evil or infected (at least at first), and stole the armour just because he wanted to protect his siblings, who are among the weakest creatures in Hallownest.
- Attack Its Weak Point: Fights against this boss only end once you deal sufficient damage to the maggot.
- Boss Remix: The battle theme for the False Knight is an arrangement of the game's main theme, AKA the Knight's leitmotif.
- Carry a Big Stick: Slams his mace on the ground, causing shockwaves and making rocks fall from above.
- Clothes Make the Superman: Maggots are the weakest creatures in all of Hallownest, but he's still putting this huge stolen suit of armor—one that belonged to one of the five legendary knights, no less—to good use.
- Cruelty Is the Only Option: After you get the maggot to fall out of the armor, he just lies defeated on the floor, but you can't continue until you kill him. And once you find two other maggots holding a funeral for him, you have kill the poor guys if you want to fill out the Journal.
- Death from Above: It can shake the ground so hard that numerous rocks would fall from the ceiling.
- The Dog Bites Back: His motivation for stealing Hegemol's armor was to protect his downtrodden kin from those who would seek to oppress maggots.
- Grievous Harm with a Body: His mace's head is actually another bug, who escapes after the Knight's defeated. Striking the bug mace with the dream nail reveals that it is happy for being finally free.
- Ground Pound: Most of his attacks are overhead smashes with the mace, that he can even perform from a jump.
- He Was Right There All Along: A room in the Forgotten Crossroads appears to just contain another horde of zombified bugs, but then the gates slam down and the False Knight drops in.
- Insane No More: The maggot was supposedly driven mad by some force, but after his Failed Champion form is defeated, he reveals he wasn't crazy and stole the armor out of determination to protect his fellow maggots (Who, again, you likely killed for the journal entries).
- Living Weapon: If the player stays a few seconds besides the False Knight after its boss battle, they can see that the False Knight's mace is actually a bug that will flee to safety.
- Load-Bearing Boss: He destroys the arena by his own attack, eventually leading to his death.
- Meaningful Name: It's a False Knight since that armor is just stolen anyway, the actual enemy here is a defenseless maggot. The armor's real owner is even hinted to be one of the Five Great Knights.
- Optional Boss: The Failed Champion can be fought by striking his corpse with the Dream Nail. Zigzagged a bit with the first fight with the False Knight, though: you have to activate the fight to go to the Snail Shaman, but you can break out of the arena once the second phase starts.
- Skippable Boss: Not immediately evident, but the left side of the arena can be destroyed after the first phase of the boss fight. The player only needs access to the Vengeful Spirit beyond the False Knight in order to progress to Greenpath and the City Crest the False Knight drops isn't entirely necessary to enter the City of Tears (which can be accessed from several other areas), so it's not necessary to ever finish the fight.
- Video Game Cruelty Potential: You can hit the False Knight's living mace in the Forgotten Crossroads for how many times as you like, or until you hit them to the edge of the screen.
- Villainous Breakdown: When you first start the fight, the False Knight is silent. After unmasking him for the first time, he drops the pretense of being a stalwart, mighty soldier and begins to sound more like he's throwing a temper tantrum.
- Wham Line: A line for the Failed Champion reveals that a maggot stole that giant armor while Hegemol was sleeping. This reveals a lot from the False Knight and False Champion boss fights - That a Great Knight now has an Ambiguous Situation on how his armor was stolen by a mere maggot, that Knight's current whereabouts, and that the maggot simply did the act to protect its brothers.Failed Champion: "I wanted it.... the strength to protect the others... When I saw that Knight... sleeping... safe in his big armoured shell... It wasn't madness that drove me to it... I just wanted it..."
- Your Mind Makes It Real: Why his Failed Champion form is so strong; the Maggot believed its armor made it invincible, so its dream self reflects that.
Brooding Mawlek
This massive beast is found in a hidden area in the Forgotten Crossroads, alone in a room full of dead Mawleks. It can also be fought in the Colosseum of Fools' Trial of the Fool.
- Death from Above: Its specialty, whether it's slamming down on you with its weight or vomiting acid into the air to fall down on you.
- Early-Bird Boss: If you end up fighting it before you're supposed to with the Sequence Breaking described below, the thing has a monstrous amount of health and it's very difficult to avoid its attacks. Without the dash, you're going to have a very rough time jumping over it, which you need to do to avoid its rain of acid vomit... unless you figure out you can pogo off its head with the nail just like the spikes leading up to it. It's not quite a Hopeless Boss Fight if you fight it early, but damn if it doesn't come close.
- Hates Being Alone: Its Journal description labels it as an extremely social creature that only becomes aggressive if it's unable to mingle with its own kind.
- Informed Kindness: The Hunter's Journal implies that it's only violent because it's been left alone, but at several points in the game you may enter areas full of Mawleks that will happily try to tear you apart and liquefy your sorry guts anyways. Maybe this only applies to the Brooding subspecies or even this particular individual specimen. Or maybe the infection made the other Mawleks violent.
- King Mook: It is technically the first boss that uses a more aggressive infection projectile spray attack compared to the aspids. And like the leaping husks, it can jump.
- Multiple Reference Pun: Not only is it a creature that lives in and cares for its brood, but based on the Hunter's Journal and its dream nail dialogue, it is emotionally brooding over its own loneliness.
- Optional Boss: Only found in optional areas, and you can easily complete the entire game without fighting one.
- Sequence Breaking: The room it's in seems designed to only be reachable once you have the Mantis Claw. However, with some well-timed nail jumps, you can reach it before fighting any other boss in the game.
- Sole Survivor: The one you fight in the Forgotten Crossroads seems to be the only survivor of its colony, hence why it's so violent. Mind you, Lesser Mawleks elsewhere will still attack you in groups.
- Unique Enemy: The Brooding Mawlek encountered in the Colosseum of Fools is smaller and thinner
 than the one encountered in the Forgotten Crossroads. This is purely cosmetic and does not affect much on its mechanics.
 - What Measure Is a Mook?: Sure, this Mawlek is aggressive to you from the start. But the implied reason why it is like this in the first place? It wasn't able to mingle with its own kind, and it's supposedly an extremely social creature. The Brooding Mawlek that you encounter in the Forgotten Crossroads is simply all alone by itself, but you can kill it.
Greenpath Bosses
Hornet

Hornet's first boss form, in which she confronts the Knight in Greenpath to impede on their quest, but underestimates her opponent and does not deploy her full strength.
Hornet's entry can be found here.
Massive Moss Charger
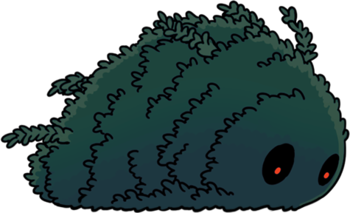
A bigger variant of the Moss Charger that acts a mini-boss in Greenpath. It lies just off the Pilgrim's Way.
- Bullfight Boss: Its main attack is to charge at the Knight. At the start of the game this attack is best jumped around, but by the time Godhome is reached, Quick Slash and Mark of Pride allow for a strategy of simply knocking the boss back repeatedly until it goes down before finishing a single charge.
- Conservation of Ninjutsu: Played With. While it's the Moss Chargers' tactic to group themselves in a massive bush to look like one giant being, it does make them more durable, as evidenced by the boss's high HP compared to an individual Moss Charger. This trope is later lampshaded and mocked by the Hunter in this boss's journal entry:There is strength in numbers, yes, but these creatures never had much strength to begin with. Cut through their trickery!
- Ground Pound: It can launch itself high in the air to crush the Knight beneath instead of charging.
- King Mook: Resembles the smaller Moss Chargers populating Greenpath. But bigger, and able to jump.
- The Battle Didn't Count: Once the boss is defeated, its layer of leaves explodes, but the bugs inside flee without injuries.
- Two Men, One Dress: The Massive Moss Charger is revealed to be a group of bugs found in regular Moss Chargers who disguised themselves as one massive bush.
Vengefly King

The territorial patriarchs of Vengeflies and are native to Greenpath. The Knight first discovers one while it's snacking on Zote the "Mighty" and another can be fought at the Colosseum of Fools' Trial of the Warrior.
- Bullfight Boss: The Vengefly King's main attack is to charge at the Knight from above, sweeping the ground. In doing so, it allows the Knight to jump above him and whack him from above.
- Flunky Boss: The Vengefly King can summon a couple of smaller Vengeflies to help him.
- Giant Flyer: They are large vengeflies, and their main strategy is flying out of range of attack before swooping in.
- King Mook: Literally as indicated by their name. Vengefly Kings are bigger and way tougher versions of ordinary vengeflies, which can be one-shotted as soon as the Nail is upgraded.
- Large and in Charge: The Vengefly Kings are said to be "patriarchs" of the ordinary, smaller vengeflies. However, they are also much more massive.
No Eyes
Backer: Liza Kretzschmar

What's inside of you...
Strip it out!"
A former warrior of Hallownest who fell to the Infection. She couldn't sleep knowing the dreams would infect her mind with the light, so she stripped both her and other bugs of their eyes to protect them from succumbing to it. They were all laid to rest in the Stone Sanctuary, a place in complete darkness, deep in Greenpath.
- Cycle of Hurting: Especially in her Ascended variant where you have a tighter room to move within. Summoned ghosts can converge so closely that you may end up bumping into the nearest environmental traps... or bump into other ghosts as well! It's common to take 2-3 masks of damage if you are hit by one attack and are very unlucky with the knockback mechanics.
- Darkness Equals Death: Her sanctuary is hidden away in pitch black darkness, with spikes jutting out from almost every wall, and she's by far the most frightening of the Warrior Dreams.
- Developer's Foresight: No Eyes won't appear unless the player has bought the Lumafly Lantern. Why? Because her stage is so dark that it's impossible to know where you are going inside.
- Disability Immunity: Invoked with No Eyes and her followers. They gouged their eyes because they believe that the "light" would infect them in their dreams, so getting rid of one's eyesight equals immunity. No Eyes is proven to be Properly Paranoid at one point since the Radiance caused the infection via invading others' dreams.
- Eye Scream: She ripped her own, and some other's, eyes out to escape infection.
- Flunky Boss: She never directly harms the knight, but rather summons the sanctuary's spirits to attack instead.
- "Get Back Here!" Boss: The real challenge of her boss fight is this. She Teleport Spams around the arena every few seconds, so the player has to get to her before she does it again to damage her, while also avoiding the spirits that actually trying to hurt them. Somewhat mitigated by listening to her lullaby: she teleports at the end of each line so you can predict when she's about to jump.
- Ironic Nursery Tune: She sings an incredibly creepy Latin-sounding lullaby in place of the usual Dream Boss Battle music.
- Ledge Bats: The ghosts accompanying No Eyes bump into you in order to push you off platforms and into the spikes.
- Meaningful Name: No Eyes has no eyes because she ripped them herself.
- Never Sleep Again: Became an insomniac due to her paranoia of being infected if she ever sleeps.
- Nothing Is Scarier: Lives and breathes this trope: She's found in a pitch black sanctuary in the depths of Greenpath, her fight is accompanied only by the sound of whistling wind and her creepy humming, and, perhaps eeriest of all, her journal entry never explicitly says she died — merely that she "disappeared" when the plague hit.
- Posthumous Character: She has been dead for quite a while.
- Properly Paranoid: Believes that if she would sleep and dream, she would become infected. She's technically correct on this one, and the idea might as well count as a Foreshadowing since the Radiance does infect other bugs by invading their dreams.
- The Spook: One of the notes about her just imply that she disappeared during the plague.
- Tears of Blood: Black liquid drips from her eyeholes.
- Teleport Spam: She teleports around the arena every few seconds.
Howling Cliffs Bosses
Gorb
Backer: Aladar Apponyi

Gorb the Great Mind, a mystic creature with a distended brain who claimed to be all-knowing. He goaded others to revere his mind and ascend with him to a different plane of existence. His remains were buried on a hill atop the Howling Cliffs.
- Ascend to a Higher Plane of Existence: He claims he can do this, and wants others to do this with him for some reason.Gorb: Ascend! Ascend! Ascend ascend ascend with Gorb!
- Beware the Silly Ones: He has a goofy voice and spouts non-sensical gibberish both before and during his fight. Despite this, he can pose a challenge to anyone who isn't prepared to fight him. His tombstone also refers to him as "the Great Mind", implying that he was smart enough to be revered by others.
- Cloud Cuckoolander: All he says seem childish and nonsensical. The weird noises he makes during his battle also contribute to his goofy aspect.
- Counter-Attack: Gorb will almost always retaliate with his attack every time the Knight hits him.
- Gone Horribly Right: He intended to Ascend to a Higher Plane of Existence. Given that his sole attack is very reminiscent of the Radiance, it seems he succeeded, but the main effect was for him to Go Mad from the Revelation and possibly succumb to the madness without even being infected.
- Take Our Word for It: He is implied to be very intelligent, might be a case of The Cloud Cuckoolander Was Right but it's never explained how.
- The Spook: Unlike the others Dream Warriors, Gorb isn't given a backstory. His life stays enigmatic.
- The Magnificent: "The Great Mind"
- My Brain Is Big: He has a pretty big distended brain, and seems rather proud of it.
- Posthumous Character: He has been dead for quite a while.
- Storm of Blades: His only attack is firing a ring of 8 spears outwards in a circle from his location. As he takes damage, he'll start doing it in waves in alternating patterns.
- Teleport Spam: He'll occasionally teleport to a different area of the arena.
Fungal Wastes Bosses
Elder Hu
Backer: Donald Lynch

A traveling sage who sought to purify the borderlands of Hallownest from the Infection. He, unfortunately, became infected himself, and his own infected mind made him see the Mantis Village Tribe as afflicted by the plague. The Mantises killed him after he attacked them, and a memorial was erected in his name above the gates to the City of Tears.
- And Then John Was a Zombie: Wanted to purify the Infection, but got infected himself.
- Death from Above: His only method of attack is to summon numerous rings down.
- Heel Realization: After being beaten by the knight, he realizes that he was wrong for attacking the Mantis Tribe, and comes to terms with his death.Elder Hu: If there was madness in that village, it was I who brought it. They were right to cast me out. When I attacked, they were right to... They were right to kill... To kill... me...? ...aah.
- No Good Deed Goes Unpunished: Traveled Hallownest trying to purify its borderlands of the Infection, and ended up infected himself for his troubles.
- Posthumous Character: He has been dead for quite a while.
- Teleport Spam: May teleport to the other side of the arena after launching an attack.
- Walking the Earth: Travelled the world tending to those affected by the plague.
- Warrior Monk: A travelling sage skilled in the use of rings. During his fight, he chants constantly.
Mantis Lords

The chiefs of the Mantis Village, they are intensely xenophobic and hostile to outsiders. The Knight must face them in order to gain access to (one entrance of) the Deepnest.
- Action Girl: Given that they're referred to as sisters.
- Artificial Brilliance: They are programmed to use the "boomerang attack" towards the Knight's direction if the player keeps on clinging to a wall using the Mantis Claw. This interaction will only stop if the Knight drops down.
- BFS: All three of them wield nails as tall as they are.
- Dash Attack: Their ground attack is a forward dash that covers the entire platform and the only way to avoid it is to jump.
- Deadly Disc: When clinging from a wall, a Mantis Lord can throw its nail like a spinning boomerang.
- Death from Above: Can teleport directly above the Knight and stab it with their nail.
- Defeat Means Friendship: They acknowledge the Knight's strength after it beats them, and the other mantis villagers won't attack it anymore.
- Dual Boss: After defeating one, the other two battle the Knight simultaneously.
- Early-Bird Boss: To the point where Quirrel explicitly tells you to upgrade your nail before facing them. You can battle them as soon as you get to Mantis Village, but compared to all of the bosses you have faced up to Fungal Wastes, the Mantis Lords are ruthlessly fast and give you very few chances to attack them due to their rapid movement and aggression, all of which gets taken up a notch when you battle two of them at once. If you return to them after upgrading your nail and gathering a couple more charms and possibly another Heart Container, they'll be a lot easier to manage, going from Lightning Bruisers to Fragile Speedsters.
- Flash Step: Their preferred method of combat. They'll appear in one end of the arena or above you, dash at you, and then jump away quickly before doing it all over again.
- Foreshadowing: There is a destroyed throne in their room in addition to the three they are sitting on. You end up facing that throne's former occupant in the Queen's Gardens in the form of the Traitor Lord.
- Graceful Loser: While they are notorious for their insular and hostile nature, they show a lot of respect for those able to best them. After defeating them, they and their warriors will all bow to the Knight whenever it passes them.
- He Was Right There All Along: The Mantis Lords initially sit idle on their thrones and only attack when you voluntarily challenge them, though they will close the gate to Deepnest if you approach it.
- King Mook: They use some movesets of the other mantises in the village.
- Lady of War: The Mantis Lords are all proud, elegant, badass warriors that gracefully leap and dash around the arena.
- Lightning Bruiser: Of the "surprisingly tough speedster" variety. Coupled with Flash Step, their attacks come off fast, and they can immediately move elsewhere after attacking. They overlap to Fragile Speedsters after you upgrade the Knight to the maximum level.
- Male Might, Female Finesse: In sharp contrast to the Mantis Lords, the Traitor Lord is slower and bulkier, and forgoes using a weapon. Justified, as if he had style, it's likely been cast away due to the plague affecting his mind.
- Proud Warrior Race Guy: The mantises found in the Fungal Wastes fit this trope as a whole. The Hunter's Journal implies that this may be the reason they weren't affected by the same tragedy that befell their civilized neighbors in Hallownest.
- Rule of Three: These three sisters are the remaining leaders of the Mantis Village, the fourth lord is banished in the Queen's Gardens.
- Sequential Boss: The battle against them is split into two parts. In the first, you face a single Mantis Lord, and two of them in the second part.
- She Is the King: According to the Hunter's Journal entry for the Traitor Lord, the Mantis Lords are all sisters. This is supported by their appearance in the Godhome, where they are called the "Sisters of Battle".
 This makes a lot of sense when you remember that female mantises tend to be More Deadly Than the Male and in fact often eat the male after mating.
 - Skippable Boss: It's entirely possible to beat the game without ever facing the Mantis Lords as there is more than one entrance to the Deepnest.
- Slaying Mantis: It's right there in the name, and this trope is the theme of their entire tribe to boot.
- Teleport Spam: They will always teleport in-between their attacks, giving only short windows of opportunity for the Knight to pummel at them.
- Throwing Your Sword Always Works: The Mantis Lords can throw their nails at you like spinning boomerangs, which even fly back at them so the player should be wary of them.
- Wolfpack Boss: In the Godhome's Pantheon of Hallownest challenge, you have to fight all three of them in their second phase.
City of Tears Bosses
Soul Warrior

Scholars who consumed Soul and gained both Soul powers as well as the fighting skills of their victims. Unfortunately for them, the infection is causing them to lose their identity among the souls they absorbed. They act as recurring mini-bosses with varying difficulty.
- Beef Gate: The first Soul Warrior the Knight will encounter is in the lower levels of the Soul Sanctum, guarding the access to the upper levels where the laboratories and precious soul jars are kept.
- Boss in Mook Clothing: They lack a subtitle and an introduction animation but act as boss in everything else, including the Godmaster content.
- Dash Attack: One of their main attacks is to dash across the screen, slashing at the Knight when they are close.
- Death from Above: They can teleport above the Knight for a downward slash.
- Dynamic Entry: They always begin the battle by suddenly appearing above the Knight and dashing downward to slash at them.
- Flunky Boss: With the exception of the first one, Soul Warriors can summons Follies to attack the Knight.
- Homing Projectile: Its ranged attack can do this albeit downplayed, since the projectile is slow and can be easily jumped over.
- Instant Expert: Their Dream Nail dialogue implies that their fighting skills came not from their own training, but from the souls of skilled warriors that they fuel themselves with.
- Magic Knight: The Soul Warriors are skilled fencers but can also use a few spells, notably teleporting and projecting orbs of soul at the Knight.
- Royal Rapier: Fitting for their status as scholars who researched in the sanctum, these warriors are trained in fencing and their nail weapons resemble rapiers.
- Teleport Spam: Soul Warriors can become very frustrating to fight against because of their habit to teleport above the Knight to perform fast attacks but also disappear when the Knight tries to get close on them.
Soul Master / Soul Tyrant

The head of the Soul Sanctum. He hoarded soul hoping to stave off Hallownest's affliction but eventually became intoxicated by its power.
- Boss Remix: Soul Master's theme is a remix of the Soul Sanctum theme, which itself is an Ominous Pipe Organ remix of the City of Tears theme.
- Clipped-Wing Angel: His second phase is this. While he is far more aggressive, he becomes a much easier target due to repeatedly using the same two moves and toning down his Teleport Spam.
- Dash Attack: One of their ground attack is simply just running towards the Knight to invoke Collision Damage.
- Dreaming of Things to Come: All of his actions are primarily motivated by the so-called "prophetic dreams" or visions of the future that he is receiving, as this dream nail dialogue suggests. Further dialogue as the Soul Tyrant reveals that these dreams originate with him Hearing Voices from the Radiance.Soul Master: In my dreams I could see it. The Kingdom's salvation, the cure for the plague... the answer was in the soul that animates our bodies.
- Ground Pound: Uses the Desolate Dive skill during his fight, teleporting above the knight before slamming into the ground and causing a shockwave. After his defeat, the knight gains the same ability (but without the teleportation).
- Hearing Voices: Just like the other victims, this is a symptom of the Radiance's infection. The Soul Master's case makes him believe that he is receiving some sort of prophecy. As the Soul Tyrant, his dream nail dialogues made the situation clear to him.You promised I would live forever!
That voice...Was it never there...? - He Was Right There All Along: The Soul Master is first seen as a distant shadow before teleporting into the foreground.
- Homing Projectile: Its usual ranged attack involves summoning these kinds of orbs that follow the Knight unless they hit a solid object.
- Immortality Seeker: He and his fellow researchers hoped to find a way to live forever, but they were all driven mad and deformed by misusing the power of souls.
- King Mook: The Soul Master is this to the soul twisters and soul warriors. It has the teleportation power and the arcane bolts of both, the twisters' flight and orbiting magic shield, and the warriors' melee attacks, primarily their dash and the teleport and downward attack combo.
- Lightning Bruiser: As Soul Tyrant, he abuses teleportation, is extremely resistant while keeping as strong as his regular form.
- Load-Bearing Boss: He destroys the floor as a transition to his second phase.
- Mad Scientist: The Soul Master hoped to use soul power as a means to end the plague, but the king, for reasons never explained to him, opposed his methods. Then again, if the Master was getting his inspiration from prophetic dreams, wouldn't that also be the work of the Radiance?
- Manchurian Agent: His dialogue as Soul Tyrant hints that the Radiance was using him to infect the Soul Sanctum and misdirect Hallownest's attempts to combat the Infection. The dreams he mentions having were her temping him into Motive Decay.
- Motive Decay: It's the Soul Master's motivations that drive the scholars to work under him. At first, they were allowed to research on the soul in order to find the cure against the infection, but they experimented on the soul in an attempt to find immortality instead. When the kingdom was ruined by the infection, most of the scholars themselves were also infected, yet still spend their fruitless hours inside the Sanctum.
- Optional Boss: The first encounter with this boss is part of the main progression path (although technically skippable), but a stronger variant can be fought by striking its corpse with the Dream Nail.
- Orbiting Particle Shield: Can summon four projectiles to orbit around him.
- Playing Possum: The Desolate Dive spell actually appears as a collectable reward after the Soul Master's drawn-out death animation. The Soul Master reappears to interrupt the player with his second phase before they can actually absorb it, however.
- Power Floats: The Soul Master can levitate above the ground, forcing the Knight to jump to hit him. Unlike winged bugs that fly, the Soul Master floats thanks to his arcane powers.
- Scale of Scientific Sins: Immortality - A sin commited by the Soul Sanctum Scholars (under the Soul Master's rule) who experimented with soul and living beings in a futile attempt to seek immortality. Surprisingly for all other scientific sins that he did, the Pale King opposed these experiments.
- Sequential Boss: Even after one exaggerated death animation, the Soul Master regenerates and the battle continues on the floor below. The same goes for the rematch, sans fake-out.
- Shockwave Stomp: The Soul Master uses the spell Desolate Dive a lot, teleporting right above the Knight to then slam the ground and cause a wave of energy on both sides.
- Skippable Boss: Beating him earns you access to Desolate Dive, which unlocks the Crystal Peak area and the Crystal Heart ability, required for gaining some of the other upgrades. However, you can also get into Crystal Peak by paying 1800 geo for the Lumafly Lantern, allowing you to skip Soul Master entirely.
- Soul Power: Like the Knight, the Soul Master fuels his spell with souls. However, he's taken the harvesting of souls too far, having killed many bugs and created plenty of abominations for his research.
- Squishy Wizard: He's got a lot of speed, teleportation, and offense, but can't take too many hits. Soul Tyrant, on the other hand...
- Teleport Spam: Utilises this a lot. He often teleports away just before he the Knight can strike him, even teleporting in the middle of his own attacks to psych the player out. The Soul Tyrant teleports to an insane degree, never staying still for more than a second.
- Trick Boss: He goes through a spectacular death throes sequence and leaves behind an upgrade pickup, only to return in full Turns Red mode.
- Turns Red: He changes his attack patterns in his second phase, with the initial scripted sequence having him spam Desolate Dive aggressively, followed by consecutive casts of Homing Projectiles.
- Victor Gains Loser's Powers: His signature technique, Desolate Dive, is claimed by the Knight on his death.
- Victory Fakeout: He has a very over-dramatic defeat animation once you beat his first form (consisting of him screaming while uncontrollably teleporting around the arena), but it turns out to be a ruse as he body-slams the Knight into the second phase. Observant players will note that he doesn't explode into infection unlike other slain infected enemies.
- Villain Teleportation: Like hell! See above in Teleport Spam, likely to indicate how insane he has become after all those experiments.
- Well-Intentioned Extremist: He truly believed that his soul research would help bugkind achieve immortality and get rid of the infection, but he and his followers eventually were driven insane by such power, unaware that the Radiance was influencing their decisions.
Watcher Knight

Formerly the elite guards of Lurien the Watcher, they are reanimated by infected flies to fight against you.
- Animated Armor: The Watcher Knights consist of nothing but hollowed out remains controlled by swarms of infected lumaflies circling above the arena.
- Boss-Altering Consequence: A subtle example. If you are having trouble fighting the six watcher knights in the same room, you can break a section of ceiling in the vestibule on the left side which brings you to the rope of a chandelier. Cutting it will crush one of the sleeping knights, permanently bringing down their number to a more manageable five.
- Dual Boss: The watcher knights are notable for being six entities, but they aren't a Wolfpack Boss fight. The first of which you fight alone, and after which, they are constantly resurrected so you're always fighting two at once. If you're having trouble you can crush one corpse permanently before entering the arena.
- Enemy Rising Behind: Invoked by this official poster which shows the Knight being stalked by a Watcher Knight from behind.
- Falling Chandelier of Doom: A hidden room lets you drop one on one of the sets of armor, bringing the total number of knights to be fought down to a slightly more manageable five.
- Invulnerable Attack: While performing the Rolling Attack, Watcher Knights are immune to nail attacks.
- Praetorian Guard: The location of their armor, their collective name, and their combat skills all imply that they were the elite guard of Lurien the Watcher.
- Rolling Attack: Although the Watcher Knights are not the only opponents to use this technique, their penchant for doing so in unison makes them a particularly memorable example.
- Scarred Equipment: Their nails already have cracks and scratches due to age.
- Sequential Boss: You fight one at first, then the rest in pairs. There are six of them in total, though you can destroy one pre-emptively by dropping a chandelier from the hidden room above.
- Suspicious Video-Game Generosity: An example that flies by the head of most first-timers is that they can actually use the dream nail on the sleeping watcher knights until the soul gauge is full, giving the player an advantage before the fight. The fight doesn't begin until the second gate at the other end of the room is triggered to close by getting near the doorway. There's a reason for this, as you get to fight a minimum of five watcher knights in the same room in order to proceed.
- Tough Beetles: Design-wise, they are very reminiscent of very round rhino beetles, and they are quite durable on par with being adept nail-wielders.
The Collector

A strange, shadowy figure that enjoys collecting bugs.
- Alien Blood: As a being made out of void itself, the Collector bleeds liquid void when hit.
- Bait-and-Switch: In the City of Tears, you come across a hidden area called the "Tower of Love", which can only be accessed with a "Love Key". When you proceed up the tower, you'll hear ecstatic giggles coming from ahead. Seems pretty obvious what's going on, right? Then you discover the source of the giggles is the Collector, and there's nothing sexual about them.
- Boss Remix: The Collector uses a distorted version of the main boss theme, "Decisive Battle", itself based on the Dirtmouth/Greenpath motif. When fought in the Godhome, it uses a distorted version of "Gods & Glory" instead.
- Collector of the Strange: Responsible for the bottled grubs you find across the world. It has other bug types bottled up in its tower.
- Contractual Boss Immunity: While the Void Heart charm makes the other void-based beings such as the siblings, shades and the tendrils docile, the charm does not affect the Collector since it is a boss. Hitting him also doesn't replenish Soul.
- Death from Above: Can damage you as it falls down from the ceiling. This trope also applies to the bottles that house other bugs, as they can damage you on the way down.
- Everyone Calls Him "Barkeep": It's just called "The Collector".
- Flunky Boss: Drops glass bottles on the Knight that contain additional enemies during its boss fight.
- Four-Fingered Hands: Well fittingly, it has four fingers each on its four arms.
- Giggling Villain: It can be heard giggling in its tower, and during its boss fight it constantly laughs. It even laughs hysterically when it's dying.
- Glowing Eyelights of Undeath: As the Collector is a void being, it has a black body with round, solid white eyes.
- The Hyena: Cackles through his entire boss fight, with particularly loud laughter when you defeat it.
- Hell Is That Noise: The fight against The Collector is constantly accompanied by its maniacal, high-pitched laughter, and as if this wasn't enough, the usual boss music theme is heavily distorted during this battle.
- I'm Melting!: Its death animation.
- It Can Think: Despite being purely made out of void, the Collector displays a high level of intelligence as evidenced by the map that it created, precisely pinpointing the locations of the bottled Grubs that were scattered. Well of course, this is not even outright stating the obvious fact that is has a weird "hobby".
- Leitmotif: While most bosses share a similar boss theme, the Collector gets a unique, heavily distorted version of the "Decisive Battle" track. Probably to emphasize its deranged mental state. This also applies to its Godhome boss fight where it gets a distorted version of "Gods & Glory".
- Living Shadow: Interestingly enough, it seems to be another being born of the Void, and has some similarities to Shades. A unique four-armed cast found in a secret chamber within the White Palace which is a mold for the Kingsmoulds implies that the Collector is possibly an escaped Kingsmould.
- Mad Love: It actually loves everything it preserves in its jars, but of course being prisoner of it is quite a terrible fate.
- Multi-Armed and Dangerous: It has four arms but they aren't the main threat as it will only occasionally claw the Knight, preferring to jump around instead.
- Nerf: This boss was once overpowered during the release of the Godmaster DLC so they had to tune it down. The Collector's minions had their hit points reduced (making it possible to one-shot them with certain Charms).
- Optional Boss: It is found in a side area, and beating it gives a map marker reward that shows all grubs that have not yet been found.
- Stylistic Suck: In fitting with how deranged the character is, The Collector's theme is a variation of the Decisive Battle theme that is deliberately played off key and is heavily distorted like if the band playing it are all drunk. When fought in the Godhome, it uses a distorted version of "Gods & Glory" instead.
- Well-Intentioned Extremist: Bottling living things is its way of protecting and conserving them, and it's no coincidence that it has a fixation on capturing grubs...
Royal Waterways Bosses
Dung Defender

Once one of the five Great Knights of Hallownest, this proud warrior now guards the Royal Waterways against intruders.
- Acrofatic: Despite his chubby looks, the Dung Defender's biggest strengths are his speed and agility. As the White Defender, he's even faster.
- Action Survivor: Ogrim survived the infection but isolated himself in a corner of the Royal Waterways, defending the entrance to Isma's Grove. He's also one of the only two remaining members of the Five Great Knights during the current events of the game, the other Great Knight being the Grey Mourner (a.k.a. Ze'mer).
- Battle Cry: Instead of the usual Mighty Roar, he screams the phrase "FAAAAAAARRRFFUUUUNNNDADDAAA!" when the boss fight starts.
- The Battle Didn't Count: Downplayed in that he is one of the few bosses to survive his battle, but if you talk to him afterward he will acknowledge your victory in the fight.
- Big Fun: Large, rotund, and jolly. And unlike most of the other bugs, he's not been driven insane by the infection. He just likes chucking dung around.
- Blood Knight: This guy loves to fight. He leaps into battle with gusto and continues laughing jubilantly the entire time. He bears no hatred for his opponent, and if you talk to him later, he will apologize for his preemptive attack. He also offers heartfelt thanks for giving him such a challenge, congratulates the Knight for an impressive victory, and declares it was the most thrilling bout he's fought in years. Like many denizens of Hallownest, he is surrounded by death and ruin, and he guards his post in solitude with only wistful memories for company. The joy he finds in combat might be the only thing keeping him in high spirits.
- Boisterous Bruiser: He shouts in a jovial tone of his voice as he challenges you while you approach his boss room, and during his battle punctuates many of his attacks with hearty laughter.
- Boss Remix: Dung Defender's battle theme is based on the White Lady's leitmotif.
- But Now I Must Go: In the Lifeblood update, defeating the White Defender five times causes Ogrim to wake up and greet the Knight. In his thoughts, Ogrim ponders if he can prevent the line of Great Knights from ending with himself. When you next visit the room, you find he's built a statue in the likeness of the Knight and left to parts unknown.
- Defeat Means Friendship: After defeating him, he can later be found again and will apologize for attacking you, explaining that he mistook you for a Husk.
- Dung Fu: He's a dung beetle. Almost all of his attacks involve creating projectiles out of dung and throwing them at you, and the rest consist of him burrowing and diving through his excremental arena.
- Establishing Character Moment: You can hear the Dung Defender joyfully laughing even some distance away from his room. He really is a happy fellow even when fighting you in a boss fight. He also apologizes when the fight is over though, stating that he mistook you for something else.
- Flipping Helpless: When you defeat the Dung Defender, his explosion sends him flying into the background, where he lands on his back and starts flailing his limbs, struggling to get up — much like a real beetle.
- Funny Background Event: When you defeat the Dung Defender for the first time, he will be sent flying to the background, face down in the pile of dung, with his whole body sinking afterwards.
- Flipping Helpless: His real-life species' traits are much more evident in him than in most other characters — notably, he lives in a room filled with dung that he also rolls into balls to fight with, reminescent of the dung-rolling insects that he's based on.
- Hero-Worshipper: Ogrim holds Isma in high regards to the point that he defends her grove even after her death. His dream nail dialogue while sleeping also mentions his desire that Isma teach him more to be stronger, but the dream nail dialogue on Isma's corpse suggests that she wasn't able to do so because "there's no time".
- He Was Right There All Along: A strange voice in the Royal Waterways beckons you to a room (literally) full of shit and nothing else, whereupon a Wormsign heralds the Dung Defender.
- Hidden Depths: Despite his joyful attitude when fighting, a scene that plays when you defeat the White Defender has Ogrim bawling in his knees, as he looks at the silhouettes of the other four Great Knights vanishing. Combined with his Dream Nail dialogue as the White Defender stating he misses all of his companions, it's clear that deep down he laments that he's the only one left. His Dream Nail dialogue after his fight also reveals that he recognizes the Knight as a Vessel - "So there were others".
- The Hyena: He laughs a lot in and out of his fight. If you enter his room, he'll sometimes do it in his sleep.
- Incoming Ham: He opens up his boss fight by bellowing "BAAAA HUNDAA!".
- Knight in Shining Armor: If you discount the fact that his current armor is anything but shining, he is a textbook example — a noble, honor-bound hero, loyal beyond death to his king. This trope is on full effect however, once you fight Ogrim as the White Defender - His armor will be white.
- Large Ham: Even in a setting that employs Speaking Simlish, he still manages to stand out as one.FAAAAAAARRRFFUUUUNNNDADDAAA!
DOMA! DOMA! DOMADOMADOMA! - Last of His Kind: He's the only living Great Knight left, as far as we know.
- Light Is Good: The White Defender, even though he's a boss for you to fight, is portrayed heroically and has white armor.
- Logical Weakness: When he burrows into the ground of dung, the Knight's Desolate Dive/Descending Dark spell can force him out by shaking the floor.
- The Lost Lenore: His fellow knight Isma, platonic or otherwise. He'll sometimes mutter her name in his sleep, and the dream nail dialogue during his fight compared to the other knights where he misses some aspect of them(their storytelling, their humor, their wisdom, etc.), he straight up misses her. The gate he guards leads to Isma's Grove, which is, if not a tomb, a sort of monument to her memory.
- Memorial Statue: Ogrim made dung statues of the King and the other Great Knights who are now dead or missing. They also appear in white silhouettes during the White Defender boss fight.
- Mistaken Identity: The Knight gets mistaken for one of those infected husks by the Dung Defender, initiating a boss fight. The latter eventually apologizes afterwards.
- Optional Boss: As of the Hidden Dreams update, hitting him with the Dream Nail initiates a rematch with an upgraded version called the White Defender.
- Permanently Missable Content: After beating up the Dung Defender, you can call and interact with him by returning to his boss area. At a certain point, he'll go to sleep in the hidden room below and you won't be able to interact with him anymore. This was later patched in the Lifeblood update, wherein defeating the White Defender five times will cause Ogrim to wake up.
- Pinball Projectile: His dung balls. Sometimes, the Defender himself will curl into a ball and join them in bouncing around the room.
- Primal Chest-Pound: To establish his boisterous nature, he pounds himself in the chest while shouting his Battle Cry of "FAAAAAARFFFUUUUUNDAAAAA!!!" at the start and middle of his boss fight.
- Really 700 Years Old: He's been around since (presumably) the founding of Hallownest, which is stated to have been at least a century ago.
- Red Baron: Dung Defender is his title. Certain dialogue reveals his name is Ogrim.
- Rolling Attack: In one of his attacks, he curls up on himself and starts bouncing around the room alonside his dung balls.
- Sand Is Water: Or "Dung Is Water" to be more specific. He burrows and occasionally even swims in the floor of his room, though he can also stand on it and the Knight cannot sink into it.
- Signature Scent: His foul odor is remembered by certain individuals in Hallownest, most notably the White Lady, who mistakes the Knight wearing the Defender's Crest, as her Great Knight Ogrim.
- Snub by Omission: Sheo doesn't seem to hold him as highly as the other Great Knights, since he doesn't give any adjectives to describe Ogrim as a legendary hero:Nailmaster Sheo: "Mighty Hegemol was always my favourite. What a towering figure he was, though surprisingly soft spoken for one so large.
They were all impressive in their own right, of course. Fierce Dryya, kindly Isma, mysterious Ze'mer ... erm, and the other one." - Stepford Smiler: His thoughts and dreams are less jolly than his demeanor. The dialogue earned by defeating or Dream Nailing the White Defender states that he severely misses his king and companions and desperately wants to reunite with them.
- Talking in Your Sleep: He can be heard talking while sleeping, sometimes even mentioning Isma.
- Toilet Humor: As heroic as he is, he's still a dung beetle—not the most dignified of insects. When he is defeated, he emits a massive explosion of noxious gas that sends him flying into the background.
- Tough Beetles: Dung Defender is a dung beetle, and he's very strong and durable, and can launch a lot of dung balls at the player character.
- Undying Loyalty: The description of his Defender's Crest states it was a gift from the king himself to his most loyal knight. You can also find that the Defender keeps dung statues of his Great Knight comrades on his room and a statue of the King with a idol next to it on the opposite room.
- You Shall Not Pass!: He guards a device that drains the acid blocking the way to Isma's Grove. Using the Dream Nail on him later while he's sleeping reveals he holds her in high regard.
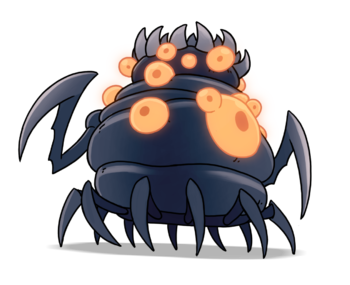
Flukemarm

Found hanging from the ceiling in a secluded room in the Royal Waterways, this giant worm covered in orifices will immediately start launching its children at you should you disturb it.
- Curb-Stomp Battle: If you have a fully upgraded Nail by the time you find her (which you may have a good chance of already), she'll go down in just a few charged hits. Abyss Shriek also works for this.
- Flunky Boss: The most extreme example in the game. Unable to attack or even move itself, it instead has to constantly shoot Flukefeys at you in order to damage and kill you.
- Hell Is That Noise: Constantly makes a bunch of gurgling, slobbering sounds with its "mouths" as you fight it.
- King Mook: Looks like a giant Flukemon, and spawns a steady stream of Flukefeys during her battle.
- Mook Maker: Flukemarm is a boss whose only defense is to cough a constant stream of flying, biting offspring at you.
- Mother of a Thousand Young: Apparently, it is the source of all the Flukefeys and Flukemons you find in the Royal Waterways.
- Non-Malicious Monster: She won't attack you unless you start it.
- Optional Boss: Its room lies off to the side, and you only need to fight it if you want the Flukenest Charm that it drops.
- Stationary Boss: Being stuck to the ceiling and lacking any limbs to move with, it's unable to do anything but spawn Flukefeys at you.
Crystal Peak Bosses
Crystal Guardian / Enraged Guardian


Found sitting on a bench in the Crystal Peak, this bug has not only been infected by the plague, but has also had its head and arms encased in the crystal that gives the area its name. After being defeated by the Knight, it flees to the room directly above, where it can be rematched as the "Enraged Guardian" and killed for good.
- Beam Spam: Mostly content to fire individual beams from its arm, it can also conjure multiple searing rays from the ceiling at once.
- Crystal Prison: Its head is encased in a crystal. The Hunter theorizes that seeing everything through the crystal drove it mad.
- Death from Above: Its roar can cause the crystals on the room's ceiling to randomly fire laser beams.
- Don't Wake the Sleeper: The Knight will find the Crystal Guardian sleeping on a bench. The Knight can spare themselves a boss battle against the Guardian by letting him be, but won't be able to use said bench, whose central location in the area makes it very useful as a checkpoint.
- Energy Weapon: This is the Crystal Guardian's primary method of attack.
- Glowing Eyes of Doom: Like all bugs taken by the infection, its eyes glow orange even beneath that crystal "helmet".
- Hand Blast: Shoots lasers from the crystals on its hands.
- In a Single Bound: After being defeated, the Crystal Guardian retreats to the second floor of its boss room in a single jump.
- King Mook: Looks like the other Husk Miners and Crystallized Husks, but has a larger crystal on it head and can spam laser beams more frequently than the latter enemy type.
- Optional Boss: Neither of its fights is mandatory, but defeating it once gives you access to the bench it was sitting on; defeating it twice rewards you with a Mask Shard.
- Power Crystal: Like the other infected bugs in the cave, the guardian has a pink crystal that constantly glows. It also draws power from absorbing the Radiance's light.
- The Battle Didn't Count: Once you defeat the Crystal Guardian in its first boss fight, you can see the bug jumping up the ceiling as soon as its crystals shatter. You can actually fight this bug again as the Enraged Guardian if you have the Monarch Wings to double-jump your way up the second floor where it retreated to.
- Upgraded Boss: Its "Enraged Guardian" form attacks faster, has more health, and deals double damage.
Ancient Basin Bosses
Broken Vessel / Lost Kin


An eerily familiar figure found in the Ancient Basin, consumed by the plague that has spread throughout Hallownest.
- Body Horror: There's a very noticeable crack on its shell, the horns on its head are bent, and there is a large blob of the infection sticking out on the top of its head, like a tumor. Subverted with the horns as the Lost Kin's spirit had them, implying that the infection had nothing to do with them and they were naturally like that.
- Born of Heaven and Hell: Invoked. All Vessels were "born of god and void", but the Pale King makes a special mention or monologue about this phrase when he talked to the Hollow Knight in the past.
- Boss Remix: The battle theme for the Broken Vessel is an arrangement of the game's main theme, AKA the Knight's leitmotif.
- Bullet Hell: Two of its attacks involve summoning infected orbs from the ground that travel in an upside-down curve - One is from an air-to-ground smash, and when it Turns Red, it even has a more unpredictable way of summoning orbs that have tighter gaps.
- Cain and Abel: The Knight and them are siblings, but their reanimated body has to be defeated to unlock the Monarch Wings.
- Climax Boss: It guards the last movement ability pickup (Monarch Wings) and its death is one of the flags that trigger the Infected Crossroads.
- Dash Attack: Its common method of attack that can also be done in mid-air. Fortunately, it has a long wind-up and telegraph time, allowing you to know in advance that this boss is gonna charge towards you.
- Death Is Dramatic: After being defeated, the Broken Vessel crawls towards the Knight, stretching its hand for a while as a sign of reaching out in despair. Then it falls dead on the floor.
- Dying as Yourself: All of the infected pus explodes off their body after they are defeated, giving them enough time to reach out desperately towards the Knight before falling dead to the ground. The Lost Kin version is still infected, and upon being defeated, instead of being able to "Listen" to their last thoughts, instead the Knight can "Accept" which makes Lost Kin nod in thanks to the Knight. The achievement for this is called "Peace".
- Empty Shell: Part of the Pale King's plan in creating the ideal, Pure Vessel. But since this poor Vessel here is already broken and infected, then this is another subversion of the trope. It is also implied to be one of the many other failed Vessels that managed to escape from the Abyss, just like the playable Knight. The Broken Vessel couldn't be purely empty, there was something that the Radiance was able to influence and infect inside it.
- Flunky Boss: The Lost Kin spawns floating blobs of infection pus at a rapid rate, forcing the player to divide their attention between these Infected Balloons and the boss.
- Foreshadowing: A Vessel that was also consumed by the infection, like the Hollow Knight, and shrieks in much the same way as them as well. It also looks like a corrupted version of the playable Knight. Using the dream nail on the boss reveals its name to be "Lost Kin", hinting that it is indeed connected to the Knight.
- Graceful Loser: Bows their head politely to the Knight after they are defeated in the dream world.
- He Was Right There All Along: In the Ancient Basin, you find a corpse of one of the player character's brethren, and as you approach the Infection pustules on the left side of the room, a swarm of Lightseeds reanimates the corpse, commencing the Broken Vessel boss fight.
- Laser Guided Tyke Bomb: All of the Vessels were made to specifically counteract the Radiance.
- Leitmotif: The Knight's theme is first heard on the main menu, and recurs frequently throughout the soundtrack most notably being shared with the other vessels, the Broken Vessel / Lost Kin and the Hollow Knight.
- Mirror Boss: Their attacks and movement abilities are strikingly similar to the Hollow Knight's, which is fitting since they are both Vessels.
- No Biological Sex: Vessels have no biological sex or gender identity due to being artificial constructs created by the Pale King.
- Optional Boss: Guards the Monarch Wings, which are not required to complete the game. It can also be rematched by striking its corpse with the Dream Nail, leading to a fight with an upgraded form, Lost Kin.
- Puppeteer Parasite: They are actually lying down on the ground when they are encountered, but then a swarm of Lightseeds gathers inside of their hollowed out shell to reanimate them and push them to battle the Knight.
- Royal Blood: As a result of being a Vessel, a child of the Pale King and the White Lady.
- Rule of Three: It is one of the three known vessels (the Knight, the Broken Vessel, and the Hollow Knight).
- Scarred Equipment: The Broken Vessel's nail already has cracks when you meet it in the Ancient Basin.
- The Speechless: Just like its siblings, the Broken Vessel has no mouth and thus, is incapable of speech. This is part of the Pale King's design for them.
- The Unchosen One: Considering the fact that there was only one chosen by the Pale King to become the Pure Vessel and that is no other than the titular Hollow Knight, then this Broken Vessel is one of the many other Vessels that get dumped and locked in the Abyss but somehow managed to escape, similar to the case of our playable Knight.
- Uniformity Exception: At a young age, all Vessels are nearly identical with their siblings save for their horns which come in various shapes and sizes. Among them, the Knight and the young Hollow Knight look almost like each other, if not for the fact that the young Hollow Knight has taller horns and with larger jagged patterns in the middle of each horn. By the time you meet the Broken Vessel, it also looks identical to the playable Knight since both are still in their smaller forms, save for the fact that the Broken Vessel's horns are now longer and bent forwards, possibly due to the infection damaging its head.
Fog Canyon Bosses
Uumuu

A giant, jellyfish-like creature that guards Monomon the Teacher. Quirrel aids you in your battle against it.
- Boring, but Practical: You have to wait several seconds for Quirrel to appear in the fight against Uumuu since he is fast, constantly moving and disappears soon after. Survival, positioning, and evasion are the priorities here as you only have a small window of opportunity to attack Uumuu's weak spot.
- Broken Armor Boss Battle: Uumuu cannot be damaged until its protective membrane has been pierced, which the Knight is unable to do alone. Fortunately, a short time into the battle, Quirrel arrives to help out.
- Contractual Boss Immunity: Thanks to the jelly layer protecting its core, Uumuu is normally invincible to your nail attacks or spells. You have to find a way to pop that layer and expose its core. Quirrel will help you with this case in the Teacher's Archives, and you have to use the Ooma's explosion to expose Uumuu in Godhome.
- Electric Jellyfish: Uses electric attacks during its boss battle.
- Expy: It's rather similar to a Metroid, what with its jellyfish-like appearance, segmented brainlike nucleus, and being fought in a creepy lab with dangerous acid at the bottom like Tourian. Fitting, given both Hollow Knight and Metroid are Metroidvanias.
- Flunky Boss: In its Godhome battle, several Ooma will rise from the water to serve as obstacles and distract you from Uumuu. This also serves as the only way to damage it there, as Quirrel isn't present in this version.
- King Mook: It's a giant version of the Ooma and Uoma fought as their area's boss, and which can also use electric attacks similar to the also-local Charged Lumaflies.
- Nerf: This boss was once overpowered during the release of the Godmaster DLC so they had to tune it down. Uumuu received many changes to its movement speed, vulnerability windows and health to make it easier.
- Praetorian Guard: The Hunter suspects that Uumuu is guarding the Teacher's Archives, and by extension, Monomon as well.
- Seemingly Hopeless Boss Fight: In the Teacher's Archives, the membrane protecting the core of the boss prevents the Knight from attacking it with spells or the nail. After a while of dodging, Quirrel will come in and pop it.
- Shielded Core Boss: You cannot damage Uumuu directly unless you pop out her jellyfish layer and expose her core first, something that can only be done via external means, like Quirrel who can pop it with his weapon in the Teacher's Archives, or by playing aggro with the Oomas in the Godhome, using their explosions to target Uumuu.
- Shock and Awe: Uumuu's primary method of attack. It has two main attacks, the first is to cover 90% of the boss room in electrical sparks, forcing the player to seek a safe spot, and the second one is to continuously summon electricity on the Knight's position, forcing the player to constantly move.
- Tactical Suicide Boss: Several Ooma will only appear when fighting this boss in the Godhome. But since Quirrel is not there to help you this time, you have to use the Ooma's explosion to your advantage and pop Uumuu's protective layer.
- Tennis Boss: How Uumuu's boss fight in the Godhome technically turns into. You have to aggro an Ooma, and try to use that exploding enemy by luring it towards Uumuu so that you can break the boss's protective layer and damage the core.
- Yellow Lightning, Blue Lightning: Uumuu's electric sparks are colored blue.
Queen's Gardens Bosses
Marmu
Backer: Zara Pellen

The innocent-minded yet strong protector of the Queen's Gardens. The Queen promised to teach her how to fly upon her return to the verdant retreat, but Marmu sadly passed away before that day came. A totem in her memory was placed upon her grave in the gardens' wilds.
- And Call Him "George": Her pre-fight dialogue suggests that she doesn't realize that "playing" with the Knight can kill them. In fact, the fight consists of her bouncing around and letting herself get hit like a beach ball until she gets "tired out".
- Blown Across the Room: Marmu is one of the few bosses that can be knocked back with the Knight's attacks. In fact, she has such a strong recoil when hit that the Knight can literally send her at a significant distance, even more with Heavy Blow.
- Bouncing Battler: Her main method of attack is curling up into a ball and flinging herself at the knight.
- Child Soldier: Implied, given that she's a caterpillar who's waiting to learn to fly (i.e. become a butterfly, i.e. grow up) and is very naïve.
- Pokémon Speak: Marmu's Speaking Simlish is all variations of her own name. "Mar-muuuuuu!"
- Posthumous Character: She has been dead for quite a while.
- Tragic Dream: She's waiting for the queen to teach her how to fly, completely unaware that she's dead and will never get the chance.
Traitor Lord

While the Mantis Tribe has by and large, fared much better than Hallownest against the plague, not even they are fully immune to its effects. Those Mantises who succumb to the plague are exiled to the Queen's Gardens, and the Traitor Lord rules over these corrupted husks.
- Advancing Wall of Doom: He can create a pillar wave that moves across the screen and can only be bypassed by the Shade Cloak's dash.
- Awesome, but Impractical: Cloth has a huge damage potential in the fight against the Traitor Lord but she's so slow against a fast-moving target that she's more likely to miss while the boss has its aggro on the Knight instead.
- Blade Below the Shoulder: Has mighty claws, just like the other mantises. Due to his size, they hit really hard.
- Deadly Disc: He can create infected variants of the disc blades that the Mantis Lords use.
- Diving Kick: One of his attacks that he shares with the mantis traitors. Due to his huge body size, the divekick can hit from a considerable range even when landing.
- Evil Makes You Monstrous: As a result of succumbing to the infection, the Traitor Lord stands out among all his other kin, for being so bloated and massive in size, constantly emitting the infection out of his body, and has orange eyes.
- Final-Exam Boss: The Traitor Lord in the Queen's Gardens serves as one, especially if you are aiming for the Kingsoul and the other endings. His lair is only accessible using the shade cloak, by which point you will have already obtained the other pre-requisite upgrades and movement abilities to obtain said cloak in the first place. His boss battle also encourages you to use most of your movement abilities to survive - the Traitor Lord may send shockwaves that can only be bypassed by the Shadow Dash ability. This would essentially mean that the player must dash often to avoid his attacks, and that the knight must wall-jump-dash when about to be cornered in a wall, because the Traitor Lord's hitbox is too large for a double jump.
- Foreshadowing:
- There is a fourth throne in the stage where the three Mantis Lords are sitting on. It belongs to the Traitor Lord and was broken to symbolize its exile from the tribe.
- A Dream Nail dialogue of the uninfected Mantis Villagers hints at his existence.
- He Was Right There All Along: The Traitor Lord's boss fight in the Queen's Gardens at first appears to be yet another Multi-Mook Melee before he makes his appearance.
- King Mook: He uses the same moves used by the grounded mantis traitors in the area, but is twice their size.
- Lightning Bruiser: Of the "decently fast bruiser" variety. This character seems like a slowpoke compared to his sisters, and in the first versions, he only had a subpar running speed, a decently fast jump-and-dive attack, and a good health pool. However, since his Buff in the Lifeblood update, the Traitor Lord can be considered a true Lightning Bruiser: he gains a Shockwave Stomp and Deadly Discs, deals double damage and acts faster than before.
- Male Might, Female Finesse: In sharp contrast to the Mantis Lords, the Traitor Lord is slower and bulkier, deals double damage every hit, and forgoes using a weapon. Justified, as if he had style, it's likely been cast away due to the plague affecting his mind.
- Meaningful Background Event: When fighting the Traitor Lord in the Godhome, you can notice his child's grave in the background. Cloth's club is added here when she joins you in the Queen's Gardens boss fight, as seen in this image◊.
- Mutual Kill: If Cloth shows up for the fight, it will end with them killing each other regardless of how much damage you deal.
- Natural Weapon: Uses his claws and body in most of his attacks.
- Orwellian Retcon: Prior to Update 1.0.3.7, the Traitor Lord was identifed as a female in his initial Hunter's Journal entry:"Deposed Lord of the Mantis tribe. Embraced the infection and turned against her sisters."
- Power at a Price: The Lord deliberately embraced the plague to become more powerful. This should have the cost of turning him feral, but he and the other exiled appear to still function as a society in the Gardens.
- Slaying Mantis: Like his sisters, but comes off as more of a brute given that he uses his bare claws rather than nails. As of the Lifeblood update he can now also throw glaives similar to the ones used by Mantis Petra and the Mantis Lords, but his seem to be lathered in infection and he can throw them in a much trickier pattern.
- Shockwave Stomp: He can slam the ground to unleash immense shockwaves that cannot be avoided without the Shade Cloak.
- Took a Level in Badass: Previously, the Traitor Lord was basically a resized Mantis Traitor with a souped-up health pool. As of the Lifeblood update, however, he has gained two new ranged attacks and now deals two masks of damage with most attacks and on contact.
- An inversion occurs in Godhome: because he and the Knight are not contained in a small room anymore, it's easier to dodge his attacks and the wind scythes he throws are slower.
- Unperson: His broken throne in the Mantis Village suggests he's received this treatment from his sisters.
Deepnest Bosses
Galien
Backer: Zachary Virden

A brave and undefeated warrior who claimed to be the strongest in Hallownest and desired to prove his valor to the Pale King as a Knight. He traveled to Deepnest in order to test his strength but eventually found death instead. His husk lies in a cave filled with unusually large glowing mushrooms.
- Blood Knight: Greatly enjoys fighting.Galien: Let us test our strength in joyful combat!
- Deadly Disc: His main form of attack is to simply spin his large scythe like it acts as a huge buzzsaw. He can also summon two smaller discs that independently move and bounce.
- Homing Projectile: His main scythe can re-adjust itself to follow the Knight's location even as it bounces. Galien can also pause the scythe for a bit before directly aiming it at the Knight again.
- Irony: He comments on how the world is not kind to the weak, as shown by "this poor fool" lying dead before he and the Knight. He never seems to realize that he's referring to his own dead body.
- Locked Out of the Loop: He never realizes that he's been killed, and acts as if the knight is the first person to defeat him. He's also unaware of the King's disappearance.
- Mind over Matter: He is the only Warrior Dream who uses a physical weapon instead of projecting a spectral copy, and he can freely move the scythe without directly interacting with it.
- Pinball Projectile: Once launched, his spinning scythe will keep on bouncing every time it hits the edges of the arena. He can also summon up to two glowing mini-scythes that do the same.
- Posthumous Character: He has been dead for quite a while.
- Scars Are Forever: There's a huge crack/split in his body and face even as a ghost.
- Sinister Scythe: He summons a flying, spinning scythe to attack the knight.
- Strength Equals Worthiness: He ventures into Deepnest because he believes he needs to prove his strength to the Pale King to be a knight. He, unfortunately, fails to do this and dies as a result.
Nosk

A predatory arthropod that lures bugs into the Deepnest by mimicking their loved ones.
- Acid Attack: It gains two acid-based attacks in a patch. The blobs stick around for a while after hitting the floor, restraining movement.
- Animalistic Abomination: It is a vaguely arachnid-like thing capable of reading the memories of bugs and taking a form that they are familiar with, in order to lure them into its layer.
- Big Creepy-Crawlies: To an even greater extent than many other enemies encountered in Hallownest. Its primary methods of attack are to skitter back and fourth across its arena and to leap at the player.
- Boss Remix: Nosk's theme is a remix of the Deepnest ambient track, of all things.
- Bullfight Boss: Its main form of attack is to charge, priming it by roaring before.
- Confronting Your Imposter: When it's initially encountered in the depths of the Deepnest, Nosk is disguised as a mirror image of the Knight.
- Damage-Sponge Boss: Its attack patterns are pretty simple but it can take a lot of hits.
- Dark Is Evil: A sadistic predator lurking in the shadows, one of the few beings in the game to play the trope straight.
- Dead Guy on Display: Several bugs are hanging in the background of Nosk's lair.
- Dead Person Impersonation: Implied by the dying dreams of the corpses left outside its lair, and confirmed by its Hunter's Journal entry: many of Nosk's victims believed they were pursuing their long-deceased companions. Curiously, to attract the protagonist, it takes the guise of a vessel just like it. This has worked before, too, given the few vessel corpses hanging in Nosk's nest.
- Death from Above: For one of its attacks, the Nosk jumps up to the ceiling and drops acid bolts on its prey. It then follows the falling acid with Nosk itself falling down, damaging the Knight if it is directly below.
- Doppelgänger: Aside from Dead Person Impersonation, Nosk can also imitate the appearance of its would-be victim like how it did with our Player Character, when we saw a mysterious figure in Deepnest that looks exactly like the Knight.
- Empathic Shapeshifter: The bugs strung up in Nosk's lair aren't all Vessels like the Knight; a few are of different species, meaning that Nosk can improvise a convincing disguise tailored to its prey. In its Journal entry, it's implied to have the ability to look at the memories of others, which help it disguise as one of its victim's loved ones.
- He Was Right There All Along: In Deepnest, a doppelganger of the Knight leads them down a twisty corridor to a room littered with strung-up corpses, where the doppelganger reveals its true form as Nosk.
- King Mook: Like the Corpse Creeper, it uses the body of a dead bug and can charge towards the player.
- Luring in Prey: The impostor knight is revealed to be a puppet mounted on Nosk's head once the Knight confronts it inside its lair. According to the Hunter's Journal and last thoughts of the corpses outside Nosk's lair, many of its victims thought they'd found long-deceased loved ones.
- Offscreen Teleportation: During the first few sightings, Nosk will always appear around a bend that will allow it to disappear deeper into its tunnels before the player is able to catch up to it.
- Optional Boss: Found in a hidden area in the lower Deepnest. It isn't necessary for game completion but rewards the player with a Pale Ore if slain.
- Shapeshifter Baggage: Nosk's true form is many times the size of the Knight, but it has no problem squeezing all that mass down into the imposter Knight's tiny frame.
- Single Specimen Species: Little is known about Nosk as unlike other bosses, it does not belong to any sort of groups or known species. Godmaster introduces Winged Nosk as a new boss but given the context, it's not clear if it a different creature of the same species or if it exists at all.
- Spider Limbs: As visible once it reveals its true nature.
- Took a Level in Badass: A post-launch patch added two acid-based attacks to the Nosk. And again in another update as Winged Nosk.
- Transformation Horror: Nosk's true form emerges with many crunching, cracking sounds, ending with it waving the Knight's body around like an anglerfish lure attached to a torso bloated with infection.
- Transformation Is a Free Action: Nosk has one of the longest boss introduction sequences, but the Knight cannot attack while Nosk is vulnerable and must wait until it has finished its metamorphosis.
- Wall Crawl: In the Deepnest, it can climb and crawl on the ceiling dropping bolts of acid from above.
- The Worf Effect: among the corpses of its victims in Deepnest is that of a Stalking Devout, the most powerful enemy in Deepnest (that can actually be killed).
Resting Grounds Bosses
Xero
Backer: Constant Pham
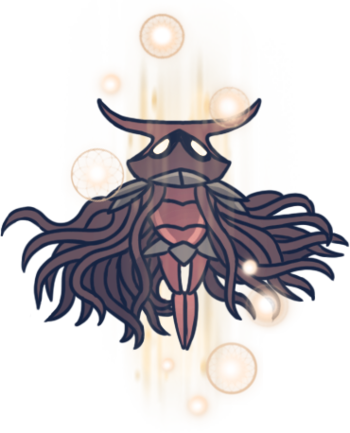
A former warrior of Hallownest who believed he could fight the infection on his own and turned against the Pale King, for which he was executed. His tomb can be found in the Resting Grounds, a reminder to any who would betray the King.
- Boss-Arena Idiocy: You fight the warrior Xero atop a platform in Resting Grounds. But unlike the other boss fights which lock you inside the room, you can easily run past and go below the platform where he hovers or far off to the left of it. Here, you can heal yourself without interruptions because his nails won't reach you and Xero only moves above the platform. This is possibly Justified as Xero is technically the first warrior dream that you can encounter after obtaining the dream nail, and he gives 100 essence, just enough to introduce you to the other, more difficult warrior dreams. However, this tactic becomes averted in the Godhome.
- Category Traitor: He was so confident in his strength that he believed that strength alone can defeat the infection. Due to this mentality, he betrayed the King and set off on his own. Xero was then "executed for crimes".
- Despair Event Horizon: Clearly crossed it a long time ago, judging by his rather bleak and fatalistic outlook on things, but it's unclear whether it was being executed or something else that caused it.
- Heel Realization: After being beaten by the knight, he realizes his coup against the king was foolish and accepts his defeat.Xero: Ah... I can see now. Those who turn against the King are doomed as soon as they raise their weapon. Do not call me a traitor... Simply call me a fool.
- Make an Example of Them: He was given a proper burial in the Resting Grounds to make others think twice about treachery. His tomb reads "Cursed are those who turn against the King." currently, and originally read "Here lies a Traitor" in an earlier version of the game.
- The Magnificent: Initially, Xero's grave inscription described him as "a Traitor" (with the uppercase T), until it got changed in a later update.
- Master of the Levitating Blades: He fights with two nails hovering near him and launching them at the player character. At low health, he summons two more nails, making the fight more difficult.
- Orwellian Retcon: The inscription for Xero's grave was initially "Here lies a Traitor". After Update 1.0.2.8, this was changed to "Cursed are those who turn against the King."
- Posthumous Character: He has been dead for quite a while.
Kingdom's Edge Bosses
Markoth
Backer: Samuel Dixon
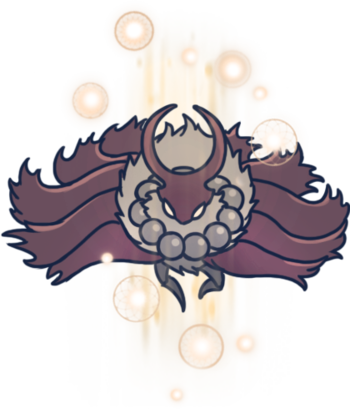
One of the only moths to carry a weapon, Markoth was an undefeated warrior who grew disgruntled from the world and the kingdom of Hallownest, rejecting them. He went to Kingdom's Edge to seclude himself and meditate, hoping to uncover a truth long forgotten, and fighting any who disturbed, regardless of their reasons. He eventually died, his remains never to be found in a lone cave of Kingdom's Edge.
- Bullet Hell: Oh boy! Markoth spends the whole fight summoning Nails around the arena that aim in The Knight's direction for a moment before flying forward. He does this whenever he isn't doing another attack, and the Nails spawn faster as the fight goes on.
- Macabre Moth Motif: He's a member of the Moth Tribe, worshippers of the Radiance and a race once associated with dreams.
- Moth Menace: The ghost of a moth warrior who's aggressive towards the player when they first meet.
- Nerf: This boss was once overpowered during the release of the Godmaster DLC so they had to tune it down. Markoth's health was lowered (requiring the player to endure the Bullet Hell for a shorter period of time).
- Orbiting Particle Shield: He summons a Dreamshield at the start of the battle that orbits around him. At half-health, he summons a second one.
- Posthumous Character: He has been dead for quite a while.
- Shield Bash: Markoth's Dreamshield orbits around him, damaging the Knight on contact. As the fight goes on, he can summon another copy and accelerate the speed of both shields.
- Storm of Blades: Attacks by summoning some floating nails near the Knight and launching them after a while.
Hornet
Hornet's second boss form in which she challenges the Knight at the entrance to the Cast-Off Shell in Kingdom's Edge to test their resolve and strength in saving Hallownest. This time, Hornet isn't holding back and deploys an arsenal of new tricks against the Knight.
Hornet's entry can be found here.
Colosseum of Fools Bosses
Zote

A self-proclaimed mighty knight who's seeking fame in Hallownest. If he survives long enough, he'll act as the final boss of the Colosseum of Fools' Trial of the Warrior the first time the Knight completes it.
Tropes regarding him can be found here under Zote's NPC entry.
Oblobble

A bigger variant of an Obble, two of which act as the final boss of the Colosseum of Fools' Trial of the Conqueror.
- Battle Couple: The two Oblobbles that you fight in the Colosseum of Fools are actually mates.
- Bullet Hell: About as close to the trope as Hollow Knight ever gets for the base game. Each one emits waves of infection bullets to attack, and when the survivor Turns Red, the bullets get faster and more unpredictable.
- Damage-Sponge Boss: Big, slow, and super easy to hit, but they can take quite the beating. Kill one, however, and the remaining other will become much, much trickier to strike.
- Dual Boss: Two of them are fought at any given time.
- Kill One, Others Get Stronger: When one falls in battle, the other becomes more aggressive.
- King Mook: A larger Obble that can fire more shots and in more directions.
- Non-Malicious Monster: Not unlike other enemy types portrayed as feral animals. In fact, like regular Obbles, they don't seem particularly aggressive, just clumsy and prone to randomly spray acid in your general direction. But kill one of them, and the survivor will go absolutely nuts, becoming much more dangerous. The Hunter's Journal reveals why: Oblobbles mate for life and will never leave their partners willingly. So the poor thing never really wanted to fight, it's just super pissed because you just killed its mate.
- Optional Boss: Only necessary for completion's sake, and can otherwise be skipped as they're otherwise only found in optional areas.
- Turns Red: Always comes in pairs: Once you kill the first one, the second one will become much faster and spew harder to dodge bullet patterns.
God Tamer
Backer: Dmitry Shcherbakov

A veteran gladiator of the Colosseum of Fools, and the final encounter of its most challenging course; a female cockroach who fights alongside a mount resembling a prehistoric trilobite.
- Ambiguous Situation: Is the God Tamer infected? Her Dream Nail dialogue is that of a husk, and her mount is definitely infected, but she still seems to care about her mount, given that she'll forfeit the battle when it is killed, whereas Husks are mindlessly aggressive.
- Beast of Battle: The crustacean mount bears all the hallmarks.
- The Beastmaster: Upon entering the arena, the tamer immediately dismounts and engages the player character in tandem with her beast.
- Blood Knight: The Hunter’s Journal refers to the God Tamer as a veteran warrior of the Colosseum, implying that she participates in the games for the sport of it.
- Checkpoint Starvation: Because the encounter occurs at the conclusion of the Trial of the Fool, if you fail to dispatch the boss, you'll have to replay the entire lengthy gauntlet to take another stab at the fight.
- Dark Action Girl: The God Tamer is a female cockroach and a veteran warrior of the Colosseum of Fools. It is unknown whether or not her mount also qualifies, as its gender is unspeciified.
- Dual Boss: The cockroach rider isn’t terribly imposing on her own, but her aggressive partner serves to keep the player on their toes.
- Dynamic Entry: Watch out when the tamer jumps off her ride for the first time, because she is always programmed to slash down to start the fight.
- Extra Eyes: The mount has multiple eyes.
- Informed Species: The tamer is a cockroach, but her lack of wings and elytra and her more slender body shape makes her more similar to an ant, especially since many ants in real life do tend other animals, like aphids, as a source of honeydew.
- Invulnerable Attack: While performing the Rolling Attack, the mount becomes immune to nail attacks.
- Jousting Lance: The rider fights with a slender lance, even after dismounting.
- Only the Chosen May Ride: Jury’s still out on whether the trilobite qualifies as a "god", but it seems to be the only remaining specimen of its kind, and isn’t particularly friendly.
- Optional Boss: Awards the player with no items or upgrades upon her defeat, and is only a required battle in a completionist run.
- Red Baron: The rider is called the "God Tamer", although it is still questionable if the large trilobite is even considered as a "God".
- Rolling Attack: The mount's main attack. It can travel the length of the stage and bounces, making evading it surprisingly tricky.
- Villainous BSoD: If the trilobite is killed before the rider, she will fall to her knees and give up.
Final Bosses (MASSIVE UNMARKED SPOILERS)
The Hollow Knight


The original Vessel for the plague, created by the king of Hallownest and sealed away in an attempt to protect the kingdom. With their ability to contain the plague weakening, they must be defeated to take their place as the new Vessel and keep the plague from fully breaking free.
- 11th-Hour Ranger: In the "Dream No More" ending, they return as a Shade to help the Knight defeat the Radiance.
- Ambiguous Gender: Just like the Knight and other Vessels,
 Word of God says that the Hollow Knight doesn't have a gender and is often referred to as an "it".
 - Ambiguous Situation: Despite the White Lady explaining that the Hollow Knight wasn't actually an Empty Shell as it was tarnished by an "idea instilled", that idea wasn't explicitly elaborated. But the key implication was that the Hollow Knight was able to develop some trait after they were branded as The Chosen One. The ambiguity of the cause can be supported by two in-game cutscenes:
- As the player Knight climbs back at the top of the Abyss, this chosen Hollow Knight stops and turns its head back to notice its sibling hanging on the ledge, before continuing to walk with the Pale King. Is this the time when the idea was made? A Survivor's Guilt after seeing a sibling get left behind?
- Completing the optional Path of Pain rewards a cutscene of the young Hollow Knight sitting on a bench with its father, the Pale King. Both glance at each other. Was this idea a form of an emotional attachment to a loved one? A bond between father and child?
- An Arm and a Leg: While it could be obscured by the cloak they wear, the Hollow Knight's second arm is never visible. The Pure Vessel fought in the Godhome very clearly has two arms, confirming that the Hollow Knight lost one arm at some unknown point after this, presumably due to containing the infection.
- Arc Symbol: The Hollow Knight's distinct horns are imprinted on various key objects and statues.
- Attacking Through Yourself: In the final boss fight, the Hollow Knight stabs itself multiple times to let out the infection inside it.
- Body Horror: They have several attacks that involve a large amount of glowing cysts exploding out of their chest. One attack has them being flung into the air and slammed into the ground in an attempt to crush the Knight.
- Born of Heaven and Hell: Invoked. All Vessels were "born of god and void", but the Pale King makes a special mention or monologue about this phrase when he talked to this character in the past.
- Boss Remix: The battle theme for the Hollow Knight is an arrangement of the game's main theme, AKA the Knight's leitmotif.
- Boss Subtitles: Both of its forms have their names centered on top of the screen, instead of the bottom-right corner that majority of the other bosses have.
- Broken Angel: The poor thing has been badly ravaged by the infection, is missing an arm, and has a scar across one eye. The Pure Vessel fight shows that most of its attacks are approximations of things it could do in its prime, replacing SOUL nails with blobs of infection. Pure Vessel also deals twice the damage and has multiple tricks that the Hollow Knight simply cannot do, such as parrying attacks and focusing soul, and attacks much more relentlessly.
- Bullet Hell: During the final phase, it can teleport in the middle of the stage just to unleash infected pellets in multiple random directions. Thankfully, the attack is just short.
- Cain and Abel: The Cain to the player Knight's Abel, though how much control the Hollow Knight still has over their actions and how much is the plague controlling their body by the time they are reached is left mostly up to debate.
- The Chosen One: Is the only handpicked candidate Vessel chosen by the Pale King based on the latter's criteria for an Empty Shell. The Hollow Knight isn't actually purely hollow, hence the Radiance was still able to bring the infection through the Knight despite being sealed inside it.
- Cliffhanger: In the new endings added in Godmaster, the Hollow Knight, newly freed from the Radiance, is seen advancing towards Hornet right before a Smash to Black.
- Combat Breakdown: A rare example of this happening to the boss. About halfway through the fight, they become visibly fatigued and start stabbing themselves in a desperate attempt to either destroy the infection or themselves as the plague begins to overtake them. By the end of the battle, they can hardly attack without collapsing and can barely even be considered a proper fight anymore.
- Counter-Attack: They have a distinct animation during which they block all nail slashes thrown their way, eventually resulting in one of these if the player keeps attacking anyway.
- Dark and Troubled Past: Hooo, boy. First, there was their creation by the Pale King via sacrificing his and the White Lady's children. Then they were raised with the sole purpose of sacrificing themselves for the world. But the Pale King ended up forming a father-child bond with it, inadvertently sabotaging the Hollow Knight's potential. When the Knight finally faces them, they are a broken mess due to the Infection taking over their body and threatening to burst forth.
- Determinator: All the Vessels were created with this in mind to better keep the Infection contained, hence "No will to break". However, the Hollow Knight gets a special mention for this trope. Despite the Infection being on the verge of breaking free, the Hollow Knight still does everything in their power to fulfill their purpose. First, they repeatedly maim themselves in order to aid the Knight. Then, when the Knight beats the Radiance, they appear in Shade form to help the former kill her once and for all.
- Early-Bird Cameo: In the prologue, there is a chained creature whose eyes turn orange before letting out a scream. That, is the Hollow Knight.
- Empty Shell: The Pale King thought of the Hollow Knight as this, since the latter was chosen based on the criteria that a Pure Vessel must have no mind, no will, nor voice, hence the "Hollow" part of its name. However, this turns out to be a big Subverted Trope since this Hollow Knight isn't actually empty contrary to the King's belief. The White Lady even states that this Vessel was "tarnished by an idea instilled", whatever that idea means gets left open for interpretations. That idea was the reason why the Radiance was still able to infect the Hollow Knight from the inside.
- Fallen Hero: It was once the greatest champion of the Pale King. When you finally meet it in the present day, it's a pathetic shell of its former self that can barely resist serving the Infection.
- Fighting from the Inside: In the second half of the fight, the Hollow Knight starts resisting the control of the plague, stabbing themselves in the chest in an attempt to help the Knight. These suicidal fits don't damage them, but they do represent huge openings for the Knight to heal themselves, openings that the otherwise-highly-aggressive Hollow Knight rarely presents.
- Flash Step: It'll appear and vanish with blinding speed throughout the first half of the fight to get an angle for attacking the Knight, verging on Teleport Spam at times.
- Foreshadowing: A minor one, but in the cinematic where you encounter the Hollow Knight's statue in the City of Tears, the statue appears to shed a few tears. When they are encountered later in the game, we see that they are Fighting from the Inside, desperate to contain the infection, but they are unable to hold on much longer.
- Freeze-Frame Bonus:
- As the infection is being sucked out of the Hollow Knight, it creates an explosion that is shaped to resemble the silhouette of the Radiance. This silhouette can be clearly seen if the game is slowed down frame by frame, like what this Reddit post points out.
- It may only be visible for a few seconds before the screen cuts to black, but the "Embrace the Void" ending cutscene reveals that the Hollow Knight wields a Pure Nail, it's just that the weapon is now cracked.
- As the infection is being sucked out of the Hollow Knight, it creates an explosion that is shaped to resemble the silhouette of the Radiance. This silhouette can be clearly seen if the game is slowed down frame by frame, like what this Reddit post
- Glowing Eyelights of Undeath: As the Hollow Knight's Shade is a void being, it has a black body with round, solid white eyes.
- Good Scars, Evil Scars: Has a simple crack on the upper part (or "eyebrow" part) of its shell.
- Grew Beyond Their Programming: Certain NPC dialogue—along with a cutscene at the conclusion of the Path of Pain—implies that the Hollow Knight could not completely contain the infection due to being raised as a child by the Pale King.
- Ground Pound: A rather disturbing variant. The infection would sometimes force the Hollow Knight to jump and stomp its entire body to the ground, and can also bounce off to repeat the attack.
- Handicapped Badass: The infection has devastated the Hollow Knight, even destroying one arm completely. It's gained some infection-based attacks, but the Pure Vessel fight makes it clear that, by the events of the game, it's barely holding together.
- Heroic Sacrifice: They tried to pull one by serving as the Vessel for the infection and sealing it away. It worked for a while.
- Hit Stop: Striking at the Hollow Knight during its defensive stance will produce this effect. After a flash and a motion freeze, it will unleash a Counter-Attack on you.
- I Got Bigger: Flashback cutscenes reveal that when they were younger they used to look pretty similar to the far smaller Knight, with the only difference being the shape of their horns and the colour of their cloak.
- Laser Guided Tyke Bomb: All of the Vessels were made to specifically counteract Radiance. The Hollow Knight in particular serves as the container to prevent the infection from spreading out.
- Leaking Can of Evil: The Vessels are the leaking can! Some of their attacks even incorporate firing blobs of glowing liquid just like some other infected creatures do. Also, if one considers the logic that they are sealed within the Black Egg Temple (which itself is a leaking can near the end of the game), then the Hollow Knight is basically a leaking can inside of a leaking can.
- Leitmotif: The Knight's theme is first heard on the main menu, and recurs frequently throughout the soundtrack most notably being shared with the other vessels, the Broken Vessel / Lost Kin and the Hollow Knight.
- Living Shadow: The Hollow Knight's Shade, which is made out of void.
- Memorial Statue: The most prominent one is located in the City of Tears, a statue of the Hollow Knight to commemorate its sacrifice.
- Messianic Archetype: The circumstances surrounding the Hollow Knight - They were The Chosen One among their siblings and once donned a white armor as the Pure Vessel. But the Pale King (its father) planned it as a sacrifice to seal the Radiance within the Black Egg Temple (as well as being chained hanging in the temple's center), in an attempt to save the bugkind away from the infection. What deviates the Hollow Knight's story from Jesus was that it eventually got infected as a consequence of having an idea instilled. Fortunately, its shade also comes back to assist you in defeating the game's antagonist in the third ending.
- Mirror Boss: The Hollow Knight is one of the knight's own kind and fights in a similar way to the knight.
- No Biological Sex: Vessels have no biological sex or gender identity due to being artificial constructs created by the Pale King.
- Non-Indicative Name: From the perspective of the Pale King, this was a case of Meaningful Name at first, since he thought of this vessel as The Chosen One that fits all of his criteria, hence it is given the names or titles of "Hollow Knight" or the "Pure Vessel". However, the White Lady reveals a big subversion out of these as she tells that this vessel was tarnished by an idea, so the titles no longer live up to its name, per this trope.
- People Puppets: In their final phases, they are so unable to contain the plague that it takes completely over, lifts them up, and slams them in the Knight's direction like a rag-doll.
- Playing the Heart Strings: The game uses a strings-focused Dark Reprise of its main theme during the final phase of their battle.
- Powered by a Forsaken Child: They are the forsaken child, in a very literal sense.
- Red Baron: They have two titles; "Pure Vessel" and "Hollow Knight".
- Reverse Grip: Always holds their nail this way.
- Royal Blood: As a result of being a Vessel, a child of the Pale King and the White Lady.
- Rule of Three: It is one of the three known vessels (the Knight, the Broken Vessel, and the Hollow Knight).
- Sad Battle Music: Their battle music, "Sealed Vessel", starts out imposing and grand but turns heartbreakingly tragic in the second part of the fight, as they are slowly reduced to a wreck, turning their blade on themselves and eventually growing so weak they can barely swing their nail without collapsing.
- Scarred Equipment: As the Hollow Knight, their nail is already cracked and worn-out.
- Scars Are Forever: By the time you reach it inside the Black Egg Temple, the Hollow Knight is already broken, to the point that there is a permanent crack in its face. Yes, it's permanent enough that even the Hollow Knight's shade has a white crack in contrast to its void body.
- Seppuku: The way they stab themselves with their own nail has shades of this, especially how it coincides with the soundtrack's shift to Sad Battle Music. Of course, even this doesn't finish them off and the Hollow Knight periodically stabs themselves throughout the rest of the fight.
- Sequential Boss: You need to use the dream nail on them to fight the Radiance. If you die from fighting the Radiance however, you have to fight the Hollow Knight again.
- The Speechless: They were meant to have no voice as part of the qualities that would help them contain the infection. "No voice to cry suffering". They appear to roar during the boss battle, but this is the voice of the Radiance seeping out through the infected parts of the Hollow Knight.
- Sword Plant: Inside the Black Egg Temple, the Hollow Knight's nail is planted just below the spot where they are chained, then the boss quickly grabs it after being freed, initiating the fight.
- Tragic Monster: During the battle, they are clearly fighting the infection that's driving them mad as much as they are fighting the Knight.
- Turns Red: The Hollow Knight does get new, dangerous moves, but only after it begins stabbing itself. Towards the end of the battle, it can barely swing its nail before keeling over, and the soundtrack reflects its miserable state.
- Tyke Bomb: There's something poignant about finding out the Hollow Knight was once kid-sized like the Knight and that the King regarded all the Vessels as mere tools.
- Uniformity Exception: At a young age, all Vessels are nearly identical with their siblings save for their horns which come in various shapes and sizes. Among them, the Knight and the young Hollow Knight look almost like each other, if not for the fact that the young Hollow Knight has taller horns and with larger jagged patterns in the middle of each horn. By the time you meet the Broken Vessel, it also looks identical to the playable Knight since both are still in their smaller forms, save for the fact that the Broken Vessel's horns are now longer and bent forwards, possibly due to the infection damaging its head.
- Un-person: Which is particularly odd since there's a giant fountain homaging them in the kingdom's capital. As Lemm points out, no one in Hallownest has any clue who the Hollow Knight is or why there's a large statue of them at the center of the City of Tears. Outside of that fountain, they're never mentioned in any historical records.Lemm: ...Who were you mystery knight?... Why no mention beyond your fountain?..
- Variable Mix: The main Final Boss theme, "Sealed Vessel", starts out appropriately epic for the first half of the battle, then transitions with a Scare Chord to violin-based Sad Battle Music, which gradually adds back the other instruments as the Hollow Knight's HP dwindles. This second movement plays out in the same manner during the Birthplace flashback and the Path of Pain.
- Villain Teleportation: To a limited extent. The Hollow Knight can teleport somewhere during or after its combos. It ditches this tactic during the final phase of the fight.
- Wrecked Weapon: Downplayed, as the nail they wield is still usable but appears to be in pretty terrible condition. Like the Hollow Knight themselves, their nail appears in a restored form when fighting Pure Vessel and is capable of dealing twice as much damage.
- Yin-Yang Bomb: Downplayed in the Hollow Knight's current form, but more present in the Pure Vessel variant.
The Radiance

A god-like entity of light. She spawned the plague that destroyed Hallownest after being shunned and forgotten by bugs in favor of the Pale King.
- Advancing Wall of Doom: She can create a pillar of light that moves across the screen and can only be bypassed by the Shade Cloak's dash.
- Angelic Abomination: The Radiance takes traditional angelic traits and twists them in a horrifying manner, as evidenced by her appearance. Hell, her signature Mighty Roar is a screaming choir accompanied by a distorted organ!
- Animalistic Abomination: In general looks, she has a lot of Moth-like elements in her design, but it's obvious she's far beyond anything like that.
- Anti-Frustration Features: As an unusual display of mercy, if you've finished everything you need to get to that final fight, even if battling the Hollow Knight left you in awful shape, you'll be restored to full health before you clash with The Radiance. You're going to need it.
- Arch-Enemy: A Dream Nail dialogue for the Absolute Radiance calls the Knight (or to be precise, the Void Entity within it) as her "Ancient Enemy".
- Background Boss: Stays in the background and is one of the few enemies that doesn't deal Collision Damage.
- Battle in the Center of the Mind: You fight the Radiance by entering the Hollow Knight's dream world.
- Beam Spam: After dealing her enough damage, she flees high above the original boss arena and begins blasting at the Knight with beams of light. Thankfully, her aim is very poor.
- Big Bad: She's responsible for the infection that killed Hallownest.
- Boss Remix: The Radiance's theme is appropriately a remix of the Dream Realm theme.
- Boss Subtitles: While all the bosses have these, the Radiance is a notable case due to her Boss Subtitle covering the entire screen in white except for the words "The Radiance". This was unique among bosses in the game until Nightmare King Grimm came along and used it as well. The Godmaster pack continued this trend with the "Absolute Radiance" variant and the Eternal Ordeal.
- Checkpoint Starvation: Every time the Knight is bested by the Radiance, they return to the bench outside of the Hollow Knight's chamber. The Hollow Knight must be defeated again before being able to fight the Radiance again. Even more extreme in the Godhome version of the fight, where losing means having to refight 41 previous bosses for another shot.
- Collision Damage: Averted; touching the Radiance's body won't damage the player. You only have to worry about the projectiles and spikes she summons.
- The Corruption: The Radiance's influence manifests as the Hate Plague that blights the kingdom of Hallownest. According to the Hunter, the Radiance actually tempts her victims (though Hearing Voices) with power and strength, at the cost of Body Horror and a Death of Personality.
- Crown-Shaped Head: She has three spikes on her head that resemble a crown.
- Crystal Dragon Jesus: In her actions and backstory, she bears some resemblance to the Abrahamic God. She created and ruled over moths, her people, until a foreign king lured them to abandon her and worship him instead (through idols, no less). Then, in her attempt to be remembered, she caused a plague that decimated her enemy's kingdom.
- Cue the Sun: Only she is the sun.
- Divine Intervention: She can speak in the minds of the infected bugs, manipulating or overwriting their actions. One of the most significant things that she did is to convince the Soul Master to experiment on live bugs for the sake of researching immortality.
- Dragged Off to Hell: How she's ultimately defeated, consumed by the Abyss following a No-Holds-Barred Beatdown from both Vessels.
- The Dreaded: Those involved in sealing her away speak of her with a mix of fear and revulsion. And even the vast majority of people who don't know about her still tend to have a faint awareness that there's some reason they should fear the light.
- Dream Walker: The plague is the product of Radiance "invading the dreams" of Hallownest's inhabitants.
- Driven by Envy: Furious with the population of Hallownest for ceasing worship in favor of her usurper, the Pale King. Hitting her with the Dream Nail reveals bitter proclamations such as "THE LIGHT CANNOT BE CONSUMED" and "I WILL NOT BE FORGOTTEN".
- Evil Is Burning Hot: Her motif. Her plague leaves its victims in simultaneous pain and reverence due to her hot, orange light. It's telling that normally peaceful animals are driven into frenzied fear, their thoughts expressing fear over the light.
- Evil Is Visceral: The orange of the Radiance and her plague is also the color of infected bug blood. Furthermore, areas heavily overtaken by plague (such as the Infected Crossroads) are full of throbbing boils of orange fluid connected by thick, pumping veins.
- Foil: Grimm could be considered one to the Radiance. Both are powerful, moth-like creatures tied to the dreaming world, but while the Radiance is an evil, petty entity of light that acts as the god of "good" dreams, Grimm is a polite, theatrical creature of dark and fire known as the "Nightmare King", which may make him the Satan to the Radiance's God. One can also notice that the sprites they produce are essences differing only in color (white for Radiance and red for Grimm and his troupe). There's also the fact that the Radiance and Nightmare King Grimm also have full-screen Boss Subtitles with constrasting colors (white for the former and black for the latter).
- Foreshadowing:
- At the very top of the kingdom, there is a winged statue with a three-horned crown. The memory in it begs people to "remember the light". The statue depicts Radiance, the source of the infection and the real final boss of the game.
- In the Seer's final dialogue, she mentions the name of the Radiance, hinting at the moth tribe's connection to this character.
- God Is Evil: Her response to being shunned by bugkind was to send a plague upon them that essentially caused a Zombie Apocalypse. It's also implied she made the bugkind into a non-sentient hivemind dedicated purely to worshipping her, before Pale King usurped her by giving them sentience and individuality and causing them to forget her by worshipping him instead.
- God of Light: The Radiance is a forgotten Goddess of Light.
- Gods Need Prayer Badly: A variation: The Radiance needs to be remembered to exist, and was originally suppressed by the Pale King destroying all traces of her existence and doing everything in his power to ensure bug-kind forgot her. Unfortunately, he wasn't thorough enough, and the discovery of a statue in her image at the top of Crystal Peak was all it took to revive her.
- Gold and White Are Divine: A fitting color scheme for a God of Light.
- Good Colors, Evil Colors: Symbolized by orange, compared to the Pale King's stark white.
- Hate Plague: Victims, when struck with the Dream Nail, display primitive but hateful comments such as "Your smell…Kill you…"
- He Was Right There All Along: The True Final Boss arena starts empty except for a couple platforms overlooking a field of sunlit clouds. Accept the Challenge prompt. and the sun unfurls its wings, leading to THE RADIANCE with full-screen Boss Subtitles and the final battle.
- High-Altitude Battle: During the last phase of the fight, you have to climb multiple platforms as well since the boss has escaped to the highest portion of the skylit stage.
- Hive Mind: Under her rule, some bugs were united in mind, but also reduced to their base instincts. Now they also get some Body Horror as a result of resisting her memory and single mindedly fighting the Knight in order to keep her coming back from being interrupted.
- Hoist by Their Own Petard: The Seer, a member of the tribe that worshipped her, pretty much gave the Vessels the means of destroying her once and for all by giving one the Dream Nail.
- Holy Halo: Presumably representing the eponymous Radiance that she emits.
- Homing Projectile: Can summon orbs of light that track the Knight's position unless they hit the floor.
- If I Can't Have You…: The Radiance destroyed her own civilization for rejecting her.
- It's All About Me: She doesn't seem to care how much suffering she causes by forcing the bugs of Hallownest to remember her.
- Killed Off for Real: In the Dream No More and both Pantheon endings, she's defeated by the Hollow Knight and destroyed, ridding Hallownest of her infection forever.
- Light 'em Up: Many of her attacks manifest as this, such as homing spheres of light or pillars of light raining down from the sky.
- Lighting Bug: A giant bug also acts as one huge source of light – the Radiance, a huge glowing moth, with the light being depicted as sun rays coming out of its body.
- Light Is Not Good: She's a being of pure white with a distinctly angelic appearance, and she's the sole cause of all the horror that befell Hallownest.
- Macabre Moth Motif: She's associated with moths, from the general shape of her body to the Seer being the one providing the way to her by proxy. A developer note says that the Moth race is descended from her.
- Made of Plasticine: The Hollow Knight rips open the face of the Radiance with their bare hands.
- Memorial Statue: A statue of The Radiance located at the top of the Crystal Peak, left behind by her moth tribe. It played a crucial role in spreading the infection once more.
- Moth Menace: The source of The Corruption that destroyed Hallownest, and is the former leader of the tribe, seeking revenge against the Pale King and his followers for usurping her throne.
- My Rules Are Not Your Rules: If you die to any other boss you access with the Dream Nail, you wake up in the real world with no penalty. Dying to her kills the Knight and creates a shade, as though the death occurred in reality.
- The Old Gods: The Seer implies that she created the moths and did so long before the King came and founded his kingdom. Chances are that the reason the Radiance was never truly forgotten was that a few moths have been left since then.
- Plaguemaster: The plague, and all the Body Horror that comes with it, is the Radiance's influence.
- Platform Battle: The battle starts out in a platform with pits on each side. Either half of the platform will be covered in spikes during the second phase. The fourth phase then takes place over a bunch of scattered small platforms. The final phase has the Knight ascend a column of small platforms while the Radiance tries to swat them down with Frickin' Laser Beams, fleeing from the Void rising up below the Knight.
- Rewatch Bonus: You can only encounter the True Final Boss on the very last stage of the game should you complete certain actions towards the Golden Ending. That would be the only time where the game directly shoves you the boss's name and appearance right on the screen. However, there are two Foreshadowed hints that seem irrelevant at first, but were actually directly pointing to the boss's identity before you can even encounter her – The Seer mentions "Radiance" in her last words, and that moth statue on top of the Crystal Peak looks like the Radiance. A first-timer may also wonder why most of the infected bugs mention the word "Light" when dream nailed, and it would make sense why they say it given that there is someone named Radiance and is literally shining brightly.
- Rule of Three:
- Is one of the three known rulers of Hallownest (the Pale King, the White Lady, and the Radiance).
- It has three horns on its head, also serving as a crown.
- Satanic Archetype: Despite being a bright godlike being with an angelic appearance, her schemes give her a strong resemblance to Satan. She's a prideful Narcissist who was cast down from her exalted position because of how she treated her subjects. She then covertly spoke to mortals in their dreams to tempt them with power, immortality, and other gifts, only to subject them to hellish torment once they were under her thrall.
- Lucifer means "Light-Bringer", which describes her perfectly.
- Sealed Evil in a Can: Containing her and therefore the infection is the true purpose of the Vessels, and the King went to great lengths to find a way to do so.
- Sealed Inside a Person-Shaped Can: The Hollow Knight was her container - or rather, her Infestation's container.
- Sequential Boss: The battle against the Radiance has five distinct phases, each one altering her arena and moveset. The first stages involve the Radiance raining death on the Knight with her Storm of Blades and Energy Weapon; during the final leg, she tries to disengage from the fight as the Knight gives chase—dodging Eye Beams along a path of floating platforms—to deliver a well-deserved No-Holds-Barred Beatdown.
- Sinister Sentient Sun: She is the Big Bad of the story and all but said to be the equivalent of the Sun in the setting.
- Spikes of Doom: She can randomly cover a half of the platform with spikes during her second phase.
- Storm of Blades: Several of her attacks spawn waves of long nails that fly in horizontal, vertical, and radial patterns, bordering on Bullet Hell. The third phase of the fight consists of an endless rain of them; luckily, they are only of the vertical variety, which is easiest to avoid.
- Superboss: The Absolute Radiance has rapid attack patterns, is durable, and deals two masks of damage per hit, which make the fight more of an endurance test.
- Teleport Spam: She warps around the arena regularly, which becomes rather frustrating when she decides to hover over the side of the arena she just covered in spikes.
- That's No Moon: When first entering the Hollow Knight's dream to fight her, the only thing seen there is a couple of platforms against a sunny sky. Jumping to the top platform gives a "Challenge" prompt, and activating it causes the Knight to turn towards the sun and draw their blade, shortly after which the sun grows wings before the Radiance reveals her true form.
- Top God: The Godseekers initially believe her to be the "God of Gods", until the Knight destroys her by uniting the Void and becoming the Shade Lord.
- True Final Boss: Defeating her inside the Hollow Knight's mind grants the "Dream No More" ending. Defeating Absolute Radiance at the Pantheon of Hallownest results in a Sequel Hook ending that ends in a cliffhanger.
- Unperson: The King took pains to erase all remnants of Radiance ever existing, making the moths forget her and burying every possible reference to her existence, because she needs memory in order to manifest. Unfortunately, the miners at the Crystal Peak Dug Too Deep and unearthed a statue that now sits atop the mountain, and caused her to awaken and spread the Infection once more.
- Villain Teleportation: She's the main Big Bad of the game, and she teleports like crazy with graceful spins.
- The Worf Effect: As the Void Given Form, the Knight needed the help of the Hollow Knight's shade to make the Radiance vulnerable. In the Godhome, it doesn't have the backup of the Hollow Knight to defeat the more powerful Absolute Radiance. But all it takes is to turn into the much larger Void Given Focus and turn the tide into the Knight's favor.
Expansion Packs
Hidden Dreams Bosses
Grey Prince Zote

"She felt her cold body grow warm, a sensation she had almost forgotten..."
An imagination of Bretta given form as she fantasizes about Zote's high and mighty, knightly prince persona. He can be fought after following some specific triggers, which culminates into Zote surviving in the end, and having you use the Dream Nail on the Zote statue found in Bretta's basement in Dirtmouth.
- Allegorical Character: Grey Prince Zote is everything Bretta thinks Zote is (and everything he's not) personified.
- Boss Remix: His battle theme ("Truth, Beauty and Hatred"), is an arrangement of the game's main theme, AKA the Knight's leitmotif.
- Boss Subtitles: Played for Laughs. Grey Prince Zote gets more and more adjectives added to his name the more times you defeat him to the point the screen can't show them all!
- Came Back Strong: Every time you defeat Grey Prince Zote, he'll get stronger and tougher, a couple of times also gaining new attacks. By your 10th fight with him, he'll have 1500 health (for reference, that's the same as Nightmare King Grimm and a little less than the True Final Boss) and deal 8 masks of damage (most other enemies do one, and very few can do two).
- Department of Redundancy Department: Some of his many titles are synonyms, like 'beautiful', 'gorgeous', and 'enchanting'.
- Dream Sue: He's essentially Bretta's Gary Stu version of Zote, being much bigger, more muscular, and more dangerous than the real deal. Strangely enough for the usual trope, he's based around Bretta's dream and not Zote's.
- Fighting Clown: He bumbles around just as much as the real Zote, but Bretta's faith in his abilities makes his attacks actually damaging, and his random flailing around makes him very unpredictable.
- Flunky Boss: He can summon various types of Zotelings that also bear a resemblance to his face.
- Ground Pound: Grey Prince Zote's aerial attacks mostly consist of just bellyfloping from above, followed by shockwave trails.
- Meaningful Background Event: Bretta lies in a sexy pose during the fight against Grey Prince Zote, while another Zote waves a fan near her. She falls down from the bed once her prince is defeated.
- Memorial Statue: Inverted. The statue only exists if you save Zote in Greenpath and after you defeat him in Colosseum of Fools. Defeating him ten times will turn the statue golden, but you won't be able to fight him in Bretta's house.
- Not So Harmless: Played with. The real Zote is an arrogant Miles Gloriosus hero who keeps getting in trouble and needs to be bailed out by the player. At first he seems utterly harmless, but then you fight him in the Colosseum of Fools... where you confirm that he really is harmless, as his "Life Ender" weapon can't even damage you, and he constantly trips over himself. But "Grey Prince Zote" is a much beefier version of Zote who still bumbles around as he fights, but is far more lethal. Even then, it's not actually Zote you're fighting, but an idealized version of him created by Bretta's subconscious after Zote convinces her that he's every bit the unstoppable hero that he claims to be.
- Optional Boss: If you rescue Bretta and defeat Zote in the Colosseum, you gain the option to fight this much beefier and more lethal version of Zote as a dream boss.
- Satellite Love Interest: Dream Nailing him reveals that he only thinks about Bretta. Justified, since he's a figment of her imagination, representing her romantic idealization of Zote.
- Shockwave Stomp: A lot of Grey Prince Zote's ground attacks end with him bellyflopping to the floor, which causes a moving wave that can damage the knight.
- Superboss: Grey Prince Zote requires going pretty far out of your way (saving Zote in Greenpath and Deeepnest, saving Bretta, and then completing the Trial of the Warrior) and is a very tough challenge for being based on the weakest character in the games. By your final fight with him, he will have minions, strangely-telegraphed attacks, will deal four times as much damage as the True Final Boss, and is relentlessly aggressive.
- Top-Heavy Guy: He's got an enormously wide torso, but his legs are small despite having some weird bug musculature.
- Try to Fit That on a Business Card: His full Boss Subtitles when written out from top to bottom. And depending on your in-game resolution, some of them may not even fit the screen!"Invincible, Fearless, Sensual, Mysterious, Enchanting, Vigorous, Diligent, Overwhelming, Gorgeous, Passionate, Terrifying, Beautiful, Powerful, Grey Prince Zote"
- Unskilled, but Strong: Grey Prince Zote — unlocked as an optional encounter after saving Bretta from the Fungal Wastes and defeating Zote in the Colosseum of Fools — he retains his pitiful swordplay and tendency to fall flat on his face, but he hits like a truck and every pratfall causes shockwaves.
White Defender
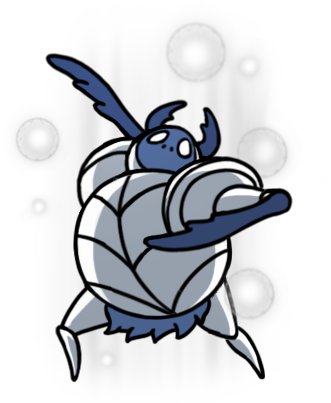
Ogrim's prime state, still donning a white armor. He can be fought when you use the dream nail on the Dung Defender while he sleeps in the Royal Waterways.
- Boss Remix: His music is a orchestral remix of the Dung Defender's theme.
- Knight in Shining Armor: Even more so than the regular Dung Defender since his armor is really shining.
- Light Is Good: The White Defender, even though he's a boss for you to fight, is portrayed heroically and has white armor.
- Memorial Statue: Ogrim made dung statues of the King and the other Great Knights who are now dead or missing. They also appear in white silhouettes during the White Defender boss fight. After you defeat him five times, he will make a dung statue of the Knight.
- Optional Boss: As of the Hidden Dreams update, hitting the Dung Defender with the Dream Nail initiates a rematch with this upgraded version called the White Defender.
The Grimm Troupe Bosses
Troupe Master Grimm

To consume the flames of a kingdom's fall"
Introduced in The Grimm Troupe campaign, Grimm is the leader of the titular Grimm Troupe. He requests that the Knight go and collect flames from his kin.
- Affably Evil: Assuming he even is evil in the first place, Grimm is still unfailingly polite and cordial to the Knight, and his Troupe's adoration for him certainly suggests he's a Benevolent Boss.
- Ambiguously Evil: While Grimm is outwardly polite enough to constitute as Dark Is Not Evil, there's a plethora of questions the more you go in the sidequest. What does Grimm gain when supplying the Knight with a Grimmchild? What exactly does his "ritual" entail? The fact that he appears to know about the Wyrm and the Vessels brings up even more questions, not to mention his upgraded form is known as the "Nightmare King". The White Lady has special dialogue for having the Grimmchild equipped and speaking to her, saying that it would be "naive" to call it a friend. It doesn't help that many characters feel that something is off about him and his entire troupe.
- Badass Cape: His leathery wings serve as a cape, and he can use it to attack by transforming it into a drill or spikes.
- Badass Fingersnap: Does this on a few occasions, namely to power up the Grimmchild and to turn on the lights in his arena.
- Battle in the Center of the Mind: You have to Dream Nail a sleeping Grimm to access his Nightmare battle.
- Berserk Button: Grimm does not take kindly to rudeness, especially when he's being gracious. You find that out the hard way when you hit him as he's bowing during his boss fight.
- Born-Again Immortality: It's implied that this is the form of immortality of Troupe Master Grimm. However unlike most examples, both the child and adult forms exist at the same time, and the child, with the player's help, must kill the adult to complete the ritual and continue the cycle. Or as the Hunter's Journal more lyrically put it "Dance and die and live forever". The player may choose to participate or break the cycle and give Grimm a permanent death. Both options are presented as having pros and cons.
- Bullet Hell: He can transform into a large sphere in the middle of the stage and continuously emit numerous orbs.
- Circus of Fear: His building seems to be a circus tent. His fight also has an audience up on podiums observing it.
- Dance Battler: Refers to the Knight partaking in his ritual as their dance, and his boss battles were deliberately designed to feel like one.
- Dark Is Not Evil: Probably. Despite his main color scheme being crimson and red and the dim lights of where you find him, he's awfully polite and only fights the Knight to mature his "child", and his Troupe seems to universally love him. However, the mystery surrounding the true nature of his "Ritual", the fact that many characters feel uneasy around him and that he's deeply connected to nightmares makes this trope all the more ambiguous.
- Death from Above: Grimm's "rising uppercut" move is always followed up by falling fireballs.
- Disproportionate Retribution: Hit him when he's bowing to the audience? He'll screech like a banshee and unleash his strongest attack immediately from the start of the fight.
- Diving Kick: One of his air-to-ground attacks (actually just shaped his cloak into a drill), followed by a horizontal thrust.
- Evil Sounds Raspy: While it's hard to tell how evil he actually is, one of his defining characteristics is his very dry and raspy voice.
- Expy: His color scheme and cloak may invoke the image of a bug Dracula. He also hangs upside down like a bat when asleep. Many of his attacks when you fight him are based on attacks a different Dracula uses, particularly launching a volley of three fireballs from his cloak, suddenly teleporting in as he makes a lunging attack from across the room, dissolving into a flock of bats (or swarm of bugs, in his case), and summoning columns of fire.
- Fireballs: He can summon bat-shaped fireballs from his cloak, a reference to the Dracula from Castlevania. His second phase however, uses the much more traditional balls of fire, but in a Bullet Hell style.
- Foil: Grimm could be considered one to the Radiance. Both are powerful, moth-like creatures tied to the dreaming world, but while the Radiance is an evil, petty entity of light that acts as the god of "good" dreams, Grimm is a polite, theatrical creature of dark and fire known as the "Nightmare King", which may make him the Satan to the Radiance's God. One can also notice that the sprites they produce are essences differing only in color (white for Radiance and red for Grimm and his troupe). There's also the fact that the Radiance and Nightmare King Grimm also have full-screen Boss Subtitles with constrasting colors (white for the former and black for the latter).
- He could also be considered one to the Hollow Knight. The Grimmchild, which is intended to become Grimm himself in a ritual of succession, is said by the White Lady to be much like the Knight themselves, implying that the fully grown Grimm is not unlike a vessel containing the dark fires of the Nightmare willingly as opposed to forcibly containing the Infection. While the Hollow Knight was deprived of a voice and surrounded by people it could not act expressively around, it ultimately learned what it means to care about people, including its Siblings, and this is implied to be what allows it to resist the Infection once confronted. Grimm is surrounded by those who adore and encourage his theatrical personality, but quite literally cheer for his demise to prolong the ritual that feeds the Nightmare Heart and reincarnate him as a new Grimmchild a fate that Brumm considers worse than mere death after seeing it happen for so long.
- Freeze-Frame Bonus: When fought in the Godhome, notice that Grimm has a new bowing animation compared to when you fight him in his tent. He's actually acknowledging the Godseeker's presence and is bowing to her, not you.
- Good Parents: It seems that way when it comes to the Grimmchild. Much of the "Ritual" involves making his child stronger. When you return to Grimm after gathering the flames the first time and after the boss fight, he praises the Knight and the Grimmchild.Grimm: [Returning with three flames for the first time] I can feel it. The warmth of the flame you've gathered together. A masterful opening act. The air hums with excitement. Dear child, you've done so well. Let your fire burn even brighter!Beautiful, yes. The child has grown, from idle youth to deadly companion. About these dangerous lands, its aid will no doubt be welcome. Just don't neglect our dance, for it too continues! Keep hunting that scattered, scarlet essence. When the child is filled with flame once more, return to the stage and the performance will begin.
- Graceful Loser: Will congratulate the Knight upon defeating him.Grimm: [Post-boss fight] Bravo, my friend. Hear how the crowd adores you! They've not seen such a show in a long time. Look here! How our child has grown, nourished and strengthened by the heat of our passionate dance! The two of you will feature in many tragedies and triumphs together, I'm sure.
- Hidden Depths: His dream nail quote seems to state that he's fully aware of what the Vessels are and that the Wyrm made them. Also, in the Godmaster update, he is the only rematched boss that directly acknowledges Godseeker's presence, bowing to her instead of you during your rematch with him. And upon dream nailing, him in the rematch, gives quotes further solidifying his awareness of the situation, talking about how it's an honor to attend "the seeker's call", and what a pleasure it is to be a part of this "charming ritual".
- Kick Them While They Are Down: Grimm will bow during the first few seconds of his fight, allowing the Knight a free hit. Defied, as hitting him while he's bowing causes him to scream and immediately start one of his stronger attacks. Nightmare King Grimm, on the other hand, lacks this bow and attacks from the get-go.
- Let's Dance: He refers to his fight with the Knight as this.
- Let's Fight Like Gentlemen: Grimm does a bow to the Knight at the start of the battle, and gets angry if the Knight takes this as an opportunity to hit him. Averted in the Nightmare King battle, where he attacks immediately.
- Level Scaling: Grimm scales in health depending on how upgraded your weapon is, providing a consistent challenge no matter how much damage you do per hit.
- Lightning Bruiser: He is constantly teleporting from place to place and attacking at a rapid pace, leaving no time to heal and little time to even approach him. And yet he also boasts a respectable amount of health. If you are not able to dodge every single one of his attacks with perfect precision, he will outlast you easily.
- Loved by All: By his Troupe. Even the guy trying to stop the ritual really wants to free him from being enslaved to the cycle and means no ill will towards him.
- Mad Artist: Grimm views himself as a performer first and foremost, and is quite prone to theatrics between bouts of acrobatic violence that he and the Troupe refer to as "dancing".
- Mighty Roar: Zig-zagged with Grimm. Averted at first since he bows silently at the start of his battle, unless you hit him while he's bowing. Then you get the Mighty Roar, and his most dangerous attack.
- Moth Menace: While his species is not explicitly named in-game, it's possible that he's a Calyptra moth, AKA the vampire moth, given that he resembles a classic vampire and is hanging upside-down like a bat when the player returns with the final flames for the Grimmchild. Reinforced by the fact that moths are connected to the Dream, and Grimm is associated with the Nightmare, though this leaves several questions related to the history of the moths unanswered. While how much "menace" applies to his intentions is ambiguous, he's certainly dangerous enough in a fight and even his larva-like Grimmchild can be surprisingly aggressive towards non-hostile bugs for better or for worse.
- Names to Run From Really Fast: Having the name of "Grimm" is already quite foreboding. You enter his final boss arena, and you are treated to a terrifying flame-wreathed entrance while "Nɪɢʜᴛᴍᴀʀᴇ Kɪɴɢ Gʀɪᴍᴍ" flashes on the screen in red text. You'd better run.
- Ninja Pirate Zombie Robot: Grimm is a Vampire Moth Ringmaster.
- Obvious Rule Patch: An update made the Grimmchild mandatory when challenging Nightmare King Grimm, to make the entry requirement similar to how you fought Grimm normally (he calls the Grimmchild to his cloak), even though this means sacrificing two charm notches. The Grimmchild is not required when facing either version of Grimm in the Godhome - but it won't appear in the boss fights since it will not fight against its master.
- One-Liner, Name... One-Liner: This is how he greets the Knight for the first time:Well met, my friend. Well met. I am Grimm, master of this troupe.
- One to Million to One: When staggered, he evades damage by transforming into a swarm of bat-like creatures, before reforming and vanishing to continue the fight.
- Optional Boss: He is not connected to the main story.
- Orchestral Bombing: Appropriately for his appearance, his boss theme is an orchestral piece that features an Ominous Pipe Organ and unintelligible chanting. Both of his boss themes, in fact.
- Playing with Fire: As appropriate for someone requesting flames, a lot of Grimm's attacks are noticeably fire-based. All of Nightmare King Grimm's normal attacks leave trails of flame in their wake.
- Polite Villains, Rude Heroes: Comes into play if you hit him while he's bowing to you. Grimm is sincerely polite and gentle, but he does not take kindly to rudeness.
- Red and Black and Evil All Over: Part of the outfit color theme and "sinister" aura of the Troupe.
- Red Baron: This form of Grimm has the title "Troupe Master".
- Repulsive Ringmaster: Though he lacks the trademark top hat, Grimm fits the character archetype owing to his penchant for dramatic spotlights, flamboyant showmanship and striking color scheme. The "repulsive" part is somewhat downplayed, though, as he is only ambiguously evil.
- Rule of Cool: Most of his attacks are bizzare compared to the bosses you encounter before – He can spawn bat-shaped fireballs, send ground spikes using his cloak, transform himself into a floating sphere object that launches countless projectiles.
- Satanic Archetype: Grimm has a few hints of being this. His appearance is very demonic compared to the rest of the bugs of Hallownest, he has a big fire motif, and his quest is basically a cult ritual in service of a dark god.
- Shoryuken: One of his anti-aerial attacks resemble this move, but uses his cloak to damage you. It is also followed up by falling fireballs.
- Shout-Out: As mentioned above, many of his attacks are direct references to a certain other vampiric overlord.
- His drill and uppercut attacks might be a reference to another battling vampire.
- Spikes of Doom: Can use his cloak to summon numerous spikes or drills that rise from the ground.
- Variable Mix: Troupe Master Grimm's battle music gains a metal guitar riff when he Turns Red and unleashes his Pufferfish Bullet Hell attack.
- Video Game Cruelty Punishment: Land a cheap shot on Grimm while he's bowing politely to you? He screeches like a banshee and retaliates with his ultimate attack, which he normally doesn't start using until about halfway into the battle.
- Villain Teleportation: Whether he's truly villainous or not is up for debate, but he certainly teleports. The Nightmare King teleports excessively.
Nightmare King Grimm

One realm now must stay apart,
Darkest reaches, beating red,
Terror of sleep. The Nightmare's Heart."
Grimm's true form as he is found inside the realm of the Nightmare's Heart. He can be fought when you use the Dream Nail on Grimm as he sleeps inside his tent after being defeated in the first duel.
- Big Red Devil: He certainly looks the part, his horns elongating compared to his waking realm version. He's also very bright red and nearly perpetually wreathed in flame, making him look like he just emerged from the mouth of Hell.
- Boss Remix: Grimm's theme gets a Symphonic Metal remix for his Nightmare King form.
- Boss Subtitles: This form has the entire screen black except for his name centered and colored red, in a similar manner to how the name of The Radiance is displayed. They become regular subtitles in the Pantheon of Hallownest.
- Brainwashed and Crazy: Implied. Using the Dream Nail on Nightmare King Grimm reveals that it has a different personality than his Troupe Master form: the former thinks exclusively about the Nightmare Heart, nightmares or the ritual - he has no thoughts for the Grimmchild or the Troupe.
- Color-Coded for Your Convenience: He is almost physically identical to Grimm aside from being entirely red.
- Lightning Bruiser: He's faster, tougher and stronger than his regular form: he abuses teleportation, takes more time to be defeated and deals double damage in a normal fight difficulty.
- Names to Run Away from Really Fast: With a title like "Nightmare King", don't expect him to play nice at all.
- No-Nonsense Nemesis: The Nightmare King has none of the politeness or theatrics of his waking realm counterpart, attacking at full strength from the get-go.
- Playing with Fire: All of Nightmare King Grimm's normal attacks leave trails of flame in their wake.
- Red and Black and Evil All Over: Less black but more red than his regular form: look at him. It's even the colors of his boss title!
- Red Baron: This form of Grimm has the title "Nightmare King".
- Skippable Boss: While he's the True Final Boss of the Grimm Troupe quest, you can avoid a hard fight with him if you manage to banish the troupe. However, fought or banished, he's still the third-to-last boss of the Pantheon of Hallownest no matter what you do.
- Superboss: He is a bonus boss within a bonus boss, as it's possible to banish Grimm and his Troupe without ever fighting him; but doing so yields a different reward. He's also extremely difficult to beat, possessing lots of health, inflicting two masks of damage, as opposed to one when compared to everything else, and moving very fast.
- Teleport Spam: Even more so than his regular form, Nightmare King Grimm will immediately teleport as soon as he attacks you, giving just short windows of opportunity for you to strike back at him. Expect yourself to be dodging a lot and finding out where did Grimm relocate himself to.
Lifeblood Bosses
Hive Knight

A flightless warrior of the Hive added in the Lifeblood Update. He arrives to defend the Hiveblood charm and his queen when the Knight comes to her chamber.
- Animal Species Accent: His vocalizations in his fight have a pronounced buzzing sound to them. Since he's noted to be flightless, he's deliberately making these sounds.
- Anti-Villain: He's simply defending his queen and the Hiveblood charm from an intruder. The journal also goes as far as to say that he has no choice on the matter and is sworn to protect her to his last breath. After his death, the ghost of Queen Vespa states her appreciation for his loyalty and hopes that he enjoys his freedom.Some creatures are born with duties and loyalties marked indelibly upon their minds. They are strong, but they are also slaves.
- Born into Slavery: The Hunter's Journal indicates that his Undying Loyalty to Queen Vespa was "marked indelibly" into his mind from birth, and Queen Vespa's spirit mentions his newfound freedom after his death.
- Contractual Boss Immunity: The Hiveblood charm acts as an Encounter Repellant against the bees inside the Hive, but this does not affect the Hive Knight in the Godhome boss fight. This is justified by Gameplay and Story Integration as well, since in the real world, you only obtain the Hiveblood after defeating the Hive Knight, while the Hive Knight that you fight in Godhome is just a dream copy made by the Godseekers.
- The Fettered: Eternally loyal to Vespa the Hive Queen; he will defend her ideals and kingdom to his dying breath.
- Flash Step: Uses this liberally, and most of his attacks begin with him appearing next to the knight before swinging his nail, accompanied by his buzz-filled vocalization.
- Flunky Boss: Summons smaller bees as the fight goes on.
- Handicapped Badass: Unlike the other bees, the Hive Knight lacks wings but he makes up for it with his fighting skills.
- Hive Caste System: Fits in the "big warrior" caste.
- Kiai: Does a buzz-accented version of this before many of his attacks.
- King Mook: A larger bee enemy, but armed with a weapon and can summon smaller bees during the fight.
- Knight in Shining Armor: He's the only bee that wears any armor, in fact.
- Optional Boss: You can go through the entire game without ever fighting him, and the area he's in is pretty out of the way.
- Orwellian Retcon: Initially, the Hiveblood charm can be obtained simply by walking through Queen Vespa's room. However, the Lifeblood update now requires you to fight the Hive Knight in a previous room. Vespa even received a new dialogue line to reflect the Hive Knight being defeated.
- Sliding Scale of Anthropomorphism: The only biped in the hive.
- Stealth Pun: The Hive Knight is a bee warrior who fights using a sharp, thin needle-like weapon. What's the connection? Because it stings!
- Trap Master: Can summon forth floating objects that eject needles in a hexagonal pattern.
- Undying Loyalty: Queen Vespa appears to be long dead, yet the Hive Knight serves her all the same.
- "Well Done, Son" Guy: His Dream Nail dialogue indicates that he desires approval from Queen Vespa.
- You Shall Not Pass!: Guards the Hiveblood charm by suddenly shutting the entrances to his room before appearing.
- Zerg Rush: The Hive Knight's summoned Hivelings come in numbers from the ceiling and track down the Knight's current location.
Godmaster New Bosses
Winged Nosk

Another form of Nosk that is encountered in the Pantheon of Hallownest. It takes the shape of Hornet and is now capable of flying.
- Bait-and-Switch Boss: It is first met in the Pantheon of Hallownest disguised as Hornet, but when approaching it, it is revealed to be another Nosk.
- Flunky Boss: It summons Infected Balloons to help it in its fight.
- Giant Space Flea from Nowhere: Even in the context of a Boss Rush, Winged Nosk comes out of nowhere in contrast to the other bosses who are properly introduced as dwellers of Hallownest. No explanation is given for its existence.
- Good Wings, Evil Wings: It has bat-like wings despite looking more like a bug or an arachnid.
- Interface Spoiler: The Nosk's statue in the Hall of God has a second notch, indicating that Nosk has a second form to be met.
- Upgraded Boss: It is basically Nosk but stronger and more mobile.
Sister of Battle

The Mantis Lords encountered in the Pantheon of Hallownest, retaining the same appearance, form and fighting style. But instead of splitting into two boss fight instances, all three of them battle the Knight together.
- Bait-and-Switch Boss: It is first presented as the regular Mantis Lord, but once the battle against the first Mantis is over, it is revealed that she takes part in the second phase, along with a new Boss Subtitles appearing.
- Boss Remix: The fight starts of with the regular Mantis Lords' theme but once the second phase starts, a remixed theme plays.
- Let's Get Dangerous!: After the first lord is defeated, the three of them exchange a glance before cracking their knuckles and all stepping into the fray together.
- Shout-Out: The Sisters of Battle are named after the Sisters of Battle from Warhammer 40,000.
- Wolfpack Boss: Fought all three at once.
Godmaster Final Bosses
Brothers Oro and Mato
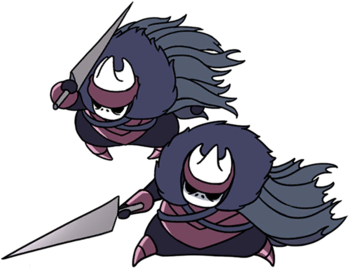
Brothers sworn to guard the weak,
Masters of the sacred ground,
Help Us find the God We seek!"
The final bosses of the first pantheon, Nailmasters Oro and Mato set aside their differences to fight as one!
- Aw, Look! They Really Do Love Each Other: Despite Mato holding a deep grudge against his brother, he jumps to Oro's assistance when Oro is seemingly beaten by the Knight.
- Charged Attack:
- Mato teaches the Knight the "Cyclone Slash", a charged Spin Attack that deals less damage than other Nail Arts but strikes several times. He uses this attack himself during his boss fight.
- Oro teaches the "Dash Slash", a charged Dash Attack which he also uses during his boss fight.
- Combination Attack: One of the unique interactions during the Dual Boss fight against the Brothers. If the Knight is placed in between the brothers, they will perform attacks in unison facing each other in an attempt to trap the Knight.
- Death Glare: When he comes to Oro's aid during their boss fight, they briefly glare at each other, complete with a Twinkle in the Eye.
- Dual Boss: Oro fights alone for the first phase, but then Mato shows up and they set their differences aside to defeat the Knight.
- Enemy Mine: While the glare Oro and Mato exchange hints that animosity still exists between them, they're still willing to put that aside to give the Knight a proper challenge.
- Let's Fight Like Gentlemen: One of the unique interactions during their boss fight. If the Knight is on the opposite side of the arena from the two, these Nailmasters will only be attacking the Knight one-at-a-time, alternating between any of their slashes while the inactive brother waits for his turn in the corner.
- Tough Beetles: Their design is reminiscent of beetles and they are both warriors adept in the art of the nail.
Paintmaster Sheo

Whose works shall eternal endure,
Peer beyond Our minds and hearts,
Reveal to Us the God most pure!"
The final boss of the second pantheon, the retired Nailmaster Sheo still sets his blade aside in battle; instead, he uses the mighter brush!
- A God Am I: Sheo has this rather boastful dream nail dialogue:What is a god, if not an artist?
- Art Attacker: Sheo has become an artist but his boss fight is among the most difficult. He uses his paintbrush to throw damaging patches of paint across the screen.
- Charged Attack: Sheo teaches the "Great Slash", a normal charged attack. During his boss fight, he uses several charged paint blasts. One is the same one he taught the Knight, but he can also perform another that reaches all across the arena.
- Color-Coded for Your Convenience: During his boss fight, the color of his paintbrush telegraphs what kind of attack he's about to use.
- Improbable Weapon User: Uses a paintbrush in his Pantheon fight, to lethal effects. Since it all happens in a dream world, it may be his passion for art that empowers his paintbrush so much.
- Tough Beetles: Just like his brothers, Oro and Mato, his design is reminiscent of a beetle and even though he is retired from the nail, he is pretty handy with the brush.
- Unnecessary Combat Roll: Regularly rolls away to start charging a slash during his boss fight.
Great Nailsage Sly

Sharpen Our nails and show Us the odds,
O greatest of masters, We wish to behold,
That one still greater, the God of Gods!"
The final boss of the third pantheon, the man who taught the Nailmasters everything they know; Sly.
- All Your Powers Combined: During the first phase of his boss fight, he utilizes all nail arts from his pupils
- BFS: The boss fight confirms that the nail in his basement is indeed his sword and that he is very capable of wielding it.
- Graceful Loser: Bows when defeated.
- Hoist by His Own Petard: Fittingly enough, Nail Arts are some of the best ways to counter Sly's attacks. They have great range which allows the Knight to strike at a safe distance.
- Killer Rabbit: How badass could this tiny firefly be? Enough to be the Nailmasters' teacher.
- Pint-Sized Powerhouse: He is tiny, about the same size as the Knight, but he is also a master of the art of combat; he has trained some of the most skilled Nail wielders in the world.
- Red Baron: The Great Nailsage.
- Rolling Attack: Performs one as a Shoryuken at the end of his standard combos. In his second phase, Sly will instead zip all around the room and then attempt to smash-roll you into a corner.
- Spin Attack: He has these, both horizontally and vertically:
- He has a larger variant of the "Cyclone Slash" that he taught his student Mato.
- One of his staple attacks, when fought, is to take his massive sword and turn himself into a living buzzsaw that follows the Knight around the room.
- Tough Beetles: He is canonically a firefly (which despite the name is actually a species of beetle) and he is the one who taught the Nailmasters everything they know. Despite his small size, he should not be underestimated.
The Pure Vessel

Given nail and named a Knight,
Bound by chain and egg and spell,
Hear Our plea! Reveal thy Light!"
The final boss of the fourth pantheon, the perfect version of the Hollow Knight, not tainted by the infection, shines as the hero it once was!
- Badass Cape: Used to wear a long, white cape with armored padding around the neck. It gets ripped off as they start fighting though.
- Boss Remix: The Pure Vessel's theme from Godmaster is a choral arrangement of "Sealed Vessel".
- Boss Subtitles: Like its original form, the Pure Vessel has its name centered at the top of the screen.
- Casting a Shadow: The Hollow Knight gains void-based attacks in its Pure Vessel state.
- Crosshair Aware: Unlike most bosses, the Pure Vessel's ranged and Area of Effect attacks are easily telegraphed, showing the attack's shape or the projectiles' paths even before they happen.
- Empty Shell: The Pure Vessel represents the Hollow Knight in their prime, before containing the Radiance, but also what they could have become if an idea had not "tarnished" them.
- Flash Step: In this form, they have the same visual effects as Shade Cloak, highlighting the link between them and the Void.
- Having a Blast: The Pure Vessel can focus SOUL much like the Knight, but instead of healing (which wouldn't work as well for a boss as a player character), it instead causes explosive bubbles of SOUL to appear.
- Knight in Shining Armor: The Pure Vessel's long, white, armored cape gives them this appearance.
- Light Is Good: The Pure Vessel in their prime, is depicted with white clothes like the Great Knights, and some of its abilities are also associated with light, soul, or white glyphs. Even its weapon is implied to be a Pure Nail in this state, a weapon that the playable Knight can also have, gleaming in silver.
- Nintendo Hard: The Pure Vessel moves fast and has rapid attack patterns, is durable, and deals two masks of damage per hit, which make the boss fight more of an endurance test.
- Pre-Final Boss: They are the final challenge of the Pantheon of the Knight, but also are the second-to-last challenge before completing the Pantheon of Hallownest - the final boss of that pantheon is arguably the only battle harder than them.
- Red Baron: They are called "Pure Vessel" for a good reason.
- Roar Before Beating: Averted. They appear to scream, but nothing is heard.
- The Speechless: In Godhome, the Pure Vessel is entirely speechless. The start of the fight uses the start of the music in place of the roar that starts the battle with the Hollow Knight in the main game.
- Spikes of Doom: Their "pillar" attack gets changed into summoning multiple giant pure nails from the floor.
- Storm of Blades: One of their attacks (replacing the Hollow Knight's infection-spewing attack) has them throwing nails from multiple directions.
- Superboss: They appear in the Godmaster update as the Hollow Knight in their prime in the dream world, uncorrupted by the Infection. They inflict two masks of damage, are very durable, move very fast, and can perform some dangerous new moves and use a combination of soul and void elements for each.
- Yin-Yang Bomb: They use a combination of the pure black Void and white-themed magic projectiles and spells based off the Nail and soul.
Absolute Radiance

"...I DO NOT FEAR YOU..."
"...LET ME BE FREE..."
"...I WILL NOT BE FORGOTTEN..."
"...DAWN WILL BREAK..."
"...THE LIGHT CANNOT BE CONSUMED..."
The final boss of the final pantheon, whom the player must battle a harder version of every other boss in the game to reach, is an even harder version of the Radiance. Dying to her will send the player to the beginning of the pantheon, meaning they'll have to fight every boss all over again to get another shot at defeating her, and she isn't a slouch herself. Defeating her is the greatest challenge Hollow Knight has to offer!
- Upgraded Boss: Compared to the original fight with The Radiance, Absolute Radiance has faster attacks that overlap in ways that are hard to predict; her platform phase has a more complex platform arrangement (making it harder to reach her to deal damage), and she has an extra phase after the climb, where the original fight would end in one more hit.