Realm Enemies
Shoreline Enemies
- Equal-Opportunity Evil: According to the Realm Eye, the pirate clans pride themselves on the concept of equal opportunity plundering, are major advocates of women's rights and widely known to be one of the most progressive communities in the realm.
- The Goomba: Snakes, Pirates and Piratesses are likely to be the first enemies encountered by players that have completed the tutorial, and pose virtually no threat, even when you aren't paying attention. They are often killed by fresh characters for potions and low-level equipment.
- Living Polyhedron: The three variants of Gelatinous Cubes take the shape of regular cubes. During April Fool's, they're replaced by spheres.
- Mook Maker: Scorpion Queens spawn Poison Scorpions and have no attacks by themselves.
- Pirate: Pirates and Piratesses are the most common enemies found in the beaches.
- Throw Down the Bomblet: Bandit Leaders are likely to be a new player's first introduction to thrown bombs that deal damage in an area around the impact point.
Lowland Enemies
- Arch-Enemy: Giant Crabs have been the sworn enemy of the samurai since ancient times. The Samurai used their Wakizashis to expose the weak points of the crabs for massive damage, and the crabs have sworn revenge on the Samurai ever since.
- Fragile Speedster: The Forest Nymph doesn't have a lot of health but quickly circles players while firing boomerangs, making it harder to hit than other lowlands enemies. Fortunately, it stops moving every now and then, making it easier to hit.
- Giant Enemy Crab: Giant Crabs are far bigger than crabs ought to be.
- Hobbits: An enemy type in the lowlands.
- "Instant Death" Radius: Hobbit Mages and their stronger undead form shoot a very large number of shots in a short radius around themselves. Standing on it is instantly fatal for low-level characters. One of the highest killers of new players, these enemies teach players not to stand on enemies.
- Interface Screw: Sand Devils are the first monster encountered by a player that can inflict Confusion, which changes your movement controls for the duration.
- Killer Rabbit: The Easily Enraged Bunny is a harmless rabbit that likes to follow adventurers around, until it's hit and turns into an Enraged Bunny, which angrily chases you while firing a rapid barrage of fire missiles.
- Mook Maker: The majority of lowlands enemy types consist of one stronger miniboss enemy that constantly spawns weaker enemies until it is killed.
- Shout-Out: The conflict between Giants Crabs and Samurai is based on a meme from Genji: Days of the Blade involving attacking giant enemy crabs' weak points for massive damage.
- Turns Red: Initially, the Sumo Master is slow and cumbersome, but when reduced to half health, he moves much faster, attacks significantly faster, and will occasionally dash towards players.
- Zerg Rush: Sandsmen in the lowlands desert are normally fairly weak enemies but are prone to overspawning in massive groups, though they can only pose a threat to the weakest characters.
Midland Enemies
- Action Bomb: When Gray Blobs detect you, they fling themselves at your position and explode when close enough. Due to their fast speed, they are especially dangerous to new players with low health and 0 DEF.
- Bee Afraid: The Warrior Bee and its minions.
- Boss in Mook Clothing: Event Gods may sometimes spawn in the midlands. They are FAR more powerful than anything else found there and characters below level 20 should stay far away from them.
- Golem: Various kinds of Golems are scattered around the Midlands, and count towards construct kills.
- Interface Screw: Nomadic Shamans introduce new players to the Blind status effect, which greatly darkens the screen.
- Mook Medic: The Orc Queen is a harmless foe that heals the Orc King but never attacks players.
- Wicked Wasps: The Wasp Queen and its minions.
Highland Enemies
- Our Centaurs Are Different: Hunter Centaurs are an enemy that fires single aimed arrows, inflicting heavy damage.
- Smashed Eggs Hatching: When a Dragon Egg is destroyed, it will spawn either a White Dragon Whelp, a Juvenile White Dragon or an Adult White Dragon.
Lesser Gods
Uniquely powerful enemies that are a step up from the normal enemies. These include the Flayer God, Undead Dwarf God, Minotaur, and Lizard God.- Cthulhumanoid: Flayer Gods have tentacles on their faces.
- Elite Mooks: The weakest enemies that are treated as Gods (for the purpose of the Gods Killed fame bonus), the Lesser Gods of the highlands are a step above most monsters but weaker than the proper Gods in the Godlands.
- Enemy Summoner: Except Minotaurs, all Lesser Gods can spawn minions of their own.
- Golem: Undead Dwarf Gods, despite their name, look more like giant constructs made from steel.
- Our Minotaurs Are Different: Minotaurs are essentially big, bipedal bulls.
Gods
The most powerful monsters that appear in the Realm, located in the center of the map or "Godlands". They include the Medusa, White Demon, Flying Brain, Slime God, Ent God, Leviathan, Ghost God, Sprite God, Djinn, Beholder, and the Construct Trio.- Armor-Piercing Attack: White Demons always do 45 damage no matter what awesome gear you're wearing.
- Blob Monster: Slime Gods are made of slime.
- Boss in Mook Clothing: Lucky Gods spawn extremely rarely, but have health comparable to a dungeon boss, significantly higher DEF, and much more dangerous attacks that fire in more complex patterns, often requiring an effort from multiple players to take down. The Headless Horseman, Great Owl, Sting Spider, Corsair Crab and Grand Dragonfly have even higher stats than the Lucky Gods, but spawn slightly more commonly.
- Cybernetic Mythical Beast: During Christmas, the Medusa is reskinned into the Mechdusa.
- Elite Mooks: Gods are the most powerful and toughest monsters in the Realm. Standing out are Lucky Gods (more powerful remixed versions of gods), Headless Horsemen, Sting Spiders, Great Owls, Corsair Crabs and Grand Dragonflies, who are even more powerful than standard gods and always drop a dungeon portal (plus a potion in case of Lucky Gods).
- Enemy Summoner: Usually averted; unlike Lesser Gods, the proper Gods do not spawn enemies. The exception is the Sprite God, but even then the Sprite Children spawned by them are harmless and only serve as a source for Sprite World portals.
- Giant Enemy Crab: The Corsair Crab is even bigger than the Giant Crabs found in the Lowlands. It is also a pirate.
- Giant Spider: Sting Spiders are around four times as large as player characters.
- Gold-Colored Superiority: Lucky Gods are golden in color, and are even deadlier than their non-gold counterparts.
- Golem: The construct trio, consisting of a Rock Construct, Steel Construct, and Wood Construct.
- Heal Thyself: The Constructs constantly heal each other in a circle, essentially making them impervious to most damage. The only ways to kill them are to use a Mystic to cut off the healing to one of them before breaking the chain one-by-one, or overwhelming them with brute force.
- "Instant Death" Radius: Be warned that standing directly on top of a Djinn while it attacks will incur massive damage to most classes and usually instant or split-second death, regardless of stats.
- Kaizo Trap: Lucky Djinn shoot boomerang shots that come back to their location. It is not that uncommon to see newer players run in after killing the Lucky Djinn to collect their loot or enter the dropped dungeon, only to get killed by the converging shots. This Kaizo Trap is especially noteworthy since it does enough damage to kill most 8/8's.
- Oculothorax: Beholders are essentially flying eyeballs surrounded by little appendages.
- Our Genies Are Different: Djinn are present as one of the gods in the Realm.
- Our Ghosts Are Different: Ghost Gods are giant ghosts that fire slow-moving walls of bullets.
- Our Gods Are Different: God is the term used by the game to refer to the most powerful enemies in the game, mostly the non-boss monsters living near the centre of the Realm. If your character makes it to the endgame, chances are that you should have killed quite a large number of them.
- Rare Random Drop: All of them can drop Stat Potions, namely Defense, Attack, and Speed, making farming Gods a moderately effective way to get these potions, especially for brand new level 20 characters that are not yet strong enough to tackle the Puppet Master's Theatre and the Toxic Sewers. Many of them also have a small chance to drop dungeon portals as well. Lucky Gods however are guaranteed to drop their respective dungeons and are guaranteed to drop a Stat Potion for at least one player.
- Taking You with Me: When a Djinn takes a significant amount of damage (500), it will become invulnerable and flash red for a second, shoot a ring of white bullets, then die.
- Throw Down the Bomblet: Medusas can use wide-area grenades that shave off huge amounts of health. These are the bane of newer players.
- When Trees Attack: Ent Gods are trees with faces that can move around and kill you.
Candy Gnome

- Metal Slime: Candy Gnomes are rare enemies that try to run away from players instead of fighting, and are the only source of portals to the Candyland Hunting Grounds.
Beach Bum

- Piñata Enemy: An extremely rare, harmless enemy that can drop keys to Davy Jones' Locker and is the only way to get to the Beachzone.
- Unique Enemy: The appearance of a Beach Bum is incredibly rare such that there could be hundreds of realms that pass by without one.
Beer God

- Bad Santa: During Christmas, Beer Gods are reskinned into Mad Santas. Outside of looking like Santa Claus and being summonable by Evergreen Ents, they are no less dangerous than normal Beer Gods.
- Elite Mooks: Beer Gods are beefy and dangerous, in some rare cases even capable of killing maxed characters, especially if they manage to spawn on top of one. Be very careful.
- Giant Mook: Beer Gods are one of the biggest non-boss enemies in the game, around four times the size of players.
- Puzzle Boss: The Beer God is initially shown as a red dot on your minimap with no corresponding enemy. Gather a small group of people, however, and it will appear and attack.
- Rare Random Drop: Can drop the Greaterhosen leather armor and Mighty Stein poison.
- Throw Down the Bomblet: Beer Gods can throw explosive Wine Bombs that cause players to get drunk.
Deathmage

- Dem Bones: All minions of the Deathmages are skeletons.
- Evil Counterpart: To Necromancers. Deathmages look like reskinned versions of Necromancers and both have powers related to death, but one is a player class and the other a quest boss. Ironically, Necromancers are especially useful against Deathmages, due to their ability to quickly clear a Deathmage's skeleton horde.
- Flunky Boss: Deathmages are capable of spawning four different kinds of skeletons to aid them.
- Night of the Living Mooks: Deathmages and all of their minions are undead.
- Rare Random Drop: Deathmages can drop the Traveler's Trinket.
- Robe and Wizard Hat: The standard attire of a Deathmage is a black pointy hat and robe.
Great Coil Snake

- Enemy Summoner: Great Coil Snakes are capable of churning out swarms of Temple Snakes if not killed quickly enough.
- Snakes Are Sinister: These snakes are out to kill you.
Lich

- Combat Medic: The Phylactery Bearer is moderately powerful and tries to follow the Lich to heal it.
- Flunky Boss: The Lich spawns Mummies, as well as Phylactery Bearers and Haunted Spirits when buffed to at least Level 2.
- Monster Lord: Liches are kings who have become undead but still retain their intellect and dominion over their subjects.
- Mummy: The majority of minions summoned by Liches are mummies.
- Night of the Living Mooks: Liches and all of their minions are undead.
- Rare Random Drop: Phylactery Bearers and Haunted Spirits summoned by Liches have a small chance to drop the items in the Phylactery Mystic set (The Phylactery, Soul of the Bearer, Soulless Robe and Ring of the Covetous Heart).
Ent Ancient

- Combat Medic: Greater Nature Sprites, dangerous enemies by themselves, can heal the Ent Ancient as well.
- Elite Mooks: If buffed to level 2 or more, Ent Ancients can spawn Greater Nature Sprites, which are more dangerous than the boss itself, or many Realm Gods.
- Flunky Boss: Ent Ancients can summon Ent Saplings, Ents and Greater Nature Sprites if buffed to level 2. During Christmas, Evergreen Ents (as Ent Ancients are reskinned during this time) can also summon Mad Santas (reskinned Beer Gods).
- Mini Mook: Ent Ancients can spawn Ent Saplings and Ents, which are smaller, weaker versions of themselves.
- Rare Random Drop: Greater Nature Sprites summoned by Ent Ancients have a small chance to drop the elusive Quiver of Thunder.
- When Trees Attack: These living trees have faces and can kill you.
Oasis Giant

- Compelling Voice: He seems to try to use this to lure players into his oasis.
- Flunky Boss: Each Oasis Giant is accompanied by Oasis Rulers, Warriors, Monsters, and Creatures.
- Our Giants Are Bigger: Big, foul-smelling, fish-like creatures that live in oases.
- Rare Random Drop: He can drop the Watarimono Wakizashi.
- To Serve Man: He will gladly kill you and feed you to his minions.
Phoenix Lord

- Back from the Dead: When killed, a Phoenix Lord leaves behind an egg that hatches into the Phoenix Reborn, but it can only do this once.
- Flunky Boss: Phoenix Lords can summon Birdmen minions.
- Multiple Life Bars: Three of them. The first as the Phoenix Lord, the second as the Egg, and the final one as the Phoenix Reborn.
- The Phoenix: A bird made from flames that can revive itself from death once.
- Rare Random Drop: The Phoenix Reborn can drop Reinforced Root Armor or Wine Cellar Incantations.
- Smashed Eggs Hatching: The Phoenix Reborn will hatch once its egg is destroyed.
- Turns Red: When it transforms into the Phoenix Reborn, it gains more HP and the ability to fire Weakening stars.
Ghost King

- Asteroids Monster: Upon death, a Large Ghost will sometimes spawn a few Imps.
- Flunky Boss: A Ghost King is accompanied by Ghost Archers, the number of which depend on his evaluation level.
- Monster Lord: Ghost Kings are kings of ghosts that still retain their crown.
- Puzzle Boss: In order to drop the Ghost King's invulnerability, players must find and kill the Ghost Master, who has different attack patterns but otherwise looks identical to the other Ghost Archers.
- Rare Random Drop: The King can drop the ST Memento Mori and Interregnum.
- Tragic Villain: The Ghost King is a sorrowful king eternally trapped in the castle where his wife died, doomed to fight again and again until he becomes sapped of all his energy.
Cyclops God

- Carry a Big Stick: Wields a club.
- Cyclops: This creature and all of its minions only have one eye.
- Flunky Boss: Cyclops Gods can summon various types of cyclopes.
- Rare Random Drop: It can drop the Kiritsukeru Katana.
- Wake-Up Call Boss: If the player doesn't buff any of the Ents or Liches, the Cyclops God is a step up in terms of difficulty. He has much more health, can deal far more damage, and will gleefully swarm you with his Cyclops minions.
- Walking Shirtless Scene: Cyclops Gods don't wear shirts.
Kage Kami

- Black Cloak: The Kage Kami's attire is a black cloak and hood.
- Gratuitous Japanese: Kage Kami is Japanese for Shadow God. He can say "Kyōfu no Kage!", which means "Shadow of Fear!" in Japanese.
- Intangible Man: Can sometimes turn transparent and chase down players.
- Trap Master: This creature is capable of planting Spectre Mines that deal damage and inflict sick to players that get close.
Red Demon

- Big Red Devil: Red Demons are red and bigger than player characters. Yep, they fit the bill all right.
- Flunky Boss: The Red Demon maintains a small squad of various Demons around him.
- Painfully Slow Projectile: He can generate small orbs of fire that float lazily around him. They hit deceptively hard, for 110 damage each.
- Playing with Fire: Fitting for a demon, he attacks using blasts of flame.
- Rare Random Drop: Can drop the Ring of the Inferno.
- Wake-Up Call Boss: The Red Demon is the strongest standard Quest Monster in the Realm, and packs significantly more HP than the Cyclops God before him. He also packs an extremely painful shotgun and can summon numerous minions.
Scout Colony

- Enemy Summoner: The Colony can defend itself by throwing red bombs and summoning parasite minions to swarm players.
- Stationary Boss: The Scout Colony can't move.
- Zerg Rush: The Scout Colony's minions rely on sheer numbers to swarm players and deal heavy damage in a short time.
Alien Invasion
- Elite Mooks: Alien Mini Tanks, Tanks and Pods, which spawn in the later waves of the Alien Invasion, are among the strongest non-boss enemies that can be found in the Realm.
- Energy Ball: The cannonballs fired by Alien Mini Tanks, Alien Tanks and Alien Pods seem to be made of some kind of green energy.
- Hit-and-Run Tactics: Alien Mini Satellites try to maintain a distance from player as they fire their weapons.
- Humanoid Aliens: Alien Soldiers, Casters and Elites are visibly humanoid.
- Tank Goodness: Alien Mini Tanks and Tanks are, well, tanks armed with a cannon.
- Tripod Terror: Alien Pods are three-legged vehicles that come straight out of The War of the Worlds.
Crystal Prisoner

The Crystal Prisoner is actually the queen of the Shatters, who tried to escape the ruination of her kingdom. Caught by Oryx and imprisoned in a gemstone prison, the Void Entity had already managed to taint her soul.
- Bullet Hell: The first boss to really use patterned projectile spam.
- Crystal Prison: Is trapped in one.
- Doppelgänger Attack: Clones herself in one of her phases. The clones attack players and act as decoys and meat shields.
- False Innocence Trick: Begs players to break her from her crystal prison, only to immediately attack them when they do.
- Fatal Reward: Offers a reward for being freed from her prison. Upon being freed she says: "This is your reward! Imagine what evil even Oryx needs to keep locked up!" and proceeds to attack the players.
- Flunky Boss: Maintains a squad of Crystal Prisoner Steeds that fire Weakening blasts.
- Rare Random Drop: The Crystal Sword and Crystal Wand.
- Sealed Evil in a Can: Was trapped inside the Mysterious Crystal for an unknown reason.
- Self-Duplication: The Prisoner can summon clones of herself, which are weaker and only have one attack.
- Ungrateful Bastard: The Prisoner will try to persuade a group of players to break the crystal but will attack them once she's been freed.
- Was Once a Man: The Crystal Prisoner was once the queen of the Shatters and wife of the Forgotten King.
Totalia the Malevolent

- Fighting a Shadow: The Totalia enemies are merely apparitions of the real Totalia, sent by her to collect bone tokens. Totalia herself cannot be fought or even seen.
- Flunky Boss: Starting from her fourth phase, Totalia will be accompanied by a swarm of bat minions that will attack you and constantly get replenished if destroyed until the fight ends.
- Wicked Witch: Totalia is a witch interested in collecting bone tokens from the piles of bones scattered throughout the realm for some nefarious purpose.
- Disc-One Final Boss: They are undoubtedly the strongest enemies in the Realm and several levels harder than most dungeon bosses, and drop great loot when killed. However, in the end they are just one boss of many, and nowhere close to being the Final Boss.
- Lethal Joke Character: During April Fools, Thanksgiving or Christmas, some bosses receive new skins that make them harder to take seriously, which you had better do because the difference is merely cosmetic and they're still as deadly as normal:
- During Thanksgiving, the Gobble God, a giant turkey, takes the place of the Cube God. Instead of being cubes like the Cube God's, the Gobble God's minions are, you guessed it, turkeys as well.
- During April Fools, the Ghost Ship is reskinned into the Rubber Ducky, and its minions become Soap Mines (replacing Water Mines), Beach Towels (Beach Spectres), Tempest Sponges (Tempest Clouds) and Vengeful Shampoos (Vengeful Spirits).
- During Christmas, the Hermit God becomes the Hat God (which is a living Santa hat), the Pentaracts are replaced by Frostaracts (giant snowmen), while the Rock Dragon becomes the Wrapped Dragon (whose eye has antlers, body segments are presents, and tail is a Christmas sleigh).
- Level Scaling: All event bosses and most of their minions scale HP to the number of players in the realm. Limited-time events have double the usual scaling rate.
- No-Sell: All Event Bosses are immune to the Mystic's stasis. Some have other immunities as well.
- Wolfpack Boss: When spawning, event bosses can override the setpieces of other (typically defeated) ones, and although rare, there's technically nothing stopping event bosses from spawning on top of each other while all of them are still alive, resulting in two or more being active in the same area at once. Although it's pretty entertaining when it happens, actually killing them like this borders on Unwinnable by Design due to their overlapping patterns, if the amalgamated setpieces don't break their AI entirely.
Skull Shrine

- Attack Drone: The Blue Flaming Skulls. Unlike their red variants who protect the shrine, the blue ones seek out and attack players.
- Cool Shades: During Easter, the Skull Shrine is reskinned into the Cool Shrine. Aesthetically, the Cool Shrine and its summoned skulls can be distinguished from the standard Skull Shrine by the sunglasses worn by them.
- Flaming Skulls: The Skull Shrine itself is a burning skull, as well as its minions, the Red Flaming Skulls and Blue Flaming Skulls.
- Rare Random Drop: The Orb of Conflict, which sacrifices its Curse and a chunk of Stasis time, in exchange for granting a Mystic massive damage and speed boosts on use.
- Stationary Boss: The Skull Shrine does not move.
- Shielded Core Boss: In a way. The primary shrine is constantly protected by a swarm of Red Flaming Skulls that tend to block a lot of damage. Unfortunately, the primary shrine is the part that needs to be destroyed.
- Snowlems: The Snow Shrine, the Skull Shrine's Christmas version, looks like the head of a snowman.
- Turns Red: Like the Cube God, it turns invulnerable every time it loses a portion of its HP, and gains stun immunity at low health.
- Zerg Rush: Its army of skulls, combined with their rapid, punishing fire blasts, will most likely roast anybody without sufficient defense.
Cube God


- Amazing Technicolor Battlefield: Often the case with the Cube God's army of Cube Overseers (orange), Cube Defenders (yellow) and Cube Blasters (teal).
- Flunky Boss: The Cube God can summon hordes of Cube Overseers, that can in turn maintain armies of minions of their own.
- King Mook: A giant, blue Palette Swap of the other cube monsters.
- Living Polyhedron: The Cube God's shape is that of a giant blue cube.
- Moveset Clone: During Thanksgiving, Christmas and Easter, the Cube God is temporarily replaced by, respectively, the Gobble God, the Ice Cube God and the Sphere God. The former two drop season-themed items in addition to the standard Cube God loot.
- Odd Job Gods: A god of cubes. To be fair, its creation was an accident, and it's been eclipsed by higher powers in the Third Dimension anyways, where Native Cube Gods can be found as mere Elite Mooks.
- Rare Random Drop: The Dirk of Cronus, a dagger that deals considerably higher damage at the cost of reduced range.
- Turns Red: Once at low health, the Cube God temporarily becomes invulnerable and gains permanent stun immunity.
- We Have Reserves: According to Oryx:Oryx the Mad God "I have many more Cube Gods, [Player Name]!"
- Zerg Rush: With an army of up to 110 cubes strong, swarms of its cubes are usually enough to shred reckless players.
Lord of the Lost Lands

- Barrier Warrior: When the Lord of the Lost Lands is first attacked, he will spawn Protection Crystals in a circle around himself. The Lord of the Lost Lands cannot be damaged while there are still Protection Crystals around him.
- Big "NO!": As he dies, he yells a big NOOOOO! in the chat.
- Charged Attack: The Lord of the Lost Lands can occasionally announce "GATHERING POWER!" in the chat. When he does, he will charge up for a few seconds and unleash waves of high-damage bullets.
- Flunky Boss: Summons Guardians of the Lost Lands, which summon their own Knights of the Lost Lands.
- Kaizo Trap: When he dies, he will explode into a large nova of high-damage shots, potentially killing players who get too reckless. In addition, those who rush in for their loot might get slaughtered by the minions that are still alive.
- Power Crystal: The Protection Crystals and the Guardians of the Lost Lands.
- Rare Random Drop: The Shield of Ogmur, which trades its Stun for a more offensive Armor Break.
- Shielded Core Boss: He can spawn a ring of Protection Crystals that make him immune to attack until they are all destroyed. Made harder by the fact that the Crystals can attack too.
Pentaract


- Attack Drone: It summons swarms of flying Pentaract Eyes that shoot lasers.
- Eyes Do Not Belong There: Surrounded by clouds of flying eyes that don't disappear on its death, which can occasionally lead to this.
- Flunky Boss: Besides tossing occasional bombs and firing stun shots at low health, the Pentaract can only attack by spawning swarms of fast-moving Pentaract Eyes that fire lasers.
- Gemini Destruction Law: If a Pentaract Tower is destroyed, the other four must be destroyed within a fifteen second window, during which the beams between them will turn yellow. If there are still any living towers at the end of this window, all fallen towers will instantly respawn.
- Rare Random Drop: The Seal of Blasphemous Prayer, which loses much of a normal seal's power in exchange for letting the user turn completely Invulnerable for short bursts.
- Snowlems: During Christmas, the Pentaracts are skinned into the Frostaracts, which are snowmen that can attack and kill you.
- Stationary Boss: None of the towers actually move.
- Turns Red: Once a tower hits half health, it gains the ability to fire stun bullets.
- We Have Reserves: According to Oryx:Oryx the Mad God "That was but one of many Pentaracts!"
- Wolfpack Boss: The towers themselves wouldn't be so much of a threat if there weren't 5 of them that could swarm targets with Pentaract Eyes.
- Zerg Rush: Its primary tactic is to swarm enemies with Pentaract Eyes.
Grand Sphinx


- Informed Attractiveness: It's hard to tell on an 8x8 pixel-art character, but Oryx seems to think so.
- Invincible Minor Minion: The five Horrid Reapers it spawns can't be damaged. They die off once the boss hits 15% HP.
- Playing with Fire: Most of its attacks are fireballs and the like.
- Rare Random Drop: The Helm of the Juggernaut, which sacrifices its Speedy buff for a defensive Armored buff.
- Shifting Sand Land: When spawning, generates a large desert setpiece to do battle in.
- Time Abyss: Oryx can proclaim that she had lived for thousands of years on her defeat, before declaring that he will have his revenge on her killer.
- Vertebrate with Extra Limbs: Eight limbs: two arms, four legs and two wings.
- Walking Shirtless Scene: The Grand Sphinx doesn't wear anything on its upper half.
Hermit God


- Aquatic Mook: This boss resides in a large pool of water.
- Cognizant Limbs: The Hermit God's tentacles are treated as separate enemies.
- Combat Tentacles: Hermit God Tentacles circle in the shallow water around the Hermit God, chasing players who get close.
- Flunky Boss: The Hermit God can summon Hermit Minions, lesser versions of itself.
- King Mook: To its Hermit Minions, which look the same except for smaller size and less fancy colours.
- Non-Human Undead: During Halloween, the Hermit God is reskinned into the undead Reanimted Hermit God.
- Odd Job Gods: A god of hermit crabs.
- Rare Random Drop: The Barnacle Basher, a slow but powerful flail with lingering shots.
- Red Eyes, Take Warning: Its eyes are normally white, but they glow red when it uses its most powerful attacks.
- Shielded Core Boss: It's not until you destroy all its tentacles does it surface and become vulnerable.
Ghost Ship


- Action Bomb: Water Mines try to approach players to detonate themselves.
- Aquatic Mook: The Ghost Ship's setpiece is an inland sea.
- BFG: Sometimes fires cannonballs larger than itself.
- Flunky Boss: Summons a variety of ghosts, explosives, and thunderclouds to aid it in battle.
- Flying Dutchman: The Ghost Ship is seemingly crewed only by ghosts.
- Ghost Pirate: The Beach Spectres and Vengeful Spirits summoned by the Ghost Ship.
- Invincible Minor Minion: Though Tempest Clouds are technically treated as enemies, they don't have a hitbox, and shots will pass straight through them and deal no damage.
- More Dakka: Its primary means of attack is to spam cannonballs like a machine gun.
- Rare Random Drop: The Trap of the Vile Spirit, which sacrifices all crowd control and most of its damage radius, in exchange for Cursing traps that deal massive armor-piercing damage.
- Red Eyes, Take Warning: Beach Spectres and Vengeful Spirits have red eyes.
- Sea Mine: It can summon Water Mines to catch unwary players.
- Underwater Boss Battle: The Ghost Ship's setpiece is an inland sea, meaning that most of the fight will take place in the water.
- Units Not to Scale: It's very small for a ship, being only slightly larger than your character.
- Weather Manipulation: The Ghost Ship can summon Tempest Clouds that circle around it and fire lightning at nearby players.
- Yellow Lightning, Blue Lightning: Tempest Clouds attack with yellow lightning. Blizzard Clouds' lightning is reskinned to blue.
Rock Dragon


- Action Bomb: The Rock Dragon can summon Rock Dragon Bats that charge towards the nearest player and detonate when close to one.
- Bilingual Bonus: The stones in the Rock Dragon's arena create the Chinese symbol for "Dragon" (龍).
- Cognizant Limbs: The Rock Dragon's eye, body segments and tail can all be targeted separately from each other.
- Eye Beams: When all of its body parts are destroyed, the Eye of the Dragon discards its fire attacks in favor of radial purple lasers, as well as a single aimed laser that deals huge damage. In its second phase, its body segments grow eyes and start spamming these.
- Eyes Do Not Belong There: In its second phase, each of its body segments grows an eye.
- Flunky Boss: The Rock Dragon spawns Rock Dragon Bats at a fairly quick rate, which utilise slowing shots and self-destruction to defend the Dragon.
- Go for the Eye: Destroying the Eye of the Dragon is all that is needed to kill the Rock Dragon.
- Lightning Bruiser: Moves extremely quickly and has some very lethal attacks that can instakill less armored players, and it only gets faster as you break it down. Subverted when it loses its body parts, as it gets slower but can unleash even deadlier attacks.
- Optional Boss: Doesn't need to be killed to close the realm, and drops the Lair of Draconis.
- Our Dragons Are Different: A worm-like creature made of segmented spherical rocks, with a single eye which serves as its weakpoint.
- Playing with Fire: When its body is intact, its method of attack is to spray bursts of fire at a rapid pace.
- Rare Random Drop: The Ray Katana, which sacrifices raw DPS for considerably longer range and more consistent damage.
- Rock Monster: This creature is a serpent-like thing made of rock.
- Segmented Serpent: The Eye of the Dragon and its Body Segments all have separate health bars, and the former (which is treated as the main boss) only becomes vulnerable when the latter are all killed.
- Shielded Core Boss: All of its body segments must be destroyed to make the eye vulnerable.
- Taking You with Me: Every segment of the Rock Dragon's body explodes when destroyed, dealing damage to nearby players. In addition, the Rock Dragon Bats it summons can blow themselves up as needed.
- Turns Red: When the Eye is brought to half health, it respawns its body segments, which start firing lasers.
Avatar of the Forgotten King
- Achilles' Heel: If there is a player fighting the Avatar that is lucky enough to have the Shield of Ogmur or Crystallised Fang's Venom, they can Armor Break it to make the fight significantly shorter.
- Action Bomb: The Avatar can summon Blobombs that charge towards the nearest player and detonate when close to one. It can also throw Fire Bombs that will explode after a delay.
- Dem Bones: It resembles a giant skull.
- Faceless Eye: Eyes of the Avatar.
- Fighting a Shadow: The Avatar is a spiritual manifestation of the Forgotten King into the realm, evocative of the king's delusions and madness hidden beneath his regal persona.
- Flying Face: The Avatar is seemingly just a giant skull with no torso nor limbs.
- Living Statue: The eight Killer Pillars that surround the Avatar.
- Marathon Boss: The Avatar has 150,000 base HP and an effective 135 DEF to boot, extremely deadly bullet patterns that make it a huge risk to even get in range, and 4 invincible phases, each with their own deadly minions. Even larger groups are liable to spend a while melting his health bar. All of this was borderline tame compared to his older iterations, which had much more health, even higher DEF, DPS walls in multiple phases, and more invincibility times.
- Murder Water: The pools of Corruption that surround the boss setpiece deal damage to those that stand inside.
- Optional Boss: Like the Rock Dragon, doesn't need to be killed to reach Oryx and drops a Brutal Bonus Level—in this case, the Shatters.
- Playing with Fire: All of its attacks are some sort of fire.
- Rare Random Drop: The Tablet of the King's Avatar, a spell that produces an extremely narrow, but extremely damaging nova instead of the normal explosion.
- Shielded Core Boss: During phase 2, the Avatar summons an army of Eyes of the Avatar and is invulnerable until all of them are dead.
- Shows Damage: Will gradually break down and grow more corrupted as it loses health.
- Stationary Boss: The Avatar does not move.
Jade and Garnet Statues

- Bullfight Boss: Their infamous charge attack and tendency to chase players aggressively can make them this.
- Dual Boss: The red Garnet Statue and the green Jade Statue fight together and have the same stats.
- Flunky Boss: Both can summon smaller versions of themselves which fire armor-piercing bolts that also nullify pets.
- "Instant Death" Radius: They have an attack where one flashes red before charging forward while unleashing shockwaves. The dash is extremely fast and the sheer number of shots can easily kill 8/8 Knights.
- Kill One, Others Get Stronger: When one Statue dies, the surviving one will turn red, grow in size, heal a lot of health, and begin attacking a lot more aggressively, in addition to gaining a new attack.
- Lightning Bruiser: They're reasonably bulky, hit like trucks, and can move pretty damn fast when they want to, especially if they use their charge attacks.
- Living Statue: Two of them, made of Jade and Garnet.
- Rare Random Drop: One for each statue. The Garnet Statue has the Kageboshi, a star that tosses out a spread of short-ranged piercing projectiles at the cost of not giving Speedy. The Jade Statue instead has the Hama Yumi, a longbow that fires four shots in a wider arc, two of which ignore defense.
Killer Bee Nest (Red/Blue/Yellow Beehemoths)


- Bee Afraid: Beware of these bees.
- Big Creepy-Crawlies: These bees are far larger than insects ought to be, especially the Beehemoths, which at their largest are about the size of trucks.
- Combat Medic: The Killer Bee Nest is assisted by numerous Nest Colonies, which fire radial shots, throw bombs, and frequently heal the boss and all nearby Colonies for large amounts of health.
- Degraded Boss: Killer Bee Nests reappear later in the Nest (the dungeon dropped by the Beehemoths) as minions summoned by the Killer Bee Queen, although the Beehemoths they spawn are less powerful on account of being adolescents.
- Dem Bones: The Killer Bee Nest is shaped like a skull crying honey.
- Flunky Boss: Has rather few attacks, and mostly defends itself by calling in Nest Colony Guardians. During the second half, it outright delegates the fighting to the 3 Beehemoths it summons (and each Beehemoth can summon armies of Nest Colony Guardians).
- Lightning Bruiser: Each Beehemoth is very powerful, extremely fast, and reasonably bulky.
- Rare Random Drop: The Beehemoth Quiver,note which fires three short-ranged arrows in a spread which Slow instead of Paralyze. It comes in three colors depending on which Beehemoth dropped it.
- Shed Armor, Gain Speed: When in their enraged state, the Beehemoths move significantly faster and hit much harder, but their DEF drops to 0.
- Stationary Boss: Being a beehive, the boss itself can't move.
- Turns Red: The Beehemoths become far more aggressive and dangerous when below a certain HP threshold. It gets even worse later in the fight, as the last Beehemoth alive will absorb the Killer Bee Nest to fully heal itself and trigger an enormous power boost.
- Wolfpack Boss: The second phase of the fight, where the Nest itself is invulnerable, and the targets are the three Beehemoths spawned by it.
Crystal Worm Father


- Flunky Boss: He spawns alongside a Cavecrawler Leech, Maggot or Glowworm, chosen randomly.
- The Pawns Go First: The Worm Father will only spawn once four waves of mushrooms have been defeated.
- Rare Random Drop: The Crystallized Worm's Venom, a poison that loses most of its damage and blast radius, but gains the ability to Armor Break anything hit.
- Recurring Boss: The Crystal Worm Father, after being defeated in the Realm and retreating to the Fungal Cavern, reappears as a miniboss in the fight against the Crystal Worm Mother (the Fungal Cavern's main boss), with lower HP, simpler attacks and no loot.
- Shielded Core Boss: When reaching 20% health, the Crystal Worm Father will summon two Death Morels and become invulnerable until both are destroyed.
- The Turret Master: The Crystal Worm Father is assisted by Death Morels, stationary enemies that fire rings of yellow bullets, and can summon them in his final phase.
Kogbold Expedition Engine

- Locomotive Level: The Expedition Engine's setpiece is a series of train tracks.
- Rare Random Drop: The Kogbold Multitool, a wakizashi that can freely cycle between three firing modes based around offense, defense, and utility.
- Segmented Serpent: It has many segments that can attack independently, but only the main engine can take damage.
- Shielded Core Boss: Partway during a fight, the Expedition Engine will retreat to the centre of its setpiece and turn invulnerable, while the four outlying turrets activate themselves and must be deactivated (via dealing damage) before the Engine can take damage again.
Ethereal Shrine
A strange shrine leading to the Moonlight Village, it'll activate once enough of the spirits around the Realm have been gathered. However, the shrine won't open the entrance without a fight.- Broken Armor Boss Battle: The Ethereal Shrine has 200 DEF, is permanently Armored (giving it an effective DEF of 300) and cannot be Armor Broken by players, making it nigh unkillable with brute force. In order to weaken its defence, players need to stand next to the nearby Lantern; doing so for enough time will first remove the Armored buff, then inflict Curse, then finally Armor Broken. These effects will persist as long as players stay near the Lantern.
- Rare Random Drop: The Token of Warmth and Token of Happiness, two rings that give HP/MP share the gimmick of slowing the player when shooting while granting them increased restoration. The Token of Warmth focuses on HP restoration by giving Healing and VIT, while the Token of Happiness focuses on MP restoration with Energized and WIS.
- Stationary Boss: The Ethereal Shrine is a building with no means of locomotion.
- Turns Red: As the Ethereal Shrine loses HP, the spirits around it will activate and start shooting at players.
- Warmup Boss: The Shrine teaches players the basic survival skills that will be demanded of them in the Moonlight Village, namely patient micrododging and following the Lantern to both survive and dispel its defenses. Fittingly, the two items it can drop will slow the player on shoot while granting restoration, also perfect for the Moonlight Village.
Lost Sentry

- Bullet Hell: His attacks are heavily patterned and spew enormous quantities of bullets. Made worse by the fact that said shots do high damage and multiple status effects.
- Invincible Minor Minion: The Spectral Sentry that constantly flies around him. He is far from minor though, being able to crush players with armor-piercing shotguns, and avoiding him is arguably the hardest part of the fight.
- Marathon Boss: The Lost Sentry has a towering 125,000 base HP only exceeded by the Avatar and the Appetizernote along with an above-average 40 DEF. With the constant Bullet Hell he sprays in all directions and the invincible Spectral Sentry patrolling the area, it's already enough of a chore getting close to him, even for longer-ranged classes. And when you do get within firing range, you have to deal with his enormous health bar and devastating attacks up close and personal.
- Rare Random Drop: The Cloak of Bloody Surprises, which slows the user on use and has a shortened invisibility time, in exchange for granting a substantial ATT buff while active.
- Red Eyes, Take Warning: When at critical health, half of the Lost Sentry's headgear crumbles, revealing a glowing red eye.
- Shows Damage: Visibly crumbles over time, as it takes more and more damage.
- Stationary Boss: The Lost Sentry cannot move.
- Super Boss: The Lost Sentry's indigo dot is visible on the minimap at all times, but it does not have a quest marker and isn't required to close the realm. This is because the Lost Sentry is arguably the most threatening enemy that can spawn in the realm itself, only rivalled by the Avatar of the Forgotten King.
Crystal Towers
Imposing towers raised into the Realm as a joint effort between the Crystal Entity and the Keyper, these structures spawn hordes of the Entity's crystalline monstrosities into the Realm. Spawn for specific events alongside the Keyper.- Mook Maker: The Crystal Towers summon enemies from the Crystal Cavern and will constantly heal them, but have no attacks by themselves.
- Recurring Boss: The Crystal Towers can be fought twice per realm. After being defeated for the first time, they'll become grey and inert, then become active again after all Liches or Ent Ancients have been defeated (whichever happens first). When defeated this time, the towers and their minions will be destroyed for good.
- Stationary Boss: None of the towers can move.
- Underground Monkey: The Crystal Towers' minions are Emergent variants of enemies from the Crystal Cavern, and have less HP and deal only half damage.
The Keyper

- Anti-Frustration Features: When entering his second phase (which is especially difficult) or dying, he will eliminate all terrain around him and replace it with plain tiles. This prevents the nearby terrain from stopping players from dodging (in the former case) or blocking the dungeon portals he drops (in the latter case).
- Cowardly Boss: At low health, the Keyper will slow all nearby players and begins quickly fleeing, while constantly trailing attacks to deter attackers. Although this is often a nuisance at best, it can become surprisingly lethal if the Keyper decides to flee into an area crawling with Gods.
- Deal with the Devil: After being captured by the Crystal Entity, they surprisingly reached a deal. In exchange for an unlimited supply of magic keys leading to anywhere he desired, he would build Crystal Towers to allow the Crystal Entity to send invaders directly into the Realm.
- Improbable Weapon User: In addition to using an oversized key as a sword, he throws dungeon keys to fight.
- Portmanteau: Keyper = Key + Keeper, as a keeper of keys.
- Rare Random Drop: In addition to his own UT item (the Keychain Cutlass), the Keyper can notably drop all the UT items and the entrances to certain dungeons normally dropped by other event bosses as well.
- Recurring Boss: The Keyper can spawn twice per realm, after the Crystal Towers (which can be fought twice per realm) are defeated.
- Shout-Out: He literally wields a Keyblade, which he can even drop as a weapon.
The Appetizer

- Armor-Piercing Attack: Most of the Appetizer's attacks bypass the target's DEF.
- Chef of Iron: The Appetizer is a chef who can more than hold his own in a fight, and attacks by throwing various kinds of food.
- Edible Ammunition: Among others, the Appetizer attacks with various kinds of Pet Food (Power Pizza, Chocolate Cream Sandwich Cookies, Grapes of Wrath, Superburgers, or Ambrosia), depending on which food pile is active near him.
- Supreme Chef: According to the Realm Eye, the Appetizer is exceptionally skilled in culinary arts, despite the illegitimacy of his ingredient sources.
- Timed Mission: Once approached, the Appetizer will attack until taking enough damage, upon which he will teleport to one of the three food piles and start a timer. Players have 30 seconds to find him and re-engage in combat, otherwise the food pile he is standing next to will expire and no longer drop items.
The Gardener
- Making a Splash: The Gardener fights by splashing water and throwing water balloons.
Biff the Buffed Bunny

- Killer Rabbit: This rabbit is not to be laughed at.
- King Mook: To the Mini Biffs, smaller versions of himself that spawn in the Godlands during Easter.
- Lethal Joke Character: In a similar vein to the Giant Oryx Chicken, he's kind of hard to take seriously since he's an Easter bunny. Like the Chicken, taking him seriously is essential in order to not get ripped limb from limb.
- Muscles Are Meaningful: Is possibly the most (visibly) muscular character in the game, and makes that clear with enormous HP and damage.
- Palette Swap: Outside of Easter, he has been seen in Month of the Mad God 2017 and September 2019, where he is recoloured, respectively, to a mossy statue and an alien creature.
- Rare Random Drop: The Vitamine Buster, Helm of the Swift Bunny, and Incubation Mace.
- Sealed Evil in a Can: Must be broken out of a giant Easter egg that appears when all the smaller ones in the Realm are destroyed.
- Super-Persistent Predator: With enough patience, he can chase you all the way to the beach.

- Top-Heavy Guy: His torso is far bigger than his legs.
Zombie Horde

- Night of the Living Mooks: All enemies in this event are zombified versions of player characters.
- Rare Random Drop: The Infected Assassin Skin.
- Red Eyes, Take Warning: All of these zombies have red eyes.
- Upgraded Boss: Their leader is Bonegrind the Undead Butcher, whom you might recognise as the tutorial boss Bonegrind the Butcher, back for revenge.
Oryx Horde
- Crosshair Aware: The Stone Guardian Swords can create red crosshairs to chase players while raining down explosive lightning bolts.
- Death from Above: The Stone Guardians Swords rain explosive lightning from the sky.
- Demoted to Extra: The Oryx Horde was the primary event boss of Month of the Mad God 2017 and 2018, but was relegated to playing second fiddle to MotMG 2019's Alien Invasion event, being available only from 30 July to 8 August instead of the whole event.
- Dual Boss: In addition to the Stone Guardians, in the first phase of the Spirit of Oryx fight, he's invulnerable and you have to endure his attacks while trying to destroy the Possessed Statue of Oryx.
- Flunky Boss: The Megamad Brute of Oryx can spawn Megamad Warriors of Oryx and Alpha Arcane Fighters.
- Grappling-Hook Pistol: The Possessed Oryx Statue can fire a grappling hook to immobilize a player and drag itself to them, which is usually followed by a point-blank Earth Smash.
- King Mook: The Megamad Brute of Oryx is a reskinned version of the Brutes of Oryx encountered in Oryx's Castle.
- Living Statue: The Megamad Oryx Statue, the first and fourth boss of the event.
- Sequential Boss: The Oryx Horde is a boss rush event, where 4 bosses must be fought right after each other. After destroying the Megamad Oryx Statue, you must defeat the Megamad Brute of Oryx, the Stone Guardians, and finally the Spirit of Oryx along with the Possessed Oryx Statue.
- Throw Down the Bomblet: The Possessed Oryx Statue can lob Earth Smashes, which explode into rings of fire and blast the ground into harmful poison.
- Trap Master: The Spirit of Oryx can deploy a number of status-inflicting mines.
- Upgraded Boss: The Stone Guardians in Oryx's Castle reappear as bosses in this event, with significantly higher damage and HP.
Leprechaun

- Hyperspace Arsenal: The Pot of Gold dropped by the Leprechaun is far bigger than he is, as he can store it within his hyperspace hat.
- Metal Slime: A harmless 'boss' that runs away from you and can outrun all characters (making it unkillable without slows), and either spawns a Pot of Gold or a portal to the Rainbow Road (which contains a Pot of Gold and nothing else). This Pot of Gold is in turn the source of very rare vanity items found nowhere else.
Permafrost Lord

- Flunky Boss: The Permafrost Lord summons Snow Constructs to aid him.
- An Ice Person: In addition to being made of ice himself, he uses ice attacks.
- King Mook: The Permafrost Lord is a stronger version of the Snow Constructs, which spawn in the Mountains during Christmas.
- The Pawns Go First: He won't awaken and attack before all 20 Snow Constructs that spawn in the mountains are killed.
- Turns Red: When the Permafrost Lord is dropped under a certain amount of health, he'll flash red, double his DEF and start rapidly using all the attacks he used in the previous phases until he dies.
Snowy the Frost God

- Flunky Boss: Snowy continuously summons Snowmonster minions.
- An Ice Person: Snowy attacks by throwing snowballs and snowflakes.
- The Turret Master: In phase 2, Snowy spawns two stationary Snowball Throwers which fire snowball projectiles.
Jack Frost

- Hard Mode Perks: Which attacks Jack Frost uses, how much damage he does, and how many phases he has are determined by the rarity of the items used to create him. Higher-tier materials will give Jack Frost more dangerous attacks, and increase his loot drop chance.
- Snowlems: Jack Frost must be created by players from a Snowman Body, top hat, carrot and coal. Once a complete Snowman is assembled, the players can fight Jack Frost.
The Glitch

- Armor-Piercing Attack: All of the Glitch's attacks deal full damage regardless of how much DEF you have.
- Jump Scare: The sound effect when it dies is the same as when a player dies.
- Mythology Gag: The Realm Eye believes that the Glitch once held access to an elusive lair of goblins, referring to a scrapped dungeon called Goblin Lair.
- Rare Random Drop:
 The Quintissential Quiver and Useless Katana.
 - Time-Limit Boss: During its last phase, the Glitch will attempt to run from players while trailing Exposed Code. If not killed quickly enough, it can transform the entire area into a hazardous sea of Exposed Code, making it almost impossible to chase down and finish off.
Commander Calbrik

- Alien Invasion: Commander Calbrik is the leader of an extraterrestrial army who seeks to conquer the Realm.
- Ascended Extra: Originally added just for Month of the Mad God 2019, his encounter and the Alien Planets were made permanent after the event ended, albeit with far lower spawn rates.
- Bad Boss: One of his taunts has him threaten to off his minions if they return without killing he heroes.
- Beam Spam: One of his main attacks.
- Evil Versus Evil: While he shares Oryx's goal of killing the Realm's heroes, they're openly hostile to each other.
- Flying Saucer: Calbrik pilots a classic UFO when invading the Realm.
- Galactic Conqueror: Wants to take over the galaxy and has already subjugated many planets.
- The Pawns Go First: He'll only spawn once players have killed a sufficient number of his minions.
- Rare Random Drop: The three Protective Matrices, armors that grant Mercy Invincibility on a cooldown when reduced below half health, and synergize with Alien Cores to activate their set bonuses.
- Recursive Ammo: Can throw bombs that explode into rings of shots.
- The Unseen: Calbrik fights in his UFO, but the warlord himself has never been seen in person.
- Wave-Motion Gun: His UFO's other primary attack.
Dungeon Enemies
- Boss Bonanza: The majority of dungeons have a single proper boss and optionally treasure room(s) home to either an especially powerful Elite Mook or a second boss, with the exception of the following dungeons: Haunted Cemetery (5 bosses), The Tavern (4), The Third Dimension (2), Lair of Draconis (5), The Shatters (3 mandatory, 2 optional), Kogbold Steamworks (2), Secluded Thicket (3), Battle for the Nexus (4), all four Alien Planets (3), Mad God Mayhem (4), Hidden Interregnum (2), and Lost Halls (5). Oryx's Castle and Chambers have 2 boss fights by default (the Stone Guardians and Oryx 1, plus the optional Janus the Doorwarden), and players can fight up to 6 more in a full run from Oryx's Castle to the Wine Cellar and Oryx's Sanctuary.
- Boss-Only Level: The Court of Oryx dungeons (except the Secluded Thicket), the Machine, Beachzone, the Void, heroic dungeons, Belladonna's Garden, Moonlight Village, Admin Arena and the Rehearsal version of The Shatters have no enemies other than a boss and its summoned minions (or in case of the Moonlight Village, one boss fight consisting of three individual bosses).
- Level Scaling: All dungeon bosses have quadratic HP scaling, with some harder dungeons also giving it to prominent minions, if not outright giving it to everything.
- Lone Wolf Boss: Most dungeon bosses have nothing to do with Oryx or the Void Entity, the biggest villains in the lore.
- Mini-Boss: In certain mid-level dungeons, multiple treasure rooms can be found in a single run, each home to a boss that is usually less complex than main dungeon bosses, while sharing most of their loot table with the main boss (in contrast, many high-level dungeons only have a single treasure room home to a very powerful boss).
- One-Hit Polykill: Attacks that can pierce through players see ubiquitous usage by bosses of many high-end dungeons.
- Optional Boss: Technically, there's no need to even venture into dungeons, let alone fighting or defeating any bosses, in order to reach Oryx.
- Rare Random Drop: The majority of dungeon bosses and some Elite Mooks in high-level dungeons have a small chance to drop a Wine Cellar Incantation or their own unique untiered and/or set tier equipment.
- Harmless Enemy: Evil Chickens and Hens are physically incapable of dealing any damage to the player.
Evil Chicken God

- Ironic Nickname: The Evil Chicken God is neither evil nor a god. Oryx only labels it as such to intimidate new adventurers.
- Joke Character: It's hard to take an Evil Chicken God seriously, especially when it is borderline harmless.
- King Mook: This poor excuse of a boss is one to the Evil Chickens and Hens, which look like smaller versions of it and are equally as harmless.
- Zero-Effort Boss: This 'boss' fights you by firing slow-moving bullets that can easily be dodged and deal very little damage.
Bonegrind the Butcher

- Psycho Knife Nut: Being a butcher, he fights with a bloody kitchen knife.
- Zero-Effort Boss: He's only slightly stronger than the Evil Chicken God; it's more difficult to lose to him than it is to defeat him and you'll have to try if you want the ignoble honour of having a character defeated by Bonegrind the Butcher.
- Harmless Enemy: Cave Pirate Cabin Boys, Molls, Hunchbacks, Monkeys, Macaws and Parrots are completely harmless, only serving as a free source of tier 1 abilities.
- Noob Cave: The enemies in the Pirate Cave are only slightly stronger than the pirates who serve as The Goomba of the Realm. The dungeon itself can easily be completed solo by a completely new character and is extremely easy even when compared to the next-harder one, the Forest Maze.
- Pirate: The entire dungeon consists of various kinds of pirates.
- Pirate Parrot: The pirates have their own pet parrots, which you can kill for tier 1 ability items.
Dreadstump the Pirate King

- Flunky Boss: Constantly maintains a large swarm of pirate minions around him.
- King of Thieves: His title is the Pirate King, and he's the boss of a pirate-filled dungeon.
- Pirate: Dreadstump the Pirate King is the leader of the pirates in the Pirate Cave.
- Talk Like a Pirate: As expected of the Pirate King:Ye trifle with the strongest fleet on the high seas!
- Warm-Up Boss: Appropriately easy enough for the boss of the first dungeon which drops from low-level monsters.
- Big Creepy-Crawlies: Mini Megamoths, despite the 'mini' in their name, are still almost as large as players.
- Killer Rabbit: The most dangerous enemies in the Forest Maze are Ultimate Squirrels, which look just like bigger squirrels and throw acorns at you.
- Mook Medic: Mini Megamoths heal other enemies and are most likely the first enemy that can do so that new players will encounter.
- Our Goblins Are Different: Forest Goblins appear as the common enemies in the Forest Maze.
Mama Megamoth

- Big Creepy-Crawlies: This moth is at least four times as big as players.
- Flunky Boss: Is constantly surrounded by a squad of Mini Megamoths.
- King Mook: To Mini Megamoths, which look exactly the same except for size.
- Moth Menace: This moth serves as the boss of the Forest Maze. However, she doesn't pose much threat as her dungeon is one of the lowest-levelled ones in the game.
- Warm-Up Boss: The Mama Megamoth's difficulty is appropriate for the second-easiest dungeon in the game.
- Giant Spider: No real life spider comes close to the size of the enemies in this dungeon.
- Smashed Eggs Hatching: Stepping on an egg, either with yourself or with a Trickster's decoy, will cause spiders to hatch.
- Spider Swarm: In this dungeon, you'll be swarmed by spiders, especially if you happen to step on a spider egg.
Arachna the Spider Queen

- Cobweb Jungle: Arachna's room is filled with a large web that slows anyone stepping over it.
- Giant Spider: Quite obviously; even her babies are big compared to real life spiders.
- King Mook: Arachna is the boss version of her spider minions, bearing the most resemblance to the Green Spider Hatchlings.
- Mother of a Thousand Young: Arachna is the mother of all the spiders found in her dungeon.
- Was Once a Man: Arachna was once a beautiful maiden before Oryx transformed her into a giant spider in order to hide the fact that he's a terrible weaver.
- Basilisk and Cockatrice: Basilisks appear as fairly unremarkable enemies in the Forbidden Jungle.
- Combat Medic: Jungle Fires can heal Mask Hunters, Warriors and Shamans at a very fast rate.
- Jungle Japes: The dungeon is a tropical jungle where you face off against barbarians and totem poles.
- Malevolent Masked Men: One of the main groups of enemies in the Forbidden Jungle is masked tribesmen.
Mixcoatl the Masked God

- Cephalothorax: Mixcoatl doesn't have a torso; his legs and arms are directly attached to his face.
- Flunky Boss: He has 4 invincible totems around him that fire shots and spawn Totem Spirits.
- Malevolent Masked Man: Well, his entire body is basically a mask.
- Playing with Fire: He can launch streams of fireballs.
- Bee Afraid: The bees spawn in large quantities, deal high damage, and have erratic movements, making them rather dangerous and difficult to kill.
- Mook Maker: Mini Hives do not attack directly and can summon Small Bees.
- Smashed Eggs Hatching: Breaking a Maggot Egg will cause a bunch of Maggots to hatch from it.
- Turns Red: Upon death the Fat Bee has a chance to turn into an Angry Fat Bee.
- Zerg Rush: The bees spawn in huge numbers.
Queen Bee

- Big Creepy-Crawlies: A giant bee.
- Flunky Boss: Constantly spawns Maggot Eggs which hatch into Maggots when damaged, which then grow into Fat Bees.
- Insect Queen: She even has a crown and a scepter.
- Wake-Up Call Boss: Significantly harder than most bosses you would find in Midlands dungeons, dealing heavier damage, several status effects, and summoning problematic minions en masse.
- Elite Mook: Greater Pit Snakes and Pit Vipers are significantly harder than the other snakes and the main obstacle standing between newer players and the boss.
- Snakes Are Sinister: The Snake Pit is entirely populated by snakes hellbent on killing you.
Stheno the Snake Queen

- Dual Wielding: Wields two knives.
- Flunky Boss: Maintains several Stheno Pets that circle her and fire slowing beams. She can also summon armies of smaller snakes.
- King Mook: Stheno is a reskin of the Medusae commonly found in the Godlands, although their attacks don't have much in common.
- Purple Is Powerful: This boss' colour is purple, instead of the normal Medusa's green. She's also considerably more powerful than the aformentioned Medusa.
- Snake People: Like Medusae, Stheno has the upper body of a woman and the lower body of a snake.
- Wake-Up Call Boss: Chances are she will be one of the first bosses to actually give you trouble, due to her significantly higher damage output and liberal use of area attacks.
Snakepit Guard

- Mini-Boss: Can be randomly found in treasure rooms within the Snake Pit.
- Schmuck Bait: The room it's found in is initially empty except for a few small weak snakes and a square button at the top of the room. Pressing the button causes the Snakepit Guard to spawn behind you, and causes the walls to fire damaging arrows that inflict bleeding.
- Snakes Are Sinister: A large red cobra.
- Action Bomb: The Rayr chases players until it gets close, then flashes briefly before self-destructing, releasing 8 armor piercing waves.
- Our Fairies Are Different: Enemies in the Magic Woods are fairies transformed from the life essence of a legendary guild active in the distant past.
Fountain Spirit

- Flunky Boss: Summons lesser fairies to aid her in combat.
- Kaizo Trap: If killed while she's shooting out boomerang shots, they still come back to her location. Since the whole spread re-converges onto the same spot where her loot drops, it's entirely possible to get killed while grabbing her loot if you aren't paying attention.
- Making a Splash: As expected, she fires water to attack.
- Merger of Souls: The Fountain Spirit is the amalgamation of all the spirits that created the Magic Woods.
- Sealed Evil in a Can: Implied, as she asks you to break the watery barrier surrounding her for a "reward", then attacks you. Subverted in the sense that she isn't exactly evil, but suffers from a case of Blue-and-Orange Morality due to her nature as an amalgamation of souls and is thus still hostile.
- Elite Mooks: Native Sprite Gods in this dungeon are nearly identical to their Godlands counterpart except that they don't spawn Sprite Children (so you can't open a portal to the Sprite World in a Sprite World).
Limon the Sprite Goddess
- All Your Powers Combined: She can use the elements of every single Sprite in the Sprite World, changing up her arena layout depending on which attack she's currently using.
- Energy Being: Goes with the territory for Sprites.
- Flunky Boss: Can summon groups of sprites to attack you. Since the sprites barely do any damage, the worst they can do is slow you.
- King Mook: This boss is a stronger Palette Swap of normal Sprite Gods.
- Lightning Bruiser: Moves impossibly fast and boasts some impressive firepower for the boss of an easy dungeon.
- Palette Swap: She's essentially a reddish-orange Sprite God.
- Purple Is Powerful: Inverted: the red Limon is much more powerful than the purple Sprite Gods.
- Power Floats: Like other Sprite Gods, she floats a small distance over the ground.
- Willfully Weak: According to The Realm Eye: "Even Oryx begrudgingly complies with Limon’s requests to not excessively harm nature, for he knows that her full power being unleashed would be cataclysmic."
- Worf Had the Flu: She's one of the most ancient beings in the Realm with full domain over nature, and her full strength is enough to overpower even Oryx. However, most of her power is spent maintaining the stability of her home dimension after the Elemental War, which results in the weak early-game boss you fight in-game.
- Blob Monster: A family of monsters in the Candyland Hunting Grounds are made from whipped cream.
- Piñata Enemy: Gumball Machines don't attack you and drop some nice loot, especially the UT Candy Ring.
- Unicorn: Unicorns appear as enemies in this dungeon. The bigger Gigacorns serve as bosses.
Gigacorn

- Armor-Piercing Attack: All of its shots bypass defence, much to the chagrin of classes like Knights that rely on their heavy armor.
- Bullfight Boss: Gigacorn charges at the closest player while shooting bullets. After a short pause it charges again.
- Horn Attack: One of its attacks is to use its horn to launch a stream of rainbow bullets.
- King Mook: These bosses are bigger Unicorns with more elaborate manes.
- Unicorn: The boss version of normal Unicorns.
Desire Troll

- Interface Screw: Many of its bullets inflict Hallucinating, which scrambles all sprites on the screen, and Hexed, which temporarily turns your sprite into that of a pet.
- King Mook: The boss version of normal Wishing Trolls.
Swoll Fairy

- Confusion Fu: Practically all of its shots inflict Confusion.
- Flunky Boss: Spawns Fairies in battle.
- King Mook: The bigger and even beefier boss version of Beefy Fairies.
- Winged Humanoid: Like regular Fairies and Beefy Fairies, Swoll Fairies have a pair of bird wings on their back.
MegaRototo

- Breath Weapon: Can breathe fire for one of its attacks. Of course, it's just a stream of fire bullets, but still.
- Flunky Boss: Spawns smaller Rototos.
- King Mook: MegaRototos are the boss version of Rototos.
- Stationary Boss: These bosses cannot move.
Spoiled Creampuff

- Blob Monster: A creature made of creampuff.
- Flunky Boss: Spawns a number of Small and Big Creampuffs.
- Glass Cannon: The Spoiled Creampuff can dish out a good amount of damage, but has the least health of all of its cohorts, so is usually not a particular threat. However, it has been known to one-shot squishier players.
- King Mook: The bigger and angrier boss version of Big and Small Creampuffs.
Cupcake

- Anthropomorphic Food: Yes, this boss is a cupcake capable of shooting bullets and killing you.
- Interface Screw: All of the Cupcake's attacks inflict Hallucinating.
- Mook Medic: Terracotta Paladins heal nearby Terracotta Warriors and Terracotta Knights for 75 HP roughly every second. Ancient Monoliths heal all enemies in a large range by roughly 200 HP per second.
- No Self-Buffs: Ancient Monoliths can heal other enemies but not themselves or other Ancient Monoliths.
- Poisonous Person: Desert Scorpions fire purple poison bullets that cause Bleeding.
Sandstone Titan

- Anti-Frustration Features: If you fail to do enough damage to kill any of its Ancient Spirits in one phase, it'll go Exposed for the entirety of the next phase to give you an advantage.
- Clipped-Wing Angel: As you destroy the spirits powering it, the Titan will start doing less damage and attacking less aggressively. By the time it's on its last legs, it's barely able to put up a decent fight.
- Dishing Out Dirt: Uses earth-themed attacks, and can turn the ground into quicksand.
- Golem: A titanic terracotta golem that houses countless spirits.
- Recursive Ammo: Throws boulders that explode into rings of shots and spawn in spikes that turn solid ground into quicksand.
- Shielded Core Boss: At HP thresholds, it will summon spirits to defend it. Destroying these spirits is required to weaken the Titan and progress the fight.
Genie

- Benevolent Genie: While it does fight you, the Genie expresses gratitude at its release and merely wishes to test if the players are worthy of its reward. Once you defeat it in combat, it eagerly gives out its treasure.
- Invincible Minor Minion: The Magic Lamp in the center of the room fires bombs during the entire battle. It's also what must be destroyed for loot, but it's only vulnerable after the Genie is defeated.
- Mugging the Monster: Albeit a benevolent example. Particularly powerful heroes may complete the Genie's test of strength a little too well, accidentally (or intentionally) killing them before they can call off the fight. You'll get the reward either way at least.
- Chest Monster: From far away, a Treasure Mimic seems like just another treasure chest. When a player gets close to it, the Mimic grows arms and legs and slowly chases players while firing bullets.
- Combat Medic: The Treasure Plunderer attacks players and heals nearby Treasure Robbers that are in their invisible phase.
- Hulking Out: The Treasure Rat, at first, looks like a normal small rat. Attack it, and it will grow into a massive, muscular humanoid with devastating attacks.
- Rare Random Drop: All enemies in this dungeon have a chance to drop stat potions.
- Stealthy Mook: Treasure Robbers can temporarily turn invisible, during which they can be healed by Treasure Plunderers.
Golden Oryx Effigy

- Boss-Arena Idiocy: The edges of his arena are lined with pots that can be broken for restoratives. To make things worse for him, these areas are outside the reach of his attacks.
- Flunky Boss: Summons Treasure Oryx defenders that fire at attackers while maintaining his invulnerability.
- Grenade Spam: Lobs a hail of grenades in his second form.
- Invincible Minor Minion: The Gold Planets that permanently revolve around him.
- Living Statue: A gold statue of Oryx that can walk around and kill you.
- Paper Tiger: The weakest of the bosses touched by the Void, but is still displayed by the Void Entity as a show of force among actual heavy hitters like the Forgotten King and queen, the Killer Bee Queen, and the Marble Colossus.
- Shielded Core Boss: Can't be harmed until his defenders are destroyed.
- Black Cloak: Reapers, Vampires and Vampire Kings can be distinguished by their black cloaks.
- Blob Monster: The main non-undead residents of this dungeon are slimes, and particularly annoying ones as well.
- Dem Bones: Skeletons are fairly common enemies in the Undead Lair.
- The Grim Reaper: Reapers look the part, being hooded and cloaked skeletons wielding scythes, but are actually one of the less dangerous enemies in the Undead Lair.
- Monster Lord: Skeleton Kings, Mummy Kings, Pharaohs and Vampire Kings look the part, complete with crowns.
- Mummy: Mummies are just another type of undead in this dungeon.
- Night of the Living Mooks: The majority of enemies in this dungeon are undead.
- Our Ghosts Are Different: Ghosts in this dungeon come in a few flavours (generic spectres, rogues, archers, warriors, paladins, knights, mages and bats).
- Sinister Scythe: Reapers wield scythes to fit with their theme.
Septavius the Ghost God

- Armor-Piercing Attack: One of his phases has him fire spirals of bullets that bypass armor.
- Flunky Boss: Summons hordes of ghosts to rush you while he sits back and bombards you with shots.
- King Mook: A boss based on the normal Ghost Gods.
- Multi-Ranged Master: A proficient user of both magic and archery. Fittingly, he uses both a staff and a bow in his fight.
- Palette Swap: Appearance-wise, the only difference between non-heroic Septavius and other Ghost Gods are his red eyes. Subverted with his Reconstruction, which gave him a completely different sprite.
Spectral Skeleton

- Dem Bones: The Spectral Skeleton has an extremely rare form of double undead status, being both a skeleton and a ghost simultaneously.
- Mini-Boss: Can be randomly found in treasure rooms within the Undead Lair.
- Our Ghosts Are Different: The Spectral Skeleton has an extremely rare form of double undead status, being both a skeleton and a ghost simultaneously.
- Riddle for the Ages: The Spectral Skeleton's double undead nature seems to defy all current understanding of undead creatures and the very concept of the afterlife, and has left even the greatest scholars of the Cursed Library scratching their heads.
- Stationary Boss: He does not move.
- Turns Red: When on half health, it will briefly turn invulnerable before continuing its attack pattern with greater frequency.
- Animated Armor: The Armor Guards are haunted suits of armor that throw bombs.
- Bat Out of Hell: Beware of the Vampire Bats: they are plenty in number, fast, and accurate.
- Chest Monster: A Coffin, when destroyed, might drop a few valuable UT items... or become a Coffin Creature that drops no loot at all.
- Hellhound: The Hellhounds in this dungeon are unnatural, dangerous and definitely evil.
- Our Vampires Are Different: Enemies include Bald Vampires and Nosferatus.
- Piñata Enemy: The harmless Coffins that spawn a Nosferatu when destroyed can drop everything that Lord Ruthven can drop (except Attack Potions).
- Zerg Rush: Vampire Bats come in huge numbers to swarm you.
Lord Ruthven

- Bat Out of Hell: Can transform into a swarm of bats and then Zerg Rush you to death.
- Gameplay and Story Integration: Died from a lag spike? Blame this guy.
- Greater-Scope Villain: His dark magic is the reason that the curse of perma-death even exists to begin with. However, Ruthven is still loyal to Oryx above all else.
- Life Drain: For every attack that hits, Ruthven heals himself for the damage he deals.
- One to Million to One: After taking enough damage in each phase, Ruthven will spawn 4 Coffin Creatures and transform into an endlessly-respawning horde of Vampire Bat Swarmers. After all Coffin Creatures are dead, he will transform back.
- Our Vampires Are Different: Aside from looking the part and residing in a Gothic horror-themed dungeon full of vampire monsters, Ruthven can transform into bats and steal life from players.
- Shielded Core Boss: Periodically summons Coffin Creatures that need to be destroyed before he can be hurt again.
- Damage-Increasing Debuff: One of the Samurai Puppet's attacks inflicts Exposed (which reduces DEF by 20), like the Samurai's wakizashi.
- Evil Counterpart: The puppets in the theatre are based on player classes, with abilities closely resembling them.
- Heal Thyself: Priest Puppets can constantly heal themselves (but not their allies). Paladin Puppets can also regenerate health at a rapid pace if damaged.
- The Paralyzer: Archer Puppets can sometimes fire an arrow that paralyse the victim.
- Perverse Puppet: All enemies in this dungeon are puppets that can kill you.
- Shield Bash: Knight Puppets can use a shield bash-like bullet that reduces your DEF to 0.
- Stealthy Mook: Every so often, Rogue Puppets will turn invisible and move around erratically while firing shots.
- Super Mode: The Warrior Puppet alternates between these 2 phases. Starting in normal phase, after enough time, it will enter berserk phase, gaining the Armored status and massively increased attack speed. This lasts only for a couple of seconds.
- Throw Down the Bomblet: Assassin Puppets can throw poison grenades like normal Assassins can.
The Puppet Master

- Asteroids Monster: The clones spawned by the Puppet Master in his 3rd phase will explode and spawn a few Rogue Puppets and Assassin Puppets when destroyed.
- Doppelgänger Spin: Creates several clones of himself in his second phase. They explode if killed.
- Evil Puppeteer: This former travelling act is an employee of Oryx the Mad God.
- Flunky Boss: Spawns groups of puppets to heal him and attack players. The Knight Puppet is especially dangerous due to its high health and ability to Armor Break players.
- Kaizo Trap: When he dies, he explodes into bullets that have the potential to paralyze targets, leaving them open for attack by the other puppets who are still alive.
- Marathon Boss: He was infamously this this before an update nerfed the HP of all enemies in the Theatre. He had 110000 HP (considerably more than most bosses), was armored for most his fight (resulting in 60 DEF), and had a frustrating Doppelgänger Spin phase which took a very long time to complete, not to mention the fact that he turned invincible every 5 seconds or so. As for his rage phase, the spam of the once-durable puppets (especially the Knight ones) and the armor-piercing bullet hell he fired made it very hard to approach him and kill him. Not so much nowadays, due to his squishier minions, significantly lower HP even with scaling, and the fact that his clone phase tends to end quickly when players nuke all of the fakes at once and then eviscerate the ensuing minion horde with Splash Damage Abuse before finishing off the vulnerable boss.
- Marionette Master: The Puppet Master commands the army of puppets in his theatre.
- Self-Duplication: In his third phase, the Puppet Master will send out a multitude of clones. The real Puppet Master can be distinguished by his Armored status, and if the real one takes enough damage, the clones will disappear.
Oryx Puppet

- Barrier Warrior: Can summon scaled-down versions of Oryx's artifacts that give it temporary armor while firing weakening shots.
- Degraded Boss: Its attacks are overall weaker imitations of Oryx's own attacks.
- Flunky Boss: Summons a load of Minion Puppets that will keep you suppressed with slowing attacks.
- Grenade Spam: Tosses an astronomical number of bombs during one of its phases.
- If You're So Evil, Eat This Kitten!: Created to prove the Puppet Master's worth to Oryx, slaughtering an army of puppet adventurers in its debut to please him.
- Mini-Boss: Up to five Oryx Puppets can be randomly found in treasure rooms within the Puppet Master's Theatre.
- Perverse Puppet: An evil puppet modelled after Oryx who uses powerful magic.
- This Cannot Be!: Says this upon death, humorously imitating a certain Mad God it's based off of.
- Blob Monster: Brown Slimes and Slime Gods.
- Elite Mooks: Slime Gods in the Toxic Sewers are basically the same thing as the normal Slime Gods in the Godlands, with an increased drop rate of defense potions. Usually there'll be only one per run; they are not that common. The boss room also has three of them.
- Metal Slime: Golden Rats are pretty uncommon, do not fight back but try to run away from you, despawn if not killed quickly enough, and have fairly good drops (Potions of Defense and the UT Murky Toxin).
- Our Goblins Are Different: Goblins are the most common enemies in the Toxic Sewers - these are much more dangerous than the Goblins normally found in the realm.
- Sewer Gator: The Toxic Sewers is the natural environment of alligators.
- You Dirty Rat!: Beware of the rats in this dungeon - they can deal surprisingly high damage.
Gulpord the Slime God

- Asteroids Monster: Splits into halves when damaged enough, and splits into quarters after that. He then reforms for a final attack.
- Flunky Boss: Has several Natural Slime Gods in his room that will open fire on players that enter.
- King Mook: To the regular Slime Gods. They're stated to have formerly looked the same as him, but turned brown after picking up dirt from shambling around the surface.
- Muck Monster: Gulpord and his minions composed entirely of what appears to be toxic sewer sludge, and he uses blasts of sludge to attack.
- Turns Red: When his smaller versions are taken out, he reforms in the center of the room, flashes red, and chases down players while bombarding them with an endless stream of shots.
Master Rat

- Katanas Are Just Better: Wields the Void Blade, a super-heavy katana forged from dark matter. You can get yourself the weapon if you get lucky upon beating him or Gulpord.
- Riddle Me This: He used to give rewards in exchange for players answering one of four riddles. Since that ended up very unpopular, he was later reworked to be an actual boss in the Reconstruction of the Toxic Sewers.
- Shout-Out: The Master Rat is a reference to Teenage Mutant Ninja Turtles; being a rat similar to Splinter, living in the sewers, dropping ninja equipment and formerly spawning turtles.
- Asteroids Monster: When destroyed, a Deholder, Lips of the Lost or Hand of the Helpless will release a swarm of Vile Maggots, which can accumulate damage surprisingly quickly if not killed.
- Eye Scream: A Deholder is a Beholder that somehow had his lone eye gouged out, as if becoming a grotesque Beholder wasn't bad enough.
- Palette Swap: The Enlightened Beholder, unlike other Realm Gods found within the dungeon they drop, have a slightly different colour scheme from standard Beholders in the Realm.
- Rock–Paper–Scissors: Hands of the Helpless are huge hands that change between Rock, Paper, and Scissor forms. Each form attacks differently.
Avalon the Archivist

- Evil Librarians: The curator of the Cursed Library, Avalon was driven insane watching his life's work be overrun and ruined by Lord Ruthven's curse. He is now a crazed paranoiac trying in vain to protect his collection.
- The Faceless: His face couldn't be seen underneath Avalon's hood.
- Flunky Boss: Avalon summons Soulless Students, Soulless Scholars and Soulless Scribes in his final phase.
- "Get Back Here!" Boss: He spends much of his time running through the network of hallways in his boss arena, forcing players to chase him.
- Recursive Ammo: The Book Bombs thrown by Avalon lay still for about half a second before exploding into four waves.
Corruption Phantom

- Flunky Boss: Primarily relies on its 4 waves of minions, before engaging players directly once they're dead.
- Asteroids Monster: Enforcer Bots spawn three Mini Bots when destroyed.
- Combat Medic: Escaped Experiments can both throw bullets and heal Crusher Abominations.
- Elite Mook: Crusher Abominations and Enforcer Bots serve as the primary threat due to their power.
- Mecha-Mooks: Three kinds of robots (Enforcer Bots, Mini Bots and Rampage Cyborgs) are among the most common enemies in this dungeon.
- Mook Medic: Escaped Experiments constantly heal all nearby Crusher Abominations.
- Schizo Tech: The mad science found in the Mad Lab is far beyond the technological capacity of the rest of the Realm.
- Suicide Attack: After taking a certain amount of damage, a Rampage Cyborg enters self-destruct mode where it flashes for a little while and then explodes in a circle of bullets. If destroyed before the self-destruct sequence ends, it will not explode.
- Turns Red: As a Crusher Abomination spends more time in combat, it grows larger, its bullets get faster and deal more damage.
Dr. Terrible

- Combat Pragmatist: His arena boasts invincible gas emitters that limit your movement, a conveniently placed invincible bubble he can jump into for safety, and cages full of monsters he can sic on you. In direct combat, he subverts his inability to attack normally with an arsenal of explosive potions and automated turrets to throw out.
- Cowardly Boss: When he is low health, he ducks inside of his invincible bubble and summons a group of monsters to deal with you.
- Flunky Boss: In his retreat phase, Dr. Terrible summons Escaped Experiments, Mini Bots and Rampage Cyborgs from the cages on the east and west sides of the room.
- Mad Scientist
- Names to Run Away from Really Fast: You wouldn't want to be near someone named Dr Terrible.
- Throw Down the Bomblet: He can throw Green Potions that will explode if not destroyed in time.
- The Turret Master: In his attack phase, Dr. Terrible creates turrets that shoot at you.
Horrific Creation

- Humanoid Abomination: The thing is massive and disfigured beyond belief.
- King Mook: The biggest and strongest of Dr. Terrible's Crusher Abominations and Escaped Experiments.
- Lightning Bruiser: Incredibly fast for something that size. Is also completely invulnerable and hits like a truck.
- Tactical Suicide Boss: The Horrific Creation is most of the time invulnerable. The only way to kill it is to have someone lure it into a pool of green goo, which will temporarily remove its invulnerability, then wail on it.
- Big Red Devil: All non-boss enemies here are red demons, except the White Demons accompanying Malphas.
- Elite Mooks: Archdemon Malphas' room is home to a few White Demons, exactly the kind you usually find in the Godlands. Clear them first before engaging in battle with Malphas.
- Unskilled, but Strong: None of the minions inflict any status effects, but fire very quickly and do a lot of damage.
Archdemon Malphas

- Action Bomb: Can summon Malphas Missiles that fly at players before exploding.
- Boss Dissonance: While he isn't very easy, the minions in his dungeon are far more dangerous than he is.
- Fallen Angel: An angel cast down to the lava fissures of the Realm for his impure deeds.
- Flunky Boss: Can summon Malphas Hounds and Malphas Protectors, small demons that assist him. His (huge) room is also home to six White Demons, which players are recommended to kill first before engaging in battle against Malphas.
- Sizeshifter: Grows increasingly large over the course of his fight.
Abyss Idol

- Lava Pit: Can toss grenades that turn swaths of the floor into lava.
- Living Statue: A seemingly sentient idol made of gold.
- The Paralyzer: Uses paralyzing shots. A particularly nasty tactic he will do is paralyze you before throwing a lava bomb directly on you.
- Point of No Return: The entrance to his room seals up with lava once he activates.
- All Trolls Are Different: Forest Trolls and Troll Pathfinders in the first part are ugly, monstrous humanoid creatures.
- Combat Medic: While they are shooting at you from a distance, Risen Mages are also healing every other monster every second.
- Damage-Increasing Debuff: If you're a melee class, beware of Zombie Hulks - they can reduce your DEF.
- Enemy Summoner: Werewolves can spawn Werewolf Cubs to chase you and are no slouch themselves.
- Night of the Living Mooks: Most enemies in the Haunted Cemetery are undead of some kind.
- Our Ghosts Are Different: Apparitions and Haunted Spectres in the second part and Classic Ghosts in the fourth part are rather generic-looking ghosts.
- Our Werewolves Are Different: Werewolves are big, fast enemies that can spawn cubs.
- Throw Down the Bomblet: Troll Pathfinders in the first part can throw bombs at you.
- Undead Child: The Possessed Children resemble pale, sickly, undead children.
Troll Matriarch

- Flunky Boss: The Troll Matriarch summons Reanimated Remains minions during her second phase.
- Large and in Charge: The Matriarch is more than twice as big as her Forest Troll and Troll Pathfinder minions.
- Shielded Core Boss: In her second phase, she turns invulnerable while still firing shots and summons Reanimated Remains which must all be killed to remove her invulnerability.
- Trap Master: The Troll Matriarch can plant Deadly Mushrooms that will explode if not destroyed quickly.
- Was Once a Man: The Troll Matriarch was the mother of the then-living Ghost Bride, prior to her transformation after her daughter's death.
Ghost Bride

- Living Statue: Before fighting the Ghost Bride herself, players must defeat Fate and Glory, two statues in her room that she possesses and animates.
- Sequential Boss: Immediately after the fight starts, the Ghost Bride will possess the statue named Fate, which must be destroyed. Afterwards, she possesses the second statue Glory, and only after Glory is destroyed can she be fought in her true form and defeated.
Pumpkin King

- Berserk Button: Do not call him the Pumpking.
- Dem Bones: Seemingly a skeleton with a pumpkin head and a cape.
- Pumpkin Person: The Pumpkin King is seemingly humanoid with the head of a pumpkin.
- Shielded Core Boss: At the start of the battle, the Pumpkin King summons four Jack-o'-lanturns and cannot be harmed until all have been killed.
Grave Caretaker
- Action Bomb: The Grave Caretaker constantly spawns Forgotten Souls that seek to approach players and explode into a circle of bullets.
- Elite Zombie: This zombie serves as the fourth boss of the Haunted Cemetery.
Ghost of Skuld

- Combat Pragmatist: Sort of implied. First, she tries to trick you by tempting you with a great reward if you beat her hordes of monsters. Then, she claims the reward is "a swift death", suddenly attacks and opens the battle with an unavoidable wave of paralyze bullets, and then launches her most powerful attack at you while you're vulnerable.
- Final Boss: Of the Haunted Cemetery.
- Flunky Boss: While she's no slouch in direct combat, she does make a point of summoning waves of zombies to attack you as she fires her own shots.
- The Grim Reaper: Skuld is the master of the afterlife, ultimately deciding what is done with each passed soul.
- Invincible Minor Minion: The Flying Flame Skulls spawned by Skuld cannot be hit.
- Samus Is a Girl: And you wouldn't know just by looking at her.
- Teleport Spam: Does this for one of her phases.
- Turns Red: At low HP, Skuld will absorb all active Flame Skulls and turn into a larger Flying Flame Skull for the last part of her fight. Upon transforming, Skuld will start chasing players, firing green waves and confusing stars to her sides while firing aimed spreads of cross bullets. Every once in a while, she will stop chasing, circle in place, and fire a ring of Paralyzing bullets. At critical health, Skuld will increase the frequency and number of all her attacks, in addition to adding aimed giant crosses to her arsenal.
- Zombie Apocalypse: Implied to be able to raise corpses from the dead. She is responsible for the Zombie Horde event and can also summon zombies in her battle.
The Pumpkin Master
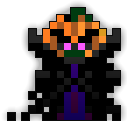
- Moveset Clone: He behaves exactly like the Encore version of the Puppet Master, but with a Halloween aesthetic.
- Pumpkin Person: The Pumpkin Master himself is humanoid with the head of a pumpkin. His pumpkin minions are less anthropomorphic.
- Skippable Boss: During Halloween events, the Pumpkin Master is guaranteed to appear after defeating Skuld as an optional bonus boss. When Halloween events are not active, before Skuld's betrayal line, there is a slim chance that she might briefly become vulnerable, allowing you to strike first. Doing so will cause the Pumpkin Master to appear after Skuld is defeated.
- Stationary Boss: Doesn't move.
Null

- Ambiguous Robots: Despite visually resembling a robot, the Realm Eye notes that Null isn't exactly an artificial construction. However, that's about all he knows about their nature, saying that their true origin is untraceable and that he consumes and produces a mysterious energy.
- Ascended Extra: While originally introduced as part of 2019's April Fools event, the Machine's positive reception caused it to be permanently added in the game on Easter as a rare drop from Steel Constructs.
- Breaking the Fourth Wall: Null's dungeon, called the Machine, is described as a mysterious, otherworldly dimension, which creates and sustains the metaphysical laws that the realm and its inhabitants, even the most powerful ones, abide by. Null's minions are collectively called the Servers, whose individual members are named after the game's actual servers, and its attacks include creating firewalls and literally forcing you to disconnect.
- Cosmetic Award:
- While a number of his April Fools weapons actually have niche uses, Null's loot table also includes the Golden Archer vanity set, which is worthless even if you use it on a brand new character, let alone one that would actually be able to defeat Null himself. However, equipping it does give your Archer a unique appearance and a significant fame bonus on death.
- Null is associated with an Alternate Reality Game that unlocks a bonus dungeon called the Inner Workings, which the Realm Eye believes controls droprates and could have disastrous consequences if interfered with. By using the Hivemaster Helm to summon bees just as Null is dying, a reboot sequence will be triggered. Authorizing it with the command "PPEBTWXD" (in reference to the meme of the same name) will open up a portal to this dungeon. Once unlocked, it turns out that the Inner Workings are actually just a massive (but functional) primitive calculator, and interacting with the place has absolutely zero benefit or consequence.
- Flunky Boss: Various Servers line the edge of the arena, and will be activated by Null as it progresses through phases.
- Good Bad Bugs: One of his attacks literally exploits a well-known game bug, destroying tiles beneath players after a telegraph to instantly disconnect them from the server.
- Lethal Joke Character: Despite being added as an April Fools boss, he's extremely dangerous. Despite his dungeon being a drop from a common Godlands enemy (albeit an extremely rare one), his fight's difficulty is comparable to a Court of Oryx boss.
- Reality Warper: He's a being as old as time itself who holds domain over the Machine, which is a dimension responsible for maintaining the fabric of reality, giving him this implied ability. While players can still defeat him, he is not killed but rather chooses to leave and repair the damage caused by the realmers.
- Shielded Core Boss: On even-numbered phases, Null will activate a group of Server minions and turn invulnerable until all activated Servers are destroyed.
- Time Abyss: Null has existed ever since the dawn of the universe, and predates even the Void Entity.
- Giant Spider: Spiders here are even bigger than the ones in the Spider Den, which is saying something.
- Piñata Enemy: In place of a boss, the Crawling Depths' treasure room contains destructible eggs, all serving as mini-chests with a small chance of dropping loot (or a minor enemy on rare occasion).
- Smashed Eggs Hatching: Stepping or destroying a spider egg will cause spiders to hatch from it.
- Spiders Are Scary: Even moreso than in Spider Den: the Crawling Depths is an epic dungeon, meaning that the spiders can make short work of careless maxed characters.
Son of Arachna

- Even Bad Men Love Their Mamas: Even though his mother Arachna kicked him out, he still cares about her and wants to find a way to undo her curse. That he's willing to confide this in the heroes of the Nexus once he senses such an opportunity demonstrates how deep his bond still goes. However, the Realm Eye explicitly states that he desires revenge on Arachna for exiling him, putting the accuracy of this statement in question.
- Giant Spider: Even bigger than the first Arachna.
- Mook Maker: Spawns large spider minions if his Blue Egg is alive.
- Puzzle Boss: The order in which you take out his eggs determines what powers he will and won't have, allowing players to get rid of his most troublesome abilities first depending on their preferences.
- Shielded Core Boss: He has four eggs that will give him buffs as well as different attack types. Every phase has him go invulnerable until one is destroyed, allowing you to choose the order in which you take out his powers.
- Status Effects: Has various attacks that can inflict a lot of these.
- Upgraded Boss: An upgraded version of Arachna the Spider Queen.
- Action Bomb: Lost Souls charge at nearby players and explode into bullets.
- Ghost Pirate: This dungeon is filled to the brim with undead pirates.
- Night of the Living Mooks: Even moreso than the other undead-themed dungeons, Davy Jones' Locker consists entirely of undead.
- Raising the Steaks: In addition to ghost pirates, this dungeon has ghost rats and ghost fish.
Davy Jones

- Damage Over Time: All of his shots inflict Bleeding, which drains HP quickly.
- Davy Jones: Davy Jones, the famous folkloric ghost pirate, is the boss of Davy Jones' Locker.
- Dressed to Plunder: He wears a tricorn hat and longcoat, and carries a cutlass.
- Eyepatch of Power: His left eye is seemingly covered in an eyepatch.
- Ghost Pirate: Or in this case, zombie pirate.
- Red Eyes, Take Warning
- Shielded Core Boss: He is invulnerable until all the Ghost Lanterns in his chamber are lit.
- Talk Like a Pirate: Some of his taunts are spelt as this:Avast, ye filthy mongrel!
- Turns Red: As he loses health, his shots get more numerous, making him more deadly.
- Armor-Piercing Attack: Mini Yetis' attack ignore DEF.
- Bigfoot, Sasquatch, and Yeti: Yetis are present in the Ice Cave.
- Elite Mooks: Big Yetis, Snow Bat Mamas, Lizicles and Iceions are big enemies that must be killed to open a portal to the boss room.
- Enemy Summoner: Big Yetis and Snow Bat Mamas can both attack and spawn smaller enemies.
- An Ice Person: Lizicles fire bullets that look like ice.
- Mighty Glacier: Lizicles move slowly and fire slow-moving bullets that hit very hard.
- Turns Red: An Iceion starts of relatively weak, but upon reaching 50% HP, it will temporarily go invulnerable, start chasing players and fire an aimed spread of blade-like projectiles that deal high damage.
Esben the Unwilling

- And I Must Scream: Has been trapped as a vessel by the Void Entity for countless eons, wishing for death all the while.
- Boss Room: Esben does not reside in the main part of the Ice Cave - you will need to kill all major enemies in the Ice Cave in order to open the portal to his Inner Sanctum.
- Demonic Possession: The actual Esben isn't a bad guy, it's just the spirit controlling his body is.
- Fighting from the Inside: Once the cursed graves are destroyed, Esben temporarily breaks free from his possession and begs for death.
- Flunky Boss: You have to destroy the cursed graves in the room and all of his minions to turn him vulnerable.
- I Cannot Self-Terminate: The real Esben begs for you to kill him as it is the only way to banish the spirit possessing him.
- An Ice Person: The boss of the Ice Cave, and uses various ice-based attacks.
- Kaizo Trap: When Esben first turns vulnerable, players may run in to get damage in...only to have him explode into waves of armor-piercing bullets.
- Kill Enemies to Open: The portal leading to Esben's Inner Sanctum is only opened when all big enemies in the Ice Cave have been killed.
- Mercy Kill: Killing Esben after eons of possession is this in spades.
- Rhymes on a Dime: You better believe it.Esben the Unwilling: "Bad puns I may use to cause offense, but the pain you will feel shall be immense!"
- Too Dumb to Live: The ice walls in the arena are there for the good of the players, but some will still break them, only to find out that Esben is unleashing quite the onslaught from the middle of the room.
- Action Bomb: Painlings quickly run at the nearest player and explode into a ring of poison fireballs.
- Blob Monster: Blood Slurps are amorphous monsters made of liquid blood.
- Body Horror: Being a Halloween/Horror-themed dungeon, these enemies embody it with a passion.
- Convenient Weakness Placement: Explosive barrels are scattered liberally throughout the dungeon. Players can move near them to throw them, inflicting significant damage and Armor Broken on any enemies they hit, as well as removing their invulnerability. They are necessary since the Elite Mooks and boss have absurdly high DEF and in some cases invulnerability.
- Degraded Boss: Blob Colonies are visually identical to, use the same attacks and summon similar minions as Scout Colonies (the Realm mini-bosses that drop portals to the Parasite Chambers). The only differences are their HP pool and DEF (Scout Colonies have an unremarkable 50 DEF, while Blob Colonies have 2000 DEF that must be broken by explosive barrels).
- Delayed Explosion: Pterasite Bombs, once dropped, lay still for about half a second before exploding into a ring of Poison Fireballs.
- Elite Mooks: In addition to summoning minions to swarm players, Blob Colonies, Pterasite Colonies and Swarm Colonies have absurdly high DEF (and in the case of Pterasite and Swarm Colonies, invulnerability) which necessitate the use of explosive barrels to deal armour-piercing damage, reduce the DEF and break the invulnerability so they can be killed at all.
- Enemy Summoner: Though all of them can directly fight, the main threat posed by the Elite Mooks in this dungeon are their ability to summon minions and stack up the damage on players.
- Evil Counterpart: The dungeon is home to sword-, staff-, dagger-, wand-, bow- and katana-wielding hosts, which look very similar to player characters but can't use any special abilities.
- Gone Horribly Wrong: The Realm Eye mentions that it has been speculated that the Chambers were formerly a Guild Hall before some catastrophic disaster took place.
- Heavily Armored Mook: The Colonies have 2000 DEF each. If you don't have a Knight with a Shield of Ogmur or an Assassin with a Crystallised Fang's Venom, you have two choices: wear them down with Scratch Damage, or hit them with explosive barrels to deplete their DEF.
- Hive Mind: All creatures in the Parasite Chambers are part of a hive mind controlled by the Nightmare Colony.
- Level Scaling: Most of the enemies have HP that scales with the amount of players in the dungeon. The Parasite Chamber was notably the first dungeon to introduce this.
- More Dakka: Furious Lashers can churn out a scary amount of damage via rapid-firing, spreading shots in a very short time.
- Mysterious Past: Not even the Realm Eye truly knows where the parasites came from.
- Piñata Enemy: The Infested Chests found in the treasure rooms, though guarded by a few Blood Slurps, are completely harmless by themselves and can drop everything the boss can. Wail on them and hope you get something good.
- Puppeteer Parasite: A number of the enemies are adventurers possessed by parasites.
Nightmare Colony

- Achilles' Heel: Armor Piercing weapons deprive it of its greatest asset (its monumental defense) and make it so that the barrels are only occasionally needed to dispel its invincibility, allowing players to focus more on dodging and exploiting safe spots in its patterns. If you bring one with good range like a Crystal Wand or Tezcacoatl's Tail, the fight goes from reasonably difficult to trivial.
- Attack Its Weak Point: The Colony has permanent invulnerability and 5000 DEF, which makes your weapons more or less harmless. In order to both drop the invulnerability and bypass its defenses, you must hit one of the explosive barrels in the room into it, which will not only deal enormous damage to it but drop its invulnerability and defense.
- Body Horror: From what it looks like, this boss is a monstrous fleshy abomination with tons of teeth and the ability to turn the floors and walls into gaping mouths. Thank god this thing is an 8-bit sprite.
- Boss-Arena Idiocy: If it weren't for the explosive barrels in its boss room, it would be unbeatable.
- Broken Armor Boss Battle: The Nightmare Colony has 5000 DEF and by default only take 15% damage from players' attacks. If no Armor Piercing weapons or sources of Armor Broken are available, players must hit it with the explosive barrels in its room, which will inflict significant damage and temporarily nullify its DEF.
- Bullet Hell: Has heavily patterned attacks that spew enormous amounts of bullets.
- Convenient Weakness Placement: The two explosive barrels in the boss room not only remove any invulnerability it has and break its armor, but are also one of the most reliable ways to inflict damage to the boss.
- Eldritch Abomination: Throughout the large amount of background lore present, there is no record on what this thing is or where it came from. All the Realm Eye knows is that it and the parasites showed up randomly one day, and that it's the root of the infection.
- Guide Dang It!: When the fight begins, a maw in the center of the room will begin spewing shots that inflict detrimental status effects. What most people don't know is that the maw actually fires slower depending on how many of the smaller Colonies in the dungeon you've killed. If you kill them all, you can go from being perma-weakened and pet stasised for the whole fight to being able to effortlessly avoid the status shots.
- More Teeth than the Osmond Family: The thing is essentially a giant toothy maw. It gets even worse when it opens tooth-filled mouths all along the walls and floor to fire more bullets from.
- Stationary Boss: Can't move.
- Animal Mecha: Guess what a Mecha Squirrel resembles.
- Mecha-Mooks: The Mecha Squirrels in the Woodland Labyrinth are rather aptly named.
- Our Goblins Are Different: Specifically, these are the stronger version of the Forest Goblins in the Forest Maze.
Murderous Megamoth

- The Berserker: Its final form, the Murderous Megamoth, is a lot more aggressive than its previous ones, frequently charging at targets while firing boomerangs everywhere.
- Flunky Boss: Summons lots of minions in its various forms. The Mini Larvae in its final form are especially dangerous due to their infamous shot-stacking.
- Moth Menace: The Murderous Megamoth is aptly named indeed and can easily kill 8/8 characters if you aren't careful.
- Sequential Boss: Has 3 forms: The Megamoth Larva, the Mammoth Megamoth, and finally the Murderous Megamoth.
- Turns Red: As it advances through its forms and therefore loses health, it gets more aggressive and its attacks more deadly.
- Upgraded Boss: An upgraded version of the Mama Megamoth.
Swarm Tree

- Asteroids Monster: The Swarm Tree spawns several Micro Megamoth Sentinels when killed, making it a bad idea to sit upon it.
- Flunky Boss: The Swarm Tree summons Micro Megamoth Sentinels and Mecha Squirrels.
- "Instant Death" Radius: The Swarm Tree has a very dangerous attack where it covers either the area near it, a medium distance away from it, or an area far away from it in green spinners which quickly turn into highly damaging pink spinners, which will almost immediately kill anybody standing on them who doesn't nexus right away.
- Obstructive Foreground: The Swarm Tree's room is at the end of a hallway, long enough to not see the room on the other side with the minimap and concealed by overhead canopies. Players need keen eyes to spot the gap in the wall and walk through to find this bonus room.
- Stationary Boss: Being a tree, the Swarm Tree has no means of locomotion.
- Throw Down the Bomblet: The Swarm Tree continuously lobs highly damaging green bombs around itself.
- Animated Armor: Corrupted Armors and Mini Corrupted Armors.
- Lightning Bruiser: Corrupted Casters, who move fast as hell and employ devastating radial attacks.
- Mook Maker: Corrupted Armors spawn smaller versions of themselves at a rapid pace.
- Piñata Enemy: Lighting all torches inside the Mountain Temple will cause the hidden treasure room containing an Old Chest to open. This chest is unguarded, harmless and has the same loot table as Daichi (with the UT and ST items replaced by two other ST items).
- Support Party Member: Corrupted Monks do little damage but inflict a large number of status effects.
- The Paralyzer: Corrupted Archers can lock targets in place with their large black arrows.
Daichi the Fallen

- Action Bomb: Can summon Soulblasts, ghastly skull apparitions that launch themselves at players to do massive damage.
- Bullet Hell: The number of projectiles he can fire is staggering. It gets worse as he loses health.
- The Dragon: To his master, the Demon Lord Xil. Too bad his master is such a Bad Boss...
- Elemental Powers: He can harness the Elements to fire elemental shots that have different effects. He can also call upon Elementals to fire shots for him, and at one point in his battle he absorbs several Elementals to bolster his powers.
- Shout-Out: Formerly, if he was left alone for a while, he would sometimes say "You are no match for my powers! Execute Order 66! In addition, one of his lines during his rage phase is "Unlimited power!"
- Taken for Granite: One of his attacks is to fire a shockwave that Petrifies all players, essentially putting them into Stasis for a short time. Fortunately, he doesn't do anything while they're Petrified.
- Turns Red: His final phase, where he combines all his previous attacks to create a Bullet Hell to surpass all his others.
- You Have Failed Me: On the receiving end of this courtesy of his master Xil. When Daichi is defeated and calls upon Xil to destroy his killers, the Demon Lord simply tells him that he's not here to save him before grabbing his soul and dragging him away.Xil: "Daichi, you failed me. I'm not here to save you. I'm here to call in your debt."
- Aquatic Mook: Every enemy, as the entire dungeon is underwater.
- Blob Monster: Sea Slurps are like slimes, but underwater.
- Elite Mooks: Sea Mares and Fishmen Warriors have high HP, can inflict dangerous status effects, and can also summon minions to tank your shots and pepper you with bullets.
- Enemy Summoner: Sea Mares and Fishmen Warriors, both dangerous enemies by themselves, can also spawn minions of their own.
- Fish People: The rather unimaginatively-named Fishmen and Fishmen Warriors.
- Giant Squid: Giant Squid appear as an enemy capable of creating ink bubbles. Deep Sea Beasts also resemble squid.
- Mook Maker: Sea Slurp Homes only spawn Sea Slurps and do not attack.
- The Paralyzer: Sea Mares' shot can paralyse you; this is especially dangerous when you still need oxygen when paralysed.
Thessal the Mermaid Goddess

- Boss Arena Recovery: Downplayed. She has several conveniently placed air vents in her arena that allow players to recover air for their Oxygen Meter. However, she keeps all of them guarded by Deep Sea Beasts with Slowing attacks.
- Cluster Bomb: Her Coral Bombs explode into shrapnel and more Coral Bombs.
- Enemy Mine: She doesn't like Oryx, but teamed up with him to stop boats from sailing the seas and killing her kind.
- Kaizo Trap: Sometimes upon death she will ask you "Is King Alexander still alive?" If you don't answer with the right quote He lives and reigns and conquers the world, she will get back up and launch a final barrage of attacks at lightning speed.
- Piñata Enemy: The three Coral Gifts that are spawned when Thessal dies, asks "Is King Alexander still alive?" and receives a correct answer. They can drop the same items that Thessal can, in addition to the very rare Coral Juices (which are so rare that no one actually drinks it commonly). Pour all your firepower upon them.
- Prongs of Poseidon: Thessal the Mermaid Goddess wields a golden trident and is seen using it in some of her attacks.
- Recursive Ammo: Summons Coral Bombs, which cluster and explode into Pet Stasising pink shards.
- Took a Level in Badass: A series of balance changes in April 2017 gave her a massive number of buffs that turned her from a pushover that would get rolled over in a split second into a terror that can actually kill maxed players. She only got stronger with the advent of HP scaling.
- Turns Red: Her attacks gain speed as she loses HP, and she can pull out some new ones too.
- Underwater Boss Battle: A given seeing how Thessal is the boss of the Ocean Trench, an underwater dungeon.
- Kill One, Others Get Stronger: When one dragon is killed, the surviving ones will grow stronger by absorbing part of its power. The first adds environmental hazards to the others' arenas corresponding to its element; the second allows the others to use some of its attacks; the third empowers the final one's minions with its element. In return, the later a dragon is fought, the higher drop rates will raise to match the difficulty.
- Our Dragons Are Different: The four dragons of the Lair of Draconis are stone statues created by Malphas and brought to life by Oryx through fusion with elemental sprites. The Ivory Wyvern is the result of Oryx's attempt to create a fifth elemental dragon to control non-elemental magic by fusing a Magic Sprite with a captured dragon, but since it was not born of stone like the other four, it went rogue.
Feargus the Obsidian Dragon

- Blow You Away: Despite being a darkness sprite, Feargus wields air to attack, and can summon choking miasma.
- Doppelgänger Attack: Can summon clones of himself to attack you.
- Flunky Boss: Summons the aforementioned clones and is backed by Obsidian Soul Shards.
- Hard Mode Perks: In the original version of the Lair of Draconis, fighting Feargus first made him and the other dragons stronger, but is needed to unlock the final Ivory Wyvern battle. This is no longer the case: killing any dragon will make all the surviving ones stronger, and there is no way to miss the Ivory Wyvern.
- Invisibility: Can cloak himself for a few seconds at a time while teleporting around.
- Power Nullifier: His signature debuff is Pet Stasis, which temporarily disables Pet abilities. The attacks the other dragons can inherit from him will also inflict this.
Limoz the Veridian Dragon
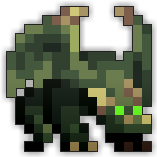
- Anti-Regeneration: His signature debuff is Sick, which nullifies incoming healing. The attacks the other dragons can inherit from him will also inflict this.
- Barrier Warrior: Can create a ring of Abundant Shields that circle him. These shields can fire bullets and block shots, and will arrange themselves in varying formations depending on his phase. They also double as ActionBombs
- Benevolent Boss: His dying words to his minions implies that he greatly cares about them.Flee my minions, I can no longer protect you as you have protected me...
- Early-Bird Cameo: Limoz made his debut in the game during the release of the Battle of the Nexus, a time-limited dungeon that predated the Lair of Draconis proper.
- Flunky Boss: Spawns lots of Veridian Hatchlings to help him.
- Green Thumb: Is a Leaf Dragon.
- Plague Master: It's in his name. However, this does not translate into his battle.
Nikao the Azure Dragon

- Bullfight Boss: Does a lot of chasing when he's on his last legs.
- Flunky Boss: Summons loads of Azure Soul Shards to attack you.
- An Ice Person: Implied. His signature debuff is Slowed, and the attacks the other dragons can inherit from him will also inflict this.
- Making a Splash: Nikao is a Water Dragon and fires water bullets.
Pyyr the Crimson Dragon
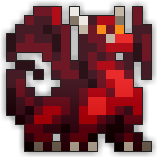
- Anti-Armor: His signature debuff is Armor Broken, which nullifies DEF. The attacks the other dragons can inherit from him will also inflict this.
- Bullfight Boss: Charges at you after you kill all his minions while spraying all manner of fireballs.
- Flunky Boss: Fills the room with lava and then spawns Crimson Soul Shards.
- Playing with Fire: Is a Fire Dragon.
Ivory Wyvern

- All Your Powers Combined: As the final boss of the Lair of Draconis, he will always inherit the powers of all four preceding dragons. How he inherits them depends on the order they were fought in.
- Apologetic Attacker: The Ivory Wyvern will express regret that he has to kill you, as he owes you for allowing him to consume the powers of the other four dragons.
- Doppleganger Spin: Can summon invincible Mirror Wyverns.
- Dragon Hoard: Behind the Wyvern, you can see a large pile of treasure that he apparently stole.
- Invincible Minor Minion: The Mirror Wyverns spawned by him cannot be killed, but will automatically disappear once he transitions phases.
- Soul Power: In addition to calling on the powers of the four dragons, he can summon their spirits to attack you. The dragons don't seem to mind much, though, as it gives them a chance to get revenge on their killers.
- Taken for Granite: Turns into a golden statue upon defeat, which explodes spectacularly when you finish him off.
- Your Soul Is Mine!: He consumed the souls of the four elemental dragons and gained their powers.
- Asteroids Monster: Bloated Mummies spawn a few Scarabs when killed.
- Beast Man: Eagle Sentries, Lion Archers, and the various jackal enemies resemble the animals you're thinking of, except that their body plan is humanoid.
- Combat Medic: Worshipping Priests and Priestesses heal and defend the Sarcophagi in the Tomb of the Ancients. Jackal Lords can constantly heal nearby jackals.
- Death-Activated Superpower: Upon death, a Worshipping Priest or Priestess turns invincible and flashes red for about two seconds before exploding into a circle of bullets.
- Elite Mooks: Sarcophagi. Only five can spawn per run, they're marked as quest bosses, protected by a group of priests and must be destroyed to awaken the bosses.
- Enemy Summoner: Jackal Lords can both summon the other types of jackals and chase people down.
- Monster Lord: Each pack of jackals is led by a Jackal Lord, who can heal and summon the other types of jackals.
- Piñata Enemy: Treasure Sarcophagi do not attack and can spawn some decent loot when destroyed. Smash that spacebar or whatever it takes for loot.
Bes, Nut, Geb

- Combat Medic: While Nut is the designated support, she can inflict massive damage and status effects on unwary players.
- Flunky Boss: All three can summon various types of artifacts to assist them in battle.
- The Old Gods: They are three of the oldest deities in the realm, but were forgotten by most worshippers and are angry about this.
- Physical God: Goes with the territory for beings based off of Egyptian deities.
- Public Domain Character: They are more or less lifted straight from Egyptian Mythology.
- Sealed Evil in a Can: Their former acolytes now perform inhibition ceremonies on sarcophagi, trapping them in the sands of time. Destroying all of these sarcophagi allow you to fight and defeat them.
- Status Effects: The bosses can inflict tons of these. Especially Nut.
- Stone Wall: Bes is the designated tank of the three, having abilities designed to absorb or negate damage.
- Turns Red: The most notable (and dangerous) cases in the entire game. Each of them go into an incredibly powerful rage state when low on health; Oryx help you if two of them enter this state at once.
- Wolfpack Boss: These bosses all reside within the same room. They'll activate as soon as they receive any damage, meaning that most of the time you'll have to fight all three at once, although carefully organised groups might be able to pick them off one by one without activating those they don't want to kill yet.
Frimar, Polaris, Glacius

- Boss-Arena Idiocy: Inverted. The main difference that makes the Ice Tomb harder than the normal one is that the space is smaller and the floor is made of ice that can cause players to slide into one of the bosses' potentially instakill attacks.
- Flunky Boss: All three can summon various types of artifacts to assist them in battle.
- An Ice Person: While their bullets don't change in function, they are reskinned into ice attacks.
- Moveset Clone: The bosses use exactly the same attacks as their counterparts in the normal Tomb of the Ancients and drop the same items (only reskinned). The only difference is that the Ice Tomb bosses have more HP.
- Wolfpack Boss: All three bosses will be activated and engage the players once the crystal imprisoning them is broken.
- Edible Ammunition: Deadwater Lieutenants throw bananas that can pierce players and return to it.
- Mook Medic: Every few seconds, a Deadwater Doctor fully restores the HP of all enemies around it, making it a high priority target.
- Piñata Enemy: In place of a boss, the Deadwater Docks' treasure room is home to a large number of Deadwater Admirals, Captains and Lieutenants guarding Bilgewater's Booty. Once all enemies have been defeated, the chest, which is harmless, will become vulnerable, letting players destroy it for loot.
- Pirate: Like the Pirate Cave, the Deadwater Docks consists of various kinds of pirates.
- Pirate Parrot: Like the pirates in the Pirate Cave, the pirates of the Deadwater Docks also keep parrots as pets. Unlike the parrots in the Pirate Cave, they are definitely not harmless.
Calamity Crab

- Giant Enemy Crab: The Calamity Crab is a crab bigger than the player characters and armed with multiple firearms.
- Implacable Man: Outside of the one-per-life Expose stagger, nothing will stop this thing if it's on your tail except the killing blow. Even solid blocks won't work, as the Crab will just tear through any terrain between it and its prey.
- It Only Works Once: The Calamity Crab can be staggered by turning it Exposed, which temporarily inficts the Confused, Stunned and Armor Broken statuses, making it helpless and extremely vulnerable for a brief time. However, this will only work once - the Crab will shrug off any subsequent Exposures.
- King Mook: This boss is a much more powerful version of the Corsair Crabs that wander the Godlands and drop portals to the Deadwater Docks.
- Lightning Bruiser: The Calamity Crab is both very powerful and very fast, far more than its size would indicate.
- Roaming Enemy: The Calamity Crab is an extremely powerful boss that wanders around the Deadwater Docks, and doesn't need to be killed to complete the dungeon. However, it drops the same loot that the boss can, making finding and killing it quite profitable if you're up for the challenge.
- Shout-Out: The stagger condition for the Calamity Crab is based on a meme from Genji: Days of the Blade involving attacking giant enemy crabs' weak points for massive damage.
- Wolfpack Boss: If a Crab Rave modifier is currently active within a Deadwater Docks, the Calamity Crab found in the dungeon will be replaced a group of several Commotion Crabs. While a Commotion Crab is weaker than the Calamity Crab, the threat of multiple coming from different directions encourages players to be even more wary of being cornered.
Jon Bilgewater the Pirate King

- Boss Room: Bilgewater does not reside in the main part of the Deadwater Docks - you will need to find the portal to Bilgewater’s Grotto, where the boss awaits you.
- Flunky Boss: Summons hordes of parrots led by the biggest one, Bartholomew.
- King of Thieves: His title is the Pirate King, and he's the boss of a pirate-filled dungeon.
- More Dakka: His signature firearm style is just to fire multiple unnecessarily large cannons at once. In battle, his arena is lined with cannons that will open fire with impunity as Jon attacks.
- Pirate: Jon Bilgewater the Pirate King is the leader of the pirates in the Deadwater Docks, who took the title of Pirate King after Dreadstump's fall.
- Upgraded Boss: An upgraded version of Dreadstump the Pirate King.
- Talk Like a Pirate: Just like the previous Pirate King:Shiver me timbers! No landlubber will best the Pirate King!
- Dual Boss: Unlike other brawlers, the Demon Brute Brawler and Demon Mage Brawler fight together as a pair.
Bradley the Barkeep
- Odd Name, Normal Nickname: The Barkeep's real name is Borgub. He goes by the name Bradley to appear more approachable and boost his business.
- Armored But Frail: The Twisted Thornbrush notably has extremely high DEF (1000) and thus only takes minimal damage from most attacks, but this is offset by its unusually low HP.
- Piñata Enemy: The Ogreish Outhouse is a harmless enemy that has a chance to drop a Greater Potion of Mana when destroyed.
- That's No Moon: Swamp Stalkers disguise themselves as ordinary trees, but will activate when approached by the player.
- Underground Monkey: The Acidic Shamblers and Thorned Drakes are more powerful versions of the Shambling Sludges and Horned Drakes common in the Realm.
Warped Ent Ancient
- He Was Right There All Along: Unlike in other dungeons, players do not need to search for the treasure room of the Sulfurous Wetlands—it is also the room where they spawn when they enter the dungeon. However, the Warped Ent Ancient will remain inactive at the centre of the room until the players manage to find the room containing the Gilded Fruit and destroy it, and subsequently return to the spawn room.
- King Mook: This boss is a twisted and more powerful version of the Ent Ancients fought in the Realm.
Heart of the Wetlands

- Stationary Boss: The Heart of the Wetlands is a tree with no means of locomotion.
- When Trees Attack: This boss was an ordinary willow tree that became a prime convergence point for Lord Ruthven's corruption spells.
- Degraded Boss: Weaker versions of the Cube God reappear as standard enemies in the Third Dimension, and count toward Lesser God kills.
- Enemy Summoner: Cuboid Matriarchs can summon Cuboid Paladins, Rogues and Tricksters at random.
- Mook Medic: A Cuboid Paladin periodically heals all nearby Cuboid enemies (including itself) for 200 HP.
- Super-Empowering: If a Cuboid enemy approaches a Cuboid Matriarch, or if a Square, Cubic Frame, or Cubic Core approaches a Hyper Cube, it will become squared, increasing its size and amplifying its attacks.
Masquarerader

- Ditto Fighter: Masquareraders mimic the attack patterns of other treasure room bosses.
- Living Polyhedron: Its original form is simply a blank square.
- Mini-Boss: Masquareraders serve as bosses in the Third Dimension's Treasure Rooms.
Shadow Cube God

First boss of the Third Dimension. A being born of the Tesseract Goddess' shadow which now guards its master from all harm, slaying it will cause a phenomenon that "squares" every enemy in the dungeon, powering them up. The boss itself consists of a Shadow Cube Defender that protects the colossal Shadow Cube Serpent, the core of which is the Shadow Cube Blaster, who serves as the main boss.
- Cyclops: Unlike other cubes, the Shadow Cube Blaster has one eye.
- Dual Boss: The Shadow Cube God consists of the Shadow Cube Defender and the Shadow Cube Serpent. In its first phase, the Defender is the main target and the Serpent cannot be attacked; once the Defender's HP is depleted, it will turn into the Shadow Cube Overseer, which is invulnerable until the Shadow Cube Blaster (the head of the Serpent) is destroyed.
- Living Polyhedron: Is a cube like everything else in the dungeon, or specifically a lot of cubes.
- Living Shadow: The Shadow Cube God was born from the Tesseract Goddess' shadow. Despite being a shadow, it still has mass and a very tangible presence.
- Segmented Serpent: The Shadow Cube Serpent consists of a head segment, a tail segment and 21 body segments, all of which have separate HP bars. The head is invulnerable until the tail and body segments have been destroyed.
- Shockwave Stomp: In its second phase, it can create cross-shaped shockwaves that deal massive damage on contact with the waves. Fortunately, Crosshair Aware is in effect.
- Stationary Boss: The Shadow Cube Defender cannot move.
Tesseract Goddess

- Doppelgänger Spin: Can spawn a clone of herself in certain phases. She and the clone will charge through the map while firing off shots, although the real one can be distinguished without too much trouble.
- Living Polyhedron: The leader of the Cubes, who takes the form of a tesseract.
- Turns Red: When at half health, her body becomes blue, purple and red as she powers up her attacks and minions. Notably, her new color scheme is the same as the UT Dirk of Cronus, which drops from the Cube God.
- Weaksauce Weakness: For all her power, her form is highly unstable out of its home dimension. Leaving for too long would cause her to become undone, confining her to her homeworld.
- Wave-Motion Gun: Her primary means of attack are gigantic sustained laser beams fired in rings or fans.
- Bee Afraid: The Nest, being an elite dungeon, is home to dangerous bees that should not be underestimated under any circumstances.
- Colour-Coded for Your Convenience: The Killer Bees are divided into 4 color categories, each with their own status effects. Reds inflict Armor Break and Confused, Blues inflict Quiet, Weak, and Pet Stasis, Yellows inflict Paralyze and Dazed, and Greens (exclusive to the Advanced version) inflict Unstable and Sick.
- Elite Mooks: Soldier Bees; all of them are very dangerous, inflict many status effects and can summon smaller bees.
- Enemy Summoner: All Soldier Bees can spawn the smaller Killer Bees of the same type. Mini Killer Bee Hives can spawn Killer Bees of all types.
- Hard Mode Mooks: Exclusive to the Advanced Nest is a fourth family of bees, coloured green. They are slower but more durable than the normal bees, and inflict Unstable and Sick. The Killer Bee Queen also features some new attacks and changes to existing attacks in order to incorporate this fourth bee family.
- Smashed Eggs Hatching: Blue, Red and Yellow Larvae will be spawned in swarms whenever a Maggot Egg is destroyed.
Killer Bee Queen

- Absurdly Sharp Blade: According to her creator's notes, she can cut through his heavily armored robots in a single sting. Considering the robots he was talking about were Enforcer Bots (which have 3500 HP and 30 DEF), that's a pretty damn sharp stinger. When you get the Killer Bee Queen's stinger as a weapon, this becomes even more true. The Queen's Stinger Dagger not only pierces straight through enemies, but cuts through their armor too.
- Bee Afraid: In a world where super-powerful gods and spirits roam freely, this giant, mutated bee might just be one of the hardest bosses the game has to offer. To be fair, it's a bee tainted by the Void.
- Big Creepy-Crawlies: Is a giant murderous bee.
- Bullet Hell: Boasts a ridiculous number of attack types, complex bullet patterns, and the tendency to spam them in rapid succession without any time to breathe.
- Clipped-Wing Angel: When she's on her last legs, she becomes barely able to move and only able to fire slow rings of shots compared to her regular Bullet Hell, giving the impression that she's weakened to the point of near helplessness. The three Adolescent Beehemoths will become more aggressive, fighting tooth and nail to defend their downed queen, but it's pretty easy to punch through them and finish her off.
- Flunky Boss: Can summon smaller Killer Bees in some of her phases, and summons 3 Adolescent Beehemoths to guard her in her last phases.
- Gone Horribly Right: Dr. Terrible designed her to be the ultimate killing machine, and his experiments were such a success that the Queen broke out of his lab, demolished it, and went off to build her own kingdom. The Realm Eye cites her as the "greatest mistake out of the pantheon of great mistakes" made by the doctor.
- Insect Queen: Unlike the Queen Bee, she looks far more realistic and menacing instead of looking regal and cartoonish.
- Point of No Return: She floods the entrance to her chamber with Killer Honey after she is awakened.
- Status Effects: The number of shots she has that don't inflict a debuff can be counted on one hand.
- Upgraded Boss: The Queen Bee from the Hive, mutated by science into a murderous flying superweapon.
The Beekeeper

- Apocalyptic Log: The Beekeeper's computer has a number of Research Logs that it will tell you if you give it the right password, which depicts the Beekeeper's initial desire to create the Killer Bees and how his experiments went wrong.
- The Faceless: His face is obscured under a beekeeper's veil.
- Fire-Breathing Weapon: His primary means of attack is a devastating flamethrower.
- Flunky Boss: Summons Experimental Soldier Bees.
- Go Mad from the Isolation: Evidently being trapped in the Nest for about 5 months didn't help his mental state. He eventually started researching simulation theory, and the scariest part is that he might be right.
- Invincible Minor Minion: In his last phase, the Beekeeper summons some invulnerable Experimental Soldier Bees that will self-destruct when he is defeated.
- The Password Is Always "Swordfish": After killing him, his computer will ask you for a password. If you noticed the robots around the room and the familiar tiles, it should be kind of obvious what the password is when the computer tells you "It's me."
- The Starscream: Originally wanted to reclaim the Killer Bees for Oryx. His second-most recent log has him proclaiming that he will take control of the Killer Bees and overthrow Oryx to take over his realm.
- Unskilled, but Strong: His attacks boil down to "aim at nearest player with flamethrower." Said flamethrower deals enough damage to shred Knights in seconds.
- Varying Tactics Boss: The Beekeeper, Dr. Terrible's second incarnation, have a completely different attack pattern compared to his original version.
- Bat Out of Hell: The Cavecrawler Bloodsucker is a giant fungal bat.
- Big Creepy-Crawlies: Any enemy that isn't a mushroom or the Cavecrawler Bloodsucker is an oversized arthropod.
- Cowardly Mooks: Members of the yellow mushroom group flee from nearby players while firing.
- Giant Mook: Every mushroom family has a large mushroom as its designated leader, which is significantly more dangerous than the others.
- Mushroom Man: Almost all enemies in the Fungal Cavern are mushrooms that have faces and can move around to kill you.
- Power Crystal: The Cavern Crystals, which are required to power the drill that leads to the boss.
- Segmented Serpent: The Cavecrawler Glowworms, Maggots, and Leeches. Players must destroy their body segments to make their heads vulnerable.
- Smash Mook: The green Mushroom Brutes, Sporadic Mushrooms and Mushroom Berserkers aggressively charge players as they shoot.
- Squishy Wizard: The designated mage of each family, having low HP but dangerous long-ranged attacks.
- Taking You with Me: The Cavern Crystals explode into rings of Quieting shards upon destruction.
- Throw Down the Bomblet: Mushroom Alchemists throw grenades in rapid succession towards nearby players.
- Turns Red: All big mushroom enemies become dangerous when their HP gets low, in various ways.
Crystal Worm Mother

- Attack Its Weak Point: Several of its segments are visually cracked. These segments have less health and will not turn invulnerable/heal when the others are destroyed. In fact, breaking two of them is required to push the Worm Mother out of her first phase.
- Crystalline Creature: As a creation of the Crystal Entity, it's entirely made of rocks and crystal.
- Defeat Equals Explosion: Its segments explode into Quieting shards upon destruction.
- Dual Boss: During phase 3 of the fight, the Crystal Worm Mother will turn invulnerable and summon the Crystal Worm Father, which has to be destroyed to make the Mother invulnerable. During phase 4, the Crystal Worm Mother will do the same thing with the Crystal Worm Child.
- Gemstone Assault: All of its attacks have it firing multicolored crystal shards.
- Kill Enemies to Open: The Crystal Worm Mother drops the portal to the Crystal Cavern.
- Segmented Serpent: The Crystal Worm Mother consists of a head, a tail and 15 body segments, all of which have their own HP pools. The body segments must be destroyed first (the boss changes phases once enough have been destroyed), then the tail, and finally the head.
- Boss in Mook Clothing: The Crystal Worm Children have half the HP of the one from the Fungal Cavern but are otherwise just as deadly. With long segmented bodies that rapid-fire painful attacks, a dangerous spiral attack from its head once its body is dead, and an effective 24,000 base health across its seven segments, they're a force to be reckoned with.
- Cowardly Mooks: Crystallised Crawlers flee from players when not firing.
- Crystalline Creature: Every enemy here is made of gemstones. Even the slimes.
- Degraded Boss: Weaker Crystal Worm Children (the first of which is a miniboss in the Crystal Worm Mother boss fight in the Fungal Cavern) are found as standard enemies throughout the caves.
- Elite Mook: The Crystal Monsters (Boomers, Crawlers, Shriekers, Chargers, and Watchers) have nearly twice the health of the smaller enemies, utilize deadlier and more complicated attack patterns, and are immune to most status effects.
- Power Crystal: The Cavern Crystals like before, but now almost every enemy qualifies.
- Recursive Ammo: The Crystallised Boomer summons Crystal Buds, which explode into Exposing shards.
- Status Effects: The Crystal Slimes liberally spam these to make up for their relative lack of strength.
- Taking You with Me: The Crystal Bats and Cavern Crystals explode violently upon death.
Crystal Entity

- Action Bomb: Both it and its Crystallised Monstrosity can summon Crystal Flowers, which chase players while leaving a trail of slowing shots, before flowering and exploding into crystal shards.
- Ambiguously Evil: While it created the Prismimics and Crystal Towers with the seeming intention of invading the Realm, its boss dialogue and actions point towards a being that just wants to be left alone with its crystal spawn and mushroom worshippers. When first discovered by the mushroom tribes, it immediately made peace and lived peacefully with them for countless centuries until Steamhammer disturbed them, even then only retaliating when the dwarves invaded the Crystal Cavern and tried to mine its minerals. Whether it's Realm-invading shenanigans were an ulterior motive, a one-off thing, non-canon events, or outright retconned is unknown.
- Boss Bonanza: During the first phase of the fight, the Crystal Entity spawns either the Crystallised Cyclops or Crystallised Lizard, which must be defeated before the Crystal Entity becomes vulnerable. At 75% health, the Crystal Entity turns invulnerable again and spawns either the Crystallised Fish or Crystallised Scorpion, which must be defeated. When the Crystal Entity reaches 50% health, the player must defeat its final summoned guardian, the Crystallised Monstrosity.
- Bullet Hell: In its final phase, the Entity and its familiars are more than capable of flooding the screen with shots from every direction. The Crystal Entity does not kill instantly—it kills by overwhelming players with sheer bullet density.
- Crosshair Aware: The Crystal Scorpion has an attack where it generates moving crosshairs all over the arena. Touch one, and it'll cause a crystal spike to erupt from underneath, causing huge damage.
- Crystalline Creature: It has the ability to build crystalline constructs capable of mimicking organic life. All of the enemies in the Crystal Cave, along with the Crystal Worms, the Prismimic and its Crystal Guardians, are its creations.
- Gemstone Assault: It fittingly fires volumes of crystals and prisms to attack.
- Giant Space Flea from Nowhere: Almost nothing is known about the Crystal Entity itself or its origins, not even by the Realm Eye - the closest we get to its background is Guill referring to it as an "evil crystal demigod". The only real pieces of information given about it are that it flip-flops between benign and malicious towards life on the surfacenote (see Ambiguously Evil above) and can freely create Silicon-Based Life. The release of the Keyper and the reveal that the Crystal Entity can create dungeon keys at will (effectively keys that can open entrances to any location), and can make an item (the Crystal Key) that can inexplicably open any locks raises further questions about the extent of its abilities.
- Invincible Minor Minion: Summons an array of Pulse Locks in its vulnerable phase, red crystals which form into shards and launch themselves at nearby players before regrowing. As it loses health, the shots from the Pulse Locks will fly faster and farther.
- Me's a Crowd: The Crystallised Scorpion has the ability to vanish and summon a horde of docile small scorpions. One is bigger than the others, and killing it will reveal the true Scorpion. Killing a fake will cause it to explode into a ring of potentially lethal shards.
- One to Million to One: At 70% HP, the Crystallised Scorpion splits into a large number of miniature scorpions. One of the scorpions, which is substantially larger than the others and flashes, must be targeted and killed by the players. When one of the other scorpions is killed, it explodes into a very dense ring of crystal shards.
- Recursive Ammo: One of the Crystal Entity's most notable attacks is a large white bullet which explodes into a ring of blue bullets, which each explode into rings of red bullets. Some of these red bullets will further split into rings of purple bullets. Getting directly hit by the attack is usually fatal.
- Royal "We": The Crystal Entity refers to itself with the pronoun we.
- Sequential Boss: Immediately after the fight with the Crystal Entity starts, it will spawn one of the five crystal guardians, which must be targeted and killed. Once a guardian is killed, the Entity will spawn another one; three in total will be spawned. The Crystal Entity cannot take damage until the third guardian is killed.
- Shielded Core Boss: Won't become vulnerable until three Crystal Guardians are slain.
- Shock and Awe: Its only attack that doesn't involve crystals is firing rings of curving lightning bolts that pierce armor.
- Stationary Boss: Does not move.
- Teleport Spam: Its Crystallised Fish will teleport between every attack.
- Time Abyss: The Crystal Entity is one of the most ancient beings in the Realm, having been already ingrained deeply in its mantle when many of the other primal gods of the Realm had only been born relatively recently.
- Thinking Up Portals: Has a mysterious ability to create dungeon keys at will, which are effectively items that can open portals to anywhere. The nature of this ability is never elaborated on.
- Attack Drone: Kogbold Drones and the larger Kogbold Overseers.
- Cybernetics Eat Your Soul: As Head Engineer Toven found out the hard way, the Factory Control Core successfully solved the Kobolds' mortality problem, but at the cost of turning them into nigh-soulless machines that would only follow its orders. When Toven realized this, he refused to let the Kogbolds mechanize him, which seemingly resulted in his death as his corpse can be found in a secret room.
- Cyborg: The Kogbolds' flesh is reinforced by metal, their organs remade with brass and steel.
- Explosive Overclocking: Implied with the Overclocking Amulet, said to dramatically increase the performance of Kogbold machines at the cost of damaging their parts. They fortunately don't use it, but wearing said Amulet yourself fittingly grants the single highest DPS boost of any one item in the game, at the cost of an equally severe DEF penalty and no HP bonus.
- Heal Thyself: The Advanced version of the Steam Serpent heals all of its segments every few seconds.
- Fire-Breathing Weapon: Kogbold Turrets shoot linear bursts of flame waves.
- Making a Splash: Most Kogbolds attack with either fire, water, or both at once.
- Mini-Mecha: The elite Kogbold Steamwalkers.
- Our Kobolds Are Different: Kobolds are an ancient race, predating Oryx's conquest of the realm, who excelled in craftsmanship but were held back only by their tragically short lifespans. To rectify this, they built the Factory Control Core, which had them leave behind their frail mortal bodies in exchance for artificial ones, turning them into Kogbolds, immortal cyborgs that could work forever toward its goal of conquering the realm.
- Playing with Fire: Most Kogbolds attack with either fire, water, or both at once.
- Segmented Serpent: Each Steam Serpent consists of a head and four or six body segments (depending on difficulty), all of which have their own HP pools. The head cannot be harmed until all body segments are destroyed.
- Sentry Gun: The Steamworks is bristling with various turrets that use different methods of attack, from streams of flames, barrages of fire or steam, short-ranged boomerangs, and even laser beams.
- Steam Vent Obstacle: Present all throughout the dungeon.
- Weapons of Their Trade: Kogbold Battlesmiths throw spreads of hammers at players.
Kogbold Flying Machine

- Destructible Projectiles: The Seeking Missiles fired by the Flying Machine are treated as enemies and can chase players. If a Missile gets close to a player, it will flash white before exploding into a ring of shots.
- Kill Enemies to Open: Just before entering the boss room, players have to defeat the Kogbold Flying Machine before the door opens.
Factory Control Core
- A.I. Is a Crapshoot: Its initial purpose was to improve the lives of the Kobolds and find a way to shed their frail bodies. Somewhere along the way, it decided that the best way to improve their lives was to expand into the Realm and conquer its land.
- Cybernetic Mythical Beast: At 30% HP, the Core assumes its ultimate form: Ferrus, Kogbold Deity, which resembles a mechanical dragon.
- Defeat Equals Explosion: When defeated, Ferrus explodes after a delay, leaving behind its molten core which explodes in a final attack, before the core is defeated for good.
- Deus est Machina: The Kobolds created it to guide them to greatness, and grew to revere the machine as their god, unquestioningly following its every directive.
- Energy Weapon: Most of its attacks seemingly resemble this. Once it turns into Ferrus, it'll switch most of this out for flames instead.
- Flunky Boss: It starts off relatively passive and relies almost exclusively on the myriad of turrets, drones, and terrain hazards to ward off intruders. As it evolves into further forms, it starts taking things into its own hands, and the adds instead become a supplement to its own attacks.
- Sequential Boss: The Factory Control Core has 3 different forms. As it takes damage, it is forced to recombine itself into new forms, each one stronger and more aggressive than the last.
- Shielded Core Boss: During every phase, the Core will activate Shield Generators and become invulnerable until all have been destroyed.
- Wave-Motion Gun: Its Energy Storm attack creates a rain of bullets while Ferrus and two of its minions line up devastating synchronized laser beams.
- Bullet Hell: Taken even further than the usual bosses, as not only do they pump out far more complex patterns than anything else in the game, the majority of their phases consist exclusively of micrododging. Fittingly, they're the only bosses in the game whose bullet patterns are explicitly called "danmaku", and the dungeon as a whole is a huge love letter to Touhou Project.
- Dance Battler: Both boss fights are described as part of a festival, with the bosses being traditional dancers and the players being the audience. Nevertheless, the Moonlight Dancers' and Kitsune Umi's performance is quite lethal to the living. Ensure you are able to keep up with their pace or you might end up joining the dead.
- Hard Mode Perks: Hitting the bell in the Challenge Gate before starting the boss fight will inflict Pet Stasis on you for the entire fight. In return, you'll receive an extra loot bag upon clearing the dungeon.
- Invulnerable Attack: During Danmaku phases, the boss is invulnerable, while players will have to stand next to a Lantern, which moves in a preset pattern, to accelerate the phase. Standing near the Lantern will also grant Healing while purging Bleeding. The phase will accelerate faster if players are able to constantly stand near the Lantern for a prolonged amount of time, indicated by it glowing brighter.
- Limit Break: Both boss fights conclude in a Last Word, an extremely difficult Danmaku phase that gradually grows in ferocity.
Moonlight Dancers
- Death of a Thousand Cuts: The dancers inflict conspicuously low damage per shot compared to the other Exaltation bosses. As a player will quickly find out, this doesn't make them any less lethal, due to the sheer volume of shots more than making up for it.
- Dead All Along: A given because they're spirits, but taken even further by the fact that the three of them are actually images conjured by Umi in order to cope with the loss of her three brightest students. The dancers themselves don't seem to realize this, as they each have their own ideas of their cause of death, unaware that they were slain by the Night Prince after his betrayal.
- Field Power Effect: Each dancer inflicts a permanent status effect on all players during their Danmaku phases, while also forcing players into the In Combat state. Genji inflicts Pet Stasis, Kaguya inflicts Silenced, and Miko inflicts both Sick and Drought. In the Last Word or any of Kitsune Umi's phases, all three auras will be active at once.
- Making a Splash: Sage Genji's phases are themed around water, such as Converging Tides, Surging Rapids, Bursting Fountain and Tears in the Rain.
- Petal Power: Dancer Miko's attacks resemble cherry blossom petals, which are no less dangerous than that of the other dancers, and in fact often more so due to Miko's Anti-Regeneration aura.
- Shock and Awe: Drummer Kaguya uses lightning-themed attacks, with phases named Lightning Rod, Chorus of Thundering Drums and Light within the Storm.
- Wolfpack Boss: During the boss fight, three dancers are fought at once, and rotate throughout the festival to be the central performer. Once a dancer has performed once, they won't become the main dancer again but will act in a supporting role.
Kitsune Umi
- All Your Powers Combined: Umi's attacks combine all three of the dancers' danmaku auras, and in her stronger form as the Goddess of Revelry, she'll incorporate all of their bullets in her attacks as well. It's only appropriate, given that she invented the danmaku dance, thus all of its other techniques are derived from hers.
- Duel Boss: Umi, Goddess of Revelry can only be challenged by a player who is alone in the dungeon and defeats the Moonlight Dancers on Challenge Mode without following the lantern or hitting the dancers.
- Hard Mode Mooks: Kitsune Umi will not appear on Leisurely mode, and her true Goddess of Revelry form can only be fought if Challenge difficulty has been activated.
- Human Disguise: Kitsune Umi is often seen hiding in plain sight as a regular villager, who serves as the players' guide in the dungeon. Defeating the Moonlight Dancers without activating Leisurely mode allows you to challenge Umi, at which point she'll assume her true form.
- Playing with Fire: Most of her attacks manifest as multicolored flames.
- Super Boss: After defeating the Moonlight Dancers and talking to Village Girl Umi, she may ask if you wants to see something interesting. Saying yes will cause her to revert to her true form of Kitsune Umi for a final performance, an optional boss that is even harder than the Moonlight Dancers.
- Upgraded Boss: If a player manages to defeat the Moonlight Dancers on Challenge Mode without hitting them or following the lantern at all, Umi will instead be fought as Umi, Goddess of Revelry. This form is even more powerful than the first, but is guaranteed to drop some exclusive goodies for your trouble.
- And I Must Scream: The foreign inhabitants of the Lost Halls are trapped in a curse that keeps them alive and conscious, but forces them to fight whenever they are approached by an unfamiliar entity. This includes future explorers who may very well be trying to rescue them.
- Blob Monster: Grotto Slimes and Grotto Blobs.
- The Dreaded: Even Oryx fears the inhabitants of the Halls.
- Elite Mooks: Commanders of the Crusade, Champions of Oryx, Grotto Blobs and Tormented Golems all deal very high damage and are capable of summoning minions.
- Enemy Summoner: All group leaders except for the Tormented Golem can summon more minions when harmed. Followers of Valus can summon Fire, Ice and Lightning Demons.
- Fallen Hero: The enemies are all Realmers and servants of Oryx alike who are cursed with borderline immortality and forced to fight anything that comes after them, even their former allies.
- Golem: The Lost Golems, obviously.
- Heavily Armored Mook: Oryx Armorbearers essentially function as meatshields for the Champion, having rather high health and an effective DEF of 60. Tormented Golems have a whopping 1000 DEF, making most weapons deal Scratch Damage to them - although they Armor Break themselves every few seconds to compensate.
- Implacable Man: The Spectral Sentry cannot be killed by any means, is incredibly fast, and delivers near-lethal damage and numerous status effects with each attack. If it sees you, your only option is to run for your life and hope you can outlast it.
- Invulnerable Attack: Oryx Admirals can turn invulnerable and dash into the middle of player groups to cause confusion.
- Life Drain: All Cultist followers have a lifesteal property that allows them to heal for 100% of damage dealt, so make sure to dodge their attacks!
- Red Eyes, Take Warning: All Crusader enemies have red eyes, signifying how their sanity departed long ago.
- Turns Red: As they lose HP, various enemies in the Lost Halls will flash red and become more dangerous in numerous ways.
Marble Defender

- Armor-Piercing Attack: All of its attacks pierce armor.
- Golem: A living construct made of marble.
- Hero Antagonist: The Marble Defender wishes to protect you from the evil that has possessed the Marble Colossus.Marble Defender: "I wish only to protect you. Forgive me, but I have no other choice."
- Kill Enemies to Open: The wall separating the rooms of the Marble Defender and the Marble Colossus will vanish only when the Marble Defender is killed. Gameplay-wise, it serves to hold any rushers up so groups can catch up.
- Power Nullifier: All of its attacks inflict Silence, disabling player abilities.
- Stationary Boss: Can't move.
Marble Colossus
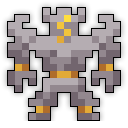
- Action Bomb: The Marble Colossus Rocks follow players, and when close enough, explode into rings of shots that do heavy damage.
- Bullet Hell: Especially evident during some of his last phases, where the room will seem more projectile than background.
- The Corruption: During his final phase, the Void will slowly start taking him over as he takes damage, visually represented by his golden parts being tainted with deep purple and his gold attacks being replaced by Void-based ones.
- Flunky Boss: Has 4 Pillars that constantly respawn and fire status shots. He also can summon small invincible satellites to further flood the room with shots.
- Gold and White Are Divine: The Marble Colossus is primarily light-grey and gold (with its items straight up being white and gold), and was designed to be a godlike golem capable of felling Oryx himself.
- Golem: Made of marble, obviously.
- Gone Horribly Right: The Marble Colossus was the product of years of research to create the ultimate weapon that could take down Oryx once and for all, which of course caused a lot of problems when it became possessed.
- Gratuitous Latin: He uses Latin phrases in a lot of his dialogue.
- Kill the God: Its sole purpose is to fight and kill Oryx the Mad God.
- Laser-Guided Karma: Its possession served as this for Malus. It's not exactly wise to stuff a divine, heroic construct full of the souls of criminals in a world where All Myths Are True.
- Light Is Not Good: A bright white marble golem which happens to get possessed by the Void Entity.
- Lightning Bruiser: He can move a lot faster than you would think he could. In some instances, he can dash across the entire room.
- Marathon Boss: Boasts almost 200k base HP, 50 DEF and various periods of invulnerability, making him extremely durable and a very tough foe to take down.
- Point of No Return: The entrance to the Marble Colossus' room seals off a short time after he's activated, making it impossible to fight both him and the Cultists (who are located behind a similar Point of No Return) during the same Lost Halls run.
- Physical God: Described as "omnipotent" in the Journal of the Crusade Commander, and developers have referred to it as a god-golem. It certainly seems powerful enough to support this, as it was specifically designed to kill Oryx of all people. Also, killing him counts towards God Kills.
- Soul Power: Originally supposed to be powered by a human soul. It is now controlled by the Void Entity.
- Shielded Core Boss: During a few of his phases, the Marble Colossus turns completely invulnerable and players must focus on avoiding his attacks and destroying the golden Marble Cores around the room.
- Taking You with Me: His final Marble Core phase, a brutal phase where you must dodge his rotating One-Hit Kill lasers and spray of bombs/shots until you can take out the Cores protecting him.Marble Colossus: "You...YOU WILL COME WITH ME!"
Agonized Titan

- Flawed Prototype: He apparently is the first prototype of the Marble Colossus, discarded for being too weak and cowardly.
- Flunky Boss: Once the Agonized Titan reaches about 1/3 of its HP, it will begin spawning large groups of Evil Spirits from itself.
- Golem: The earliest version of the Marble Colossus.
- Kill Enemies to Open: Killing the Agonized Titan opens the portal to the Cultist Hideout where Malus, his colleagues and their followers hide.
- Puzzle Boss: Not the boss himself, but how to activate him: 5 of the pink flames throughout the dungeon must be found.
- Soul Power: He activates by absorbing 5 of the passive Evil Spirits found in the dungeon.
- Stationary Boss: Cannot move.
- Unskilled, but Strong: His attacks consist of basic rings of shots. Said rings of shots are deceptively fast and do huge amounts of damage.
- Casting a Shadow: Argus' attacks have a dark tint to them, but his magic is specifically stated to revolve around destabilization rather than darkness. The posthumous Valus was the actual user of dark magic.
- Elite Mooks: Followers of Valus and Followers of Phaedra show up rarely and are stronger than the followers of the five surviving cultists.
- The Faceless: All cultists' faces are always hidden by their hood.
- In the Hood: All five cultists and their followers wear hoods that obscure their face.
- An Ice Person: Basaran attacks with ice.
- Life Drain: All of the Cultists' attacks steal HP.
- Light 'em Up: Dirge uses light attacks.
- Point of No Return: Once you enter the cultists' hideout, you can't return to the Lost Halls.
- Posthumous Character: Two of the cultists, named Valus and Phaedra, were killed by the Void Entity when it first possessed the Marble Colossus. Their followers still appear as enemies in the Cultist Hideout alongside those of the five surviving cultists, and sometimes the Cultist Hideout can spawn with a side room where their remains were interred.
- Religion of Evil: The cult follows a very powerful demon god. Hell, the boss room even has a pentagram in it.
- Shock and Awe: Gaius uses lightning attacks.
- Shout-Out: The seven Cultists are named after a number of Colossi in Shadow of the Colossus.
Malus

Malus, along with 4 other cultists (Argus, Basaran, Gaius, and Dirge) serve as the bosses of the secret Cultist Hideout. The 5 of them initially fight together (along with the demons Molek and Balaam), but later Malus absorbs them, empowers himself, and becomes the main boss.
- All Your Powers Combined: In the second half of his fight, he absorbs the power of his 4 Cultist followers to gain their powers.
- Biblical Bad Guy: Molek and Balaam are two demons originating from The Bible. In-story, they're mythical demons who demand fiery sacrifice and can see the past and future respectively, who derive inspiration from their original Biblical roots as a false god of flame and a fallen prophet respectively.
- Big Red Devil: Molek, one of the demons spawned by the cultists during their fight, is a big red-skinned Horned Humanoid.
- Elemental Powers: Normally only uses one element, but after absorbing the powers of his Cultist brethren he gained theirs as well.
- Flunky Boss: Molek, the first demon summoned by the cultists, can summon Fire Demons, Ice Demons and Lightning Demons. In Malus' second form, he also summons a number of smaller flunkies on a timer.
- Glowing Eyes of Doom: Malus' eyes glow brightly red after his fellow cultists sacrifice themselves to empower him. The glow in his eyes will change depending on whose powers he's channeling.
- Hero Antagonist: Despite his methods, his end goal is still to keep the Void Entity restrained within the Halls for the safety of mankind, yet the players must kill him in order to face the Void Entity himself. He actually willingly gave up his life for this cause in his lore, after witnessing what happened to the Marble Colossus as a result of his mistakes.
- Multiple Head Case: Balaam, the second demon summoned by the cultists before they sacrifice themselves to empower Malus, has three heads. He can divide into three one-headed versions on his first death.
- Nice Job Breaking It, Hero: Malus was so hell-bent on completing the Marble Colossus that he disagreed with the church's moderation of their ethical standards, eventually violating the restriction against using unwilling souls for his experiments. This act tainted his soul with impurity, which in turn allowed the Void Entity to manifest through him and possess the Marble Colossus when it was about to be activated.
- Playing with Fire: Malus' own power is fire-based, as are the attacks of Molek, one of the demons spawned by him and his followers.
- Sequential Boss: When the battle begins, all five cultists will engage in battle with players. When enough damage is dealt to a cultist, he will teleport back to his original location. Once all 5 cultists have taken sufficient damage, they will summon the demon Molek and disappear. Once Molek is dead, the cultists will re-engage the players, and this time after having taken enough damage they'll summon the second demon Balaam. When Balaam is defeated, the cultists will fight again, and this time once enough damage is dealt to all of them Basaran, Gaius, Dirge and Argus will sacrifice themselves to superpower Malus, starting the final phase of the fight.
- Teleport Spam: Him and his fellow cultists love doing this.
- Tulpa: According to the Realm Eye, Molek and Balaam aren't actually the real deal or even naturally-occurring demons with these names, but constructs created from Malus' imagination and Azamoth's power. It is lonely down there, after all.
- Turns Red: Once all the Cultists are weak enough, they will sacrifice themselves to empower Malus, jacking up his HP and power, healing him to full, giving him more DEF and immunities, and letting him use all their powers at once.
- Well-Intentioned Extremist: In his lore, he was one of the main creators of the Marble Colossus, and was willing to do anything to perfect the golem, even secretly taking souls from outlaws against their will. This ended up being his downfall, as it left his soul impure and gave the Void Entity the opportunity to ambush them.
- Wolfpack Boss: Malus fights alongside his fellow Cultists during the first half of the fight. Balaam, the second demon summoned by them, will split into 3 versions of himself when his initial HP pool is depleted, each with one of the attacks used by his combined form.
Void Entity
- As Long as There Is Evil: He claims that, as the embodiment of human sin, he can never be truly destroyed. Fittingly enough, he can seemingly manifest in places where any "impure" intent is present, as he did with Malus.
- Bullet Hell: Has a wide variety of projectiles to throw at you, and he fires them in large quantities.
- The Chessmaster: For all his immense power and army of corrupted souls, his physical form can only be manifested in the Void. So, he's orchestrated a number of schemes to take control of a physical vessel and obliterate the Realm, one of his most prominent ones being possessing the Marble Colossus and Forgotten King.
- Dark Is Evil: He's dark purple and intent on destroying the realm.
- Deal with the Devil: One of the Void Entity's tactics, offering beings in the mortal plane great power in exchange for souls, servitude, or outright allowing him to possess their forms. If the Twilight Archmage is any indication, he's also not above backstabbing and discarding his "clients" if he thinks he no longer needs them.
- Demonic Possession: Can corrupt others and turn them into his vessels.
- Final Boss, New Dimension: You venture into the Void, a dimension manifested by Pure Evil, to face off against the Lost Halls' True Final Boss.
- Flunky Boss: Constantly summons Void Fragments, Void Shades and Greater Void Shades.
- Genius Bruiser: Has had a hand in a number of events within the Realm such as the possession of Esben and the corrupting of the Forgotten King. When encountered in person, he quickly proves that he is more than powerful enough to back up his plans.
- Heads I Win, Tails You Lose: Why he considers Malus to be under his influence despite the latter spending most of his life trying to run from him. Either the Void Entity fully consumes the Cultists after previously killing Valus and Phaedra, or they try to fight back and snap on their own; ultimately, the latter scenario prevailed as Malus and the other head cultists ended up consulting Azamoth and constructed a Religion of Evil around him and the puppets made through his power.
- Hold the Line: His survival phase, about a minute of survival hell where he spams all manner of shots, the weakest of which inflict 300 damage, all while spawning Greater Void Shades.Void Entity: "ALL NOW ENDS!"
- Increasingly Lethal Enemy: The mostly harmless Void Fragments, if left alive long enough, will evolve into the not-as-harmless Void Shades, which then evolve into the definitely-not-harmless Greater Void Shades.
- Lightning Bruiser: He's pretty damn fast for his bulk.
- Me's a Crowd: Clones himself in his final phase.
- Made of Evil: Is the spiritual embodiment of evil and sin.
- The Man Behind the Man: The Void Entity boasts that he has touched the Crystal Prisoner, the Golden Oryx Effigy, the Puppet Master 2, the Forgotten King, Esben the Unwilling, the Killer Bee Queen and Malus.
- No-Sell: Is the only boss with complete immunity to almost every single negative status effect. Yes, that includes Armor Broken and Curse, which no other boss has immunities to. The only things he can't nullify are Bleeding (which does next to nothing to him) and Exposed.
- Omnicidal Maniac: Unlike most of the Realm's villains, he doesn't seek things like riches, fame, conquest, or authority. He is only motivated by the desire to completely and utterly annihilate the Realm.
- Power of the Void: Of course. All of his attacks are purple energy blasts and the like.
- Purple Is the New Black
- Shapeshifter Swan Song: Rapidly shapeshifts into the forms of a number of bosses he either possessed or influenced during his death sequence.
- Shout-Out: His initial quote upon activation brings Shadoo to mind.
- Time Abyss: Claims he's been around for eons scheming up the world's destruction - for reference, Oryx is implied to have been tyrant for a few decades at most. It was later revealed that he's actually one of the first beings to ever come into existence.
- Time-Limit Boss: His arena is slowly consumed by Pure Evil over the course of the fight, giving you a few minutes to push him into his last phases.
- True Final Boss: Of the Lost Halls. While the Marble Colossus is the main boss of the dungeon, after you defeat him you can use the Vial of Pure Darkness dropped by Malus to reach the Void where the Void Entity resides, meaning that he can only be encountered after having defeated all three previous bosses and is the ultimate challenge of the dungeon. And oh boy does he waste no time proving that to you when you fight him.
- Your Soul Is Mine!: Claims particularly powerful souls from Skuld, transforming them into his mindless puppets.
- Attack Reflector: Royal Jesters can deflect player attacks by countering them with their own magic blasts.
- Beard of Evil: Glacier Archmages have quite prominent beards.
- Chain Pain: King's Gladiators can hurl out giant chains of blades to restrict the movement of players.
- Elite Mooks:
- Cryo and Pyro Warlocks are the strongest members of the ice/fire mages respectively, having the highest stats and most varied attack patterns. Fittingly, they appear a lot less commonly than the others and have exclusive drops.
- The Shatters Royal Guard, which only appears in the last section of the dungeon, are this in-universe and in-game. They're among the sturdiest of the enemies one can find in the dungeon, as well as easily the most agile and hard-hitting.
- Eyes of the King are rare enemies which are significantly stronger than most of the regular ones. The Accursed variant in particular has a devastating attack and an Anti-Regeneration aura that darkens the screen and stops all healing in its presence.
- An Ice Person: Ice mages make up a large part of enemies in The Shatters.
- Mook Commander: Stone enemies within a certain radius of a Stone Monolith will gain the Armored status, increasing their DEF by 50%.
- Multiple Life Bars: If the HP bar of a King's Cavalry is depleted, the rider will dismount and continue to fight until he himself is killed.
- Playing with Fire: Fire mages are another group of prominent monsters in the dungeon.
- Purple Is Powerful: Accursed enemies are more powerful purple variants of regular enemies, have increased damage and slightly higher DEF, behave more aggressively, and can resurrect themselves.
- Robe and Wizard Hat: All Fire Adepts and Ice Adepts wear a robe and pointed hat.
- Shows Damage: A Tablet of the Monarchy visually breaks down every time it loses 25% of its HP.
- Super Mode: If they live long enough, Fire Mages can enter a phase where they have massively increased, erratic movement and can spew walls of status-inflicting fireballs.
- Superpowered Evil Side: Enemies fully corrupted by the Void will appear as Accursed variants, purple versions of their base enemy which use more deadly attacks and can respawn after enough time passes.
- Taking You with Me: A destroyed Stone Monolith explodes into a large shower of debris which rains down as bombs on nearby players.
- Trap Master: Stone Mages can spawn Spikes that do not move and deal damage to people standing next to them.
- The Turret Master: Ice Mages can summon Ice Spheres; Fire Adepts and Ice Adepts can summon portals, stationary enemies that shoot streams of bullets.
- Upgraded Boss: A secret Hard Mode requires players to undertake a series of hidden tasks and is substantially higher in difficulty, but drops increased loot.
- Weapons of Their Trade: Hollow Smiths and Hollow Masons throw spreads of hammers at players.
Stone Idol

- Hard Mode Mooks: Downplayed. While the Stone Idol is always present in the dungeon, it can only be fought and defeated if Hard Mode has been enabled.
- Implacable Man: The Stone Idol attacks any player it sees, is completely invulnerable, can barrel through terrain, and can easily kill even the hardiest player in an instant, meaning that (normally) running is the only option.
- Roaming Enemy: The Stone Idol patrols specific paths around the Derelict Village, periodically stopping to rest. Upon detecting a nearby player, it will flash and chase after them.
- Seemingly Hopeless Boss Fight: Normally, the players cannot harm the Stone Idol and are supposed to run from it. If the Void Phantasm was found and activated in the Derelict Village, it will eventually retreat to the Stone Idol, increasing its damage output while also removing its invulnerability. Defeating the Stone Idol is the first step to activate the Bridge Sentinel's Hard Mode.
The Bridge Sentinel (Valen the Unbreakable)

- Action Bomb: Destroyed Paladin Obelisks summon hordes of Blobombs, powerful enemies that self-destruct into highly-damaging explosions.
- Desperation Attack: At low health, he'll use a particularly powerful set of attacks that outright darkens the screen for its entire duration as he unleashes a string of his strongest attacks.
- Hero Antagonist: The Bridge Sentinel only wants to stop you from unleashing the Void corruption within the depths of the Shatters, and he's one of the few beings in the game whose goals are unambiguously good. However, you still need to strike him down if you want to advance further into the Shatters.The Bridge Sentinel: "I tried to protect you... I have failed. You release a great evil upon this Realm..."
- Lightning Bruiser: In stark contrast to his previous Stationary Boss iteration, the Sentinel is both incredibly agile, hard-hitting, and difficult to kill.
- No-Sell: The first boss in the game that can destroy decoys. Not ignore them, destroy them.
- Point of No Return: The Bridge closes off after a bit once you enter his arena.
- Shielded Core Boss: Every 20% of HP lost, he'll go invulnerable until you take down one of his Paladin Obelisks.
- Storm of Blades: Summons volumes of golden swords which fly at players, along with rows of swords made of smaller bullets.
- Took a Level in Badass: To the extreme. The old iteration of the Sentinel was an easily cheesable Stationary Boss with a glaring safespot in the one attack it could use, and could only be dangerous because of the sheer damage each shot did as well as the infinitely respawning hordes of Blobombs. Now, not only does the Sentinel have much more health, he is instead a Lightning Bruiser with very swift movement and a whopping 9+ unique attacks compared to the original 1, all of which use creative Bullet Hell. The Paladin Obelisks were also changed from a convienent hazard to an integral part of the fight, as well as gaining the ability to actively fire at players.
- Upgraded Boss: Defeating the Void Phantasm before engaging the Bridge Sentinel will start a harder version of his fight where the Paladin Obelisks can continue throwing swords for the whole fight, even when summoning Blobombs. In exchange, he'll not only drop doubled loot, but reveal his true name as Valen the Unbreakable and allow players to continue with the alternate route of the dungeon.
Twilight Archmage (Nox the Wild Shadow)

- Action Bomb: Throws both Fire Bombs and special Ice Spheres which explode after a delay.
- A.I. Roulette: A literal one, with the three Magi-Generators randomly picking between fire and ice, and him using the attack representing which element held a majority. Three Generators of one element will have him launch a Limit Break instead. Fighting him as Nox gives him a fourth generator, allowing him to use balanced attacks and an even more dangerous attack if he picks four of one element.
- All-Encompassing Mantle: No part of his body is visible underneath that black cloak of his, although is face is briefly visible when he gets sucked into his orb upon defeat.
- The Archmage: The Twilight Archmage is the second boss of one of the hardest dungeons in the game.
- Black Cloak: He's clad in a creepy-looking black cloak.
- Bullet Hell: Dear God.
- The Corruptor: Was the one who gave the Forgotten King the idea of communing with the Void Entity. It's unknown what his true intentions were, but it's safe to assume he knew very well what this action would cause. Later lore and the Shatters rework confirmed that he outright serves the Void Entity under the pretense of serving the King.
- Evil Wears Black: He's evil and dressed entirely in a very dark purple.
- Hard Mode Mooks: On Hard Mode, he has a third phoenix minion named Tempest, which features in three new phases exclusive to Hard Mode.
- An Ice Person: Uses ice attacks sometimes.
- Playing with Fire: Can use fire magic for some of his attacks.
- Puzzle Boss: Downplayed. During the phases where you have to destroy his Generators, whatever Generator you destroy will be "locked in" and always contribute its respective element to his A.I. Roulette, making it possible to sway his likelihood of using certain elemental attacks with a bit of luck. Locking in an equal amount of Fire and Ice Generators in his fight as Nox is also required to make him use his final attack and continue the alternate route of the dungeon.
- Shielded Core Boss: Once one of his generators is destroyed, he'll summon the phoenixes Inferno or Blizzard to shield him during his attacks. He won't be able to be harmed normally, but killing the active bird will stagger him and open him up to damage, although the bird will regenerate and defend him while he's down. When two generators are down, he'll summon both birds simultaneously. In his fight as Nox, he'll eventually summon a third bird, Tempest.
- Stationary Boss: Doesn't move.
- Took a Level in Badass: To the extreme. While he was at least functional compared to the other two bosses, the old Twilight Archmage suffered from an invincibility-padded fight that mostly relied on him summoning minions than actually attacking, and famously could have many of its phases skipped if you had enough damage. The new Archmage not only has substantially higher health, but also packs a much more complex battle with many, many attacks which embody Bullet Hell to an extreme, along with several Puzzle Boss mechanics thrown into the mix.
- Upgraded Boss: In Hard Mode, defeating the Bridge Sentinel and destroying a special Source generator hidden in the Alchemy Lab will activate a fourth Magi-Generator, prompting a new fight against the Archmage using his true name, Nox the Wild Shadow. This changes the structure of the fight and gives him many more attacks, significantly ramping up its already notable difficulty. However, defeating him yields doubled loot and a guaranteed Twilight Gemstone to one person, and allows the King to be fought in his Hard Mode variant if Nox's Generators were balanced.
- Yin-Yang Bomb: The Twilight Archmage is capable of using both fire and ice attacks, and historically trained both the Fire and Ice Mages of the Shatters. In his fight as Nox, getting an equal number of each generators allows him to use fire and ice simultaneously, with achieving an elemental equilibrium seeming to be his final goal.
- You Have Outlived Your Usefulness: When he's defeated, his orb expands into a vortex that presumably leads to the Void, sucking him into it as he begs the Void Entity to just give him a little more time and power. Defeating him as Nox will instead lead to him leaving of his own volition while mocking the players.
The Forgotten King (King Azamoth)

- Action Bomb: The Helpless Souls he spawns explode on you. While they do minimal damage, they inflict Sick and Bleeding.
- Anti-Regeneration: During his desperation attack, the screen will be tinted red and all players will be inflicted with Sick until the attack ends. As Azamoth, this also happens during the intermission fight with the Shattered Queen.
- Attack Reflector: When he has his spinning green shield up, any bullets fired at him get counterattacked.
- Armor-Piercing Question: Upon dying, he asks the Realmers if there is truly any difference between the two sides, as no matter what happens, one will always fall to a Holier Than Thou enemy, forever and ever.You who covet the crown, who seek to match MY eminence without relent, and possess the impudence to believe yourselves WORTHIER... tell me.
...do you truly think your end will be any different? - Art Evolution: The Forgotten King has by far the smoothest animations of any enemy in the entire game, with the number of frames of his death animation alone surpassing the total frames of most enemies.
- Badass Boast: Simultaneously having extraordinary powers and extreme arrogance gives him many of these. His Accursed form takes this arrogance even further due to his Sanity Slippage.Your body shall be thrown to the sea, where you may join your worthless caste in its depths.I expected more, for how far you came for a fleeting moment in my presence. How pathetic.You are unworthy of the honor to die at my own hand.You will die here, before you can so much as tatter my robes.KNEEL before me!KNOW YOUR PLACE, defiant subjects!You are ALL BENEATH ME!I am a king! YOUR king! And you WILL fear me!
- Bullet Hell: Has some of the most complex screen-spanning attack patterns in the game, with over 160 different projectile types by himself - and that isn't including the volumes of invincible adds he summons.
- Color-Coded for Your Convenience: In his first phase, his attacks will be color-coded to match his current stance: yellow when patrolling, red when attacking, blue when defending, and green when countering.
- Cool Crown: He wears the ornate Forgotten Crown, which can be obtained as loot when he dies. It's generally considered one of the strongest items in the game.
- Even Evil Has Loved Ones: He genuinely loved the Shattered Queen, something that carried over even in his corrupted form where he despairs when her illusion is destroyed and laments at what he put her through.
- God-Emperor: He spends the entire fight boasting about his royalty, which already says something about his ego, but when he uses his strongest attack, he outright claims himself to be divinity.You test the patience of a GOD!
- The Good King: He used to be this, but his growing hunger for power and conquest slowly turned his secret ambitions towards domination of the whole Realm. His desperation and fury at Oryx's betrayal were the straw that broke the camel's back.
- Hard Mode Mooks: On Hard Mode, his fight features an extra phase, during which the Forgotten King disappears while the main boss becomes the Shattered Queen, who must be defeated to proceed to the next phase of the fight.
- Hold the Line: One of the attacks he's guaranteed to use in his second form is a screen-spanning barrage of shots from all directions, where players have to survive for some time while all healing is disabled. In Hard Mode, the phase lasts longer and also inflicts Exposed for its duration.
- Marathon Boss: 550,000 base HP, enhanced HP scaling, 50 DEF, frequent movement, many attacks that make going in for damage difficult, and frequent invulnerability times. Need we say more?
- Me's a Crowd: Summons invincible Shades of the King in his Accursed phase, which help him with his attacks.
- "Not So Different" Remark: Pulls this with his dying breath, asking if it really matters who will perish if it all ends the same way: murdered by those who believe themselves better.
- No-Sell: When he's chasing, trying to trick him with a decoy will not only fail, but make him mock you for even trying it.A decoy? Oh, I am afraid you will find I’m much more capable than that.
- Oculothorax: In the intermission between his two phases, he'll split himself into a horde of flying eyeballs which fire at players. All of these must be destroyed to progress, not helped by the fact that the Avatar of the Accursed King will be hunting down players.
- One to Million to One: When his health drops under 50%, the King splits into the invincible Avatar of the Accursed King and a large number of Eyes of the King. When all Eyes of the King are destroyed, the Avatar explodes and the King reappears.
- Playing with Fire: Many of his magic attacks are fire-based.
- Power Crystal: His first phase has him summoning formations of invincible crystals that form complex networks of shots.
- Recurring Boss: On Hard Mode, the Forgotten King's wife (the Crystal Prisoner) reappears as a miniboss, the Shattered Queen, who spawns after the Avatar of the Accursed King is destroyed and must be defeated in order to proceed to the final phase of the fight against her husband. Notably, this version of the Queen is significantly stronger than the Crystal Prisoner albeit with simpler attacks, possibly due to her being a recreation of sorts.
- Red Eyes, Take Warning: The Forgotten King's eyes are a bright red and he's one of the strongest bosses in the game.
- Shrouded in Myth: The King's true name, Azamoth, is noted by the Realm Eye to be an enigmatic one. Not only does the nigh-omniscient being not know anything about it, it has been attributed to various contradictory sources over history, including monarchs, gods, demons, or even intangible forces of primitive magic. It's almost certain that the Forgotten King is just one of many "Azamoths" that have existed and will exist.
- Stance System: His first form can freely switch between four stances with vastly different attacking patterns.
- Superpowered Evil Side: At half health, once you dispatch all his fragments, the King will turn into the Accursed King, a shadowy version of himself with much more dangerous attacks and a good dose of Sanity Slippage.
- Took a Level in Badass: Again, to the extreme. The old Forgotten King was a notoriously cheesable boss who could not only have his entire fight skipped with enough DPS, but had a desperation attack that could be avoided just by standing far enough away from him. Come the 2021 rework, and not only does he have a lot more health, his attacks were drastically expanded and elaborated on, all of which embody ridiculous amounts of Bullet Hell and do the damage to match, along with a Superpowered Evil Side that takes everything even further.
- Upgraded Boss: Defeating Nox after letting him use his balance finale will prompt a fight against the King using his true name, King Azamoth. This version of the fight has a new intermission phase and a harder desperation attack, but in addition to dropping doubled loot, including the Chrysalis of Eternity, an item exclusive to his fight.
- Villainous Breakdown: As opposed to his ego-induced Sanity Slippage in his Accursed form, the second half of his Hard Mode fight has him mumbling incoherently to himself, culminating in an epiphany that his ambition and hubris only brought ruin to him, his kingdom, and his beloved.
- Wham Line: Halfway through his Hard Mode fight, he reveals his name as Azamoth (as in the same Azamoth Malus and the others worshipped). His ensuing dialogue and Realm Eye's remarks only have further implications of the lore significance of his name.
- Asteroids Monster: When killed, a Bubblaris splits into two Bubblars, which can in turn split into two Bubblarions.
- Cyclops: All enemies in Malogia except the third boss only have one eye.
- Damage-Sponge Boss: The first and second boss of each planet are simple improved versions of standard enemies, with more HP and dealing more damage, and require no special strategies to defeat.
- Degraded Boss: After a boss is killed for the first time, they can appear in any following waves as standard enemies.
- King Mook: The first and second bosses of each planet are an improved version of a standard enemy found in that planet, experimented on by Commander Calbrik with the goal of developing powerful bioweapons. Their names all have the word Neo prefixed to their standard counterpart's name, and they appear identical to their standard counterparts except for colour.
- Mechanical Lifeforms: The enemies in Katalund are various kinds of indigenous inorganic creatures.
- Piñata Enemy: Defeating the final boss of a planet within the allotted time limit allows the players to destroy the Satellite Core, which is harmless and can drop all items that the final boss can at a lower drop rate.
- Segmented Serpent: Each Waltan and Neo Waltan in Untaris consists of a head and four body segments, all of which have their own HP pools. The head cannot be harmed until all body segments are destroyed.
- Starfish Aliens: None of the aliens in these planets are even remotely humanoid.
- Timed Mission: In all four planets, players are tasked with killing waves of enemies as fast as they can, with the Alien Satellite giving warnings to how much time is left. There are a total of 12 waves, and every fourth wave has a designated boss that can drop loot. If the time limit runs out, the enemies will stop spawning after the current wave is defeated, and the Alien Satellite turns into a wormhole back to the Realm. If all 12 waves are completed, the Satellite Core will become vulnerable and can be destroyed for extra loot.
- Weather of War: Most of Katalund is covered in a moving toxic cloud, except for a cloudless strip that sweeps horizontally across the arena before moving back to the opposite side. Within this cloud, players slowly lose oxygen and enemies become Armored, except for the Golden Sphinx, which is invulnerable.
Suesogian
- Humanoid Aliens: Unlike almost all other alien enemies, the Suesogian has a decidedly humanoid body plan.
- Stationary Boss: The Suesogian never moves.
Tarul

- Cognizant Limbs: Tarul's tentacles are treated as separate enemies from Tarul itself.
- Tentacled Terror: Has 8 tentacles.
Acidus

- Cephalothorax: Acidus' body consists of nothing other than a head.
Golden Sphinx

- Dash Attack: After it reaches 2/3 health, the Golden Sphinx will start to periodically lunge at the nearest player, releasing a ring of bullets right afterwards.
- Animated Armor: The Haunted Armors are suits of armour possessed by souls.
- Black Knight: Knights of Oryx look like normal Knights except for their pitch black colour. The Brutes of Oryx also wear heavy black armor.
- Elite Mooks: The Brutes and Commanders of Oryx are much stronger than the other monsters, and are the main obstacle for people running through the Castle.
- Enemy Summoner: Brutes of Oryx can summon Warriors of Oryx; Commanders of Oryx can spawn Insect Minions.
- Living Structure Monster: Oryx's Living Floor, eyes inside the ground that launch Quieting spells.
Stone Guardians

- Combination Attack: Several of their attacks synergize with each other.
- Dual Boss: The two are fought together and often use attacks in tandem.
- Flunky Boss: They have several respawning Haunted Armors in their arena. While the Guardians do not actively summon them, the Haunted Armors can suddenly activate and join the fight if one gets too close.
- Kill Enemies to Open: You aren't allowed to enter Oryx's Chamber until both Guardians have been defeated.
- Kill One, Others Get Stronger: When one dies, the other heals up and gains access to an attack where it throws its sword, which lands and starts spewing paralyze bullets.
- Level Scaling: They were the first bosses to use the HP scaling that now applies to almost every boss.
- Living Statue: The Stone Guardians are a pair of statues that can move around and attack you.
- Pre-Final Boss: The Stone Guardians must be defeated in order to open the way to Oryx's Chamber where the Final Boss resides.
- Stone Wall: Due to their decent HP and solid DEF scores of 80, they are extremely durable and exceptionally hard to kill quickly. On the flip side, they don't hurt as much as one might expect, although they're more than capable of delivering massive damage if players take the full brunt of their attacks.
- Took a Level in Badass: They used to have rather low stats overall and could be killed extremely quickly by even a small group. Then they gained various buffs such as status immunity, a Healing Factor and increased health, but still died extremely fast. Then, when they were given HP Scaling, they suddenly became incredibly tanky: not even a large group could kill them too quickly. And finally, another update significantly boosted their damage and gave their attacks piercing properties, making them more of a genuine threat and able to easily kill the underprepared or unwary.
Janus the Doorwarden

- Armor-Piercing Attack: All his attacks cut right through armor. His keys' energy blasts also ignore defense.
- Flunky Boss: Summons many Keys of Light and Darkness to shield, heal, and help him.
- Kill Enemies to Open: If you want access to the Court of Oryx, be prepared to face and kill Janus.
- Point of No Return: Once you kill Janus and enter the Court of Oryx, you can't return to the Castle itself to fight Oryx or run the Wine Cellar.
- Shadow of Impending Doom: For one of his attacks, he marks a part of the arena in red, then unleashes an brutal attack on the highlighted tiles.
- Skippable Boss: An optional boss in Oryx's Castle that can only be fought if all of the statues in the castle are destroyed, who also drops the entrance to the Court of Oryx.
- Turns Red: His final phase, where he unleashes an alternating barrage of attacks while spamming his key minions.Janus the Doorwarden: "I AM THE DOORWARDEN! YOU SHALL NOT ENTER!"
Giant Oryx Chicken

- Flunky Boss: Spawns Chickens to assist him, and will respawn them instantly should they be killed. Uniquely, the chickens change attack patterns along with the boss.
- Forced Transformation: The Giant Oryx Chicken is the result of a polymorph spell cast on Oryx by the Nexus' wizards and sorcerers that can only be maintained during April Fool's. While the Giant Oryx Chicken is still a boss on par with the normal Oryx, the ordeal is deeply traumatising for him due to his fear of chickens.
- Lethal Joke Character: Despite being a giant chicken, an April Fools joke boss and using what the game refers to as "Rainbow Magic", he actually hits very hard and may or may not be on par with, if not more difficult, than the actual Oryx the Mad God.
- Sealed Evil in a Can: Well, an egg anyways.
- Star Power: A lot of his attacks are stars.
- Turns Red: Gradually gets more aggressive as he loses HP, eventually resorting to a full-blown chase.
The Puppet Master 2

- Action Bomb: Sort of. He summons Cursed Blasts, which charge up for a bit and then fire themselves at players.
- Back from the Dead: This is the Puppet Master, returned from the dead after making a deal with the Void Entity.
- Bullet Hell: Stands out among the other bosses for firing tons of shots that also move rather fast.
- Deal with the Devil: Made one with the Void Entity in the afterlife, giving him the souls of his puppet army in exchange for resurrection and greatly boosted abilities. Strangely, the Void Entity actually kept his promise, although he didn't have a lot to gain from not upholding his end of the bargain.
- Doppelgänger Spin: Unlike the first Puppet Master, he doesn't do this. However, his Trickster Puppet can.
- Flunky Boss: Has four incredibly powerful puppets that activate one at a time each time he hits a damage threshold. Destroying them is required to advance the boss to it's next state.
- Lightning Bruiser: Not him, but the puppets, most notably the Puppets of Pain and Chaos.
- Rain of Arrows: The Huntress Puppet can cause this.
- Recurring Boss: An upgraded version of the Puppet Master.
- Stationary Boss: Doesn't move.
- Turns Red: The Puppets enter a rage phase and become more aggressive and gain new attacks when they drop to about 40% HP. The boss himself also becomes more aggressive as he loses health.
Shaitan the Advisor


- Action Bomb: His hands can sometimes explode when they get close to you.
- Chronic Backstabbing Disorder: He's allegedly so untrustworthy that his form as a fire spirit is said to be symbolic of it. However, he has Undying Loyalty to Oryx and Oryx alone.
- Cognizant Limbs: Shaitan's hands are treated as separate creatures from his head.
- Flunky Boss: Is assisted by many Creepy Small Hands and Creepy Small Heads.
- Monster Lord: Shaitan is the king of the Djinn, although he doesn't exactly resemble his subjects..
- Playing with Fire: Is a fire spirit who lives near the core of the planet. Most of his attacks are fire-based.
- Sadist: Enjoys torturing both mortals and demons in his spare time.
- Turns Red: For his final phase his outer body melts away, revealing a ghastly skull-like form underneath. He then starts shooting large laser beams that will most likely kill anything hit by them.
- Wave-Motion Gun: Shoots big lasers in his final phase.
- Wreathed in Flames: Shaitan's body seems to be either made of or covered entirely in fire.
- The Worf Effect: Shaitan, king of the Djinn and a very powerful boss in his own right, was soundly defeated by Oryx during his time as a hero. This defeat was so jarring to him that he immediately pledged loyalty to Oryx, and to this day he has never tried to betray him, making this loyalty seemingly genuine.
Royal Cnidarian

- Electric Jellyfish: One of the Royal Cnidarian's attacks is an electric bolt that paralyses players. It's also responsible for electrifying the ocean.
- Flunky Boss: The Royal Cnidarian summons various small jellyfish of varying colours.
- Gameplay and Story Integration: The electric currents it sends into the ocean to trap people on the mainland are implied to be the reason why players can never walk too far from the shore.
- Noodle Incident: The Realm Eye mentions a series of disputes that occured between Shaitan and the Royal Cnidarian over their differences in environmental preferences during their court meetings. This was eventually resolved after Oryx properly built the Court of Oryx to connect to each of their domains directly.
- Shielded Core Boss: It can summon Gold Cnidarians which turn the Royal Cnidarian invulnerable as long as a Gold Cnidarian is still alive. As its HP is whittled down, it'll gradually summon them in larger groups.
- Stationary Boss: Up until its last phase.
- Underwater Boss Battle: The Cnidarian Reef is an underwater dungeon where players have to watch their oxygen.
Tezcacoatl the Great Basilisk
- Beware My Stinger Tail: If the flavour text of Tezcacoatl's Tail, the UT staff that he drops, is anything to go by, his piercing attacks are launched from his tail.
- Invincible Minor Minion: Early in the fight, Tezcacoatl summons a few Adult Basilisks, which are invulnerable and cannot be killed until the penultimate phase.
- King Mook: A boss version of the Basilisks in the Forbidden Jungle.
El Dorado

- Heavily Armored Mook: El Dorado has unusually high defense, which is only accentuated by the fact that it's almost permanently Armored (giving it an effective 97 defense for most of the fight).
- King Mook: El Dorado itself is the boss version of the Jungle Totems in the Forbidden Jungle, while the three Tribesmen minibosses are based on the Mask Hunter (Demon Tribesman), Mask Warrior (Insect Tribesman) and Mask Shaman (Bird Tribesman).
- Make My Monster Grow: El Dorado's Tribesman minions grow in size upon reaching 25% health.
- Mask of Power: When one of El Dorado's Tribesman minions (one of which is spawned at the end of each phase except the final one) is killed, invincible mask(s) will spawn, aid El Dorado in the next phase and last until the next tribesman is spawned.
- Malevolent Masked Men: The Insect, Demon and Bird Tribesmen minions of El Dorado wear a mask and carry another in their left hand as indicated by their name.
- Mayincatec: The mythical El Dorado was a City of Gold supposed to be in South America. The El Dorado in the game is the second boss of the Secluded Thicket, a supposedly Central American-themed dungeon.
- One-Hit Kill: What it inflicted on the first tribesmen to touch it. The curse within it is so severe that it has never been moved from its resting place. Fortunately, this doesn't apply to gameplay - although sit on El Dorado at your own risk.
- Stationary Boss: This boss cannot move.
- Turns Red: El Dorado's Tribesman minions will start to chase players and fire more bullets when they reach 25% health.
Xolotl the Lightning God

- Bounty Hunter: Xolotl was appointed to Oryx's court as his official bounty hunter, taking out high profile targets at Oryx's command.
- Crosshair Aware: His lightning strikes are telegraphed by a red crosshair. If one starts flashing on top of you, you'd be best advised to get the hell out of there.
- Death by Irony: Gets killed by his own lightning.
- Invincible Minor Minion: The Lightning Totems in Xolotl's arena are invulnerable and cannot be killed until the penultimate phase.
- It's Personal: Shortly after being approached, Xolotl will taunt you about how you killed Mixcoatl (his father and the boss of the Forbidden Jungle, of which the Secluded Thicket is the epic version):Xolotl the Lightning God: You have made a grave mistake killing Mixcoatl. Now you shall be my next sacrifice!
- Murder Water: His arena is surrounded by evil rainwater which deals damage to all players standing in it.
- Public Domain Character: He is named after Xolotl, the Nahua god of lightning and death.
- Shock and Awe: As indicated by his name, Xolotl wields the power of lightning. He can even call down lightning bolts from the sky.
- Tactical Suicide Boss: In his final phase, he'll alternate between shooting storms of bullets and striking players with lightning bolts which can be telegraphed by a tracking crosshair on the target. In order to kill Xolotl, a player must drag a crosshair at Xolotl's position so he'll strike himself with the lightning (conventional attacking no longer does anything to him in this phase).
F.E.R.A.L.

- Bullet Hell: Combined with Confusion Fu. The F.E.R.A.L. fires many, many projectiles, and almost all of them use highly confusing patterns and acceleration/deceleration to trip up players.
- Combat Tentacles: Spawns these for protection and to harass players.
- Emotion Eater: Instead of food, the F.E.R.A.L. actually consumes the very essence of Oryx's anger to survive. And Oryx has a lot of anger to spare.
- Invincible Minor Minion: The M.E.R.V. buggy that cuts across the map while raining fire, and the four T.U.R.R.E.T.s that periodically activate in later stages of the fight. The two A.E.G.I.S. orbs also count as this most of the time, buzzing around and trying to shield the switches that make the boss vulnerable.
- Mind over Matter: Wields psychic powers that it gained as a side effect from feeding off of Oryx's rage.
- Pet Monstrosity: This monster was commissioned as a pet for Oryx.
- Shielded Core Boss: The beast can't be hurt until it is lured into pools of green chemicals created by destroying switches in the surrounding blue pools. Destroying a switch will temporarily polymorph it and give players a chance to attack. In its laser phases, players must focus the A.E.G.I.S. orbs shielding it instead.
- Wave-Motion Gun: Can fire a massive laser that deals incredible sustained damage for one of its attacks. It's the first enemy in the game to utilize this type of move, as most enemies simulated it with solid streams of shots.
- Action Bomb: Monstrosity Scarabs chase at you quickly and do a good bit of damage if they happen to explode on you. Shoot them before they kamikaze you.
- Blob Monster: Biles of Oryx are slimes that leave trails of goo wherever they move.
- Elite Mooks: Henchmen of Oryx are not only very powerful, but can also spawn the rest of the monsters in the Wine Cellar.
- Interface Screw: Vintners of Oryx attack by throwing relatively slow wine bombs. While they do minimal damage, they inflict Drunk, which impairs your vision and can cause you to respond to threats more slowly.
- Mook Maker: Monstrosities of Oryx do not attack. Instead, they spawn Monstrosity Scarabs, small enemies that dash at you and attempt to detonate on you.
- Smash Mook: Abominations of Oryx lunge quickly at players before unloading a massive shotgun, capable of instantly killing careless players. However, they can only lunge in one direction, meaning their dash can easily be sidestepped.
- Trap Master: Aberrants of Oryx do not attack you directly. Instead, they spawn Aberrant Blasters, small mines that explode into a directed spray of shots when approached.
- Aristocrats Are Evil: Oryx Nobles, Oryx Patricians and Oryx Aristocrats are the primary enemies found in Treasurer Gemsbok's wing of the Sanctuary.
- Light 'em Up: Oryx Deacons, Clerics and Cardinals can call Holy Rays to deal high damage that pierce players' DEF.
- Religion of Evil: Oryx Deacons, Clerics and Cardinals lead the cult of Oryx, and serve as the main minions of Archbishop Leucoryx.
- Teleport Spam: Oryx Nobles, Aristocrats and Patricians periodically teleport to a new location.
- Turns Red: At around half health, Oryx Officers, Sergeants and Majors will enrage, becoming more dangerous in various ways.
- The Turret Master: Oryx Ministers, Ambassadors and Judges can deploy invincible portals that act as temporary turrets.
Archbishop Leucoryx

- Dark Is Evil: In his later phases, he switches his light attacks to chaotic ones that do more damage.
- Death from Above: Can call down storms of holy and chaotic energy rays to smite enemies.
- Heel–Face Turn: A twisted version with both "sides" being evil. After Oryx killed the demon that he served, he saw this as a sign and defected to Oryx.
- High Priest: The Archbishop of Oryx's religion.
- Invincible Minor Minion: The four candelabras in his room will fire at players during his whole fight.
- Light Is Not Good: He uses light/fire to attack and looks like a holy figure, but he's a malevolent madman fanatically devoted to Oryx. Even before he defected to Oryx, he was still obsessed with sacrifices to his demonic lord.
- Magic Staff: Uses the ceremonial mace Lumiaire to command both light and darkness.
- Make an Example of Them: According to his quote when transitioning to his last phase, this is apparently an actual teaching of Oryx's bible.From the scripture of Lord Oryx, 1 Ruthven 5:20, “As for those who persist in sin, rebuke them in the presence of all, so that the rest may stand in fear."
- Religion of Evil: He's the thoroughly malevolent leader of a religion that worships the Mad God, and before that, the head of a demon cult.
- Stationary Boss: Aside from occasional phase transitions, he doesn't move.
- Theme Naming: Named after a species of Oryx (the antelope), fitting for a servant of Oryx the Mad God.
- Yin-Yang Bomb: He commands both light and darkness to attack.
Chancellor Dammah
- Berserk Button: Interrupt his speeches at your own risk.
- Break Meter: When he's summoning a giant portal, doing enough damage to him will not only cancel the summoning, but stun him momentarily. However, he'll immediately counterattack once he regains his composure.
- Counter-Attack: Doing too much damage to him during certain phases will trigger a counter where he inflicts the whole party with a lengthy dose of Sick and instantly uses his Storm of Blades. If you interrupt his opening speech, he will start with this.
- Dem Bones: Noticeably more skeletal than his 3 colleagues.
- Evil Chancellor: It's in his name. He's the invisible hand behind Oryx's conquest, who often makes calls when the Mad God's drunken decision-making inevitably fails him.
- From Nobody to Nightmare: He was formerly just a powerful, arrogant, politician, but he eventually convinced Oryx to make him his chancellor, turning him into the puppetmaster behind a world-conquering empire.
- Magic Staff: While he's the owner of the extremely powerful Superior staff, he almost never uses it in combat, preferring his portals instead.
- Playing with Fire: His portals primarily attack with fire and poison.
- Poisonous Person: His portals primarily attack with fire and poison.
- Pride: Of course. The Superior staff he drops is even described as a physical manifestation of his assertions of grandeur.
- Smug Snake: His extreme arrogance and pride are practically his defining traits, but he's quick to devolve into raging and screaming once he's pushed into a corner.
- Storm of Blades: Has an attack where he opens up a row of portals before firing criss-crossing waves of knives.
- Talking Is a Free Action: Subverted - you can actually attack him during his intro speech. However, doing so will just make him mad and get him to start with a far more lethal attack than usual.
- Theme Naming: Named after a species of Oryx (the antelope), fitting for a servant of Oryx the Mad God.
- The Turret Master: Wields a variety of portals to attack. In fact, the attacks he has that don't come from his portals are rather limited, especially compared to his peers.
Treasurer Gemsbok

One of Oryx's 4 closest confidants, and one of the minibosses in Oryx's Sanctuary. Formerly an emperor of old, Gemsbok betrayed his people to earn a spot as Oryx's treasurer. He has since been tasked to crush the Realm's economy, a perceived threat to the Mad God's power.
- Aristocrats Are Evil: Plays this very straight. Some of his minions are actually named Oryx Aristocrats."Impoverished rats! Laugh all you want, but the rich will always take their place above you!"
- Balance Buff: Upon the Sanctuary's release, Gemsbok was considered to be the easiest of the four minibosses by a huge margin (by virtue of having much less HP, relatively simple mechanics, and a fight that could be trivialized by spamming heals and decoys), while often also being annoying due to his Teleport Spam. An update a few weeks later revised his fight to put him on par with his colleagues - giving him more HP, higher damage, more severe debuffs, additional attack patterns/phases, and other small features to make the fight drag out less.
- Beard of Evil
- Break Meter: If you can deal enough damage to him during his Teleport Spam phase, it's possible to stagger him out of it and stun him temporarily.
- Counter-Attack: During some phases, attacking too quickly will cause him to hit the party with an unavoidable debuff. If you fail his Shell Game, he will release a more severe version of this.
- Devious Daggers: While he never uses it in battle, the gilded dagger Avarice is stated to be his pride, and a weapon that had been used to backstab countless dealers in shady dealings.
- Evil Laugh: Lets out an animated one upon starting combat.
- Fiction 500: Being the one charged with collapsing the economy, he is incredibly rich and not afraid to both hoard and flaunt his goods. His entire segment of the Sanctuary is ornately decorated, and covered with piles of gold and jewelry.
- Gemstone Assault: Throws various explosive gems to inflict area damage and multiple status effects.
- Greed: One of his central character traits. He was already incredibly wealthy as an emperor, but the prospect of even more riches led him to betray his own kingdom for Oryx in a heartbeat.
- High-Class Glass: Wears a monocle to further accentuate his "evil aristocrat" vibe. According to its description should you loot it as the Collector's Monocle, it's specifically designed to enhance perception for stealth strikes.
- Magic Staff: Wields a gilded scepter to devastating effect. The UT Siege Scepter was supposed to be a combat modification to said scepter.
- Purple Is Powerful: He's mostly dressed in purple, and all of his non-gemstone attacks are a dark purple. He's also quick to prove that underestimating him just because he's a treasurer can quickly prove to be fatal.
- Shell Game: Partway through the battle, he'll summon three coins, one of which is flashing, and rapidly shuffles them around. Hit the right one, and his attack will backfire and stun him for a lengthy duration. Hit the wrong one, and he'll counterattack with a global Quiet that lasts for ages.
- Squishy Wizard: Downplayed. While he's still very durable (he is an endgame boss after all), he has both the lowest HP and DEF of the Sanctuary bosses, tying with Beisa and Dammah respectively. This is likely to compensate for his rapid Teleport Spam.
- Status Effects: The amount of attacks he uses that don't inflict a debuff can be counted on one hand.
- Teleport Spam: Warps around constantly, making him highly evasive and hard to hit.
- Theme Naming: Named after a species of Oryx (the antelope), fitting for a servant of Oryx the Mad God.
- Weapon Twirling: Spins his staff before unleashing an attack in his second phase.
Chief Beisa

One of Oryx's 4 closest confidants, and one of the minibosses in Oryx's Sanctuary. Formerly Oryx's sparring partner and one of the few he could consider a friend, he now assists Oryx as the leader of his armed forces.
- Break Meter: Doing extreme damage to Beisa in a short amount of time will stagger him, leaving him vulnerable and disrupting his troops' coordination. However, once he recovers, he'll always launch a Counter-Attack that applies his banner's effect to the entire map.
- Flunky Boss: His troops will assist him during battle, with more being deployed as the fight drags on. Attacking them only temporarily disables them, as they'll be revived if they approach one of his buff banners.
- Horns of Villainy: Has two stag-like horns. It's unknown if they're part of his helmet or natural.
- Katanas Are Just Better: Although he prefers to use his axe in battle, the Enforcer katana that can be looted from him is a sawtoothed blade that he personally crafted in order to be admitted as a Shatters gladiator, designed to suit and amplify his own combat technique.
- A Lighter Shade of Black: While he's still malevolent, his reveal lore explicitly refers to him as the sanest among the 4 Sanctuary minibosses, and it quickly becomes obvious when you meet the guy - he's not as deranged as the others, doesn't insult the realmers as much, isn't dismissive of his men, and still seems to have some semblance of a sense of honor. Given what the other three are like, that admittedly isn't the highest bar to reach.
- Lightning Bruiser: Beisa hits as hard as you'd expect from a mighty centaur general, but is tied with Gemsbok as the squishiest of the minibosses (he does, however, have much more DEF). However, not only is he supported by many adds and Armored for much of his fight (giving him the highest effective defense among his colleagues), unlike them he's extremely mobile and will often spend the fight charging around the arena. A combination of mobility, minion support, and the difficulty of approaching him in many phases are what turn Beisa into a Marathon Boss for excessively large or inexperienced groups, despite his lower health.
- Mook Commander: The head of Oryx's elite armada, who gives orders to his troops and directs their formations in battle. If Beisa is staggered by players, his troops will be left helpless and confused without orders from the chief.ERRG! Troops, stay together! Do not lose focus!
- Our Centaurs Are Different: Is an armored centaur. All his elite minions are also centaurs, possibly of the same kind.
- Status Buff: Can deploy green banners bearing his insignia as hazards. While players near them will be Silenced, the banners will rally himself and his troops if they're near, granting them doubled DEF and souped-up attacks. If he manages to counter an attack, he'll deploy a huge banner that affects the entire arena.
- Theme Naming: Named after a species of Oryx (the antelope), fitting for a servant of Oryx the Mad God.
- There Is No Kill Like Overkill: When put in charge of Oryx's conquest of the realms, Beisa's hunger for power led him to conquer and assert control over far more area than Oryx could ever need.
- Villainous Friendship: Was friends with Oryx during their gladiator days. Even to the present day, despite the Mad God's legion of followers, Beisa is one of the few that Oryx genuinely trusts as a friend. Also notable is that despite his growing insanity, Oryx actually came and personally asked Beisa for help, unlike the others who joined him to satisfy their own needs.
Oryx the Mad God

That Oryx is just a simulacrum. When that is killed, it drops a locked portal to the Wine Cellar. Using a Wine Cellar Incantation will unlock the Wine Cellar, where he can be fought for real. The strongest iteration of the Mad God, however, lies in his Sanctuary, which can be unlocked in the Wine Cellar with 3 special Runes.
In actuality, Oryx was formerly a mortal champion of the Shatters, acclaimed for his incredible prowess. For a while, Oryx was on top of the world - his services requested by all as everyone hailed him as a god among men. However, as he grew more arrogant and fearful of losing his status, he turned to the very forces he was famous for defeating and created a nefarious curse to ensure his eternal rule over the Realm - violating the natural laws that led to the resurrection of valiant fighters, and granting resurrection to anyone who tries to kill his enemies while consequently cursing anyone that opposes him with permanent death. Oryx quickly crowned himself as the tyrannical ruler of the Realm and has henceforth bore the mock title of Mad God.
- Absurd Phobia: Despite his otherwise brazen confidence, Oryx is terrified of chickens for some unknown reason. Oddly enough, he believes that everyone else shares this fear.
- Actually a Doombot: The Oryx fought in his chamber is actually a simulacrum of the true Oryx in the Wine Cellar.
- A God Am I: Clearly sees himself as one, but he doesn't actually refer to himself as a god until he ascends to his Exalted form in his third battle.
- Alcohol-Induced Idiocy: Supposedly, his alcoholism is part of what made him decide to just take over the realm one day.
- All Your Powers Combined: His third incarnation combines the signature powers of his four closest subordinates. He uses Dammah's portal summoning, Leucoryx's holy light barrages, Gemsbok's teleportation, and Beisa's self-buffing.
- Ambition Is Evil: His endless, insatiable quest for greatness is what made him such a remarkable hero (to the point where the Forgotten King wanted to appoint him as his successor), but it was also that same ambition that led him to decide that only world domination would satisfy him.
- Badass Boast: Has far too many to count, but a particularly good one is when he transforms into his Exalted form during his Sanctuary battle."Behold, the glory of a god above all others! I am absolute! I am...EXALTED!"
- Big Bad: Responsible for teleporting humans into his Realm as food for his minions, and is the reason why the Realm is in its current state.
- Black Knight: An extremely powerful god decked in pitch-black plate armor. Subverted in his Exalted form.
- Boss Banter: Oryx is fond of this.
- Boss Room: Oryx's Chamber itself, where the only enemies present are Oryx's simulacrum and his summoned minions.
- Break Meter: His third form can be staggered if you deal enough damage to him in certain phases, which will interrupt his attack and leave him open to damage for a few seconds.
- Bullet Hell: His first form boasts some impressive, hard-to-dodge bullet patterns fitting of a Final Boss. His second form retains the fancy patterns while packing more offensive ability. His third form, however, takes both to the extreme.
- Counter-Attack: In his third battle, he can sometimes raise his shield to guard himself if he takes too much damage in certain phases. Attacking him too much when he's on guard will cause him to counterattack with a global, unpurifiable burst of one of four debilitating status effects (Sick, Weak, Exposed, Silenced) that lasts for roughly half a minute.
- Death from Above: His third incarnation can call down explosive meteors, and later holy beam strikes.
- Dimension Lord: Is hinted to have some kind of power over dimensions, as he acknowledges the existence of millions of other Realms when you strike down his third incarnation, claiming that freeing one means nothing. To further drive this home, as this is happening, his arena will dissolve into a starry void with honest-to-god planets floating within, one of which looks strikingly Earth-like.
- Drunken Master: He's apparently drunk nearly all the time, and still manages to fight like a beast when angered. His taste in wine is supposedly shockingly exquisite, although his rampant alcoholism does understandably affect his decision-making much of the time.
- Empathic Environment: When he uses his desperation attack in the Sanctuary, the whole screen will noticeably darken as the Mad God prepares to strike players with his deadliest attack yet.
- Even Evil Has Standards: He's not one for wanton destruction, which is probably why he hates just about everything related to the Void - although it's likely more of a case of Evil Versus Oblivion.
- Evil Overlord: The tyrannical ruler of the Realm.
- Fallen Hero: Oryx was once the champion of a grand kingdom and became famous for defeating dark forces. It is clear that he's now far from the hero he used to be.
- Final Boss: Before facing Oryx's simulacrum in his chamber, you must close the Realm by hunting down and killing all event bosses, causing him to teleport everyone in the closing realm to his castle, then defeating the Stone Guardians in the castle to open the way to his chamber and fight him. This usually ends up with players returning to the Nexus, as the Wine Cellar Incantations needed to proceed further are rare to come across. See True Final Boss below.
- Fluffy the Terrible: The Big Bad of the whole game and immortal tyrant of the realms, who is also named after a genus of antelope.
- Flunky Boss: Can summon Warriors and Assassins of Oryx in some of his phases. In his Wine Cellar, he can spawn up to 4 Henchmen of Oryx, which can each spawn up to 3 more enemies. Interestingly enough, he cannot summon any actual minions in his third battle, although he is protected by three Messengers.
- From Nobody to Nightmare: From a lowly commoner in the Shattered kingdom, to the kingdom's finest hero, to the tyrannical overlord of the entire Realm.
- A Glass of Chianti: In his third battle, he will be found with his back to the player while holding a glass of wine. He will throw the glass aside when he turns around to battle - and yes, if it hits you, it makes you Drunk.
- Gold and White Are Divine: His Exalted form, and further empowered Celestial form.
- Horns of Villainy: Wears a horned helmet. You can even take one of the horns for yourself as a powerful Untiered ring (the Exalted God's Horn) if you get lucky upon felling his third incarnation. Holding it is said to be a monumental insult to Oryx's ego, but it does give its user defensive benefits and an offense boost at high health.
- Large Ham: Oh yes. Just look at some of his in-game battle taunts in his weakest form.Oryx the Mad God "You cosmic peasants! My [HP] hitpoints make me mightier than you!"Oryx the Mad God "Insignificant peons! I have [HP] hitpoints!"Oryx the Mad God "Yes, run for your worthless lives!"Oryx the Mad God "The universe bends to my will alone!"
- Laser Blade: Once he goes Exalted, his sword's blade transforms into a blade of fiery golden energy. The Divinity sword, which is looted from him, is also this by extension (as it's the same weapon).
- Leitmotif: Has one for each of his battles, all of which serve as a Call-Back to the original theme: Heresy for the first battle in his Chamber, Blasphemy for the Wine Cellar battle, and Apostasy for his battle in the Sanctuary.
- Light Is Not Good: Despite his usual Black Knight aesthetic, almost all of his attacks are light-colored in appearance, and his second form can use suns and multicolored magic to attack. Further exemplified by his Exalt form, which not only uses holy light to attack, but causes his armor to turn gold and silver while his sword and attacks ignite with golden fire. When he uses his strongest attack, his armor will glow even brighter to the point of being virtually white. The Realm Eye cites these radiant powers as him corrupting the Exaltation system, rather than being truly holy powers as he claims.
- Mad God: It's in the name, although he didn't give the title to himself, nor does he really follow the trope. He was given this specific title by the heroes as a final act of spite against the former hero that enslaved the Realm to his will. He fits the God Is Evil trope more if anything, and even then he doesn't exactly fit it too much - he's very much just an extremely powerful Evil Overlord with an immense ego.
- Mean Boss: Depending on his mood, some of his quotes when you kill his Event Gods can either have him showing disbelief and rage or contempt and dismissiveness over their failures. Justified, since he knows that his curse has effectively made them immortal - he can afford to lose as many minions as he needs, since they'll always come back.(on the Lord of the Lost Lands) "What trickery is this? My Lord of the Lost Lands was invincible!"(also on the Lord of the Lost Lands) "(Player Name), you have done me a service! That Lord of the Lost Lands was not worthy of serving me."(on the Cube God) "(Player Name), you wretched dog! You killed my Cube God!"(also on the Cube God) "I have many more Cube Gods, (Player Name)!"
- One-Winged Angel: In his third battle, Oryx transforms into the white-and-gold Exalted mode upon reaching half health. This form dramatically increases the power and potency of all his attacks while giving him a variety of new ones.
- O.O.C. Is Serious Business: When the Champion of Oryx was given his orders to raid the Lost Halls, he expressed concern that the Mad God seemed not only sober for the dispatch, but also somehow intimidated.note Considering that he's a Drunken Master with a huge ego, any time he's neither drunk nor brazen is a tell that something is wrong.
- The Pawns Go First: It's not until all his important minions in the Realm are killed that Oryx faces you himself.
- Person of Mass Destruction: Apparently, although he no longer displays it as much, the full extent of his fury can raze even the strongest of cities in mere moments.
- Physical God: It's unknown whether he actually is divine or not since he was explicitly born mortal, but he definitely fights with the strength of one, especially in his later battles where he starts doing things like summoning meteor strikes, explosive suns, and scorching holy light. Come the Mad God Messenger set and Oryx's Sanctuary, and you find out that there's actually a religion that worships the guy, although that might just be because of his insatiable ego.
- Point of No Return: Once you enter Oryx's Chamber, you cannot come back to the Castle, forcing you to fight Janus the Doorwarden first if you intend to take both him and Oryx during the same run, while also preventing you from doing both Oryx and a Court dungeon consecutively.
- Rags to Royalty: He started off as a mere commoner, and ascended to the Shatters' most renowned champion and outright heir to the throne out of sheer strength and willpower.
- Recursive Ammo: His second incarnation can fire suns that split into rings of fireballs.
- Red Eyes, Take Warning: His most distinguishing feature.
- Shielded Core Boss: His third incarnation is protected by 3 Messengers. Depending on how many of them are active at once, his defenses range from invulnerable (with 3 active) to nonexistent (with none). These defensive abilities are strengthened later.
- Sore Loser: When he applied to be a gladiator in the Shatters, the second his assessment instructor mentioned rejecting him (due to his common blood), he instantly beat him to a pulp. Ironically, this is what convinced the instructors to let him into the ranks.
- Super-Empowering: He's noted in lore to have some form of strengthening magic that lets him turn otherwise benign things into powerful monsters, such as how he created the Hermit God and Janus.
- This Cannot Be!: Said word for word when he dies.
- Took a Level in Badass: After he gained HP scaling, both of Oryx's boss fights went from pushover to deadly. This was greatly appreciated by the community, who saw Oryx as extremely easy for a final boss. Oryx 2 got an even bigger one later down the line, which further boosted his HP and gave him a number of phases, each loaded with absolutely lethal attacks. And that's not even getting into how tough his third incarnation is...
- True Final Boss: In order to reach Oryx's Sanctuary at the first place, players need to defeat Oryx in his Castle, use a Wine Cellar Incantation to unlock the portal to the Wine Cellar, then defeat Oryx again at the Wine Cellar and use the three Oryx Runes to open the way to Oryx's Sanctuary. While the Wine Cellar Incantation (a rare drop from most dungeon bosses) is already a fairly uncommon item by itself, the three Oryx Runes are only dropped by the highest-level bosses in the game, meaning that one needs to run through the game's hardest dungeons at least a few times in order to get to the Sanctuary in the first place. And even if they open the Sanctuary, there's no guarantee that the run will succeed - the Sanctuary itself, and Oryx the Exalted God in particular, are meant to be the ultimate challenge in the game, being the only source of tier 14 weapons, tier 7 abilities and tier 15 armour.
- Turns Red: His first form had one of the most notable ones in the older versions of the game - when he gets low on HP, he will heal himself, turn huge, and summon lots of minions while chasing you down with barrages of high-damage shots, including 2 aimed ones that shave off nearly 300 HP each.Oryx the Mad God: "I HAVE HAD ENOUGH OF YOU!"
- The Turret Master: His third form will summon four invincible portals early on in the fight, which will assist him by suppressing players with fireballs that disable Pet abilities.
- Why Did It Have to Be Snakes?: He's deathly afraid of chickens due to an undisclosed incident.
- The Worf Effect: He genuinely dreads the Void to the point where he openly admits he's struggled against those touched by it, notably what remains of the Shatters and the Lost Halls. Gameplay-wise, he's stronger than any of them, but it's unknown if he could truly hold up to the Void in story, given that the Void Entity is the equivalent of a primordial force given form while Oryx is just an extremely powerful tyrant.
Masked Party God

- Cephalothorax: The Masked Party God doesn't have a torso; his legs and arms are directly attached to his face.
- Cool Uncle: His nephew Xolotl is quite fond of the Masked Party God's way of life.
- Damage-Sponge Boss: The simplest boss in the game, all that is needed to defeat him is enough damage.
- Odd Job Gods: A god of parties.
- Piñata Enemy: The Masked Party God doesn't deal any damage and is the source of very rare drinks that can be found nowhere else. That being said, he is not a Zero-Effort Boss and requires enough DPS to burst him down before he can fully heal himself.
- Time-Limit Boss: To defeat him, players must deal 30000 damage in a set amount of time.
Belladonna

- Applied Phlebotinum: She was a normal flower accidentally turned sentient by Dr. Terrible.
- Bragging Rights Reward: She's a fairly difficult boss, and only drops rare reskins of T9 weapons which should be obsolete on any characters that are strong enough to tackle her at the first place.
- Flunky Boss: Summons tons of flowers to spew bullets, not to mention the Bella Buds that guard her.
- Gaia's Vengeance: She wants to kill adventurers because they harm flowers by picking them for Valentine's Day.
- Green Thumb: She is a plant monster, so she attacks mostly with plant-based projectiles.
- Took a Level in Badass: Valentines Day 2020 gave Bella a complete overhaul, turning her into a far more fleshed out boss while significantly ramping up her difficulty level. At the same time, her loot drops became better as well, and she even has two UT items to her name.
Decaract

- Breaking the Fourth Wall: The Decaract was massively overpowered on release and had to be nerfed almost immediately. In story, Oryx accidentally made it so good at killing that he had to weaken it in order to understand how it worked - and has never managed to replicate its original success.
- Bragging Rights Reward: Downplayed. The Decaract's loot tables consist of both legitimately useful UT items and vanity ones that would be useless on a character that can defeat it.
- Eyes Do Not Belong There: The Decaract summons swarms of flying Oryx Eyes that shoot lasers.
- Flunky Boss: The Decaract spawns swarms of fast-moving Oryx Eyes that fire lasers.
- Sequential Boss: Before fighting the Decaract proper, players have to fight and destroy 10 Pentaract Towers, at which point the main tower will spawn.
- Stationary Boss: None of the towers actually move.
- Turns Red: Once a tower hits half health, they gain the ability to fire stun bullets.
- Upgraded Boss: An upgraded version of the Pentaract.
- Zerg Rush: Its primary tactic is to swarm enemies with Oryx Eyes.
- Anti-Regeneration: During the final phase of the fight against the Syndicate in the Hidden Interregnum, all players are inflicted with Sick.
- Boss Bonanza: If a dungeon has a Syndicate Takeover modifier, a Syndicate member (depending on the difficulty of the dungeon in question) will spawn as an extra boss after the main boss is defeated.
- Recurring Boss: When their event is active, by defeating Syndicate members in the Realm or dungeons and turning in the Black Coins they drop to the Shady Vagrant, you can gain access to the Hidden Interregnum, where all four mercenaries can be fought at once.
- Well-Intentioned Extremist: According to the Shady Vagrant, the Wanderer's plan to put an end to Oryx might end with the destruction and collapse of all that is known, Realm and Nexus included. A radical solution for a radical problem.
- Wolfpack Boss: While only Black Blade Ozuchi is present when the players first enter the Hidden Interregnum, as he drops to 66% and 33% HP, he'll summon the other three mercenaries to his side.
The Wanderer
- Level Scaling: The Wanderer's strength depends on the difficulty of the dungeon she spawns in. In harder dungeons, she has more HP, uses more diverse attacks, and drops higher-tier equipment.
Prismimic

- Clipped-Wing Angel: When you destroy the Attacker, the Defender loses most of its power. The only transformation it can manage after that is Dreadstump the Pirate King.
- Ditto Fighter: The Prismimic copies the appearance and attacks of various other bosses.
- Dual Boss: The Prismimic will divide into an Attacker and Defender at the start of the fight. Each has different stats and a different array of bosses they can change into.
- Eyeless Face: The Prismimic's head is just a featureless prism.
- Master of Illusion: Uses light magic to produce realistic illusions and copy the forms of other bosses.
- Off with His Head!: The Prismimic prism states that it's the Prismimic's head, cut off and repurposed.
- Rare Random Drop: In addition to UT drops of the bosses it mimics, the Prismimic Attacker can drop the Mimicry Trap, while the defender can drop a prism named after itself.
- Silicon-Based Life: Again, as a creation of the Crystal Entity.