Character page for the towers in Kingdom Rush. Note that these entries are only for their appearance as towers; tropes relating to their role as enemies in other games should go on Kingdom Rush Towers or Kingdom Rush Enemies.
Return to the main character page here.
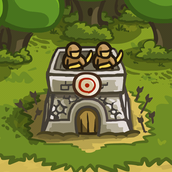
Archer Tower

Upgrades in Frontiers: Improved Aim, Lumbermill, Focused Aim, Accuracy, Twin Shots
Upgrades in Origins: Master Shooter, Treesinged Bow, Obsidian Heads, Elven Training, Bloodletting Shot
The first type of towers and the backbone of any defenses. Each towers are manned with two archers which fire at any enemies in range. They are capable of attacking both ground and flying enemies. In Kingdom Rush and Frontiers, there are three tiers of Archer Towers: Archer Tower, Marksman Tower, and Sharpshooter Tower, with each tiers increasing their damage and range. In Origins, they are known as the Hunter Arbor, Watcher Arbor, and the Sentinel Arbor, and each tier increases their damage, range, and the number of archers per tier.
- Annoying Arrows: Their main weakness is their inability to do meaningful damage to heavily-armored enemies. The Piercing Shots upgrade in Kingdom Rush remedies that.
- Anti-Air: They can fire on both ground and flying enemies.
- Armor-Piercing Attack: The Piercing Shots upgrade ignores portion of the enemies' armor.
- A-Team Firing: Their arrows have the chance of missing their targets.
- Boring, but Practical: They may not appear to be something but they are your main source of damage as the Mage and Artillery Towers are too slow and the Barracks is meant to slow down the enemies. Many of the upgrades for the Archer Tower boost its damage and range, as well as some complimentary like Salvage in Kingdom Rush, which set their sell value to 90%, and Lumbermill in Frontiers, which lower their cost.
- Damage Over Time: Bloodletting Shot in Origins gives their arrows a chance to inflict bleeding, which damages the enemies for every second.
- Multi Shot: The Twin Shot upgrade in Frontiers gives them a chance to fire two arrows at once.
- Rain of Arrows: Their low damage is made up for their high attack speed, so they fire their arrows a lot.
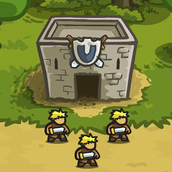
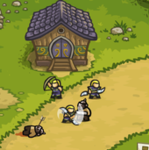
Barracks Towers

Upgrades in Frontiers: Defensive Stance, Boot Camp, Esprit de Corps, Veteran Squad, Courage
Upgrades in Origins: Elven Fencing, Expert Tactician, Enchanted Armor, Moon Forged Blades, Blessing of Elynie
The second type of towers. The barracks produces three soldiers to defend the ground from any enemy waves, slowing them down. They are not strong on their own, making them valuable meat shields for your towers to deal meaningful damage. If a soldier is killed, they will respawn from the barrack. They can be controlled by the player by moving their rally point. In Kingdom Rush and Frontier, there are three tiers of Barrack Towers: Militia Barracks, Footmen Barracks, and Knight Barracks. Each tier give extra health, damage, and low armor to keep the foes at bay. In Origins, they are known as the Defender Barracks, the Warden Barracks, and the Ranger Barracks, which in addition to extra health and damage, upon upgrading to Warden Barracks, they also gain a ranged attack to deal damage against both ground and flying enemies.
- Attack Reflector: In Kingdom Rush, the Spiked Armor upgrade allow the damage from enemies to be reflected at them.
- Bow and Sword in Accord: In Origins, Wardens and Rangers are equipped with bows alongside their swords, allowing them to attack enemies at range and even target airborne enemies.
- Hold the Line: Their main purpose. They are to fight against the ground enemies and slow them down until either one of them is dead.
- Last Chance Hit Point: The Blessing of Elynie upgrade in Origins gives the soldiers the chance to survive a fatal attack.
- Stone Wall: In general, soldiers don't do so much damage on their own, but they draw enemies to stop and fight them.
Mage Tower


Upgrades in Frontiers: Rune of Power, Spell Penetration, Eldritch Power, Wizard Academy, Brilliance
Upgrades in Origins: Crystal Focus, Empowered Magic, Crystal Gazing, Unstable Magic, Alter Reality
The third type of towers. They fire a magic bolt that ignores armor but are reduced by magical resistance. They can fire at both ground and flying enemies. They deal higher damage than archers but have a slow attack speed. In Kingdom Rush and Frontiers, there are three tiers of Mage Towers: Mage Guild, Adept Tower, and Wizard Tower. Each tier increases the damage and range of the towers. In Origins, they are known as Mystic Dais, Arcanist Dais, and Eldritch Dais, and they fire two bolts instead of one but weaker than the original Mage Towers.
- Action Girl: All the mage towers in Origins (except the High Elven Mage) are operated by sorceresses.
- Armor-Piercing Attack: Spell Penetration in Frontiers give their bolts the chance to ignore magical resistance.
- Projectile Spell: They fire magic bolt which deals strong damage but have the weakness of having slow attack speed. In Origins, they are weaker than the previous Mage Towers but can fire two bolts.
- Robe and Wizard Hat: The mages on the towers are wearing the typical wizard robe and hat in Kingdom Rush and Frontiers.
- Status Effects: Slow Curse in Kingdom Rush gives their attack a slowing effect to enemy that receive damage from them.
- Unwanted Assistance: Alter Reality in Origins is a double-edged sword at times as it can teleport the more troublesome enemies back... out of the range of your tower killzone, especially if it's an Ettin or Ogre Mage with Regenerating Health.
- Weaponized Teleportation: Alter Reality in Origins gives their attack a chance to teleport enemies back.
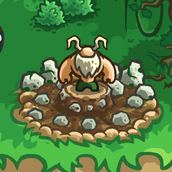
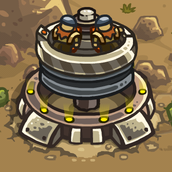
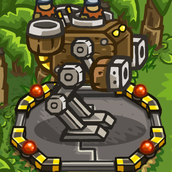
Artillery Tower

Upgrades in Frontiers: Smoothbore, Alchemical Powder, Improved Ordnance, Gnomish Tinkering, Shock and Awe
Upgrades in Origins: Hardened Boulders, Sharp Splinters, Earth Mastery, Heavy Load, Shocking Impact
The last of the four types of towers. Though they suffer from low attack speed, artillery towers can deal strong damage to a single target and spread damage to any enemies near the target. In Kingdom Rush and Frontiers, there are three tiers of Artillery Tower: Dwarven Bombard, Dwarven Artillery, and Dwarven Howitzer, with each tier adding extra damage and range. In Origins, they are known as Stone Circle, Boulder Circle, and Menhir Circle, who are notably weaker in damage and range.
- Armor-Piercing Attack:
- Their attacks by default ignore half of enemy armor.
- Heavy Load upgrade in Origins allows their explosion to ignore physical armor.
- Bamboo Technology: Not counting Origins, all tier 4 upgrades for artilleries look very high tech compared to the fantasy setting.
- Dishing Out Dirt: The druids in Origins create the rocks from the circle they stand in and use them to throw the large rock to damage the enemies.
- Druid: In Origins, artillery are re-flavoured into Druid Towers, muscular old druids that throw rocks at the enemy.
- Herd-Hitting Attack: Their main purpose is to deal spread damage against a horde of enemies. Useful against weak but numerous horde of enemies.
- Ludicrous Gibs: When an enemy is killed by an Artillery Tower, they explode into red chunks of gore.
- Our Dwarves Are All the Same: Dwarves are miners and are the explosive crew for the Artillery Towers.
- Splash Damage Abuse: It can damage enemies that it couldn't target directly like invisible and flying enemies.
- Status Effects:
- Shock and Awe upgrade in Frontiers may cause stun to any enemies that receive damage from the artillery.
- Shocking Impact upgrade in Origins adds a slowing effect to their explosions.
Rangers Hideout
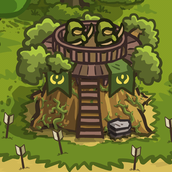
One of the two Tier 4 Archer Towers in Kingdom Rush. These elven rangers fire a large stream of arrows against their enemies. They have two abilities: Poison Arrows which poison enemies and deal true damage per second, and Wrath of the Forest entraps a group of enemies with vines.
- Damage Over Time: The Poison Arrows ability does this to enemy units.
- Druid: When Wrath of the Forest is upgraded, an old man appears next to the tower and is responsible for activating the ability.
- Green Thumb: When Wrath of the Forest is used, enemies are immobilised for a few seconds by vines.
- Herd-Hitting Attack: Wrath of the Forest stuns and damages multiple enemies, making it useful against hordes.
- Magic Staff: The Druid who stands next to the tree wields a staff which he uses to activate Wrath of the Forest.
- Poisoned Weapons: Poison Arrows let their attack inflict poison on any enemies, dealing true damage per second. It is their only reliable source of damage against armoured enemies.
- Rain of Arrows: They shoot extremely quickly.
Musketeer Garrison

One of the two Tier 4 Archer Towers in Kingdom Rush. Armed with muskets, these sharpshooters can shoot with precise accuracy and powerful bullets at the cost of attack speed. They have two abilities: Sniper Shot, which gives them a chance to instantly-kill a foe or at least deal massive damage to them, and Shrapnel Shot, which let them blast an area with shrapnel.
- Blue Is Heroic: The Musketeers wear blue on both themselves and the tower itself.
- Friendly Sniper: Adept at taking down enemies from far away with little fuss, and with a jolly Cockney accent to boot.
- Herd-Hitting Attack: Shrapnel Shot lets them blast an area with shrapnel, dealing damage to all enemies within the area.
- One-Hit Kill: Sniper Shot has a chance to instantly kill its target.
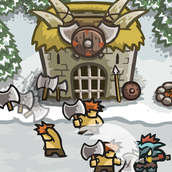
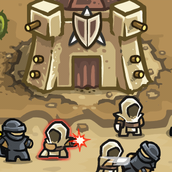
Holy Order

One of the two Tier 4 Barrack Towers in Kingdom Rush. These Paladins will hold their ground against the forces of evil. They have three abilities: Healing Light, which lets them heal themselves and remove negative effects when injured, Shield of Valor, which gives them high armour, and Holy Strike, which give them a chance to unleash a shockwave to deal damage to nearby enemies.
- Foil: To the Dark Knights from Vengeance, in a fitting The Paladin vs. Black Knight contrast. Both of them are barracks troops with 75% armour when fully upgraded, but while Holy Order paladins focus on longevity via Holy Light while having an Area of Effect attack in Holy Strike, the Dark Knights have longevity via Impervious and focus on singular targets with Armor of Thorns and Brutal Strike.
- Heal Thyself: Healing Light allows the Paladins to heal themselves and remove any negative effects while injured.
- Holy Hand Grenade: Holy Strike allows them to deal true damage in an area.
- Light Is Good: They're Paladins who use light powers to heal themselves and smite evil.
- The Paladin: Warriors of the light who could heal themselves and use their holy powers to smite evil.
- Stone Wall: Paladins are very durable with their medium (high if upgraded with Shield of Valor) armor and healing abilities, but they need Holy Strike if they want to deal reasonable damage.
Barbarian Mead Hall
One of the two Tier 4 Barrack Towers in Kingdom Rush. These Barbarians will fight to the death. They sacrifice armor for more damage. They have three abilities (the second vary for each version): Throwing Axes which allows them to attack ground enemies at range and flying enemies, Hunting Nets which slows down flying enemies (Flash only), Whirlwind Attack which gives them a chance to deal damage to all enemies around them (in iOS, Android, Steam version), and More Axes which boost their attack.
- Barbarian Hero: Barbarians who seek battle, whose thankfully are fighting for you...for now.
- Brutish Character, Brutish Weapon: They wield axes to show their barbaric nature, and can wield two axes with More Axes.
- Discard and Draw: They lose armour compared to Knights, but gain a ranged attack and much higher damage output.
- Dual Wielding: More Axes allows them to wield a second axe in their free hand. Subsequent upgrades increase their attack power.
- Fiery Redhead: Brutal, high-damaging soldier units who are quote: "savage warriors".
- Glass Cannon: Barbarians can deal a lot of damage with their abilities, but because of their lack of armour, they'll die very quickly without support.
- Herd-Hitting Attack: Whirlwind Attack is strong against a horde of enemies as the Barbarian can kill them when many of them activates it at once.
- Inescapable Net: In the Flash version, Barbarians can use Hurling Nets to slow down flying enemies.
- Spin Attack: Whirlwind Attack allows Barbarians to spin attack to deal damage to any enemies around them.
- Throwing Your Sword Always Works: Throwing Axes allows them to throw their axes to attack ground enemies at range and can hit flying enemies.
Arcane Wizard
One of the two Tier 4 Mage Towers in Kingdom Rush. A powerful mage tower that can fire a concentrated beam against a single target. They have two abilities: Death Ray, which disintegrates a single target for every 20 seconds, and Teleport, which sends a group of enemies back.
- Death Ray: Exactly What It Says on the Tin. It can instantly kill a foe.
- Klaatu Barada Nikto: It says this as one of its many quotes.
- Power Crystal: A purple one that is used to attack enemy units.
- Purple Is Powerful: The first example in the game.
- One-Hit Kill: Death Ray can turn any single enemy into dust for every 20 seconds. Upgrading it further can reduce down to 16 seconds at maximum level.
- Reality Warper: The text describing it when it's unlocked at The Citadel, seems to heavily suggest this.
- Weaponized Teleportation: Teleport allows them to send a group of enemies back, slowing their progress down.
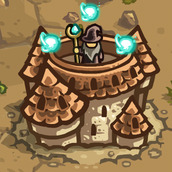
Sorcerer Mage

One of the two Tier 4 Mage Towers in Kingdom Rush. A mage tower that can fire a bolt of magic that continuously damage a foe and lower their armor for a few seconds. They have two abilities: Polymorph, which transform a foe into a weak but unblockable sheep, and Summon Elemental, which summons a giant stone golem to fight against a single target.
- Damage-Increasing Debuff: Their bolts can lower the enemy's armor so that non-Mage towers can deal more damage against them.
- Damage Over Time: Their attack deals additional damage to the target for the next few seconds.
- Dark Is Not Evil: Their bio states that they handle forces that are close to darkness, but they are firmly on your side.
- Forced Transformation: Polymorph gives the Sorcerer Mage the ability to transform a foe into a sheep. While as a sheep, they cannot fight, they lose their ability (except for flying and running), lose their armor and halves their health. However, they can no longer be blocked so be careful when creating chokepoints as they can still take lives.
- Golem: The Earth Elemental of the Summon Elemental ability is this.
- Power Crystal: Orange ones that jut out of the sides of it, giving the tower its power.
- Summon Magic: Summon Elemental creates a single golem that can fight like soldiers. They have high health, strong armor, and can deal area of effect damage. Upon death, they will respawn every 8 seconds.
- Support Party Member: They are not very strong towers compared to the Arcane Wizard, but the tower makes up for it with its crowd control.
Big Bertha

One of the two Tier 4 Artillery Towers in Kingdom Rush. A powerful dwarven cannon with a detonating payload. They have two abilities: Dragonbreath Launcher, which fires a missile that targets both ground and flying enemies and deal splash damage, and Cluster Launcher Xtreme, which fires a payload of mini-explosive to deal damage against a path of enemies.
- Bamboo Technology: It has MISSILES in a MEDIEVAL setting... need we say more?
- Big, Bulky Bomb: Both the regular ammunition, and the Cluster Launcher Xtreme.
- Macross Missile Massacre: Dragonbreath Launcher gives the Big Bertha the ability to fire a missile to damage any target (ground or flying) and deal splash damage. Have three of these things and expect a lot of missiles flying.
- Recursive Ammo: Cluster Launcher Xtreme fires a ball of payload which open to release mini-explosives to deal damage to a path of enemies.
- Sound-Effect Bleep: Upon upgrading the Dragonbreath Launcher.
- "Big Bertha": Yippee-ki-yay, mother-***!
- Xtreme Kool Letterz: Cluster Launcher Xtreme.
Tesla x104

One of the two Tier 4 Artillery Towers in Kingdom Rush. A tesla coil that sacrifices range for the ability to target flying enemies and deal high damage. They have two abilities: Overcharge, which leaves a static field around the tower upon attacking and dealing damage, and Supercharged Bolt, which extends the chain up to two times.
- Bamboo Technology: Similar to the Big Bertha, though this time it uses electricity to attack enemy units.
- Chain Lightning: The Tesla x104's bolt can arc from the primary target to two others by default, and four when fully upgraded.
- Herd-Hitting Attack: Overcharge allows them to generate a static field around them every time they attack, damaging nearby enemies.
- Lightning Gun: A dwarf-manned Tesla coil that deliver lightning strikes at enemies.
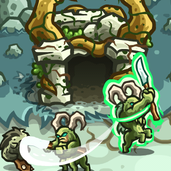
Sylvan Elf Hall
A group of elves, possibly refugees from the southern continent after the Elven War. They will fight for you after you fix up their Halls in the Silveroak Forest (Campaign) and Fungal Forest (Premium). They cost 100-200 gold each, and up to 4 elf warriors can be trained at any single time.
- Bow and Sword in Accord: Masters of bow and blade.
- Can't Catch Up: Sylvan Elves are very useful in Silveroak Forest, but nearly useless in Fungal Forest, since the enemies in the latter are too strong for them to be worth their cost.
- Double Weapon: The weapon that they use for melee combat has a blade on each end.
- Guest-Star Party Member: They are only available in two levels: Silveroak Forest and Fungal Forest.
- Hair of Gold, Heart of Gold: Though you do have to pay them to come to your side, they are ultimately good.
- Jack of All Stats: They are capable of both ranged and melee attacks.
- Our Elves Are Different: Guardians of the forest who fight Bow and Sword in Accord.
Sasquatch
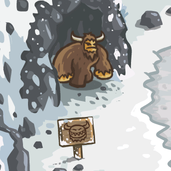
A giant, legendary beast trapped in ice. It will fight for you upon being freed.
- Awesome, but Impractical: It may be powerful, but it has a lot of factors required that it may not be a worthy investment. First, it had to be freed with using Rain of Fire ability, which should be used for emergencies or other purposes. Second, you must pay 400 gold to recruit one (it was 500 in Flash). Finally, the Sasquatch has a limit of one, can only target one enemy at a time, and can be killed by ranged attacks. Also, you have to pay again to get another one. The absolute kicker is that this beast's location and rally range is just barely past a shortcut in the path, which enemies are more likely to take than the normal path. While the Sasquatch's high health and area of effect attack can be useful, it'll need a lot of protection.
- Bigfoot, Sasquatch, and Yeti: The Sasquatch's appearance and stats are similar to the Yeti enemy.
- Guest-Star Party Member: It is only available in "Icewind Pass".
- Horned Humanoid: A rare example for a Sasquatch.
- Human Popsicle: It is encased in ice which can only be freed with Rain of Fire.
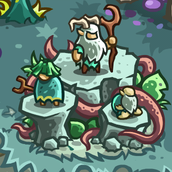
Sunray Tower
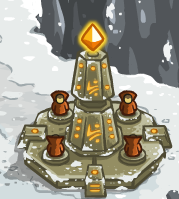
A tower operated by up to 4 sunray sorcerers, it uses the magic of the sorcerers to harness the power of the sun in order to strike an enemy unit at the players command. The more sorcerers purchased by the player, the lower the cooldown period, and the more useful it is.
- All There in the Manual: If the post made on who locked the Winter Queen is to be believed (on the IronHide Games website), then the Gem on top of the tower is the "Solar Heat Quartz". This may explain why it's destroyed in the every version except Flash, so that it couldn't be used to trap her again. The statues on the sides of the stairs of Stormcloud Temple, are those of the wizards who faces the Winter Queen, erected in their honour.
- Badass Longrobe
- Charged Attack: The sorcerers need to charge it up in order for it to be used. The more sorcerers there are, the faster it charges.
- Guest-Star Party Member: A rare double example, it is only available in Stormcloud Temple, and it is only unavailable in the iOS version.
- Hero of Another Story: It's revealed in Vengeance (on the IronHide Games website) that they're the ones who managed to seal away the Winter Queen using the Solar Heat Quartz.
- Light Is Good: They're good guys who use the power of the sun's rays to destroy evil.
- Power Crystal: One that sits atop its tower, which the sorcerers use to vapourise youe enemies.
- Power Glows: When it's ready to be used, the gem on top of it glows to signify it.
- The Power of the Sun: It channels the sun's rays (hence the name) and strike your enemies with its beams.
Crossbow Fort

One of the two Tier 4 Archer Tower in Frontiers. Armed with crossbows, these archers can fire arrows with high speed and high range. They have two abilities: Barrage which allowed the archers to fire bolts in quick succession, and Falconer to improve the range and critical hit chance of this and any nearby towers.
- Action Girl: The archers in the fort are female.
- Automatic Crossbow: With the Barrage ability, they can fire their crossbow in quick succession.
- Fiery Redhead: The archers manning the tower have red hair.
- More Dakka: In addition to their high attack speed, Barrage lets them fire bolts in quick succession. The achievement "Bolt Out the Sun" requires them to shoot 10,000 bolts.
- Purple Is Powerful: The archers were purple uniforms.
- Support Party Member: Their Falconer ability allow nearby towers to have extended range and critical hit chance, making them useful to be placed in the center of tower fortifications.
- Warrior Monk: Or, more accurately, Warrior Nun. Their description refers to them having been trained under "monastic discipline."
Tribal Axethrowers

One of the two Tier 4 Archer Towers in Frontiers. These axethrowers of the Tuk'va tribe can cast two strong spells to deter enemies. They can summon Totem of Weakness, which amplify damage against the enemies by 40% for a few seconds, and Totem of Spirits, which silences all spellcasting enemies within the area for a few seconds.
- Anti-Magic: Totem of Spirits disables any enemies' magical capabilities, such as defense buffs, zombification, or invisibility.
- Arch-Enemy: Their sworn enemy is the Ma'qwa tribe, the tribe you are facing in the jungle. They joined your army in order to defeat them.
- Damage-Increasing Debuff: Totem of Weakness amplifies the damage received by enemies by 40% in an area, weakening the foe to be easily killed.
- Hollywood Voodoo: They are spiritual and shamanistic in nature and use totems to weaken their enemies.
- Tribal Axethrowers: (upon upgrading Totem of Weakness) "Watch out for da voodoo!"
- Malevolent Masked Men: Averted, they are on your side, and are the enemies of the real Masked Men, the Ma'Qwa tribe. They're actually quite jovial.
- Support Party Member: They are far outclassed in damage by the Crossbow Fort, but their special abilities deter enemies by making them take more damage and prevent them from casting spells.
- Tipis and Totem Poles: Their totems invoke this.
Assassin's Guild
One of the two Tier 4 Barrack Towers in Frontiers. The Assassins are excelled in surprise attacks and countering enemy attacks by dodging incoming attacks. They have three abilities: Sneak Attack gives them a chance to deal extra damage and even assassinate a target, Counterattack improves their dodging ability and can counterattack for extra damage, and Pickpocket which gives them a chance to steal 1 gold for reach strike.
- Blade Below the Shoulder: They wield blades on their wrists, and use them as their primary weapons.
- Counter-Attack: Upon upgrading Counterattack, they will counterattack upon dodging an enemy's attack, dealing true damage against them.
- Flash Step: They do this when activating their Counterattack ability.
- Glass Cannon: They can dodge attacks, deal good damage and instantly kill enemies with Sneak Attack, but they lack armor and can die from powerful foes.
- In the Hood: They wear hoods as part of their "uniform" to attack your enemies.
- Invisibility: When idling, the Assassins will turn invisible, allowing them to avoid being seen and attacked.
- One-Hit Kill: Sneak Attack gives them a chance to assassinate a single target, instantly killing them. Upgrading this ability will improve the chance. They still keep this ability when your forces fight against them in '"Vengeance'', allowing them to one-shot your troops (but not heroes).
- Video Game Stealing: Pickpocket gives them a chance to steal one gold for each strike.
Knights Templar

One of the two Tier 4 Barrack Towers in Frontiers. The Templars are very durable and very strong at the cost of slow attacks. They have three abilities: Toughness which gives them more health, Arterial Strike, which gives them a chance to inflict bleeding and deal damage over time, and Holy Grail which gives them a chance to survive a fatal attack and restore 5% to 40% health.
- Auto-Revive: Holy Grail gives them a chance to revive from a fatal attack and replenish health. Upgrading it further will give them a higher chance to revive.
- Chest Insignia: The templar cross.
- Cool Sword: They have large broadswords, as befitting knights of such prowess.
- Damage Over Time: Arterial Strike gives them the ability to inflict bleeding on a foe and deal damage over a few seconds.
- Mighty Glacier: Templars are extremely durable, which can be taken to the limit with Toughness, and can deal great damage with their attacks and Arterial Strike, but their slow attack might hinder them against a horde of enemies.
Archmage Tower
One of the two Tier 4 Mage Towers in Frontiers. The archmage has the ability to charge up his bolts up to 3 times, dealing massive damage against a single target. They have two abilities: Twister, which summons a tornado that pushes back a group of enemies and deal damage per second, and Critical Mass, which may cause the bolt to explode and deal extra damage.
- Blow You Away: The archmage can summon Twister which takes a parade of enemies and force them back.
- Charged Attack: The archmage can charge up his bolts up to 3 times. When a single target reaches his range, all three of the bolts will hit them, dealing massive damage.
- Do Not Touch the Funnel Cloud: The Twister ability.
- Herd-Hitting Attack: Critical Mass gives the bolt a chance to deal extra damage against a small group of enemies.
- Locked Out of the Fight: Enemies that are sucked into Twister are deemed untargetable until the end of the duration.
- Rule of Three: It can charge up to three bolts before firing them at any unlucky enemy.
Necromancer Tower
One of the two Tier 4 Mage Towers in Frontiers. The necromancer fires weak bolts at a decent attack speed and can summon skeleton minions when enemies die near them. They have two abilities: Pestilence which let the necromancer blight the land to deal damage over time and Summon Death Rider which summons a Death Knight minion.
- Dem Bones: The Skeleton and Skeleton Warrior minions.
- Heel–Face Turn: They were originally enemies in Kingdom Rush. In Frontier, they joined you to oppose Malagar's plans.
- Necromancer: They can summon Skeletons and Skeleton Warrior minions from corpses of dead enemies within his range.
- Plaguemaster: They can unleash Pestilence which deals true damage to ground enemies within its area of effect.
- Plot Tailored to the Party: You obtain them in the same level where you first encounter Parasytes. This is useful since Parasytes that kill a Skeleton or Skeleton Warrior die without hatching into Reapers.
- Promoted to Playable: The skeletons and skeleton knights.
- Skeleton Motif: Being a necromancer, this is a given.
- Summon Magic: In addition to skeletons, they can summon Death Knight upon upgrading Summon Death Rider. Death Knights boost the damage and armor of skeletons in the field and has decent durability. Upon death, they'll respawn every 12 seconds.
- Support Party Member: They lack the raw damage of the Archmage, but they can heavily bolster Barracks troops with their undead minions and death knights.
D.W.A.A.R.P.
One of the two Tier 4 Artillery Towers in Frontiers. A dwarven drilling platform that cause earthquakes, dealing damage and slowing them around the tower. They have two abilities: Core Drill, which delivers a drill to gib one foe, and Furnace Blast, which burns the ground around it and damage any enemies in its radius.
- Big Red Button: One is placed on the tower (though one must look closely to see it).
- Earthquake Machine: The platform causes a localized earthquake, damaging and slowing enemies in the tower's radius.
- Fun with Acronyms: Drilling Weaponised Auto-Attack Rumble Platform.
- One-Hit Kill: Core Drill delivers a drill to instantly-kill a single target.
- Playing with Fire: The Furnace Blast sets any enemy that walks over the affected area on fire.
- Red Eyes, Take Warning: Not eyes, but a red light appears on top whenever an ability is ready to be used.
- This Is a Drill: A drill platform used for mining. It can summon a drill with its Core Drill ability.
Battle-Mecha T200
One of the two Tier 4 Artillery Towers in Frontiers. A walking robot piloted by dwarves which fire a mortar at the enemy. They have two abilities: Wasp Missiles, which fires a cluster of missiles at any target, and Waste Disposal, which dumps oil on the ground which slows any enemy in its radius.
- Bamboo Technology: If you thought that the fourth tier towers of the previous game were complex, this is a Humongous Mecha with the ability to act independently from the tower (as in it can't be disabled) and shoots missiles. Need we say more?
- Chicken Walker: The robot's legs has backward knees.
- Humongous Mecha: A giant robot equipped with a mortar, a missile launcher, and oil dumping area. As it is piloted, it can be rallied to different areas like barracks, although it can't Draw Aggro.
- Macross Missile Massacre: Wasp Missiles fire two missiles at any target with its second level letting it fire two more missiles. Have more than three of them and expect to see a swarm of missiles fly everywhere.
- No-Sell: The Walker is immune to tower-disabling effects as it acts as a separate unit independent from the platform. However, it can't be moved if its platform is disabled.
- Oil Slick: Waste Disposal cause the Battle-Mecha to dump oil onto the ground, slowing down any enemies that is in its radius.
Legion Archer

A special ranged tower available on the first two levels of Kingdom Rush Frontiers, consisting of a single archer shooting at enemies.
- Guest-Star Party Member: As aforementioned, Legion Archers only appear the first two stages: Hammerhold and Sandhawk Hamlet.
- Hero of Another Story: In the storyline, some of them were damaged before the player could get to them, while mounting a defense.
Mercenary Camp

A Mercenary tower that allows the player to hire up to 3 legionnaires and genies to fight for your cause (as a mix up, three total). Legionnaires are half the price of genies and have no armour, while genies are expensive but are excellent fighters.
- Benevolent Genie: The genie units are on your side.
- Blood Knight: The legionnaires are described as this.
- Forced Transformation: Genies turn enemies into dancing frogs, treasure chests, and golden harps.
- Good Counterpart: The genies are these to the efreets you battle at Nazeru's Gate.
- Guest-Star Party Member: They are only available in Dunes of Despair.
- Jack of All Trades: The genies are capable of every mode of combat.
- One-Hit Kill: Genies can instantly kill enemies by turning them into harmless objects; unlike the Sorcerer's ability in the first game, these enemies are can no longer reach the exit and removed from the game for good.
- Power Floats: The Genies, the more powerful of the two units, float above the ground.
- Walking Shirtless Scene: The legionnaires don't wear shirts.
SCUMM Bar

A Mercenary tower that allows the player to train up to three different types of pirate mercenary: Corsairs, Buccaneers and Boatswains.
- The Alcoholic: The Buccaneers like their grog.
- Anchors Away: The Boatswains wield anchors.
- Booze Flamethrower: The Buccaneers light their grog on fire as they spit it out onto enemy units.
- The Big Guy: The Boatswains, being reasonably priced and durable.
- Glass Cannon: The Buccaneers have high (ranged) damage output, but no armour.
- Guest-Star Party Member: SCUMM Bars appear in three levels: Buccaneer's Den, Snapvine Bridge and Port Tortuga. Corsairs are available for hire in all three, Buccaneers in the former two, and Boatswains in the last one.
- Improbable Weapon User: The Buccaneers and Boatswains use glass bottles and anchors, respectively.
- Molotov Cocktail: The Buccaneer's ranged attack involves throwing bottles of booze lit on fire.
- Pirate: Quite blatantly so.
- Stone Wall: The Boatswains will act as these, having the highest HP.
- Video Game Stealing: Corsairs have the ability to steal 2-5 gold from their enemies.
Pirate Cap

A captain with a gun battery that you can pay to shoot at your enemies, up to three times per payment, and costs 25 gold (one shot), 45 gold (two shots) and 60 gold (three shots). It acts very much like the Rain of Fire Spell (but you have to pay for it).
- Assist Character: Its purpose is to assist you in return for a small amount of gold.
- Cast from Money: The Pirate Cap's cannons cost money to fire, and unlike nearly every single use of gold in the game, the benefit is very much not permanent.
- Cool, but Inefficient: It's inefficient against big enemies like Executioners, but great for other lone enemies or dense groups.
- Guest-Star Party Member: The Pirate Cap's service is only available in Buccaneer's Den.
- Pirate: It's in the name.
Spear Maiden Hut

A mercenary tower that allows the player to train up to three Spear Maidens that will hold the line against just about anything.
- The Ace: As the quote above proves, they are very good fighters, posses more HP than regular soldiers, cost very little, and have a decent damage output.
- Action Girl: An all-female Mercenary tower.
- Amazon Brigade: Among the best of the mercenary units in the game, and comprised entirely of women.
- Continuity Nod: They have the Whirlwind attack of the Barbarians from the first game.
- Guest-Star Party Member: They are only available in Crimson Valley.
- Hair of Gold, Heart of Gold: They've all got blonde hair, and a fighting for you against Malagar and the Maq'wa tribe.
- Proud Warrior Race Guy: As the quote says: A tribe of proud warrior women reday for battle.
- Spin Attack: Their Whirlwind ability, which involves them spining around to deal more damage to the enemy units.
Dwarven Bastion

A shooting tower encountered by the player in one of the Cavern stages, consisting of two dwarfs shooting at enemy units. There are two Bastions on the campaign and heroic challenge modes (in different places), and three in the Iron Challenge (also in different positions on the map).
- Boring, but Practical: Full Mithril Jacket may not sound like much, but it is very useful in a level like this, since it increases the attack damage.
- Cool, but Inefficient: Explosive Keg, while cheaper (at first) than Full Mithril Jacket, has a long cooldown, and isn't affected by any upgrades.
- Cool Helmet: They were winged helmets, as seen in the image above.
- Guest-Star Party Member: Dwarven Bastions only appear in The Dark Descent.
- Suspiciously Similar Substitute: It is very similar to the Musketeer Garrison from the original game, firing slowly, but dealing high damage.
- Throw a Barrel at It: Their Explosive Keg ability, where one of the dwarves throws an explosive barrell at an enemy unit, dealind Splash Damage.
Dwarf Hall

A special Barracks tower encountered in the Cavern Stage (on two different levels), training up to three dwarves with large warhammers to help pound enemy units. There is one Dwarf Hall in both Main and Heroic modes, while on Iron Challenges there are two and three (2 on the Dark Descent, 3 on Darklight Depths).
- Booze-Based Buff: The Dwarfweiser ability allows them to chug down bear to heal themselves.
- Cannon Fodder: They ultimately become this in Darklight Depths, being at the Mercy of the Saurian Deathcoils.
- Cool Helmet: They were winged helmets, as seen in the image above.
- Guest-Star Party Member: Dwarf Halls only appear in The Dark Descent and Darklight Depths.
- Shout-Out: Their quote, Khazâd ai-mênu!, is the battle cry of the Dwarves from The Lord of the Rings.
- Stone Wall: When used properly in The Dark Descent.
- Suspiciously Similar Substitute: They are similar the Holy Order's Paladins from the first game, being tough (when maxed out on their Mithril Armour and Mithril Hammers) and able to heal themselves (Holy Order has Healing Light, the Dwarf Hall has Dwarfweiser).
Pirate Watchtower

A watchtower manned by a pirate, wielding a primitive firearm, dealing explosive damage to enemies that it hits. There are 2 located on the Campaign and Heroic modes and 3 on the Iron mode (with one always located on its own on an island at the top of the map).
- The Ace: It has the longest range in the game, more than any tower you're able to build, and matched only by the Dwarven Bastion in The Dark Descent.
- BFG: The firearm it carries is big.
- Boring, but Practical: Rapid Reload is dirt cheap, and increases the attack speed, allowing you to deal a lot of damage to enemies coming from the water (including the Gunboat).
- Guest-Star Party Member: It only appears in Port Tortuga.
- Ludicrous Gibs: The fate of any enemy killed by Parrot Bomber.
- Mighty Glacier: It has a heavy-hitting, but very slow attack.
- More Dakka: Upgrading Rapid Reload will allow the Pirate to shoot much faster than it would if not upgraded, and it's very cheap to boot (only 75 gold).
- Pirate: As its title suggests.
- Pirate Parrot: Parrot Bomber allows the tower to have one or two (depending on the upgrade).
- Herd-Hitting Attack: Its shots will deal a lot of damage to large groups of enemies whenever they get close enough to each other.
- Suspiciously Similar Substitute: To the Dwarven Bastion. It has a slow but heavy-hitting attack, has its units holding large firearms and hats, has an expensive bombing attack (Bastion has the Explosive Keg, Watchtower has Parrot Bombers), both have the longest range in the game, have a Boring, but Practical ability, and their numbers vary depending on the level mode (both have 2 on the Campaign and Heroic Modes and 3 on the Iron Modes).
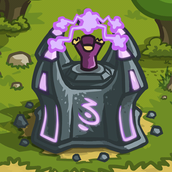
Shrine of Regnos

A Shrine dedicated to Regnos, the in-game God of the Seas, which when upgraded, allows players to shoot a concentrated strike of purple lightning from its Trident at a group of enemies, dealing Splash Damage and acting as a sort of Wave-Motion Gun.
- Cool Crown: Regnos is implied to have one been a king, and he has the crown to match.
- Grandpa God: Regnos, the God of the Seas, is depicted as an old man with a prominent beard.
- Guest-Star Party Member: Shrines of Regnos only appear in Storm Atoll and The Sunken Citadel.
- Prongs of Poseidon: It shoots from a Trident it holds up in the air.
- Skeleton Motif: The area that it targets is marked with a Skull and Crossbones.
- Shock and Awe
- Suspiciously Similar Substitute: Being a manually-controlled tower that can fire anywhere on the screen and has a long cooldown, the Shrine of Regnos is very similar to the Sunray Tower in the original game, but is available on all platforms, is more expensive, and much more powerful.
Dark Forge

The Dark Forge (formerly known as the Forbidden Forge) is a special tower that only appears on the first level of the Shadowmoon Mini-campaign. Being manned by two Mad Scientists that lend their brain power to fight the forces of Vasile.
- Brainy Specs: One of the scientists manning the Forge have these.
- Composite Character: It's a cross between the Tesla Coil x104 (having its Chain Lightning ability) and the Sorcerer Mage (with its ability to summon one fairly good golem to block enemies).
- Chain Lightning: By default, the Dark Forge's bolt can arc to three enemies, and can be upgraded to five with Lightning Strike.
- Cyborg: Frankie's last upgrade invokes this, with cybernetic arms and an eye to match.
- Dark Is Not Evil: Despite having two Mad Scientists manning it, and having a Flesh Golem with them, they are entirely on your side.
- Einstein Hair: Both of the scientists have these.
- Fiery Redhead: One of the scientists has bright red hair.
- Frankenstein's Monster: Frankie the Flesh Golem is sewn together from body parts and animated by electricity.
- Good Counterpart: Frankie the Flesh Golem is this to the Abominations that come through towards you in the Shadowmoon Campaign levels.
- Ground Punch: Frankie can do this at level 3.
- Guest-Star Party Member: It's only available in Bonesburg, the first level of the Shadowmoon mini-campaign.
- Hulk Speak: Frankie talks like this, bumbling and talking in the third-person.
- Lawyer-Friendly Cameo: It has a Flesh Golem called Frankie.
- Mad Scientist: With lab coats and everything.
- Shock and Awe: It has a lightning and electricity based ability, which are useful with large crowds of enemies.
Arcane Archers

One of the two Tier 4 Archer Towers in Origins. These specialized archers fire magical arrows which gradually decreases the foe's magical resistance. They have two abilities: Burst Arrows, which let them shoot an explosive arrow to deal true damage, and Slumber Arrows, which let them fire an arrow that put enemies to sleep for a few seconds.
- Blue Is Heroic: Silvery-blue elite archers that fight for the Queen.
- Damage-Increasing Debuff: Their arrows gradually lower the enemies' magical resistance permanently, allowing mages to deal potential damage that they couldn't do otherwise against those foes.
- Herd-Hitting Attack: Burst Arrows deal damage to enemies within the area of effect.
- Mage Marksman: Though they are archers, they wield strong magical abilities in their arrows.
- Tranquilizer Dart: Slumber Arrows functions as this.
- Trick Arrow: They are equipped with magical arrows to inflict certain effects.
Golden Longbows

One of the two Tier 4 Archer Towers in Origins. These elite archers slowly fire arrow at a long range while shooting twice as fast with half the damage when firing at nearby enemies. They have two abilities: Crimson Sentence, which lets their arrow instant-kill a single target, and Hunter's Mark, which amplifies the damage against one target.
- Badass Cape: They wear billowing red ones that look awesome.
- Damage-Increasing Debuff: Hunter's Mark allows the Golden Longbows to mark one target to amplify the damage taken.
- Friendly Sniper: On the side of good, and with a ong range and deadly accuracy.
- Long-Range Fighter: Golden Longbows boast the largest range of all Archer towers. Although Downplayed as they can fire enemies close-by twice as fast like other Archer Towers at half of their normal damage.
- One-Hit Kill: Crimson Sentence allows them to instantly kill one target with a very low percentage. Upgrading it will increase the chance.
- Red Is Heroic: Their red an gold colour scheme is matched by their heroic actions during the levels.
Bladesinger Hall

One of the two Tier 4 Barracks Towers in Origins. These warrior monks excel in the art of the blade, trading in their ranged attack for swift strikes. They have three abilities: Perfect Parry which gives them a chance to become invulnerable for two seconds, Edge Mastery which boost their attack and attack speed, and Blade Dance which let them strike many foes with their slashes.
- Discard and Draw: Bladesingers loses their ability to attack enemies from the distance with bows in exchange for more melee offense.
- Dual Wielding: They wield a pair of curved swords.
- Flash Step: Blade Dance allows the Bladesinger to strike many times against a wave of enemies. It shows them striking the enemies at a quick velocity.
- Master Swordsman: They are the master of the blades. They can upgrade Edge Mastery to improve their damage and attack speed.
- Mercy Invincibility: Perfect Parry gives them a chance to become invulnerable after being attacked.
- Parrying Bullets: Perfect Parry works on any attack, including ranged.
- Red Is Heroic: Their overall red colour scheme, and long red hair is indicative of the fact that they're on your side.
- Spin to Deflect Stuff: The animation for Perfect Parry.
- Warrior Monk: Their caption before purchase describes them as such.
Forest Keepers
One of the two Tier 4 Barracks Towers in Origins. Forest Keeper are versatile warriors with a ranged attack but have limited numbers. They have three abilities: Circle of Life which allows them to heal themselves and allies, Eerie Gardener allows them to summon vines to slow and damage foes, and Ancient Oak Spear which powers up their spears to deal true damage.
- Armor-Piercing Attack: Ancient Oak Spear bypass enemies' defences and deal true damage.
- Green Thumb: Eerie Gardener allows them to summon vines which slows down and damages enemies over time.
- Glowing Eyes: Green ones, indiciative of their greenery-based powers.
- Healing Hands: Circle of Life gives them the ability to heal themselves and any allies.
- Javelin Thrower: Forest Keepers attack enemies that fly or are far away by throwing javelins.
Wild Magus
One of the two Tier 4 Mage Towers in Origins. They sacrifice damage for incredibly high attack speed. They have two abilities: Eldritch Doom, which instantly kills a single target and explode to deal damage to nearby enemies, and Ward of Disruption, which silences a group of enemies.
- Genki Girl: Judging by their quotes, voice, and attack style, they seem to be this.
- Herd-Hitting Attack: Eldritch Doom, in addition to instantly killing one foe, deals damage to all enemies standing nearby.
- Ludicrous Gibs: The fate off anyone struck by Eldritch Doom.
- Magic Missile Storm: The Wild Magus's individual attacks deal little damage, but the tower has one of the fastest attack speeds in the game.
- Mystical White Hair
- One-Hit Kill: Eldritch Doom gives the magus a chance to instantly kill a single target.
- "Pop!" Goes the Human: Any enemy unlucky enough to be hit by Eldritch Doom explodes into gibs.
- Power Floats: The entire tower seems to be floating.
- Status Effects: Ward of Disruption cast silence against a crowd of enemies, including Twilight Harasser's jump ability.
High Elven Mage

One of the two Tier 4 Mage Towers in Origins. They are seasoned mages that can fire three bolts instead of two. They have two abilities: Timelapse, which phase out a group of enemies and deal damage to them over a period of time, and Arcane Sentinel which summons a ball of magic that attacks any enemy in range.
- Badass Long Robe: The only wizards that have them in Origins
- Blue Is Heroic: They have a mystical blue colour scheme and they're on the side of the player.
- Locked Out of the Fight: Timelapse traps a group of enemies for a duration and deals damage to them during that time.
- Plot Tailored to the Party: They are first made available in The Crystal Lake, where there are several crystals both in and around said lake. Their source of power comes from crystals, and the brief in the beginning of the episode says that they are using these crystals to aid you in your campaign.
- Power Crystal: Their source of power.
- Summon Magic: Upon upgrading Arcane Sentinel, the mage will summon a ball of magic that damages any enemy within double of the mage's range. It can be upgraded to include two sentinels.
Arch-Druid Henge
One of the two Tier 4 Artillery Towers in Origins. A stone platform for three druids. The main druid can charge up to three rocks and sling them at any target with moderate speed. They have two abilities: Sylvan Curse, which curses a single target to deliver a percentage of damage to any nearby enemies, and Runed Bears, which summons rune bears to fight.
- Area of Effect: A strange one in the fact that the Sylvan Curse allows them to attack multiple enemies, as well as the regular Splash Damage done by all artillery towers.
- Badass Long Robe: A slightly shorter one worn by one of the Druids.
- Bears Are Bad News: Runed Bears summon a rune bear which aren't strong or durable, but are good meat shield. And what's worst than one bear, upon upgrading it to level 2, there's two bears.
- Charged Attack: The Arch-druid can charge up to three rocks when not attacking. When an enemy is in its range, he'll sling the rock to deliver three explosive damage.
- Druid: As their title says.
- Horned Humanoid: The main Druid has curled horns on its head.
- Magic Staff: Again, the main Druid has a magic staff that it uses to summon an hurl stones.
- Splash Damage: As with most Artillery Units.
- Synchronization: Sylvan Curse causes all enemies that are near the cursed enemy to receive a percentage of damage that the cursed enemy taken.
Weirdwood
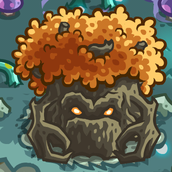
One of the two Tier 4 Artillery Towers in Origins. A giant treant that throws acorns at the enemy. They have two abilities: Fiery Acorn, which throws a burning acorn that explode to deal spread damage and leaves behind a fiery trail, and Clobber, which cause the tree to slam the ground and deal damage and stun the enemy.
- Fiery Redhead: An almost literal example, where it uses its Fiery Acorn and having reddish leaves.
- Ground Punch: Clobber allows them to slam the ground to deal damage and stun the enemy for a few seconds.
- Playing with Fire: Its Fiery Acorn ability sets the ground on fire for a short amount of time.
- Slasher Smile: It sports one before throwing its Fiery Acorn.
- Treants: A large tree that throws explosive nuts.
- When Trees Attack: And they prefer throwing nuts at their enemies.
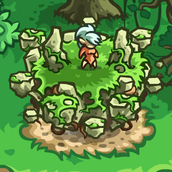
Awok Hut

A special barrack in Redwood Stand. For hundred gold, the barrack can spawn up to 4 Awoks and defend their home from the invaders.
- Awesome, but Impractical: Having them on your side may sound cool, with their ability to attack the Perythons that appear on the stage, but they have very little health and armour, are situated near the end of the path, and cost 100 gold each to hire.
- Bears Are Bad News: To the enemy units that is.
- Guest-Star Party Member: They only appear in Redwood Stand.
- Lawyer-Friendly Cameo: They are the Ewoks in all but name.
- Suspiciously Similar Substitute: To the Sylvan Elf Hall from the first game, being a run-down hut, on the fourth level, available to train up to 4 units, for 100 gold each, and having a ranged attack.
Gryphon Riders
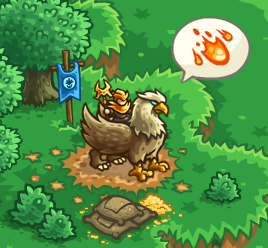
A pair of elves that ride Gryphons into battle at Gryphon Point that attack specific areas of the path that your enemies will be walking on.
- Awesome, but Impractical: While they cost nothing, and do a fair amount of damage, they are also limited to certain parts of the map, and only come after a certain amount of time has passed.
- Beast of Battle: The Gryphons.
- Conveniently Timed Guard: They appear at key times on the levels, attacking parts of the paths that would most likely be crowded with enemies.
- Death from Above: What they deal to your enemies on the level.
- Guest-Star Party Member: They only appear in Gryphon Point.
- Magic Staff: One that the elves riding them use to shoot down your enemies.
- Playing with Fire: The riders seem to shoot a fiery spell down on the path when flying over them.
Faery Dragon Aerie

Dragonlings that appear on The Crystal Lake level in the Enchanted Forest area of the main campaign.
- Badass Adorable: Baby dragons that are incredibly helpful in your battles against the enemy units.
- Boring, but Practical: While they themselves don't do any harm to your enemies, their crystalizing ability becomes very useful for crowd control, especially on this particular level.
- Crystal Prison: Essentially what they trap your enemies in, by [[Breath Weapon breathing on them and temporarily trapping them in a crystalline substance.
- Fairy Dragons: Small purple-blue dragons with insect wings instead of forelegs, and which can trap foes in crystal.
- Guest-Star Party Member: They only appear in "The Crystal Lake".
- Harmless Freezing: Their crystalizing ability does absolutely no harm to your enemies, but stops them dead in their tracks.
- Innocent Blue Eyes: They have icy blue eyes, and their attacks deal no damage.
Gnome Garden
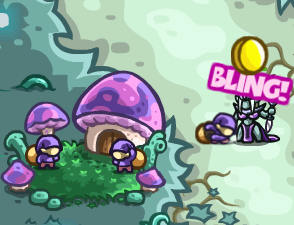
Some troublesome gnomes that come to your aid when fighting against Malicia in The Unseelie Court. Up to three gnomes can be called into action to help you.
- Assist Character: What they essentially are, with them using their tricks to stall the enemies in a variety of ways.
- Beware the Silly Ones: They're silly gnomes, but their attacks can seriously harm enemy units, such as poisoning them and turning them into harmless bunnies that are easy to kill.
- Forced Transformation: They can turn some of your enemies into harmless bunnies, though this reduces the amount of gold that they can give.
- Guest-Star Party Member: They only appear in The Unseelie Court.
- Magic Wand: What each gnome has on them to cast a spell on an enemy unit.
- One-Hit Kill: They can disintegrate enemies when Total Mischief is maxed.
- Our Gnomes Are Different: Surprisingly powerful humanoids that can do some serious harm to enemy units.
- Poisoned Weapons: They can poison enemies, dealing 120 damage, but cannot finish them off.
- Purple Is Powerful: Gnomes that wear purple, and are surprisingly powerful units.
- Rule of Three: There are 3 gnomes available and 3 levels possible for the Total Mischief ability.
- Video Game Stealing: Their passive ability involves pickpocketing from your enemies, in the same way as the Assassins would years later.
- Weaponized Teleportation: They can teleport enemies backwards.
Dragon Nest

A nest housing a single red dragon egg that you can hatch for 250 gold to get a baby red dragon on your side in Arcane Quarters, something you will want to consider given the fact that the level is split into three different islands. The red dragon in question is in fact Ashbite.
- Badass Adorable: For a newly-hatched red dragon, he is surprisingly powerful against enemy units.
- Breath Weapon: Just like grown-up Ashbite in Frontiers.
- Future Badass: This is in fact Ashbite, with some of the same abilities as he would use years later.
- Guest-Star Party Member: He only appears in Arcane Quarters.
- Instant Expert: Seems to know how to use the Blazing Breath and Fiery Mist abilities only a short while after hatching from an egg.
- Pint-Sized Powerhouse: A tiny, newly-hatched, and surprisingly powerful baby dragon.
- Playing with Fire: Just like his future self (with the Breath Weapon variety, of course).
- Red Is Heroic: As with the future Ashbite.
- Smoke Shield: What the Fiery Mist does, which helps to slow down enemies.
- Weaksauce Weakness: He is susceptible to Anti-Air enemies, which become quite common on that level in particular.
Young Beresad

A young black dragon that the kingdom will meet many years later in the caverns of the Saurians. You can call for Beresad's help with 100 gold to set fire to all of the paths your enemies go down, but only temporarily. Like the younger version of Ashbite, he is only available on Arcane Quarters.
- Badass Adorable: A young, powerful, and surprisingly powerful black dragon.
- Breath Weapon: He breathes green fire.
- Cast from Money: Beresad must be paid 100 gold every time his Conflagration ability is activated.
- Death from Above: Like Ashbite above. Though his method involves flying to specific parts of the map in a specific order to achieve this.
- Dragon Hoard: Beresad has one even at this relatively young age.
- Greed: The flavour states that he's very fond of gold.
- Guest-Star Party Member: Only available in Arcane Quarters.
- Promoted to Playable: From being an obstacle in Frontiers, to a playable tower in Origins.
- Red Eyes, Take Warning: As with future Beresad.
- Technicolour Fire: He breathes green fire, like he does in Frontiers and later, Vengeance.
- Token Evil Teammate: Given your encounters with him in the future, he seems to be this for your troops in Arcane Quarters.
Renegade Post

A special barracks tower, consisting of twilight elves that have joined you at the last minute in order to put an end to Malicia and Mactans' plans for the Tear of Elynie. As last-minute allies, they are only available on the last level, Shrine of Elynie.
- Attack Backfire: Their Blade Mail ability reflects a certain percentage of the damage they're dealt, back at the enemy units.
- Defector from Decadence / Everyone Has Standards: They turned against their own kind after their plans went too far for them, personally.
- Guest-Star Party Member: They only appear in Shrine of Elynie.
- Heel–Face Turn
- Jack of All Trades: They have decent armour, both close-quarter and ranged attacks, and can heal themselves with Life Stealer Strike.
- Life Drain: Their Life Stealer Strike ability allows them to both deal physical damage, and heal themselves thanks to them beating their enemies.
- Storm of Blades: A mild example, wherein they can throw a blade at their enemies, and throw two when the Double Daggers ability is unlocked.
Bastion

Two towers that only appear on the Galadrians Wall level of the Hulking Rage mini campaign. One (the one seen in the image above) is destroyed when the 5th wave begins, while the other can be used throughout the level. It's the only special tower that doesn't appear in the main campaign.
- Awesome, but Impractical: While the one in the middle of the map is quite useful (until its destroyed) the one at the top of the map can only really harm a few low-level enemies, not to mention that its rather expensive to rebuild.
- Cool Helmet: Worn by the elf manning the Bastion.
- Crippling Overspecialization: While it does give good damage to enemy units, it's limited to one part of one path only, with very little leeway.
- Crutch Character: While the one functioning Bastion is very powerful at taking down the swarms of enemies, the player should not rely on it as a Gnoll Burner will destroy it at the start of wave 5.
- Guest-Star Party Member: They only appear in Galadrian's Wall.
- Hero of Another Story: One was destroyed and has to be rebuilt, most likely defending the Wall the Ogres are attacking.
- Red Shirt: One Bastion is destroyed by a Gnoll Burner at the start of wave 5.
- Storm of Blades: It shoots razor stars that can do an alright amount of damage to enemy units.
In General
- The Bus Came Back: Most of them are enemies from the first three games who now make a reappearance as playable towers.
- Crippling Overspecialization: Unlike the previous games where tower specializations are determined at their fourth tiers, each and every one of these towers are specialized from the get-go, and you can bring up to 5 into a level. This of course means that certain towers will naturally be vulnerable to certain enemies from the get-go.
- Dark Is Evil: All of them are controlled by the Dark Army's monsters and evil humans, a number are Evil Counterparts to the previous games' towers, and they're all working on the side of evil.
- Promoted to Playable: Enemies from the previous three games that are now playable as towers.
- Summon Magic: Notably, a good number of the non-barracks towers have the ability to spawn minions that can block enemies or attack. These towers are Specters Mausoleum, Bone Flingers, Rotten Forest and Goblin War Zeppelin.
- Villain Protagonist: All of them are on the Dark Army's side, and are all used by the player.
Shadow Archers

Shadow archers from the first game, now deployable as towers. They have three abilities: Blade of Demise, which is an instant kill on one target with a cooldown, Shadow Mark, which amplifies the damage against one target like the Golden Longbows from Origins can, and Crow's Nest, which summons a crow to help attack enemies.
- Creepy Crows: Crow's Nest summons a crow that repeatedly attacks a targeted enemy in range and drains their health over time until they die or leave the range.
- Damage-Increasing Debuff: Shadow Mark allows the Shadow Archers to mark one target to amplify the damage taken.
- Evil Counterpart: To Golden Longbows from Origins. Both Shadow Archers and Golden Longbows have a One-Hit Kill ability and another ability that marks a target for a Damage-Increasing Debuff.
- Knee Capping: The quote upon upgraded to fourth level is a play on the memetic line from The Elder Scrolls V: Skyrim.
- No "Arc" in "Archery": Unlike other Archer towers, their projectile shoot straight rather than an arc, making their shots much quicker.
- One-Hit Kill: Blade of Demise allows the Shadow Archer on the tower to teleport and perform a Back Stab that instantly kills a non-boss target.
Orc Warrior Den
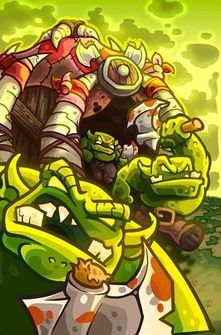
A group of 3 orcs fighting for you. They have three abilities: Lust for Combat, which increases their attack damage, Captain Promotion, which replaces one unit with a stronger unit permanently, and Seal of Blood, which gives them constant health regeneration.
- Evil Counterpart: To the Barracks towers in general.
- Healing Factor: Seal of Blood gives them a constant health regeneration to make them survive much longer.
- Mook Promotion: Captain Promotion promotes one of them into a Captain with higher health, damage, regeneration and armour.
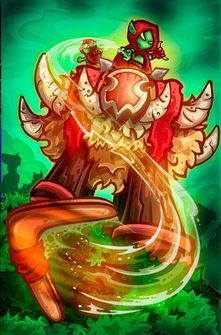
Infernal Mage

Demon mages that throw fireballs at enemies. They have three abilities: Lava Fissure, which causes eruptions beneath enemies, Affliction, which reduces enemies' armour, and Infernal Portal, which teleports enemies backwards in the path.
- Damage-Increasing Debuff: Affliction temporarily reduces the armour of enemies affected by it.
- Evil Counterpart: To Mage towers.
- Playing with Fire: The demon attacks by throwing fireballs at enemies and causing fire eruptions under them with Lava Fissure. Interestingly enough, none of their attacks actually set enemies on fire.
- Weaponized Teleportation: Infernal Portal teleports enemies backwards on the path.
Rocket Riders

Goblins who ride rockets to the skies...and promptly crash back down, damaging enemies in the blast. They have three abilities: Minefield, which drops landmines on the path, Nitro Boosters, which launches a special rocket that travels further and deals more damage, and Defective Engines, which launches a rocket that explodes mid-air and rains down the shrapnel on enemies.
- Evil Counterpart: To the Big Bertha from the first game. They fire in a similar fashion, gain a Recursive Ammo attack similar to Cluster Launcher Xtreme, and have a long distance attack similar to the Dragonbreath Missile.
- Recursive Ammo: Defective Engines has the rocket explode in mid-air and rain down a shower of bombs in a manner similar to the Big Bertha's Cluster Launcher Xtreme.
- Suicide Attack: They attack by having a goblin ride an explosive rocket into the air then crash and explode on a target area.
- Trap Master: Minefield allows them to drop mines on the path that explode on enemies walking by.
Dark Knights

A pair of the toughest knights in Vez'nan's army with high armor. They have three abilities: Brutal Strike, which gives them a chance to instantly kill enemies, Armor of Thorns, which makes enemies take damage if they engage in melee combat, and Impervious, which gives them a tower shield to hide behind for a few seconds.
- Attack Reflector: Their Armor of Thorns ability makes enemies that hurt them in melee combat take damage. This makes it especially effective against low-HP enemies that attack quickly such as Glacial Wolves.
- Black Knight: The units spawned from this tower are dark knights with heavy physical armor, high HP, and have dark abilities in contrast to the Paladins.
- Chainsaw Good: Their level 4 upgrade gives them chainswords. This is also the attack animation for Brutal Strike.
- Elite Mooks: Only a maximum of two Dark Knights are spawned as compared to the Orc Warrior Den's three, but these two knights have much higher HP and armour. Their drawback is that their fewer numbers mean that they aren't as effective at blocking Zerg Rushes.
- Gameplay and Story Integration: You obtain them once Clockwork Factory is beaten. As the level intro suggests, Vez'nan wants to take over the metal smelting factory in his name, and once you succeed you're able to use the metalworking machines to mass-produce the Dark Knights' armour.
- Foil: To the Holy Order from the first game, in a fitting Black Knight vs. The Paladin contrast. Both of them are barracks troops with 75% armor when fully upgraded , but while Holy Order paladins focus on longevity via Holy Light while having an Area of Effect attack in Holy Strike, the Dark Knights have longevity via Impervious and focus on singular targets with Armor of Thorns and Brutal Strike.
- Hoist by Their Own Petard: Armor of Thorns is especially effective against fast-attacking melee enemies such as Chomp Bots, Glacial Wolves and Apex Stalkers since it will deal 15 damage per level (up to 45) to them each time they hit the Dark Knight.
- Luckily, My Shield Will Protect Me: Impervious causes them to put down their shield which makes them invulnerable to non-boss attacks. Enemies attacking them will still take damage from Armor of Thorns.
- One-Hit Kill: Brutal Strike gives them a small chance of instantly killing an enemy when attacking.
- Spikes of Villainy: Their armor gets increasingly spiky as they level up. With Armor of Thorns, said spikes are even put to good use by damaging enemies who attack them in melee combat.
- Theme Naming: Their names are all Sir (actor who played/voiced Batman). As such, we have names like Sir Wilson, Sir Lowery, Sir West, Sir Keaton, Sir Kilmer, Sir Clooney, Sir Bale, Sir Affleck, and Sir Conroy.
- Tin Tyrant: They have a set of black spiky armour at higher levels, and at the maximum level they definitely give off this vibe. The armour's not for show either, it gives them 75% physical armour.
Melting Furnace

A smelting furnace capable of generating stunning shockwaves around it. It has three abilities: Abrasive Heat, which increases the attack power of nearby towers, Burning Fuel, which temporarily increases its attack speed, and Red Hot Coal, which drops burning coals on the path, damaging enemies.
- Area of Effect: Like the DWAARP, it hits all enemies in an area around it and stuns them for a brief while.
- Damage Over Time: Red Hot Coal drops coals onto the path that constantly damage enemies walking on it.
- Earthquake Machine: Similar to the DWAARP, it smashes the ground to create a shockwave that damages and stuns enemies around it.
- Evil Counterpart: To the DWAARP from Frontiers. It hits all enemies in an area around itself by making a quake and temporarily stuns them. Like the DWAARP's Furnace Blast, it also gains a similar Damage Over Time burning ability in Red Hot Coal.
- Magikarp Power: The Melting Furnace is rather weak at lower levels. However, once it gets to the maximum level, it deals great damage to hordes of weak enemies and can further increase that via Burning Fuel and Red Hot Coal.
- Playing with Fire: Red Hot Coal drops some of the coals on the ground to deal constant damage to enemies walking on it.
- Overdrive: Burning Fuel allows it to go into overdrive every 30 seconds, making it attack at twice the rate for 10 seconds.
- Status Buff: Abrasive Heat boosts the damage of towers near it.
- Status Effects: Its basic attack allows it to stun enemies they hit for a short while.
Spectres' Mausoleum

A haunted mausoleum housing spectres that gather around and launch themselves at enemies. They have three abilities: Spectral Communion, which increases the amount of spectres stored when idle, Possession, which sends out a spectre to possess enemies, making them go back and attack other enemies, and Guardian Gargoyles, which summons gargoyles to stall enemies.
- Brainwashed and Crazy: Possession causes one of the spectres to possess one of the enemies, turning them against their side for a short while.
- Charged Attack: Can store up to 3 souls and unleash them all at once at the first enemy that enters its range. Upgrading it with Spectral Communion allows it to increase that number up to 5.
- Demonic Possession: Possession has a spectre possess an enemy and control it to fight its allies.
- Evil Counterpart: Of the Archmage Tower from Frontiers. Both are capable of charging up to three shots before unleashing them on an enemy, and both have an ability that sends enemies backwards up the path.
- Our Gargoyles Rock: Guardian Gargoyles spawns a Gargoyle that can attack enemies and have high armour.
- Set a Mook to Kill a Mook: Possession temporarily turns an enemy over to your side, and they will not only attack their allies but can also use their special abilities against them.
- Soul Power: The mausoleum attacks by shooting spectres at the enemies to deal magical damage.
- Took a Level in Badass: The gargoyles in the first game were the weakest flying enemy type. The Guardian Gargoyles are durable and have armour to defend against enemies.
Goblirangs
A pair of goblins who throw boomerangs at enemies, which hit all targets on the way back and forth. They have three abilities: Headbang, which gives the boomerangs a chance to stun enemies, Biggarangs, which allows them to throw out one massive boomerang, and Angry Bees, which allows them to throw a beehive at enemies, creating a cloud of damage around said enemy.
- Battle Boomerang: They throw boomerangs which hits anyone that were in a line and return back. Biggarangs allows them to throw a giant one for more damage every now and then.
- Bee-Bee Gun: The Angry Bees skill allows them to throw a beehive on the ground which causes a lingering cloud of bees to spawn. Enemies walking into it take continuous Damage Over Time.
- Herd-Hitting Attack: Unusually for an archer tower, they specialize in this even with their basic attacks. Their boomerangs and Biggarangs hit multiple units in a row, while Angry Bees affects an area around a target for area Damage Over Time.
- One-Hit Polykill: Unlike most archer tower variants whose basic attacks generally hit a single unit, the Goblirangs' boomerangs can hit multiple units in a line.
- Status Effects: Headbang allows them to have a chance to stun enemies they hit.
Bone Flingers
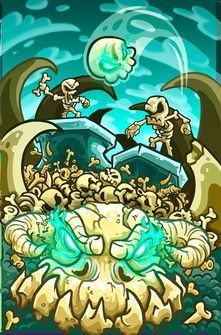
Skeletons who throw bones quickly at random enemies in range. They have three abilities: Summon Bonem, which summons a large bone golem to stall enemies, The Walking Dead, which periodically spawns skeletons that travel down the path to fight enemies, and Got Milk?, which increases their attack damage.
- Ballistic Bone: Their main method of attack is throwing bones, the size of which varies depending on their level and how many upgrades of Got Milk? they have.
- Cursed with Awesome: One of their supposed drawbacks is that they indiscriminately target random enemies within their range. This is actually a blessing in disguise as it allows them to Shoot the Mage First or Shoot the Medic First more often, compared to other towers that always target the front-most enemy.
- Death Is Cheap: The Bonem doesn't fade when killed, but collapses into a pile which simply reanimates at full HP after a bit of time.
- Death of a Thousand Cuts: They deal weak damage but attack very rapidly. Averted once you buy all three levels of Got Milk?, since their damage becomes very noticeably stronger.
- Dem Bones: They're skeletons on a skeletal tower that throw bones. Summon Bonem creates a huge skeleton carrying a smaller one that can throw bones.
- Magikarp Power: Their attack damage from level 1-3 is extremely weak, and at level 4 it's just ok. However, once you buy all three levels in Got Milk?, they deal a much higher damage per second than Shadow Archers.
- The Minion Master: With The Walking Dead, they can summon a skeleton every now and then that will walk up the lane, drawing fire from enemies. Upgrading it a second time changes that to a Skeleton Knight and shortens the cooldown. Summon Bonem will spawn a huge Bonem as a unit that can attack and stall enemies.
- Summon Magic: Summon Bonem summons a huge bone golem to block enemies and fight, while The Walking Dead will make the tower summon a skeleton that walks up the path every few seconds.
Elite Harassers

A pair of twilight elves hailing from the southern continent to assist Vez'nan. They can fire arrows from range and have a 30% chance to dodge melee attacks. They have three abilites: Backstab, which allows them to deal damage after they dodge an attack, Arrow Storm, which allows them to fire a volley of arrows at enemies, and Fury of the Twilight, which gives them a chance to go berserk when they die.
- Adaptation Dye-Job: Their skin color is pale as opposed to the dark blue skin they had in Origins.
- Anti-Air: They're the only barracks troops who can attack aerial units.
- Bow and Sword in Accord: They use both a bow and blade. One of the quotes they say is even "Bow and Blade".
- Counter-Attack: Backstab allows them to deal damage with a counterattack whenever they dodge. It also increases their dodge chance, all the way up to 50.
- Elite Mooks: Elite Harassers are the only barracks towers who can take on flying foes, and they can deal pretty good damage to grounded ones. Their drawback is that their fewer numbers mean that they aren't as effective at blocking Zerg Rushes.
- Evil Counterpart: To The Sylvan Elf Hall from the original and the Ranger Barracks from Origins. They're elves with both bow and blade and can target flying enemies.
- Gameplay and Story Integration: You obtain them right before the Silveroak Outpost level. As mortal enemies of Alleria and the Elves and bitter from Malicia and Baj'nimen's defeats in Origins, they would be more than glad to help Vez'nan's cause if it means taking down Alleria and the Elves in Silveroak Outpost.
- Glass Cannon: Out of all the Barracks towers, these can output a good bit of damage but lack any armour. Most of their abilities are tailored to deal even more damage instead of tank, and they do have a chance of avoiding melee damage via dodging.
- Spam Attack: Arrow Storm allows them to shoot a rapid-fire hail of arrows at enemies.
Orc Shaman

An orc shaman who uses lightning strikes and the nature itself to fight enemies. Their basic attacks stun enemies. They have three abilities: Healing Roots, which heals allies in an area, Meteor Shower, which rains rocks onto enemies, and Static Shock, which gives their attacks splash damage.
- Area of Effect: Healing Roots allows them to heal allies around them, Meteor Shower allows them to hit a group of enemies for heavy magic damage, and Static Shock makes all their basic attacks consistently have a residual area of effect.
- Death from Above: Meteor Shower calls down meteors over an area that deal heavy damage.
- Healing Hands: Healing Roots gives them the ability to heal allies.
- Randomized Damage Attack: Their main attack has a very large damage range, sometimes doing little but sometimes doing a lot. At maximum level, it ranges from 35-190.
- Shock and Awe: Their basic attack is a lightning strike that stuns enemies it directly hits.
- Splash Damage: Static Shock causes their attack to deal a bit of splash damage to enemies around it when it hits.
- Status Effects: Their attack briefly stuns enemies that are hit.
Grim Cemetery
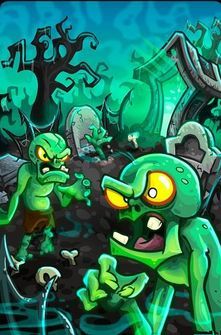
A cemetery that spawns zombies whenever enemies die near it. They have three abilities: ZombieX Muscle-Gain, which spawns stronger zombies, Bloated Corpses, which makes them explode when they die, and Cold Grip, which spawns hands on the path to slow down enemies.
- Action Bomb: Bloated Corpses causes zombies to explode when killed.
- Came Back Wrong: Most enemies that die near this cemetery will be raised as zombies.
- Elite Zombie: ZombieX Muscle-Gain turns the zombies stronger and more muscular, with more health and attack damage.
- Evil Counterpart: To the Necromancer tower from Frontiers. Enemies that die within its range will be raised as zombies that fight for your side.
- Quantity Versus Quality: Enemies killed nearby are turned into zombies and a maximum of 5 zombies can be around for every Grim Cemetery, which makes it effective against Zerg Rushes. However, despite their good HP, these zombies have no armor like Dark Knights, no way to dodge like Elite Harassers, no way to heal like Orc Warriors or even regenerate health when idle, and most importantly they also cannot use rally points to move unlike other Barracks towers.
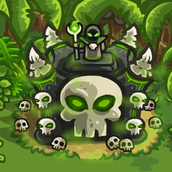
Rotten Forest

Corrupted trees that use their spiky roots to slowly damage enemies. They have three abilities: Evil Treants, which summons treants to fight enemies, Roots of Evil, which extends its roots to grab and stun enemies, and Fog of Despair, which generates a fog around it, making enemies miss their attacks.
- Ominous Fog: Fog of Despair causes a fog to generate around it which makes enemies within have a chance to miss their attacks.
- Status Effects: Causes a stun with Roots of Evil in a manner similar to the Rangers Hideout's Wrath of the Forest.
- The Trees Have Faces: A grove of malevolent trees with glowing green eyes.
- When Trees Attack: The Rotten Forest is a tree whose roots deal constant damage to enemies inside the area of effect, and can be upgraded with Evil Treants to spawn treants on the path to block enemies.
Shaolin Temple
Monks of an ancient temple who strike up to three enemies in range, pausing them for a short while. They have three abilities: Dragon Warrior, which spawns a powerful melee unit on the battlefield, Lion of Abundance, which gives a Money Multiplier to enemies killed within range, and Shaolin Monks, which increases the number of Monks that can attack at once.
- Anti-Air: Unlike most artillery, they are capable of damaging and even stalling Airborne Mooks.
- Death of a Thousand Cuts: While they don't deal much damage, they attack quite often and also force enemies to pause for a short while. Furthermore, they hit multiple enemies at one go, allowing them to stall small groups of foes while whittling them down.
- Shoryuken: They use this against Airborne Mooks to hit them.
- Mechanically Unusual Class: The Shaolin Monks are an odd cross between an artillery and a barracks tower. Up to three of them Flash Step over to hit an enemy for low damage before returning to the temple, which also pauses the enemy temporarily like if they were engaged with soldiers. Shaolin Monks increases the number of monks that can attack up to 6, and Dragon Warrior does spawn a strong unit that can block like typical barracks.
- Money Multiplier: Lion of Abundance causes enemies that die in its range to give 10% extra money. This effect stacks multiplicatively.
- Tactical Rock–Paper–Scissors: The Monks are extremely good at stalling and disrupting enemies, especially casters. Smokebeard Engineers and Ice Witches will have trouble reviving robots or summoning Apex Shards when they get constantly interrupted by a Monk.
Blazing Gem

A gem powered by Vez'nan's acolytes that can fire a constant stream of destructive magic that increases damage with time. It has three abilities: Gem of Amplification, which allows for a fourth damage increase, Unstable Power, which makes enemies explode if they're killed by the beam, and Destructo-Ray, which shoots out a beam that instantly kills enemies.
- Death Ray: Destructo-Ray allows it to shoot one that instantly kills enemies.
- Evil Counterpart: To the Wild Magus from Origins. It's a magic tower that deals rapid damage that increases over time against the same enemy, also gains the ability to instantly kill a foe and explode them.
- Visually it is one for the Sunray Tower at Stormcloud Temple in the first game, with four wizards surrounding it in order to power it up and blast enemy units.
- When the Gem of Amplification is added on, the gem on top looks like the gem on top of the Arcane Wizards' tower from the first game.
- Gathering Steam: It increases its power the longer it holds its fire on a target, up to three times. Gem of Amplification gives it a fourth level of power.
- Necessary Drawback: It's extremely effective against Giant Mooks, melting them in seconds. However, it will not change its target until the target dies or moves out of range, and since its initial damage is weak it becomes a liability against fast, magic resistant enemies that attack in Zerg Rushes such as Glacial Wolves. It also targets enemies that are furthest from the exit as opposed to the other towers' targeting enemies that are near the exit.
- One-Hit Kill: Destructo-Ray allows it to periodically shoot a Death Ray that disintegrates enemies similar to the Arcane Wizard's.
- Purple Is Powerful: Once Gem of Amplification is purchased, its ray will change from red to purple once it gets to the fourth level of power.
- Splash Damage: Unstable Power causes enemies that are killed by it to explode and deal damage to nearby enemies.
Deep Devil's Reef
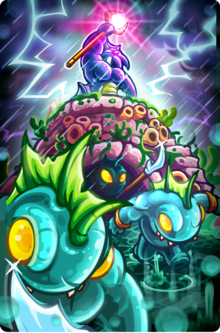
A hybrid Barracks/Mage tower in a series' first. It consists of a reef that spawns Greenfins (Redspines when leveled up), and has a Bluegale on top casting magic on enemies in range.
- Cthulhumanoid: The Bluegale on top appears to be a mindflayer crossed with a fish.
- Fish People: The Barracks units are Greenfins that later on become Redspines when fully upgraded. They get more buff-looking after Chosen by the Sea is bought.
- Inescapable Net: Downplayed. Net Throw allows them to throw nets over enemies to keep them temporarily Locked Out of the Fight, just like what they did to your troops in Frontiers.
- Jack of All Trades: As the first hybrid tower in the series, they can perform the job of Barracks and Mage, although less proficiently compared to a fully-specialized tower. The mage deals less raw damage than the Infernal Mage, while the soldiers, despite only coming in two instead of three, don't hurt as much as the Elite Harassers nor have heavy armour like the Dark Knights.
- Javelin Thrower: At the final upgrade level, the Greenfins are replaced with Redspines who throw javelins that can hit enemies at range and also attack airborne enemies.
- Locked Out of the Fight: Net Throw temporarily removes enemies from the battlefield.
- Sleeping With The Fishes: The trope is referenced with one of their quotes, where they say this exact term.
- Swiss-Army Weapon: In a series first, it's the first hybrid Barracks/Magic tower that can perform both its roles from the get-go, unlike the Specters Mausoleum which needs to be maxed out to spawn Gargoyles.
- Weather Manipulation: Just like in Frontiers, Perfect Storm allows the Bluegale on top of the tower to summon a lightning cloud over an enemy to zap them.
Wicked Sisters

A tower that employs a pair of witches to do the dirty job of hexing enemies. One changes the type of hex, and the other can be deployed above the battlefield to attack enemies. They have three abilites: Froggification, which turns enemies into frogs, Nimbus 4000, which increases their rally range, and Hex Totem, which silences all spellcasting enemies within the area for a few seconds.
- Anti-Magic: Hex Totem silences magic users near it but also affects certain non-magi users such as Quarry Workers and Smokebeard Engineers.
- Bodyguarding a Badass: They seem to be the closest thing that Lord Blackburn has to bodyguards, not that Blackburn needs to be guarded in any way.
- Composite Character: They're kind of a cross between the Axethrowers and the Sorcerer Mage, by having a silencing totem and the ability to polymorph enemies into harmless animals.
- Dark Is Evil: One of the most interesting examples of this in the series. While they currently have the look of stereotypical eitches seen in popular culture, they were formerly Light Is Good, before Blackburn ordered the spell to be used on his lands in order to protect the lands from evil.
- Devolution Device: Against the Anurians who are already frogs to begin with, Froggification essentially does this by turning them into a non-sentient frog.
- Dual Mode Unit: The player can manage the type of hex they use (poison or damage and stun).
- Fallen Hero: On the orders of Lord Blackburn, they cast an ancient spell that turned the Lord's land into a wasteland, the civilians into monsters, themselves included, and Lord Blackburn into what he originally fought against.
- Forced Transformation: Froggification turns enemies into harmless frogs that cannot be blocked and die when tapped on enough.
- No-Sell: The broomstick witch is immune to tower disabling effects since she moves as a separate unit.
- Poison Is Evil: One of the capabilities of these Wicked Witches is poisoning enemies.
- Praetorian Guard: They are this to Blackburn in their current forms.
- Status Effects: Depending on which one is used, they can either poison or stun enemies. Hex Totem causes silence to enemies nearby.
- Undying Loyalty: They had this to Lord Blackburn and his family, having served the family for centuries, and continue to follow him into the state of undeath that they currently inhabit.
- Wicked Witch: They're the Black Hags from the Castle Blackburn campaign and they have an assortment of nasty spells including the one that turns enemies into frogs.
Swamp Thing

A giant swamp creature who can either fight on the road or stay in its tower and throw rocks at enemies. They have three abilities: Smash!, which increases the chance of instantly killing an enemy with each hit, Blinding Liquid, which increases the chance of stunning enemies with each hit, and Carnivore, which heals the monster every time it kills an enemy.
- A Handful for an Eye: Averted, Blinding Liquid doesn't actually blind them, but instead stuns the enemy.
- Card-Carrying Villain: "I am not your friend."
- Dishing Out Dirt: It throws large balls of vegetative earth at the enemies on the paths.
- Dual Mode Unit: They can function as either a long range tower, or as a heavy duty barracks unit.
- Elite Mooks: As a barracks, the Swamp Thing has a staggeringly high amount of health and good attack power, but it can only block one enemy due to being a single unit.
- Green and Mean: Described as such in the tower selection tab.
- Law of Chromatic Superiority: When Smash! is purchased, it gets a small chance to throw One-Hit Kill projectiles in its ranged mode. Said projectiles are differentiated from normal ones by having a reddish tint.
- Long-Range Fighter: When in ranged mode, they have the longest range in the entire game.
- Mighty Glacier: They hit hard but at a slow rate.
- Muck Monster
- Mythology Gag: At maximum level, it has 3000 HP, attacks with melee at a rate of 2.5s, dealing 40-100 base damage. These are exactly the stats it had as an enemy in the original game on Normal mode.
- One-Hit Kill: Smash! gives them a chance to one-shot an enemy they hit.
- Poison Is Evil: The balls that it throws are rather toxic.
- Red Eyes, Take Warning: Just as they were back in the first game.
- Stand Your Ground: Its quote "I will cede no ground", invokes this.
- Stone Wall: At maximum level, it gets stats on par with its enemy counterpart in the first game, including its gargantuan 3000 HP, allowing it to tank even bosses. Most of your troops only have 200-300. While its attack as a barracks unit is certainly impressive, it's held back by a slow attack rate.
- To Serve Man: Its Carnivore ability allows the Swamp Thing to eat enemies, healing it in the process.
Goblin War Zeppelin
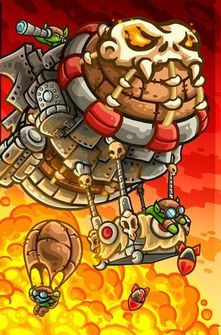
An airship with a goblin in it, dropping bombs down on enemies. They have three abilities: Tar Bomb, which drops a barrel of tar to slow down enemies, Goblin Scout, which increases the range of nearby towers, and Paratroopers, which summons a goblin zapper to help fight enemies.
- Cool Airship: It starts out as a hot air balloon that drops bombs, but at its final level it gets replaced with a Zeppelin.
- Evil Counterpart: To the Battle-Mecha T200. It's an invulnerable Artillery unit that can be controlled around a rally point, and its Tar Bomb slows down enemies on the path similar to the Battle-Mecha's Waste Disposal.
- I Can See My House from Here: The Flavor Text for Goblin Scout is this word-for-word. The goblin can also say a similar quote when it's upgraded anywhere from level 1-3.
- It's Raining Men: Paratroopers allows the zeppelin to drop a Goblin Sapper who throws bombs. He's immune to melee combat but has very low HP and can be targeted by ranged enemies.
- Lightning Bruiser: Attacks for very heavy Splash Damage at a moderate rate, and the blimp is immune to tower-disabling effects.
- Necessary Drawback: They have extremely high DPS for an artillery tower, and can be moved anywhere within its rally range. To compensate, they're also the most expensive tower in the series.
- No-Sell: Since the tower itself only serves as air control for the zeppelin, the latter can still attack (but not move or upgrade) if the tower is disabled.
- Skeleton Motif: It's covered in the skulls of various creatures.
- Squishy Wizard: The Goblin Sapper summoned via Paratroopers has very low HP but is immune to being engaged in melee combat, and he throws bombs that deal some Splash Damage every second.
- Sticky Situation: Tar Bomb drops a barrel of tar on the ground that slows grounded enemies walking on it.
Troll Mercenaries

A Troll tent in the Northern areas that the player can hire Trolls or Troll Champions from.
- Art Evolution: Like several of the other now-playable enemies from the first game, their art is much more detailed now.
- Evil Redhead
- Guest-Star Party Member: They appear in certain levels and challenges in the Northern areas, and all but one of the appearance are on Heroic and Iron challenges (the one regular campaign mode they're on is the Northerners' Outpost).
- Healing Factor: The Trolls are capable of regenerating health quickly just like they did in the first game.
Spider Nest

A spider nest in Silveroak Forest that houses a Spider Matriarch which lays eggs.
- Art Evolution: Like several of the other now-playable enemies from the first game, their art is much more detailed now. As part of this, the spider matriarch now has a purple colour scheme to it.
- Giant Spider: Consists of a large Spider Matriarch that lays spiderling eggs.
- Guest-Star Party Member: They only appear in Silveroak Outpost.
- Perspective Flip: In the first game, Silveroak Forest was the level where the Rangers Hideout first became playable, the Sylvan Elves were a Guest-Star Party Member, and the Spider and Spider Matriarch enemies debuted. In Vengeance, Silveroak Outpost is the level where the Spiders are a Guest-Star Party Member and the Elven Rangers are one of the enemies debuting in the level.
- Red Eyes, Take Warning: The Spider Matriarch that lays the eggs has red eyes.
- Sticky Situation: Sticky Web puts a web around the nest, slowing down grounded foes that walk on it.
Caravan
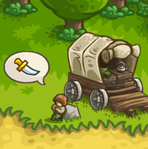
A caravan on the outskirts of Lightseeker Camp that hires bandits. You can hire either two mercenaries for 60 gold, or three mercenaries for 120.
- Army of Thieves and Whores: They consist of the Bandit, Marauder and Raider from the first game.
- Art Evolution: Like several of the other now-playable enemies from the first game, their art is much more detailed now.
- Cast from Money: Like other mercenaries, they cost money to hire, but unlike other mercenaries, they do not last until killed but will automatically leave when their duration expires.
- Cool Helmet: The Marauder and Raider, like before.
- Discard and Draw: Their stats have gone through several changes. For example, the Bandit is now a Fragile Speedster instead of a Glass Cannon, dealing lower damage compared to what they did in the original game.
- Guest-Star Party Member: They only appear in Lightseeker Camp.
- Private Military Contractors: They're hired mercenaries from Hushwood.
Royal Archers

Paladin Covenant

Arcane

Tricannon

Arborean Emissary

Demon Pit

Ballista Outpost

Dwarven Flamespitter

Rocket Gunners

Elven Stargazers

Necromancer

Battle Brewmasters

Dune Sentinels

Grim Wraiths

Eldritch Channeler
