Heroes (A-F, G-L, M-Z) | NPCs and Merchants | Darkest Dungeon Monsters | Darkest Dungeon II: Monsters | DLC Monsters
The Bosses and other Creatures
Brought into existence or turned into horrors by the Ancestor's meddling, these villains, monsters, and cannons lead and create the lesser monsters to do their bidding, making them the biggest threats to the Hamlet's safety.

- Badass Normal: Like all the Brigands, the Bloodletter has no supernatural powers, just size, gunpowder, and a mean streak.
- Degraded Boss: Guys like the Blooodletter occasionally appear as a regular enemy after the tutorial.
- Dented Iron: His bare chest is covered in scars.
- Giant Mook: A huge brute of a man, he fills two spaces and looms over all the other Brigands and the party alike.
- In the Hood: Wears a green hood, like his fellow bandits.
- Large and in Charge: He is noticeably taller and larger than any other humans, to the point that he occupies two positions in the formation system.
- No Range Like Point-Blank Range: Like the Highwayman, he carries a flintlock and sometimes uses it at point blank range.
- Outside-Genre Foe: A heavily armed highway robber isn't high on the list of bosses one expects in a game about eldritch horrors and other supernatural beings.
- A Taste of the Lash: Two of his attacks, Punishment and Rain of Whips. One is single-target, the other hits your whole party, and both inflict bleed.
- Warmup Boss: He first appears in the second fight of the game, during the tutorial. Generally speaking, he's not all that gimmicky compared to other bosses later encountered.
- Walking Shirtless Scene: Wears nothing above his belt, except a hood on his head.

- Achilles' Heel: A Crusader with an Unholy Slayer's Ring trinket trivializes the skeletons he summons at Apprentice difficulty and leave the rest of the party free to wail on him, and two will probably achieve a similar result even at harder difficulties. Four Crusaders are actually a pretty good method to kill him Explanation.
- Arc Symbol: His robe's collar is identical to the stress symbol.
- Black Speech: Hisses in a horrible, hoarse voice whenever he takes a hit or delivers one.
- Chained by Fashion: The Necromancer has a giant steel collar around his neck, and his belt looks like chains wrapped around his waist.
- Flunky Boss: Summons undead minions to support him with every blow, while shuffling back and forth between their ranks.
- Gone Horribly Right: They are one of the few, if not the only things, that the Ancestor managed to get right in his pursuit of the dark secrets of the world, as he brought them back completely intact. Unfortunately, their resurrection came back to bite him later on.
- In the Hood: Has his face completely covered by one.
- The Leader: Of the Undead faction, as they're the ones constantly summoning new undead to replace those slain by your heroes.
- Monster Progenitor: They are the source of all the unholy undead haunting the ruins and the Hamlet in general.
- Necromancer: Goes without saying.
- Our Liches Are Different: While never referred to as one, they do fit the trope — they're intelligent undead with enough magical power to raise other, lesser undead and were well-learned in necromancy before being killed and brought back as undead.
- Undead Abomination: Whatever he is, between the claws and hidden tentacles, he's definitely not human any more.
- Warm-Up Boss: Will most likely be the first boss you face in the game, and is fairly straightforward. His fight doesn't have any gimmick beyond summoning enemies with every attack, and his lack of Contractual Boss Immunity means pretty much any skill will work on him. The biggest problem is keeping on top of this summons, since he will always conjure up a new minion with every attack, and on higher difficulty dungeons he may summon stronger undead or they'll start off in stealth. Some of his attacks do inflict stress across the entire party, so he'll need to be killed fast.
- Was Once a Man: The Necromancer was one of the many scholars and visiting sorcerers that came to the estate at the Ancestor's invitation. He later killed them and raised them as the creatures they are now.

- Achilles' Heel: The Man-at-Arms guarding and shooting him with mark-benefiting attacks. The former will make his normally-fearsome rubble little more than an annoyance (aside from the instances when he decides to mark two heroes that aren't the Man-at-Arms at once...), and the Prophet is otherwise fairly simple to kill outside of being immovable way back in the last rank. To a lesser extent, put some stun resistance on the Man-at-Arms to limit him being stunned when you really don't want him to be (which is always) and bring a Plague Doctor or antivenom to deal with the other most threatening attack he provides — blighting everyone.
- Another possibility is bringing at least one Occultist with Curse of Weakness, as the damage debuff will enormously reduce the danger posed by the collapsing rubble. Two Occultists with a well-trained Curse can quickly destroy his offensive capability entirely.
- Arc Symbol: The knives protruding out from his hunched back combined with the stocks he is locked to form the shape of the game's stress symbol — five spikes embedded through an arc.
- Blind Seer: He clawed out his own eyes, but still receives visions. He also holds them in his hands while he fights.
- Broken Smile: Possesses a rather deranged grin and is utterly, hopelessly insane.
- Cassandra Truth: Averted; he was a threat precisely because the people of the hamlet believed him. Only the Ancestor ignored his warnings.
- Collapsing Ceiling Boss: One of his attacks causes two large blocks of stone to fall on the party from the Ruins' ceiling, dealing heavy damage to two heroes.
- Crazy Homeless People: He wasn't the picture of mental health to begin with, and the Ancestor's Breaking Lecture broke him completely. Perhaps he had some contact with eldritch forces in the past...
- Crosshair Aware: He marks two character positions with red light via one of his attacks. The following turn, rubble will drop on those positions for huge damage. And getting someone tough to take the hit will either damage your formation or take up their turn to set up their guard skill.
- Eye Scream: Tore his own eyes out during his revelation.
- Fallen Hero Antagonist: He repeatedly risked death to warn the Ancestor against his excavations. He was then exposed to the portal, went insane, tore his own eyes out, and began serving the horrors beyond the portal, which is where you come in...
- Go Mad from the Revelation: How the Ancestor finally disposed of him — he showed him the excavations, "The Thing", and told him everything he planned. The prophet promptly tore his eyes out and ran away, screaming and blind. Now he is the leader of the cultists, seeking only to hasten the end.
- Implacable Man: The ancestor tried to murder him multiple times, and each time he miraculously survived. He still carries the stocks and knives in his back as taunting mementos.
- Implausible Deniability: The Ancestor, even in death, claims his warnings are 'mindless drivel'. Despite the fact the Prophet was one hundred percent right and the evidence is... well, the entire plot of the game.
- The Leader: Of the Cultist faction, serving as the prophet of their master's cause. This notably marks the cultists as *not* a Keystone Army, as they continue to serve the Darkness well into the depths of the Darkest Dungeon itself and what comes after even stronger than before.
- Monster Progenitor: The source and spearhead for the unholy cult which stalks the surroundings of the Hamlet in search for sacrifices.
- Puzzle Boss: Relatively straightforward, as bosses go... but protected by three ranks of tough wooden pews. They're worth a lot of money chopped up, and doing so exposes him to your melee heavy hitters... but it also causes your party to be subject to the collapsing ceiling for that much longer.
- Rasputinian Death: He was locked in the stocks to die of thirst or exposure, plunged into icy waters to drown or freeze, and in a final act of exasperation, the Ancestor repeatedly stabbed him in the back with several different knives. Each time the Prophet returned, and even now he clings to a twisted facsimile of life in death.
- Stock Punishment: Is restrained this way, although his left arm is free to hold his eyes in his hand.
- The Undead: He's marked as an Unholy enemy, so either he's undead or being kept alive by dark magic. Notably, the cultists he leads are all still marked as Human.
- The Unintelligible: Makes gurgling sounds when he attacks or as he gets hit.
- Wisdom from the Gutter: He quite accurately predicted what the Ancestor's digging would lead to despite being, by all appearances, just a random homeless person.

To see Wilbur's tropes as an Elite Mook and the miniboss of the Sluice in II, look here.
- Achilles' Heel:
- Ripostes, due to Wilbur having multiple actions and the King generally using multi-target attacks. Note, however, that this is not necessarily a good thing, as Wilbur tends to get himself killed very quickly against a riposte-heavy party, and the Swine King takes that poorly.
- The Arbalest and Musketeer with their ability to clear marks render the Swine King far more manageable, since he relies on Wilbur's marks to deal a large amount of damage.
- Asskicking Leads to Leadership: The swine unanimously declared it their king because it was the biggest and strongest among them.
- Berserk Button: Attacking his minion, Wilbur, will cause him to retaliate with a very powerful strike that hits everyone in the party and has a high chance to stun. Killing Wilbur outright will enrage the King into spamming it.
- BFS: Wields a giant blade the size of one of the heroes. With one hand, no less.
- Big Eater: According to the Ancestor, the King required prodigious amounts of meat to sustain itself after being summoned. It's heavily implied that he solved this issue by feeding Hamlet-dwellers to it.
- Body Horror: He's covered in open sores, his brain is exposed, his bones have torn through his flesh in places, and he sits in a massive pile of his own viscera.
- Cherry Tapping: Wilbur only causes 2 damage per hit, but this can still kill heroes, especially if he uses the Bit O' Squeal skill to stun the entire party into another use of it. One of your heroes ignobly dying to a small pig child squealing at them is even a secret achievement.
- Combat and Support: The Swine King is the Combat, using direct attacks on your party for huge damage. Wilbur acts as the Support, marking characters for the Swine King to attack, while also causing them to take increased damage from his already-powerful attacks.
- Demon Lords and Archdevils: It's heavily implied that the Swine King is a demon lord or other powerful hellish entity, bound to Earth in the form of a pig.
- Dumb Muscle: It needs Wilbur to direct its attacks for it and lacks many tactics beyond "Swing at the Marked". The Ancestor even derisively notes how stupid it is during his narration of the King's backstory.
- Eldritch Abomination: The Swine King is the result of something from another plane of existence taking over the body of a common pig.
- Even Evil Has Loved Ones: While it does need to rely on Wilbur's directions to be able to do anything other than just attack wildly, it does seem to care for him, as shown by him going utterly ballistic if Wilbur goes down first.
- Half the Man He Used to Be: He's nothing but intestine from the waist down, though it's questionable whether he ever had more.
- Handicapped Badass: The hulking giant appears to be eyeless and blind. This is probably why Wilbur directs its attacks. Notably, using the Arbalest's Rally Flare to clear the marks from your party causes the Swine King's attacks to be aimless and far less effective, as it loses its direction and swings blindly.
- Hope Spot: Wilbur's Bit'o Squeal skill can still stun the entire party, turning a narrow victory into a frustrating defeat due to the party getting stunlocked by a small pig child squealing at them.
- The Leader: Of the Swinefolk faction, if the name didn't give it away.
- Names to Run Away from Really Fast: Like other bosses, his title changes depending on the difficulty level, from Swine Prince, to Swine King, until it escalates to Swine God.
- Pig Man: Like all the Swinefolk, the King resembles a humanoid pig, though he's much more deformed and disproportionately built than the rest.
- Red Eyes, Take Warning: It normally seems eyeless except for when a bright red glow shining out its left socket whenever it attacks. If Wilbur dies, however, the glow instead comes from his arm and starts slaughtering the party.
- Shoot the Mage First: For once, this is actually a terrible idea. If Wilbur falls first, be prepared for a Total Party Kill unless the Swine King itself is close to death.
- Super-Scream: In addition to his role as Target Spotter for the Swine King, Wilbur will sometimes use Bit O' Squeal, which has a chance of stunning one or more of your heroes. Once the King is dead he starts spamming it until he's dead as well.
- Target Spotter: On his turn, Wilbur will either use End This One or End These Two, Marking one or two of your party members respectively with his flags and allowing the Swine King to Obliterate them.
- Trick Boss: Do not kill Wilbur first. This will enrage the King. In a rare case of Anti-Frustration Features for this game, the first time Wilbur's hit, one of the heroes will shout that it's a bad idea, explicitly warning not to do this.
- True Companions: The Swine King is very fond of Wilbur. It's ill-advised to slay him before the king.
- Turns Red: Killing Wilbur enrages him, changing his single-target attacks to party-killing multi-target attacks. Unless you're particularly
 Crazy-Prepared to do so, that is.
 - Weaksauce Weakness: He has a rather crippling weakness to the Arbalest's Rallying Flare, which clears all marks and stuns from the party. Given that his fight revolves around him dealing massive damage to whichever heroes Wilbur marks, it's easy to spend the entire fight with him ineffectually flailing.

- Achilles' Heel: The Formless Flesh's forms are nigh-impossible to debuff or stun effectively with them constantly shifting, have powerful attacks that can inflict bleed or blight, and are usually highly resilient to damage; aside from that, it can heal itself. But because it is mechanically treated as four separate enemies that share one health bar, multi-target attacks are particularly effective against it, and multi-target Damage Over Time attacks are supremely effective. Special mention goes to the Houndmaster's "Hound's Harry", which can potentially inflict bleed on every segment of the flesh at once every turn.
- A.I. Roulette: How it transforms is entirely random, so what you're fighting shifts to something with different resistances each turn. It's by no means certain it will generate a weak spot. At the same time, it has been known to put a given component in a position where it cannot actually attack.
- Ass Kicks You: One of its body parts is the backside of a hog... with multiple tentacles sticking out of it. Which it will then fire at your heroes as an attack.
- Attack Its Weak Point: It is possible to harm the flesh at any point, but all but one of its spots are armored and will absorb some of the damage thrown at it, with many being armored quite heavily. The only non-armored point are the gigantic heart-shaped lumps it uses to heal and regenerate, so it's advisable to attack them whenever they show up.
- Barrier Change Boss: Its four different parts shift into different forms randomly, each of which has different resistances to different statuses. Only one "form" has no protection, however.
- Body Horror: The Ancestor himself says it is more horrible than he can describe.
- Body of Bodies: The Formless Flesh is formed from countless half-living demon-possessed pigs fused into one unstable, shape-shifting nightmare.
- Combat Tentacles: The main form of attack from its rear end involves firing a Blight-dripping tentacle from what remains of a hog's backside. It also has a toothy mouth on the end, just in case that wasn't disturbing enough.
- Eldritch Abomination: A beast with a pig's head, multiple eyes, a spine jutting out from its back, and a body composed of a single large tentacle. Sometimes. Sometimes it's one, none, or all of those things. Clue's in the name.
- Heavily Armored Mook: Each of the individual parts has a different level of PROT - except for the heart-like blobs, which are completely unarmoured.
- Shared Life-Meter: It's technically made of four targetable enemies, with all of them sharing a health pool.
- Status Infliction Attack: All of the Flesh's attacks inflict either Bleed, Blight, or stun.
- Too Many Mouths: Every last one of its parts has at least two mouths on or in it, giving it over half a dozen mouths at any one point. And those are just the ones we can see.
- Transformation Horror: Spread across the whole of the enemy formation, it is a many-mouthed pile of diseased, mutant pig-flesh that shapeshifts every round so that something different but equally abhorrent is in each rank. It's actually even worse to look at than that sounds.

- Achilles' Heel: Because she has relatively low health, piling on rapid high damage or high Damage Over Time backline attacks can rapidly deplete her limited health. She is also vulnerable to area-of-effect attacks that hit both the front and the back, as this damage both the Hag and the Pot and can knock it over to free the trapped hero. The Hellion, in particular is very effective against her by combining her Breakthrough, Bleed Out, and Iron Swan skills. Having multiple Hellions is a viable strategy in this instance.
- Arc Symbol: The antler crown she wears bears a similar resemblance to the stress symbol.
- Crown of Horns: She sports a deer skull with attached antlers as a hat, giving off this look. Her minions, the crones, are also fond of this trope.
- Evil Makes You Ugly: Played entirely straight. The Hag's constant experimenting turned her from an attractive young woman into a fat, hideous cannibal. The change was drastic and horrifying enough to gross out the Ancestor.
- Fat Bastard: Not only is she a depraved cannibal, but she's also quite large. She takes up two spaces in the enemy formation.
- Glass Cannon: While she can disable one of your heroes and does a lot of damage to the others with her meat tenderizer, the Hag has significantly lower health overall than most bosses, to make up for the fact that she'll be cooking — or trying to cook — one of your party members, leaving only three heroes available to fight her. A legitimate strategy against the Hag is to just blitz her as fast as possible with high-damage backline attacks.
- I'm a Humanitarian: Her M.O. is to toss your heroes into her cooking pot and try and turn them into stew. One of her attacks is her tasting the stew while a hero boils inside, which will understandably stress a hero out, and the multiple turns she can take at once will stack it up fast.
- Improbable Weapon User: Fights with a ladle, a meat tenderizer, and seasoning.
- I Was Quite the Looker: According to the Ancestor, she was quite attractive when she was still human. Her hideous transformation was what drove him to exile her.
- Mad Scientist: Much like the Ancestor, though her fields of expertise were botany, alchemy, and chemistry.
- Non-Standard Game Over: Normally, the cook pot spits out its victim when they reach Death's Door. But if there's a character in the pot and the rest of the party is dead, the mission is lost — presumably because the Hag finishes cooking the last one.
- Professor Guinea Pig: The Ancestor mentions that she had a penchant for self-experimentation, which is likely the cause of her current appearance and diet.
- Puzzle Boss: Requires very careful planning and specific team composition to defeat her. In particular, teammates who can only attack the front ranks will have trouble pulling their weight.
- Stewed Alive: She does this to the heroes during the battle; if the party flees while someone's in the pot, they're dead.
- Turns Red: In early builds, when the pot was possible to destroy, if it was defeated before the Hag, she would use "Meat Tenderizer" every turn, alongside another attack.
- Wake-Up Call Boss: The Hag is requires a very different strategy compared to the other dungeons' bosses. The party's ranks are constantly shuffled from being thrown into the pot and then dropped into rank one when freed. The Hag sits behind her pot, both fully immune to being moved, making it impossible for classes that can't target the back ranks to hit her. The pot itself invokes a Sadistic Choice on whether to free its hapless victim or focus on the Hag herself.
- Was Once a Man: The narration before the mission to kill her mentions a comely young woman who constantly sought your dead relative's attention. It's implied that this "young woman" is now the Hag.
- Wicked Witch: Goes without saying. She's also a fan of throwing whatever character is in front of your party into her pot to cook them alive.

- Achilles' Heel: The Matchman is the most obvious example of this out of all of the bosses. Killing the Matchman renders the cannon itself powerless except to summon reinforcements, leaving the party to only have to contend with the damage dealt by a pair of brigands... at least as long as they can keep killing the Matchman whenever he spawns.
- And Then What?: The brigands and their cannon were hired by the Ancestor to keep the increasingly restless townsfolk of his estate in line. What a heavily armed group of psychopaths might do after achieving that didn't interest him.
- Attack Backfire: Rarely, the Brigand Cannon may use the move "MISFIRE!" instead of the catastrophic stress and damage-dealer that is "BOOOOOOOM!", if your party fails to stop the Matchman in time. This gives your heroes a party-wide stress heal and essentially wastes the Cannon's turn.
- Badass Normal: An ordinary cannon, crewed and defended by ordinary men, and yet it's every bit the match of the other, more-occult horrors in terms of the danger it poses to the hamlet (and the heroes, who can easily suffer a Total Party Kill if it fires).
- BFG: It's a gigantic cannon that can deal a lot of damage and stress to the party if it's allowed to fire. Killing the Brigand Matchman prevents it from going off.
- Bigger Stick: The most sophisticated piece of technology in the setting, it's a match for the various supernatural beings who serve as the other bosses.
- Desperation Attack: In early builds, the Pounder averted Keystone Army and if it was defeated before the Brigand Matchman, he would use every turn "Hotshot": a very weak attack that hits the entire party. Its only real porpuse was to finish off heroes still on Death's Door at the end of the fight before he got felled as well.
- Disability Immunity: The Cannon is unable to take actions, just "auto-actions" that will trigger when certain conditions are fulfilled (it uses "Reinforcements!" at the end of the round to summon more bringands to refresh their numbers and "BOOOOOOOM!" or "MISFIRE!" when the Brigand Matchman manages to light it up). That also means however that stunning it is pointless, as the stun won't be able to negate any of its moves and the Cannon will just remain stunned the whole fight while suffering no ill effect beside taking more damage from moves like the Bounty Hunter's "Finish Him!". This is hard to see in normal gameplay though, given the Cannon high stun resist.
- Epic Fail: Sometimes, the cannon may misfire, causing it to deal no damage while giving stress relief to the party.
- Flunky Boss: Constantly uses "Reinforcements!" to call brigands to its side; it cannot attack on its own. It will summon a Matchman if one is not already on the field, and has a chance to summon another type of brigand.
- Logical Weakness: Without someone to operate it, the Cannon cannot fire, so taking out the Matchman is the fairly obvious way to keep it from shooting.
- Made of Iron: Literally and figuratively. In addition to the unique Ironwork enemy type, the Cannon has a huge protection stat and is immune to any status effect.
- Mechanical Monster: Needs a Brigand Matchman alive to attack, but by itself can summon more if you've killed them.
- Outside-Genre Foe: A colossal cannon, callously crewed by cruel, combative cutthroats. It's a very different flavor of enemy from the witches, demons, undead, and other supernatural foes that comprise most of the other bosses in the game.
- Psycho for Hire: The Brigands manning it brought it with them when the Ancestor hired them. The money's long since dried up, yet the Brigand Cannon crew continue to terrorise the region.
- Secret Weapon: It served as one for the Brigands at first, being deployed when resistance from the townsfolk became too much for them.
- Shoot the Mage First: If the Brigand Matchman is alive, it will allow the cannon to fire and deal heavy damage and stress damage to your entire team. Thus, he needs to die every time he appears.
- Squishy Wizard: The Brigand Matchman has low health and is very easy to take out. he's also the one who operates the cannon, so he should be dealt with first.

- Achilles' Heel:
- Debuff resistance and bleed cures. Unlike the Necromancer or Brigand Cannon, she can only summon a minion as one of four specific attacks instead of constantly every turn. Her other two attacks are rather low in damage aside from one inflicting bleed.
- The Antiquarian, oddly enough. Due to prioritizing characters with low debuff resistance, chances are the Siren will waste plenty of turns charming someone whose offensive capability is an utter joke and who is more likely to pass damage on to her than anything else.
- Besides summoning a Cove minion and charming a hero, her only other attacks are low-damage AOE effects. Bringing a few heroes who can riposte will turn that against her. This can also backfire if she has a captured hero attack someone who can counter.
- Low damage Stun attacks can prevent your charmed heroes from hurting your party, and Pull skills can immediately break the charm effect if they land a critical hit.
- Brainwashed and Crazy: She inflicts this upon your heroes, enthralling them to fight by her side. Thankfully, the effect is only temporary, and the hero rejoins your side after a few turns.
- Breeding Slave: The Ancestor's description of the Siren heavily implies her to be this; she's referred to as a "matriarch" to the Fishmen, as well as being a slave.
- Cute Monster Girl: How she appears when brainwashing people. At all other times, NO. (At least not by human standards...)
- Heroic Willpower: Her mind control has a fixed chance to land on a hero, only for them to resist her call.
- Even the Girls Want Her: Fittingly for a Siren, Song of Desire works on all heroes, regardless of sex.
- Fish People: Has a fish tail below her waist and an anglerfish for a head.
- Flunky Boss: On top of her Charm Person powers, she can use "High Tide" to call a pelagic monster to fight for her. Thankfully, she can't summon more than one at a time.
- Get A Hold Of Yourself Man: Low-damage skills with a high stun chance are very valuable in the fight, since they have a chance of locking down any charmed teammates until they come to their senses. Alternately, a critical hit with a Pull skill will instantly beak the charm and bring the affected hero back to your side.
- He Knows Too Much: Right after the Ancestor finished bargaining with the fish-men, he noticed the village girl had been watching. His response was to chain her to an idol and throw her to the Pelagics to prevent her from talking.
- Instrument of Murder: The whelk-shell horn she uses to summon minions and tides holds a nasty surprise.
- The Leader: Both the leader and the slave of the Pelagic faction.
- Making a Splash: She can also summon a tidal surge that damages and stuns the entire party.
- Mix-and-Match Critters: She used to be human, and now has traits of sailfish, anglerfish, and sea monsters as well as a starfish in her hair.
- Mercy Kill: Considering the rather nasty implications of her new state, it’s not hard to think that the prospect of killing her is more or less euthanasia.
- Necromancer: Not as much as the actual Necromancer, but still present. There are enemies in the cove called Thralls, people that were so enthralled by the Siren that their bloated bodies continue serving her even in death.
- Nonhumans Lack Attributes: Zig-Zagged. She used to be human, but now she's covered with scales that conceal her skin. Her brainwash-induced Cute Monster Girl form has what seems like the outlines of her nipples under her scales.
- Non-Standard Game Over: As with the Hag's cookpot, if three of your heroes are dead and the last is under Song of Desire, her boss quest fails.
- Precocious Crush: She had one on the Ancestor. Obviously, this did not turn out well.
- Sirens Are Mermaids: She has the lower body of a fish.
- Stalker with a Crush: The Ancestor describes having noticed her watch him make a deal with ancient things in the waters during a specific phase of the moon... that is probably not a location or time of day that someone would happen upon it accidentally.
- Tragic Monster: The Ancestor repaid her crush by giving her to the Pelagics. As he states, she is now their queen — which is the same thing as being their slave. And the fact that she is repeatedly called a "matriarch" has horrific implications.
- Was Once a Man: She used to be a young girl with a crush on the Ancestor. Then he handed her over to the Pelagics as part of a deal, who transformed her into her current state.

- Achilles' Heel: A party that is able to act or move around with their skills easily from any rank, stun the first rank, and apply blight. The anchorman isn't particularly hard to stun and the crew is rather dependent on him grabbing a hero to heal and protect themselves. The crew will constantly pull someone forward as they summon an anchorman, but that isn't much of an issue if the party's skills are chosen with knowledge of this. Blight will ignore the main crew's protection while someone is grabbed. The Shieldbreaker can also bypass the anchorman's PROT bonus.
- They are also, for some reason, unable to anchor someone who has virtued, so placing trinkets that enhance virtue chance on the person in the front will trivialize the fight as well. The Highwayman is particularly good for this, since his Crimson court trinket set boosts his virtue chance to 75%, and because he has a repositioning skill that will help move him back to the front should the captain shuffle someone else forward. The Abomination is a close second, since he also has a forward-moving skill and virtue chance-boosting trinkets.
- And I Must Scream: Due to their anchor being hexed, they have been sent to drown forever at the bottom of the sea.
- Arc Symbol: The crew's anchor that cursed them into drowning forever is designed exactly like the stress symbol.
- A.I. Breaker: The anchorman was always immune to movement skills before he throws the anchor, but his crewmen were not. Using pull skills to drag them in front of him would break the encounter, since he doesn't have the ability to move in front of them and must pass every turn, leaving the crew vulnerable to being blasted to death by the heroes as they ignore the battle's core mechanics. An update changed both the crew and the puller to have 200% resistance to shuffle, which prevents this from happening now.
- Anchors Away: If one isn't out, they always lead by summoning the anchorman, which binds up and immobilizes the first hero in line with the cursed anchorline, forcing them to experience the crew's horrible death. While the hero is free to attack, his or her stress will increase rapidly over time, and the crew will feed on their terror and regenerate health every round. And the same attack that calls up the anchorman pulls a random hero into the front rank.
- The Dividual: The main boss is three undead smugglers that fight as one unit, with one health bar and three actions per turn. They also summon a fourth.
- Disproportionate Retribution: When the crew was running errands for the Ancestor, they asked for a raise as the tasks got more difficult. The Ancestor paid them with a cursed anchor that dragged them and their ship to the bottom of the ocean and doomed them to drown forever.
- Emotion Eater: While someone is tangled in the anchor and suffering through the horrific experience they did as they first drowned, the undead crew will feed on their terror and despair to regenerate health every time someone takes a turn of any kind.
- Ghost Pirate: Technically smugglers and of the undead corpse persuasion, but they fit most of the tropes anyway.
- Glowing Eyelights of Undeath: Combined with their equally-glowing Ghostly Gape to give them an ominous atmosphere.
- Hoist by His Own Petard: The anchorman's attack builds up stress as it forces heroes to relive the Drowned Crew's last moments. If a hero reaches 100 Stress but becomes Virtuous instead of Afflicted, they immediately throw the anchor off, and all subsequent attempts to use the anchor on them will fail, denying the Drowned Crew an opportunity to heal using the anchor.
- Jacob Marley Apparel: Swaddled in the chains that killed them, they each use attacks appropriate to what they were in life.
- Mind Rape: The Drowned Crew specialize in building up stress, whether via using the anchorman to inflict visions of how they died, or one of the crew members coaxing a member of the party to "drink with the dead." The captain's main attack, Mutiny!, deals a heavy debuff without directly affecting stress unless it crits.
- Nigh-Invulnerable: While the anchorman can be taken out before it gets a chance to throw the anchor, doing so is a tricky task, since it comes into play with a powerful buff that gives it high armor and makes it very resistant to other sources of damage. Even stunning it is a chancy proposition. And after throwing the anchor, that same effect transfers to the rest of the crew while it's still alive.
- Stone Wall: They don't have much in the way of inflicting physical damage. However, their Anchorman gives them Regenerating Health and confers a sizeable PROT and Blight/Bleed resistance. Either way, it's a fairly long fight, giving them more time to pile stress on the frontline.
- Vengeful Ghost: They're rather unhappy that the Ancestor condemned them to a terrible fate, and are taking their anger out on anything unfortunate enough to enter the Cove.
- You Have Outlived Your Usefulness: When the crew demanded higher payment for their services, the Ancestor decided to kill them by enchanting their ship's anchor to drag them underwater. Unfortunately for the heroes, they still stalk the Cove as monsters.

- Achilles' Heel: The Man-at-Arms guarding. The Man-at-Arms can easily ensure Vvulf will never hit his bombs on anyone but the Man-at-Arms himself, and the protection it will grant him will make him shrug it off. To a lesser extent, a Vestal specializing in healing will probably be necessary to keep the Man-at-Arms going, and stress heals are probably vital to get to Vvulf at all, since the Brigands and Madmen in his dungeon will otherwise definitely build up stress to your party before ever fighting him.
- Animal Motifs: Wolves. He wears a wolf's pelt over his back, and his forces are like a pack of wolves hunting down their prey, with him as their alpha. The mission to fight him is appropriately named "Wolves at the Door".
- Arc Symbol: Vvulf painted the game's stress symbol over a skull on his massive shield.
- Arc Villain: Of the Brigand Incursion event. He has no relation to the horrors beneath the manor and instead uses the opportunity of the party being away from the Hamlet to sack it of its riches.
- Badass Normal: Like the rest of the Brigands, he's human. A very formidable human, but a human nonetheless. A human boss fought on Darkest difficulty, which means that he can stand on the same ground as the hellish monstrosities in the Darkest Dungeon itself.
- Beard of Evil: He's got a pretty big beard and is also the leader of a band of brutal, butchering brigands battering the badly-beaten Hamlet for blood and bounty.
- Big Bad Ensemble: As the leader of the Brigands, Vvulf is the one enemy in the game who has nothing to do with the Heart of Darkness, competing with it to destroy the heroes and the Hamlet.
- Big Bad Wannabe: An interesting case of the Wannabe not deliberately trying to be a Wannabe. While Vvulf is a threat to the hamlet and a very formidable boss, he's also just a human with the misfortune of being put in a Cosmic Horror Story. It's hard to view him as having the same threat level as the Eldritch Abomination that's currently poised to destroy all of creation; he's just a local problem, and the real enemy is more apocalyptic.
- Crosshair Aware: Not unlike The Prophet, he'll place a bomb on a character spot in your formation at the beginning of the round that will blow up at the end of the round, dealing massive damage to the character in that spot unless they destroy the Barrel of Bombs that accompanies him on each round.
- Elite Mooks: Leads his own personal cohort of outlaws, identifiable by their wolf pelts. Better-equipped and better-trained than your average bandit, they cannot only take a lot of damage but dish out a ton.
- Evil Laugh: Lets one out when he's encountered, and more if he gets a Critical Hit on your heroes.
- Flunky Boss: He'll summon beefed-up versions of Brigand Cutthroats to assist him in the battle.
- Killed Off for Real: Unlike most bosses, Vvulf can only be killed once. Doing so will prevent the Brigand Incursion from happening again for the rest of the current playthrough.
- Large and in Charge: The leader of the Brigands and far larger than the average man, at least in appearance. Gameplay-wise, he's actually Average-sized and only takes up one enemy slot in the field.
- Luckily, My Shield Will Protect Me: Carries a massive tower shield as his primary weapon, which humorously is dwarfed by his own size in comparison. Works both for him and against him. On one hand, the Brigand Raiders he summons can become nearly untouchable with his skill Tower Shield, where he redirects the damage meant for them towards himself instead. On the other hand, though, this gives your front-line heroes a way to deal damage to Vvulf still reliably, as he'll move backwards and away from the frontline as he summons more Raiders.
- Make Me Wanna Shout: Aside from throwing Bombs, he only directly attacks the heroes through his battle shouts. One skill named Get Them! has Vvulf shout at the heroes for Scratch Damage, but it summons a Brigand to join the fight to add to the damage he can deal. His other skill, War Cry, has him roaring at the heroes, intimidating them and dealing stress damage.
- Outside-Genre Foe: The only faction leader to be a regular human being, albeit a heavily armed one. In a game filled with eldritch horrors, cults of the old gods, cannibalistic witches, undead sorcerers, demonic pigs, and fish people, the bomb-throwing bandit chieftain is a decided oddity.
- Psycho for Hire: He was a notorious mercenary, hired by the Ancestor to keep the townsfolk in line. Now he's turned bandit and plans to burn the Hamlet down and take what little the townspeople have left for his own profit and amusement.
- Tactical Suicide Boss: Though he generally remains in the back ranks, he'll frequently use a Guard ability on his minions in the front ranks, making it much easier for close-range heroes (like the Crusader and the Leper) to hit him.
- Throw Down the Bomblet: His primary form of attack is tossing bombs at your heroes. Destroying his Barrel O' Bombs will temporarily disable the attack, but he can summon a new one on his next action.

An elusive being with a hobby more sinister than gathering harmless trinkets, it travels through the corridors of the dungeons, collecting the severed heads of fallen heroes he comes across. A tall and terrifying figure – a King in Yellow, Desecrator of Graves and Bodies, Beheader of Corpses. The Collector is shaped like a man, dressed as a man, has the skull of a man, but the similarity ends there. What is hidden underneath that yellow cloak is an inhuman monster, a horrid amalgamation of severed heads and torn-out spines twisted together into a nightmarish mass of flesh and skulls. He's a rare encounter in any given dungeon once the party's pack is more than 85% full.
In Darkest Dungeon II, he returns to menace your party by having a five percent chance to appear in a Road Battle if you have a Trophy equipped or in your inventory, hoping to catch you with your pants down so that he might collect your party's heads. Otherwise, he is functionally identical to how he played in Darkest Dungeon.
- Achilles' Heel: Stuns. Because of the Collector's low stun resistance, it is very easy to get him down to half his health or below before he is able to summon his heads for support, particularly if he's surprised.
- Body of Bodies: Body of Heads, to be precise.
- Collector of the Strange: Of Human Heads, which he uses as Mooks during battle and occasionally drops when beaten.
- Dem Bones: Downplayed, his head is only a skull, but his body is composed of his collection of severed heads. Fittingly, he lacks the Unholy enemy classification.
- Dynamic Entry: He was given one of these in II. While the Collector would suddenly pop up in front of your party in Darkest Dungeon, here he receives a mini-cutscene where he rises out of a portal in the ground (similar to Death) and gesticulates wildly.
- Flunky Boss: Summons the severed heads of the Vestal, Man-at-Arms, and Highwayman to fight by his side. The heads float with their spines dangling down, and create a body out of blue energy when they act. Its own offensive ability is lacking, but the heads will gladly compensate.
- From Nobody to Nightmare: The origin comic◊ included with the Darkest Dungeon board game offers at least a possible beginning for the Collector. Namely, it got its start as a lowly Bone Rabble skeleton, one of the weakest mooks in the game. Things changed when it got its hands on a wealth of the Ancestor's artifacts and came into contact with a Red Hook idol, giving it the physical strength to rip a Highwayman's head clean off.
- Expressive Skull: While in Darkest Dungeon his head has a vacant, empty expression typical of skulls, in II it's perpetually in an angry grimace.
- Gameplay and Story Integration: In II, he has a chance to spawn in a road battle if you have a Trophy equipped. Most of the Trophies in the game are severed heads, which makes perfect sense as his whole M.O. is trying to collect said severed heads.
- Ghostly Glide: Levitates off the ground with his body hunched forward.
- Glass Cannon: Compared to other bosses, he really can't take that much punishment, easily going down in two-three turns if he's surprised or stunned. However, his heads can bring a lot of pain if left alive.
- Glowing Eyelights of Undeath: The Collector himself gains them when he uses his Life Steal attack, and all the heads he's collecting have glowing blue eyes.
- Humanoid Abomination: It's got the general shape of a human, but that's where the similarities end. Even the human skull that acts as his head may not have originally been his to begin with. Fittingly, it is of the Human/Eldritch type, rather than the Unholy type.
- Hurricane of Puns: Almost all of his and his minions attacks' names are puns. ("Collect Call", "Gnawing Sensation", "Head Games"...)
- Leaning on the Fourth Wall: In II, after he appears, he will spend every moment he's not attacking to turn slightly away and look straight where the player would be at as if to size them up properly for another head to harvest.
- Life Drain: His aptly named Life Steal attack damages a hero and heals him.
- Metal Slime: A rare and powerful enemy, though not quite as much as the Shambler, who drops one of three powerful trinkets or a very valuable gem each time he's beaten.
- Nightmare Fetishist: One of the Ancestor's comments on it in the first game ("The sparkling eyes of youth- twisted and made merciless!") suggests that the Collector finds a childlike fascination in collecting heads, perhaps in a way similar to how someone else would collect butterflies or leaves.
- Non-Lethal K.O.: In II, defeating him doesn't even cause the death animation; rather, he stumbles back and then escapes through the same portal.
- Optional Boss:
- A random encounter in dungeon hallways, he has about as much health as a Shambler and can summon some fairly potent Mooks, but killing him gives some fairly powerful trinkets.
- He's technically not this from Confession 2 onward in II, as to enter the mountain you are required to have at least one Trophy, which gives him a chance to spawn in. This means that even if you wait until as late as possible to affix a Trophy to your stagecoach, there will still be a chance you'll encounter him.
- Pungeon Master: Is implied to be this, as all of his head minions' attacks are head-based plays on words, such as Headhunt, Head Games and Head Knock. For a more obscure example, "Collect Call," with which he summons his minions, is based off of an old method of dialing a phone call and making the other party pay for it.
- Shout-Out: He wears a crown and tattered yellow robes.
- The Spook:
- Compared to all the horrors in the Estate. Even though the Shambler has some documentation, the ritual for its summoning is known and mostly related to what's beneath the Manor. The Collector is just something else, and from his appearance, fighting style, and everything involved in his existence, it's not clear what his connection is to everything happening in the Manor, or even if that connection exists. The Ancestor has nothing on it, and the Hamlet's denizens and the missions never bring it up. It's just something from Beyond that caught wind of the misery in the Estate and wanted in, having no stake in the entire battle between the heroes and what's beneath otherwise. Barring, perhaps, the ever-growing number of corpses in the vicinity, and thus the opportunity to add to its collection...
- Commentary from one of the developers suggests that the Collector sustains himself by using the heads he's collected, and without them, he'll crumble away.
- This Cannot Be!: In II when he gets to Death's Door, he's occasionally seen faintly shaking his head, as if he's refusing to admit that he's being beaten.
- Villain: Exit, Stage Left: In Darkest Dungeon he simply shows up again and again without explanation, but II shows him doing this by retreating into the portal he emerges from at the start of the battle when he's defeated.
- Wake-Up Call Boss: Can be randomly encountered literally on the first expedition after the tutorial level. The tools for reliably beating him (stunning him, moving him forward, and being able to hit him while he's in the back line, as well as having consistent and strong healing and Damage Over Time cures if possible; Life Steal- aside from doing the obvious, and healing him for a crap-ton at that- hits like a truck and can potentially inflict Bleed, as can the Headhunter attack from its Collected Highwayman, minus the health recovery) are ones that not every possible party might have. They are ones that any solid party probably should have.
- Your Soul Is Mine!: It's implied that he collects not only the heads of his victims, but their souls as well.


- Achilles' Heel:
- Parties that can move around a lot won't have an easy time, but they'll definitely have an easier time. The Shieldbreaker is particularly notable for this; both the Shambler and its Spawn can gain quite high Protection ratings, and the Shieldbreaker can bypass it. The minions are also vulnerable to Damage Over Time; their stacking PROT doesn't help against bleeds and blights.
- The Shambler's skills hit the entire party at once, which makes it vulnerable to a party rife with Riposte skills. The counterattacks it triggers will allow the party to maintain the offensive on its Tentacles without needing to worry about using extra turns to damage the Shambler.
- Black Speech: Usually talks in this while possessing the Occultist, although it can occasionally speak in English.
- Brown Note Being: This being's existence causes stress damage on the heroes. In one journal, it merely showing up is enough to drive at least one hero completely insane, and the survivors react with horror at merely remembering the battle.
- Casting a Shadow: If summoned from an altar, the Shambler will automatically immediately snuff out the torch and cannot be relit while fighting it.
- Combat Tentacles: Summons them to attack the party; it also uses the many slithering ones on its body to inflict high stress on any heroes unlucky enough to be touched by it.
- Dark Is Evil: Heavily associated with dim lighting and darkness in general. The creature itself is bathed in shadow, and coloured like the night itself.
- Darkness Equals Death:
- Utter darkness signals the Shambler's appearance, which more often than not heralds death for the heroes. The implication is that it's been hunting the party the entire time but can only come out when there's no light.
- With a snuffed torch, no place is safe from the Shambler. Not snuffing the torch out during the tutorial should go without saying.
- Demonic Possession: Occasionally does this to the Occultist, who serves it.
- Difficult, but Awesome: In both games, beating the Shambler offers some truly stellar rewards, but it's not by any means going to be easy, even with a heavily buffed party that just rested. In Darkest Dungeon it drops Ancestral Trinkets and some other high-value goodies. In Darkest Dungeon II it drops one of its own unique set of indelible Shambler Trinkets, as well as rewarding two Mastery Points, purging all Loathing, and giving a full Torch refill.
- The Dreaded: Heroes facing the Shambler do not like facing the Shambler, suffice to say.
- Early-Bird Boss: Snuffing the torch means it's possible to face the boss at the start of the game. While not impossible to defeat it at that state, it is still immensely difficult.
- Eldritch Abomination: The Shambler truly is a creature of nightmare. A being from the elder days that continues to haunt humanity from the shadows, the Shambler is a multi-tentacled horror, that constantly delivers endless stress damage on the heroes by simply existing. It also has the most obviously Lovecraftian inspired creature design in the game.
- Eviler than Thou: Implied to be on the receiving end of this by The Heart of Darkness, whose corruption turned one Shambler into the Shuffling Horror.
- Expy: Its design is highly reminiscient of descriptions of a Shoggoth, although instead of being an amorphous, ever-shifting mindless Blob Monster it's some kind of hyper-predatory Living Shadow being that lives in a realm between the dark places humans cannot see.
- Eyes Do Not Belong There: Absolutely covered in many glowing red eyes, all visible like any other eldritch creatures, despite the game's otherwise Hidden Eyes artstyle.
- Flunky Boss: The Shambler itself does extremely low damage for a boss enemy, dealing only 1-2 damage, and minor bleed, blight or stress from its attacks. The primary threat in its boss fight are the Shambler Tentacles it spawns each time it attacks. The Shambler Tentacles start weak but will continuously self buff themselves. Even if you kill the tentacles, the Shambler will simply spawn more on its next turn.
- Foreshadowing: The battle against the Shambler teleports the party to a cosmic realm, hinting at the true nature of the Final Boss and the game's true Cosmic Horror Story.
- Hero Killer: Already has a reputation for ruining thousands of runs, but the true qualifier for this trope is all the heroes it's devoured in In-Universe diary entries.
- Increasingly Lethal Enemy: The Shambler Spawn/Shambler Tentacles only have one move, Clapperclaw, which does a lot of damage. The catch is that every time they use this, they get a PROT buff/Armor tokens, a damage boost, a speed boost and a boost to their crit rate, until they're critting your heroes every single turn before they can react and are nigh-unkillable.
- It Can Think: Appears to be a mindless monster, but according to the sequel, it's the Occultist's patron and occasionally possesses him, occasionally speaking coherently and aiding him.
- Kaizo Trap: Unlike the Necromancer, the Shambler Tentacles are not considered Minions that disappear when the Shambler is killed, meaning you can still lose after killing it if you're unlucky.
- Magikarp Power: Not the Shambler itself, but the Shambler Spawn it creates gain powerful buffs every time they attack, and they can radically stack horrifying PROT and damage capabilities if left to their devices.
- Mama Bear: Bringing the Shambler’s Spawn pet into the fight results in the Shambler gaining a +4 speed and 100% damage buff. Defeating it in this state nets you the "Circle Of Life" achievement.
- Meaningful Name: The Occultist calls it "the black-beast", appropriate for a monster that only appears in darkness.
- Metal Slime: A rare and powerful monster that drops high-tier trinkets when killed; indeed, it's the only drop source for a handful of Ancestral trinkets.
- Mook Maker: Can summon Shambler Tentacles that do both stress damage and blight, but the worst part is they get more powerful as the fight progresses.
- Optional Boss: It's a random encounter at complete darkness, but it can also be summoned at its altars if a torch is used. There is a very good reason why it's optional. It will also always catch the party by surprise, disrupting formations.
- Outside-Context Problem: Implied by the existence of the Shuffling Horror below, which appears to be a Shambler that was corrupted by That Which Came From The Portal, which means that regular Shamblers aren't connected to it.
- Primal Fear: Much of the Flavor Text surrounding it talks about how humanity has always feared the dark and offers the suggestion that this thing is the reason for that fear; the similarity in appearance the starry night in both its arena and that of The Miserable Dark town event also implies that the Shambler specifically is the "something haunting the dark" in the Hamlet at that time.
- Rush Boss: Killing it quickly is a great way to avoid three of your heroes being on Death's Door due to repeated Clapperclaw crits, only to get wiped out all at once by an Obdurous Advancement. High-DPS parties are great for this reason, but beware if they require specific ranks and get shuffled around, as you'll be wasting precious time putting them back in order.
- Super-Persistent Predator: If it's summoned bu the party runs away, it will appear again as the next encounter; your only means of escaping at that point by returning to the Hamlet. Don't summon it unless you're ready to kill it.
- Volumetric Mouth: Its mouth opens surprisingly wide, suggesting a jaw system similar to that of a snake.
- Weaponized Offspring: Implied. "They are its larval offspring." is one of the first possible explanations that comes to mind for the Shambler Spawn.

- Animalistic Abomination: It was previously a normal raven, but the corruption of the Weald has twisted it into a hulking, multi-eyed otherworldly monster. Fittingly, it's of the Eldritch/Beast type.
- Brown Note: The Shrieker's cries are explicitly described as maddening to human ears, and the huge shriek it belts out when it flees the battle is terrible enough to inflict upwards of 50 stress on each hero.
- Brown Note Being: The Shrieker's stress-damaging cries are an innate part of its being, and not a voluntary choice.
- Collector of the Strange: Collects Trinkets. Justified, since as a raven, it is attracted to shiny objects. It has its own hoard of stolen trinkets, which it stores within its nest.
- Creepy Crows: A mutated, thieving raven, who will attack you if you try to retrieve the trinkets it stole from you. Can also summon a whole murder of the things to mob your party.
- Dirty Coward: While the Shrieker is horrifying, it still has the mentality of a crow; if it knows it can't win (or gets bored), it'll fly away, screaming.
- Feathered Fiend: An avian monstrosity that wants nothing more than to feast on your heroes' cadavers, and steal their glittering baubles from their corpses. And if they're not already dead, it'll be all too happy to correct that little issue when confronted directly.
- Hold the Line: Although the Shrieker is a difficult boss that can turn up before you have a party capable of defeating it outright, completing the quest only requires that you outlast the Shrieker. After four turns, it will simply fly away, allowing you to retrieve the trinkets it took as long as at least one of your heroes survived.
- Lightning Bruiser: The Shrieker has a ridiculous Dodge attribute, making even laying a glove on it a challenge. Meanwhile, it can inflict all manner of mischief to your party, including the ever-popular method of disease-laden projectile vomit.
- Make Me Wanna Shout: Has three skills of this nature that all deal massive stress damage: Caw, which is Exactly What It Says on the Tin; Call the Murder, a loud caw that summons a horde of ravens to swarm your party; and Shrieking Flight, which makes the Shrieker let out a deafening caw while fleeing from the battle.
- Screw This, I'm Out of Here!: Once the fight turns against it, the Shrieker will fly away from the battle, ending it immediately.
- Thieving Magpie: While it's a raven and not a magpie, once per playthrough it can steal from your Trinket Inventory, forcing you to engage in a boss battle against it if you want your valuable trinkets back. It will also scavenge trinkets from dead heroes and collect those lost in town activities too.
- Time-Limit Boss: Downplayed; to complete its related quests, you have to survive for four turns, after which it flees the battle, and you can reap the rewards. However, if you want even better rewards, the trope plays itself in full — in these four turns, you have to destroy its nest. If you can manage that, you'll gain valuable treasure.

- Achilles' Heel: A party that can attack from multiple positions can easily overcome the Shuffling Horror's main gimmick of scattering your formation. Highwaymen, Jesters, a Crusader with Holy Lance in his moveset, Hellions, any character that isn't bound to a single spot can do well against it.
- Brainwashed and Crazy: Implied to be a Shambler corrupted by The Heart Of Darkness to serve him.
- Damage Over Time: What the Shuffling Horror will use primarily to harm targets, since by itself it isn't terribly damaging with its direct attacks, relying mostly on the Cultist Priests it summons to do the damage.
- Eldritch Abomination: Slightly more of one than the Shambler, this one has fleshy growths with extra mouths and eyes scattered on its body.
- Enemy Summoner: Will summon either a Cultist Priest or a Defensive Growth to assist it in the fight whenever possible.
- Keystone Army: Averted. Defeating the Shuffling Horror doesn't cause the Cultists to vanish; the party can still die afterward. The game will still identify it as a completed quest, since you defeated the Horror, even at the cost of your party.
- Punny Name: As stated in the character description, "shuffling" could refer to both its movements and the way it "shuffles" your party members around.
The Heart of Darkness

The true Big Bad, and the thing responsible for the horror plaguing the Hamlet.
The Heart of Darkness is the source of all the horror and corruption plaguing the state, an eldritch god of unknown origin. Through the shade of your Ancestor, it claims it created humanity, then went to sleep in the depths of the world until it was roused during the Ancestor's foolish quest for knowledge. It is a slumbering, ethereal, and omnipresent deity manifested through your Ancestor's misdeeds, whose form became a vessel for the creature to cross over, and is revered by the cultists and priests of the Darkest Dungeon who have, under the influence of its cosmic power, became distorted entities of multiple mouths, eyes, and tentacled appendages. Just as a kicker, it takes some resemblance to humanity to try and prove its point.
- Achilles' Heel: Since status effects transfer between its different forms, the right team can give it a ridiculous amount of Blight and Bleed.
- Always Accurate Attack: "Come Unto Your Maker", an unavoidable, unblockable, can't be Death's Door'd One-Hit Kill. At least it only uses this twice, and you get to choose who dies to it.
- The Assimilator: It absorbs other beings and/or makes them more like itself, and might have been the shade of the Ancestor all along, goading you into feeding it with dead heroes and accelerating its resurrection. Its cultists also come to resemble it more and more in the final dungeon. From its perspective, after all, it is only recalling something that used to be a part of it."You still foolishly consider yourself an entity separate from the whole, but I know better. And I. Will. Show you."
- Arc Symbol: What's in all likelihood its symbol, it also fits in one more subtle representation with its bony forehead.
- Big Bad: Its existence is why you're here in the first place.
- Break Them by Talking: Gives a Breaking Lecture at the beginning while disguised as the Ancestor. The appropriate response is listed below.
- Broke Your Arm Punching Out Cthulhu: Even if you defeat the Heart of Darkness, it will almost certainly cost you two of your party of four in the process, unless you manage to deal tremendous damage to the monster before "Come Unto Your Maker hits", or only fight it with two heroes so the attack goes unused.
- Dead Person Impersonation: Takes the Ancestor's form during the first two phases of the final battle. It may or may not be his voice guiding you throughout the game.
- Do Not Taunt Cthulhu: A number of the heroes will attempt to taunt it when about to be sacrificed to its "Come Unto Your Maker" attack. Naturally, it won't end well for them if they're chosen.
- Eldritch Abomination: An unspeakable nightmare from the earliest days of the universe, awakened from its eternity of slumber because the Ancestor Dug Too Deep. Its unique enemy type is Cosmic, and it's implied that, even assuming some other fool doesn't wake it, the "stars will align" and cause it to explode from the earth like an egg, destroying humanity one way or another. Assuming that it's telling the truth.
- Evil Versus Evil: The thing in the Comet is an infant of the same tier of Eldritch Abomination as it, and if it were to mature, the two would fight for dominion of the planet. Humanity likely wouldn't survive.
- Final Boss: Its existence is why you're here in the first place.
- Final-Exam Boss: Bosses in this game are generally best defeated by specific strategies and precautions that you wouldn't use for normal battles. This one being a Sequential Boss, the ideal team is ready for anything: hero shuffling, enemy shuffling, morale damage, health damage, blight effects, multiple targets, single targets. The difficulty level is not that high compared to what has come before, but the wrong team makeup can get completely stonewalled.
- A God Am I: Claims to be the god of the world, and the Ancestor mentions that it's the creator of humanity.
- God Is Evil: Claims it created humanity and is all too willing to try to wipe it out. Whether this is true or not is up for debate.
- Greater-Scope Villain: Your ancestor might be the reason everything went to hell in the estate, but this being is the reason things kept getting worse without him.
- Hoist by His Own Petard: Was the one who brought The Heir to the estate, who was the cause of its (possibly temporary) demise.
- Human Sacrifice: It refuses to feed on anything but the flesh and blood of humans. This is also important in Stygian Mode: If 12 of your characters die, the Heart will awaken prematurely and destroy the world.
- I Have Many Names: The Ancestor gave it at least four names. In its own case, it refers to itself both as "The black-beast" and "C'THOGUS".
- Jerk with a Heart of Jerk: Assuming it sent the letter drawing you to the estate. It ate the ancestor, demonically possessed his spirit, and then goaded you on this wretched journey; not for the sake of redemption, but because all the slaughter and sacrifice you caused to defend your home made it stronger.
- The Maker: According to the Ancestor, it created the human race. For what reason, or even if it was voluntary, nobody knows.
- Mind Rape: The final phase has an attack called "Know This", which causes no physical damage, but does tons of stress, presumably by overloading the victim's mind with eldritch truths.
- Mook Maker: Its first phase focuses on spawning reflections, both perfect and imperfect, which are the things that actually attack you, as well as healing them. The boss himself is immune to all sources of damage, and the only way to harm him is by destroying the imperfect reflections.
- No Saving Throw: There's no way to protect from "Come Unto Your Maker"; no amount of avoidance, defence, or Death's Door will save a character from suffering a One-Hit Kill when it's used. The only way to survive it is for the attack to simply not happen, which is done two ways, neither of them easy: to nuke it with a single attack*, or to fight it with only two characters*.
- No-Sell: The first form displays "IMMUNE" if hit with any attack. The only way to injure it is to destroy its reproductions — when enough Perfect Reproductions are destroyed, it has no choice but to create Imperfect Reproductions, which are bound to its health.
- One-Hit Kill: The bad news: The final phase has an attack that will insta-kill one of your heroes without fail. The not-so-bad news: It uses it only twice, once when its hit points reach 2/3 and 1/3 each; and you are at least given a choice of who's going to face it.
- Our Gods Are Different: If the Ancestor is right, this is the creator, this is God Himself staring you in the face.
- Planet Destroyer: A potential one. If it breaks free, it will destroy the Earth.Heart of Darkness: I WILL SMASH THIS PATHETIC CELL AND RETURN TO THE STARS.
- Sadistic Choice: When its hit points reach the 2/3 and 1/3 mark, it will perform the attack "Come Unto Your Maker", which forces you to choose a hero who will be devoured, killing them instantly.
- Sequential Boss: It has a whopping four phases.
- At first, it takes the form of the Ancestor and is, for the most part, a Mook Maker.
- After you defeat the Ancestor's first form, he takes a second form that is more of a direct attacker, paired with non-attacking, perfectly-dodging mobs to try and reduce your ways of hitting him.
- After that, it takes the shape of a fleshy cocoon that has no ways of causing direct damage, and in fact heals whoever hits it, but also has a chance of inflicting them with blight, and possesses a party-wide blight attack.
- Finally, from the cocoon emerges the Heart of Darkness's true form, and the true final battle begins.
- Shut Up, Hannibal!: Apparently it never considered the idea that mere mortals could strike it down. The fact you managed to defeat it somehow seems to enrage and confuse it.
- The Topic of Cancer: If the Polyps, Malignant Growths, and Large Cysts are really part of its body, this thing's not very healthy.
- Unreliable Narrator:
- It and the Ancestor's claims of it being the setting's god (which may in fact be the same thing) would fit the Cosmic Horror Story setting, but the Prophet receiving visions trying to prevent it from being released, several classes having holy based powers, and even Holy Burns Evil being in effect (especially the case with the Vestal) does raise questions about if it's as all powerful as it seems. This makes it even harder to tell whether or not it's telling the truth when it claims that its birth is inevitable and will result in the destruction of the planet.
- Color of Madness reveals this to be most likely a lie. With the existence of the Sleeper, an alien Eldritch Abomination of the same level as the Heart, and something the Heart actually fears, it turns out the Heart is just another fish in a cosmos-wide pond. It may be the creator of humanity, but it isn't the father of the universe. This throws everything else it says into immense doubt.
- The sequel not only reveals the malign influence of the Iron Crown exists elsewhere in the world, but the Confession bosses are all other eldritch entities themed around parts of the human body leading an even more powerful evolution of its cult, suggesting it may simply be a single piece of something much greater, both adding more ambiguity to the situation and deepening the eldritch horror of the setting.
- As well, the fact that the Iron Crown is the Anthropomorphic Personification of everything negative in the human psyche or even a Sentient Cosmic Force, and is also a Greater-Scope Villain to both the Heart and the Sleeper, casts doubt on its claims of having created humanity. In fact, since the Iron Crown may have sprung from the human psyche, and the Confession Bosses appear to have been the result of the Scholar's actions, that potentially means that humanity created the Heart.
- Walking Spoiler: This being is, literally, a Thing Man Was Not Meant To Know.
Dungeon Enemies
Along your adventure to clear up the Ancestor's loose ends, your heroes will be facing the hostile monsters and corrupted beasts that have taken over the Estate, most of them exclusive to the dungeon they call home, and others that wander around.Look in the Darkest Dungeon folder information about the Cultist Brawler and Acolyte, as their upgraded versions are Moveset Clones to the ones you can encounter normally.

For more information about the Brigand Bloodletter, see the Boss Folder.
- Badass Normal: They're not cultists blessed with dark magic, undead warriors, or even eldritch things from the far beyond, just bandits who can lay down the pain just as effectively as everything else plaguing the Estate.
- Taken a step further with the upgraded Brigand Raiders and Hunters that show up in the Wolves At The Door quest, which has the same difficulty rating as the Darkest Dungeon itself.
- Bandit Clan: The hired thugs formed one to more effectively steal from the region when their payroll ended.
- Color-Coded for Your Convenience: A Brigand's toughness can be determined by the color of their attire. Weak Brigands wear green, tougher variations wear brown, even tougher ones wear a dark blue, and the strongest of them all wear wolf pelts and coats in dark blue.
- Combination Attack: The Bloodletters and Cutthroats assist each other, where the Cutthroat will issue multi-target bleed debuffs while the Bloodletter will deal a multi-target bleed attack.
- Glass Cannon: The Brigand Cutthroats don't sport a whole lot of health or protection, but their swords are capable of inflicting huge amounts of damage thanks to their increased critical hit chance and good bleed damage.
- Long-Range Fighter: The Brigand Fusilier wields a blunderbuss, but rather than taking precise and damaging shots, they prefer to lay down some Blanket Fire to cause minor damage to everyone in the party, as well as debuff their dodge skill. It's normally not very dangerous until their debuffs stack up, allowing their Bloodletter and Cutthroat allies to put multiple heroes on Death's Door with their multi-target attacks, giving them a high chance to deal killing blows on several characters at once.
- Outside-Genre Foe: The other factions contain the undead monsters, pig-demons, fishmen, fungal monstrosities, and cosmic horrors one would expect from a game like Darkest Dungeon. The Brigands, as a heavily armed goon squad of highwaymen, thugs, and hired guns, go decidedly against the grain. Tellingly, they're the one faction in the game that the Cultists will not work alongside.
- Psycho for Hire: They were an army of brutal mercenaries, in it for the pay and the chance to lord it over the townsfolk. They've now gone rogue, and are as mad as the rest of the enemies around the Estate.
- Support Party Member: Oddly enough, the Fusilier are this for the Brigands, who are there to debuff your chances to dodge stronger incoming attacks with Blanket Fire, and at the highest levels act as their stress dealer with each Blanket Fire having the ability to stress the entire party out.

- Damage-Increasing Debuff: His "Accuse" move will make its target take more stress damage until the next camp, or if you have no camp, the whole quest!
- Giving Someone the Pointer Finger: He points an accusing finger at whichever hero he's making an Accusation towards.
- Institutional Apparel: He wears a straitjacket with its straps ripped apart, freeing his arms that will be clutching his head while he's not shouting at your heroes.
- Mad Oracle: He shouts terrible revelations and accuses your heroes of their deepest, darkest sins.
- Rare Random Drop: They have a 4% chance to drop one of three music box trinkets (Aria, Overture, and Crescendo), which grant your heroes powerful buffs.
- The Unintelligible: Constantly shouts in panicked gurgles and moans.

- Big Creepy-Crawlies: Maggots about the size of a torso who love to leap up for a bite out of their targets.
- Color-Coded for Your Convenience: A Maggot's difficulty depends on its shade, the weakest being white, the Veteran dungeon Maggots being shaded yellow, and the toughest being orange.
- The Dividual: Two Maggots take up one space and act as one unit.
- Fragile Speedster: Very quick, but it's not uncommon at all for them to be taken out in one hit from most attacks.
- The Goomba: Very easy to take out in one turn and weak in their attacks, though encountering them runs the risk of mounting stress and disease that can hinder you later.


- All Webbed Up: Webbers will try to do this to make targets more vulnerable by slowing their speed down or even stunning them for a turn.
- Big Creepy-Crawlies: Giant fanged spiders.
- Color-Coded for Your Convenience: Spitters and Webbers distinguish themselves by being colored either green or orange, Spitters as the former and Webbers as the latter.
- Combination Attack: The move Web will stun and mark targets for the Spitters to focus down with blight attacks. Individually weak, the two combined can quickly down heroes on higher difficulty levels.
- Creepy Camel Spider: Their redesign in II makes them look like a cross between regular spiders and this.
- Fragile Speedster: The spiders are fast, have high Dodge, but have so little health that they can get squashed in one hit.
- Glass Cannon: Spitters definitely more so than Webbers, but still. If the Webbers manage to apply Marked/Combo on your heroes, they will take some serious damage, and you'd better hope it doesn't crit. That being said, high-damage party members can often one-shot them if they can actually hit them.
- Long-Range Fighter: Spitters are especially deadly at range when striking a marked target, as their attacks will deal double damage with a high percentage chance of a critical hit. Against unmarked targets or up close (where they are forced to use their weak bite attack), not so much the case.
- Super Spit: Spitters can do massive damage and inflicit serious Blight on heroes with Marked/Combo on them. In II their spit gains a high chance to apply Blind tokens, making them even harder to hit if they keep spitting at your damage dealers.
- Target Spotter: Webbers function as one for a Webber-Spitter combination. They mark a target, stunning them, increasing the damage of spit attacks, and encouraging the whole spider group to gang up on the helpless hero.
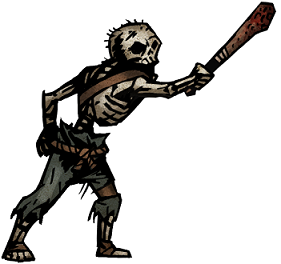
- Carry a Big Stick: A large bloodied club, though they aren't very good with it.
- Dem Bones: And not limited to the Ruins, like most other examples.
- The Goomba: Probably the straightest example in the game, having lackluster stats and pose a very small threat with their weak attacks that don't even have the benefit of dealing stress damage or debuffs at lower levels. The only saving grace they get is a low chance to apply a dodge debuff with the move Bump In The Night at the highest-leveled dungeons.
- Achilles' Heel: Like other high protection/low HP monsters, Damage Over Time is the bane of their existence. Eroding them away with blight damage usually ends them quickly without the hassle of trying to break a stone statue. Likewise, they have poor health and heavily depend on their Protection stat, so any attack that ignores Protection will slaughter them with ease.
- Living Statue: Tellingly, they're the only (non-DLC) enemy of the Stonework type.
- Red Eyes, Take Warning: Their eyes are bright red, and they're bent on killing your heroes.
- Stone Wall: High protection, low-damaging attacks that help their party with formation-ruining moves and stuns. Their primary weakness is their laughably low HP - even with 50% PROT, an HP pool of 10 is terrible for a Veteran-level enemy.
- Tail Slap: The move Lash Of The Tail is this, with a chance to stun and move targets.

- Achilles' Heel: Their poor resistances. Ghouls, unlike most other undead enemies, are as vulnerable to Bleed as they are to Blight, so focused fire from Damage Over Time specialists will make the Ghoul kill itself before it has a chance to ruin your party.
- Ballistic Bone: Their Skull Toss skill involves them hurling a skull at the target, which does damage, stress, and has a chance of stunning.
- Glowing Eyelights of Undeath: Their wide eyes glow bright yellow.
- I'm a Humanitarian: Judging by the amount of human bones they wear, this is probably the case. This may explain why they are never encountered with Brigands or Pillagers.
- Lightning Bruiser: Quite fast and durable and can eviscerate heroes with a few swipes of their claws.
- Our Ghouls Are Creepier: Ghouls in Darkest Dungeon are towering, stringy-haired, blood-soaked undead humanoids who gorge themselves on human flesh wherever it is found (including the Courtyard), possessing lethally sharp claws and a blood-curdling scream. They are far more durable than many other types of ghouls, being able to dish out serious damage to your party while taking a lot of punishment.
- Skeletons in the Coat Closet: They wear a necklace of human skulls. II gives them a full bandolier made of skulls and tibias to wear.
- Super-Scream: The move Howl has them roar at the heroes to snuff out their torchlight, stress them out, and spread disease all at the same time.
- Was Once a Man: Whatever happened to them, it turned them into towering monsters that want nothing more than to tear prey apart.

- Achilles' Heel:
- The Crusader class, who has a damage bonus against all Unholy-class enemies in the game. Being a dungeon that's occupied almost entirely by the Unholy, the Crusader is at his best here where he can one-to-two-shot most enemies with his sword.
- Blight damage to a lesser extent. They might have a skyrocketed bleed resist, but their blight resistance is pitifully low, meaning they can be eroded away by the toxins very easily. As such, The Ruins are where an offensively built Plague Doctor can thrive and melt the opposition.
- Dem Bones: They're the reanimated remains of your long-deceased ancestry, and the soldiers who served them.
- Expressive Skull: Most obvious with the basic Bone Rabble and Bone Soldiers, but most of the enemies react with pain when defending.
- Hell Is That Noise: Let the torchlight fade too much, and the chittering and hissing of reanimated bones stalking your heroes can be heard in the ambiance.
- No-Sell: In regards to attacks and characters that rely on bleed damage, such as the Houndmaster and offensive Jesters. Being skeletons, they are incapable of bleeding to death.
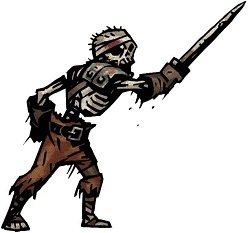
- Boring, but Practical: Even though their low HP can qualify them as The Goomba, the damage they can deal in a sword swing is fairly average all around, and gets the job done when it comes to adding to the DPS that the skeletons can deal.
- The Goomba: Only a step above the wandering Bone Rabble in terms of health and protection, with the only huge difference being that they deal way more damage than their club-swinging allies, and as such are usually low-priority targets that can felled with one or two hits.
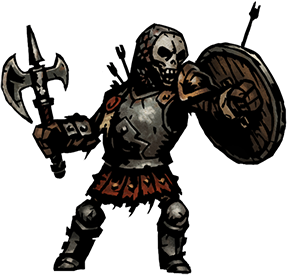
- Achilles' Heel: Their high protection buffs can be pierced very easily by Damage Over Time, which ignores protection and gets straight to dealing damage every round. With their very low blight resistance, it's very easy to pull off.
- Evil Counterpart: Is basically a diluted version of the Man-At-Arms. They both make up for their lowered damage with good protection and ally Guarding, can Shield Bash for a stun/disruption of formation, and are meant to establish a nigh-unmmovable Stone Wall for their parties.
- Luckily, My Shield Will Protect Me: The shield isn't just there to add flavor to the skeletal ranks, they will likely use their better armor and shield to their advantage by using the move Foul Warning, which guards a potentially more powerful but fragile ally, redirecting most forms of damage towards themselves instead.
- Shield Bash: One of their attacks, called Dead Weight. It has a chance to stun and a chance to move the target backwards, potentially ruining your formation.
- Stone Wall

- Emergency Weapon: Making a Courtier move to the front 2 positions one way or another forces them to forfeit their Tempting Goblet and instead use the pitifully weak move Knife In The Dark instead. And unlike most other backrow supports, this move doesn't move them back to their favored position.
- Food Slap: That wine must be really bad if it causes physical harm when splashed in a hero's face...
- Fragile Speedster: Fast enough that most rounds in a fight will begin with the Bone Courtiers attacking first, unless your party is built with buffed speed in mind. Additionally, their low HP is compensated with a higher-than-average chance to dodge any incoming attacks.
- Improbable Weapon User: Wields a goblet filled with wine that they love to splash on their victims when they aren't drinking from it.
- Rare Random Drop: Killing Bone Courtiers at Champion leveled dungeons could very rarely reward you with their Tempting Goblet. Letting a hero hold it lets them move faster, dodge better, and gives them an HP buff, but gives them a 50% increase in stress damage taken.
- Shoot the Mage First: If you value your party's sanity, the Courtiers need to be removed ASAP.
- Squishy Wizard: They can completely wreck a team's sanity left if unchecked, but their HP and protection is severely lacking compared to the actual bone soldiers and are highly vulnerable if caught out of position.
- Wine Is Classy: Fitting for a former blue-blooded noble.

- Bayonet Ya: Their Emergency Weapon in a pinch. It's not very strong, but it does allow them to retreat back to their effective range where they can get back to sniping your heroes.
- Critical Hit Class: While the damage from their regular shots are nothing to scoff at, they can quickly turn the tide of an encounter thanks to their increased Critical Hit chance.
- Evil Counterpart: To the Arbalest class you can recruit; both wield similar weapons, can cause loads of precise damage at range, and are equally as helpless when forced to the front of the formation.
- Long-Range Fighter: They're in their prime in the back rows of their parties, but once moved up they're only able to use a weak move called Bayonet Jab.

- Authority Equals Asskicking: The designated Commanders and Generals for their armies, both in life and in death, and perfectly capable of ruining any would-be heroes' day.
- Carry a Big Stick: An absolutely massive mace they use to bludgeon your party to death.
- Ground Pound: The name of their party-wide stun move, though thankfully it deals Scratch Damage.
- Large and in Charge: Large enough to occupy two spaces of the enemies' formation.
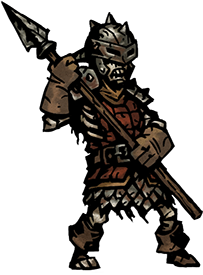
- Boring, but Practical: They have no gimmicks to their moves, they exist solely to deal great damage to your heroes from any position they find themselves in.
- Critical Hit Class: What makes them so frightful when combined with their ability to deal damage wherever they stand. They have an increased chance to score a Critical Hit that can easily wipe out half of an HP bar on a hero, or erase it entirely when a light class is targeted.
- Impaled with Extreme Prejudice: Their specialty, and they do it well enough that they can drive their lance through 4 armored adventurers at once.

- Arc Symbol: The game's stress symbol is decorated upon the flag they carry into battle.
- The Bard: With their military bugle, they can use the move Wicked Surge to empower an ally with a 25% boost in damage.
- Elite Mook: Only appears in Champion level dungeons in the Ruins.
- Emergency Weapon: They carry a sizable dagger to slash at their foes if they find themselves too close for comfort, allowing them to retreat back to their supportive positions if there's other skeletons or corpses to hide behind.
- No-Sell: Beside the immunity most Unholy enemies have to Bleeding, Bone Bearers are also nearly impossible to Stun, which denies you the possibility to force them to skip their turn to prevent them from buffing or reviving other enemies.
- Shoot the Medic First: Brutally enforced if the enemy has a Bone Bearer. Not only does the enemy party have a sizable damage boost so as long as the Bearer is alive, but killing any of the units will just result in the Bone Bearer getting a free turn to revive them back to full health. You'll either need to focus all damage on the Bone Bearer itself, or get really good at erasing dead bodies one by one.
- Pulling Themselves Together: Can help their party do this with the move Unholy Rally. This includes Human-type enemies.
- Wearing a Flag on Your Head: A flag with an eye that's constantly surveying the battlefield and grants unholy powers to the bearer, specifically.

When the Ancestor banished The Hag to the Weald after being disgusted by her appearance, she began to use her discovery of an odd, parasitic fungus to transform the woodland into something more sinister. Now the road leading to the town is blighted with a fungal infestation that has taken over the ecosystem, hiding the hordes of zombified victims under the control of the fungus being spread by the witches that serve under The Hag.
- Festering Fungus: A particularly nasty and toxic infestation.
- Fungus Humongous: The woods leading to the Hamlet have been blighted by mushrooms of varying size, sometimes even thick enough to replace the trees entirely.
- No-Sell: On account of them being a fungus that specializes in spreading blight, they have a high resistance to the poison themselves.
- Hell Is That Noise: If the torchlight goes too low, the growling, gurgling, and howling of the fungal horde and the Wealds monsters will slowly take over the ambiance.
- Mushroom Man: From possessed humans to animal-like crawlers. The Viragos that work for The Hag have the luxury of being only hunchbacked from a mass of fungal growths instead of losing their entire heads and bodies.
- Our Zombies Are Different: Unfortunate victims of a fungus that's taken over their bodies. Seems to range from being obviously dead skeletons, represented by the Fungal Artillery, to living bodies under siege by the fungus, represented by the Fungal Scratcher and Unclean Giant.

- Body Horror: A bloated, leathery body that has had its head replaced with a huge poisonous mushroom, along with smaller growths scattered about the rest of of its body.
- Stone Wall: Under normal circumstances, they're a slow but sturdy mob of enemies with an inaccurate set of attacks that don't deal a dangerous amount of damage, and thus only serve to block your frontline heavy hitters from getting at the threats in the back row. However, if a hero is Marked by an enemynote , then they can use the move Rend The Marked for a sizable damage bonus, turning them into Mighty Glaciers.

- Body Horror: A corpse that has had its limbs twisted into walking upside down in a spider-like manner. Its head is missing its skin and lower jaw, as well.
- Shoot the Mage First: Their strategy of melting your heroes with blight and marking them for increased damage means that taking them out first is usually the best idea.
- Smoke Out: One of their attacks is called Escape Cloud; though they won't leave the fight, it does allow them to retreat to the back rows while potentially blighting one of your heroes.
- Target Spotter: When they aren't raining blight down upon your heroes, they're using the move Mark Prey to allow their Scratcher allies to use their stronger Rend the Marked attack.
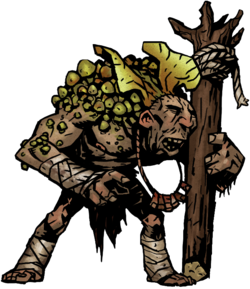
- A.I. Roulette: While present in all enemies, the Giants are an especially obvious case, they might use their poison spores attack which hits only one character for what amounts to Scratch Damage with a possible blight, or they can use their Treebranch Smackdown and wallop away half to three quarters someone's health with a shuffle and stun added on for measure.
- Body Horror: Along with their gigantism, the skin on their backs can split open to reveal more fungal growths, which then dispels toxic spores towards your party.
- Creepy Souvenir: Is wearing a necklace of toes/fingers.
- Elite Mook: Downplayed; the are only fought in Veteran and Champion mission and cannot be found in Apprentice ones. There is actually a version that was meant to appear in Apprentice dungeons (in fact, that's where the name of "Unclean Giant" comes from), but it went unused in the final game.
- Giant Mook: As their name suggests: they are as big as the Brigand Bloodletter, even taller than them, and they hit much, much harder with their giant makeshift clubs.
- Mighty Glacier: Infamous monsters known for their massive amounts of HP and tide-turning attacks.
- Powerful, but Inaccurate: Treebranch Smackdown not only takes away a large chunk of its target's health, but can smack them out of the front lines. Mercifully, this move is not used that often, and it's very likely to miss.
- Telephone Polearm: Has a move called Treebranch Smackdown, where they'll swing an uprooted tree they use as a weapon. It's the attack they're least likely to use and it's fairly inaccurate, but it hurts like all hell when it hits.

- Crown of Horns: Has two antlers wrapped around their heads with a cloth; not nearly as impressive as their Hag leader's headdress, though.
- Hell Is That Noise: In a game filled with masterfully horrible audio, it takes a lot for the Crone's death scream to be on a different level of unpleasant.
- The Napoleon: Are rather short, and definitely capable of issuing debilitating blights and insanity with their herbal mixtures and dark magic.
- Shoot the Mage First: As another Target Spotter for the fungal hordes, it's important to wipe her out of the picture before she can ensure that the Scratchers she's fighting with can reliably hit your party.
- Wicked Witch: They don't quite fit the expected appearance like their Virago sisters, but they can cast wicked magic just the same.


- Beware of Vicious Dog: It is a half-rotted canine with Rabies that attacks your party on sight.
- Blessed with Suck: Capable of inflicting Rabies on any hero they attack. There's a sizable damage boost in contracting the disease, but the victim's accuracy suffers as a result.
- Color-Coded for Your Convenience: Normal Gnashers encountered in lower-leveled dungeons will show them as a brown-colored dog. More dangerous Gnashers will be colored white in the Champion dungeons.
- Death of a Thousand Cuts: The only attack they're capable of doing, Rabid Rush, deals rather low damage and can issue a modest bleed, but due to the chances that you'll always encounter at least 3 at once, the damage and bleeding will stack up very quickly.
- Elite Mook: It has a unique variant in II called Gander, which seems to have once been a war dog of the Lost Battalion.
- Fragile Speedster: They have one of the highest speed stats in the game, and thus are able to move first in nearly every encounter. Their HP is low enough that they can usually be removed in one hit, though that'd mean managing to hit them past their dodge rating first.
- You Will Not Evade Me: Fetch allows them to pull heroes forward, disrupting your party composition.


- A.I. Roulette: The entire strategy around fighting them involves hoping they don't use Cytokinesis to drag the fight out longer by summoning more of themselves, and especially hoping they don't use Ectoplasmic Profusion to summon a Large Ectoplasm with more than 40 health.
- Blob Monster: Ectoplasms are giant blobs of an amorphous, acidic substance with multiple dissolved skeletons inside.
- Death of a Thousand Cuts: They might not deal the best damage all around, but let them linger for too long, and you'll be taking damage every turn as they continue to multiply as they're killed.
- Expy: Their appearance matches up almost one to one with every description of a Gelatinous Cube, right down to the half-dissolved skeletons floating inside them.
- Giant Mook: Large Ectoplasms are size 2 and have as much health as a Ghoul. Running into one unexpectedly can mean a long and exhausting fight.
- The Goomba: Ectoplasms have a measly eight health and can be one-shot by practically every damaging move in the game, but this is downplayed and mitigated by the fact that they can duplicate themselves.
- Oh, Crap!: The reaction your party will have if the Ectoplasm decides to start multiplying their numbers before them. Each time they use Cytokinesis to multiply is another small bit of stress added to the heroes' Sanity Meter. Witnessing them summon a Giant Ectoplasm will freak them out quite a bit.
- Self-Duplication: The Ectoplasm can use the move Cytokinesis to split into more of their kind, but if they're feeling particularly evil, they can use Ectoplasmic Profusion to create a much stronger version of themselves, a Large Ectoplasm.
- Status Infliction Attack: Large Ectoplasms have a move called Slimesmack, which can potentially stun your heroes in ranks 1 and 2.
- Smash Mook: Large Ectoplasms hit much, much harder than regular ones, and will do so relentlessly while continuing to summon more Ectoplasms on top of themselves.
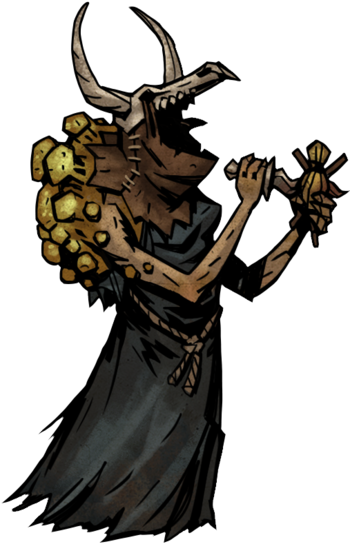
- Anti-Magic: The Necrotic Fungus will block all forms of healing, effectively rendering Vestals and certain other moves useless until it's destroyed.
- Breath Weapon: Has a move called Putrefying Breath where they'll cough out a thick cloud of blight on a hero.
- Body Horror: Their transformation process in the Hag's cauldron has made them tall and lanky, gave their skin a sickly tone, and allowed a severe growth of the fungus to live on their backs, giving them a hunchback. Unlike the other horrors of the Weald, though, this was what they wanted.
- The Faceless: You'll never see what their faces look like behind their sack hoods and skull masks. The closest there is in their corpse sprite, but by then it's been reduced to a bloody, mangled skull from the killing blow.
- Elite Mook: Only appears in Champion level dungeons in the Weald.
- No-Sell: Much like their Ruin-counterpart, the Bone Bearers, Viragos are impossible to Stun.
- Shoot the Mage First: Like the Bone Bearer, they're capable of making your life hell until they're dead.
- Sinister Schnoz: It's hard to see thanks to their headwear and the gloomy atmosphere the Weald has, but they sport a very long Wicked Witch nose. It's easiest to see when they're attacking.
- Target Spotter: And probably the most dangerous target spotter in the Weald. When using Ruinous Hex, the affected heroes will gain a -20 to their dodge stat and suffer a penalty to their accuracy, further ensuring that they won't be able to avoid any attacks anytime soon, especially from the Fungal Scratchers' Rend The Marked.
- Voodoo Doll: Wields one made of straw in one hand. When using Ruinous Hex, they'll stab into it with their knife, causing damage to the targeted heroes and debuffing their accuracy and ability to dodge.
- Wicked Witch: Fits the bill entirely.

- Achilles' Heel:
- The Warrens are populated almost entirely by Beasts, meaning that the Houndmaster's damage bonus against Beast-class enemies can be put to its best usage. The dungeon itself is populated by a good amount of low-HP Squishy Wizards, so there's potential for many enemies to be killed in one Hound's Rush in lower-leveled dungeons.
- Bounty Hunters also shine here, as nearly every Swine is a human half-breed, letting the Bounty Hunter get a damage bonus to his already impressive DPS.
- Flagellants are also highly effective against Swine, taking full advantage of their low bleed resistances to quickly wear them down. Moreover, the risk of catching Diseases (which is particularly high in the Warrens) is considerably reduced thanks to the Flagellant's high resistance and his camping ability, which allows him to purge himself of illness.
- Animalistic Abomination: The Swinefolk: once humble pigs that were used as vessels for demon-summoning rites by good ol' Ancestor.
- Big Eater: The Swine have colossal appetites, and while they love to eat human flesh, they'll settle for more conventional foodstuffs like grain. One possible mission in the Warrens is to loot the Swine's grain stores both to starve them out and to fortify the Hamlet's food supplies.
- Explosive Breeder: The Ancestor's quotes imply that the Swine are capable of this, explaining why the ranks of their armies never seem to thin no matter how many times you go down into the Warrens.The Ancestor: They breed quickly down there in the dark, but perhaps we can slay them even faster.
- Expy: While most of the monsters in the game are inspired by the Cthulhu Mythos, the swinefolk have their roots in William Hope Hodgson's The House on the Borderland.
- Hell Is That Noise: Let the torchlight go too low, and the sounds of squealing pigs closing in on you will slowly begin to take over.
- I'm a Humanitarian: It's no secret that they love to dine on human meat; the fact that their home is absolutely littered with human remains only confirms it.
- Nausea Fuel: In-universe, the Warrens and The Swine are described as horrible smelling due to all of the rotting flesh and sewage that the Swine live in and leave everywhere. One of the town events even implies that the stench is so strong that the side of the Hamlet that faces the Warrens can smell it from there.
- Nothing but Skulls: All that's usually left of the victims eaten, which you can encounter in the hallways between rooms.
- Pig Man: And are just as ravenous as you'd expect one to be.
- Sigil Spam: A modified version of the Iron Crown (inverted with two middle prongs, making it resemble a pig's tusks) is scattered everywhere in the Swine's home, from flags hung up on the walls to stone statues erected in the center of rooms; even the Swine Drummers carry it around on their backs. One of the possible missions to do in the Warrens is to find and destroy the effigies that they worship in an effort to demoralize them.
- Sinister Swine: The Swine are disgusting man-eating monsters who live in filth and are breeding like rabbits in order to raise an army to march on the Hamlet with.

- Epic Flail: They can use their flail in a move called Ball & Chain to stun any heroes in the back row, with a chance to move them backwards in the formation if they aren't already at the very rear.
- Mighty Glacier: Slow in terms of speed, but they're still the primary damage dealers of the Swine, who can take a hit as well as they can deal it.
- Serrated Blade of Pain: Their meat cleavers have gruesome serrated attachments on them, and fittingly enough, they'll inflict bleeding on your heroes.

- Arc Symbol: They wear a variant of the game's stress symbol on their backs.
- The Bard: Their only two attacks are Drum of Debilitation and Drum of Doom; the former Marks a target for death while the latter issues a party-wide stress attack.
- Brown Note: Drums of Doom inflicts stress damage on its listeners.
- Combination Attack: Though their marks make targets a more tempting target in general, Carrion Eaters gain a damage bonus from attacking marked heroes. A common team composition that can be encountered is 3 Carrion Eaters and a lone Drummer that marks a target in an attempt to sic the Eaters on one person for a huge amount of damage.
- Cruel and Unusual Death: Whoever was killed had the unfortunate fate of having their face peeled from their skull and stretched out to act as the drum head for the Swine's war drum.
- Drums of War: Drummers keep the armies of the Swine marching in step and demoralize and strike terror into their enemies with the infernal beating of their drums.
- Shoot the Mage First: With a beat of their drum, they can stress the whole party out and encourage the other Swine to focus on one particular target, meaning they should be taken care of quickly.
- Target Spotter: Their primary usage in a battle is to Mark a target for death, reducing their ability to dodge attacks.

- Body Horror: The Swine weren't the picture of health to begin with, but the Wretch takes the cake with its atrophied legs, disproportionately long arms, and the human skull embedded through its torso.
- Fragile Speedster: Similar to the Bone Courtier, they have a speed stat high enough to ensure that they go first most of the time and a high dodge chance, but are lacking in HP and protection.
- Shoot the Mage First: A first move in any fight should be taken to killing the Wretches before they can do their work.
- Squishy Wizard: Horrible at taking hits, but can really put the pressure on your heroes with stacking stress damage and a chance at debuffing their overall effectiveness with debilitating diseases.
- Vomit Indiscretion Shot: Their one and only attack, which can spread an array of diseases if they aren't resisted.
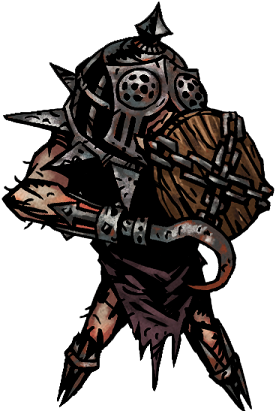
- Achilles' Heel: They have enough protection to classify them as Mighty Glaciers, but they also have pitifully low health, maximizing at 16 HP. Stacking bleed damage instead of bothering to break through their defenses makes very short work of them.
- Body Horror: The Slashers' limbs have been replaced with metal spikes embedded through their flesh, including a particularly large metal hook they use as a weapon.
- Combination Attack: Their hook synergizes with both the Chopper and the Wretch with the debuff it can apply, allowing their allies to throw out bleeds and diseases a little easier.
- Critical Hit Class: They have among the highest crit chances of any enemy in the Warrens (up to nearly one in four hits will be a crit), which also gives them a better chance of having their debuffs stick.
- Hook Hand: The weapon they use is a large meat hook they use for a hand, which is capable of dealing a good amount of damage, but also serves as a combo weapon for the Swine Chopper and Wretch, as it can apply a debuff to the target's resistance towards bleeding and disease.
- Luckily, My Shield Will Protect Me: Wields a wooden shield, to further improve their protection.

- Crippling Overspecialization: The Swinetaur relies on his party to move backwards for charging room to unleash their most devastating attack, with them either being alive and fighting or as corpses taking up space. If the rest of their party has been killed and their bodies were cleared, their overall threat diminishes greatly, as they're forced to use their less effective attack.
- Impaled with Extreme Prejudice: Their best attack, Boar Rush, has the Swinetaur charge and impale a hero for a huge amount of damage and a chance to send them flying to the back of the formation. Their second-most destructive attack, Pig Spear, lets them run through the entire party.
- Logical Weakness: A large, equine-like pig with a lengthy lance? He suffers from the same weakness as any large cavalry with a lance: he's deadly at a distance where he can set up a devastating charge, but if you lock him in close combat he's much more vulnerable.
- Mighty Glacier: Sports a great amount of health, a devastating attack, compensated with very low speed and the need to spend turns telegraphing those strong attacks. The moment all of their allies are dead and their bodies get swept away is the moment they become Stone Walls instead, losing their best moves while they're bound to a single spot.
- Our Centaurs Are Different: A towering pig centaur, though there's more pig than man in this example.

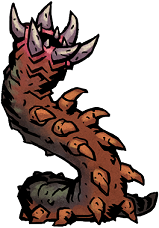
Following the introduction of the Crimson Court, they can now also be found in The Courtyard.
In Darkest Dungeon II, they are primarily found in Creature Dens, though they can sometimes be found alongside the Swine in the Sluice.
- Attack Animal: Are these for The Swine, helping them spread blight and disease to any intruders.
- Big Creepy-Crawlies: A very large lamprey with large, sharper teeth and capable of surviving on land.
- Big Eater: In II they are capable of sucking down entire corpses in an instant.
- Evolution Powerup: If a Carrion Eater eats a corpse, it will quickly transform into the larger and tougher Carrion Devourer.
- The Goomba: Are rarely expected to grant any problems on their own thanks to their average speed and modest health, though their blight damage and ability to single out a marked target when working with their Swine masters comes into play when it's time to attract your attention.
- Lamprey Mouth: Ring of teeth inside, bordered by a a much larger set of fangs that stick out, capable of secreting blight.
- Took a Level in Badass: Their transition from a small scavenging species to a predatory attack animal would be considered this.

Following the introduction of the Crimson Court, it can now also be found in The Courtyard.
- Body Horror: One for the Carrion Eaters, who have turned into something completely unnatural and tentacle-ridden.
- Combat Tentacles: The tentacles surrounding their jaw are there to snare prey, as in your heroes, and weaken their ability to fight back with massive debuffs to their damage output and accuracy.
- Combination Attack: Large Carrion Eaters are usually accompanied by their smaller, regular Carrion Eater brethren, who join in the effort to focus a single target down after the Large Carrion Eater has both marked them and hindered their ability to fight back as effectively.
- Eyes Do Not Belong There: They've grown eyes all along the ends of their heads, but also around the base of their Nested Mouths, which reveal themselves when they decide to start feeding.
- Nested Mouths: What they primarily use to attack your heroes with, a hidden bloodied jaw that'll try to take a huge bite out of their victims.
- Sequel Non-Entity: Despite being the large versions of Carrion Eaters, which do appear in Darkest Dungeon II, Large Carrion Eaters are instead swapped out with Carrion Devourers, which metamorphosize out of Carrion Eaters.
- Smash Mook: Compared to normal Carrion Eaters, Large Carrion Eaters are capable of reducing hero health bars to dust with a single Tentacle Devour. Their whole thing is softening up your party with Weaken Prey and then obliterating them, while letting their smaller allies finish them off.

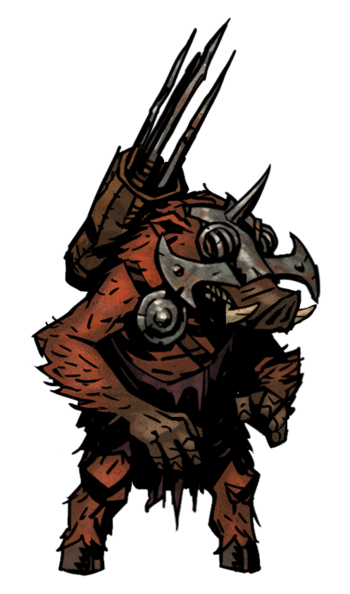
- Elite Mook: Only appears in Champion level dungeons in the Warrens, thankfully. In the sequel they have a Champion variant called Fulgore.
- Full-Boar Action: Rather than looking like a farm pig crossed with a human like most of the other Swine, the Skivers resemble bipedal boars with their tusks and hairy bodies.
- Hero Killer: One of the deadliest enemies in the game: fast yet durable, with highly accurate, high damage attacks that hit multiple ranks at a time, inflicting crippling debuffs. Their only weakness is that their mediocre front row attack, which nevertheless helps them relocate.
- Impaled with Extreme Prejudice: Are very fond of their javelins, and are capable of doing huge amounts of damage with them.
- Javelin Thrower: What they were born for.
- Lightning Bruiser: A stark contrast to their Swine brethren, the Skivers are sturdy, capable of outpacing a good portion of your roster, and can deal horrendous amounts of damage in the process.
- Long-Range Fighter: Their best move, a multiple target attack called Cripple Them, is exclusive to their back rows. Unlike other long-range fighters in the game, though, they'll actually move forward every few turns to use Spit To Roast, a single-target attack that deals a massive amount of damage before moving back to the back rows.
- Non-Indicative Name: A skiver is British slang for a person who avoids work or personal responsibility. Needless to say, Swine Skivers are the opposite of lazy or irresponsible and are probably the hardest workers in the Warrens and Sluice concerning the business of killing your heroes.
- Poisoned Weapons: The tips of their javelins have been tipped with poison, meaning they can blight 3 heroes at once.
- Rain of Arrows: The attack animation for Cripple Them is a flurry of javelins landing on the heroes. True to the move's name, the attack hinders the heroes ability to outpace the Swine and their ability to dodge.

- Achilles' Heel:
- Occultists have several skills and trinkets which make them a lot more effective against Eldritch enemies.
- While the fish folk are resistant to bleed, they're vulnerable to blight, so a Plague Doctor or Shieldbreaker can work their magic, especially against the heavily-armored enemies.
- Almost all of the Grave Robbers abilities help her fight against the fishmen, and her high dodge attribute takes advantage of their generally lower-than-average accuracy.
- Expy: Of the Deep Ones from The Shadow Over Innsmouth. This would make the Ancestor into an analogue of Obed Marsh, since he dealt with the Pelagics for treasure. Of course, the Ancestor didn't willingly copulate with them in order to consolidate power over his coastal hamlet, choosing instead to exchange a young girl to them which they used as their breeding slave.
- Fish People: They come in two variations, from piranha-like swordsmen and shaman to shield-bearing Cephalopods. The odd members out are the Ucas, who are Giant Enemy Crabs.
- Hell Is That Noise: Let the torchlight fall too low, and the gurgling of the very agitated Pelagic society will replace the ambiance.
- Human Sacrifice: If sailors and trespassers aren't killed on the spot, they're captured and sacrificed for the Pelagics' own purposes.
- The Runt at the End: They are the one enemy faction that the Ancestor's narration doesn't describe as being created or summoned by him. They were already there, and he engaged in less-than-ethical business transactions with them. The only reason the game gives for why you're fighting them is a brief mention that the territorial jerks are sinking merchant ships trying to bring the hamlet much-needed supplies.
- Sea Monster: Various tentacled beasts reside in The Cove, ranging from man-sized trappers residing under the water to leviathans dragging down sea craft. Thankfully, you'll only ever see the tentacles of a smaller monster trapping your heroes in the hallways for a moment to give them a long-lasting and serious debuff.
- Terrestrial Sea Life: The Pelagic and the sea creatures trailing are this, minus the Ucas, who have the justification of being crabs.
- Was Once a Man: According to some notes left behind by a previous expedition, one of the members was attacked by a sea creature and slowly turned into one of the Pelagic horrors overnight, which suggests that some of the Groupers were once human.

- Boring, but Practical: One of the more dangerous enemy formations in The Cove isn't a balanced team of supports, defenders, and attackers, but instead a 4-fish party of Groupers capable of attacking from any position for a considerable amount of damage.
- Javelin Thrower: If they're not slicing up your front rows with their swords, they'll be throwing harpoons and dragging your back row heroes forward.
- Jack of All Stats: The Groupers have a mixture of stats that allow them to do well in any composition you'll find. They're not damage sponges like the Guardians, but they're definitely not frail. They're not as fast as a Deep Stinger, but they aren't slow. Their main show is that they will always deal damage compared to the others' status debuffs, stress attacks, and damage-over-time abilities.
- Piranha Problem: They're bipedal piranhas, who are just as ravenous and capable of grouping up in packs to tear up intruders as their Hollywood counterparts.
- You Will Not Evade Me: An effect that the move Spearfishing can have, as in they'll pull a hero in the back of the party towards the front and disrupt the synergy or pull them in range of their stronger Seaward Slash.

- Black Magic: What they'll be using for their benefit and your suffering.
- Emergency Weapon: If they find themselves in the front rows of the formation, they'll use their sacrificial knives for a Ceremonial Cut.
- Piranha Problem: Like the Groupers, they're piranhas that have gone upright, and are extremely vicious and territorial over their salty homes.
- Sanity Slippage: They're capable of making your heroes experience this with the move Stress Wave.
- Shoot the Mage First: They have massive utility for the Pelagics with their magic, making them high priority targets in any fight. Also, unlike most other enemy supports in the game, they're actually capable of healing.
- Squishy Wizard: As usual, they can employ magic to their side's benefit but have low health.
- Support Party Member: Most of their abilities are designed to help their allies directly.
- Witch Doctor: Resembles one, though with an undersea theme.

- Achilles' Heel: Like all high-protection characters, Damage Over Time is great for ignoring their protection in favor of stacking damage. Blight in particular works well since they're fairly resistant to bleeding.
- Luckily, My Shield Will Protect Me: Capable of guarding an ally and themselves for a great damage reduction.
- Red Eyes, Take Warning: Has blood-red eyes, though they're serving for the slightly more noble role of protecting their allies.
- Stone Wall: Like the Bone Defender, they make up for their lack in damage and speed with a huge shield capable of giving considerable protection through a move called Barnacle Barrier to both themselves and an ally.
- Tentacled Terror: They're hostile octopuses standing upright.

- Achilles' Heel: Their shells ensures some of the best protection in The Cove, but they can't protect themselves from Damage Over Time. A team that can stack blight damage on an Uca has little to worry about while they watch its health bar drain for potentially 20 damage every turn.
- Arc Symbol: The broken ship's wheel they wear around their necks takes the form of the stress symbol.
- Color-Coded for Your Convenience: Weaker Ucas come in red, while tougher Ucas come in a blue/purple tint.
- Damage Over Time: The Ucas specialty. The move Arterial Pinch will have them pinch a hero and inflict 10 bleed damage every turn, which can stack if they feel like targeting a specific hero.
- Giant Enemy Crab: Darkest Dungeon's brand of crab enemy.
- Mighty Glacier: Big, slow, and tough. However, unlike other examples, they favor a terrifying amount of bleed damage per attack.
- Wound That Will Not Heal: Inflicts a debuff that reduces the effectiveness of healing, making it more difficult to recover from or mitigate bleeding.
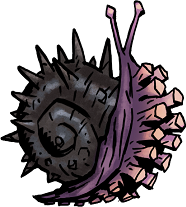
- Achilles' Heel: They have the highest protection level of any enemy in the game but no more than 10 hitpoints in their strongest incarnation. This makes them disproportionately vulnerable to an Armor-Piercing Attack as well as damage-over-time, which will usually get them in no more than two turns. This is not helped by their very slow speed.
- Non-Indicative Name: Sea Maggots are giant sea snails.
- Scratch Damage: Don't be surprised to see attacks dealt to it deal 1 damage at most, though this is mitigated by their low HP.
- Stone Wall: A ridiculous amount of protection thanks to their shell, but unlike other Stone Walls, they lack the HP to make the best use out of it.

- Color-Coded for Your Convenience: Tougher Stingers will be colored differently, with green and blue being weaker than their violet counterparts.
- Combat Tentacles: Inevitable since they're massive jellyfish, though they hold a spike in the tips of their tentacles to give a surprise to prey.
- Electric Jellyfish: Though their main damage comes from retractable spikes that bleed targets out, their other attack, Shocker, is also there to administer a stunning shock to targets.
- Fragile Speedster: Boasts a high speed and dodge chance to compliment their role of stunning heroes and bleeding them out for their allies, but tend to be easy to take out.

- Action Bomb: They'll always use the move The Revenge on their second turn, exploding all over your party for a huge amount of damage and stress.
- Body Horror: Whatever the Pelagics have done to these corpses, it has turned them into shambling, bloated, exploding horrors. Close examination during their attack animations shows that their ribcages have been pushed down into their stomachs and are visible through large, gaping holes in their sides.
- Color-Coded for Your Convenience: The more dangerous Thralls tend to be shaded blue and purple, over their less sturdy green-shaded relatives.
- Dead Weight: While probably not overweight in their time while alive, time spent decomposing in the water has made them big and bloated.
- Glass Cannon: They have very little-to-no protection to their HP, which means that getting rid of them is an easy sword swing or two away. They also explode and deal massive damage if they aren't taken care of for whatever reason.
- Our Zombies Are Different: A drowned corpse reanimated through the fish-men's magic to serve them.
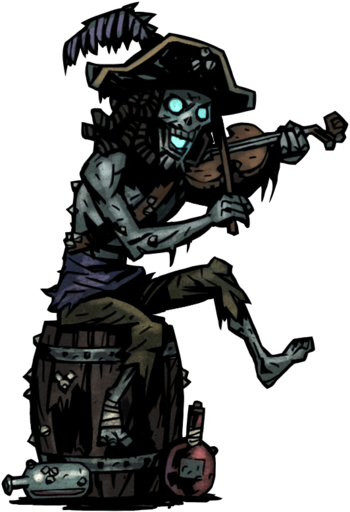
- The Bard: They have no offensive ability, but their drunken music is fully capable of stacking a horrifying amount of stress damage to heroes.
- Brown Note: The music they play is this in its entirety.
- Chill of Undeath: Their breath lets out a blue, ghostly cold air.
- Dreadful Musician: Dreadful enough to induce insanity and heart attacks, but also the names of their moves implies that they're playing rather poorly.
- Elite Mook: Only appears in Champion level dungeons in the Cove.
- Evil Counterpart: To the Jester. Both have extremely high mobility, play stringed instruments and spend much time changing the party's stress levels. As if to recognize this, there's an achievement called "Mine Goes To 11" for killing a Squiffy Ghast with a Jester attack. It's even written into the game's code: If there is a Jester in the party and the Ghast uses Maddening Shanty, it is guaranteed to target the Jester. This is the only attack in the game programmed to target a specific class.
- Ghost Pirate: Of the shanty music-playing variety.
- Glowing Eyelights of Undeath: Like the Drowned Crew, their eyes are missing in favor of a blue light coming from their sockets.
- Shoot the Mage First: The Squiffy Ghast should be killed first as it can inflict stress and the Horror status effect.
- Anti-Frustration Features:
- In the Darkest Dungeon, Enemies will never perform a nighttime ambush on camping heroes, meaning that camping in the Darkest Dungeon is risk-free of waking up to a mob of enemies surprising the party.
- Hunger checks are much less frequent than in other dungeons, meaning more food is available for camps.
- The Darkest Dungeon has scripted encounters in both hallways and rooms. This means that someone can memorize the spots where they encountered trouble and what kind of enemies populate those locations and build their team accordingly if they were wiped out the first time.
- The third Darkest Dungeon is the largest in the whole game and is the only dungeon classified as Exhausting. Four campfires are given for this dungeon.
- Body Horror: The Cultists who patrol the halls of their temple are not quite human anymore. The Cultist Priests aren't even classified as Humans anymore, but as Beast and Eldritch.
- Damage Over Time: The enemies here adore inflicting heavy bleed damage, with 6 being the average amount inflicted for most attacks.
- Demonic Spiders: A whole dungeon filled with them, done intentionally to drive the point home that this is The Very Definitely Final Dungeon.
- Eldritch Abomination: The Cultists that pestered your party in the regular dungeons are now this. Other hellish non-human creatures can also be found in the deeper parts of the Dungeon.
- Eyes Do Not Belong There: Most of the creatures have multiple, smaller black eyes scattered across their bodies.
- Lovecraftian Superpower: People who give themselves to protecting and worshiping whatever came from the portal are rewarded with grotesque new forms and terrifying powers.
- Money Spider: Averted. Unlike the usual twisted wildlife in the other dungeons, the encounters in the Darkest Dungeon, barring the Shuffling Horror, yield no loot on defeat.
- Took a Level in Badass: Those Cultists that liked to annoy your party with their bleed and stress damage? Their Ascended siblings are far more terrifying with their much more potent movesets.

- Arc Symbol: The symbol of their god is their headdress.
- Body Horror: Their bodies have been augmented with a fleshy profusion that forms into a serrated scythe appendage when they attack.
- Combination Attack: The move Rend For The New God has a good chance to inflict a +20% stress damage debuff on targets, a great opening attack to compliment their Witch allies' Fate's Reveal, a sanity-draining attack.
- Lightning Bruiser: Is packed with a passable speed stat, good HP, and a dangerous ability to cause heavy bleeding for your party so as long as they're on the front rows.

- Arc Symbol: Wears the symbol of their god as a headdress.
- Body Horror: Their bodies were augmented with tentacles that seep out from their robes and wrap around their arms.
- Combination Attack: Heroes hit with Fate's Reveal will be Marked in addition to taking heavy stress damage. The Brawlers that accompany the Witches will then capitalize on the increased damage with powerful hits from the move Rend For The New God.
- Go Mad from the Revelation: Will try to inflict this on your party with enough usage of the move Fate's Reveal.
- Target Spotter: In addition to stressing heroes out, the move Fate's Reveal will mark its targets so the Brawlers can deal increased damage against them while targeting them in particular.
- You Will Not Evade Me: The move Fate's Pull will have the Witch summon a tentacle through a portal to drag a hero to the front of the party.
- Inversely, Fate's Push will do the opposite, by pushing targets away from the front rows with one hard push from a summoned tentacle.
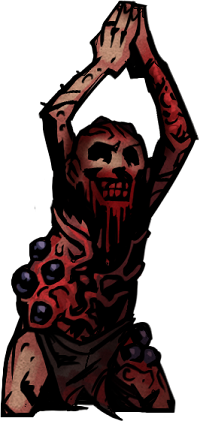
- Broken Smile: Has their mouth agape in fanatical devotion to their god.
- Eyes Do Not Belong There: Multiple black eyes are scattered on their chests and legs.
- Fragile Speedster: They have an impressive speed stat, but are lacking in HP, and are especially devoid of dodge and protection.
- Human Shield: Rapturous Cultists will use the move Flesh Wall to provide a turn of protection to the target.
- Shoot the Medic First: Any turn not spent on getting rid of these Cultists is a turn where they make their much more dangerous allies immune to direct damage or possibly even undo your progress with a heal. Thankfully, they have nonexistent stats to protect themselves with, so it's fairly easy.
- On the other hand, though, bearing through their heavy healing and protection and leaving one Rapturous Cultist alive means a few turns to heal risk-free, thanks to their complete lack of fighting power unlike other supports.
- Support Party Member: Has no offensive capabilities whatsoever, only the abilities to protect their allies or heal them.

- Body Horror: And how!
- The Faceless: Their hoods completely shadow whatever counts as their face.
- High Priest: They serve as these for the Cultists.
- Lightning Bruiser: Is possibly one of the toughest standard enemies in the dungeon, sporting a good amount of HP, high damage and heavy bleeding, and a speed that ensures they can move first against most of the damage dealers in your party.
- Was Once a Man: The Priests were apparently once human, but a granted favor from their god has turned them into something nearly unrecognizable. Notably, they're the only Cultist who aren't classified as a Human in any way.

- Arc Symbol: The growths have attached themselves to broken parts of the arc symbol.
- Anti-Frustration Feature: A rare one for the game, but the Defensive Growth will only ever use the move Grand Guard once every 3 turns, which is understandable as they're capable of absorbing a ridiculous amount of damage for their allies.
- Desperation Attack: When the Defensive Growth is the last unit standing, they'll use the move Unbearable Tremors to deal a party-wide stress attack against your team.
- Early-Bird Cameo: The Growths appear only once as encounters in the first Darkest Dungeon mission before they become common enemies in the second mission.
- Mighty Glacier: The Malignant Growth is a powerful and sturdy unit thanks to the statue it's attached to, and capable of inflicting heavy damage and stuns.
- No-Sell: Being made mostly from stone, they have a bleed resistance just barely behind the skeletons in The Ruins, making bleed-reliant attacks next to useless on them.
- Shoot the Medic First: It's difficult to pull off on the Defensive Growth without the usage of blight damage, though, meaning that either stun-locking them or killing off the rest of their allies can be more worthwhile than wasting turns hitting a stone statue.
- Stone Wall: The Defensive Growth is exceptionally sturdy, even more than the Malignant Growth, making them perfect for defending their damage-dealing allies.
- Support Party Member: The Defensive Growth, contrary to the Malignant Growth, are dedicated protectors, damage buffers, and healers for their parties, and are deceptively fast enough to pull their tricks off before most of your party can move.
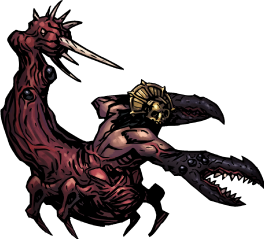
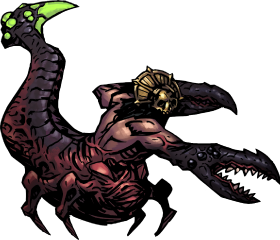
- Achilles' Heel: Revelation may hit like a truck on both physical and mental fronts, but the Talisman of the Flame trinkets from the first Darkest Dungeon mission near-totally nullifies their impact. However, there's only enough for three party members, so one is left vulnerable.
- Arc Symbol: The Stress symbol forms the frame of their golden headdress.
- Degraded Boss: The third Darkest Dungeon mission also contains Templars — the Templar Gladiator and Sniper. These lack the minibosses' headdress, cannot use Revelation, and take only one action per turn.
- Dual Boss: One of the Iron Crowns is guarded by the Templar Warlord and Impaler, which means one must deal with two rounds of Revelation each turn.
- Eyes Do Not Belong There: Besides the usual numerous black eyes typical to Darkest Dungeon enemies, they have a particularly large one beneath their human torso, which they use for their Revelation attack.
- Scary Scorpions: They have a general scorpion motif throughout their design and their manner of attack.
- Signature Move: The Templars are scripted to use Revelation on the first of their two actions each turn, which deals massive physical and stress damage.
- These Are Things Man Was Not Meant to Know: It is implied their Revelation attack exposes the target's awareness to incredibly stressful things.

- Animalistic Abomination: Vaguely resembles a dog with its form and attack names.
- Early-Bird Cameo: Flesh Hounds make an early appearance in the second Darkest Dungeon mission to accompany the Templars, before they become the standard enemy in the third mission.
- You Will Not Evade Me: The move Fetch has the Hound lash their tongue out to try and yank a targeted hero to the front of the formation. As an added bonus, it also has a chance to stun the same hero.

- Blown Across the Room: Their specialty and main source of drawing hatred from you, if they manage to get a front-row hero away from their position.
- Early-Bird Cameo: Polyps can be encountered fighting alongside the Templars in the second Darkest Dungeon mission before they become regular enemies later on.
- Long-Range Fighter: From a distance, they can easily spread blight and ruin formations, but they're incapacitated for a turn should they find themselves in the front, as they'll have to use Violent Hack to push themselves back to their preferred spots.
- Meaningful Name: Like real-life antibodies, they form part of a biological self-defense mechanism.
- Palette Swap: Highly similar to the White Cell Stalk, shown below.

- Anti-Frustration Features:
- The White Cell Stalk will never use Teleport the first turn to avoid possibly every encounter immediately opening up with a teleport. Instead, the chances for the move to be used gradually increases with every turn before the inevitable happens, if they're not killed.
- Teleporting will not reset the White Cell Stalk's health; if they were almost dead, they'll still be almost dead upon return.
- Boss in Mook Clothing: There are multiple Mammoth Cysts in the dungeon, yet they're built like boss battles in each and every encounter.
- Big Guy, Little Guy: For a loose definition of 'guys', but the Mammoth Cyst takes up 3 spaces while their support Cell Stalk takes up only one.
- Enemy Summoner: The Mammoth Cyst will summon new White Cell Stalks as they're killed, who support the Mammoth with healing when they're not teleporting your party away.
- Expy: Visually very similar to the beholders from Dungeons & Dragons, they can even attack your party by gazing at them with their large central eye.
- Meaningful Name: The White Cell Stalk acts like a real White Blood Cell in a body, venting and wiping out intruders to protect the body. In this case, the party is that has to get past the White Cells to find and kill what came from the portal.
- Mighty Glacier: As well as hitting like a truck, Mammoth Cyst sports a hefty protection stat that it can buff. Both it and White Cell Stalk can heal
- Random Transportation: The White Cell Stalk's specialty, where it'll teleport the party into a random room in the largest dungeon in the game.
- Shoot the Mage First: The White Cell Stalk should be killed as soon as possible, as it will teleport the party to a random location otherwise..