Heroes (A-F, G-L, M-Z) | NPCs and Merchants | Darkest Dungeon: Monsters | Darkest Dungeon II: Monsters | DLC Monsters
Crimson Court
Bosses

A towering and domineering force of seething, zealous rage and terrible intent, the Fanatic is a monk who has gone rogue from the Church to hunt down and slaughter anyone and anything affected by the Crimson Curse anywhere it can be found. His heavily scarred face reveals a storied past of brutal and consequential encounters with the mutated inhabitants of the Courtyard, from which he has spilled unimaginable amounts of heathen blood. His most dangerous weapon is his unwavering conviction in the righteousness of his cause and the zealous fervor with which he pursues it, even if it means putting himself directly in harm's way.
A wandering mini-boss in the Crimson Court DLC. A vampire hunter that will attack your party if anyone has the Crimson Curse status effect, similar to the Collector and Shambler in that he can show up at any time.
- Achilles' Heel:
- Ripostes. He can attack 3 times per round and will use a lot of low-damage AoE attacks, but because ripostes last per round but are triggered per turn, taking advantage of this with Highwaymen or Men-at-Arms (or both) can lead to him damaging himself more than your team when he attacks them.
- Damage over Time. As DoTs trigger at the start of each turn and bypass PROT, the Fanatic's three turns per round mean a bleed-heavy party (which he has less resistance to, compared to blight) can absolutely tear through his health by combining regular attacks with stacking bleeds; this can also be stacked with the Highwayman's riposte-activating skills for extra pain.
- Bald of Evil: The top of his head is completely bald, and he's an insane Knight Templar.
- Badass Normal: Like Brigand Vvulf, The Fanatic is a completely unaugmented human who, in a world full of Eldritch Abominations, stands out as one of the toughest bosses in the Estate and is fully capable of killing four fully equipped heroes. Even more notably, unlike Vvulf, the Fanatic fights by himself without any Mooks to assist him; he's that hardcore.
- Berserk Button: Destroying his pyre will piss him off but good, and lead to him unleashing the Fury of the Righteous attack note on your entire party.
- Boss Warning Siren: A visual variation — if you embark on a quest and your loading screen's not the usual picture of a gate to the dungeon, but his leering face instead, then he will find you in that dungeon.
- Burn the Witch!: He will burn your heroes at the stake right then and there, and the background is filled with the screaming forms of other people he's doing this to.
- Church Militant: The Fanatic utilizes holy chants and a heavy hammer to terrorize and bludgeon anyone he doesn't burn at the stake.
- Everyone Has Standards: The Church of the Light supplies the Hamlet with some of its most combative and zealous denizens, sometimes to an unnerving degree with fringe-types like the Flagellant. The Fanatic, however, has proven mad and violent enough in his zeal to have actually been excommunicated.
- Fashionable Asymmetry: The Fanatic has a pauldron on his left shoulder.
- Genre Savvy: Garlic, holy stake, hammer, a rather large pyre, and a cure to vampirism; he is well-equipped to fight vampires, and clearly planned it out.
- Good Scars, Evil Scars: His face is horribly scarred, possibly tied to his previous history with vampires that drove him into his obsession with killing any suspected vampires.
- Hammer of the Holy: His sprite presents him with a hammer, which he uses to drive holy stakes into your heroes' flesh. He can also use it to inflict a Stun, 15 stress, and a two-space knockback.
- He Who Fights Monsters: His demented devotion to his cause has made him little better than the insane horrors of the Estate. Even the Ancestor explicitly refers to him as a rabid animal that needs to be put down.
- Identical Stranger: He looks suspiciously familiar to your Hamlet's abbot, if after a really bad Madness Makeover.
- Just Ignore It: The Fanatic is a wrecking machine beyond peer, and one of the most devastating bosses in the entire game. Mechanically, he exists to punish players taking excessive advantage of the damage and speed bonuses conferred by the Crimson Curse, and the only thing of note to be gained from defeating him is The Cure... which is entirely worthless for players making the most of the Curse. All of this, in addition to being otherwise a very difficult fight, is reason to avoid the Fanatic as much as possible since there is extraordinarily little to gain and plenty to lose.
- Knight Templar: He has the noble goal of slaying vampires. Unfortunately, this guy has killed countless innocents in his mad bid to eradicate the Crimson Curse. If you're afflicted with it, or associate with said afflicted in any way, he wants to kill you, regardless of how you got the curse or what you're trying to do with it. The background of his battle is a field of people burning alive on his stakes after one of his attacks, with the sounds of people screaming in agony taking up the background music. He's such a Knight Templar that the Church of the Light, which can get pretty hardcore in its own right, wants nothing to do with him.
- Lean and Mean: The Fanatic stands head and shoulders above your party, but he's also rather slim.
- Lightning Bruiser: He gets three moves a turn and each of them will be spent delivering pain and horror to your heroes, on top of a sizeable health pool and modest PROT on top of it.
- Magic Antidote: Defeating him will result in at least a couple vials of the Cure for the Crimson Curse dropping, which allows you to instantly cure a cursed hero.
- Mark of Shame: His "Brand the Tainted" attack involves using a hot branding iron to Mark a victim as tainted by the Crimson Curse.
- Sadistic Choice:
- Do you let a hapless victim burn on a pyre and focus on The Fanatic? Or do you try to free them, knowing that each time the pyre gets damaged, The Fanatic receives a buff of his own?
- Will you let the pyre stand, knowing the Fanatic will take every chance to throw one of your heroes onto it to incapacitate them completely? Or will you chop it down, letting you use all four at any time but also infuriating the Fanatic and letting him blast all four with Fury of the Righteous every round?
- Turns Red: Similarly to the Swine King, killing his pyre gives him a powerful attack that hits the entire party at once for serious damage. Unlike the Swine King, however, this will not be his only action every round; his other two attacks will proceed as normal.
- Vampire Hunter: His main role, although with a few twists. The developers claimed that they wanted him to look more like a mad monk than the typical Van Helsing vampire hunter. On top of that, he's an antagonist instead of a hero.
- Van Helsing Hate Crimes: He will not only kill vampires, but those who are infected with but battling against the Crimson Curse, and those who associate with infectees. And given that he never appears in the Courtyard... yeah, he does a lot more Van Helsing Hate Crimes than productive vampire hunting.
- Withholding the Cure: Despite knowing how to make a cure for the Crimson Curse, the Fanatic is very, very vehement about keeping it for himself. If you want it, you're going to have to pry those vials out of his cold, dead fingers.
- What Happened to the Mouse?: After the Countess is slain the Fanatic simply stops appearing in dungeons, even if you have infected party members, with no explanation behind his sudden disappearence.
- Wooden Stake: Another weapon at his disposal; it inflicts bleed and slows an unlucky victim, on top of causing extra damage to Marked individuals.
- Villain: Exit, Stage Left: The Ancestor's lines imply that the Fanatic flees from battle rather than being killed, explaining how he can appear multiple times after being defeated.Ancestor: (Upon the Fanatic's defeat) The whimpering dog flees back to his kennel!
- You Will Not Evade Me: If you decide to retreat from his fight, he will follow your party and overwrite the next random encounter you get into. The only way out, once he's found you, is to fight to the death or abandon the quest.

A giant crocodile crossed with a mosquito, multiple Crocodilians are spread throughout the Courtyard to block your progress to the real objectives. Much like the Prophet, it stands behind 3 cattail bushes to harass your party from in safety, and occasionally submerging into the water to prepare for a powerful attack that propels it forward.
- Achilles' Heel: The best way to deal with the Crocodilian is to keep it away from the deepest parts of the swamp it fights in, (the middle two roles) by using forced movement skills to yank it around. Especially useful, is a Bounty Hunter with a Vengeful Kill List, who can either Uppercut or Hook the croc out of the centre positions so it never gets a chance to Submerge and launch its highly damaging Apex Predator attack.
- Body Horror: Even disregarding the point below, it has a mosquito hive on its back, fully operational and with a swarm to unleash upon your hapless party.
- Giant Space Flea from Nowhere: Among a gallery of aristocratic vampires playing blood sports with the people of the Estate is a giant mosquito/crocodile monster with no real impact in the grand scheme of things, minus a mandatory encounter early on.
- Heal Thyself: Submerge has the Crocodilian submerge in the water for a dodge bonus while also healing it every turn for however long it decides to stay submerged. This move will also cleanse it of any Damage Over Time that might’ve been applied on it.
- Lightning Bruiser: It sports high speed, high HP, and a strategy that involves frequently shifting around the safety of its cattail bushes/submerging underwater to remain hidden before suddenly using the move ‘Apex Predator’ to lunge forward from beneath the water to charge and chomp a group of heroes.
- Mini-Boss: Acts as one for the Crimson Court, appearing unannounced and sometimes off the path of the true objective, guarding treasure chests or shortcuts. And yes, there are multiple Crocodilians to fight.
- Mix-and-Match Critters: As with most Bloodsucker enemies, it's part-mosquito, most notably the legs.
- Never Smile at a Crocodile: Let alone one who's part-mosquito and part-bloodsucker.
- Nigh-Invulnerable: The vegetation accompanying it has such stupidly high PROT and Dodge values that trying to damage it is an exercise in futility.
- Reptiles Are Abhorrent: As scaly as it is monstrous.
- Rush Boss: If the Courtyard is the ultimate region of attrition and seeing how far you can push your heroes before tagging them out, then Crocodilians are the ultimate hurdle in that regard. If you can't kill them quickly and painlessly, settle in for a grueling, down-to-the-wire battle as they repeatedly heal all the damage you just dealt to them with Submerge and then bring your healer to Death's Door with a single Apex Predator. They're an encounter that can turn a planned longer excursion into the Courtyard into an in-and-out venture with a single wayward attack.
- The Swarm: Can summon its own swarm from its mosquito hive by using the move Swarming Corruption, hitting a hero with stress damage and an accuracy debuff from the swarm of mosquitos taking them.
- Our Vampires Are Different: It's a vampiric mosquito crocodile. It's certainly very unique among the types of vampire.
- Wake-Up Call Boss: You can enter the courtyard as early as your fourth expedition. Not that this is advised. The main source of its difficulty is that, unlike every other non-wandering boss, you will only become aware of its presence once you enter its room.

- Achilles' Heel: Bleed and riposte. His constant turns mean he'll take lots of damage from bleed, and since one of his main attacks hits everyone at once, he can get hit with multiple ripostes for big damage. Hound's Harry is the most efficient way to pop all the eggs and reveal his location in one turn.
- Belly Mouth: He has an entire additional face on his belly. It's what he uses to bite your heroes whenever he uses The Thirst.
- Body Horror: His lower body is that of a huge, bloated flea, and he has flesh whips for arms. And that's without mentioning the gaping, monstrous Belly Mouth with More Teeth than the Osmond Family.
- Cold-Blooded Torture: If the disturbing diversion curios you can find near his boss arena are any indication, he enjoyed doing this to helpless victims even before he was turned into a giant tick.
- Damage-Sponge Boss: Despite being a Veteran-leveled boss, he has over 250 HP. Balanced out by the fact that his fighting style is centered about slowly grinding you away, and thus deals a modest amount of damage.
- Decadent Court: Is fighting in front of one, who enjoy their "wine" in the background while cheering and laughing when you get hit and strike the wrong egg, and quietly boo when you reveal The Baron's correct spot.
- Flunky Boss: Of a sort. Thanks to the trick below and his low damage output, the Baron relies heavily on you popping the wrong eggs (or not popping them fast enough) so that his minions can wear you down.
- Puzzle Boss: At the start of the fight and every time his health drops 1/3rd of the way, he'll summon four egg sacks and hide in a random spot. Striking the wrong one will bring you into a fight with a Bloodsucker Mook, and striking the right one will reveal him. Additionally, all of the eggs will deny you healing, making you have to weigh the options of either getting rid of every egg immediately and face the Bloodsuckers and the Boss all at once for the chance to heal, or to take the eggs out one by one to minimize exposure to the onslaught. Making this worse is that, if you take too long to open all of the eggs, the Baron will reveal himself (if still hidden) and pop them all at once, forcing the matter.
- Sadist: His idea of "entertainment" is to make his victims suffer for the sake of his and his fellow aristocrats' amusement. Mind you, this was even before he contracted the Crimson Curse; afterwards, his idea of "entertainment" only became even more grotesque.
- Stone Wall: He's got ludicrous amounts of HP, and gets minions to tank for him as well with his egg sack trick, but his offense is lackluster even in the final stages of the battle.
- A Taste of the Lash: His arms can transform into fleshy whips that deal heavy stress damage.
- Theme Naming: The names of The Baron's attacks all reference his sadistic brand of entertainment, with offensive moves such as "Crowd Pleaser" and "Necessary Discipline" (i.e.: beating the performers senseless).
- Too Many Mouths: Aside from his gaping Belly Mouth with More Teeth than the Osmond Family, "Crowd Pleaser" has him turn his whip-like arms into teeth-tipped maws
 , giving him at least five or so mouths at once.
 - Whip of Dominance: The Baron was a famous Sadist obsessed with torture, often doing it just for entertainment. The curse fittingly turned him into a monster that has arms that can shift into whips. The attack is even called "Necessary Discipline" and deals heavy stress damage.
- You Will Not Evade Me: The move Necessary Discipline has The Baron use his whip-like arms to drag a target forward.

- Achilles' Heel: Any Blight or Bleed affecting the bodies he feeds from will be transferred over to him when he eats them; since he has three turns per round, these DoTs can progress surprisingly fast. A riposte-heavy party can also quickly kill off the bodies, then force the Viscount to take heavy damage whenever he uses one of his frequent attacks.
- Big Eater: He eats so much that he can regenerate one hundred health points if he's lucky. Even before the Curse hit him, he was a pretty big eater willing to choke down damn near anything.
- Body Horror: From the lumps on his stomach, his lower body which can unfold to reveal lots of eyes and another human who has fused with the Viscount, to the half-eaten bodies of his victims who are hanging from the ceiling, this boss battle is full of it.
- Counter-Attack: Activates Riposte from time to time to defend himself while using his turns to eat.
- Extreme Omnivore: Even when he was human, he had no qualms about feasting on rotting food. Now he'll happily eat almost anything, including humans and other Bloodsuckers.
- Eyes Do Not Belong There: He's got about a dozen or so Extra Eyes hidden beneath the chitin plates at his waist, and he'll gleefully use them to unnerve your heroes as part of his "Hungry Eyes" attack.
- Fat Bastard: While what's left of the man doesn't quite look fat, his new insectoid lower body definitely makes him look as disgustingly rotund as he should have been.
- Fork Fencing: He uses his eating utensils as weapons throughout the battle, and uses them with unnerving skill.
- Glass Cannon: He doesn't really have much HP as far as bosses go, at least at this stage of the game. What he does have, however (aside from occasionally healing), is a massive damage output, with normal attacks hitting as hard as any of the Courtyard's bruisers if not harder, and setting up Ripostes that also hurt like hell whenever you dare touch him. The ideal strategy is to burst him down before he can chop your party to tiny pieces in a couple of turns.
- Hell Is That Noise: The muffled screams of his still-alive meals are... unsettling, to say the least.
- Hoist by His Own Petard: Normally, eating one of the bodies cures the Viscount of any Bleed or Blight currently active. However, if the body in question is infected with Bleed and/or Blight, he will then transfer those status effects from the "meal" to himself. Because everyone knowns that eating a particularly bloody steak can make you start bleeding yourself.
- I'm a Humanitarian: All of the vampires of the Crimson Court are, but it's his gimmick especially. His main method of healing isn't even The Thirst, it's feasting on the still-living, cocooned bodies of at two human meals and an unlucky Esquire.
- Jabba Table Manners: Even the Swinefolk are less messy eaters than he is; the road to his boss room is lined with food-related Curios, while the background is essentially nothing but a giant pile of half-eaten meals, gnawed bones, and partly-eaten corpses.
- Monstrous Cannibalism: The Bloodstuffed Body at the back of his fight's formation is quite clearly what's left of an Esquire or other Crimson Court Bloodsucker, and he'll happily eat it without a heartbeat's hesitation.
- Shoot the Medic First: Or the meat supply, as the case may be. It's not necessarily a good idea, because any turn not spent killing him or suppressing him is a turn where he can freely set up ripostes, make mincemeat of your party, or both. However, if you're incapable of bursting him down quickly, or have excellent tanking, it remains valid.
- Theme Naming: All of his attacks are named after food-related idioms or terminology, such as his "Served Rare" and "Refined Pairing" attacks.
- Two Beings, One Body: One of his (presumed) human meals has become fused to his insectoid lower body, hidden within his abdomen. Whenever he uses Served Rare, the body erupts out to stab heroes with its mutated arms; it's ambiguous whether it's properly "alive" or whether it's just part of the Viscount.
- Villainous Glutton: His whole schtick. After he had eaten all the Ancestor's food, he started eating all the waste and garbage that the partygoers had thrown out, and in his current form as a Bloodsucker, he simply adores the taste of human flesh and blood.
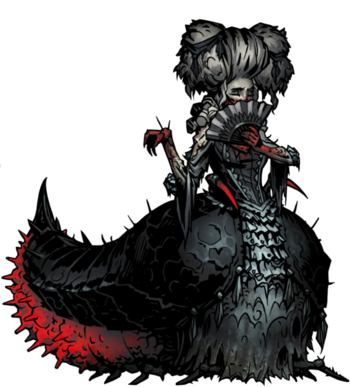
The penultimate boss of the Crimson Court DLC.
Back when the Ancestor was still fraternizing among the upper class, a woman caught his eye during one such party. Whether it was her temptress vibe or the Ancestor's dwindling patience with the aristocrats, he plotted to kill her for sport, dancing with her under the moon... before the hour of murder struck and she pounced on him first. Lucky to survive and strike her, his curiosity soon got the best of him. He served her tainted blood to the rest of the party, causing the outbreak of the Crimson Curse. Now, her disease has reached its final stage, and she rules over the Courtyard as the leader of the hive.
- Achilles' Heel: Her thirsty, more humanoid form is already quite dangerous, and her insectoid One-Winged Angel form is horrendously so. But the weakness lies between the two: To transform, she needs to pass through a Flushed form, which you'll note by her agitated fanning and only one turn per round. This comes with losing all her PROT and getting substantial debuffs to her resistances. This is the chance to strike: Her resistances will be quite low by Champion standards, and thus you can keep her stunlocked for a good while, bleeding and blighting her as well as striking at her now unprotected HP pool. And due to having only one turn, until she finally gets it, you can have entire rounds of nothing but wailing on her. Take advantage of the Flushed transition, and even in a single chain of stuns, you can tear through her health very, very fast.
- Arc Villain: Of the Crimson Court DLC. She was the first person with the Crimson Curse, which spread with the Ancestor's intervention. Now, it appears she is the matriarch of the hive that is the Courtyard.
- Big Bad Duumvirate: With the Heart of Darkness. It acts as Big Bad of the main game, while she serves as the Big Bad of the Crimson Court DLC. The two are not necessarily working together, but they do not compete with one another, and the fact that her blood tipped off the Ancestor to the existence of the Heart implies some sort of familial link between them.
- Blood Countess: As her name clearly states, she is a literal countess who feeds off blood.
- Body Horror: Good Lord. Her abdomen is swelled up and lined with legs. Her fan also hides a rather hideous insectoid mouth. Her dress is lined with disgusting hives. And when you piss her off enough for her to transform, things get ten times worse. And she'll inflict it on your heroes through instant mosquito hives, too.
- Climax Boss: Easily the toughest boss of the Crimson Court DLC whose Boss Room is ominously situated in the center of the map, complete with a long Boss Corridor leading up to her. Beating her relieves a lot of the player's woes involving the Crimson Curse.
- Dark Action Girl: A disgusting example, but an example nonetheless; as the Countess is by far the deadliest female encountered in the game.
- Depraved Bisexual: Heavily implied. She'll use those horribly suggestive abilities on all the adventurers.
- Eviler than Thou: Tried to invoke this onto the Ancestor of all people by luring him onto an isolated balcony with the intent of eating him. It really didn't work out for her, as he easily proved to be her match, in both evilness and in battle.
- Evil Versus Evil: When she was in conflict with the Ancestor - she was out to kill him and presumably subvert the aristocracy to her own ends, while he was the Big Bad-in-waiting and had already presided over several debaucheries.
- Hive Queen: The matriarch of the Bloodsucker hive in the Courtyard.
- Humanoid Abomination: The game isn't clear on the Countess even is. Most of the enemies and bosses encountered in the game are the result of the Ancestor's meddling in the occult, but the Countess predates them all. She can wear the form of a highly attractive woman, but her true shape is that of a hideous mosquito monster. To further muddle things on her true nature, it was her blood that awakened the Ancestor's desire to unearth the Darkest Dungeon, so she's in some way connected to The Heart of Darkness. Indeed, it is implied in the final cutscene that the entire reason she came to the Estate was to feed on the cursed blood of the Heart.
- Large and in Charge: Even in her more humanoid form, she's huge, taking up all four enemy slots of the battlefield. This actually works against her since offensive positioning is much easier than defensive in this game.
- The Leader: Of the Bloodsucker faction - she's the very last Crimson Court aristocrat that has to be fought, and seems to act as their Hive Queen.
- Let's Dance: Her move "Sway With Me" harms the heroes if it hits.
- Monster Progenitor: The source of the Bloodsuckers and the "Thirst" in Hamlet's courtyard. She is described as the first vampire of the setting.
- Nightmare Face: Springs this lovely expression◊ on the Ancestor in the first cinematic.
- No-Sell: Most of her attacks don't trigger Ripostes.
- One-Winged Angel: Her transformation isn't blood-triggered; rather she shifts into her extra-horrific insectoid form when she's had enough of playing with you and decides some roughness is due.
- Patient Zero: The first person with the Crimson Curse and the origin of its spread to the other aristocrats.
- Pimped-Out Dress: Wore a very fashionable dress back when she masqueraded as a human. She still wears it to this day, although it's long since been tarnished and twisted, just like the Countess's own form.
- Stance System: She has three different "forms" she will cycle through - her regular "Thirsty" form, an intermediate "Flushed" form, and ending in her "Bloodlust" state (a giant, insectoid mosquito-queen with extremely strong attacks and resistances). Exploiting the intermediate stage's low stun/DoT resistances and lack of attack is critical to winning the battle.
- Superboss: She's the Final Boss of The Crimson Court (which is itself three extra-long Brutal Bonus Levels), has over 400 health and is just as if not more difficult than the Heart of Darkness itself due to her self-healing and rank-shuffling abilities.
- Theme Naming: All of her attacks are named to be horribly suggestive if not outright flirtatious, appropriate for The Vamp of the Crimson Court.
- Transformation Horror: Her transformation into her extra-insectoid mosquito queen form doubles as an attack on the entire party at once, inflicting the Horror debuff on them all which leads to stress-over-time. And frankly, with how she looks when shifted, it's not surprising.
- Transformation Is a Free Action: Averted. Her single turn between bug-woman and woman-bug is when you attack for massive damage; be sure to slap a Stun on her to maximize this vulnerability.
- The Vamp: The unnervingly suggestive names of her attacks, casually flirtatious attitude towards the Ancestor in the flashbacks, her former seductive beauty, and her well-kept appearance (of the parts that still look human at least) paint her as this, puns aside.
- Vampire Monarch: More of a Vampire Aristocrat, but she fits the trope otherwise by being both a member of high society and a leader to other vampires.
- Villainous Legacy: It was the Countess' blood that first clued the Ancestor into the existence of the Heart of Darkness below his mansion. Long after she died for the first time, her influence lingered, serving as a major factor in his decision to try and excavate the Heart, and thus indirectly causing the events of the game.
- Weaponized Offspring: Of a sort; "Love Letter" involves her shooting out... something (an ovipositor, presumably) from her mouth and implanting an egg on an unlucky hero. If it hatches, it does massive damage and buffs her.
- White Hair, Black Heart: Her hair is as white as the snow, and her heart is just as cold.

- Achilles' Heel: The Shieldbreaker, ironically enough, allows you to get through the whole fight without needing to worry about breaking its shield. High speed lets her go early in each round; Puncture lets her make it impossible for the shield to protect the main body.
- Cognizant Limbs: Its shield and its spear are treated as separate entities, each with its own sort of attack. The main body is not even active until one of them is destroyed.
- Eye Beams: If the main body is awakened, it will constantly hit you with Annihilating Glare, which get more powerful with every use.
- Increasingly Lethal Enemy: Of the 'self-buffing' variety, should its shield be destroyed. If it awakens in this fashion, it'll spend one action every round lasering your party and another giving itself a permanent offensive boost. This will get out of hand if you can't dispatch the torso quickly.
- Living Statue: Half-buried, but a moving, aggressive statue nonetheless.
- Luckily, My Shield Will Protect Me: Whenever its shield isn't flying through the air, it will guard everything that tries to hit the main body. The shield is not invincible, however, but destroying it can make things worse. You can also stun the shield to keep it from blocking damage, however it is that works.
- Made of Iron: Not as literal as the Brigand Pounder, though. The Guardian and its parts have incredible resistance to everything on top of very high PROT numbers, such that the game can give the player a Trinket that bestows a damage bonus against its almost-uniquenote Stonework enemy type.
- Optional Boss: The Countess is the real final boss of the expansion; the Garden Guardian is simply a valuable, if unnerving diversion unlocked right afterwards.
- Overdrawn at the Blood Bank: The main body constantly seeps blood from its eyes and mouth, with no indication of why a statue of all things is bleeding. Its spear will also try to bleed your heroes dry through constant, vein-slicing jabs which quickly pile up.
- Piñata Enemy: Once you know to not destroy the shield and bring some heroes who can hit the spear, he's not difficult at all, just kind of tedious. And he always gives two of the powerful Crimson Court trinkets, without repeating them until you have them all. He's basically your reward for beating the Countess.
- The Power of Hate: It's what brought the Guardian to life. The land itself hates all life beyond itself, and works to strike it down. And if the attack names are right, its withering gaze is powered by pure hatred.
- Respawning Enemies: Just as the Narrator fears, you cannot put it down permanently, and the mission to destroy it and take the valuables it guards is always available once unlocked.
- Shield Bash: A decidedly strange one; occasionally, its shield will leap so high into the air it won't come back down until the next turn. When it does, however, it lands right on the two frontline heroes, crushing them for high damage, knocking them back and stunning them. However, while the shield is up, the body's guard is down, so you can focus all your damage into it before it comes down.
- Tears from a Stone: It seems to be constantly seeping blood from its eyes and mouth, presumably as a sign of how deeply corrupted by the Crimson Curse the Courtyard has become.
- Turns Red: If its shield is destroyed, the main body will wake up and start attacking. Every turn, it will give itself a permanent, stacking buff to damage, accuracy, and critical chance named Hatred Beyond Time and then fire its Annihilating Glare, for ever-growing damage. You don't need to trigger this state, as the statue can be killed without destroying its shield, so it's usually good to simply bide your time and wait for its guard to lower. But if you've set it off, you better hurry in killing it before its gaze overwhelms you completely.
Monsters
By the time the Heir arrives on the estate, the Courtyard and its surrounding gardens have become flooded and merged with the nearby swamp, creating a damp, miasmatic maze where the air is heavy with the scent of blood. The infected creatures and bloodthirsty parodies of nobility that find their home here carry a creeping sickness that threatens to overwhelm even the corrupted lands of the rest of the estate.
- Aristocrats Are Evil: Even before vampirism took them, the nobles were awful. The levels of debauchery they reached even at first were vile, and after a while they just started sinking lower and lower, their entertainments more disgusting and bloody. In terms of evil, the Ancestor was just a more adventurous sort who actually decided to get his hands dirty with archeology and vile magic, but he was not the worst of the lot by far.
- Autocannibalism: None of them do this in-game, but the cutscene where the Ancestor fed them the Countess' blood shows them turning upon themselves in a very literal way.
- Clothing Damage: Their fancy robes and garments stand no chance once they decide to sate their thirst and enter their bloodthirsty forms, the courtesans being the most extreme as they lose all of their clothing from doing so, though it's nowhere near as fanservice-y as it sounds◊.
- Daywalking Vampire: There's no evidence that sunlight poses any sort of issue at all for them. In fact, their region is one of only two that's considered to be in permanent full torchlight.
- Decadent Court: While not exactly a royal court, they were all horribly depraved nobles more than willing to engage in sadistic entertainment even before contracting the Crimson Curse. Afterwards, they became even worse, as some of the backgrounds and curios in the Courtyard may attest note .
- Even Evil Has Standards: As deranged and depraved as they are, pre-vampirism, even they firmly believed that the Viscount's suggestion of sampling the rotten leftovers of their meals was the one depravity that would be too difficult for them to stomach.
- Evil Laugh:
- Most Bloodsuckers can't help but cackle and giggle after they get a Critical Hit on someone.
- Whenever you hit the wrong pod during the Baron's battle, the onlooking Bloodsuckers will burst into mocking laughter at your failure.
- Faux Affably Evil: Manservants, Courtesans, and Esquires' attacks carry a thin veneer of sophistication one would expect from an entourage of nobles. Then they use The Thirst and any semblance of dignity flies out the window.
- I'm a Humanitarian: They don't just drink blood, they are also happy with eating humans (and each other).
- Life Drain: Most Bloodsuckers possess a move called The Thirst, which not only heals them at a hero's expense, but also allows them to take on new, more horrifying forms.
- Logical Weakness: Creatures who gorge themselves on blood are vulnerable to bleeding.
- Must Be Invited: Inverted in this case; you and your heroes will need to be invited by the vampires for an evening of bloodsport, entertainment, feasts, and a chance to take on their bosses for valuable items and progression.
- Nice Job Breaking It, Hero: The vampires of the Court seemed to be content to stay inside their blood-drenched swamp, with their only presence being irritating swarms of buzzing mosquitoes. When the Heir sends a team in to destroy the mosquito hives, the successful burning of the insect hives causes a spreading infestation in the surrounding countryside along with the nobility sending out their servants to gather blood and hand out invitations for gruesome entertainment. Both of these drive the Heir to slay the Court's nobility one by one.
- No Zombie Cannibals: Averted, Bloodsuckers will still drink from heroes infected with the Crimson Curse and their own half-eaten remains can be found in the backgrounds of some maps.
- Our Vampires Are Different:
- Instead of a bat-like motif, they have a bloodsucking insect-like motif, primarily invoking mosquitos or ticks. Some have elongated noses ending in a sharp point, while others have abdomens swollen with blood. The Courtyard possesses an ever-present high-pitched whine and cocoons filled with larval bloodsuckers are scattered throughout the region.
- Furthermore, vampires are not a type of Undead in this setting. A specific curse merely mutates them.
- There also appears to be two different forms of the Crimson Curse: one caused by consuming vampire blood, which turns humans into insane, ravenous insect bloodsuckers, and a form caused by being bitten by these vampires, which instead causes a physical addiction and dependency to blood.
- Roaming Enemy: Once you clear the first Courtyard mission, Bloodsuckers start popping up in other dungeons as well.
- Sealed Evil in a Can: Self-inflicted. The Court's vampires seemed content with staying in the Court ever since the Ancestor infected them. In-game, they don't even start appearing in regular dungeons until you initially attempt to purge the irritating infestations of mosquitoes by entering the Court and destroying their hives.
- Sinister Schnoz: The human Bloodsuckers have impressive pointy noses in their visages. However, these are also fully functioning mosquito proboscises which elongates whenever they use "The Thirst".
- Stance System: Upon using the move The Thirst, most of the Bloodsuckers will take on more vicious forms that let them gain access to other moves.
- The Swarm: You can find lots of mosquitoes stirring around the Courtyard, and the poor devil who opened the gateway to the Court even died after getting stung to death by them!
- Vampires Are Rich: The courtiers still maintain a semblance of nobility, with expensive fashions, pompous titles, and large numbers of attending servants.
- Vampires Are Sex Gods: The courtesans and the Countess herself are arguably a very dark parody with their faux-coquettishness.

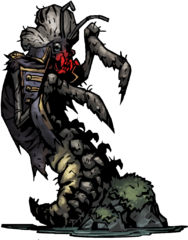
- Body Horror: A long-deceased body with everything peeled off its skull, piloted by a giant bloated tick.
- Combat Tentacles: When it uses "Gather the Blood", the tick fires a set of proboscis-like tentacles at its target to drain their blood.
- Hard Head: It's all but immune to Stuns.
- Puppeteer Parasite: The human body is long dead, with the bloated tick latched onto its head as a parasitic pilot.
- Zombie Puke Attack: Predigestion; inflicts Blight and shuffles a Supplicant further to the front so it can Gather the Blood.
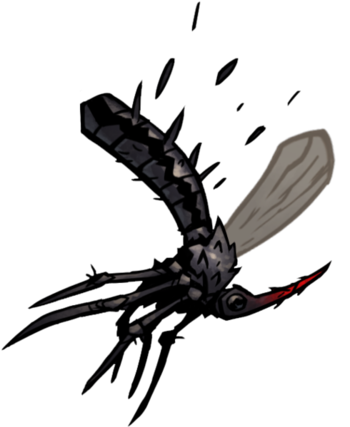
- Big Creepy-Crawlies: The most obvious one, as it's essentially just a giant mosquito.
- Fragile Speedster: High speed and dodge make swatting these flies relatively difficult, but they go down in a few hits if they don't heal themselves with the Thirst.
- Hell Is That Noise: Maddening Whine amplifies the ambient mosquito buzzing to inflict stress on your heroes. They also have Deafening Whine, which instead stuns a target.
- Stance System: Upon using The Thirst, Sycophants will gain access to the bleed move Bombing Run, and Deafening Whine will replace Maddening Whine, which has a chance to stun targets along with dealing stress damage.

- Battle Butler: Though they're more of a Support Party Member, they contribute by being a Human Shield and using sanity-draining attacks. Once they transform, they take on a slightly more active role, becoming something close to a Glass Cannon with their cleaver chops and frequent blood-sucking that they juggle along with their usual tricks.
- Luckily, My Shield Will Protect Me: Infallible Servitude functions like other guarding abilities despite using a servant tray rather than an actual shield. Notably, a Manservant doesn't even have to stand in the front to use it.
- Practical Taunt: The move called Enraging Slight has the Manservant sass a hero in the party◊, with a chance to mark them, move them forward, and stun them all at once.
- Shoot the Mage First: The longer it stays alive, the higher the chance of someone in your party catching the Crimson Curse from its almost untouchable allies. Thankfully, it has little health or Protection compared to other front-row blockers, though it can heal itself via The Thirst.
- Stance System: After successfully using The Thirst, Manservants will be able to protect every enemy on their side at once instead of just protecting one by using the move Gibbering Entourage, which replaces Infallible Servitude, at the cost of marking itself.
- Squick: Can inflict this on targets by revealing the human remains under the lid of their tray.

- Damsel in Distress: The name of the move that forces one of their allies to take any hits meant for them.
- Hell Is That Noise: Careless Whispers inflicts Horror (Stress Damage Over Time) upon the whole party.
- Lean and Mean: Has a gaunt, tall posture and is definitely up to no good.
- Magic Dance: Midnight Minuet applies a hefty speed and damage bonus to its whole party, but it also shuffles everybody around at random and gives them an accuracy debuff.
- The Oldest Profession: "Courtesan" is just a more elegant word for prostitute.
- Pimped-Out Dress: It's long lost its color, but it's still appropriately puffy and aristocratic.
- Stance System: When they use The Thirst, they will give up their support move pool in favor of offensive abilities, a Damage Over Time attack called Renewed Appetite, and a bleed attack called Expose The Veins.
- Support Party Member: Until they use The Thirst, they exchange their offensive capabilities in favor of being the Bloodsuckers' Target Spotter and stress dealer.
- Zombie Puke Attack: They'll start puking blight-ridden vomit on targets after they transform.

- Counter-Attack: Upon using Skewering Repartee, they'll activate riposte and damage anyone that attacks him without dealing a killing blow. This will drop whenever they choose to use The Thirst.
- Gun And Sword: Alternates between fencing your heroes or firing at a single target with a pistol.
- Lean and Mean: Like the Courtesan, except the Esquire has no puffy dress to balance his figure out, making him seem even taller.
- Royal Rapier: Their main threat comes from their fencing that damages everyone in the party, along with the aforementioned riposte that gets activated.
- Achilles' Heel: In addition to the standard weakness to Bleed that most Bloodsuckers have, Chevaliers have an astonishingly low Stun resistance, so they can be kept out of commission for at least half the fight while the team works on the other enemies.
- Big Creepy-Crawlies: Far worse than other Bloodsuckers; they're essentially giant mosquito centipedes.
- Combat Tentacles: Their large forearms are used to dig under the ground to swipe at any hero for stuns and heavy bleed damage.
- Mighty Glacier: They occupy the back ranks, but they're still very durable and can cause high damage from afar.
- Mix-and-Match Critters: An odd mixture of what looks like a grub's body, praying mantis forearms, and a grasshopper's head with mosquito feeding habits.

- Not on the List: He'll check if you're invited, and dismiss you with a Practical Taunt when he confirms you're just rabble that's not on the list. If you want that invitation, you'll have to pry it from his cold, dead hands.
- Plot Coupon: The invitation that they hold is the only way to get into the Courtyard, plain and simple.
- Practical Taunt: "Enraging Dismissal" counts as this, just like the Manservants above.
- Shoot the Messenger: Enforced and literal. Without an Invitation, you cannot venture into the Courtyard, and no other enemy drops them. Of course, that's not as easy as it may seem, since...
- Villain: Exit, Stage Left: ...on the second turn, the Gatekeeper leaves with the move Elusive Exit, inflicting Horror on the whole party and summoning additional reinforcements for heroes to deal with.
Shieldbreaker
Monsters
- Character Select Forcing: You have really only two options: bring a Jester along with the Shieldbreaker, or expect an Affliction check in short order. It's also strongly encouraged to keep Puncture on your Shieldbreaker, because of Warning Rattle.
- Counter-Attack: Warning Rattle is basically the Defender/Retribution Man-at-Arms combo squeezed into a single move, although admittedly one with a lower PROT bonus.
- The Dreaded: To the Shieldbreaker, at least. She spends any fight with these creatures with a brutal Horror debuff that isn't affected by Laudanum, that lasts until the battle ends. 23 stress a round adds up quickly.
- No-Sell: Ambush-prevention abilities like Sanctuary don't work on them, because they're attacking in the Shieldbreaker's dreams, not the physical dungeon.
- Piñata Enemy: Defeating them nets you Shieldbreaker-specific equipment, Quest-long buffs, and Aegis Scales. Just don't lose.
- Snakes Are Sinister: And also have a wide selection of unpleasant moves to try on you.
- Spare Body Parts: Adders have two heads, one of them moulting.
Color of Madness
The dungeon added in the "Color of Madness" DLC. After a meteorite crashed into the Miller's Farm, the once fertile lands around it are home to a horde of puppets, the Miller and his workmen controlled by a yet unknown force which tries to expand beyond the borders of the farm. It is up to your heroes to quell the unending waves of monsters.
- Body to Jewel: A recurring theme among the creatures of the farmstead, whereas the Heart uses Body Horror, the Thing From the Stars transforms organic matter into stone◊ and Green Rocks.
- The Corruption: Much like in the Lovecraft story that inspired it.
- Humanoid Abomination: Many of the workforce at the Farmstead that fell under the pull of the Comet become horrific amalgamations of crystals and stone stripped of all but the barest vestiges of their humanity, and now have become little more than extensions of the creature inside the Comet itself.
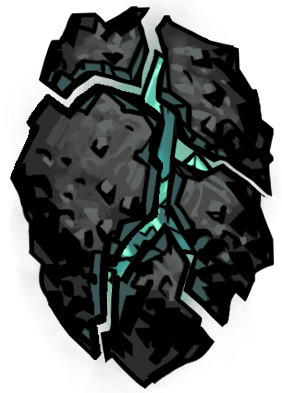
- Living Statue: Those infected by the Comet’s influence become glowing, semi-crystallised, rocky parodies of themselves driven by its will.
- Was Once a Man: Since the Comet's influence transforms things into crystalline monsters, you wouldn’t be blamed for mistaking them as animated statues. They aren't - they're what's left of the Miller's workforce.
- Zerg Rush: The Farmstead will be the ground for a new type of mission described as "wave-based survival", which has your party fight through a literally unending horde of monsters. The stated goal of the mission is to kill the most enemies before your party cannot fight anymore.

- Body Horror: Farmhands have been mangled. Their torsos are basically hacked in half and shot through with large holes, while one of their legs is broken off halfway. They also suffer from a severe case of Facial Horror.
- Empty Shell: Literally and figuratively, the Farmhands look like hollowed out stone statues with green light coming through the cracks, and are doomed to repeat the motions of the tasks they performed in life.
- Facial Horror: As seen in the provided picture, they sport a massive crack through their face.
- A Handful for an Eye: The move named Sow the Seeds has the Farmhand spray a fistful of crystal dust and fragments into a hero's face, inflicting stress and sometimes blight.
- Heal Thyself: Farmhands may take a break from work by using the move Pause from Labor, wiping the sweat off their foreheads before going back to work rejuvenated and sped up.
- Mooks: You're going to be killing a lot of these guys.
- Technically-Living Zombie: Farmhands look more like zombies than anything else in the game, including most of the actual undead. They're not Unholy, though; they're Husk/Human.

- Bad Boss: The Foremen came into the picture once The Miller allowed the Ancestor to have his men start erecting massive stone slabs around the farm, and if their giant whips and commanding nature is any indication, they were definitely not the best bosses in their time.
- Body Horror: Look at the provided picture. Sufficient to say, they got hit the worst by the corruption out of all the husks haunting the farmstead with only one arm that's even remotely human left.
- Counter-Attack: Can buff another creature to get a riposte effect.
- Mook Lieutenant: A leader among the Husks, specialising in buffing other Husks, directing their attacks, and granting them Ripostes.
- Power Floats: Who needs gravity when you've got space corruption?
- Rage Helm: Well, technically, it's his face, but it does look very angry.
- Support Party Member: They will stand back to increase their teams speed and grant them Riposte by using the move Stir the Rabble.
- A Taste of the Lash: When using the move No Trespassers, they’ll use a very large whip to punish one hero.
- Whip of Dominance: They were the Ancestor's enforcers who oversaw the farmhand, and wielded whips to "persuade" the workers. In-game they function as a Mook Lieutenant that orders around the other husks with their whips, providing the husks with buffs or attacking the party with the whip, which leaves them with the "Marked" debuff.

- Animate Inanimate Object: Presumably and hopefully, Scarecrows are just simple scarecrows that came under possession by the Comet. Given that scarecrows are mostly made from organic materials - straw, cotton, wood and so on - it does make sense that the corruption could influence them.
- Arc Symbol: The Scarecrows are nailed upon a stick fashioned in the likeness of the stress symbol, but with the ends face up rather than downwards as usual.
- Noose Necktie: Oddly enough, the Scarecrow wears a severed noose as a necklace.
- No-Sell: Their lack of a body makes it so that Bleed is ineffective to try and apply on them.
- Power Floats: In fairness, they don't have legs.
- Scary Scarecrows: They're evil, crystal-possessed scarecrows that specialise in inflicting Horror or just plain beating on your heroes.
- Your Head Asplode: For a minor case in the Scarecrows, when they use the move Haunting Revelation, their heads will burst to flash a hero with crystal energy, inflicting Horror.

- Animalistic Abomination: A monstrous horse-creature.
- Body Horror: Almost completely overtaken by the crystals, filling its innards and having a whole mess of the things protrude from its whole upper body.
- Body to Jewel: Much of its back is covered in crystalline spikes.
- Chained by Fashion: The horse was leashed by chains before it became a Husk to the Comet.
- Fragile Speedster: Surprisingly one for a unit that takes 2 spaces in its formation: Plow Horses favor using the move called Paw the Ground to retreat all the to the back of the party, entering stealth before charging forward to use the move Trample, a team-wide shuffle attack. With a speed stat of 9 at the highest levels, catching them before they execute all of this can be a workout for some characters.
- Glass Cannon: Among heavy units, it is this. It can hit and shuffle your entire formation, or deal a lot of damage to forward characters, but only has between 20 and 40 hit points depending on level; one good swing from a Leper can kill it.
- Hellish Horse: Although in a much weirder way than the traditional fire steed.
- Power Floats: It’s hard to notice, but the Horses hover just above the ground thanks to their hooves being shattered by crystal energy.
- Rearing Horse: Strikes this pose when using the move Rearing Strike, a single target stun attack.

- Action Bomb: Deals a nasty amount of damage if left unchecked.
- Glass Cannon: While they can deal an impressive amount of damage to one hero or the entire party, their HP is the lowest in the game (even less than corpses, on anything less than Champion difficulty).
- No-Sell: Boasts very high resistances to Bleeds and Stuns, not that it matters very much when one could sweep them away easily without those actions though.
- Piñata Enemy: The Aberration will heal whoever kills it for a small amount, giving a much-needed source of healing during the extended combat that is characteristic of the Farmstead. It even remembers the source of any Damage Over Time that kills it - you can hit it with a Harvest from a Jester, get the bleed, and when the bleed kills it, the Jester will heal.
- Achilles' Heel: It has high Protection but underwhelming HP, and the DLC dropped alongside a patch that made the Shieldbreaker's Protection-ignoring attack, Pierce, hit harder and let it target any rank. Also, you don't get to counterattack if you're dead. The calculations from that point aren't hard.
- Counter-Attack: It has a permanently active Riposte.
- Hoist by His Own Petard: You get an achievement for killing it with one of your own counter-attacks.
- Reality Warper: Its attack, Reality Bend, has it distort the space around up to two heroes, which can force their attacks to target random enemies. Meanwhile, the Sleeper's Dream outright teleports the party through time and space.
- Rock Monster: Resembles nothing so much as some sort of evil space geode. As one would expect, it comes with a solid Protection rating.
- Stone Wall: Its damage is nothing spectacular, but it does have fairly beefy Protection.

The Miller was once the owner of the Farmstead and the surrounding lands. He, his family and his group of loyal and swarthy Farmhands worked the fields. However, after losing his crops to a blight for the second time in a year, the Miller went to the Ancestor and pleaded for help to save his farm. The Ancestor agreed, but his assistance masked his true intent, and as he arranged for a comet carrying an unspeakable monstrosity to land on the Miller's lands, infecting it with a new blight that promised grand rewards for the Estate, at the cost of the Miller and all of his people's souls being damned by the Sleeper and its reality-warping influence.
- Achilles' Heel: Mildred's Locket makes the bearer immune to his hideously painful The Reaping attack. The Reaping is also a mass-damage ability, meaning it will always trigger Ripostes.
- Beard of Sorrow: Sported a long and grayed beard both in his original life as a desperate farmer and currently as an undying victim of the Comet.
- Breath Weapon: The move named Winters Breath has Miller target one of his own Farmhands, breath his crystallizing breath on them, and turn them into a support unit.
- The Dragon: To the being from the Comet; he's the threat your heroes will have to face at least once to get at the Comet-borne being.
- Even Evil Has Loved Ones: The locket on his necklace holds a picture of his wife, Mildred. One of its moves is to invoke despair in one of your heroes, causing them to pity him. Additionally, there is a trinket that weakens him considerably, containing the picture of a woman who is implied to be his wife.
- Flunky Boss: Constantly summons Husks to aid him.
- From Bad to Worse: First, the man's fields were yieldless twice in a year. Then the Ancestor had a comet dropped on him. And then the comet stole his soul. It's hard to say how the Miller's life could have ended up worse.
- Happily Married: It seems he was this with his wife Mildred, judging by the way he reacts if someone has her locket equipped during the fight.
- No-Sell: One of his combos is to set up a "Frozen Farmhand" enemy, which guards him, shoots Horror debuffs, and prevents the party from guarding.
- Sinister Scythe: One that's fractured and floating in one place. You will learn to hate it.
- Skyward Scream: If the player has the Mildred's Locket equipped, the move "Immortal Beloved" will be added to his moveset, which inflicts a debuff upon him, causing him to collapse on his knees, drop his weapon, and scream up towards the heavens.
- Tragic Monster: The Miller was suffering from two seasons' worth of failed harvests on his farm and came to the Ancestor to beg for help. Instead of aid, he was unknowingly being used as another twisted experiment for the Ancestor and was possessed by the Comet that came crashing down on his farm. To further the point, Miller is not classified as a Human nor a Husk, but instead as a ‘Poor Soul’.
- Trauma Conga Line: The Miller's fields were barren twice in a year. When he went to the Ancestor for help, he and his workers ended up being put under the lash of brutal foremen before having a comet dropped on their collective heads. Then the comet stole his soul, turned him, his workforce and his wife Mildred into Empty Shells, and doomed him to a permanent time-loop.
- Unwitting Instigator of Doom: It turns out that trusting the Ancestor to help you out ends poorly for everyone but him, as the poor Miller's Trauma Conga Line above can attest.
- Was Once a Man: A specific man, this time. One you end up fighting repeatedly, because time in the Farmstead has gone a bit funny.
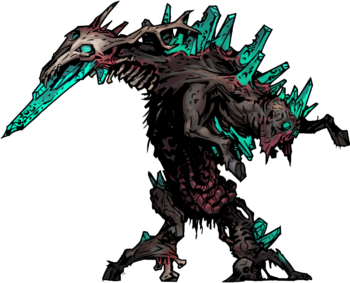
An utterly otherworldly creature, a twisted and chaotic amalgamation of flesh, bone and crystal. Formed from mutated flesh and crystal, with multiple limbs and disgusting appendages, this hulking abominable mutant is able cross the barrier separating the Farmstead from the rest of the Estate and wreak havoc wherever it wanders.
- Achilles' Heel:
- Armor Piercing attacks. It gains a massive protection boost (80% PROT) when his health is below 45%, and it can cure itself from both bleed and blight whenever it executes its "Return to the Stars" move. Therefore, attacks that can bypass said protection make killing it that much easier. Grave Robbers and Shieldbreakers in particular excel at this task due to their Armor Piercing Attacks.
- While it can cure itself from Bleed and Blight every turn, they'll still deal their damage at the start of its turn before it acts. Stacking these Damage Over Time effects can still whittle down the Thing's health at a good pace and kill it in a few turns.
- A Head at Each End: It has a human head on the right side of its body, while what looks like a deer's head sticks out of its back.
- Body Horror: Just look at the thing. It looks like a drowned and rotting corpse of The Thing was infected by SCP-409. The corpse it leaves behind at the end of its fight implies it may just be a lump of living crystal that used corpses of people and animals to give it further form.
- Body of Bodies: It's comprised of at three corpses (two humans and a deer), all fused together around a mass of eldritch crystal.
- Breath Weapon: Capable of exhaling a blast of crystal dust from its mouth by using the move Paralyzing Shard.
- Brown Note Being: This thing is incomprehensible enough that all of its attacks inflict stress.
- Cast From Hitpoints: It will use a move called Return to the Stars at the start of each round, which takes some of The Thing's health in exchange for planting a Crystalline Aberration to aid it.
- Detachment Combat: The Thing inflicts damage to itself in order to summon Aberrations, implying that it is shedding pieces of itself to support it in combat. In practice this tends to do more damage to it than the heroes do, but ignoring the Aberrations is a bad idea due to the stress damage that they inflict if they aren't killed quickly.
- Eldritch Abomination: The Thing is a hideous agglomeration of corrupted flesh, shards of an unknown color, and disgusting appendages, and is in general one of the most mysterious, monstrous, and horrifying things in the entire game.
- Hoist by His Own Petard: Return to the Stars usually ends up doing it more harm than good. Not only because of the Cast from Hit Points factor mentioned above, but also because a Crystalline Aberration will slightly heal whoever kills it. Worse still, Aberrations are deliberately statted with such a low speed as to almost always go dead last in the round. Worst of all, once The Thing gets its low health PROT bonuses up you'll often find that the creature is taking more damage from this move than from your own adventurers. The biggest issue toward the end of a fight is keeping your party alive and sane until the Thing kills itself.
- Lightning Bruiser: The more damage dealt to it, the faster and tougher it becomes. It's implied that this is due to cutting away the flesh coating the Thing, exposing the crystalline horror underneath.
- Mix-and-Match Critters: Its body seems to be comprised of at least two humans, a couple horses, and possibly a deer or other horned quadruped. This is pretty understandable, considering it's an Eldritch Abomination.
- Mook Maker: "Return to the Stars" creates a Crystalline Aberration.
- Nested Mouths: Its human mouth contains something like a large, suction-cupped tentacle. This seems to act like a fly's proboscis, extending from the human mouth to spew Blight-inflicting fluid at its victims.
- Optional Boss: While you can just not do the first Farmstead quest if you feel like it, unlike the Courtyard, you technically never have to fight the Thing even if you did release it. You can always see in which of the four main regions the Thing currently roams while on the Embark screen, so you can simply do a quest in one of the other areas and avoid it entirely.
- Rare Random Drop:
- It has a very small chance of dropping Memories (used to build the Mill, the best district in the game). The only other (and guaranteed) way to get them is killing the Sleeper in the Endless Harvest.
- There are also several unique trinkets and Quirks that you can get by beating the tar out of it, though the former will only drop on Veteran or above.
- Reality Warper: Not to the extent of the Sleeper, but its assorted eldritch mayhem includes attacks with names like "Phase Gnaw".
- Roaming Enemy: Shows up in various locations. Unlike other minibosses, however, the Embark screen will show which dungeon it is lurking in each week.
- Tactical Suicide Boss: The Aberrations it produces will eventually start doing more damage to it than your heroes.
- Turns Red: Its stats spike as its health goes down. When it hits 45% health or less, it gains an incredibly high PROT buff (80%), an extra 40% to all direct damage it deals, an extra 13% Critical Hit chance, and a boost to its speed.
- Zombie Puke Attack: Will extend a large, suction-cupped mouth from its human mouth to puke Blight at a target by using the move Phase Gnaw.
The Sleeper

- Arc Villain: Of the "Colour of Madness" DLC. It's responsible for the Farmstead and its residents' miserable state, and is the Final Boss of the DLC as a whole.
- Body to Jewel: What it inflicted upon the Miller and his farmhands, turning them from human beings to stony, statue-like creatures.
- Combat Tentacles: It's "The Sleeper Stirs" move, which causes some tentacles to break out of the comet and hit your entire party with blight and inflicting horror on them.
- Comet of Doom: The Sleeper is responsible for destroying the Miller's Farmstead after the comet containing it crash-landed there at the Ancestor's behest.
- Crystal Prison: What the comet itself is, containing a gestating cosmic horror. The first phase of the battle involves fighting this prison as it creates shards of itself to attack the party.
- Eldritch Abomination: Everything happening around the mill can be directly attributed to the comet, from the transformed workers to the Farmstead's now-tenuous relationship with cause and effect.
- Evil Learns of Outside Context: Much like his quest to uncover the Heart of Darkness, the Ancestor sought to harvest the Sleeper's comet for the rare otherworldly crystals it exuded for further use in his nefarious plans. Unlike with the Heart, however, the Ancestor was successful, though it came at the cost of the destruction of the Miller's Farmstead. Not that the Ancestor cared, though.
- Expy: It's the titular "Colour"/unidentified organism from The Colour Out of Space, but instead of distorting and eventually sucking the life out of all organic material around it, it instead covers the nearby landscape in crystalline growths and refracts reality itself into countless facets.
- Flunky Boss: It summons focus points that later develop into larger crystal formations which blow up, causing damage and status effects which depend of the color of said crystal formations. It drops this once it moves onto its second stage.
- Goo-Goo-Godlike: It's implied to be an infantile version of the same type of creature that The Heart of Darkness is, still encased within its comet.
- Mighty Glacier: The Sleeper's speed and dodge stats aren't great, and unlike many bosses, it only gets one action per round. It makes up for this with high health, substantial PROT, and devastatingly powerful attacks that hit the entire party.
- Obliviously Evil: The Sleeper doesn't appear even to be aware that it is fighting anyone, as its attacks involve briefly waking or stirring while slumbering. But considering what it is, this is enough to deal massive stress and physical damage to the party.
- Octopoid Aliens: Not immediately apparent, as it's still embedded in a giant rock, but its singular eye does have the typical vertical hourglass-shaped pupil of many cephalopod species.
- Reality Warper: Simply being around the thing warps all space and time, hence why the Farmstead has become such a bizarre Eldritch Location with a tenuous relationship to cause and effect.
- Sequential Boss: Once enough damage is dealt to the Fracture, it becomes The Sleeper, ditching the Flunky Boss aspect and attacking your heroes more directly.
- Superboss: There is good reason behind why it's the Final Boss of an "Endless" mode. Not only does it have nearly 300 health not counting its first phase, but it's capable of walloping your party with lethal cleaving attacks and dealing enough Stress damage to Afflict your heroes within a handful of turns, meaning it's quite easy to get wiped against and be forced to start a new run in the Farmstead. It gives the Heart of Darkness a run for its money, fittingly enough since they're both godlike cosmic entities.
- Time Master: Among its Reality Warper powers, it can manipulate time to its will. In-game, it has a move called "Slow The Sands", which causes a party-wide stun and speed debuff, implying it's slowing the passage of time for the heroes.
- Walking Spoiler: Its existence reveals what exactly had ravaged the Farmstead.
The Binding Blade
Military
- The Highwayman: Very similar to the Pillagers, they block travelways with imposing barricades in order to stop and rob passing coaches (including yours), though the Military construct heavily reinforced bulwarks compared to the simple roadblocks built by the Pillagers.
- The Remnant: The Academic describes them as this. Their invasion of the countryside was abruptly cut short by the Spreading Stain, and they're now haphazardly strewn across the highways and backroads of the world trying to eke out an existence for themselves through the robbery of passing caravans while slowly regrouping once again under the banner of the Warlord.
An army of loyal soldiers under the command of the Warlord. Like the Pillagers, they are taking advantage of the chaos engulfing the world in order to loot and plunder, but will only attack the party if the Crusader's Helmet is mounted to the wagon. After the first step of the Lost Crusade is completed, they become recurring potential Road Battle encounters, easily differentiated from other factions by the giant bulwarks they put up in the middle of the road.
- Achilles' Heel: They are much more lethal and difficult to deal with unless you destroy their fortifications first, in which case they're merely pretty standard Mooks when fully exposed. Cleaving attacks that strike both the soldier and the fortification meant to protect them, or attacks that simply bypass the guard ability, also bypass their main gimmick.
- Badass Army: Only at least two of them at a time need to lock down a blockade in order to defend it well, demonstrating the Warlord's army's overall high skill.
- Heavily Armored Mook: A Spearman or Swordsman standing behind a Spiked Barricade gains three Guard tokens until the Barricade is destroyed, effectively giving them 30 or so extra health unless you have a way to bypass Guard.
- Palette Swap: Of the generic human soldiers seen in several characters' backstories.
Defensive barricades the Warlord's Army uses to support themselves in battle.
- Achilles' Heel: The Guard tokens that Spiked Barricades can grant Spearmen and Swordsmen don't go away over time, but will disperse momentarily if you manage to shuffle them around some which way, allowing you to bypass the barricades' defenses for some direct damage.
- Counter-Attack: Attacking a Spiked Barricade will cause it to apply 1 Bleed to whomever hit it.
- Mook Commander: As long as they stay in battle, the actual Military personnel manning them will receive powerful buffs at the start of every round as well as protect them from damage.
- Shield-Bearing Mook: Spiked Barricades apply three Guard tokens to whomever is standing in the rank directly behind them, turning them into a Heavily Armored Mook. However, they are unable to attack and even move or act in any way.
- Support Party Member: These buildings aren't even considered active combatants and don't get counted in initiative, instead solely providing support for the Spearmen and Swordsmen who defend them.

- Achilles' Heel: Damage over time and skills that ignore block. His actual health pool is pretty low for a boss, so he has to rely primarily on generating Block+ tokens to soak damage, meaning anything that can bypass them absolutely mulches him with ease.
- Arc Villain: Of The Binding Blade, as the one who imprisoned the Crusader and is halting you from rescuing him.
- A Sinister Clue: In a noticeable contrast to almost all the other enemies and bosses in the game who are right-handed, the Warlord wields Securis powerfully in his dominant left hand to further indicate his deplorable villainy.
- Ax-Crazy: Literally, as his weapon of choice is a large axe. He's an exceptionally brutal and violent warmonger who collects morbid trophies of his slain foes like their skulls and ears and then wears them into combat, and the Crusader's slight on his honor made him embark on a relentless quest of revenge until he had the Crusader in his clutches.
- Badass Cape: His suit of armor is complimented by a furred collar and full-bodied cape which makes him look even more imposing.
- Badass Normal: Much like the other human bosses in the series, the Warlord is a powerhouse capable of fending off four well-trained heroes at once while taking a beating despite not having any supernatural abilities.
- Contrasting Sequel Antagonist:
- To Death. They're both bosses driven entirely by their singleminded pursuit of another specific hero, but while Death is a supernatural entity relentlessly pursuing the death-defying Flagellant and won't even bother you if you don't have him in your party, the Warlord is an all-too-mundane threat who is more than willing to kill anyone who crosses his path even if they're not the Crusader.
- To Brigand Vvulf. They both are Badass Normals among a much larger group of supernatural threats, but while Vvulf was a murderous bandit leader who wanted to plunder the Hamlet of its valuables, the Warlord is a still bloodthirsty yet more calculating military commander who establishes bulwarks on public roads in an effort to loot passing travelers.
- Creepy Souvenir: He wears a necklace made out of severed ears, presumably the ones that used to belong to the skulls he's also wearing. You can actually collect it as the Tropaeum combat item after defeating him, where it is unique among combat items in that it's not single-use and can be reused every 5 turns to apply Combo to one target.
- Cruel Mercy: The Crusader gave him this instead of striking him down, knowing that the humiliation from being defeated and spared when the Warlord himself gave no quarter would be a Fate Worse than Death for him.
- Duel Boss: In the Crusader's fourth hero shrine, he and the Crusader duke it out mano y mano after both their armies have fled. The Warlord is a formidable opponent, so preventing him from doing unprotected damage is crucial.
- Flunky Boss: He fights your party alongside a Swordsman and Spearman. His special trait allows him to Guard an ally standing directly behind him, one of his attacks can apply Combo to the first three ranks which both his minions can take advantage of, and if he reaches rank 4, he can use Cohortor, which gives both of them Speed, Strength and Crit tokens.
- Gratuitous Latin: All of his moves have Latin names, to go with his pseudo-Roman aesthetic.
- It's Personal: He has a personal vendetta against the Crusader, having imprisoned him, broken his sword and thrown the helmet away, as well as hiding anything that could possibly hint at his location. The combat intro can state he has been perfecting his revenge for a long time. The Crusader's Hero Shrines reveal that he fought the Warlord during the Crusade, but he was defeated and (in an act of Cruel Mercy from the Crusader) humiliatingly left alive, seeking vengeance for the offense years later.
- Large and in Charge: The Warlord stands twice as tall as his subordinates, and is capable of giving them commands and buffs in battle.
- Limit Break: If two or more of your heroes have Combo applied to them, he can use Ferox Impetus (lit: "Ferocious Attack"), a lethal, high-damage attack which hits ranks 1, 2 and 3. Luckily, he can only use this move every two turns.
- Mighty Glacier: He may not move very fast, but he can apply three Block+ tokens onto himself in a single turn and most of his attacks hit multiple ranks, meaning he can start serious hurting your party if you can't dispatch him quickly.
- Mook Commander: Any mook standing behind him receives three Guard tokens as long as he's alive, and he has several buffs that he can apply to his subordinates as well.
- Named Weapon: His huge poleaxe is named Securis, which simply means "ax" in Latin. Even though the blade more resembles a cleaver or bardiche-type weapon.
- One-Handed Zweihänder: He wields Securis as if it were a very large knife or short sword in one hand, despite the fact that it's a huge polearm with a very long haft.
- Recurring Boss: He can sometimes be found at the bulwarks his men occupy, and the chance goes up with each successive region. However, he always manages to escape death.
- Skeletons in the Coat Closet: He wears an additional belt made out of skulls in addition to his necklace of human ears.
- Tin Tyrant: He is clad from head to toe in bulky, heavy-looking armor reminiscient of a Roman centurion.
- Villain: Exit, Stage Left: Like the Antiquarian, a Deathblow doesn't display when he's defeated, indicating how he's able to flee the battle and be a Recurring Boss as well. However, unlike the Antiquarian he can only be encountered once per Confession.
- Villain Has a Point: Zig-zagged. The story itself lends ambiguity to the idea whether the Warlord's pursuit of revenge on the Crusader is just him being Ax-Crazy and following Revenge Before Reason or whether the Crusader is to blame for it, as the Warlord was fully prepared to accept an Honorable Warrior's Death at his hands and the Crusader's true intentions for sparing him are muddynote .
- Wrecked Weapon: His cleaver Securis is a rusted hunk of metal that looks too dull to even cut anything.
- Your Size May Vary: Normally he occupies two ranks as a large enemy, but in "Blood in the Snow" and as a Specter in the Body of Work fight he only occupies one rank.
Hero Shrine Enemies
- Barrier Change Boss: As part of being a Hero Shrine Puzzle Boss. Both the Mentor and Dummy will adopt unique Tokens that prevent them from being hit unless the Duelist dispels it by being in a certain stance. Therefore, careful action management is the only way to defeat them without accumulating too much Stress and losing the shrine.
- Teacher/Student Romance: As the Mentor took notice of the Duelist's budding skill, their Strictly Professional Relationship conflagrated into a full-blown romance.note .
- Failure Is the Only Option: It is literally impossible to reap and bale enough crops to fill all three ranks behind the Crusader, since they lose HP every turn and he'll have to Rest at least once to avoid getting overwhelmed by stress.
- The Famine: Is a representation of the Crusader working his ass off to not lose his crops to the freezing cold before the winter months set in, as his family will starve without them. He fails.