This page details the secondary characters encountered thoughout the lands. Head back through here for other character pages.
Unmarked spoilers ahead.
Firelink Shrine
- Voiced by: Sean Barrett

A blacksmith from the fallen kingdom of Astora, somehow having survived since the Chosen Undead walked the lands of Lordran.
- Ambiguously Human: Andre is hundreds if not thousands of years old and hasn't changed at all from the first game to the third. Of course, he's almost certainly Undead, so it's to be expected.
- Aw, Look! They Really Do Love Each Other: Of the platonic variety; giving him the Giant's Coal reveals that he and the Giant Blacksmith of Anor Londo were apparently friends, and he remembers the Giant with great fondness and sadness, considering you take the Coal from the Giant's corpse.
- Back for the Finale: Was nowhere to be seen in Drangleic, but in this game you see him almost as soon as you first enter Firelink Shrine and he serves you faithfully for the entirety of the game.
- The Blacksmith: As in the first Dark Souls, he is the first blacksmith encountered. Although, now he's the only blacksmith encountered. Well, the only one still alive anyway, as you do encounter the Giant Blacksmith's corpse.
- Cool Old Guy: Because some things never change.
- Gameplay and Story Integration: Andre is a rare instance across all three games of another Undead that will actually respawn (presumably) at a bonfire like you when you kill him instead of being permanently dead. Even Andre himself stayed dead if you killed him in the first game. In this game, however, you just need to reload the area and he'll be right back at his workstation hammering away. He'll even be mad at you for killing him and refuse to do any smithing for you, unless you go absolve your sins.
- Honor Before Reason: When given the Profaned Coal from the Profaned Capital, he's horrified at how dark it is, and REALLY doesn't want to make anything with it that you could use (it opens Dark, Blood and Hollow infusions), but considers that his duty as a blacksmith overrules his personal feelings. Still, he warns you of what using it entails, and urges you against using it, since it embodies everything the player character is fighting against, and could corrupt you irreversibly.
- Messy Hair: Has a massive, unruly mane of white hair.
- Really 700 Years Old: Giving him the Giant's Coal reveals he's the same Andre from Dark Souls, hundreds - possibly thousands - of years later.
- Walking Shirtless Scene: Again, some things never change.
- Workaholic: Andre is fully dedicated to his career as a blacksmith, enough that it's kept him from going Hollow all these years, a feat matched only by Patches.
- Voiced by: Carolyn Pickles
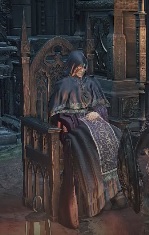
An elderly handmaiden who resides in the Shrine, selling equipment to the Unkindled. She requests umbral ash, from which she gains new inventory. Another one, or possibly the same one, is the sole resident of the Shrine in the Untended Graves and sells Artorias' armor set.
- Adam Smith Hates Your Guts: You can kill her and she comes back, just like the Fire Keeper and Andre, but she hikes her prices up by 20% every time you do so. Luckily, you can use the statue of Velka in the Undead Settlement to absolve yourself and reset her prices back to normal.
- Ambiguously Related: After you complete Sirris' plotline, the Handmaiden will sell a bouquet of flowers with a note saying "Goodbye, grandmother. I'm going to visit grandfather in the pit of hollows." The grandfather is undoubtedly Hodrick, Sirris' grandfather, but it's uncertain if the grandmother is the Handmaiden, or if Sirris left the bouquet on a grave and the Handmaiden later stole it.
- Call-Back: She strongly resembles the elderly Fire Keepers from Dark Souls II. Coincidentally, there are two other women who look like her in Dark Souls III (one in the Untended Graves, another that gives you access to the Way of Blue Covenant), giving a grand total of three elderly women - the same number of elderly Fire Keepers from Dark Souls II who greet you.
- The Constant: She is the only character still alive and sane in the Untended Graves, the dark alternate version of the Firelink Shrine in a world where the Fire has gone out for good. When everything else has Hollowed out she still goes on, maintaining her shop despite there being no one sane in the world to buy anything from her until the Ashen One shows up — including the armor of the Knight Artorias! Should you avoid interacting with her present self all the way until meeting her in the Untended Graves, she'll recognize you before brushing it off. This is a hint that the world presented in the Untended Graves was part of the past, and that Ludleth's time breaking was indeed real.
- Deadpan Snarker: If you murder one of the other merchants in Firelink Shrine and give her their ashes, she'll sarcastically jab that the ashes seem awfully warm, like the person had only died mere moments ago, but surely you didn't have anything to do with it, right?
- Gameplay and Story Integration: Like Andre, she'll just respawn if you kill her, and she'll be mad at you for doing so. Unlike Andre, she won't refuse to serve you, she'll just up her prices.
- Voiced by: Blake Ritson

A downtrodden knight, clad in the signature armor of the Abyss Watchers.
- Animal Motifs: A lone wolf. Keeping in theme with the Undead Legion's wolf motifs, Hawkwood is themed as a lone wolf. As in reality, lone wolves are most often the screw-ups and rejects from their packs.
- Assist Character: He can be summoned for assistance against Oceiros, and at the summit of Archdragon Peak (he'll refuse to fight the Nameless King with you), as part of his quest to become a dragon.
- BFS: He fights using a Bastard Sword, and later using a Farron Greatsword.
- Decon-Recon Switch: Just like the Crestfallen Warriors of previous Dark Souls games, Hawkwood initially resembles what players who are unable to beat the game and quit look like: a downtrodden failure. Unlike the previous two warriors, however, Hawkwood doesn’t go hollow nor remain in the game’s Hub Level, instead striking out on his own and even providing assistance to help you fight Oceiros, the Consumed King. This shows that even a failure can muster up the resolve to resume his journey and face whatever challenges comes their way, seeking to overcome the harshest of obstacles to achieve great things in life.
- Defector from Decadence: He's a military deserter from Farron's Undead Legion, as the Watchers basically laughed him out of the order when he insisted on using a shield as opposed to their traditional sword-and-dagger combo. This is only in the English version, however, as this part of the storyline is omitted in the Japanese version.
- Dual Wielding: For his final battle, he casts aside his Bastard Sword and Shield and takes up a Farron Greatsword with its associated dagger - the weapons his former brethren used, having decided to embrace their legacy for one last time before starting his own.
- Face–Heel Turn: Progressing his questline causes him to become antagonistic. In his pursuit of power, he challenges the Ashen One to a duel to the death. If he wins the duel he requests against you in Farron Keep, he takes your Twinkling Torso Dragon Stone, but upon beating him you take the stone(s) he has. Once defeated, he’ll recognize you as “a true dragon,” giving you his final regards as a worthy rival.
- Failure Hero: He follows a long line of Crestfallen Warriors from previous games.
- In the English version, he was laughed out of the Abyss Watchers for using a shield in his combat style, until he abandoned the order. It’s unknown why he left in the Japanese version, however, which omits this detail.
- He tried to link the first flame but wasn't strong enough in body, mind, and/or will, thus was instead rejected and became an Unkindled.
- He was resurrected to bring the Lords of Cinder back to their thrones, but abandoned this duty. He then tries to follow the Path of the Dragon, but is bested and slain for good by the Champion of Ash.
- However, unlike the previous two Crestfallen Warriors of the first and second game, Hawkwood did not resign himself to his fate and decided to once more strike out on a journey to find his purpose in life, thus he is a Reconstruction of this trope since even failures can decide to make something of themselves.
- Helmets Are Hardly Heroic: Unlike the rest of the Abyss Watchers, Hawkwood does not wear their signature pointed helmet or face covering mask. Instead he wears a chainmail hood that doesn't cover his face.
- Irony: The Abyss Watchers were all about fighting aggressively and in the English version thought hiding behind a shield made you a wimp, thus they all mercilessly mocked Hawkwood for using one until he quit. Little did they know that Artorias, who either personally founded the Abyss Watchers or was invoked in honor and spirit when the group was founded because they desired to emulate him, used to use a greatshield that was much bigger and more defensive than Hawkwood's flimsy small wooden shield.
- Lightning Bruiser: Being a trained Abyss Watcher, his BFS doesn't slow him down at all, while letting him smash through enemy defenses. Doubly so once he swaps to his legion's standard weapon set, letting him slide and flip around the battlefield like a wild animal.
- Luckily, My Shield Will Protect Me: Unlike the other members of the Abyss Watchers, who dual-wield greatswords and daggers, Hawkwood chose to use a shield and was scorned by the other Abyss Watchers until he quit. Ironically, he's using the actual fighting style of their founder, Artorias, albeit the latter’s choice was a greatshield instead of the former’s smaller shield designed for parrying.
- Later, after Hawkwood leaves the Firelink Shrine, he will ditch his shield and use the Farron Undead Legion’s trademark moveset of Ultra Greatsword in one hand and an atypical dagger in the other in the final part of his questline, fighting you in Farron Keep to take the other part of the Twinkling Dragon Stone.
- Recurring Element: He's this game's equivalent of Dark Souls I's Crestfallen Knight as well as Saulden from Dark Souls II, being one of the longest-standing residents of the Hub Level and a highly-jaded one at that.
- Refusal of the Call: Like the Champion of Ash, he was resurrected to return the Lords of Cinder to their thrones; most likely the Abyss Watchers specifically. Instead, he decided instead to abandon his duty and follow the Path of the Dragon.
- Screw This, I'm Outta Here: He can be summoned on Archdragon Peak, but leaves immediately if you ring the bell for the Nameless King. He's only interested in ascending to dragonhood, so his real purpose there is to help you fight against the Elite Mooks blocking your way towards the Twinkling Dragon Torso Stone, which he intends to take from you later in a duel to the death he requests from you.
- There Can Be Only One: At the end of his questline, Hawkwood says this to the Ashen One. He aims to transcend humanity and become a true dragon, and if he defeats you he will loot the Twinkling Dragon Torso Stone from your corpse. That being said, you can challenge him as many times as you want until you defeat him, taking both stones for yourself, unless you leave him alone after losing to him and finish the game while he holds both - allowing him to transcend into a dragon (or at least a dragon-like being).
- Throwing Down the Gauntlet: At the end of his questline, Hawkwood leaves some swordgrass with Andre in order to challenge the Ashen One to a duel. The winner will claim the loser’s stone.
- Token Good Teammate: Unlike past versions of the Crestfallen Knight, Hawkwood is still driven enough to be proactive and can be summoned to help fight bosses, namely Oceiros, the Consumed King. Subverted if you go down his questline, as his fighting spirit gives way to a lust for power and he attempts to kill you for a chance to gain power through the Way of the Dragon. In the end though, once you defeat him, he accepts his defeat gracefully and acknowledges you are worthy of being a dragon.
- Worthy Opponent: Once defeated by the Champion of Ash, his dying words are to approve of his defeat and say the player is worthy of being a dragon.
- Voiced by: Edward Bennett

A mysterious warrior who appears in Firelink Shrine after you go to and return from the High Wall of Lothric for the first time. He's actually a member of Rosaria's Fingers, and holds the position of Ringfinger.
- Blue Blood: According to the description of his armor set, he was born into royalty, where he learned his skills.
- Evil All Along: At the end of his questline, he kills Rosaria and takes her soul, necessitating the player hunt him down with a Black Eye Orb and kill him to retrieve it.
- Expy: To the Hunters from Bloodborne. His statements on hunting down other players is eerily similar to how Bloodborne NPCs refer to hunting beasts. He himself will refer to the player as a "beast" should they attack him without provocation. His views on attacking other players and his eventual turn upon the leader of his own covenant likewise mirrors a hunter who has been infected and succumbing to the Scourge.
- Knight Templar: Even after killing Rosaria and taking her soul, seemingly believes that he's doing the right thing, stating that "nobody will despoil her soul", and calling the player out as a "sick beast".
- Love Is a Weakness: Mocks Yellowfinger Heysel for her attitude of Evil Is One Big, Happy Family.
- Magic Knight: He fights with a sword and shield, but can also cast sorceries.
- Murder Is the Best Solution: Leonhard is an staunch advocate for invading other players to get Embers, when there are other ways to get them through jolly cooperation. And he murders his goddess to prevent other people from murdering her and stealing her soul, as opposed to just guarding her.
- Mythology Gag: He wears a tricorn hat similar to the ones found in Bloodborne, and overall his clothing resembles that of a Hunter. And when you go after him to get Rosaria's soul back, he spends some time calling you a beast. His signature weapon makes reference to the Moon (which was featured heavily in Bloodborne) but doesn't seem connected with either Seath or Gwyndolin.
- Number of the Beast: He has 666 health, a sign that he is by no means a good person. Having a "mark of the beast" is also another reference to Bloodborne and his imagery as a beast scourge infected hunter.
- Scars Are Forever: His whole body was heavily burned as a child, which is why he wears his mask and heavy leathers. For some strange reason, he refused to let Rosaria renew his body and erase his injuries at any point of his years of service to her.
- Sinister Scythe: During your final battle with him, he wields the Crescent Moon Sword, a sickle useful for both DEX and INT builds thanks to its scaling, and which can shoot magic projectiles.
- The Starscream: At the end of his quest line, he kills Rosaria and takes her soul to prevent others from doing so themselves.
- Suspiciously Similar Substitute: A man wielding a sickle kills a woman with no tongue for her soul, and you invade him in Anor Londo with a Black Eye Orb to get it back. Lautrec, is that you? Take his outfit into consideration and you pretty much have Lautrec dressed as Marvelous Chester.
- Sword Beam: His Crescent Moon Sword's weapon art, Crescent Blade, takes the form of this.
- Token Evil Teammate: He is a member of the PvP guild Rosaria's Fingers, which is Dark Souls III's equivalent to the Darkwraiths, and openly encourages, if not goads, the Ashen One to invade others and pillage their Embers. And he's even too crazy to work with them!
- Yandere: He is so jealously possessive of Rosaria that he eventually murders her and steals her soul just to make sure no one else can have her.
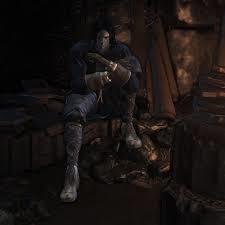
- Voiced by: William Vanderpuye

A very familiar vagabond with a penchant for treasure and betrayal.
- Affably Evil: It wouldn't be Patches otherwise! Striking up a friendly conversation and selling you his wares right after attempting to murder you and take your equipment.
- Back for the Finale: He’s the same Patches you met back in Dark Souls I. This trope is invoked yet again if you have the Ringed City DLC; he returns for the final DLC of the Souls series calling himself Lapp, having forgotten his memories. If you progress his storyline he eventually remembers who he is, deciding later to help you reach - and optionally be summoned to fight - the penultimate boss of the DLC.
- Back from the Dead: Killing Patches in the first game doesn’t stop him from appearing in this one, which is justified considering that he’s an Undead in the first place. This happens once again if you kill Patches in the main game; he reappears as an amnesiac man who calls himself Lapp in The Ringed City DLC.
- Bad Impressionists: He steals Siegward's armor, then impersonates him in the Cathedral of the Deep in order to trick the Ashen One. His impression is decent and aided by unfamiliarity (he only tries if you hadn't seen him before this play-through), but anyone listening for a second time will notice Patches overdoes Siegward's bumbling mannerisms; doesn't pretend to recognize the Ashen One; and breaks character by obsessing over treasure.
- Bald of Evil: He's an absolute scoundrel and bald as a bean.
- Bilingual Bonus: "Lapp," the name he gives when you meet him as an amnesiac in The Ringed City, means "patch" in several Nordic languages.
- Blatant Lies: His usual spiel of "it's not my fault". Even his armor set has an absurdly inaccurate description in his favor, though it's hard to tell if it's supposed to be Patches' self-description or sarcasm.
- Breakout Character: Patches has always been a popular character in the Souls series for varying reasons, but this game goes further than others by expanding on his storyline outside his norm of “tricking the player then selling things he looted to them.” He’s one of two potential people who can save Greirat’s life from Irithyll if you send the thief out to loot it, and is the true identity of Lapp in The Ringed City DLC. This means he’s not only one of the few people to never go hollow in the series (albeit coming close to it), he’s one of few people to reach the end of time itself. The DLC goes so far as to reveal what kind of person he was like before becoming the infamous Lovable Coward everyone knew him as, further expands on his motives for why he trapped people (he loved to punish those who were greedy), and for the first time in Souls series history he was summonable for a boss fight against Halflight, Spear of the Church, the penultimate boss of the DLC.
- Combat Pragmatist: It may be considered cowardly to some, but the greatshield and spear Patches uses in combat is an effective fighting style for its ability to both attack and defend at the same time; he certainly doesn’t care about fighting fair to begin with anyways. As Lapp, his choice of shield is the Curse Ward Greatshield that uses weapon arts in lieu of bashing opponents, allowing him to use the wide sweeping attacks of his Splitleaf Greatsword with just one hand and quickly switching back to defense with little effort. His armor is also far more protective than his original black leather set, albeit he switches back to his original clothing once he regains his memories (though he still continues to use the Splitleaf Greatsword and Curse Ward Greatshield).
- Corpsing: In-Universe, as part of his Bad "Bad Acting". He ends the first conversation as 'Siegward' saying he is "in quite a pickle" and can't help but chuckle mid-sentence.
- Determinator: Yes, him. Patches found his purpose- tricking people and stealing their stuff- and stuck to it, enduring the ages between games kicking treasure hunters off cliffs and looking none worse between when the Chosen Undead and Ashen One meet him. In fact, he only starts to hollow at the literal end of time, implicitly because he outlived everyone he could kick off cliffs. His ashes point this out-Patches never lost heart, and never looked back. He marched in one direction, and that direction was dead ahead. Did you see him passing by?
- Failed a Spot Check: If the Ashen One killed the giants in the Cathedral of the Deep, Patches fails to notice before trapping them.
- Heel–Face Turn: As usual, he becomes a friendly merchant after you escape his death trap(s).
- Hidden Depths:
- Patches is rather fond of the “Siegbrau” drink, having apparently learned how to brew it from Siegward before tricking and robbing him. This is discovered when you meet Lapp in the Ringed City DLC, who later turns out to be an amnesiac Patches. During his time as Lapp he will share his stash of Siegbrau with you multiple times, indicating that despite losing most of his memories he never forgot how to brew one of his favorite drinks.
- His true motives for why he trapped people are revealed when he regains his memories in The Ringed City DLC. Patches hated greed and sought to punish those who gave into it, thus he continued to rob people whom fell for his traps with promises of treasure until the end of time. This is why, despite being surrounded by countless treasures from different eras due to the convoluted working of time and the converging of lands, he started to go hollow. It’s also the reason why he was friendly towards Greirat: he stole from Lothric Castle only to help the poor in his hometown (the Undead Settlement), then continued to loot dangerous places in order to help provide the Unkindled One with valuable gear for their mission (after being freed by them from the castle).
Patches: “Every age, it seems, is tainted by the greed of men. Rubbish, to one such as I, devoid of all worldly wants! Hmmm, I dunno, maybe it's just the way we are. I'll stick you in my prayers. A fine dark soul, to you.” - Hidden Heart of Gold: If he still has Siegward's armor when Greirat goes to scavenge Irithyll, Greirat will return safe and sound, still claiming to have been saved by an "onion knight" as if you had returned Siegward's armor to him. Patches will say nothing about this, evidently not wanting his reputation as a loathsome bastard ruined by an act of benevolence. The Ringed City DLC shows his personality minus the countless eras of hopelessness weighing down on him, having lost his memories after he begins Hollowing since almost no one is left to scam and trap. As Lapp, he is kind; friendly; and helpful, but after regaining his memories he acts like his usual Jerkass self - complete with kicking you off a ledge and mocking you for your stupidity and greed like in Dark Souls I. However, falling off that exact ledge is the only way to progress through the area, and Patches will be summonable for the upcoming boss fight for the first and only time in the series (not counting Lapp being summonable for the Demon Prince). This means he's actually helping you, but trying not to show it, showing that he’s holding his promise he made as Lapp to be friends with you.
- Hypocritical Humor: He calls the Ashen One out on being greedy. Later subverted when you find out his true reasons for scamming people in the first place: to punish greed.Patches: Shame on you, you greedy guts.note Thought you could outwit an onion?
- Implausible Deniability: When the Ashen One gets out of his trap using Siegward's armor, Patches initially feigns innocence and then says the armor made him do it.
- Jerk with a Heart of Gold: He's a sleazy trickster and grave robber, but when he hears his old friend Greirat went to go loot Irithyll Patches is legitimately concerned with Greirat’s safety and decides to rescue him (albeit Patches does so wearing armor he stole from Siegward). Later on, when Patches learns that Greirat went to Lothric Castle, Patches leaves regardless of whether or not he still has Siegward’s Catarina armor set, showing that Patches no longer cares about his reputation and wanted to save Greirat’s life. Unfortunately Patches fails, only managing to swipe a bottle of Hidden Blessing from the castle for his troubles.
- Legacy Character: Oh yeah, wouldn't be a Souls game without him. And yes, he traps you like usual.
- Lovable Rogue: After he settles down in Firelink Shrine and opens shop for good upon failing to kill you, he'll be around to keep Greirat safe late in the game and will show open concern for Greirat's safety. Granted, Patches will do it with the armor that he stole from Siegward.
- Luckily, My Shield Will Protect Me: As before, he uses a Winged Spear with a Twin Dragon Greatshield (the equivalent to Dark Souls I's Eagle Shield), i.e. a combat style considered cowardly by many people in the fan base. After regaining his memories in The Ringed City, he continues to use the Splitleaf Greatsword and Curse Ward Greatshield he used as Lapp, and like his previous weapons they make a deadly and practical combo even if considered cowardly by some.
- Meaningful Name: He's appeared in every Souls game that Miyazaki has directed and never went hollow. That is, until the Ringed City DLC takes place, having become an amnesiac man named Lapp who wants to remember who he was and is beginning to turn hollow. With your help, however, he can make a full recovery should you finish his storyline.
- Pet the Dog: Mentions that Greirat did him a favor at the High Wall and can be sent out to Irithyll to help keep an eye on Greirat when he goes scavenging; this is necessary to save him if you’re not continuing Siegward's quest line. Patches tries to play this off as being interested in looting Greirat's corpse for more stuff to sell, but the concern in his voice is audible. Killing Greirat will also make Patches hostile to you.
- Really 700 Years Old: Since he’s still around in The Ringed City DLC and is the same Patches from Dark Souls I, there’s a good chance he’s hundreds if not thousands of years old. This gets more complicated considering the passage of time is convoluted in that world.
- Red Herring: In The Ringed City DLC, players who don’t kill Lapp (even if they could tell by the voice that it’s Patches) will reach a point where they re-visit the Earthen Peak from Dark Souls II in the Dreg Heap, where Lapp mentions that he left behind some treasure he didn’t need there and suggests they look strong enough to fetch it for themselves. This will ring warning bells in the minds of players getting put into dangerous traps by Patches, all the while he’s laughing at them for their greed and stupidity. However, Lapp never activates any kind of trap and congratulates you if you find the “treasure” he was talking about (a titanite slab). Even more baffling, if you reload the area three times (either by dying, quitting the game and re-loading, or using homeward bones), he will decide that the Unkindled One needed help and will fetch the treasure for them instead, then celebrates his friendship with you. This is a sign that Patches really did lose his memories, plus in his amnesiac state he’s showing who he was as a person before years of cynicism wore down on him.
- Ring of Power: He wears the Horsehoof Ring, which boosts the power of his kicks, facilitating his means of trapping people. Ironically, he doesn't kick the player in the maingame in III.
- Running Gag: He tricks the Unkindled One into multiple traps intending to loot your corpse, then pleads for mercy when you get out and he tries bribing you into forgiving him should you initially refuse to do so. Then he happily sells his wares of everything he’s stolen from other people so far.
- Took a Level in Kindness: While Patches still hates clerics like in the first game and has more damning insults for you if “Cleric” is your starting class, he won’t try to murder you if you escape his traps and attempt talking to him afterwards (unlike the first game if you told Patches you were a cleric in the Tomb of Giants). Once Patches regains his memories in the Ringed City DLC with your help, he’ll be summonable for Halflight, regardless of whether or not you’re a cleric. He did, after all, make a promise to always be your friend while he was still Lapp for helping him, not to mention he still gets to kill a cleric anyways.
- Villainous Breakdown: If the giant in the pit is already dead when he lowers you down, he throws a bit of a tantrum:Patches: Have you no shame? How dare you! How dare you!
- What You Are in the Dark: You can only send Patches to save Greirat if you haven't bought any parts of the Catarina Set off him, and Greirat returns believing that he was rescued by Siegward. Evidently Patches doesn't want any good deeds tarnishing his reputation.
- Voiced by: Lillie Flynn

A knightess from the Sunless Realms, seeking out someone she made a promise to.
- Action Girl: Sirris is a very skilled knight who will help the Ashen One several occasions throughout their journey, contributing towards two battles against Lords of Cinder!
- Ambiguously Related: To the Shrine Handmaid. Complete her questline, and the Handmaid will sell a bouquet of flower meant for Sirris' grandmother. It's unclear if the Handmaid stole the bouquet from a grave (like most of her inventory), or if she is the grandmother in question.
- And Then John Was a Zombie: If you turn down her request to swear fealty to you and then defeat a boss, with no purpose left, she turns Hollow and can be found in the Pit of Hollows.
- Assist Character: She can be summoned for assistance in the battles against the Deacons of the Deep, the Abyss Watchers, and if you accept her knighthood, the Dragonslayer Armour and the Twin Princes.
- Battle Ballgown: Her armor is pretty much one, with the leggings resembling a skirt.
- Black-and-White Morality: Her dedication towards battling members of Rosaria's Fingers is absolute, and she will always become hostile towards The Ashen One should they join their ranks, regardless of how friendly they've been towards her beforehand.
- Crutch Character: She can hold her own as a summon NPC the first few times you summon her, but she doesn't as well against the
 Lothric Twins.
 - Despair Event Horizon: The Ashen One can do this to Sirris after helping her with her last target, as she's finally fulfilled her quest and has nothing more to struggle for. Refusing her request to swear herself to the Ashen One's service will make her leave heartbroken, and cause her to Hollow out within the pit her grandfather was put down in.
- Killed Off for Real: After completing her questline, allowing her to swear fealty to you, and beating the Twin Princes, her corpse can be found by Hodrick's grave just outside Firelink Shrine.
- Lady of War: Her armor is descried as having a "feminine silhouette", and she comes as a very graceful warrior.
- Magic Knight: She uses miracles and a rapier in combat.
- Nice Girl: She's surprisingly optimistic and pious for Dark Souls's extremely bleak setting, which furthers her image as a holy warrior. Even if you join Rosaria's Fingers, an organization she despises, she will only give you a gentle farewell and a warn you that the next time you'll meet her, it will be as adversaries. That said, she does not show up in the playthrough after she says that; seems more likely that she is disappointed in you rather than hating you.
- The Paladin: She's a miracle-using knight and former "servant to the divinity," and wholly dedicated to the cause of righteousness. As such, joining Rosaria's Fingers — which she hates with a passion — will render her hostile to you. Before the 1.05 Regulation update, she'd go hostile even if you only had Rosaria respec your stats or change your appearance.
- The Promise: Proceeding to the end of her quest-line reveals that she, like Siegward, had a promise to return and Mercy Kill someone close to her: her grandfather, Hodrick.Sirris: Good night, granddad.
- Recurring Element: Continues the trend of being a common summon for many bosses.
- Royal Rapier: Uses the Estoc in battle, true to her knight status.
- Suspiciously Similar Substitute:
- Of the Darkmoon Knightess from Dark Souls, due to her image as a feminine Darkmoon warrior.
- One of Lucatiel from Dark Souls II as well, being a female recurring summon with a family member turned evil.
- Undying Loyalty: Complete her questline, and she will request to swear an oath of fealty to the Ashen One.
- Voiced by: Clare Corbett
An unseen crow with a nest atop the Firelink Shrine rotunda. Will trade special items with the player.
- Legacy Character: The third unseen bird that trades you special items in the series, fourth if you include Demon's Souls.
- Saying Sound Effects Out Loud: "Pump-a-rum" and "pickle-pee" are onomatopoeia for the playing of a drum and a fife, respectively. The former is somewhat common, but the latter is almost solely associated with the poem "The Ceremonial Band"
 .
. - The Voice: Doesn't show up herself physically, but can be heard.
High Wall of Lothric
- Voiced by: Stephane Cornicard

A petty thief from the Undead Settlement who was captured on the High Wall. He sells you his scavenged/stolen wares as thanks for freeing him.
- Death Seeker: A possible interpretation of his mindset after learning his friend Loretta is dead. He takes on more and more dangerous scores to satisfy a passive death wish.
- Delayed Reaction: He seems to take Loretta's death stoically at first, but reloading the area sees him having a bit of a breakdown, muttering sadly to himself about how she was already dead and proving unable to operate his shop.
- Expy: A three-fold one, all from Demon's Souls: the Dregling Merchant from the Boletarian Palace (occupation), Graverobber Blidge (relationship with Patches), and Stockpile Thomas (associated sidequest).
- Failure Is the Only Option: If you want to get his final goods, you have to send him to his death in Lothric Castle so you can collect his ashes and give them to the Shrine Handmaid.
- Falling Damage: His death in Lothric Castle appears to be caused by falling from a great height, since unlike in Irithyll, there are no enemies near his body.
- Guide Dang It!: There's actually a way to save him in his second scavenger hunt. The game doesn't tell you how it's done or even a small hint it can be done though.
- In the Hood: He wears a peculiar dark hood that covers his entire head and has eye holes cut in it. Picking up it as equipment for yourself (dropped by enemies wearing the same thing) reveals that it's a hood used to distinguish Thralls (basically a slave caste) in Lothric, but is also used to mark criminals such as thieves.
- Intrepid Merchant: If sent out, he'll sneak around stealing stuff and come back with new wares to sell. You can only do this up to three times. The first time sends him down to the Undead Settlement, so he comes back unscathed. The second time sends him to Irithyll, where he will die unless the player rescues Siegward from the well, or sends Patches to rescue him. The third time sends him to Lothric Castle, where he is guaranteed to die. It's possible to send Patches to rescue him again, but he will fail.
- Just Like Robin Hood: Analyzing his ashes will reveal that Greirat's motivation for scaling the High Wall of Lothric was his desire to help the people of Undead Settlement.
- Killed Off for Real: There is no way to save him from being killed on his third scavenger hunt in Lothric Castle.
- Nice Guy: Greirat seems genuinely fond of the player character, and warns them to stay safe whenever they leave the Shrine... even if he finds the place a bore. And finding out his friend Loretta is dead emotionally devastates him.
- Sole Survivor: Other than Emma, the High Priestess, he is the only sane person on the High Wall of Lothric.
- Thrill Seeker: While he's a nice dude, he constantly complains about being bored, and when he goes on expeditions, he keeps pushing at more dangerous places until he dies.
- Token Heroic Orc: He appears at first glance to be a non-hostile Thrall, like those found in the Undead Settlement and Cathedral of the Deep. The Thrall hood description reveals that he and other thieves are forced to wear their hood as a humiliating punishment for thievery.
- Voiced by: Joan Blackham
An elderly matron residing in the chapel of the High Wall, who gives you the banner required to descend the High Wall.
- Flat Character: She's got three lines in the whole game, and her entire purpose is to basically give you a small flag and say "Hey, go after those Lord of Cinder guys, chop chop". She's really just there to prevent the player from going up to Lothric Castle too early. Naturally, you can just Sequence Break by killing her anyway.
- I'm Dying, Please Take My MacGuffin: She gives you the Basin of Vows, which is required to reach Lothric Castle and the Consumed King's Garden, after you defeat the other three Lords of Cinder. That said, you can just kill her right after receiving the Banner and Way of Blue Sigil, if you don't mind sequence breaking and attempting the Dancer of the Boreal Valley boss fight early.
- Killed Off for Real: After slaying Aldrich, Yhorm, and the Abyss Watchers, she has been attacked by some unknown assailant and teleports you back to the High Wall chapel to give you the Basin of Vows with the last of her strength.
Undead Settlement
- Voiced by: David Sterne

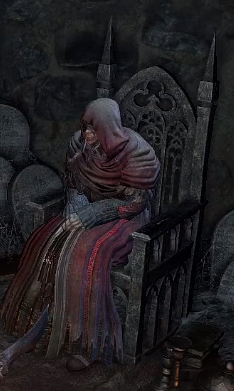
A Londor pilgrim that journeyed to Lothric, stuck among his dead brethren on the broken roadway leading to the castle-city of Lothric.
- Age Without Youth: See Body Horror.
- Body Horror: He's been an Undead for so long he has withered and shriveled into a very inhuman shape. Everything but his arm is mercifully obscured by his robe, but his gangrenous arm is bad enough on its own.
- Death Seeker: He is one of the few surviving members of the hooded stone-bearing undead seen in the opening cinematic. They believed if they could get close enough to Lothric Castle, what was left of the flame would weaken their darksign enough that they could finally die. But Yoel lived while everyone else died, and is looking for some other way to end his own life.
- Dude, Where's My Respect?: Averted, Yoel and Yuria treat the player character with a great deal of respect should they become Hollow, and for good reason at that, seeing as how they're trying to convince you to become the Lord of Hollows.
- Killed Off for Real: He, finally, finally dies after giving you five Dark Sigils, and Yuria of Londor will take his place as a merchant, selling the same things he did plus some other items. If he hasn't given you five Sigils, he will die once the Abyss Watchers are killed and Yuria will not show up to replace him.
- Power of the Void: He can mark the Ashen One with a Dark Sigil, which gives them a free level but causes them to Hollow upon death. He dies after bestowing five of them, and is replaced by Yuria.
- Who Wants to Live Forever?: He and the other Undead pilgrims are tired of their endless, painful existence.
- Voiced by: Sean Barrett

A former knight from the Sunless Realms. After journeying to Lothric, he became a member of the Mound-Makers in the Undead Settlement.
- Ax-Crazy: His dialogue when recruiting you as a Mound-Maker indicates that he thinks of his victims as "family", and he has no shortage of victims. In his mad phantom form, unlike most phantoms, he wildly attacks everything in his path, not caring what it is, emulating the fact that members of this covenant can also attack the enemies of their victim’s world.
- The Berserker: According to the description of his armor, he was known for being rather insane on the battlefield, raging like a "crazed ghoul", unable to discern friend from foe. No wonder he fell in with the Mound-Makers, or was possibly their founder.
- Boss in Mook Clothing: Thankfully an optional one, but his summon rematch in the Road of Sacrifice is a lot harder to kill than his Settlement invader version. In NG+ beyond, he’s been known to one-shot players after parrying their attacks, making him easily one of the deadliest opponents in the game if they lack a way to get past his ability to parry attacks.
- The Computer Is a Cheating Bastard: Hodrick is notorious for being able to parry virtually any attack that can be parried, as he is designed to read the player's inputs and parry their attacks automatically. So the only times it's ever safe to attack him are when he's busy performing an animation (attacking, healing, casting), or he's two-handing his greatsword and has his shield on his back. Either that, or attack him with a weapon that can't be parried such as a two-handed ultra weapon or a whip.
- Crazy Sane: He's part of a covenant that attacks anyone and everyone just For the Evulz, and he outright declares himself as insane, even encouraging the Player Character to embrace their eventual descent into madness. Yet, if encountered before fighting the Curse-Rotted Greatwood, he'll give you sound advice to leave at once since your time to go mad hasn't come yet.
- Creepy Souvenir: There's a reason that you find him right next to a shrine covered in skulls.
- Critical Status Buff: Hodrick has both the Red Tearstone and Blue Tearstone Rings equipped, so when he gets low on health he becomes significantly more dangerous to be around.
- Dropped a Bridge on Him: It's easy to miss the first time around, but he dies from the ceiling collapsing on him during your fight with the Curse-Rotted Greatwood. You can find his corpse during the battle near the skulls, albeit due to the nature of the undead it’s possible he’s not really dead for good since you fight him again when assisting Sirris during her quest line.
- Easy Level Trick
- When he invades you in the Undead Settlement, it's really easy to kill him by luring him into the graveyard (after befriending the Giant Archer first), then jump onto the island with the Undead Bone Shard. There's a good chance Hodrick will fall into the pit trying to get to you (it's easier when walking on the side of the island near the shack that leads to the Curse-Rotted Greatwood, since he will try to walk over the narrow gaps in that spot and probably fall through).
- His summon rematch both has one and is one, and they're the same trick. As a mad phantom, he's considered hostile by literally everything and everyone in the Road of Sacrifices, from tree-waving hollows to invaders to the giant crabs. As a result, instead of summoning him and fighting him one-on-one in an honourable, if hard and unrewarding, duel, you can instead kite him around the area, dragging him into fights with enemies who can be perma-killed like the Exile Watchdogs or Yellowfinger Heysel; whoever survives the clash will be weakened and much easier for you to take down.
- Fallen Hero: He’s heavily implied to have been one of the last Blades of the Darkmoon, who protected the meek looking for help against those who invaded their world. Now he’s a mad psycho who attacks anything that moves when he’s not trying to recruit others to do the same.
- Heal It With Fire: He'll use the Warmth pyromancy to heal himself, though fortunately staying near the flame heals you as well.
- Non-Indicative Name: One would expect a character with "Holy Knight" in his name to be The Paladin or at least a Knight in Shining Armor. And to be fair, he probably used to be, once, though not so much any more.
- On a more humorous note, his holy-themed title has led to players nicknaming him “Parry God Hodrick,” which gets worse if you summon him in the Farron Keep where he’s at his most dangerous point.
- Old Soldier: His A.I. has a staggeringly high parry success rate, which he follows with what is generally a oneshot riposte to players. There's a reason his granddaughter, Sirris, requests you to help her in putting him down. All his experience went into magnificent skill.
- Serrated Blade of Pain: He uses the Flamberge, a serrated Greatsword that inflicts Bleed.
- Suspiciously Similar Substitute: Of Aslatiel of Mirrah, being a family member of a recurring summon NPC that's gone insane. His Sunset Shield is even just a renamed Mirrah Shield.
- The Red Mage: His brand of pyromancy consists of casting Warmth to chip heal himself overtime as well as Power Within to empower his attacks/stamina regeneration further. Fortunately you can heal yourself being near his Warmth spell, but unfortunately he’ll use it to counteract the health cost of Power Within as well.
- Wake-Up Call Boss: He will punish you for mashing that attack button due to how good he is at parrying. You can avoid this by using weapons/attacks that cannot be parried such as two-handing a great mace (minus the rolling/running attacks), but even then he’s a tough combatant in his own right.
Siegward of Catarina
- Voiced by: Miles Richardson
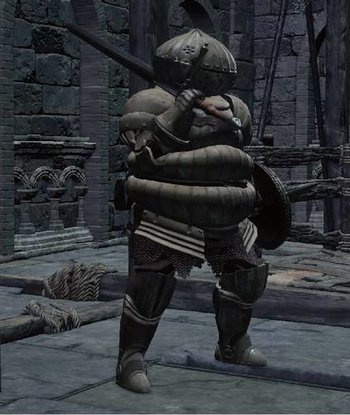
An Unkindled knight from Catarina who always seems to be in a bit of a pickle. He's becomes a good friend to the Ashen One and is also available as a non-summon ally for Yhorm the Giant if his questline has been followed.
- Beware the Silly Ones: Just like his predecessor, he's always in a bit of a pickle, and wears a strange onion knight armor, but is generally very capable in combat. He's much more dangerous than Siegmeyer, however, since he prefers to think methodically, tries not to rush into battles too quickly, and knows when the time for action has come. This is best showcased when you try to fight the Fire Demon on your own, a Mini-Boss that's quite challenging for the player early in the game. Siegward can easily solo the Fire Demon on his own with you backing him up.
- BFS: He wields a Zweihander. When fighting Yhorm with him, however, reveals that he wields the second Storm Ruler Sword.
- Big Damn Heroes: It's possible for him to save Greirat from being killed during his scavenging run in Irithyll, and Greirat's dialogue makes it sound like he did so in the nick of time.
- Catchphrase: When giving a toast, he says, "Long may the Sun shine!" And when entering Yhorm's boss fight, he declares, "May the Sun shine on this Lord of Cinder!"
- Cloud Cuckoolander: Don't even get us started. He is Siegmeyer's successor, after all.
- Dying Moment of Awesome: While he either succumbs to his wounds, or offs himself after mercy killing Yhorm, Siegward is one of the very few characters in the series who doesn't return as Hollow, and goes out in a blaze of glory, at peace that he fulfilled his promise to his best friend.
- Failed a Spot Check: If you do his questline in order, you will release him from a cell in the Irithyll Dungeon. If you miss him in Irithyll of the Boreal Valley, unlock his cell, then go back and find him, he can be found sitting in the same cell, having apparently not noticed that the door is wide open.
- Hidden Depths: Leave it to someone from Catarina to create a booze that even the Undead can enjoy. He also makes a good Estus Soup.
- Killed Off for Real: He dies after finally fulfilling his promise to Yhorm. Seeing that he fulfilled his purpose of returning Yhorm to his throne, he likely killed himself to avoid becoming hollow now that he has no purpose left.
- Legacy Character: He's initially introduced as a Generation Xerox of Siegmeyer from the first Dark Souls, though he very quickly proves himself to be an antithesis to his predecessor in regards to how your interactions with him play out, making him ultimately more like Biorr from Demon's Souls.
- He also has a bit of Solaire in him, what with his catchphrase, and his presence during one major boss fight makes said boss fight much easier.
- Mercy Kill: Made a promise to do so with Yhorm, and keeps it if the player completes his questline prior to fighting Yhorm.
- Naked People Are Funny: You know how Patches likes to kick people down holes and then strip their bodies for things to sell? Well, Siegward is his most recent victim, trapped in a well without his armor. It's implied he could easily get himself out at any time, he just doesn't want to be seen naked.
- Nice Guy: He's a rather laid-back guy who made a promise to Yhorm to put him out of his misery if he were resurrected.
- Noodle Incident: How Patches actually got Siegward out of his armor and threw him into a well is never mentioned.
- Nothing Left to Do but Die: After helping you take down Yhorm, it is highly likely that he kills himself after fulfilling the promise he made to his old friend. It's possible that he instead dies from wounds he recieved while fighting Yhorm, but considering that the two of you had just shared one last drink of Siegbräu, which restores HP...
- Pre-Asskicking One-Liner: Turns his Catchphrase into one when he shows up to fight Yhorm.Siegward: Let the Sun shine upon this Lord of Cinder!
- The Promise: Made a promise to Yhorm before he linked the First Flame that he would put him down in his madness once resurrected by the Bell of Awakening, and helps the player defeat him with a second Storm Ruler to uphold it.
- Superior Successor: To Siegmeyer who wasn't exactly helpless himself, but had a bad habit of leaping before he looked and getting in way over his head. Siegward, on the other hand, is a far more effective warrior due to actually not rushing in without a plan, never has to be rescued from a fight, and on at least two occasions he can end up saving you rather than the other way around.
Eygon of Carim
- Voiced by: Grahame Fox
A mysterious knight who's guarding a failed Fire Keeper. Once you free her, he allies himself with you, becoming available as a summon.
- Assist Character: After releasing Irina from her cell, he can be summoned for assistance in the battles against the Crystal Sage and the Dragonslayer Armour.
- Black Knight: Visually fits the trope to a T.
- Driven to Suicide: Knights of Carim each dedicate their entire lives to the protection of one maiden. Once you free Irina and later defeat the Dragonslayer Armour, then Eygon will kill himself since he no longer has a purpose. His body is found in the same cell he originally locked Irina in.
- Humongous-Headed Hammer: He wields an enormous great hammer.
- Jerkass: Eygon's method of protecting his blind charge, who is terrified of being alone, is to lock her in a small cell and sit outside. He also professes a distaste for having to keep her safe, but that gets averted if she gets killed. He also has a remarkably low opinion of her. Then again, he seems to have a remarkably low opinion of pretty much everyone.Eygon: [when spoken to in Firelink Shrine] I just dropped in to see how she's getting on. Now, what are you playing at with this circus? This cesspool of doddering oldfolk and degenerates... Couldn't be better. She must fit in perfectly here. [sinister laugh]
- Jerk with a Heart of Gold: Despite the above, he is committed to his duty of protecting Irina and will turn on you if you cause any harm to come to her.Eygon: I made myself very clear. My allegiance remained only as long as you ensured the girl's safety. This knight of Carim does not forgive betrayal. Even a broken woman deserves her dignity...
- Luckily, My Shield Will Protect Me: Unlike other knights of Carim, he uses a shield, specifically, a greatshield depicting a rather unsettling face. The description reveals that it was made in the likeness of his older sister.
- Mercy Kill: Irina made him promise to kill her if the darkness ever became too much for her to bear. In the bad ending to her quest, she will request this of you should you touch her while wearing Eygon's gauntlets, mistaking you for him.
- Mythology Gag: He's a mashup of two characters from previous Soulsborne entries. His role and attitude is similar to Garl Vinland from Demon's Souls, as he's the knightly protector of a handicapped holy woman, while his sour personality and his watch over a failure of a Fire Keeper bring to mind Lautrec of Carim from Dark Souls I.
- The Paladin: A dark version of this trope, but he fits both the religious symbolism (guarding a holy woman, able to manifest miracles through his weapon) and the singular dedication to his purpose to the point of killing himself once his purpose is fulfilled.
- Roaring Rampage of Revenge: If you kill Irina or buy at least one Dark Miracle from her, he'll show up at Firelink Shrine near Iudex Gundyr's bonfire with a bone to pick with you.
- Swapped Roles: Unlike Lautrec from Dark Souls I, he's determined to protect the (failed) Fire Keeper he's watching over. Not that he enjoys doing this, mind you, it's just his job. The result of this is a man with the personality of Lautrec but with the function of Garl Vinland.
- Voiced by: Sarah Beck Mather
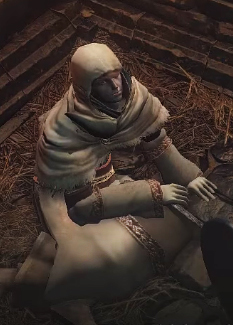
A blind maiden locked in a cell within the Undead Settlement. She was venerated as a Saint in Carim, likely due to her ability to read braille.
- Anti-Frustration Features: If you give her the Deep or Londor tomes and still get the good ending to her quest, she'll drop them on the ground so that you can still learn the dark miracles by giving the tomes to Karla.
- Blind Seer: She was intended to be a Fire Keeper, but for some reason she failed to become one.
- Bittersweet Ending: If you purchased all of the holy miracles and none of the dark ones, she becomes a full-fledged Fire Keeper. She can even level you up! Eygon, on the other hand, is Driven to Suicide now that he has no purpose.
- Downer Ending: If you give her the Londor or Deep Braille Tomes, then purchase any of the dark miracles, she will become corrupted by the Dark, and Eygon will attack you in revenge, forcing you to kill him. After doing so, purchasing the Morne Gauntlets and wearing them will cause her to believe you're Eygon, and she asks you to Mercy Kill her. Wearing any other gauntlets will result in her not being able to detect you at all, implying that at this point there's no difference between you and the dark monsters she feels constantly biting her.
- Hates Being Alone: When spoken to, she's terrified that she's all alone and desperate for human contact. Touching her shoulder is enough to comfort her.
- Orphaned Etymology: Since she's blind, the miracle tomes you give her are written in braille, referred to in the game as such. The language was named after its inventor, Louis Braille, who naturally shouldn't exist in the Constructed World of Dark Souls.
- Power of the Void: She can teach the Ashen One how to use Hexes, which in past games channel the power of Humanity and the Dark.
- Prophet Eyes: Her eyes have no visible pupils, being stricken with cataracts.
- Protectorate: Eygon is watching over her, and if you kill her he'll hunt you down and return the favor.
- Voiced by: John Rowe

A Pyromancer from the Great Swamp trapped in a cage in the Undead Settlement. Once you rescue him, he serves as a merchant and Pyromancy teacher.
- Cool Old Guy: One of the oldest character in the game and also one of the friendliest.
- Feather Motif: It was customary for dwellers of the Great Swamp to adorn themselves with articles of nature, thus he chose raven feathers. He shares this with a summonable NPC for the Old Demon King boss fight named Cuculus, who may have been his apprentice at one point.
- Gender-Restricted Ability: He cannot interpret the Quelana Pyromancy Tome since the one who invented its spells, Quelana, was a female master.
- Mr. Exposition: Has an unique conversation for each Pyromancy Tome you bring to him, each revealing more information about the world and Izalith, home of the Pyromancies.
- Mythology Gag: His outfit greatly resembles the Harrowed Hunter Set worn by Simon from Bloodborne, though without the hood and in a different color scheme.
- Old Master: One of the oldest characters and serves as your teacher in Pyromancies, calling you his pupil. He is also old enough to remember Izalith, which existed a very long time ago.
- Playing with Fire: He is the game's main Pyromancy teacher.
- Ravens and Crows: He favored raven feathers as his connection to nature.
- Recurring Element: He's the equivalent of Laurentius from Dark Souls I, being a Pyromancer from the Great Swamp who teaches you Pyromancy after you rescue him.
- These Are Things Man Was Not Meant to Know: Will not accept the Grave Warden Pyromancy Tome, due to it being related to the Dark and is pretty much a taboo to everyone everywhere else.

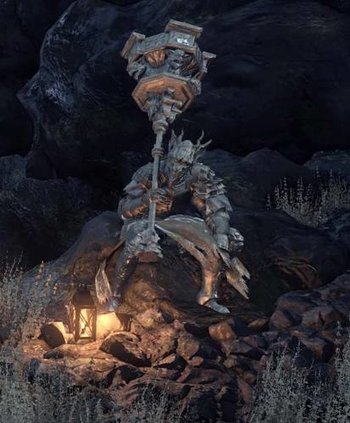
One of the few surviving giants from the Age of Gods, stuck atop a tower in the Undead Settlement and firing greatarrows at those who trespass amongst the white birch trees growing there.
- Expy: Serves as one to Djura, initially attacking you from high elevation until you make peace with him.
- Gentle Giant: The reason why he shoots you is because he wants to help you to kill the hollows. If you talk to him and make peace, he gifts you a branch and stops firing arrows at you as long as you have the branch in the inventory.
- Great Bow: The arrows he shoots are the size of javelins.
- Improbable Aiming Skills: The way how he tells you apart from other hollows is by seeing one of two particular versions of the Young White Branch on your person note . How he can see the branch at such great distances is a mystery. Of the three locations he assists you, one is several miles away and the other is inside a dense forest where he can't even see you, and he still manages to hit his target dead on every single time!
- Killed Off for Real: If the Ashen One collects all six Young White Branches, as well as the Saint-Tree Bellvine and the Crown of Dusk, he will be found dead at the top of his tower.
- Suspiciously Similar Substitute: Of Hawkeye Gough from Dark Souls. With some hints he is Gough himself, or most likely a descendant of his. Should you kill him or complete his minor sidequest, you'll get old Gough's Hawk Ring from him. He also uses Gough's greatbow and the same custom made arrows Gough was known for.
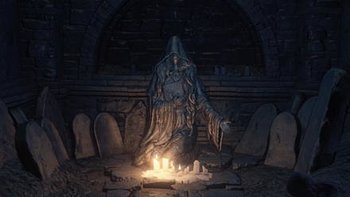
A statue dedicated to the worship of Velka, left abandoned within the sewer-jail of the Undead Settlement. Despite all this, it still holds latent power from the Goddess of Sin.
- Anti-Frustration Features: Unlike the previous two pardoners, it's an inanimate statue, not an NPC, which means you can't permanently lock yourself out of being able to pacify hostile NPCs by accidentally turning the pardoner hostile.
- The Ghost: Velka herself still never appears. However, the statue may be a representation of what she actually looks like.
Road of Sacrifices
- Voiced by: Ryan Morris

A mute soldier and member of the Blue Sentinels, acting as Anri's escort.
- And Then John Was a Zombie: He gets separated from Anri while exploring the Catacombs of Carthus, and eventually ends up trapped in Smouldering Lake, where you find him Hollowed out.
- Assist Character: Can be summoned for assistance against the Deacons of the Deep.
- The Determinator: It's unclear if he's Unkindled, like Anri, or merely Undead. If the latter is the case, he managed to stay sane for however long it has been since Anri tried to link the fire. Makes it all the more tragic that he hollowed just as they had reunited.
- Face–Heel Turn: If you progress Anri's quest line, Horace goes Hollow and attacks you in a well out of the way little cave at the Smouldering Lake. If you tell Anri where he is but haven't killed him yourself first, he'll end up killing Anri and prematurely end that questline.
- Luckily, My Shield Will Protect Me: Wields, and drops, the Llewellyn Shield. Though it's not much compared to a medium or greatshield, it's one of the most protective Small Shields in the game.
- Mercy Kill: One of the options available to player once the player finds him Hollowed out at Smouldering Lake.
- Nice Guy: According to Anri to least. He does give the player the Blue Sentinel covenant and will happily assist in the Deacons of the Deep boss fight.
- The Quiet One: He doesn't say anything, instead making growling or grunting noises. It may be a sign of his imminent Hollowing, or, since he is a Blue Sentinel, it's possible he had his tongue cut out by one of Rosaria's Fingers, for whom the tongues of blue phantoms are worth twice that of a host.
- Sole Survivor: He's only one of two people to escape from being devoured by Aldrich. The other person is never mentioned, although both Anri's quest to slay Aldrich and his/her dialogue after doing so implies that it was him/her.
- Voiced by: Brendan Patricks
An aspiring sorcerer with a thirst for knowledge.
- Assist Character: Once you've given him all the sorcery scrolls and bought out his entire stock of spells, he leaves Firelink Shrine and can be summoned for assistance against the Twin Princes.
- But Now I Must Go: He leaves Firelink Shrine once you buy all of his sorceries and bring him every scroll in the game, preferring to end your partnership on a high note. He can eventually be found in the Grand Archive, only as a corpse. And this is the only way to get his ash for Yuria of Londor without killing him.
- Defrosting Ice King: Is initially quite cold to you, often reminding you to bring back Sorceries Scrolls for him. Once you buy enough spells from him, he will tell you about his past as an assassin and acknowledge you as a friend and well-trained sorcerer. His farewell dialogue even changes, going from "Don't forget what you promised." to "Promise to stay safe."
- Guide Dang It!: If you recruited him, and you still haven't found a scroll for him after killing four bosses (or specifically the Abyss Watchers in earlier versions of the game), he leaves the shrine permanently without prior notice.
- Killed Off for Real: If all of his spells are purchased and the Twin Princes defeated, his corpse can be found in the Grand Archives.
- Pet the Dog: Despite his frosty nature, he is surprisingly kind to players who don't have high enough intelligence for him to sell to them. He'll tell them that not everyone is cut out for magic and that they should focus on the talents that they have.
- Professional Killer: He offered to work as an assassin for Vinheim, in exchange for admittance to the Dragon School. That said, he is never seen assassinating anyone in-game.
- Suspiciously Similar Substitute: As you'd expect, he's the Dark Souls III counterpart of Griggs of Vinheim. However, while Griggs is nice to the player right when you meet him and keeps his role as a spy well-hidden, Orbeck takes some time to warm up to you, but is much more open about his past as an assassin once he does.
- Took a Level in Kindness: In spite of his grumblings, once you buy enough of his sorceries he begins to urge you to be safe when you're done talking to him. He's also extremely grateful once you begin getting spell scrolls for him.
- Took a Level in Badass: He started out as an assassin working for the Dragon School in a hope to learn sorceries, however, he didn't get a chance to learn from the school. You are the only hope who can provide him scrolls, which gives him a chance to learn sorceries. Eventually, once you buy all of his sorceries and studied with him together, he becomes a full grown sorcerer and fights alongside you against Prince Lothric. Yes, he has the guts to go completely ballistic against a Lord of Cinder.
Farron Keep
Black Hand Gotthard
One of the three Black Hand hunters of Lothric, Gotthard fled Lothric Castle to assist you.
- Assist Character: Can be summoned for assistance against the Abyss Watchers and Pontiff Sulyvahn.
- Defector from Decadence: Unlike Black Hand Kamui, who chose to remain and protect Prince Lothric, Gotthard left to help you instead.
- Broken Bridge: While you can kill the Dancer of the Boreal Valley early and gain access to Lothric Castle at the start of the game, his corpse, which contains the Grand Archives Key needed to access that area and proceed with the game, will not appear until you've killed three Lords of Cinder.
- Dual Wielding: His signature weapon is the Gotthard Twinswords, a paired weapon.
- Killed Off for Real: You find his corpse outside the Grand Archives after three Lords of Cinder have been slain.
- Screw This, I'm Outta Here: He fled Lothric Castle at some point to assist you instead.
Cathedral of the Deep

A woman found within a hidden bedchamber in the Cathedral of the Deep. Matron of the Rosaria's Fingers covenant, she takes severed tongues as tribute.
- Composite Character: She's a combination of the Fair Lady and Princess Gwynevere. The fact that her soul can be transposed into Gwynevere's Bountiful Sunlight miracle may indicate that she is Gwynevere, or at least one of the "several heavenly children" that Gwynevere is said to have raised.
- Her sidequest is also exactly the same as Anastacia of Astora's. A mute woman is killed for her soul by a sickle-wielding man, who you invade in Anor Londo with a Black Eye Orb in order to get the soul back. You can then revive her by returning it to her body, or use it to increase your own power.
- Dark Is Evil: Zig-zags between this and Dark Is Not Evil. Rosaria is held to be a source of evil by the righteous and is worshiped by a band of psychopaths. She, on the other hand, is the only one in the world who offers the chance to heal all wounds for serving her. Rosaria's followers kill people for their tongues so they can try to comfort their goddess' pain in losing her own. She also lives up to her title, as her murdered followers get reborn into the man-grubs outside her chamber, but that can be argued to be a bad reward.
- Eyes Out of Sight: You can never see Rosaria's eyes under her long black hair.
- Gameplay and Story Integration: Experiencing "rebirth" one too many times turns you into a Man-Grub. You can only change your appearance or respec your stats a combined total of 5 times per New Game cycle, so presumably that's the limit before you get grubified.
- Magic Plastic Surgery: One manner of "rebirth" she offers is the ability to change your character's appearance.
- The Speechless: She actually never talks. It's rumored that her firstborn child ripped out her tongue after being born and vanished, and she's been waiting for them to return ever since. Restoring her back to life after Leonhard kills her doesn't restore her ability to speak either, implying that she was born mute.
- Skill Point Reset: One manner of "rebirth" she offers is the ability to respec your character's stats.
- Unkempt Beauty: Apparently scissors haven't been seen in the Cathedral of the Deep for a long time.
- Video Game Caring Potential: Unlike Anastacia, there is no in-game benefit whatsoever to returning her soul to her body instead of keeping it for yourself, since all of her functions can still be accessed from her corpse. The only reason to revive her is to be a nice guy.
Smouldering Lake
- The Apprentice: Based on the fact that she wears Cornyx's Set, and her corpse can be found by the cage where Cornyx used to be, it’s possible she was Cornyx's apprentice.
- Assist Character: She can be summoned to assist in battle against the Old Demon King, or for clearing out Smouldering Lake's dungeon section.
- Feather Motif: Like Cornyx himself, Cuculus' outfit is decorated with raven feathers. It was customary for dwellers of the Great Swamp to adorn themselves with articles of nature, thus both of them used raven feathers.
- Killed Off for Real: If you summoned her and she survives the battle with the Old Demon King, what is presumably her corpse can be found in the Undead Settlement by the cage where Cornyx used to be, which contains her clothes and whip.
- Master Poisoner: She's capable of poisoning an ancient demon king of all beings. Considering she's capable of breathing poisonous fumes out of her mouth to poison her adversaries, she's had time to perfect this art.
- Playing with Fire: Subverted. Although she's a pyromancer, she doesn't actually use any fire-based attacks. She is, however, very good at deal with fire based attacks thanks to her choice of equipment and usage of the Flash Sweat pyromancy spell.
- Poisonous Person: Her main damage tactic is poisoning opponents using her Spotted Whip as well as casting Poison Mist via breathing fumes out of her mouth.
- Squishy Wizard: Though she can poison enemies and the Old Demon King, her armor is weak against physical attack, so she'll go down quickly if don't try to help her. She's better equipped to deal with the Old Demon King's fire based attacks, making it easier for her to survive if you can bring the boss to his second phase quickly.
- Weak, but Skilled: While her tactics for damaging opponents — using a whip and poisoning them — isn't very strong damage wise, she does use a weapon that cannot be parried and strikes from a distance, not to mention poison status does cause chip damage overtime that can become a problem for opponents in a prolonged battle. Likewise, while her armor isn't very strong against the Old Demon King's physical attacks, it's a good choice against his fire attacks, plus she uses Flash Sweat in conjunction to toughen her fire defenses.
Irithyll of the Boreal Valley

A late member of the Church of the Deep clergy. Despite this, he still holds enough sway to grant power to newcomers of the Aldrich Faithful.
- Ambiguous Situation: Exactly how he died is unknown. Though judging from the black goo coming from his eyes, it's entirely possible that his death was a result of overexposure to The Deep.
- Admiring the Abomination: He delighted in the presence of the cathedral's Human Dregs, which represent the worst and most disgusting bits of humanity.
- Co-Dragons: Shared the role of Pontiff Sulyvahn's right-hand man with fellow Archdeacon's Kilmt and Royce until his demise and the former leaving the group to join Rosaria's Fingers.
- Fat Bastard: His corpse is bloated just like the other large-bodied Deacons of the Deep though he's even larger in size than them. And considering he's an Archdeacon of the Deep - he wasn't a very good person.
- The Heretic: His "trespass", his decision to channel sorceries through his Staff turned it from a mere symbol of religious authority into a full-blown catalyst that causes sorceries to scale entirely with Faith.
- Posthumous Character: You only encounter him as a corpse. Even leveling through the covenant is done by interacting with his corpse.
- Religion of Evil: He and his fellow covenanters worship Aldrich as a god.
- Sinister Minister: He is the leader of the Aldrich Faithful covenant.
- Voiced by: Martha Mackintosh

The last remaining deity of Anor Londo and the last of the Darkmoon Blades. Despite this, she now leads the Blades, hoping to drive the Aldrich Faithful out of the ruined city of the gods.
- Ambiguous Situation: Is Yorshka actually a member of the Anor Londo royal family or does she just think she is? Between her nonexistence in the lore before her appearance and the fact that the creation of Crossbreeds only seem to be possible via magical or scientific means, there's not much evidence that she is who she says. The only thing that's concrete is that she was in the care of Gwyndolin in the time before Aldrich came to Anor Londo.
- Big Brother Worship: Excitedly talks about her brother Gwyndolin as you advance in the covenant. If you kill her, she calls out to him for forgiveness.
- Guide Dang It!: Getting to her Tower is a bit unintuitive; from the rotating platform (either from the top if it's in the down position or from the bottom if it's in the up position), you need to walk along an invisible path in a straight line and then take a hard right when you see the drop off on her Tower. Thankfully there is a bonfire there so you'll only have to find it once.
- Last of His Kind: The last member of the Blades of the Darkmoon, and the last (confirmed surviving) child of Gwyn. Until you find her other sister, Princess Filianore, in The Ringed City. Who isn't doing too well either.
- Little Bit Beastly: Possesses a tail, not unlike Priscilla's. She also has◊ a pattern of vaguely quill-like scales around her eyes (not entirely unlike Priscilla's small horns) and some kind of strange tendrils coming down from the back of her head beneath her hair.
- Muscles Are Meaningless: She's ridiculously thin, to the point where one wonders how she can stand. If she actually was a Darkmoon Blade at some point, it's even harder to imagine her fighting.
- Her dialogue and the Darkmoon Blade description indicate that she was never actually a Darkmoon Blade, she merely inherited the captaincy from her brother, Gwyndolin.
- Non-Human Humanoid Hybrid: She's apparently a Crossbreed of Old God and something else, most likely dragon.
- Purity Personified: She's a white-clad, soft-voiced, willowy girl with some very child-like dialogue and mannerisms. Further, it's implied she's quite unaware of the vengeful purpose of the covenant she leads, with the Darkmoon Blade miracle calling attention to her innocence. And even the Darkmoons get in on the act under her leadership too, abandoning the duty of avenging players and Non Player Characters and punishing those that broke Anor Londo's illusions in favor of protecting others from those that would invade their worlds.
- Physical God: Her dialogue reveals that she is one of the last surviving old gods. Specifically, she is the last of Gwyn's bloodline.
- Remember the New Guy?: Considering that Gwyn had every mention of one of his sons completely expunged, and raised another as a girl just for being born with Lunacy, it's not surprising that we never heard of her in Dark Souls 1. She does, however, have a church dedicated to her in Irithyll, indicating that at least some were aware of her existence.
- Statuesque Stunner: As an old god, this is to be expected. Though it is worth noting that while huge compared to a human, compared to her siblings she's absolutely tiny.
Irithyll Dungeon
- Voiced by: Jenny Funnell

A mysterious witch found within the dungeons of Irithyll.
- Really 700 Years Old: As a Child of the Dark, she was created when Manus was defeated by the Chosen Undead hundreds of years before the start of Dark Souls.
- Because You Were Nice to Me: Her whole reason for helping you is that in spite of her telling you what she is, you still chose to help her escape. Given that her dialogue upon meeting her implies she's been imprisoned for a long time, you may be the first person in her life that has shown her any kindness.
- Call-Back: She bears resemblance to Yuria the Witch from Demon's Souls and some fans theorize that she might have links to Zullie, Alva's adversary-turned-lover from Dark Souls II.
- Dark Is Not Evil: Like her sister Alsanna, she is not evil and provides aid to the player, in this case teaching you dark magic; pyromancy; and miracles that no ordinary person could teach/learn without having been terribly afflicted, or burdened by deep sorrow.
- Dark and Troubled Past: Despite being a benevolent Child of Dark, Karla was treated poorly by others and eventually jailed for an unknown length of time, leading to her considering herself a monster. It’s telling that the Prisoner Chief’s ashes are how you can buy a duplicate set of her clothing, indicating he may have personally tormented Karla, considering she acts dismissive of you the first time she chats because she initiallly thinks you’re one of the jailers. Her sorrowful backstory, combined with the fact she has connections to the Abyss, is why she’s able to teach dark sorcery; pyromancy; and miracles without going insane since she already suffered a tragic past.
- Expy: Of Yuria from Demon's Souls, in appearance (physical and clothing); mannerisms; voice (both share the same voice actress); and in that you have to go out of your way to rescue her from the enemy. They also use sorceries that are influenced by emotions and are hinted to have suffered greatly before meeting the player.
- Heel–Face Turn: As a Child of Dark, she is actually a shard of Manus, Father of the Abyss, the final boss of the Artorias of the Abyss DLC. But in-game she is one of the nicest NPCs once you help her escape the dungeon she was locked in for an unknown amount of time.
- Humanoid Abomination: Her ashes and dialogue reveal that she is a Child of Dark, like Nashandra, Elana, Nadalia and Alsanna. Like Alsanna, she is not evil and teaches the Ashen One sorceries and pyromancies rooted in the Abyss, plus dark miracles used by the Sable Church of Londor and the Cathedral of the Deep (albeit reluctantly).
- Hidden Depths: Can read Braille with some difficulty, despite not being stated as blind, implying she learned it as a secondary language.
- Hot Witch: She's quite attractive despite her tattered clothes and long imprisonment.
- Irony: Despite the fact she is a sorceress, all the tomes you bring her have nothing to do with sorcery, instead teaching pyromancy and miracles instead.
- Omnidisciplinary Scientist: A magical version. Most magic-users in Dark Souls specialize in Miracles, Sorcery, or Pyromancy, but Karla is knowledgeable and skilled with all three. She describes herself as a sorceror, but she'll interpret certain Pyromancy and Miracles for you if you bring them to her (although she really doesn't like Miracles, she'll still interpret them with some prodding). She even lampshades this, joking that you only bring her pyromancies and not any actual sorcery once you bring her two pyromancy tomes (Quelana’s and the Grave Warden’s tomes). Justified, as she is a Child of Dark, a shard of Manus who was known as the "Father of the Abyss", a being of great power whose influence is felt in several dark abilities used throughout the ages. Also justified in that Dark spells scale off both Intelligence and Faith, so anyone specializing in them would have the stats needed to be competent with all types of magic.
- The Pig-Pen: She's been imprisoned for so long that her clothes are stained and reeking with all sorts of filth.
- Power of the Void: As a Child of Dark, she teaches Abyss sorceries and pyromancies. Even dark, abyss-related miracles can be taught by her without issue, albeit she hates miracles regardless of their nature.
- Robe and Wizard Hat: She wears a tattered robe and peaked hat with a broad brim.
- Troll: From Software knew that Karla’s set was going to be popular amongst the fan base, both for its high magic/elemental defense that weighs little as well as the “Fashion Souls” appeal it has for female witch cosplaying. As a result, the description of the outfit reminds the player they’re filthy because Karla has been locked up in a dungeon cell for a long time, therefore only someone who is mad would ever consider wearing it.
- Tsundere: She often teases you by calling you a "bumbling apprentice", as seen in her page quote, but asks for you to stay safe and enjoys talking to you whenever you visit her.
Other
A woman whose writings inspired the faith of the angels followed by the Winged Knights. She was said to be a child of Lothric's queen, and was imprisoned within the Grand Archives.
- Ambiguous Situation: There is a corpse in her cell, but the door is open, and three winged knights are just outside, so it's uncertain if she died in imprisonment, or if she escaped.
- The Determinator: No matter what it led to, the fact that a blind, mute girl managed to record tales powerful enough to become miracles is pretty impressive.
- The Ghost: She isn't encountered in person, but the faith she inspired is critical to the state of Lothric when the Ashen One reaches it.
- The Heretic: The angelic faith Gertrude inspired was deemed heretical by the Three Pillars of Lothric, resulting in her imprisonment.
- Jeanne d'Archétype: She inspired a religious movement after experiencing a vision of the angels, with the Winged Knights following her, was imprisoned by her enemies as a heretic, and it seems died while imprisoned.
- Small Role, Big Impact: Gertrude makes no confirmed appearance in game, and is only mentiond a few item descriptions. Her simply existing however caused an Enemy Civil War within Lothric so intense that it prevented Lothric from being able to do more about the state of the world. In effect, her role allowed the Ashen One to have a chance at getting to the Twin Princes.
- The Voiceless: According to the Divine Pillars of Light miracle, she was mute, possibly as a result of her vision of the angels.
- Winged Humanoid: It's possible that she was one, as what is presumably her body in the cage in the Grand Archives is surrounded by feathers.