A list of characters who appear in The Binding of Isaac: Antibirth.
Characters introduced in Rebirth and the orignal Vanilla game go on its own page.
open/close all folders
Antibirth New Playable Characters
Bethany

Debut: Antibirth
Named after the village that was home to Lazarus, Bethany is unlocked by having any combination of 12 soul, black, or immortal hearts during a run. She starts with the Book Of Virtues, which summons Wisp familiars that shoot alongside her and block shots, but can be destroyed. Uniquely, she cannot use soul, black, or immortal hearts, instead adding them to a consumable counter when picked up. She can spend these hearts to use her active item if it isn't charged.- Aerith and Bob: The only playable character with a name taken from a town instead of a character.
- Girlish Pigtails: She sports a pair tied up with blue ribbons.
- Magikarp Power: Bethany's inability to pick up soul hearts means that one would have less health over all, and needs to avoid taking damage period to have a good chance at getting an Angel/Devil room for the floor, to say nothing of the fancy dodging required to build up flames with Book of Virtues. However, the soul hearts function to get much more use out of her starting item, and with enough cleared rooms and/or soul hearts picked up, she could have a huge multi-layered tornado of flames that each fires a spectral shot on its own.
- Mechanically Unusual Fighter: As stated above, Bethany uses heart pick-ups to increase the counter to recharge space bar items. This lets her use space bar items more often at the cost of being more dependent on health increasing items and pick-ups. Any item that remove all of her hearts will kill her; for example Abaddon remove all of her red hearts and add the Black Hearts to the counter.
- Nonstandard Character Design: Bethany is the only playable character with a pair of eyelashes.
- Secret Art: Bethany is the only character capable of spawning white and black flames with Book of Virtues, by consuming Immortal and black hearts from her counter. Black flames can inflict fear with their shots, while white flames can regenerate themselves and other flames and their shots can block enemy tears.
Jacob & Esau

Jacob

Esau
Debut: Antibirth
A pair of brothers that are unlocked by defeating The Witness for the first time. Both brothers are controlled simultaneously, but they have separate items, trinkets, and health bars with Jacob having more health and Esau having more damage. If Jacob or Esau dies, the run is over. They are named after the twin sons of Isaac.- Always Identical Twins: Played with. Jacob looks like a normal person while Esau has dark red skin, but both have the same hair style.
- Anti-Frustration Features: Since they automatically use any cards and pills they pick up, picking up a red card would run the risk of that card being Suicide King. Thankfully, the developers realized this and made it so that Suicide King never spawns in a Jacob & Esau run.
- Amazing Technicolor Population: Esau is a dark red because the Biblical Esau was described as "red all over" when he was born.
- Born Unlucky: Esau starts with negative luck.
- Can't Live Without You: If one of the brothers dies, both die, so neglecting one of them to make the other stronger is out of the question.
- Damn You, Muscle Memory!: The twins automatically use any pick-ups as Esau's "use item" button is "Q", the standard use pick-up item button.
- The Dividual: Both Jacob and Esau are controlled by the player and if one dies both die.
- Mechanically Unusual Class: The player is in control of two characters at once, and needs to manage their health and who gets what items. At first it's essentially like having double firepower, but it starts to get funky once the brothers have different movement speeds, tear effects, or even things like flight. They also have a unique UI to accommodate them, with Esau's health, active item, and trinket all in the bottom corner that normally shows your pill/card/rune.
- Single-Minded Twins: Literally. Both brothers are controlled by one player, and move and shoot at the same time. You can however control Jacob independently by holding the item swap button, which is useful for positioning them for grabbing items or placing bombs.
- Tears of Blood: Esau has these standard.
Monsters
Flies
Flies
Willo
- Will-o'-the-Wisp: What they're based on, fitting with Downpour's ghost theme.
- Wreathed in Flames: Willos are flies on fire.
Fly Bomb
- Action Bomb: Fly Bombs are literally just bombs with wings.
- Easter Egg: Using Remote Detonator will instantly detonate all Fly Bombs in the room.
Ink/Mama Fly
Dragonfly/Sick Boom Fly
- Action Bomb: Just like the other Boom Fly varieties.
- Deadly Gas: Sick Boom Flies release a cloud of poison gas on death.
- Playing with Fire: On death, Dragonflies will release waves of fire in 4 directions. The directions they hit depends on the Dragonfly's appearance: if their eyes are normal, the fire goes in the cardinal directions, and if they have "x" eyes, the fire will be launched diagonally.
Humanoid
Humanoid
Blurb/Tidal Gaper/Strifer/Rotten Gaper/Twitchy
- Composite Character: Twitchy alternates between acting like a Gaper and acting like a Trite.
- Inescapable Ambush: Tidal Gapers start out submerged. They pop out once every other enemy has been cleared, forcing you to kill them before you can leave.
- Zombie Puke Attack: Blurbs start with a mouth full of water, which they spit at Isaac before becoming effectively a normal Gaper.
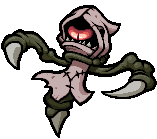
Wraith
- Invisible Monsters: Wraiths are invisible, but (somehow) still leave reflections that can be used to track them.
- Lightning Reveal: They're also revealed by the periodic flashes of lightning in the Downpour.
Danny/Coal Boy
- Dishing Out Dirt: They spit out rocks, which can also be Rock/Coal Spiders.
Faceless/Fanatic
- Losing Your Head: They look like human enough, except they're missing the upper half of their head.
- Unique Enemy: Fanatics only appear in the Heretic's boss fight, and nowhere else.
Sub Horf
- Counter-Attack: They will spin and fire tears as they take damage.
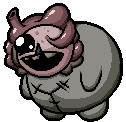
Dumpling/Skinling/Scab
- Gasshole: They attack by farting, although the Dumpling's farts only inflict knockback and don't damage you. Skinlings and Scabs upgrade to Fartillery due to their fart attacks actually being dangerous on their own.
- Pushy Mooks: Dumplings can only harm you by tossing you into floor hazards or other enemies.
- Shout-Out: Taken from Edmund McMillen's earlier games.
- Toilet Humor: They're basically floating butts that move around by farting.
Revenant
- Breath Weapon: They attack by breathing a stream of purple fire toward Isaac.
- Dem Bones: They're Elite Mook Bonies.
Bubbles/Quakey/Big Bony/Barfy/Vessel
- Action Bomb: Bubbles bursts into a fountain of tears on death, but it's easy enough to avoid as long as you don't run directly into it.
- Counter-Attack: Bubbles spits tears on taking damage, while Vessel spawns Small Maggots.
- Dead Weight: Barfy and Vessel, being zombie Fatties.
- Dem Bones: Big Bony is a skeletal Fatty. Turns out they're big-boned after all.
Prey/Mullighoul/Bouncer/Blaster
- Achilles' Heel: Blasters take massively reduced damage, but are instantly killed by explosives.
- Action Bomb: Bouncers explode into multiple bullets on death. The salvo is a lot smaller if you manage to kill them before they inflate.
- Body Horror: As Mulligan varieties, this is a given for most of them. Of special note is the Bouncer, whose entire head is little more than a giant tumor that can inflate.
- Mook Maker: Prey spawns Small Leechers, Mullighouls summon Willos, and Blasters lob Fly Bombs.
Mole
- By the Lights of Their Eyes: They still have visible eyes in Curse of Darkness or the blackout rooms in the Mines.
- Call a Smeerp a "Rabbit": They don't really look like moles, rather they're little humanoids.
- Whack-a-Monster: They pop up around the room, fire at you, then duck underground again.
- Wormsign: They leave one of these while travelling underground.
Cursed Globin/Cohort
- Asteroids Monster:
- Cursed Globins collapse into two piles of goo when killed, and each is capable of reforming into a new Cursed Globin. Thankfully, they can only duplicate a limited number of times.
- Cohorts split into several piles of Globin goo on death, which will naturally become Globins if not killed quickly enough.
- Enemy Summoner: One of the Cohort's attacks summons a goo-form Globin.
Black Knight/Loose Knight/Empty Knight/Pon
- Attack Its Weak Point: As with the other Knight variants, you damage these guys by attacking their exposed brains. The catch with the Empty Knight + Pon is that the brain is now hopping around outside the Knight.
- Attack Reflector: In addition to being immune to damage, the Black Knight's front end deflects tears.
- Composite Character: Loose Knight combines the normal Knight enemies and a Mask + Heart.
- Detachment Combat: Killing a Loose Knight causes it to split into an Empty Knight and a Pon.
Vis Versa/Evis
- Combat Tentacles: Instead of shooting a laser, Evises latch a tentacle on to Isaac. It doesn't deal damage, but slowly drags Isaac towards them.
- Eyes Do Not Belong There: Vis Versa has an eyeball inside the hole in its stomach (which itself is upgraded to a Belly Mouth). It's used to fire a homing Brimstone beam.
- Punny Name: Both are variants of the Vis enemy, playing off "vice versa" and "evil".
- Vagina Dentata: Are the normal Vis not Freudian enough for you? Vis Versa's hole is filled with teeth.
Swapper/Unborn
- Fetus Terrible: Unborn is even smaller than other Baby variants.
- Swap Teleportation: If a Swapper hits you, you trade positions with it.
Bishop
- Mook Medic: They can only protect other enemies, and have no offensive abilities.
- Shoot the Medic First: Unless you focus down the Bishop first, you won't have much luck trying to damage enemies in the room.
Necromancer/Exorcist
- Enemy Summoner: Both of them attack by summoning other enemies until killed. Necromancers resummon dead enemies (or Bonies if nothing died yet) while Exorcists summon ghosts.
- In the Hood: Their heads are pulled back in a way where the loose skin resembles a hood.
- Skull for a Head: In the most nightmarish way possible. Necromancers have peeled their face back while Exorcists and pulled their entire head skin down, revealing their skulls.
Screamer
- Don't Wake the Sleeper: Screamers start out passively wandering around the room. Getting too close to one causes it to wake up, paralyzing you and causing it to run at you.
- Make Me Wanna Shout: They wake up with a scream that inflicts paralysis.
- Shout-Out: They're based on ReDead.
Whipper/Snapper/Lunatic
- Attack Reflector: The Whipper and Lunatic's attacks can deflect tears.
- The Berserker: As its name suggests, the Lunatic attacks by charging at you while flailing wildly.
- Combat Tentacles: They attack by lashing out with fleshy whips.
Worms and Grubs
Worms and Grubs
Small Leech/Small Maggot
- Aquatic Mook: Small Leeches only appear in the Downpour, and because the floor is covered in water, they can swim across gaps.
- The Goomba: Small Maggots crawl around very slowly and aimlessly, and pose very little threat. Unusually, these only start appearing in the Corpse, the final alternate floor.
Adult Leech
Fireworm
Corpse Eater/Carrion Rider
- Cannibalism Superpower: Corpse Eaters can eat other enemies that cross their path, gaining a speed boost in the process.
- Mounted Combat: Carrion Rider is a Bony mounted on a Corpse Eater, which can still fling bones at you.
Spiders
Spiders
Strider
- Walk on Water: Striders are well, water striders. They behave exactly the same as regular spiders, but they can cross over gaps on the Downpour since they're filled with water anyway.
Rock Spider/Tinted Rock Spider/Coal Spider
- Kaizo Trap: Coal Spiders leave hot coals where they die, which can still hurt Isaac for a bit.
- Piñata Enemy: Like regular Tinted Rocks, Tinted Rock Spiders drop Soul Hearts on death.
- Scrappy Mechanic: Tinted Rock Spiders spawn when you blow up a tinted rock on the Mines, replacing any Soul Hearts you would've gotten.
Soi Creep
- More Dakka: They fire a continuous stream of shots, similar to the effect of Soy Milk.
- Wall Crawl: As a Wall Creep variant.
Fissure
Other
Hardy
- Rule of Three: Hardies can only use their charge attack three times; after the third time, they automatically crumble.
- Talking Poo: Well, it doesn't talk, but it's still a living coprolite.
Grilled Clotty
- Balance Buff: They're one for the Clotty, giving them a powered-up fiery form and by extension making them immune to fire damage.
- Infernal Retaliation: They're formed when a Clotty catches fire, causing it to move and shoot much faster.
Floating Host/Hard Host
- Dishing Out Dirt: Hard Hosts attack by releasing rock waves.
Cyst
Spikeball
- Invincible Minor Minion: They're more of an obstacle than an enemy, as they can't be killed and don't become inactive when the room is cleared.
Bomb Grimace/Quake Grimace
- Earthquake Machine: The Quake Grimace releases rock waves in front of it.
- Helpful Mook: Bomb Grimaces don't really count as enemies at all, as their only function is to give you bombs that can be picked up and thrown.
- Invincible Minor Minion: They can't be damaged, and don't deactivate under any conditions.
Pustule
Blind Bat/Echo Bat
- Actually Four Mooks: Blind Bats are seen hanging from the roof by themselves, but once they're awakened, four of them drop down at once.
- Interface Screw: The Echo Bat can scramble your movement controls, which can be bad news when you're busy dodging three other enemies.
Stillborn
- Invincible Minor Minion: Can't be damaged, but will die if all other enemies are killed.
- Kaizo Trap: When they die after clearing the room, they also explode. Fortunately, there's a long enough delay before the explosion that you should be able to get away.
- Taken for Granite: Stillborns are composed largely of stone. They're inspired by the phenomenon lithopedion, which is where a fetus dies in the womb and becomes calcified.
Smoky
- Invincible Minor Minion: As a Death's Head variant, they only die when the room is cleared.
- Supernatural Fear Inducer: They're surrounded in a purple aura that inflicts Fear, although it works differently than normal Fear, preventing Isaac from shooting rather than making him run away.
Nightwatch
- Enemy Summoner: Nightwatches appear in darkened rooms and hold lanterns; if they catch you in the lantern's beam, they'll lock the doors and disappear while leaving enemies in their place.
- Invincible Minor Minion: Nightwatch is invulnerable, but can be ignored as long as you stay out of their line of sight.
Polty/Candler
- Artificial Brilliance: Polties tend to make a beeline for any explosives in the room to try and get in as much damage on you as possible. And if you're expecting them to crack open a Tinted Rock for you, forget about it; the Polty will throw everything else in the room, then grab the Tinted Rock and run away with it.
- Improvised Weapon: Rocks, TNT, buckets, poop… if it's an obstacle that can be picked up, Polties will use it as a weapon.
- Playing with Fire: Candlers periodically create damaging flames in their wake.
- Poltergeist: If the name didn't make it obvious, Ploties are ghosts that pick things up and throw them at you.
Coil
- Invincible Minor Minion: Coils can't be killed normally, and will respawn if destroyed with a Chaos Card. Note that they will cause contact damage even if the room is cleared.
- Shock and Awe: They radiate electric beams that attach to enemies in the room. A number of rooms have these in combination with Wall Huggers and Sliders, leading to a lot of dodging with not much else you can do about it.
Gyro/Grilled Gyro
- Infernal Retaliation: Gyros will turn into Grilled Gyros on contact with fire, becoming faster and tougher.
- Our Monsters Are Weird: Even by the standards of this game, a wheel of meat that rolls around while attached to a bone is pretty out there.
Gasbag
- Deadly Gas: Release a cloud of poison gas around themselves that lingers for a few seconds after they're killed.
Bosses
Normal Levels/Shared
Baby Plum

- Bullet Hell: Very mild compared to most examples in the game, but it shoots a lot of projectiles for a boss you can fight on the first floor.
- King Mook: Of various flies, most notably the Level 2 Flies.
- Mascot Mook: Baby Plum is the mascot of the mod. Ironically, it is the only new boss that does not appear on any Antibirth floornote .
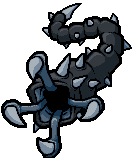
Reap Creep

- All Your Powers Combined: Reap Creep combines the abilities of all three varieties of Wall Creep in the vanilla game and turns them up to eleven.
- Beam Spam: Its third phase can fire a spray of four sweeping Brimstone beams.
- Giant Spider: It's a giant Wall Creep around the size of Widow.
- King Mook: Of the wall creeps.
- Mook Maker: Spawns a lot of creeps to harass the player. It can also shake spiders loose from the ceiling.
- Sequential Boss: Has three phases, each imitating a different Wall Creep, all with different attacks. Its first phase primarily fires long chains of bullets aimed at the player, its second phase shoots wide spreads, and its third phase attacks with Brimstone lasers.
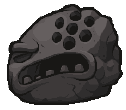
The Pile

- Back from the Dead: It's an undead version of Polycephalus and The Stain.
- Ballistic Bone: It can launch sprays of bone projectiles.
- Dem Bones: A fully skeletal version of Polycephalus.
- Fast Tunnelling: One of its attacks is to duck underground then instantly pop up behind you.
- "Get Back Here!" Boss: Like always, it pops up to attack and pulls away to hide.
Downpour
Wormwood
- Boss Arena Urgency: It can punch holes in the floor with its tail. Given the way pits work in this game, this won't kill you, but it does make it more difficult to dodge Wormwood's attacks and gives it more places to ambush you from.
- Deadly Lunge: Gains a very fast one when it's at low health.
- King Mook: To the leech enemies found throughout the game, but especially the Small Leeches in the Downpour.
- Making a Splash: Its projectiles appear to be water, as opposed to the standard blood projectiles.
- Meaningful Name: Named after the biblical Wormwood
 , a star which will fall and turn a third of Earth's waters bitter and deadly.
 - Turns Red: It becomes much more aggressive and will start making holes in the ground at low health.
Beelzeblub

- Flunky Boss: Just like the original Duke of Flies, but with small leeches instead of flies.
- Punny Name: "Beelzebub" + "blub", an onomatopoeia for bubbling water.
- Underground Monkey: A drowned, but still animate, version of the Duke of Flies.
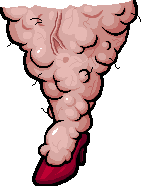
The Rainmaker

- Battle in the Rain: The battle against him is accompanied by a constant downpour that stops when he's defeated.
- Dance Battler: His movements in battle borrow heavily from the flamenco.
- Making a Splash: Rainmaker's attacks all have him levitating balls of water to hurl at the player.
- Our Ghosts Are Different: This ghost has water-based powers and dances the flamenco.
- Something about a Rose: He carries a rose in his mouth in the Versus Character Splash. In the fight itself, it's mostly absent except when he pulls it out after one of his attacks.
The Haunt

Debut: Rebirth
- Bedsheet Ghost: What's underneath its sheet is quite a bit scarier, however.
- Energy Weapon: In his second phase, he'll fire Brimstone downwards as he strafes along the top of the screen.
- Flying Face: That rips itself open to reveal a skull when its minions are dealt with.
- Flunky Boss: He is surrounded by three Lil Haunts which attack before he does. First one attacks, then the other two do. He's invulnerable until they're dead and he moves to the top of the room. His black Champion version spawns spiders instead of shooting Brimstone.
- Heel–Face Turn: The Lil' Haunt item gives you a friendly Lil' Haunt who chases your enemies.
- Intangibility: Until his minions are dead.
- King Mook: To the Lil' Haunts.
- No Fair Cheating: He normally paces from side to side along the top edge of the screen, shooting downwards. If you try to move to the top where he can't shoot you, he'll immediately charge at you to cause damage. Which hurts like crazy. Of course, if you're fast enough you can dodge it and still hurt the boss before it loops back.
- Our Ghosts Are Different: This one has a skeleton. Which he'll gladly show to you.
- The Pawns Go First: Sends his Lil' Haunt minions to attack you while he himself remains intangible. When they go down, then he fights you.
Mines
Tuff Twins
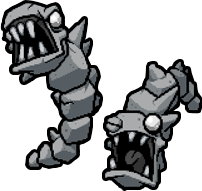
- Boss-Arena Idiocy: The Tuff Twins start out covered in a rock shell that makes them impervious to attack and must be broken with explosions. Their boss room always happens to contain a number of Bomb Grimaces that provide free bombs to chuck at them, and occasionally a couple of TNT barrels as well.
- Flunky Boss: They spawn Inks (which release four bullets in the diagonal directions on death along with a puddle of slowing creep) to harass the player throughout the fight. If their head is exposed, they switch to Suckers instead.
- Shed Armor, Gain Speed: They become faster as you blow up their stone armor.
Great Gideon
- Added Alliterative Appeal: Great Gideon. As a bonus Easter Egg, in the codes, the crawlspace under him is called: "Gideon's Grave". A nod to the Scott Pilgrim comic book series.
- All Your Powers Combined: Combines the abilities of all Grimace varieties in Rebirth and the new Quake Grimace in Antibirth.
- Easter Egg: Throwing a Chaos Card at him will instantly kill him, as well as open a hidden crawl space that holds several items and chests.
- Fire-Breathing Weapon: One of Gideon's attacks has it spewing fiery bullets down the middle of the room, which will leave lingering fires on the ground. It also exploits this by summoning a number of enemies that become more powerful when lit on fire.
- Flunky Boss: Summons six waves of enemies to attack you in addition to shooting at you himself. Defeating all of the minions ends the fight.
- King Mook: To the Grimaces.
- Nigh-Invulnerable: Like the enemies he's based on, Great Gideon is immune to everything that's not a Chaos Card, and you defeat him (without actually killing him) by killing all of the other monsters in the room.
- Vacuum Mouth: One of his attacks, taken from the Gaping Maw enemy. Only he'll also suck in rocks from the walls which you have to dodge.
Hornfel

- Mad Bomber: His main modus operandi is to ride around on his minecart, chucking various bombs at you.
- Minecart Madness: Inverted. He's the one on the minecart, but you're still the one doing the dodging.
- Scooby-Dooby Doors: His boss room is lined with them, and Hornfel can emerge from any one at any time. Of course, the player can't use them.
- Screw This, I'm Outta Here: Depleting Hornfel's health destroys his minecart, at which point Hornfel will run for the nearest door. This makes Hornfel the only boss that can be defeated non-lethally, but you do get a few bomb pickups or even a bomb-based item if you can kill him before he escapes.
- Shout-Out: The Brimstone bombs he uses are visually based on the grenades launched by the Iron Bomber, an unlockable weapon in Team Fortress 2 which was originally designed and submitted to the Steam Workshop by Kilburn (one of the mod's creators).
- Super Spit: His main non-bomb attack has him continually speeding up on his minecart, only to end up going so fast that he gets sick and projectile vomits in your general direction. The puke, of course, explodes.
- Trick Bomb: Hornfel's bombs use several different modifiers: he can throw Hot Bombs which leave damaging fire behind, Rock Bombs which send rock waves in the cardinal directions, and a unique Brimstone bomb that explodes into a four-way Brimstone laser.
Mausoleum
The Heretic

- In the Hood: He traded his ectoplasm skin for a black cloak.
- Kaizo Trap: After it dies, the fire in its eye falls to the ground and erupts into a four-way burst, possibly damaging you if you're not paying attention.
- Non-Human Undead: It's an undead ghost. Try to wrap your head around that.
- Our Ghosts Are Different: And apparently more undead.
- The Pawns Go First: Just like the Haunt, the Heretic will send its minions after you first and only start fighting once they're all dead.
- Reflecting Laser: His boss room always comes with a number of extinguished fireplaces. One of his attacks lights them up, then fires a Brimstone beam that chains between them.
- Ungrateful Bastard: It gets revived by cultists, and it thanks them by turning them into Mooks to send after you.
The Visage

- Attack Its Weak Point: Initially, it's the chain holding the two together; afterwards, the heart itself becomes the weak point, and the mask can be incapacitated by attacking it from behind.
- Cat-and-Mouse Boss: As with Mask of Infamy, the heart flees while the mask tries to run you down. The difference is that the heart is fully capable of fighting back, and the mask doesn't like to stay dead.
- Dual Boss: As opposed to the original Mask of Infamy which is taken down one part at a time, both parts of The Visage attack simultaneously, and even come with a number of Combination Attacks.
- Grappling-Hook Pistol: The Visage's heart can use chains to pull itself to nearby surfaces. Note that this includes the mask and Isaac.
- Turns Red: Twice. Once when the chain is destroyed and gives the two parts of the Visage free movement, and a second time when the heart's health drops low and it changes its attack patterns.
- Variable-Length Chain: The chain binding the heart and mask together in the initial phase, particularly noticeable when the mask charges and stretches the chain to around twice its usual length. During the second phase, the heart uses one in a number of its attacks.
The Siren

- Beat the Curse Out of Him: If she steals one of your familiars, you can get it back by shooting it.
- Bullet Hell: Like a number of other bosses, The Siren can unleash a dense array of bullets in all directions. Her shots actually curve in the air, making them harder to dodge.
- Charm Person: Can steal your familiars with her voice and turn them against you.
- Expy: Of, oddly enough, the Gorgun from Enter the Gungeon, having several similar attacks and a similar appearance.
- Magic Music: Her singing can lure your familiars over to her side.
- Not Quite Dead: If she steals an extra life familiar like Dead Cat or 1up, she'll use it to bring herself back with 10% health and eat the extra life in the process. You'll want to make sure you get those familiars back before killing her.
- Power Parasite: Effectively copies the abilities of your familiars by charming them. Things can get very messy if she steals something like Dry Baby or Dead Cat.
- Stripped to the Bone: The Siren is rapidly reduced to an inert skeleton upon death. Destroying her skull unlocks a trinket.
Mausoleum Mom
- Attack of the 50-Foot Whatever: Her boss fight.
- Ax-Crazy: Her goal is to kill her own son, and she doesn't sound too upset about it during the fight, what with the laughing and all.
- Battle Theme Music: Matricide, as with normal Mom.
- Body Horror: The way Mom's body parts move throughout the fight (such as both eyes appearing on opposite sides of the room while she tries to stomp on you) suggest an ability to contort herself in rather… impossible ways.
- Boss Banter: ISAAAAAC!
- Death by Irony: Crushed by her own Bible!
- Disc-One Final Boss: Demoted to this on your second playthrough and beyond. She's still a Disc One boss in the alternate path, but in terms of floor number, she's faced much closer to the path's final boss than the main path's end.
- Evil Is Visceral: Likely the reason her body parts are detailed and somewhat deformed.
- Evil Laugh: She lets out one every time she successfully damages Isaac.
- Eye Beams: Mausoleum Mom gains the ability to fire Brimstone beams from her eye.
- The Faceless: Her entire face is never shown at any point in the main game (the intro and epilogue don't count, as they're Isaac's cartoon drawings). This is subverted after you beat the Chest in WOTL or Rebirth, but only briefly. In photographs, to be precise.
- Fan Disservice: When Isaac uses the Mom's Bra item, a picture of his mother's shirtless torso flashes on the screen. A very unflattering picture of his mother's less-than-fit shirtless torso.
- Fat Bastard: As shown by her giant leg and the picture that shows up when using Mom's Bra.
- Final Boss: In your first playthrough. She's nowhere near the True Final Boss, though.
- Flunky Boss: She'll summon groups of random enemies to battle Isaac.
- Gameplay and Story Integration: Using the Bible instantly defeats her in her boss fight.
- Giant Foot of Stomping: Her main method of direct attack.
- Gonk: Same deal as normal Mom.
- Gross-Up Close-Up: One of her leg in the boss portrait, and one of her body in the picture that appears when using Mom's Bra.
- Humanoid Abomination: Most of what she does in-game and in a few cutscenes blatantly disregards normal body movements if not physics. She can step on her own eye, generally alter size, and her arm can fit in a chest inside her heart inside her womb.
- Mook Maker: And these mooks are a lot harder than last time!
- Mother of a Thousand Young: If you go by the theory that the majority of the enemies are her former children.
- Say My Name: ISAAC!
- Skippable Boss: Provided you have the Bible on you by the time you reach her, and it's fully charged.
- Tactical Suicide Boss: It's not actually mandatory, but making her stomp herself is possible, and deals lots of damage.
- Trick Boss: Defeating her while holding the Knife Pieces throws you into a fight against Mom's Heart immediately afterwards.
- Your Size May Vary: Just how big is she? In the cutscenes, she's a normal-sized human being, but her underwear is the right size to be worn by a child visibly smaller than her, in the boss fight her leg is the length of the screen, and then her womb is big enough to have two entire levels in it, with her heart being larger than Isaac.
Mausoleum Mom's Heart

- Battle Theme Music: The mod gives Mom's Heart the new battle theme Gloria Filio, a slower but no less triumphant and dramatic rock theme with an audible heartbeat keeping time. "Gloria filio" roughly translates from Latin as "glory to the son", representing Isaac overcoming his abusive mother and killing her, as seen in the Corpse ending.
- Boss Rush: Can be fought right after Mausoleum Mom if you enter the Mom fight with all three Knife Pieces.
- Bullet Hell: Just like regular Mom's Heart, only its bullet patterns are much flashier and more complex, travelling in zig-zagging paths or spiraling through the air. They also follow the rhythm of the heart's beating, meaning they will zigzag faster as the heart loses health.
- Climax Boss: Mausoleum Mom's Heart is an alternate path run's point of no return, and the point where the mod's atmosphere really takes a turn for the worse. Once it's defeated, you're locked into the Corpse.
- Degraded Boss: Mom's Heart normally appears at the end of the Womb, but shows up two chapters early here as its regular place is taken by the Witness.
- Mook Maker: Like regular Mom's Heart, it will spawn enemies in between Bullet Hell salvos, except its spawns are all Antibirth monsters like Gyros and Loose Knights.
- Palette Swap: It can summon Blurbs colored in a more natural skin tone, whose water bullet spray is also reskinned into blood.
Corpse
The Scourge
- Bullet Hell: Particularly notable is that one of its attacks has it sucking in bullets from the walls of the room.
- Combat Tentacles: Has two of these tipped with sharp blades that it uses to lash out at you or confine you to a certain part of the room.
- Faceless Eye: Its "head" consists of a single eye and nothing else.
- King Mook: To the Whipper enemies encountered in Mausoleum.
Rotgut

- All There in the Manual: The maggot fought in the second phase is named "Gus" according to the Antibirth devs.
- Body Horror: It's some sort of gaping mouth with a giant maggot and rotten heart inside. Not something that should be inside anyone's body.
- Nested Mouths: A smaller brown-yellow mouth inside the original, which pops up to spew out shots.
- Sequential Boss: Has three separate phases. First it's a fight with its maw. Once that's defeated, it eats you and you kill a maggot in its gut. Then you kill it by destroying its heart.
- Stationary Boss: In all three phases.
- Swallowed Whole: After defeating the first phase, it sucks you in with its Vacuum Mouth and you have to kill a giant maggot and Rotgut's heart.
- Unexpected Gameplay Change: The second and third phases use Crawl Space physics and controls, turning the game into a 2-D platforming shooter.
Chimera
- Confusion Fu: Chimera has perhaps the widest range of attacks of any non-final boss in the game, which changes up in its second phase; as such, it can be a very unpredictable opponent.
- Dual Boss: In the second phase.
- Fastball Special: In its first phase, it can throw Sick Boom Flies at the player. In the second phase, it throws its own head.
- Losing Your Head: Chimera's head detaches when it takes enough damage, turning it into a Dual Boss.
- Mix-and-Match Critters: It's The Cage with Gurdy Jr. for a head.
- Sequential Boss: Once Chimera is at about 50%, it splits into both the head and body and gains totally different attacks.
The Witness

- Attack of the 50-Foot Whatever: The biggest boss in the game (barring perhaps Mega Satan, or Mom counting the unseen rest of her body), taking up the entire top wall of a 2x2 room.
- Back from the Dead: It's the rotting corpse of Mama Gurdy, grey from time.
- Battle Theme Music: Memento Mori, a chilling and oppressive rock theme with heavy synthesizer, bass, and a droning organ accompaniment. "Memento mori" means, of course, "remember that you will die", as if the Witness is already lording its inevitable victory over you.
- BFS: One of its attacks has it pulling out and throwing a gigantic knife.
- Body Horror: Oh yes. Not only is it a decayed version of a boss that's already pretty far in Body Horror territory, but when its head detaches, it exposes two more skulls where its shoulders would be.
- Bullet Hell: As expected of a Binding of Isaac endboss, but The Witness takes this to a whole new level that would only be rivaled by Hush.
- Evil Overlooker: Its boss portrait has the Witness looming over Isaac in this fashion, instead of the "facing Isaac from the side" view of every single other boss.
- Female Monster Surprise: Repentance reveals her to not only be female, but a grotesque, undead form of Mom. Of course, the Antibirth version was already female, given that it's based on Mama Gurdy.
- Final Boss: Of the Antibirth content.
- Interface Screw: A minor example. The Witness's fight takes place in a quadruple-size room that is zoomed out so that the entire room is visible.
- Marathon Boss: Downplayed. While the fight against it is still longer than a normal fight, it lacks the scaling damage resistance that the canon final bosses have, meaning that it's a relative Glass Cannon.
- Taken for Granite: After you finally kill it, it hardens over into stone.
- Turns Red: After you deplete its health bar once, its arms explode, and its head bursts out out of its body to keep attacking.
- Two-Faced: Half of its face has rotted down to the skull.