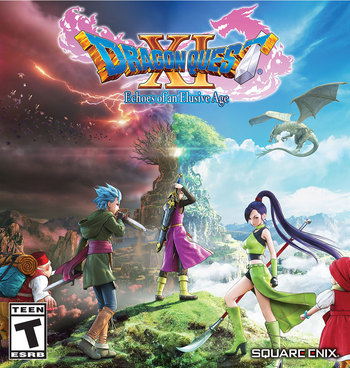
Dragon Quest XI: Echoes of an Elusive Age is the eleventh mainline installment of the Dragon Quest series. It was released in Japan on July 29, 2017 for the PlayStation 4 and Nintendo 3DS, with an international release on PS4 and PC on September 4, 2018.
A Nintendo Switch version was announced for a worldwide release, but was delayed due to technical issues and not released until September 27, 2019 as Dragon Quest XI S: Echoes of an Elusive Age Definitive Edition, which includes extra features such as Japanese voice acting, new character-specific story chapters, new sidequests, and the ability to change between polygonal and 16-bit pixel art visuals. XI S was eventually released on PS4, Xbox One and PC on December 4, 2020, marking Dragon Quest's first appearance on one of Microsoft's consoles.
Long ago, the world of Erdrea was beset by a powerful, malicious darkness. This darkness and the monsters it spawned were eventually defeated by a great hero known as the Luminary, who wielded a blade of light. For centuries, peace reigned, but 16 years ago, on the date of the birth of the Luminary's latest reincarnation, the monsters suddenly returned, burning the great kingdom of Dundrasil to the ground and slaughtering its people.
Since that fateful day, the legend of the Luminary has been split in two. One side claims that the Luminary is a force of righteousness, and will one day rise to cleanse the land once more and restore peace. The other side claims instead that the Luminary's (or "Darkspawn" as they prefer to call him) mere existence beckons the darkness to return with his light, and only by slaying him will the monsters return to whence they came. One such believer of the 'Darkspawn' version of the legend is King Carnelian, ruler of the nation of Heliodor, the most powerful nation in Erdrea (especially following the fall of Dundrasil, alongside another nation, to the monster hordes). Under his command, his forces are keeping a sharp eye on the four corners of Erdrea for the emergence of the Luminary, utilizing their otherwise friendly relations with other nations and cities to be ready to spring to action once the "Darkspawn" is located. As the years have gone by, the "Darkspawn" version of the legend has gradually overtaken the original legend, to the point that those who still believe the Luminary to be a hero are often ruthlessly oppressed and persecuted by Heliodor's forces and followers.
The story begins with a young man, freshly 16, discovering his destiny as the Luminary. Unfortunately, following the advice of his grandfather and mother (who, being from a highly provincial village in Heliodor's hinterlands, are unaware of Carnelian's obsession), he walks right into the Heliodor throne room and discloses who he is to Carnelian, with predictable results. With the unexpected help of a guileful thief, the Luminary successfully escapes from Heliodor's dungeon, and sets out on a grand journey to discover the true source of the darkness, end Carnelian's increasingly mad reign, and discover his destiny as the savior of all Erdrea.
The Luminary appears in Super Smash Bros. Ultimate as a DLC newcomer and the second character in the first Fighter's Pass, being the default skin for "Hero"note . Coming alongside the Luminary is Yggdrasil's Altar as a stage, and a downloadable outfit based on Veronica for the Mii Swordfighter. This marks the first time any Dragon Quest Hero appears in any spinoff or crossover of the series in a playable format. Characters from this game would also appear in Final Fantasy Brave Exvius as part of a crossover event, as rare summons.
Also, the spinoff Dragon Quest Treasures gives party member Erik and his sister Mia A Day in the Limelight, by telling an adventure they went on when they were younger.
Tropes associated with this game are:
- Aborted Arc: At the end of the Gondolia arc, Erik warns the Doge that Heliodor will likely seek revenge on the city for siding with the "Darkspawn". Nothing actually comes of this, though that's probably for the best, since the King doesn't punish the city for a reason.
- Accent Adaptation: In the Italian translation, everyone on the island of Lonalulu gains a very thick Sicilian dialect. On top of that, the name itself of the island is different (from Lonalulu to Porto Trinacrio) and all names of the characters in the island are changed to sound more Sicilian.
- Achievement System: The "accolade" system makes a record of various feats, such as collecting different types of items, winning battles, and completing quests. It is built within the game, functioning independently of the platform the game is played on.
- Adam Smith Hates Your Guts: With Inns, and typically done to represent how well-to-do the area is. Many locations will cut you a blank check if they like you, though. There's also a tourist trap in Downtown Heliodor, where someone offers Holy Water at a 1000% mark-up.
- After the End: The second part of the game takes place after Mordegon destroyed Yggdrasil and made the world go to the shitter.
- Alas, Poor Villain: All Miko wanted to do was to protect the village and her son, who has turned into a monster. Jasper is given sympathy as well, being manipulated into becoming evil.
- Alternate Timeline: Act 3 takes place in a new timeline, created after the hero went back in time to prevent the deaths of Veronica and countless other people (though notably this merges the previous timeline rather than erasing it or completely diverging from it, resulting in people having vague memories of what originally happened). At the true ending of the game, a genuinely separate third timeline is created and glimpsed when Serenica goes back in time herself, to save Erdwin.
- Amazing Technicolor Battlefield: The battle against the True Final Boss takes place in such an area, being set on a platform of light in an colorful space background.
- Anti-Frustration Features: XI offers a plenty of features that smooths out the gameplay.
- Gallop while riding on the horse and you'll just kick most monsters aside, provided your level is higher than theirs, although certain bigger enemies cannot be kicked aside in this fashion regardless of your level. Very useful if you want to just get from Point A to Point B.
- Added in the English release is the ability to dash on foot, greatly increasing the speed by with you explore towns and dungeons.
- In the map screen, you look up where the material spots in the field are and which item spawns where - including ones that you didn't find yet, marked as "???".
- You can swap your characters in-and-out of the party on the fly even during battles, though it does end your turn.
- For a small fee of 20 gold per skill point, you can reset all of a character's unlocked skills in one of their skill trees at any church or statue and be reimbursed with all of the points spent in that tree. While this may be primarily intended to allow players to try out different character builds or refocus their progress, due to the way some skill trees cannot be initially accessed without learning skills in another tree (such as the Luminary's Swordmastery skill tree), clever use of this system can enable some characters to learn powerful skills at a much lower level than they'd normally be able to.
- You can cast Zoom from the map screen; especially useful if you don't have the Luminary in the first spot of your party and don't want to scroll down every time to warp somewhere.
- You can cast Zoom indoors or even in dungeons without worrying about bonking your head on the ceiling. However, this is 3D mode only in the 3DS and Switch versions — if you try using it indoors in 2D mode, you hit your head as in past games.
- Several sidequests involve using specific Pep Powers. Characters can simply defend until getting Pepped Up, then swap out of the active party until they're needed again without losing Pep.
- In the Definitive Edition, you can automatically purchase buyable forging materials you're missing if you have enough money regardless of your location, though some super-rare materials cannot be purchased in this manner. You can also use the Fun-Size Forge anywhere instead of only at a campsite, and without the five minute cooldown upon loading a save that was present in previous versions.
- Loading back a saved game will present a recap of events preceding the point in time you're currently at, making it easier for those who haven't played in a while to get back on track in the story.
- While the idea of certain party members gaining levels faster than others is a
 Scrappy Mechanic, during parts when the party is separated, when those party members rejoin, they join at specified levels tailored to the point of the plot when they join. During the start of Act 3, after the Hero goes back in time and regroups with the party of the past, retaining his level but having everyone else's reset to what they were during Act 1's Arboria, eventually everyone's levels are boosted to match that of the Hero.
 - There are a few spots where you have to sneak past hostile guards to reach an objective, but getting caught only triggers a battle of speedbump difficulty (for that point in the game), and winning this battle leaves you free to continue from exactly where you were caught. By the standards of stealth games, this is very forgiving.
- Anti-Rage Quitting: In the original versions of the game, you're forced to wait five minutes after starting a play session before you can use the Fun-Size Forge; preventing easy Save Scumming. This restriction is removed in the Definitive Edition.
- Appease the Volcano God: When you return to Hotto after the destruction of Yggdrasil, the village is preparing to sacrifice one of their own to the volcano. You can learn that in previous years the sacrifices had always been of food, like grains. Miko said a human sacrifice was necessary this time but kept the reason a secret from the village. That reason is that her son, Ryu, had turned into the dragon which had been attacking the village after it was slain by them. Miko, searching for a cure for him, was willing to do anything to keep him alive.
- The Artifact: Churches still have a "Divination" service for telling you how many experience points each character needs to level up, despite that information being more conveniently available in the Attributes menu.note
- While not completely pointless, there's little reason to pay to stay at an inn like in older games when you can Zoom to a campsite and rest for free.note
- Zoom no longer causes you to bonk your head on the ceiling in dungeons, making Evac and Chimaera Wings mostly superfluous.note
- For an example between versions, the Fun-Sized Forge still appears at campsites in the Definitive Edition whenever you make camp, even though this version lets you use the Forge anywhere and anytime.
- Artificial Brilliance: One reason Dora-in-Grey is considered to be one of the more challenging bosses in the game is that her shtick revolves around crowd controlling your party members to attack one another. Sylvando, who has a Get a Hold of Yourself, Man! ability that undoes this (free of damage even) is almost always targeted.
- Artificial Stupidity: Party members that are given tactics aren't quite as smart as they were in previous games, particularly with the more complicated abilities that are new to this entry.
- Sylvando's Reheal spells are treated like healing spells to use in an emergency, rather than as buff spells that should be applied preemptively.note
- Erik's Persecutter and Victimiser skills deal extreme damage to enemies with the right status effects, but are about as strong as a regular attack otherwise. If he has either of these skills, Erik will flip between using them and one of his status-afflicting skills every other turn, regardless of whether the enemy has a status on them or not.
- Awesome, yet Impractical: Zig-zagged with the Infinity +1 Sword. You can make it be Awesome, yet Impractical or a complete aversion depending on when you obtain it. Since the postgame has no set order on what you need to do once you defeat Alt-timeline Mordegon, if you know how to accomplish it and get it "early", you will be rewarded for your efforts.
- Back-to-Back Badasses: The Hero and Hendrik join forces when defending the Last Bastion, both positioned close to each other and facing opposite directions.
- Badass Creed: The Knight's Pledge, which all knights are meant to uphold and live by;"A knight's word is his bond, his kingdom his master. He serves the weak untiringly, challenges the strong unflinchingly and never retreats in the face of adversity."
- Bait-and-Switch:
- The game opens with a flashback to the fateful night that set the plot into motion. An ominous council of old men discuss the grave implications of the Luminary being reborn into the world, and then the Luminary's kingdom of birth is destroyed by monsters, our infant hero only narrowly escaping its fate with the help of his mother and a protective older child. The obvious takeaway from this is that the shady council orchestrated the massacre, which couldn't be further from the truth. The council is a gathering of kings, all of whom are heroic characters (and one of whom is your grandfather and becomes a party member), and King Carnelian — possessed later that night by the Big Bad, the real mastermind behind the kingdom's fall — was the most fierce believer in the Luminary's righteousness, only presenting himself as sinister to give the boy's father a Secret Test of Character.
- When returning to Cobblestone after escaping Heliodor near the beginning of the game, none of the residents recognize you making it seem like their memories of you have been erased. It turns out that you're actually in the past due to the root of Yggdrasil in the middle of town, and when you return to the present, you see that the village was completely wiped out with seemingly no survivors.
- The Puff-Puff Running Gag returns and runs on this. Every instance, while it looks like the Luminary is about to receive some R-rated service, it turns out the results are... not exactly as you imagined it. Gallopolis? It was the dad who did it. Sniflheim? Makeup. Octagonia? Trumpet. Hotto and Gondolia? Possibly played straight, for once.
- The Battle Didn't Count: After the players defeat the Auroral Serpent, he'll simply comment on their strength and then brings down all of the party in one swoop in the cutscene. A Total Party Kill is narrowly avoided by the reappearance of Serena.
- Battle Discretion Shot: After the players Beat The Curse Out Of Jade and then defeat Booga, Jade kills Booga. The camera goes black and then switches to the party, who turn their eyes during the beatdown.
- Betting Mini-Game: Traditional for a Dragon Quest title, the casinos in this game offer four different gambling mini-games consisting of Traditional Slot Machines, Poker, and Roulette table, and a unique Slime Quest slot machine that plays out like a mini-RPG quest.
- Big Bad: The demon lord Mordegon is the primary threat in the main game, with his uprising inspiring the heroes to bring about his fall. Mordegon is killed at an earlier point in time in the post-game, and taking his place is the demon god Calasmos, who's the true Dark One the Luminary is destined to defeat, rather than Mordegon.
- Big Good: Queen Marina of Nautica and High Priest Benedictus are the largest and most authoritative supporters of the Luminary. After he's released from Mordegon's control, King Carnelian joins them.
- Bitch in Sheep's Clothing: Dora-in-Grey assumes the form of an innocuous little girl to lure people to her mural.
- Bittersweet Ending: The end of Act 2: The world is saved, Mordegon is defeated and Yggdrasil is restored; however, many people died, including Veronica, which leaves a rather bitter feeling. However, booting the savefile up again after the supposed end credits will allow the Luminary to defy the ending and travel back in time to prevent Mordegon's reign from ever happening and prevent Veronica's death, cue Act 3.
- Bizarre Sexual Dimorphism: The citizens of Nautica consist of female mermaids and male Fish People, no in-between. There are also various types of mermen fought as monsters. However, they look nothing like the male Fish People of Nautica and while their body structure is more similar to the mermaids (in the sense that unlike the Fish People they lack legs), they seem to have no real relationship or connection to the mermaids themselves. The male Fish People also notably lack the "mermaid's burden," being able to live on land and return to the sea with no issue (whereas if a mermaid turns her fins to legs to live on land, she will turn to seafoam and die should she ever get wet again).
- Bleak Level: The Ruins of Dundrasil. There aren’t very many enemies in the area wandering around (aside from a Green Dragon), but the site itself is depressing to walk through with all the wanton destruction, least of all the bad memories it holds for certain members of the party.
- Boring, but Practical:
- Dual Wielding makes attacking much more practical over skills, especially for Erik. Averted with bosses though, who will destroy you with ease if you do not fight smart.
- Healing spells. You will not make it far without reliable healing spells.
- Boss-Altering Consequence: The Tentacular boss is a notable difficulty spike, unless you explore the town before you fight him and acquire the cannon. This will stun him for a few turns, allowing you to take out his tentacles before he has a chance to attack, tipping the odds significantly in your favor.
- Boss in Mook Clothing:
- Fourteen monsters have palette-swapped Rarefied variants, nearly all of which present a boss-level challenge when they first appear due to having far more HP, higher damage, better abilities, and often multiple actions per turn. The Brollympian and Type G0 are particularly notable, the former for being able to render your entire team unable to attack for a turn and the latter for being a powered-up version of a Killing Machine just like in Dragon Quest X, which is already an extremely powerful monster.
- Überkilling Machines get bumped up a level in difficulty in this entry. They're restricted to a couple of dungeons; but can attack twice, reflect spells, use Rain of Pain at random, and bring one of their allies back from death with Remote Repair. If you face more than one and your levels are still low for the post-game, this may well be a Total Party Kill.
- Boss-Only Level: The Dark Star, a floating dark sphere created by Calasmos and technically the final area of the game. As soon as the party breaks through the barrier and enters it, the final battle against Calasmos begins.
- Bragging Rights Reward: Jade's Hare-Raising Suit, an Infinity+1 Armor that gives her a massive boost in Charm and the ability to auto-revive at full health no matter what, effectively rendering her immortal. Unfortunately, it's acquired from the hardest boss fight in the game and is really just an item to do a New Game Plus with as there aren't really any new challenges to use it with.
- Brainwashed and Crazy: Booga, one of Mordegon's Spectral Sentinels, captures and brainwashes Jade with the Hare-Raising Suit, forcing the party to fight her before facing him.
- Broken Bridge: Many are featured in the game, from landslides to the traditional broken bridges. Though most are there to prevent you from reaching certain areas too early. After Yggdrasil falls, most of these paths are opened to allow you to reach areas that are otherwise inaccessible without a boat.
- Brick Joke:
- Before you are given the Forging Hammer in Act 2, Faris mentions that they were going to sell it as a prize in the next race. Now that you no longer have to forge a new Sword of Light, Act 3 has its new location as the prize for winning the Easy race of the Platinum Cup.
- Have a party chat with Sylvando in L'Académie de Notre-Maitre des Médailles, and he'll note how elegant the girls look picking up mini medals, and note he should try it himself. Come Sylvando's mini-arc in the Definitive Edition, he'll pick up small items with the exact same gestures.
- Brutal Bonus Level: Drustan's Labyrinth is a set of three dungeons that are remixed versions of one or two previous dungeons with much more difficult enemies compared to the first time, ending with a boss fight that you have to defeat in order to get a wish from Drustan.
- Butterfly of Death and Rebirth: In the Ruins of Dundrasil, when Rab and the Luminary send the souls of Dundrasil's people off to Yggdrasil, they take the form of countless glowing butterflies.
- But Thou Must!: Almost, if not all, yes/no choices are rigged so that not being a stereotypical Hero sees people berating you for refusing to help them, or your refusal being an illogical option. Either way, the game does not advance until you select the "correct" choice, so you WILL do what the plot wants you to do whether ya like it or not.
- Caged Inside a Monster: Iron Maidens, a new class of monsters was introduced in this entry which appear as porcelain dolls with a birdcage where their legs would be.note These monsters can trap allies inside their cages rendering them immobile until freed.
- Call-Back: Aside from the monsters and musical themes that are a mainstay of the series, the Tickington quests are a long series of call-backs to scenes from previous Dragon Quest games. Often, these quests show the action from a different point of view, or flesh out an event that was mentioned but never shown onscreen.
- Carnivore Confusion: Downplayed in the ocean. Fish are shown to be intelligent and can communicate with mermaids and fishmen, but they still eat fish. There is a law in place where you have to warn a fish in advanced that you want to eat them, to give them a fair chance of escaping with their life. There is a side quest where a fishman is put on trial for biting a fish without prior warning.
- Challenge Run: The Draconian Quest options - it's a set of limitations that the player can turn on when starting a new game. This includes harder enemies, no escaping from battles, no shopping, lesser to no experience points from weaker monsters, "shypox" that makes the Hero miss turns in combat and temporarily unable to talk to NPCs due to remembering something embarrassing, and not being able to equip any armors. The Definitive Edition dropped "no running" for three new ones: a souped up version of shypox that affects the whole party, game over when the Hero drops in battle, and the ability for NPCs to give wrong info to the Hero. Needless to say, turning more than two of those will make the game Nintendo Hard. You can turn them off at any church or statues, but you can't turn them back on on this particular playthrough.
- Chaos Is Evil: Played completely strait in the game. The playable characters clearly stand for justice and order (helping benevolent monarchs, fighting criminals and terrorists, keeping stability in the world, and so forth), while the villains cause destruction and death wherever they go.
- Chaos Architecture: Dundrasil Castle's 16-years-ago past and present maps just don't line up properly. The present version has multiple extra walls built in place and no sign of the past's staircases, tiled floor, and water canals. Extra strange because the past version is explored literally on the day of its destruction, so there would not have been an opportunity to rebuild at all.
- Chekhov's Gun: Remember how Erdwin's Lantern up and falls to the Earth, only to be destroyed with extreme prejudice by Mordegon before it can land? Yeah, turns out the Hero should have asked a few questions about everything involved with that.
- Chekhov's Gunman: That black Tockle (the little ghosty thing) in the opening of the game? It's the soul of the True Final Boss.
- Chest Monster:
- This entry introduces slot machine Mimics called Penny Pinchers, in addition to their stronger Token Taker, Gold Grabber, and Fortune Filcher relatives. In a few areas, slot machines which act similarly to treasure chests, but are filled with casino tokens, appear. The first few of these are legitimate slot machines, but the Pinchers are mixed in soon after.
- The same game also introduces giant versions of the Cannibox, Mimic, and Pandora's Boxes monsters
- Circular Definition: According to the class titles, Veronica is merely "Serena's Sister", while Serena just so happens to be "Veronica's Sister".
- City of Canals: Gondolia heavily features canals running its length. Some of the residents even recommend taking the gondolas, saying the roads are confusing.
- Clockworks Area: The Tower of Lost Time.
- Close-Knit Community: This entry in the series features this to a T. Most of the NPC's are friendly and helpful.
- Convection, Schmonvection: After the End, much of the landscape of the world is covered with burning patches, yet the game doesn't even so much as ding you for getting close to them, or in some cases even running right over them. Averted with the Mount Huji portion, which involves you going inside a volcano. If you Party Talk anywhere on the mountain, Sylvando, Erik, Veronica and Hendrik complain about the heat.
- Cool Crown: Numerous, both on NPCs and ones that your party can wear. On the latter part, the Crown of Dundrasil (equippable, naturally, only by former king Rab) is impressive, and on the former, King Carnelian's probably takes the cake—it resembles a cross between the crown of the Holy Roman Empire and an Ottoman emperor's turban, with a peacock plume to boot.
- Cozy Catastrophe: During the part of the game that takes place After the End, some areas (namely the mini medal academy or Puerto Valor) took it pretty well. Some of the NPCs actually acknowledge that they're better off.
- Crutch Character:
- Every guest character has infinite HP, MP, and items, and enemies will still target them even though they can't be hurt. The last guest character in particular stands out for using an ability that directs all enemy damage onto them, effectively making the entire party immortal.
- The Luminary himself is one in the beginning of the post-game scenario. Due to traveling back in time, he'll temporarily outlevel the rest of the party by however much you leveled him up in Act 2.
- Cursed Item:
- This entry features a cursed item as part of the story, a magic necklace that allows its wearer to turn whatever they touch to gold. However, if they try to take it off, the wearer becomes a gold statue themself.
- The Definitive Edition's sidestories reveal the bunny suit Jade had when she was demonized was cursed. If you try to change to a different outfit during the sidestory, the game will stop you, stating it's cursed and can't be removed. If you do the logical thing and talk to the priest, he'll say it's Uber-Cursed and he can't lift it.
- The prize for completing the last sidequest in the Dragon Quest III Tickington missions is the Golden Claw, and it still has the same nasty side effect of forcing encounters. Notable because the traditional cursed equipment like the Skull Ring and Hades Helm are free to put on in this game, and ironically protect against curses.
- The Choker, one of the cursed items from the first Dragon Quest, can be found near the Purple Orb in the Zwaardrust Ruins. It can't be equipped as it goes to the Important Items bag instead of Equipment, and if you try to use it, the Luminary reconsiders the decision and puts it away as the series' ominous "Cursed!" jingle plays.
- Dark Is Not Evil:
- Rab uses the "Zam" spell family, which inflicts dark damage.
- Out of King Carnelian's top knights, Hendrik is very much the better man in spite of wearing black iron armor. His counterpart, Jasper, is more malicious, manipulative, and smug despite wearing silver armor.
- Even after being freed from Booga's control, Jade is able to access her demonic playboy bunny form willingly and uses it to fight alongside the heroes.
- In spite of being corrupted by Mordegon, the Sword of Shadows isn't actually evil. In fact, it plays an instrumental part in defeating Jasper upon returning to the past, as it can cut clean through the shadows he summons.
- Death Is Cheap: Downplayed. Losing takes either half of your Gold, or all of the Gold and Experience Points you acquired since your last autosave, but you can deposit Gold in multiples of 1000 to mostly avoid the former. Buying revival items, on the other hand, requires a mountain of Casino Tokens.
- Then there's Zing, a middle-of-Act-1 Spell, which revives someone for at least 12 MP in at least one turn. Its late-game upgrade, Kazing, does it for a flat 24 MP right away; or, if you have the Skill Points, Rab and Veronica can use Zing Stick for a "Kazing" at half-price. You can't buy MP-restoring items, but restoring MP outside of battle is free in many places.
- De-power: At the midpoint of the game, Mordegon takes the power of the Luminary from The Hero. In an instance of Gameplay and Story Integration, when this happens, that portion of the skill tree is removed.
- Demonic Possession: King Carnelian is possessed by the sorcerer Mordegon.
- Developer's Foresight:
- The Hero and Erik encounter a Black Dragon in the sewers of Heliodor Castle. At this point, the player is around level 6 and their attacks are likely to do no damage apart from critical hits so the player is expected to flee. In the unlikely scenario that a player either cheats or grinds long enough to actually beat the dragon this early, they'll get a slightly different cutscene where Erik is mildly impressed at their strength.
- If you equip the Luminary with a costume that would cover his hands, the Mark will still appear and glow in certain cutscenes.
- It's possible to do a few events out of order, such as getting Sylvando back before re-recruiting Rab. He will appear in the Angri-La cutscenes and will react to events, but will have no spoken dialogue. He does have some things to say if you talk/Party Talk with him.
- The post-game essentially drops the player back to a save-state made around the midpoint of the game, which means that the game not only remembers the equipment state of your characters but also whether or not you consumed any seeds or had any hard-to-obtain items equipped at the time.
This save-state is created once, and only once — When speaking to Benedictus with 6 orbs. It is entirely possible to duplicate items this way, by equipping them right before this on everyone that's not your main character, talking to the person that triggers the save-state, and then unequipping them. When the save-state comes into play much later in the game, the items are duplicated. This is not terribly useful outside of a few accessories that are one shot otherwise, but it's good for farming ability seeds in preparation for the postgame's difficulty increase.- This can be gamed in interesting ways via 11 S's chapter select system — you can take endgame gear back to before the save-state, put it on other characters, and then rush through the act to duplicate it. This is the easiest way to get multiple versions of the Infinity +1 Sword crafted weapons, such as the Hypernova Sword.
- Disc-One Final Dungeon: There are two.
- After spending about sixty hours assembling your party, gathering the plot coupons and doing some side quests, you try to get the Sword of Light at Yggdrasil, but Jasper fights the Luminary and the party, swatting them aside with his dark powers, and when Hendrik shows up with Carnelian to confront his former friend, the latter reveals himself to really be Mordegon and steals the Luminary's Heart to gain the Sword of Light, forcing you to assemble it all over again.
- The climactic fight against Mordegon. Enormous build-up? Check. Pants-wetting dungeon name (Fortress of Fear)? Check. Dark and gothic architecture and incredibly convoluted pathway? Check. Final boss using a mix of other boss techniques? Check. One-Winged Angel form? Check. Credit roll after the win? Check. But the alert player might notice that there's a major dangling plot thread (the Shadow Tockle) and tons of pastwords and monster entries you haven't yet found. You're actually maybe two-thirds of the way through the game, and it's about to get a lot harder.
- Disc-One Nuke:
- A Luminary focused on Greatsword skills can make much of the early game into a cakewalk: while One-Handed Sword Skills focus on dealing more damage to specific enemy types, Greatsword skills focus mainly on doing big damage in general, and a properly buffed Luminary can MELT through bosses just by constantly using single-target Greatsword skills. It stops being particularly game-breaking around mid-Act 2, but Greatswords themselves keep being useful throughout the entirety of the game.
- Sylvando's Gold Rush ability costs 1000 gold to use and deals high fixed damage to all enemies. It'll drop most enemies in one-hit, severely damage those that live and remains useful throughout much of Act 1 and 2. The downside is that the ability can be expensive to spam (especially early on) and it can be difficult to fit into an early-game build because Sylvando has many other useful skills that are also deep in his skill tree.
- You can reach the casino about a third of the way through Act 1 and gamble for tokens to trade in for some weapons that are very strong for that point of the game. Notably, there's the Platinum Powersword for the Hero that has far more attack power than any other weapon available until Act 2, and the Lightning Spear, which is the strongest spear up until the end of Act 1, that can be given to Serena or Jade.
- Distant Epilogue: Long, long after this game; a woman finished reading about the Luminary in a book. She puts it away; and goes to wake up her child. It's his 16th birthday, and he has to go meet the King. After all, "Erdrick" was a title given to Heroes even before their victory over Zoma.
- Doomed Hometown:
- The Hero's hometown gets burned down at the beginning of the game. He can choose to help rebuild it in the post-game.
- The opening scene has the hero's birthplace, Dundrasil, sacked by monsters.
- Dragon Rider: It is possible to ride the dragon steeds of Dragon Riders, Dragooners, and Dread Dragooners - as well as a whole heap of other critters - in this game.
- Dramatic Chase Opening: The story begins with monsters attacking the kingdom of Dundrasil and the queen running away with The Hero and a young girl, while being chased by 3 Headless Horsemen.
- Dramatic Irony: When the Luminary and his party visit Tenton, Hendrik says that had fate been kinder to him, he would've been raised there instead. If only he knew the Hero of that game's fate of monsters attacking the village also happened there as well...
- Dub Name Change: As is standard for a DQ localization.
- It amusingly even extends to our unnamed main character: the Luminary was originally simply Yuusha/"the Hero". It was probably changed because the title has a heavy legacy in Japan with how much of an influential classic Dragon Quest is, but sounds overly simplistic without that context.
- Erik was originally "Camus"; this was likely changed because Camus is a (famous) surname in its native France. Actually, it's probably because he's originally from the Viking clan.
- Serena was originally "Seña"; this was probably changed because while a fair few Anglophones are probably familiar with the enye letter, it strictly speaking isn't part of the English alphabet. (This does get marginally more dubious when there's a big fat enye right there in the character naming screen at the start of the game, and you can use all kinds of "non-standard" letters for your main character.)
- "Sylvia" was changed to Sylvando, since the character, while flamboyant, still very much identifies as male.
- Jade was originally "Martina" (or "Marutina" for the overly literal). This change was made so that her family would have gem-based Theme Naming.
- "Graig" became Hendrik, likely because his name in Japanese was a made-up variant of a very common nickname.
- The demon villains once again get sweeping name changes because their names, which would sound a bit threatening to a child in Japanese, are completely meaningless in English and were changed to have links to sinister Anglophone words; "Urnoga" became Mordegon, and "Nizzelpha" became Calasmos.
- Many of the Monster names are changed into puns that work in their native languages. (You're not missing much; The Japanese puns are just as eye-rolling)
- Dungeon Town: The Ruins of Dundrasil are inhabited by monsters, including Green Dragons, Liege Lizards, and Royal Reptiles.
- Early Game Hell: The "hard monsters" setting of the Draconian Trials in the English version strongly increases the difficulty early on, up to when you fight the Slayer of the Sands. Early enemies do quite a bit more damage, and even once Veronica and Serena join, bad RNG can result in one or more party members being killed before you can even act against even-level monsters. The Slayer is especially bad - it has as much health as Baramos from Dragon Quest III (just without silent regeneration) and can easily deal 40-50 damage to the party in one turn if it combos its multi-hit and sand breath. And if the RNG is especially bad, it'll act at the end of one "turn", and the start of the next, meaning it gets four actions before you can do anything to respond. The average level you're likely to fight it at? Around 15 or so. The mode more or less demands familiarity with older DQ mechanics and a very quick acclimation to XI's new elements. The difficulty does begin to smooth out once you get past Gallopolis, however, since you now have at least one backup party member and your party members' skill kits and trees begin to flesh out.
- Easing into the Adventure: You begin the game making the trek up Cobblestone Tor with your childhood friend in your hometown. Afterwards, you can help some of the people in your town before you’re sent off on your journey.
- Easter Egg:
 In the Japanese version only. One of the clips shown in the credits is a Spell of Restoration from Dragon Quest; if that spell is entered into XI's Spell of Restoration screen, the game will transport you to a fully playable recreation of Dragon Quest's first screen, in Tantegel Castle's throne room. Once you leave the room, the game will open up your system's online store, allowing you to download the original Dragon Quest for free.
 - Emergency Weapon: Erk's mid-game side-story (in the Definitive Edition) has him start near a Steel Broadsword, just so he has something to handle the monsters with, in case you under-equipped him before the end of Act 1. Likewise, Jade's gives her a bunch of medicine and Rockbomb Shards to handle the two things she might not be able do on her own (healing and crowd-control), while Sylvando's has him start next to a weapon shop with 3000 gold to spend.
- Evil Costume Switch: Jasper once he reveals his true colors and joins Mordegon's demon army. Also, at one point in the game, Jade due to being brainwashed by Booga.
- Evil Overlooker: In the reveal trailer, King Carnelian, Hendrik and Jasper can be seen looking down at the party from Heliodor Castle. Ultimately subverted in the game itself, as only Jasper is evil; Carnelian is Brainwashed and Crazy and Hendrik is an Anti-Villain who pulls a Heel–Face Turn halfway through the game.
- Evil vs. Evil: In Act 2, Mordegon destroys Erdwin's Lantern before Calasmos can regain its powers, so that he can rule the world undisputed. This has the side effect of saving Gallopolis, but this is completely unintentional on his part. In Act 3 Calasmos pays in kind after the Luminary travels to the past, preventing Mordegon from obtaining the Sword of Light and causing him to suffer an early death by the hands of the party compared to the original timeline.
- Evolving Title Screen: The title screen changes its location depending on where you're currently at in the storyline. The first area is a panorama view of the Heliodor region, and as you go on the title screen will switch to other cities that you will visit over the course of the game. The last area the title screen can switch to is the Tower of Lost Time, just after going into Act Three.
- Fairy Tale: When compared to other entries in the series, this one is the most fairy tale-eque.
- Fighter, Mage, Thief: The Luminary, Jade and Sir Hendrik are physically powerful warriors; Serena, Veronica and Rab fulfill the role of squishy spellcasters; finally, Erik is the fragile but swift thief. Being a Jack of All Stats, Sylv slots comfortably into the first two, with hints of the third in his skill tree.
- Fire, Ice, Lightning: The Luminary learns the Zap (Lightning) family of spells, Veronica learns Crack (Ice) Spells, and both of them learn Sizz (Fire) class of magic.
- Five-Second Foreshadowing:
- One guard at Heliodor Castle almost calls the hero "Darkspawn" before stopping himself, moments before King Carnelian orders you arrested in the next room.
- When you confront the Ursa monster blocking the path to Mount Huji, the voice acting gives the game away before the kids lose control of the monster costume. All the real monsters that are voiced are given suitably demonic-sounding voices; this one sounds like a child trying to do a scary voice — which is exactly what's going on.
- Flash Sideways: After the Hero successfully goes back in time to save Veronica, his companions and some other people in Erdrea have vague recollections of memories from the previous timeline despite being unaware that it occurred.
- Flavor Text: The item descriptions for Materials are largely irrelevant to gameplay, with one notable exception; if a character falls prey to an Instant Death move while they have a Dieamend in their inventory, the Dieamend will save its bearer from the effect, and will shatter into a thousand pieces in the process.
- Floating Continent: Yggdrasil rests on top of one... or more accurately, it pretty much makes most of the landscape of one. There is also the Battleground and Havens Above, though the latter gets almost completely decimated by Mordegon.
- Free-Sample Plot Coupon: When the party learns that they need to collect the six Orbs to reach Yggdrasil, two of them are already in their possession.
- Foreshadowing:
- Erik's accent is fairly odd. Someone with a keen ear can figure out that it's vaguely Scandinavian sounding. When you finally reach Sniflheim, the characters have Scandinavian sounding accents.
- Sylvando seems to know a lot about knighthood to tell Faris off, and hides behind Erik when he spots Don Rodrigo's servant when traveling through the sea gates of Puerto Valor. Interesting... why would he seem to do that?
- When you start the post-game proper and go out on the world map, the music on the overworld changes to the overworld from Dragon Quest III. This ends up making sense after the final scene of the game when it turns out Erdrea is actually the world from DQIII', but in the past. Another foreshadowing musical hint of this game's connection to DQIII is the music in the town of Hotto; it's near identical to the music in Jipang in DQIII.
- Just before the end of Act I, Serena and Veronica have a late night chat about their nature as twins. Serena wonders if, since the leaves representing their lives bloomed on Yggdrasil at the same time, they will fall (die) at the same time too. Veronica replies that she doesn't know the answer, but she hopes so. That's heartwarming...and weirdly ominous.
- After learning that the Luminary's birth-mother sacrificed herself to save him, Serena notes that she and Veronica should learn from her example. Veronica clearly had the same thought.
- When Rab and the Luminary do a traditional ritual to guide spirits of their kingdom's dead back to the World Tree, the scene lingers on a lone spirit butterfly implied to be the Luminary's birth-mother. Only showing her leaving for the tree further implies the father's soul is trapped elsewhere.
- In flashbacks showing the previous Luminary and his companions, Morcant can be seen carrying a staff exactly like the one Mordegon carried prior to taking the Sword of Light.
- Gameplay and Story Integration:
- Several cutscenes in the game will take account if the Luminary is equipped with a one-handed sword or a two-handed sword, and will subtly change.
- Storyline-wise, Serena and Veronica are both the reincarnation of Serenica - thus her powers are split between two people. In gameplay, this is reflected both in their stat gains and their skill trees. They are almost too specialised - as Veronica can mostly cast offensive spells (and debuff with whips), while Serena can only really heal and support (and sometimes smack with spears). Their talent trees are both evenly spread out with very few hidden panels. Serena stops gaining skill points around the time you hit the end of Act 1. What's more, when Veronica makes a Heroic Sacrifice, Serena becomes Purposely Overpowered, gaining a boatload of overpowered skills and gains skill points by the dozens upon leveling up. And when you go to the post-game scenario, both Serena and Veronica gain extensions of their regular categories like everyone else.
- Traditionally, whips in this series have been used mostly by female characters. That Sylvando can equip them fits with him being either Camp Straight, or more likely Camp Gay. He is also a circus performer, and he mentioned that he'd tamed his share of lions while traveling with the circus.
- At the very beginning of the post-game scenario, the Luminary goes back in time to the point before Veronica died. You essentially jump into a save state - which means that the rest of the party members are as strong as they were at that point in the game - and will still have their equipment and not be able to access their hidden skills.
- When The Hero loses the power of the Luminary, that part of his skill tree is removed until he regains the power. The same applies at the very beginning of the game before you get those powers.
- When Erik loses their memory, their entire skill tree is empty.
- When Vince challenges you for the top prize at the end of the Octagonia tournament, you'll realize all his attacks will not hit you. This shows he's a pretty lousy fighter without the energy from the other fighters to dope him up (and he knows it).
- Character traits inform how resistant they are to Puff-Puff-type abilities. The Covert Pervert is very weak to them, the Dirty Old Man is moderately weak, and the Camp Gay is highly resistant.
- The Gloomnivore feeds off your misery, so if it wipes your party in battle, you'll wake up in a nearby Inn instead of being killed.
- When Serena saves the party from the Auroral Serpent, every ability shown in that scene exists in gameplay. The serpent paralyzes the party with the same breath attack it was using throughout the battle, Serena uses her Doleful Dirge ability (despite not being able to learn it at that point) to weaken her target, finishes off the serpent with a Kaswhoosh spell, then uses the Tingle spell to cure everyone's paralysis.
- When the party goes to the circus for the first time, they see Sylvando doing two things: Juggling daggers, and breathing fire. Knives are one of three weapons he can use, and he joins the party with Hot Lick already at his disposal.
- When Erik joins forces with the Luminary at the start, one of his starting weapons is a soldier's sword; it's the very same sword he stole from the guard in the dungeons.
- Throughout the story, Veronica is stated to be a prodigy and Serena admits that Veronica picked up most skills quicker than she did - true enough, Veronica starts out at a higher level than Serena, and after she's revived in the post-game, she gains levels much quicker than everyone else and will almost certainly be the first party member to hit the level cap if the player chooses to grind for it. Inversely, Rab is an old man, and towards the end, he begins to take a longer time to gain levels to reflect his age.
- Gameplay and Story Segregation:
- A monster can notice you on the world map and crash right into you to start a fight but still be 'caught by surprise' for the first round. The inverse is true as well - the party can be caught by surprise despite hitting the enemy with a preemptive strike.
- The subplot about Heliodor tearing Erdrea apart in their hunt for the hero is initially treated as a big deal, but in the end you really only have to deal with them twice before the country as a whole does a Heel–Face Turn, and even then, in only one of those instances do you actually fight them in gameplay. You're initially prevented from Zooming back to Heliodor prior to getting Sylvando's ship and you can't go back through the Door of Departure, but that's the extent of how your mobility is limited. Zigzagged in that as you play the game Heliodor is smart enough to block off certain spots that could be of use to the player (like Angri-La).
- But even then, once you have the ship and can dock it at the Emerald Coast, it gets to such an extent that, despite being the most wanted man in the world, you and your merry band can just walk back into Heliodor, though the front gate, and the guards will barely bat an eyelash and aren't competent enough to realize you're the man they're looking for. If you activate party chat during this time, your party will say that this is a stupid idea, but at no point are you in danger of capture. The only thing your party will stop you from doing is walking into Heliodor Castle, as that's just too brazen.
- Very early on in the game, after escaping from the dungeon you're taken in by a kindly nun who doesn't know you are the people the guards are looking for. Saving in the Dragon Quest series always takes the form of making a confession to the church so the priest or nun will write it down. If not for Gameplay and Story Segregation, by saving with her, she would know you are the fugitives they're looking for because you just told her everything that happened.
- At one point in the first act, Serena and Veronica have a discussion about the possibility that their lives are connected so that the two of them will die at the same time. This is despite the fact that it's fairly possible for one of them to have been killed at some point during the adventure, and had to be brought back to life.
- When The Hero loses the power of the Luminary, the skill tree removes those skills and the mark on his hand goes away in a nice bit of Gameplay and Story Integration. However, he can still somehow learn Erdwin's master Luminary spell. However, it is hinted later that his powers weren't completely diminished and were staying dormant until the right time. This explains why, in-game, you can still see the mark on his hand and on his stomach as a fish.
- The game will make your preemptive strike scale-able to the enemy so that you do not take out weaker enemies with one strike.
- At the end of the game, if one of the player's wishes is to live with one of the characters, Mia will appear in the photo...even if the player has not met her again.
- Genre Throwback: Dragon Quest XI is a nostalgic throwback to NES/SNES era games in general. Its basically a retro game with a few updated tweaks here and there.
- Get It Over With: When Krystalinda is defeated and her last ruse of posing as Queen Frysabel is exposed, she tells the heroes to finish her, as she used up all her power and can't fight back.
- Glass Cannon: It is possible to hinder party member's defenses with the Draconian option to eliminate the ability to wear armor, until you get a chance to subvert this with Defense Seeds, but offense is unaffected. With enough seeds, this trope is averted, though that's an exercise in RNG grinding from hell.
- Glowing Eyes: Later in the game, enemies gain vicious and malicious variants which are significantly stronger. These enemies can be identified by their glowing red or green eyes, respectively.
- Gold Coloured Superiority: End of Time and Timewyrm are both golden versions of major antagonists and are the strongest bosses in the game.
- Good All Along: The merpeople of Nautica are quite friendly, kind, caring and helpful despite rumors and gossip of merfolk being evil and scary.
- Gory Discretion Shot: In Act 2, Tatsunaga eating Miko alive is hidden by a Smash to Black and a horrified witness's shriek.
- Got Volunteered: Prince Faris of Gallopolis is instructed by his father, the Sultan, to go face the Slayer of the Sands. Afterwards, he begs the hero to aid him, as he actually has no knightly skills. Following this, many NPCs you speak to talk of how Faris "bravely volunteered" to undertake such a mission.
- Guide Dang It!:
- The Post-Final Boss Calasmos starts the fight wreathed in a shroud of shadows, giving him different abilities, higher defense, and higher damage. Even at maximum level, he's extremely difficult to defeat in this state. Removing the shroud requires the player to Use the Super Sword of Light from their inventory. This is a Guide Dang It! for several reasons. First, unlike every other piece of equipment that can be used this way, the Super Sword of Light does not say that it can be used as an item during battle. Second, the fight against Jasper at the start of the post-game has him in a similar shroud of shadows, but his is dispelled simply by attacking him with the Sword of Darkness. And third, the player probably possesses the Supreme Sword of Light by the time they fight Calasmos, which, despite being otherwise superior to the Super Sword of Light, cannot be used to dispel Calasmos' shroud. You'll most likely have to die several times before figuring this out, even with the hint from a particular Watcher letting you know that this is possible and that the Sword of Light is the key.
- To successfully complete the Cobblestone rebuild sidequest, you have to defeat the Malicious Jörmun using a Zap family spell. The only hint you have for this is in the large, puzzle-filled Royal Library.
- To get the Circle of Serendipity (an accessory that makes rare monsters more likely to appear) in Act 2, you have to look at a chalk board at the academy that marks the location of a hidden mini-medal. The treasure itself isn't in a breakable object, chest, or bookshelf so it's not marked by the game's hint systems as a treasure, and the spot where it needs to be picked up is very specific. This is largely inconsequential as the post-game offers you the ability to farm mini-medals through some means but this is one of the more notable cases of obscure treasure in the game.
- The game is very vague about the strength of status buffs and debuffs, and how likely they are to stick on enemies. Expect phrases like "slight increase," "substantially reduce" and "sometimes." Don't expect anything as precise as "20% increase."
- The Bestiary tells you which materials are dropped by monsters, but does not tell you the drop rate.
- The Guards Must Be Crazy: The guards never check Erik's cell to see the massive hole that he dug. Justified; this is because his ex-partner Derk was bribing them.
- Guest-Star Party Member:
- Gemma and her pet dog Sandy join the hero on the route to Cobblestone Tor. Gemma just cheerleads from the sidelines, but Sandy takes part in battle as an uncontrollable ally.
- Every member of the party initially joins as a uncontrollable guest character before becoming a full member. The length of time they stay this way varies; Veronica is a guest the longest (a long overland segment, a dungeon, and the subsequent boss fight), and Jade the shortest (a brief overland section bookended by two cutscenes).
- Vince, your partner in the Octagonia tournament who then later shows up again to help you fight against the revived Arachtagon in Act 3, acts as a damage sponge, since as an uncontrollable NPC, he can't be killed.
- In the Ruins of Dundrasil where you relive memories of the day the kingdom fell, you fight alongside your father King Irwin.
- In the Updated Re-release, Dave and the Soldiers of Smile serve as backup for Sylvando in his story.
- Vince, Sinderella, Golden Boy and the Underdigger join Jade in the struggle against Booga in her story.
- Healijah the Healslime assists Erik in his escape from a horde of monsters in his story.
- Headless Horseman: A monster known as a "Headless Honcho" is fought near the beginning of the second act. Notably, its shield has a face on it that talks on behalf of the headless body. Various weaker variants of this monster appear as low level Mooks throughout the rest of the game, not all of which have horses.
- Heroic Mime: The main character is very much one, though not much is made about it during the game. It is lampshaded however in the short character bios that appear in the loading screens. Cole, a young boy who idolizes the main character, is said to have attempted the strong silent type act and managed an impressive three days before he had to stop. Also, if you use Party Talk with Veronica, she'll sometimes comment "You want to talk? That's not like you."
- There's even an option to disable the hero's in-battle shouts and grunts, rendering him truly silent (In a possible callback to the English dub for Dragon Quest VIII, which also made the hero completely silent)
- Heroic Sacrifice:
- Veronica does this in order to save the party from getting killed by Mordegon. The hero travels back in time to prevent this from happening in the post-game scenario.
- Miko also offers herself up to Tatsunaga in place of any other Hotto villagers.
- Hijacked Destiny: The hero briefly has their power as the Luminary stolen from them later in the game. In turn, that branch of their skill tree ends up locked off until they regain their power.
- Hoist by His Own Petard: Jade defeated Booga by using the dark power he gave her.
- Holding Hands: In the Switch version, if the player decides to have Jade live with the Luminary, she asks for this. She'll do it again after they spar, admitting that when he was a baby, she used to be afraid of breaking them because of how fragile his hands looked.
- Hopeless Boss Fight:
- The Black Dragon in the sewers of Heliodor requires the player to Run or Die as it chases you. With some level grinding, it is beatable and there is a different cutscene for if you do beat it. It will still be there as a Degraded Boss regardless of if you kill it or not when you return later in the game.
- The fight with Jasper in Yggdrasil. He is invulnerable to all of your attacks due to a magic barrier and is also fairly powerful. You must lose this fight and doing so kicks off the second act of the game. In the post-game, you come back in time to shortly before this fight, and because you wield the Sword of Shadows, you are able to win this fight, officially switching the timeline to something different.
- Identical Grandson: The Kais of Lonalulu. What makes this unusual is that Kai the Younger is the son of the adopted daughter of Kai the Elder, and as such isn't related to him at all, and yet still resembles his grandfather sufficiently that his mermaid lover Michelle mistakes the grandson for the grandfather at first glance.
- Infinity +1 Sword:
- An unusually practical variation. Make a second Sword of Light even though you have the original in the new timeline. Sell some orichalcum to the Ultimate Blacksmith who will make the Sword Of Kings. Yes, Erdrick's Sword. Now beat a single Optional Boss in the Bonus Dungeon and you'll get a recipe to combine them into the "Supreme Sword of Light." If this is your first wish, then you still have quite a bit of game left.
- The Brilliant Blade from beating the final trial of the Wheel of Harma in 30 turns or less and the ultimate weapon recipes from beating EVERY Optional Boss in the Bonus Dungeon are much less practical examples.
- Informed Equipment: Played straight when it comes to most armors. It is averted with weapons which always appear on your character with unique models and with certain combinations of armor changing the wearer's full appearance.
- In Spite of a Nail: Despite majorly changing the world in the postgame, many events still happen despite their cause in the original timeline no longer existing, with varying justifications.
- Interface Spoiler:
- In the weapon list, there is a category for axes, which none of the main cast can equip nor is even available for a good while. There is also the trophy "Knight Exemplar", which is rewarded for completing the ability panels of a character... but no one in your party is a knight. It all points to a Secret Character that joins your party at a later date. It's Hendrik.
- Late into the game, after gathering the rest of your party members again, does it seem odd that the equipment status page still displays what Veronica can equip despite being dead? Turns out much later, in the post-game, you go back in time where Veronica is alive and well.
- Doesn't it also seem weird that Serena and Veronica don't have any obviously hidden panels, like Erik and Sylvando do? In addition, after the end of Act 1 and the fall of Yggdrassil, each of the Hero's party members gets A Day in the Limelight in the definitive edition dictating what they've been up to in the Hero's absence, except after Rab's episode, the game goes straight back to the perspective of the Luminary, skipping over Serena and Veronica entirely.
- Sorting the Bestiary alphabetically before the Disc-One Final Dungeon shows that there are pages and pages of ????? between "Very Devil" and "Vince", an alarmingly small portion of the alphabet for so many enemies (they're "Vicious" enemies).
- Hidden Trophies in the PS4 version are all story-related. When you go to confront the villain at Yggdrasil, there are still very many hidden trophies, so either the game has a huge Playable Epilogue, or that final battle is a lot less final than you think. It is the latter case.
- The Definitive Edition adds Tickington and its many quests to the past. Even if you find every Tockle and do every possible quest before facing Mordegon, there's still quite a few missing. Showing that the game still isn't over.
- Interspecies Romance:
- Deconstructed in a very sad way with Kai and Michelle. Since merpeople live to be over 500 years old, Michelle's old lover Kai whom she saved died long ago and Michelle kept waiting for him, completely unaware of his passing. Both died after living the rest of their lives in isolation and depression.
- A book the player can read records that the ancient hero Drustan himself had a romance with a mermaid, but refused to marry her because he was unable to defeat her father in battle (despite her father blessing the marriage anyway when the fight ended in a draw, since defeating him were the original terms Drustan decided he was bound by his word as a knight).
- The mermaid Queen Marina notes that humans and mermaids have a long history of falling in love with each other and the relationships usually ending badly. Believing it is the World Tree's will that their kind learn from and admire each other rather than remain apart, it is one of her goals in life to find a solution to the issues that make human/mermaid relations so difficult.
- In-Universe Game Clock: There is a day and night cycle in the game; depending on time of day, different monsters will appear on the field. Also, in town, certain events and NPCs may only be available depending on what time of day it is.
- Involuntary Dance: In Act 3, the young adults of Phnom Nonh are forced to dance day-and-night as a result of a curse from the mural.
- It Always Rains at Funerals: It starts raining after the party discovers that Veronica performed a Heroic Sacrifice and her body fades away. The rain continues throughout the funeral, only stopping after Serena resolves to carry on the fight without her.
- Item Crafting: One of the things you can do while camping is use the "Fun-Size Forge" to create new weapons, armor, and accessories, or improve store-bought or treasure equipment. In the Definitive Edition, you can use it anywhere, making it a breeze to make things on the go.
- Justified Tutorial: One for "Peep", Erik's spell that checks for Canniboxes and Mimics. Sneaking around in Erik's midgame side-story will draw you to five treasure chests, which Erik will point out to Healijah to be a trap. He'll assume that four are traps and only one has loot, to which Healijah will respond that, as a thief, he knows his stuff. Only two are trapped, and a Grublin straight-up tells you which chest is plot-important if you're brave enough to eavesdrop, if but still.
- Karma Houdini: The Luminary is encouraged more than once to forgive his enemies and not hold revenge in his heart. This leads to a few fairly morally ambiguous characters getting off pretty lightly.
- Vince's motivation is sympathetic, and true, he sees the error of his ways, but joining forces with an evil monster and feeding his fellow fighters to it for the means to continue his Fake Ultimate Hero act is pretty damn evil. He gets off scot-free for this and the truth never even comes out (despite suspecting he wasn't fighting as well as he usually would)...however, talking to the NPCs later reveals the fans and other fighters did find out what he did (with varying disappointment) and the offender retired in shame. It's also indicated later that the monster had manipulated his mind to some degree with magic, though Vince never tries to excuse his actions with such a reason.
- Krystalinda at least owns up to her villainy in the end and surrenders herself to Queen Frysabel's judgement; it turns out the queen had grown to like her enough to give her a royal pardon. To her credit, you'll be glad things played out this way in the post-game, where Krystalinda becomes a very useful NPC. It's also noted that it's easier to forgive her because no one died from her actions, indeed most didn't even recall they had been frozen and had to be told about it.
- Kick the Dog: Jasper burns down the hero's hometown and attempts to execute its inhabitants. Thankfully, Hendrik steps in to prevent the latter.
- Kleptomaniac Hero: As usual for the series, no one in the towns much cares if you barge into all the homes, smash all the pots, root through the wardrobes, straight up loot the treasure chests, and take everything of value found. Occasionally, a townsperson will chastise you for trespassing or violating their privacy or whatnot, but the Luminary otherwise gets a pass on all this.
- Laser-Guided Amnesia: Characters who are turned into monsters or possessed by monsters typically suffer this concerning their time as monsters once they are turned back, remembering little or nothing of what happened. Albeit their behavior may still be effected by what happened when they were monsters (one character retaining the winking habit she got as a Vampire Succubat), and when possessed (as in King Carnelian's case) they may remember they were possessed even though they remember little of what they did while possessed. Further, when they are monsters they may (or may not) remember they were previously human. Notably this doesn't happen with Jade after she is freed from Boogie's control. After briefly not being sure what happened, she quickly regains her senses and states she remembers everything, before proceeding to slaughter Boogie in vengeance. That she was so different may come down to how she made the power granted to her as a monster her own, in a sense possessing it rather than it possessing her (or indeed, how the post game implies the power was her own to begin with and Booga simply awakened it). Since she remained part monster, no memory loss stuck. Under Booga's control she also retained memory of her life as a human, but was convinced that she was finally happy and didn't care about what happened to the world any more.
- Last Bastion: A settlement literally named "The Last Bastion" is formed in the Heliodor region following the Time Skip, and acts as the last line of defense against the newly-empowered monsters. It's located in the ruins of Cobblestone Village. It's also a Pep Power in the game itself.
- Late Character Syndrome: The game takes steps to avert this. You get your final party member after a significant mid-game plot event that scatters the group all across the world, and a lot of time is spent on just the two of you traveling as a pair and getting to know one another. Combat-wise, he's also one of the best characters in the game, and can be quickly turned into a killing machine or incredible tank.
- This can be averted with an optional Draconian Quest setting "Reduced Experience from Easy Fights". With this setting active, characters will earn fewer experience points from weaker monsters, and eventually no experience points at all. Since this is based on the individual character, you can have lower level characters in the party receiving experience points while higher level ones receive none. By grinding on the correct enemies, you can even out the party pretty easily. You can only set this option when starting the game, and you can turn it off once, but after this you can never turn it on again without restarting the whole game.
- Later-Installment Weirdness:
- This is the first game in the series to change up the turn structure of battles. While still turn-based, you give commands to each party member when they can act, rather than giving the whole party commands at the start of the turn before everyone acts. This more-or-less makes turns "invisible" unless you're keeping track of who has acted yourself, and sometimes results in moments where a combatant appears to act twice in a row, due to them acting last in one turn then first in the next turn. Averted in the 3DS and 2D mode of the Definitive Edition, which runs on the older games' structure.
- There's no cursed equipment that requires the aid of the church's or Rab's Benediction to unequip. Instead, Benediction is used to remove the "curse" status effect, which was changed from yet another "lose a turn" effect to a persistent condition that randomly inflicts detrimental effects and can linger after battle, like poison. Interestingly, returning "cursed equipment" from previous Dragon Quest games, like devil tails or the Ruinous Shield, protects against curse status and the darkness element in this game.
- Lazy Backup: Averted for this entry. You can switch out party members, even dead ones, at any time on your turns, though those who are switched in must wait until the next round to act (except in the 2D mode of the 3DS and Definitive Edition versions, where combat turns function as they did in previous entries and party members can only be switched in at the start of turns, but are able to act immediately). Should your entire active party be wiped out, reserve party members will automatically hop into the fray.
- Lethal Joke Item: Grand Master Pang's Naughty Stick is a reward for beating Angri-La's Wheel of Harma challenges. Although it has a measly attack power of 5 and can only be wielded by Serena, it has a critical hit rate of 50% at max level, making it useful for hunting metal slimes. Rab is actually frightened when he sees Pang herself Dual Wielding Naughty Sticks in his sidestory.
- Lethal Lava Land: Mount Huji, which has magma so hot you can’t go through certain paths without taking damage unless you’re riding inside a Visor Kaiser.
- Lighter and Softer: When compared and contrasted to other entries in the series (in particular Dragon Quest VIII and Dragon Quest X), it is definitely this.
- Limit Break: Pep Powers. As characters deal and take damage in battle, they have a chance to enter a Pepped Up state which causes them to emit a blue aura and boosts some of their statistics. The status will wear off either over a number of turns, or by consuming the Pepped Up state to unleash a Pep Power, which has effects ranging from powerful group elemental attacks, to strong party or single member buffs, to unique and exceptionally useful support skills like guaranteeing rare drops and spawning multiple rare Metal Slime enemies. Most Pep Powers are combination attacks requiring specific characters, and most of those require all of the specified characters to be Pepped Up at the same time to use. The player characters are not the only ones capable of employing Pep — enemies can Pep Up as well, and in the 2D mode of the 3DS version and Definitive Edition, certain enemies can begin battle already in a Pepped Up state.
- Linear Warriors, Quadratic Wizards: True to Dragon Quest, this is inverted...to a point. Magic is the preferred method for dealing with groups of enemies, while physical damage is the go-to method for dealing with single enemies. This means against single bulky enemies (IE, most bosses), mages lag behind while your Oomphled fighters are dealing triple digit damage. Then Serena becomes Purposefully Overpowered and Veronica gets Magic burst, and for the first time in the series, the roles are reversed. Steps are taken to mitigate this effect overall - the "magical might" and "magical mending" stats that boost magic damage and healing output and spells being able to do critical damage have been carried over from IX, there are buffs for magic abilities (Channel Anger in particular shoots Veronica to the very top in terms of damage output), and the majority of Pep Powers, which tend to do the most damage, are overtly magical in nature.
- Luck-Based Mission:
- Some sidequests require that the party use a certain pep power against a certain monster. This, by extension, requires that a certain combination of party members be in a pep state at the same time, which is not something the player can control. The player can keep the pepped up members in the reserve, where they will retain it, but this doesn't work for the early side quests where you don't have enough party members. Later on, there also items that can induce the pep up, but they are in short supply. There is also the hidden Luminary skill "Pep Up", which allows him to pep up himself at will.
- The forging mini game. Individual hammer blows are sometimes harder or weaker than expected. This is an annoyance when getting the best results requires precisely estimating how hard to hit.
- The Man Behind the Man: The demon lord Mordegon is revealed to have been possessing King Carnelian, who himself is not actually evil.
- Mayfly–December Romance: Deconstructed if you choose to tell Michelle the truth about what happened to Kai. It ends with Michelle completely forgetting that she lives for five hundred years and that the time without her beloved made her unaware of so much time in human years passing since the last time she saw her beloved. She has to come to terms with his death, and commits suicide so she can be with him in death.
- Mental Monster: In Drustan's Labyrinth, all of it's bosses are embodiments of the hero's suppressed vices, taking the form of the Spectral Sentinels and tying them together via references to the Seven Deadly Sins. They even have a remix for Dragon Quest III's boss theme playing during their fights.
- Mercy Kill: Narrowly averted: when Gyldygga's power goes haywire, Erik grudgingly prepares to deal her the final blow before the gold fever starts spreading too fast. A combination of the Luminary stopping him and Mia reaching her hand out to him quickly make him change his mind.
- Metal Slime: As always. New to the family is the Hardy Hand, a metal version of the Muddy Hand monster that is just as hard to take out as the rest, but is also capable of throwing Whack spells to deter any experience-hungry hunters.
- Mini-Mecha: The Kaiser monsters from Dragon Quest X make their return, while the Eggsoskeleton monsters make their debut. They're mechanical in nature, and some can be ridden by the Luminary after besting them in battle. In the Eggsoskeletons' case, they can jump much higher than the heroes, providing access to high cliffs.
- Money for Nothing: Plenty of excellent equipment can be found, crafted, or received as quest rewards, so there is little need to spend large sums. It isn't hard to have hundreds of thousands of gold in the bank by the end of the second act.
- Monster Compendium: The Defeated Monster List in the Info menu. It includes drops, locations, some Flavor Text, and a model viewer.
- Monster Town: The Medal King is a Posthumous Character in this installment; however he had a daughter, and he turned his palace into the L'Academie de Notre Maitre des Medailles, an academy where young girls (human and monster) can learn how to find mini medals elegantly. Being an established Truce Zone between human and monster even after Yggdrasil's Fall; they are aware they have it a lot better than most of Erdrea.
- Moses in the Bulrushes: After the fall of Dundrasil, the infant Luminary's basket fell into a river while the survivors were escaping from monsters. He's found later by an old gentleman known as Chalky, who would adopt him as his own grandson.
- Ms. Fanservice:
- Jade, especially with some Battle Bikinis. One of her skill trees is Allure, which is the Sex-Appeal skill set used by Jessica from Dragon Quest VIII.
- Serena gets the classic Dancer's Outfit in Gallopolis, well before Jade can be recruited. And of course, there are Sexy Bikini drops.
- Murderous Mannequin: The "maiden doll" monsters: Dora-in-Grey, Golden Girl, Iron Maiden, Platinum Poppet, Steel Siren, and Zomaiden.note They are all part of the Material Family, despite Steel Siren being described as Undead. "Maiden doll" monsters consist of a puppet-like upper half and a cage to trap people in as lower half, evoking antique dress forms.
- Mythology Gag:
- A book detailing the origins of Cantlin's guardian Golem from Dragon Quest can be found in the Sniflheim Royal Library. This is especially confusing since the game explicitly takes place before Dragon Quest III, which places it before I as well, though it can reasonably be chalked up as Cantlin's townspeople trying to make one to defend their town from monsters, but it can't tell the difference between friend or foe.
- One of the outfit sets for the Luminary available at the very start resembles that of the Dragon Quest VIII Hero, and it's not even subtle by being called the Trodain Bandana and Trogs.
- One of Veronica's postgame outfits makes her resemble Stella from Dragon Quest IX. She also gets a recreation of Jacqueline's priestess robes from Dragon Quest VII.
- The description for the Great Sabrecub mentions they'll remember their owner years later, even if they're separated. Its adult form will mention the various names Sabrecats have been given in the series.
- Erik's sidestory in the Definitive Edition is a nod to the first chapter of Dragon Quest IV. Both segments feature a computer-controlled Healslime ally (Healie in IV, and Healijah in XI S) alongside a single player-controlled human character (Ragnar in IV, and Erik in XI S), and the music in Erik's sidestory is taken directly from Dragon Quest IV. The cave music from IV is newly added to the Definitive Edition of XI, and appears nowhere else in the game (unlike the battle theme, which appears in Octagonia).
- Rab's sidestory in the Switch (and PC) version essentially replays the opening scene of V at one point.
- At a certain point of Act 3, the party receives a powerup and the Luminary unlocks the new Splitter set of sword skills. Said skills are essentially just elemental versions of the Avan Strash.
- In Tickington, each altar to a past world is named after the game's subtitle (excluding the first as it doesn't have one). With Dragon Quest X though, it's referred to as the "Altar of the Undeciphered", referencing the game's status as the only not to get localized (as of XI S's release date).
- Newbie Immunity: The Luminary cannot die in the beginning during the trek through Cobblestone Tor as Gemma will keep using Medicinal Herbs on him if his health gets low.
- New Game Plus: A variant in the Definitive rerelease's 3D to 2D system.
- As background, the 3DS and PS4 versions had a password system in Japan, based on the first two Dragon Quest games' password systems, where you could move your progress between the two games. The game would keep you at the exact same place in the story, but your characters and items would be reset using a procedural algorithm to characters that were reasonable for the area. This would allow you to move from the fully 3D PS4 version to the portable 3D or 2D 3DS version.
- The Definitive Edition expanded rerelease includes both 2D (based on the 3DS) and 3D (based on the PS4) modes. This takes the opposite approach from the password system, with the Definitive Edition resetting your storyline progress to a checkpoint, but allowing your characters and items to be transferred intact. While side-quests are retained (no farming the rare accessories, for example), chests are slightly different in the two versions and are thus reset to unopened when switching between the two. It's entirely possible to switch from 3D to 2D (and immediately back) in order to return to the start of the game, before the Cobblestone Tor.
- Nice Day, Deadly Night: Stronger enemies can be found on the world map areas during the night. Often times, they are undead.
- Nice Job Breaking It, Hero: In the post-game scenario, the Hero's traveling back in time to save Veronica has an unfortunate side-effect of allowing the soul of the demon god Calasmos to prevent the destruction of his own body by Mordegon and successfully resurrect himself.
- With this in mind, a book in the Royal Library's last room flat out spells this plot point out: No matter what happens, you must not use time travel. Unfortunately, the book is too old and faded to read fully.
- No Cutscene Inventory Inertia: Zig-Zagged - Generally characters retain their costumes and weapons in cutscenes as the vast majority of them are rendered in engine. That said the game still has a few pre-rendered cutscenes where everyone is reverted to their default costumes and gear.
- Not Quite the Right Thing: You can choose whether or not to tell Michelle the truth about Kai, but it still feels wrong no matter what you say. If you lie to her, she'll remain patiently oblivious of his fate. If you tell her the truth, she commits suicide upon remembering merfolk live far longer than humans.
- Now, Where Was I Going Again?: Pink circles on the map are usually characters who tell you what is important in an area; or where you should go next.
- NPC Roadblock: Quite a few are used early on in the game to constrain your movement, or force you along certain paths. The first one you encounter is a horse.
- Off Screen Villainy: With the exception of Gondolia and the Ruins of Dundrasil, the crimes committed by Heliodor's forces in their hunt for the Luminary are all entirely offscreen, though according to Hendrik in Act 2, they were quite extensive. The most that can be gleamed from in-game dialogue is that, at the very least, they blockaded Angri-La and apparently mistreated the monks there, explaining their initial hostility and distrust towards Hendrik in the second act.
- Old Save Bonus: Very old. The Spell of Restoration is used as a password system for transferring data between the 3DS and PS4. You can also use the Spell of Restoration with passwords from the Japanese versions of Dragon Quest and II, from over 30 years ago, to start a new game with some extra money or items. Sadly, because America didn't get the 3DS version of the game or versions of DQ 1 or 2 with passwords, the feature was removed from the English version.
- Ominous Floating Castle: An airborne castle shrouded in darkness serves as the final dungeon of the main game.
- One-Gender School: L'Academie de Notre Maitre des Medailles is an all girls school, meant to cultivate fine young ladies. It also serves as the location you can bring all of your mini medals to. The Hero despite not being a young lady is made an honorary member.
- Ooh, Me Accent's Slipping:
- The characters in Gondolia sound quite fake to a native Italian speaker. The Scandinavian accents in Sniflheim also sound... a little too subtle to the point where people didn't even realize what they were supposed to sound like.
- Optional Boss:
- Various Malicious Monsters are fought as optional bosses in the post-game, usually causing trouble in one of the several cities of the game. They pretty much serve as warm-up before the final fight with Calasmos.
- More typical Optional Bosses can be found within Drustan's Labyrinth, being much more powerful Palette Swaps of the Spectral Sentinels.
- The 3DS edition adds The End Of Time a golden version of Calasmos as a powerful Superboss. The Definitive Edition, on top of having The End Of Time, also adds the Timewyrm, a golden version of Mordragon, and implied to be the discarded timeline's version of him that somehow survived which tops The End Of Time as the strongest optional boss in the game.
- Origins Episode: This game is the distant predecessor to the entire Erdrick Trilogy, is the game where the title itself was christened, and the direct backstory of Erdwin is the beginnings for the entire world outright, with the origins of the Hero role being a blessing of Yggdrasil— which is itself the form taken by a primordial deity, The Dark One being the primordial source of darkness and evil.
- Party Scattering: At the end of Act 1, when Mordegon steals the Luminary's power and makes Yggdrasil fall, Veronica willingly sacrifices herself to safely scatter the rest of the party across the world. Act 2 primarily focuses on the Hero as he travels across the world for a second time in order to gather his friends and rebuild his party.
- Photo Mode: The Definitive Edition features one, allowing you to pose and take pictures with any amount of your party members.
- Playboy Bunny: Jade can dress in a bunny outfit in battle with the right gear or the Re-Vamp skill, just like other games in the series.
- Port Town: There are three port towns in the game, each acting as a gate to the next portion of the game. The first port grants you your boat, the second port opens the rest of the sea to you, and the last port lies near the end point of the first act.
- Portal Crossroad World: The Echo Chamber in Tickington (which appears in the 3DS and Definitive Editon re-release) allows you to visit past worlds in the mainline Dragon Quest series.
- Psychic Dreams for Everyone: In the second act of the game, at one of the inns, everyone who spends the night has the same dream of a man in armor. Said man is Irwin, the Luminary's deceased father, whose soul is trapped in Dundrasil Castle by the Gloomnivore.
- Putting the Band Back Together: Part of your mission after Mordegon destroys Yggdrasil and the Hero is separated from the rest of the party for months is to find them all again.
- Ragtag Bunch of Misfits: The Definitive Edition reveals the origins of the Soldiers of Smile. They are composed of a trio of fishermen who turned to crime out of desperation, a wandering priest, a novice circus performer, a novice knight, a juggling fortune teller, a drummer with a fondness for horses, a botanist, a wandering martial artist, and a blacksmith.
- Reduced-Downtime Features: The first two entries on the "Misc." section of the menu are Heal All and Handy Heal All. Heal All fully heals everyone with one click. Handy Heal All heals everyone with one click, but won't spend a full healing spell to top up your last few HP.
- Reformulated Game: They were concurrently developed with one another, but the PS4 and 3DS versions of the game are highly different from each other.note
- The PS4 version was co-developed by Orca, and is built on Unreal Engine 4. The characters have full body proportions, and the game uses a controllable third-person camera. It is most similar visually to the Dragon Quest Heroes games.
- The 3DS version was co-developed by Toylogic, and has the option to either play the game in full 3D, with Super-Deformed characters and an art style similar to Dragon Quest IX, or with 2D sprites that closely resemble the Super NES games in the series. The opening uses both styles on separate screens, before having you choose which you want to stick with.
- Relax-o-Vision: As in Dragon Quest VIII, the signature Puff-Puff attack cuts to a screen featuring hearts and birds. In this game, Jade is the one who uses this skill.
- Reincarnation:
- A major theme of the game. Yggdrasil governs reincarnation; the Hero is the reincarnation of the original Luminary; the twins are the reincarnation of one of the original Luminary's companions, Serenica; Hendrik is heavily implied to be the reincarnation of Drustan, the Luminary's warrior companion.
- In the post-game content, Kai is revealed to be the reincarnation of his grandfather, who fell in love with the mermaid Michelle.
- Remixed Level:
- After Mordegon takes the Sword of Light and sends Yggdrasil crashing to the ground, a few new pathways open up on the overworld, the landscape in many areas is devastated by flames, and tougher enemies start popping up. When Calasmos regains its full power, said pathways open up again and even stronger enemies spawn - both on the overworld and in certain dungeons, this time.
- Drustan's Labyrinth is entirely built out of dungeons and areas that the party has previously explored, albeit with its own unique array of enemies, crafting items, and treasure.
- Retraux:
- The 3DS version has a mode that makes the game looks like it was made on the Super Nintendo. It was later brought over to the Definitive Edition version.
- The 3DS version also had the ability to visit locations from previous Dragon Quest games, complete in their original graphical style. The Definitive Edition of this feature SNES-styled versions for the locations that are from the 3D installments.
- Rewarding Vandalism: There are pots and barrels scattered all over the world, and smashing them regularly yields rewards.
- Rhymes on a Dime: Everyone in Nautica talks in rhymes. More specifically, the mermaids speak in heptameter couplets, while the mermen speak mostly in prose with the occasional rhyme snuck in.
- Royals Who Actually Do Something: Jade, Rab, and the Hero turn out to be members of royalty. Sylvando is technically nobility too, descending from a long line of knights.
- Running Gag:
- People frequently compliment and are subsequently jealous of the Luminary's perfect hair.
- Erik's costume descriptions making fun of his hair if there is an option to not put headgear on.
- Sad Battle Music: In the Definitive version, the final Duel Boss battle between Hendrik and Jasper's ghost in act 3 is set to a slow and sad piece instead of the usual boss theme, to drive home the tragedy of the fight.
- Saintly Church: In comparison to Dragon Quest VIII, the Church of the Goddess is much more saintly and helpful in this entry.
- Schizo Tech: While most of the towns are typically medieval, some places like the casino have neon lighting and gambling machinery that wouldn't look out of place in a modern setting. The castle in Sniflheim has an elevator and the sailing ship used to traverse the overworld has a paddle wheel like a 19th century steamship despite not having any smokestacks. There are also people wearing bunny girl costumes throughout the world, which is another modern invention. L'Academie de Notre Maitre les Medailles is a female boarding school with girls wearing uniforms from a Japanese high school, and even the classroom looks like it was from a contemporary Japanese school.
- Schmuck Bait: The Other Side has a colossal chest in it, which turns out to be a Colossal Cannibox. How were you going to open it, anyway?
- Sealed Evil in a Can: The star Erdwin's Lantern is revealed to be the sealed body of the demon god Calasmos.
- Secret Test of Character:
- In the backstory, during the Colloquy of Kings, King Gustaf of Sniflheim and King Carnelian together raise the possibility of the newly-born Luminary being a bringer of evil rather than a savior. When King Irwin, the Luminary's father, responds with righteous indignation and delivers an impassioned speech about how the Luminary is a force for good, Carnelian commends him and remarks that had he shown any less conviction they would have had to take the child from his care.
- The party are met with at least two in the postgame — Don Rodrigo sends Sylvando and Hendrik on a knights' trial to test their teamwork (doing so correctly unlocks new skill categories for them), and the Friend of Time messed with the past DQ heroes' stories to see if this game's batch of heroes would be up to the task of defeating Calasmos.
- Sequence Breaking: While the narrative of Act 2 seems to have a clear order in reuniting with your party (namely Rab, Sylvando, Jade, Erik and finally Serena), it's actually quite possible to do each character's segment and re-recruitment in virtually any order you want, though this will make certain boss fights either easier or harder, most notably Jinxed Jade and Booga.
- Set Right What Once Went Wrong:
- The main crux of the post-game scenario. Your team is not simply going to let Veronica die, so long as there's something they can do about it. Even if it involves a Timey-Wimey Ball that would make Crono and gang blush. Going further from their wishes to get Veronica back, the Luminary and his team also prevent many other tragedies from happening again in the new timeline, several characters who had previously died can be saved this time around.
- The Tickington sidequests in the 3DS and Definitive Edition are about making sure the histories of past games are on their right course as you deal with monsters trying to meddle in them.
- After the True Final Boss is defeated, the Luminary gives his power and the Sword of Light to a restored Serenica, so she can go back to her own time and save Erdwin, like the Luminary himself did for Veronica.
- The Shangri-La: The very aptly named Angri-La is a temple on top of a snowy mountain inhabited by bald, orange-robed monks. They have an agreement with Dundrasil to train their princes for a time when they come of age.
- Shared Dream: After the halfway point of the game, everyone who sleeps in the Warrior's Rest Inn has the same dream of a man in armor calling out. It's turned the inn into quite the tourist attraction. After defeating the Gloomnivore and allowing the man, who turns out to be the Luminary's father, to rest in peace, the dreams stop.
- Shout-Out:
- The game's original Japanese subtitle translates to "in search of lost time."
- A bard in Sniflheim sings something that's very close to "Immigrant Song", by Led Zeppelin. During the Gold Fever episode, he also sings a song with lyrics very similar to the main theme of Goldfinger.
- In Nautica, a quest given to you by a mermaid to seek a particular human singer is titled "Up Where They Walk." This would seem to be a reference to the song "Part Of Your World" from The Little Mermaid, which features the line "Up where they walk / Up where they run / Up where they play all day in the sun..." The Mermaid's Burden is a nod to the original story.
- There's a fighter in the Masked Martial Arts tournament called "The Underdigger".
- Bring the cannon to the Tentacular fight and Sylvando will declare "Say hello to my enormous friend!" before opening fire with it.
- The Trophy for obtaining all the appearance-altering equipment is called "Dedicated Follower of Fashion", which is also the name of a song
 by The Kinks.
 - After the Gold Fever curse is lifted from Sniflheim, the scholar Snorri considers writing a chronicle of the events, with possible titles related to plague-related stories: "The Masque of the Gold Death", "The Sniflheim Strain", and "World War G."
- Veronica and Serena are twins who wear similar clothes, but the younger twin is taller and wears green, while the elder twin is shorter and wears red. Kinda like a certain pair of Italian plumbers.
- Tyriant, an armored skeleton tyrant who favors purple and has a dark sense of humor, has a voice resembling another famous skeleton ruler.
- One of Veronica's audible lines in Party Chat is "Hey, listen!", said with the same inflection as Navi.
- Serena's Sacred Set in the Definitive Edition makes her look like adult Zelda from The Legend of Zelda: Ocarina of Time.
- A Super Shypox line for Erik reveals his childhood nickname was the 'Half-Inch Hedgehog'. Given that he's the party's Fragile Speedster and his blue Anime Hair, it's likely this is referring to the Blue Blur.
- In the Definitive Edition, it's revealed that three members of Sylvando's Soldiers of Smile troupe were originally a trio of Gondolian fishermen-turned-street thugs named the Beastly Boys, referencing The Beastie Boys.
- The portion of the game involving an ice witch couldn't resist referencing Frozen with Krystalinda quipping "Do you want to be a snowman?" during the battle. This is quickly followed up with a Mary Poppins reference, as the sealing spell used against her is a pun on "Supercalifragilisticexpialidocious".
- After helping Lonalulu in Act 1, one of the villagers can sing a song called "Somewhere Over The Raincloud". Given that Lonalulu is a Fantasy Counter Part Culture expy of Hawaii, this is probably a reference to the famous rendition by Israel Kamakawiwoʻole
- A bard with a sidequest in Act 2 is named Luter van Boss.
- Calasmos has "hands" resembling the Acguy and Z'Gok mobile suits.
- King Gustaf of Sniflheim, though (as a Posthumous Character) glimpsed only in the opening cutscene and certain flashback scenes, looks identical to the human form of the Winter Warlock, including the hat.
- For being a musician, Sylvando has a lot of music references in his abilities, including the song "That's Amore" by Dean Martin and several British bands/songs. This even extends to one of the characters he helps; Golden Boy. In act three, upon saving him from Malicious Arachtagon, while giving you a recipe book he makes references to the band Take That.
- In the final dungeon the party briefly meets a crying girl who kindly asks them to die for her.
- When you first meet him, Maxime Médaillé runs towards you with Airplane Arms while saying "kiiin" in the Japanese dub, much like fellow Akira Toriyama-drawn character Arale from Doctor Slump.
- Sliding Scaleof Idealism VS Cynicism: Firmly on the idealist end of the spectrum.
- Sole Entertainment Option: Averted for the most part. While there's still only two casino halls as it usually was in previous Dragon Quest titles, there is also a Racing Minigame in Gallopolis. There's the martial arts tournament in Octagonia and Signor Universo contest in Gondolia, but the former is plot-relevant and so the player can't participate again, while the latter is unavailable to you.
- Sound-Only Death: We never see Jade's ruthless beatdown of Booga, but we hear it, and the party is not so fortunate as we are. Multiple critical and heavy blow sounds are in quick succession.
- Sssssnaketalk: The Auroral Serpent, all the way. "You shall have the pleasssure of being the Auroral Ssserpent'sss sssupper!" This also applies to a Diethon during Erik's sidestory, showing the Flython monsterline from Dragon Quest VI talk like this.
- Stealth-Based Mission: A few stealth segments appear in the game, though aside from getting into combat, the game does not punish you for failing them.
- Near the beginning of the game, you need to sneak out of the city through the sewers, avoiding the guards. Though it is possible to brute force your way through.
- Later, in Gondolia, you have to sneak past guards in the city to rescue one of your companions. However, there's too many guards down the central street so you're forced to go the long way.
- Stealth Prequel: The game takes place before Dragon Quest III, as revealed in The Stinger, which is itself is a prequel to the original Dragon Quest.
- Stockholm Syndrome: While Krystalinda kept Queen Frysabel prisoner within the book that previously held the witch, they would occasionally talk, and Krystalinda apparently gave some words of advice to the young Queen. When the heroes defeat Krystalinda, and frees Queen Frysabel and free her again as the first time was Krystalinda in disguise, again, the Queen is willing to forgive her and offers her a chance at a Heel–Face Turn.
- Sudden Downer Ending: Just for Part 1, fortunately. Still, it's shocking to get all the way up to Yggdrasil, and right up to the Sword of Light inside Yggdrasil's heart, only for Jasper to roll up with a corrupted Orb and ruin absolutely everything.
- Suspicious Videogame Generosity: You can always tell when a boss is right in the next area as you will find a chest just outside with four Mana Potions.
- Surprisingly Realistic Outcome:
- In Hotto, you meet Veronica, who has lost her little sister, then Connie, a small child who is lost. According to the logic of most video games, this would be mission accomplished. However, when you attempt to "reunite" the two, you learn that Connie is an only child and is most definitely NOT Veronica's little sister.
- When the party first reaches Sniflheim, the main gate is frozen over. Serena notes that in the cold wintery climate, freezing over is a natural occurrence. Veronica points out a city cannot function if its main entry point is blocked, and Rab agrees; Sniflheim has always kept its gates clear, regardless of weather.
- Using something that wasn't made for human consumption won't do your vital organs any favors. Just ask Vince.
- Sympathetic Wince: When a newly-freed Jade gives an offscreen No-Holds-Barred Beatdown to Booga (who had kept her Brainwashed and Crazy for a long period of time), the Hero and everyone else in the party wince every time she gives the demon a loud strike.
- Tamer and Chaster: The first new mainline entry in the series to solidify the decision of making some classic females wear be a tad little bit less revealing, after the re-release of Dragon Quest VIII, to accommodate the stricter CERO rating board guidelines on what a game accessible for children is allowed to have. One can notice more layers of fabric on classic Female Soldier designs and the popular Divine Bustier costume right away, among other costumes following the same path. About the ever present churches in the series, the use of cross imagery was replaced by a more abstract symbol to distance itself a little bit from the very obvious catholic church inspiration.
- Team-Based Tournament: When the player first arrives in Octagonia, they become involved in a tournament where teams of two randomized pairings fight each other. Rab and Jade are the only ones who gained an exception and were allowed to keep their normal duo intact.
- Theme Naming: One that's easy to miss among the named residents of Cobblestone — they're named after rocks and minerals. Cole and Dunstan are the only odd ones out, but the former is practically phonetic with "coal", and the latter's name is similar to tungsten. The theme is carried on with Heliodor and its royal family, consisting of King Carnelian and Jade.
- There Is No Kill Like Overkill: Most enemies have separate animations for being killed; and being overkilled by a lot of damage.
- Throne Room Throwdown: Twice.
- The first encounter with the now demonic Jasper in Act 2 happens right in the throne room of Heliador Castle. After that scene, the Spectral Sentinel Tyrian appears and has to be fought right there.
- The final encounter with Mordegon happens right in his throne room, and the second phase as Mordragon is also in the throne room...but completely destroyed.
- Time Skip: Downplayed and played with. When the Luminary recovers from his injuries and starts Part 2 of the game, Queen Marina mentions it has been "many months" since Yggsdrasil fell. Still more months are implied to pass during Part 2, so that by the time the Luminary goes back in time (retaining all his skills, experiences and, apparently, age), Jade notes that he looks a bit taller than when she last saw him less than an hour ago (from her perspective). Part 1 of the game and the Post Game are themselves implied to cover a period of over a year, with two different Sand Nationals being mentioned over the course of the story.
- Tournament Arc: It would hardly be Dragon Quest without one, and with the Dragon Quest IV combat music and several Expies to cap it off, no less. It happens in Octagonia, it's one of the final legs of the quest for the Rainbough, and at the end of it, you recruit Jade and Rab after having fought them in the tournament itself.
- Trailers Always Spoil: Several trailers show the hero fighting alongside Heliodorian soldiers against an army of monsters, showing that the country and its forces eventually undergo a Heel–Face Turn. This scene is even shown in the opening montage sequence that plays when you load the game or if you let the title screen sit too long.
- Transferred Transformation: One Tockington sidequest sees the party visit the town of Moonahan from Dragon Quest II. In the original II, the Princess of Moonbrooke was transformed into a dog by Hargon's forces and had to wait for the two Princes to find a mirror that could change her back. In the Tockington quest, however, the mysterious character altering the stories of the previous Dragon Quest worlds made it where the Princess was able to change back prematurely at the expense of everyone else in Moonahan becoming dogs. She asks the Luminary to find the necessary item that will turn her into a dog again so the people of Moonahan can be uncursed.
- Tricked Out Time: When you go back to Cobblestone when the Hero is around 8 years old, some minor changes occur, but nothing that can change the timeline. As Yggdrasil sent you back in time before you realized what happened to Cobblestone, so you couldn't warn them, as they weren't warned originally. However, you did talk to Chalky, which is revealed shortly afterwards via his letter.
- Tropical Island Adventure: Lonalulu, a tropical island based on Okinawa in the original Japanese version or Hawaii in the English localization.
- Unholy Holy Sword: Mordegon corrupts the Sword of Light into the Sword of Shadows, forcing the Hero to eventually have to make a new Sword of Light. The corrupted version is a drop from the Final Boss and is usable in the first part of the Post-End Game Content.
- Updated Re-release: The Definitive Edition of the game, called Dragon Quest XI S, features voice acting in the Japanese release, to the contrary of the PS4 and PC versions, which went undubbed. There are also additional scenarios involving the individual party members, the ability to use a live orchestral version of the soundtrack, and to play it as a 16-bit style console game like in the 3DS version, as well as a few extra Draconian Quest options. The international release also has the ability to change between the current dub work and the new Japanese voices.
- Useless Useful Spell: Evac, a spell that lets you warp back to the entrance of the dungeon, becomes obsolete in the face of how Zoom is overpowered in this game, as Zoom can be used indoors and in dungeons for no MP cost. Does gain limited use as it can transport you to the beginning of large dungeons when you zoom to them as Zoom points are often in the middle or at the end of the dungeon. Even more useless for Erik in the PS4 and PC versions, as he gets it several levels after the Hero does and it doesn't cost any MP — the Definitive Edition version replaces it with the more thematic Nose for Treasure.
- Video Game Caring Potential: Several sidequests and events in the postgame are made up of this:
- A faculty member of the mini medal academy will ask you to recruit any new students who lost their family. Sure enough, there's one fitting that very category in the Last Bastion, and a monster at the very top of the Eerie Eyrie who was chased out of her home after her friends turned on her - and if you visit the academy after helping them, they'll thank you and give you rewards.
- The postgame's gist is to Set Right What Once Went Wrong. You don't have to do things such as save Tatsunaga (and by extension Miko), rescue Mia, defeat the Gloomnivore again, and the monsters terrorising the Snærfelt or the seas. But it feels great when you do, and you get some prizes as thanks.
- Video Game Cruelty Potential:
- In Puerto Valor's casino, there is a man who sleeps at the bar. The bartender says that the snoozing patron spends his waking hours building a house of cards, which gets ruined by someone every time he dozes off. You can interact with it and cause it to fall. Even the bartender calls you on it!
- While galloping on the world map, you don't need to run into every single enemy and knock them off like bowling pins... but gosh darn it if it isn't so satisfying to blow away several beasties in a row!
- Villains Out Shopping: In Part 1, you can find some Heliodorian soldiers lounging in Puerto Valor. If you talk to them, they admit that they should be chasing you, but since they're on vacation they just pretend they don't see you.
- Well-Intentioned Extremist:
- Sure, Miko, protecting your town and your son is a good idea, but lying to the town about what really happened, and setting up a Human Sacrifice to appease your monster-son's hunger isn't the best way to do it...
- Vince is willing to make a Deal with the Devil and nearly kill himself with his doping in order to make sure the orphanage kids still have a place to sleep every night.
- Wham Line: When you return to Hotto, Miko, the villain of the week, changes things entirely:"Stop! Stay your weapons!
Though this may seem a dragon,
it is but a boy!" - World-Healing Wave: Mordegon steals the heart of the World Tree, Yggdrasil, setting the second half of the game After the End and causing much of the world to end up as a charred wasteland. Once you defeat him, Yggdrasil is restored and emits one of these, restoring life and beauty to the land.
- World of Pun: As is befitting the franchise, puns are everywhere in the game.
- Wrecked Weapon: The Sword of Light that the Hero makes gets wrecked when he uses it to shatter the Sphere of Time to Time Travel, which the Timekeeper states is a consequence of rewinding time itself. The Sword of Shadows then shatters after defeating Jasper and his Orb of Shadow, which is somewhat implied to be the result of a Paradox due to preventing the events that lead to its creation.
- Wrong Bathroom Incident: While in Hotto, after using the sauna instead of going back into the male changing room you can instead step outside and then go into the female changing room. Doing so gains you an achievement, but an NPC will call you out for it.
- Wutai: The village of Hotto is explicitly modeled on ancient Asian architecture. In addition, most of the towns folk speak in Haiku. Though the English localization gave it a more Hawaiian flavor, Lonalulu is clearly based on Okinawa.
- Young and in Charge:
- The high lama of Angri-La is a young boy. It was noted that many protested this choice initially but he has proven himself very capable.
- Less extreme, but still noteworthy, is the young adult queen Fryselda of Sniflheim. She took over her father's throne when he passed away, but realizes she still has a lot to learn about leadership. Still, she's loved by her people and is seen doing an admirable job.
- Your Princess Is in Another Castle!: You've traveled the whole map — twice — in your quest, defeated Mordegon, and returned peace to the land; but the postgame opens by presenting the possibility of going back in time to prevent his rise to power — and the Heroic Sacrifice of one of your party members — in the first place. Follow through on that, and there's yet another problem looming: in the original timeline, you saw Mordegon destroy something that he felt threatened his reign. Now with Mordegon down, the other evil makes his move unopposed.