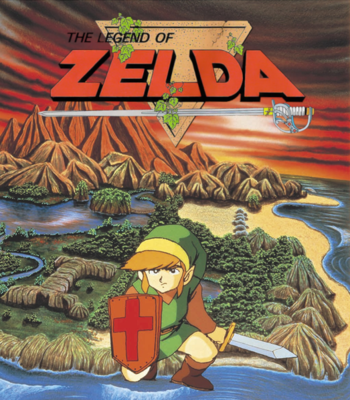
The Legend of Zelda is a 1986 top-down Action-Adventure game and the first game in The Legend of Zelda franchise. One of the early role-playing games with nonlinear setup, it is credited as one of the most important games among them for codifying many of the genre's touchstones.
Originally released as The Hyrule Fantasy: Zelda no Densetsunote for the Famicom Disk System's launch in Japan on February 21, 1986, it was ported to cartridges for the Famicom's western counterpart, the Nintendo Entertainment System, in North America a year and change later on June 30, 1987, and subsequently Europe in November 1987.
The NES release was notable for being the first game to use a battery-backed save feature, and was released, as a gimmick, in a gold cartridge rather than standard gray. This version was later released on a standard Famicom cartridge in 1994 as Zelda no Densetsu 1.
Both the original adventure and the "second quest" would eventually be remade as BS The Legend of Zelda, an enhanced version for the Satellaview Super Famicom add-on with new dungeon layouts and voice acting. This version of the game is notable for being the first game to allow the player to play as Princess Zelda.
The story, as told through an Engrish title scroll (later revised in re-releases) tells of the evil warlord Ganon, who has stolen the Triforce of Power and kidnapped Princess Zelda, holder of the Triforce of Wisdom. To keep it from falling into Ganon's hands, Zelda split her share of the Triforce into eight pieces and stashed them in dungeons across Hyrule before she was kidnapped. Link, the hero, must gather the pieces to enter Ganon's lair up on Death Mountain, recover the Triforce of Power, and Save the Princess. Unlike in later games, there is little dialog, other than vague hints given by various old men, and not much in the way of sidequests.
This has had some fan remixes over the years, including Zelda Classic, as well as some ROM hacks such as Zelda Challenge: Outlands.![]() There are also a number of randomizers for the game:
There are also a number of randomizers for the game:
- The Zelda 1 Randomizer, created by Fred Coughlin, found here.
 it can mix up almost everything in the game, including the layout of dungeons. The only major feature it does not randomize is the overworld. It was was one of the first randomizers to become popular, preceding other popular randomizers like the A Link to the Past: Randomizer and Super Metroid randomizer.
 - Infinite Hyrule, a sort of complement to Fred's randomizer, randomizes the overworld. It can be run on the vanilla game or run on seeds that have already been run through Fred's randomizer.
- The Legend of Zelda Reloaded, created by MetalMachine. Still in beta; can randomize the overworld, dungeon layout, item placement, enemy placement/difficulty, and numerous other game features. MetalMachine was already known for a combo randomizer for Zelda I and Metroid.
- A Web randomizer created by Tetra. It doesn't have as many features as the others yet, but it's also the only one of these that's not a Windows exclusive.
- Lastly, there's also a Zelda Randomizer built in Zelda Classic; this isn't strictly a Zelda I randomizer in some respects, since it's not running on the vanilla game, but it plays similarly to one.
The game can be played on the Nintendo Switch as part of its Nintendo Entertainment System — Nintendo Switch Online suite of emulated classics. In addition, a special version of the game entitled The Legend of Zelda: Living the Life of Luxury! is also available. This special edition of the game attempts to enhance accessibility by giving access to nearly every single item at the start of the game in addition to a massive cache of Rupees.
The game would also get a re-release in November, 2021 as a special edition Game & Watch to commemorate the 35th anniversary of the game's original release.
According to Hyrule Historia, this is the second-to-last game in the "Hero Defeated" timeline; its immediate sequel is the last.
IT'S DANGEROUS TO GO ALONE! TAKE THESE EXAMPLES:
- 11th-Hour Superpower: The Red Ring and Silver Arrows, both located within the final dungeon of both quests (you need all 8 Triforce pieces to even get in, so they're really only useful in said dungeon). In the second quest, the Arrows can be obtained fairly early on, but the Ring is located only a few rooms away from where Ganon is, so you really only get to use it on him (and for self satisfaction that you got every item).
- Abnormal Ammo: This game uses your Rupees as ammunition for your arrows for some reason, most likely technical limitations.
- Absurdly Short Level: The third dungeon in the Second Quest is unusually brief, only consisting of a small arrangement of rooms shaped like an L (save for the final two rooms, which appear to form an apostrophe at the left of the L). It's even shorter than any of the early dungeons seen beforehand in the First Quest. Another unique detail is that the main bosses (a trio of Dodongos) don't guard the Plot Coupon directly (they're fought prior to the aforementioned two final rooms, plus another one preceding them), which gives the impression that they are mini-bosses in a dungeon without a boss (though they still drop a Heart Container upon their defeat).
- Adaptation Dye-Job: This particular Link is brunette in canon, which is very uncommon in the series. However, some of the artwork still depicts him as blond or strawberry blond. Some of the merchandise for the sequel even makes it look bleached.
- After Boss Recovery: Starting with this game, almost all installments in the series have dungeons let you not only fully recover from a major boss fight, but also permanently increase your health meter, by obtaining Heart Containers.
- A.I. Breaker: Dungeon enemies capable of actively targeting Link as opposed to attacking randomly (Ropes, Darknuts, Blue Wizzrobes, etc.) can only do so if he's standing directly on a floor tile, and they themselves cannot move along the spaces where tiles meet. You can, so walking on the edges of floor tiles or standing in their four corners makes it much easier to fight these enemies while avoiding the full brunt of their offense.
- Airborne Mook: The game marked the debut of Peahats, which hover in the air with the flower-like petals above their heads and tend to move from one spot to another in a straight line. Peahats have since appeared in later games in the series, usually having a more flexible movement as well as higher endurance.
- Almighty Idiot: According to Hyrule Historia, Ganon never fully recovered from his botched resurrection in The Legend of Zelda: Oracle Games; his next chronological appearance occurs in this game, and is described as a beast deprived of Ganondorf's genius intellect, explaining why the final battle is more of a simple Bowser-like boss fight in comparison to the more complex battles in other games.
- Alphabet Architecture: In the Second Quest, the first five dungeons are modeled after letters in their map designs, spelling Z-E-L-D-A (one letter per dungeon) in a scrambled order (E-A-L-D-Z).
- Ambiguously Christian: Link, as confirmed by the developers. He has a cross on his shield and carries a Holy Bible in his inventory (renamed to Magic Book in the English dub), and he's willing to selflessly and unquestioningly risk his life to rid the world of evil.
- Ambushing Enemy: The Wallmasters are disembodied hands that creep out of the wall and, if they hit Link, drag him back to the entrance of the dungeon. They're also quite generous with dropping blue Rupees and life hearts though, and they aren't that durable, so players who aren't creeped out by them may be happy to encounter them.
- Animated Adaptation: The cartoon was primarily based on this game, with elements of Zelda II: The Adventure of Link.
- Anime Hair: Link, although you would never tell from the sprites. In addition to the long sideburns from other games, his bangs also point straight forward.
- Anti-Frustration Features:
- Nintendo of America was well aware that new players would be lost and confused, so the original game box came bundled with a map to help guide players through the game. None of the ports or rereleases kept this, since internet guides have made such a map superflous.
- Due to how open the world is, it's possible to run out of keys, so the game allows you to buy them at shops so your quest doesn't become unwinnable.
- The second game is typically considered significantly more difficult than this one, and it's probably because of this trope. Both games involve some difficult fights (with Zelda II being slightly harder with its superior AI), both have obtuse hints that practically need a walkthrough to understand, but the first game has a lot more room for error from the player before they're defeated due to extra life, plentiful healing, and a little more flexibility in handling challenges.
- The battery-backed save feature on the original NES cartridge can be seen as an anti-frustration feature due to being released at a time when saving your progress to continue later was practically unheard of. Had this feature not been present, this game would have been made much more frustrating to complete due to the sheer length compared to most other games of the time.
- The Classic NES Series games on the Game Boy Advance are just emulation "ports" with virtually nothing changed from the originals. However, they also only support one player, and thus one controller. This game's "bring up the Continue/Save/Retry screen without dying" command requires using a controller plugged into the player 2 slot, but in the Classic NES version, the command can be performed by pressing Up and Select on your GBA.
- In the original Famicom Disk System version, Pols Voice can be instantly defeated with the microphone on the second controller. This function is emulated on the Nintendo 3DS and Wii U Virtual Console versions, which have dedicated microphones — but ports on systems that don't have microphones sometimes get creative in emulating it. On the Game Boy Advance version, it's pressing Select four times; on the Wii Virtual Console, it's rotating the right stick on a Classic Controller, or the C stick on a GameCube controller; on Nintendo Switch Online, it's holding either L and ZL, or R and ZR; on the Game & Watch version, it's holding Select for a few seconds.
- Armor-Piercing Attack: Gohma, Gleeok, and Ganon all fire energy balls that cannot be blocked by your Magic Shield.
- Armored Villains, Unarmored Heroes: Link faces foes dressed only in a tunic and pants, while his armored enemies range from stone statues to ten-foot-tall knights in full plate.
- Arrange Mode: The "Second Quest", unlocked either by completing the game or entering the file name as "ZELDA". This quest has the dungeons and Heart Containers rearranged around the map, as well as increased difficulty.
- Asteroids Monster:
- Zols and Vires split into two monsters, but only if struck with a weapon under a certain power level. In order to kill them in one go, Zols require the White Sword, Arrow or Magic Rod; Vires require Magic Sword or Bomb (Silver Arrows also work, although you're only likely to use this strategy in ROM hacks of the game since the Silver Arrows can't be collected before level 9 and there aren't any Vires in level 9 of either quest).
- The boss Digdogger will split into three smaller, weaker versions of itself if Link plays the Recorder.
- Attack Its Weak Point: Some bosses have a specific point: Aquamentus' and Gleeok's heads (not only respectively, but also literally in the latter's case), Dodongo's mouth, and Gohma's eyes. In contrast, the remaining bosses either require using a specific item to be defeated (Digdogger, Ganon) or are simply weak to any attack no matter where they're hit (Manhandla, Patra).
- Audible Sharpness: Swinging Link's sword with full health sends out a Sword Beam with its own distinct sound.
- Back from the Brink: The previous legendary hero was slain long ago, Ganon's forces have ravaged Hyrule, the Triforce is shattered, and all that remains of the kingdom are a few random old people hiding in caves. And then Link appears to revert gradually the situation and eventually defeat Ganon and his army.
- Bat Out of Hell: Keese are a kind of large aggressive bat.note Vires on the other hand are demonic bat-like imps that split into two Keese when killed.
- Battle Theme Music: A notable aversion for the franchise, likely due to technical limitations from the game's era: None of the enemies or bosses, not even Ganon who is the Final Boss, has a battle theme.
- Beef Gate:
- The Lynels that populate the Death Mountain area in the northwest of the map. They're by far the nastiest enemies you'll find in the overworld, with the orange Lynels taking four hits from the Wooden Sword to kill and the blue ones taking about seven, and both varieties shoot a sword projectile that requires the Magical Shield to deflect, while dealing a hefty two hearts of damage when they hit. A single one can easily slaughter a beginning player, and you will find swarms of them in the northwest, effectively keeping the player out of that region until they acquire some more hearts, the White Sword, the Magical Shield, and preferably the Blue Ring.
- The Manhandla that is the boss of Level 3-1. Manhandla is incredibly hard to kill with any weapon weaker than the White Sword; it has four different heads to kill, and each one takes four strikes with the Wooden Sword to destroy, and it gets progressively faster and harder to dodge as it loses its heads. If you haven't gotten the White Sword (or don't know about Manhandla's bomb weakness) you aren't going to have an easy time finishing that level. To a lesser extent, the Zols that heavily populate 3-1. The White Sword kills them easily, but the Wooden Sword splits them into two Gels and then they respawn every time you leave and reenter a room.
- "Begone" Bribe: "IT'S A SECRET TO EVERYBODY." The Moblin is bribing Link to leave him alone and not tell anyone where he is.
- Betting Mini-Game: An NPC suggests to Link, "Let's play money making game." Said NPC leaves unspecified exactly who will be making the money. There are three Rupees on display and each one gives or takes a certain amount. One gives you the bonus, the other one takes a few rupees away, and the last one takes a lot of rupees away from you.
- Beware the Skull Base: Level 9 uses a dungeon layout that is shaped as a skull, which is prominently displayed when the player finds the dungeon's map.
- Big Bad: Ganon has the Triforce of Power and is commanding all the other monsters to try and obtain the pieces of the Triforce of Wisdom.
- Big Boo's Haunt: The graveyard in the northwestern part of Hyrule has a stark white-and-grey color palette and is full of ghostly Ghini monsters that emerge from gravestones. The nearby dungeon (the Dragon, labeled in-game as Level 6) features a foreboding yellow palette instead of the more welcoming blue and green ones from all prior dungeons except the fourth (which also uses yellow), and is filled to the brim with powerful magicians called Wizzrobes.
- Big Creepy-Crawlies: Gohma, an armored crab-like monsters visibly larger than Link. It would later go on to grow into a family of boss monsters with a large eye as their weakness.
- Blackout Basement: Starts and is most prevalent in Level 4 of the first quest, where nearly every room is pitch black. However, Level 5 is a close runner-up. In later dungeons, it becomes more of a random gimmick. The Blue and Red Candle can light up the entire room, but it goes pitch black again should you leave.
- "Blind Idiot" Translation: To the point that it actually severely increases the difficulty of the game.
- A lot of the trial-and-error aspects of the game would have been averted if the messages had been rendered properly, and indeed Japanese speakers who played the Japanese version have traditionally cited the enemies as being the primary reason for the game's
 Nintendo Hard difficulty, rather than the difficulty of finding dungeon entrances and hidden treasures. That being said, there's one notable hint given by the old man in level 8 where he says "10th enemy has the bomb". The Japanese version has him give a hint about the Magical Key instead. However, the English hint about the bombs is actually true, but how you get bombs from a "10th" enemy isn't exactly explained. Explanation
 - The localization removes the hint about the Silver Arrows' location. In the Japanese version, the old man in Level 8 says "look for the arrows in Death Mountain," which was changed to "Spectacle Rock is an entrance to death." In fact, the hint in the localized version was originally given in level 7, which was changed to "there's a secret in the tip of the nose." Without the hint, they're not just harder to find — with no mention of them anywhere else, a lot of 80s kids probably spent a ton of time attacking Ganon and not knowing why nothing can keep him down, never having gotten that earlier hint that there are some arrows around here that are supposed to be important.
- The opening story contains several spelling and grammar errors, most infamously, "Many years ago Prince Darkness Gannon stole one of the Triforce with Power", which originated the misspelling "Gannon". However, this is present in the Japanese version, too. The localizers simply didn't bother to correct it! This was at least addressed in the GBA port, which rewrote the scroll to be more comprehensible.
- A lot of the trial-and-error aspects of the game would have been averted if the messages had been rendered properly, and indeed Japanese speakers who played the Japanese version have traditionally cited the enemies as being the primary reason for the game's
- Boring, but Practical: The doorway hiding trick in dungeons. This trick only works on open doorways and will not work on trap doors nor bombable passages. You can hug the doorway just enough to not pass to the other room but enough to not be on the room tiles. You won't get hit by enemies nor projectiles while you are able to spam your sword attack; even better when you are in full health to sword beam spam. The only exception to not getting hit is the Blue Wizzrobes where it can pass through walls.
- Boss in Mook Clothing:
- A lone blue Lynel blocks the path to the White Sword. While not as dangerous as the packs of Lynels that appear on Death Mountain, it is still one of their kind, being the hardest-hitting enemy on the overworld with Sword Beams that can only be deflected by the Magical Shield. This powerful enemy is positioned in such a way that it acts as a Threshold Guardian to overcome before obtaining the White Sword, despite not being a true boss.
- Some enemies you don't encounter until later in the game (blue Darknuts, blue Wizzrobes) can be tougher than some of the early game bosses like Aquamentus and Manhandla.
- In the second quest, the Pols Voice act as an enemy equivalent to the Early-Bird Boss, as they first appear well before the weapon necessary to One-Hit KO them, the bow and arrow. With the sword, they take many hits to kill, and are difficult to strike with their erratic "jump" movements. This only applies to the English version: in the Japanese version, they can be killed just as easily as in the first quest by shouting into the Famicom controller's microphone.
- Boss Rush: Level 7 has three Digdoggers and two sets of three Dodongos before meeting the dungeon's actual boss, Aquamentus. Some of the bosses in the level can be ignored. Level 9 has eight bosses you can encounter before reaching Ganon, though you won't have to fight them all if you know where you're going.
- Bowdlerise: The Book of Magic item is referred to as the Bible in the original Famicom Disk System version, and the mode that allows you to delete save files is known as "Kill Mode" in the FDS original; this was renamed to "Elimination Mode" in the NES version.
- Buy or Get Lost: The hidden merchants will greet Link by shouting "BUY SOMETHING, WILL YA!"
- Cap: Link can only hold 255 rupees and eight bombs. He can later upgrade his bomb capacity to twelve and then sixteen if he finds certain old men in dungeons and pays the 100 rupee fee to upgrade.
- Cartoon Bomb: Bombs are depicted as large, smooth balls with a long wick; contrary to most depictions though, they're typically blue rather than black (how deep of a blue depends from game to game), a carryover from the technical restrictions of the NES.
- Cartoon Meat: The Monster Bait item takes the form of stock cylinder of manga meat with a femur bone at each end. Its advertised purpose of distracting baddies isn't terribly useful (only the weaker ones seem to go for it), but you still have to buy the stuff as it's also a Plot Coupon in disguise that you have to trade to progress through the game.
- Cash Gate: The game requires you to purchase food/bait (60 Rupees at the cheapest) and arrows (80 rupees) from the merchant. These items are needed to advance in dungeons.
- Cast from Money: Arrows in this game drain Rupees when fired due to a lack of a proper ammo system.
- Cave Behind the Falls: There's an old man who tells you to "WALK INTO THE WATERFALL". Doing so yields an old lady who gives you a hint to finding the next dungeon.
- Classic Cheat Code:
- Naming your saved game ZELDA (or at least starting the name with ZELDA, so ZELDARA would trigger this too) starts you off on the second quest.
- Pressing Up+ A on the player 2 controller takes you to the Continue/Save/Retry screen immediately, so you can save without having to die. In rereleases on platforms where you can't plug in a second controller, substitute commands are used, such as Up+Select on the GBA version.
- Clean Dub Name:
- The boss Testitart was renamed to Manhandla for the English version, probably because the Japanese name sounded too close to testicles.
- The recurring knight-like enemy characters known as the Darknuts in the English versions of the games were originally known as Tartnucs in Japan. The change was likely due to the name "Tartnuc" forming the words "cunt rat" when spelled backwards.
- Colour-Coded for Your Convenience:
- Red is used for things that favor Link, while blue favors his enemies. Most of the upgraded items are red, and special items like the Power Bracelet are also red. Weaker enemies are red, while stronger ones are blue. The first two dungeons are colored blue, and there are no red dungeons. Finally, Ganon himself is colored blue, but he turns red when stunned and vulnerable to the Silver Arrow, and the ashes shown after his death are red.
- Turned backwards with the red and blue bubbles in the 2nd Quest. Touch a red one, and you won't be able to use the sword at all until you either touch a blue one, drink the water of life, or visit a fairy in the Overworld.
- Comic-Book Adaptation: There are at least three adaptations, two being manga works and one being the Valiant Comics series, authorized by Nintendo and based on this and Zelda II.
- Convection, Schmonvection: Every dungeon located on Death Mountain in the first quest has lava in place of water. Not only is Link unaffected by it, but he can also cross narrow flows of it with a wooden Stepladder. It gets better: the lava is completely invisible in the dark.
- Counterpart Artifacts: The iconic Triforce is portrayed as this in this game, with Zelda having the Triforce of Wisdom and Ganon the Triforce of Power. It wasn't until the second game that the Triforce of Courage was introduced (and, starting from that game's ending, associated permanently with Link).
- Crapsack World: There are no cities or villages. The entirety of Hyrule is a wilderness overrun with monsters, and the few scattered Hylians are hiding out in caves and ruins. The Hyrule in this game is not a nice place at all. This is explained in the sequel, where the play area of this game is revealed to be a very tiny, remote part of Hyrule, located at the southern end of Death Mountain.
- Creepy Cemetery: There's a graveyard on the western side of the map. Touching most of the gravestones makes an invincible Ghini spawn, which can quickly become a hassle. But if you can handle them, it becomes one of the best places to farm rupees. The first quest hides the magic sword there, and the second quest has the entrance to the 6th dungeon hidden there.
- Creepy Centipedes: Centipede enemies known as the Lanmola first appear as basic Mooks in this game, only appearing in the Death Mountain dungeon.
- Creepy Crosses: All the tombstones in the graveyard have crosses on them, as do Link's shields and the Book of Magic. Miyamoto explains that the motif is caused because the original plan was to have Christianity as the main religion in Hyrule; the three goddesses weren't invented until after the two NES games were released.
- Crossover Cameo: According to the Japanese instruction booklet, Digdogger and Manhandla are respectively a Unira from Clu Clu Land and a Piranha Plant from Super Mario Bros. (incidentally, Rupees use Ingot sprites from the former).
- Curse: There's one pertaining the red/blue bubbles from the Second Quest. Touching a red one disables Link's sword until the player locates and touches a blue one.
- Damage Discrimination: Played straight with bombs, which can't harm Link even when he's standing directly on top of the explosion. Averted with the Candles and the "Book of Magic"-enhanced Magical Rod, where the flames they produce damage Link if he's careless enough to walk into them.
- Damsel in Distress: Zelda knows she's going to be captured as part of Ganon's plot, so she fragments the Triforce of Wisdom (which is what he's really after) and hides it in various parts of her kingdom, then enables her most loyal servant to escape to find help while she herself is taken prisoner.
- Death Mountain: The trope namer, with almost all of the hallmarks. Interestingly, outside the NES it's usually the home of the friendly Gorons and its ominous name doesn't match unless walking in a straight line is hard for you. In this one, it's the site of The Very Definitely Final Dungeon, and in the sequel, a series of very tough mini-level caves, some of which even lead to dead ends. In other words, it's called Death Mountain 'cause YOU WILL DIE!
- Degraded Boss: Several bosses appear as normal albeit one-off enemies in later dungeons. Several of them are inverted, if anything, being stronger and more dangerous than the boss versions fought earlier.
- The First Quest:
- Level 4: Manhandla, boss of the third dungeon, returns as a miniboss.
- Level 5: Three Dodongos show up for a miniboss battle, where a single one served as the final boss of the second dungeon.
- Level 6: The two-headed dragon boss of the fourth dungeon, Gleeok, shows up as a miniboss sporting a third head.
- Level 7: The fifth dungeon's boss, Digdogger, is fought as a miniboss battle three times. In two of these fights it sports three Digpuppies instead of one. This is followed later on by two more trios of Dodongos. Finally, the boss of this level is Aquamentus, the boss of the first dungeon without any changes.
- Level 8: A total of three Manhandlas appear in this dungeon. Also, two Gohmas from the sixth dungeon, requiring three times as many hits to defeat. The final boss is a four-headed Gleeok.
- The second quest has bosses scattered all over that even some of the end-dungeon bosses appear even before the main end-dungeon boss itself. The Manhandla is no longer considered a dungeon boss in this quest.
- The First Quest:
- Dem Bones: The game marks the debut of the Stalfos, the skeletons who wander around in dungeons. They get upgraded to firing sword beams in the second quest.
- Denial of Diagonal Attack: Link can only move in four directions and his main attack is a straightforward stab, which makes it difficult to attack things that you'd rather not be standing directly in front of. It's a major factor in the game's Nintendo Hard status; all later games give you a slashing motion so you can attack enemies you aren't directly in front of and nose-to-nose close to and so are much easier even without lessening the damage enemies do. With a little finesse, you can throw the boomerang diagonally, but that's it.
- Destructive Saviour: There are a lot of secret rooms hidden behind walls and bushes which requires Link to do a lot of demolition and burning. Unlike later games, these destructible points are not visually hinted at in any way, making for a major case of Guide Dang It!. If you want to beat it the "right" way with no outside advice, you'll be bombing and burning every inch of the overworld.
- Developer's Foresight: You start with three heart containers, and the game will not allow you to have fewer than that. If you somehow manage to reach one of the "Leave your Life or Money" rooms in the second quest with only three heart containers and try to give one up, the game will empty all of your hearts, but will allow you to leave without taking a heart container. However, take any damage before finding a way to heal, and it's Game Over.
- Difficult, but Awesome: Bombs have a time delay, stay put when used, have a somewhat limited range, and suffer from low capacity. However, their power is equal to that of the Magical Sword, and they are one of, if not the easiest side-weapons to get in the game. When used in tandem with other items (e.g. bait, boomerang), bombs can capably clear screens where you're otherwise overmatched early in the game. In the first quest, bombs are also essential in acquiring the Disc-One Nuke; see below.
- Difficulty by Region:
- A very minor example — the North American version adds Keese to a couple of originally empty rooms.
- Pols Voices are much harder to deal with outside Japan. This becomes most apparent in the second quest, where they appear before the bow. As mentioned elsewhere, its vulnerability to sound refers to the microphone the Famicom has but the NES doesn't, and they take a lot of sword hits and are clustered together. Since you're supposed to talk into your controller and watch them die, not fight them, they become terrible enemies where that doesn't work (for instance, the Nintendo Classic Mini Famicom release has no microphone, so the Pols Voice has neither weakness in that version). Later games do make them vulnerable to musical items (ironically, without hinting at it, meaning that you're supposed to remember this game and try something that didn't work!)
- Disc-One Nuke:
- Both quests:
- For newcomers who are unacquainted with how to find everything, the Boomerang is a big boon to have, and it can be found in the first dungeon. It requires no ammo, it has a long range and it can stun any enemy except for the bosses, either letting you evade them easier or giving you a free shot at attacking them (especially useful if you're at full health and are thus able to use the Sword Beam), which is very, very helpful in a game with a lot of close quarter combat and the overworld areas filled with Lynels. It also kills minor mooks like Keese as a bonus. On the second quest, it is immediately found in the room on the right after killing 5 red Goriyas.
- Bombs. Can be received at anytime in the game. Giant radius of damage. Does the same amount of damage as the Magical Sword. Several walls can break for shortcuts. The only thing stopping this from being a game breaker is the limited amount of supplies.
- The First Quest can be done in the order it is placed (minus Level 6 which is often played last before 9), so most of the following would be more Awesome, but Impractical due to the difficulty required to get some of those items:
- The Bow and Arrow in Level 1. If you are stacked with rupees, this will make your life much easier in the case you are not in full health at any point in the game to shoot sword beams.
- If you know where to look, are somewhat good at evasion, and willing to grind Rupees for a few minutes, it is possible to get three of the five overworld Container Hearts and therefore the White Sword, and the Blue Ring before entering the very first dungeon in the first quest. The three extra hearts and the White Sword can easily be gotten quickly and will allow you to breeze through at least the first half of the game, but the ring is very expensive at 250 Rupees (five away from the maximum) and thus requires more time spent finding hidden rooms in the overworld for larger caches of Rupees if you want to buy it quickly (and without savescumming or Rupee-farming), but it is also a major boon to have itself. (You can also manipulate the money-making game with Save Scumming, which will greatly cut down on the time necessary to farm Rupees).
- The Magical Rod in Level 6 without any other items than bombs. Good luck with a room where you are required to defeat Wizzrobes and Like-Likes, but this will make the 1st half easy in case you don't want to to exhaust rupees for the Bow and Arrow.
- The Magical Key in Level 8. Get the bow in Level 1. Good luck dealing with Blue Darknuts and Blue Gohmas, but you don't have to cash in rupees for keys.
- The Second Quest's difficulty inconsistencies make this a must to do in this particular order:
- The Ladder in Level 6 can be collected very early by just having the Recorder. You do not have to defeat any of the Wizzrobes in 3 rooms to achieve this, but you just have to be very careful approaching. Most players would go for this after completing the first 3 dungeons, have 9 hearts health, the Blue Ring, Magical Shield, and Water of Life stocked. The ladder in this quest will be used much more than the first quest for sure, and sure will make this a blessing to tackle...
- Level 8's big 3: The Magical Key, Wand, and Bomb Upgrade. Doing the above for the ladder is required. This dungeon doesn't feature any enemies harder than Blue Goriyas, this quest's revamped Stalfos, and Digdogger. Those 3 things would make the second half of the game a LOT easier than just doing them in the order designed.
- Both quests:
- Dismantled MacGuffin: Princess Zelda breaks the Triforce of Wisdom into eight pieces to keep it out of Ganon's hands, and sends Impa to find someone to recover the pieces before he does. She finds Link and that's where the game begins.
- Double Unlock: You get the Bow from a dungeon, but you need to buy the Arrow from a shop as well before it's usable. Even then, it costs rupees to fire arrows.
- Dub-Induced Plot Hole: The manual includes the hint that the Pols Voice enemy "hates loud noises". At no point in the localized version of the game does this come into play. It's referencing a trick on the Japanese (Famicom Disk System) version, in which Pols Voices could be killed by shouting into the microphone built into the controller. However, when the Famicom was released in the West as the Nintendo Entertainment System, it didn't have the microphone, but the description in the manual was unchanged. American gamers wasted a lot of time trying to kill them by playing the recorder, not helped by the presence of a boss who is injured by the recorder. And when the enemy reappeared on the Nintendo DS it was back to using the microphone.
- Dub Name Change: Most notably Bible to "Book of Magic" between the Disk System and NES releases, but also Tartnuc became Darknut, and Testitart became Manhandla. Later installments also renamed Molblins to Moblins and Zolas to Zoras.
- Dynamic Loading: The game has a brief pause when you move to the next room or area, which is used to load the next area plus whatever enemies that are there. Sometimes the enemy data takes longer to load than normal and causes the sprite to appear as a puff of smoke until the sprite is fully loaded. This can also happens to the NPCs you meet in caves and you can't move until they are loaded since you are usually forced to wait for their text box to finish.
- Early-Bird Boss: Aquamentus takes six direct hits with the wooden sword to kill, and he spits energy beams that can't be blocked without the magical shield. Once you've got either the white sword or magical shield beating him becomes easy (having both makes it near effortless), but with the starting equipment he can be a brick wall. It's possible to get the white sword before entering the first dungeon by collecting hearts hidden in the overworld, but a first-time player wouldn't know that.
- Early Game Hell: This game and its sequel are very brutal in the beginning where enemies are strong and you lack decent gear and enough hearts to survive. As you progress, you'll find better items and your life meter will be longer, thus you can endure enemies a lot better.
- Early-Installment Weirdness: Enough to warrant its own page.
- Easier Than Easy: The Game & Watch edition (both NES and Famicom versions) include a special mode that starts you off with all sixteen hearts. This breaks the first two-thirds of the game wide open, since you can grab the Magical Sword right away, and you can freely choose the Life Potions offered by the old men because you have no use for the extra Heart Containers.
- Endless Corridor: The game contains two areas which constantly repeat: the Lost Woods and the Lost Hills. You can only get out of them and move on to the next game-critical area by making a certain sequence of moves. In both cases, though, you can bail out by moving once in a certain direction. The Lost Woods have become somewhat of a series staple and appear in subsequent games as well.
- Exact Words: One of the old ladies in the cave says "Pay me and I'll talk." So, you give her a good chunk of Rupees, hoping for some great information about what to do next... and she says "Boy, you're rich." Well, she did say that she would talk if you gave her money...
- Faceless Eye: Patras are swarms of flying eyeballs, with no other body parts besides wings.
- Feed It a Bomb: The usual method of killing Dodongos, introduced in this game. It's also possible to beat them by detonating a bomb near them instead of having them eat it, since it stuns them and lets you kill them with one hit from your sword (much harder to pull off, but takes half as many bombs)note . As the old sages say, "DODONGO DISLIKES SMOKE".
- Final Dungeon Preview: Link can enter the final dungeon any time after he gets bombs, but in the second room he'll be told he needs to have the full Triforce of Wisdom to go any further.
- Flash of Pain: Both Link and the enemies briefly flicker to show damage when they're hit.
- Flip-Screen Scrolling: The game scrolls in full-screen intervals, both horizontally and vertically. Dungeon maps were explicitly divided into a grid of discrete rooms, but the overworld map was not.
- Food as Bribe: Happens in the seventh dungeon, as you have to buy a bait to pass a particularly hungry Goriya enemy.
- The Foreign Subtitle: Inverted, its tagline The Hyrule Fantasy was dropped from international releases.
- Forest of Perpetual Autumn: The Lost Woods have orange-leaved autumn trees instead of the green-leaved spring trees elsewhere.
- Friendly Fireproof: Old men, old women, bribing Moblins, and shopkeepers cannot be injured by your sword or items, since they just pass right through. Old men in labyrinths, for some reason, can be hit. See Mugging the Monster for a bit more.
- Game Mod: Redux keeps most of the game as-is, but adds numerous quality-of-life improvements over the vanilla version: Among other tweaks, your sword attack is now a quarter-circle slash rather than a direct stab, the Overworld map reflects the actual layout instead of being a simple grey rectangle, walls and trees are given subtle visual cues that they can be bombed or burned, there are three new BGM tracks for the dungeons, arrows have their own ammunition stock rather than drawing from your rupee count, your wallet now holds 999 rupees instead of 255, many enemies have been redrawn to reflect the manual artwork, and Link's blue tunic is given a more vibrant blue color to replace its periwinkle hue from the original.
- Gameplay and Story Segregation: According to the manual, Link rescued Impa from monsters before the start of the game. However, at the beginning, you have no equipment at all and you can't fight until you get the sword from the old man.
- Giant Enemy Crab: Gohma, the boss of the Level 6, has a robust crustacean body and a large eye that serves as its weak point. Later incarnations veer towards Giant Spider or Creepy Centipedes.
- Give Me Your Inventory Item:
- GRUMBLE, GRUMBLE...note
- LEAVE YOUR LIFE OR MONEY.note
- Glass Cannon: Red Wizzrobes' spells deal twice as much damage as those of Blue Wizzrobes — tied with Ganon himself for the most damage of any enemy in the game, in fact — but take less hits to kill at exactly one Magical Sword attack, do less damage on bumping into them than the Blue ones, and have movement patterns that leave them more vulnerable.
- Go for the Eye: Gohma is only vulnerable to an arrow to the eye.
- Götterdämmerung: Retroactively, the game is this for the Zelda timeline. The Hero of Time was slain, Ganon's hordes destroyed the world, the Triforce has long since been shattered. All that remains of Hyrule are a few old men and women cowering in caves. And then a wanderer appears, garbed in a familiar green tunic.
- Guerrilla Boulders: Boulders tumble down if you walk by the river at the very northern part of the world map. They only stop when you leave the area and you never get to see where they are coming from.
- Guide Dang It!: Some can consider the entire game as a guide game, meaning you need a strategy guide to even know what to do next or where to go. It was intentional by the developers since they wanted players to exchange information with each other as they played. That being said, there's still many notable moments below that screams guide dang it.
- Try to get through the second quest without looking at a map. Just try. You'll probably get to about Level 3 before giving in.
- Starting with Level 2, the labyrinths in the second quest feature walls you must walk through (by holding down that direction for a couple of seconds) instead of bombing in order to proceed. There is nothing whatsoever in the manual or the game itself indicating this new twist in gameplay.
- Along with the bombable stone walls and burnable trees, the overworld on the second quest also features several hidden doors that you must play the Recorder to reveal. They function just like the entrance to Level 7 in the first quest, only most of them are nowhere near any deserted fairy springs and no hints are given that this can be done outside of those spots, so the player is unlikely to discover this on their own unless they just happen to try warping in an area that contains one of the these passages. Worse yet, it's not optional, since this method is how you're expected to find the entrance to Level 6.
- "Eastmost penninsula [sic] is the secret." The secret (a 100-rupee Moblin hidden above the money-making game at the northeast corner on the map) went undiscovered for a pretty long time because it is the only instance in the first quest where one must do the aforementioned "walk through walls" trick to find it, and it's on the Overworld, through a pathway that isn't centered on the screen. It's just money in the first quest and skippable, but it's the site of the Blue Ring shop in the second and far more important.
- Most of the game, really, especially with the "Blind Idiot" Translation. Miyamoto outright admits that the game was designed to support player collaboration (ex. walkthroughs from more experienced players).
- Obtaining the White and Magical Swords requires you to have a certain amount of Heart Containers, but the only hint you are given is you must "master using it" (referring to the sword). The Japanese version had a similar hint.
- Pushing blocks in dungeons is required to reveal a staircase, reach a visible one more easily, or open locked shutters. Nothing in the game or instruction manual tells you that you can push blocks.
- Getting past the Goriya in a dungeon who says "Grumble, grumble..." will go away if you give him the food item. While one can argue that the grumble phrase is a hint that he is hungry, it's not obvious at first and can be mistaken for something else.
- Hand Wave: The Lion Key is a late-game item in the form of a key that is not used up when opening a locked door, allowing for infinite uses. When it's collected, the number of keys remaining in the HUD is replaced with an "A". This is because you're normally not supposed to have more than nine keys, and since the key counter is a single-digit hexadecimal, having a state of keys above 0-9 causes the counter to go to the next base-16 digit: A. At least one supplementary material by Nintendo of America around the time of release attempted to get around this by saying that the Lion Key makes the key counter read "A" because it lets you open all the locked doors.
- Hard Levels, Easy Bosses: While a few of the bosses like Gleeok and Manhandla can provide a decent challenge, especially early in the game, they're a breeze compared to the difficult moments where you're constantly dealing with the enemies that crowd areas, corner the player, and work alongside other enemy types to cover their weaknesses. In particular, the blue Wizzrobes are one of the nastiest enemies in the series' history, especially so as they appear with red Wizzrobes, Bubbles, and Like Likes. Then the rest of the bosses are flatout jokes. To sum up data against most bosses, the Blue Darknuts and Blue Wizzrobes have more HP (8 and 10), have more immunity to other attacks (sword and bombs only), and can deal two hearts' worth of damage. To further add, they come in packs, making things worse. And the Red Wizzrobe's projectile shot does the most damage in the game, only equal to Ganon's physical touch.
- Hard Mode Mooks: Red Bubbles (which take away your sword permanently if they hit you) only appear in the Second Quest (the game's version of a Hard difficulty).
- Healing Potion: The Life Potion refills your health bar when used. The blue kind can only be used once, while the red kind has two charges.
- Heart Container: The trope namers and Trope Codifiers, although they were originally called "Container Hearts" in this game; collecting one increases Link's Life Meter by one heart, which becomes handy to tackle the later, more difficult dungeons. In addition to the 8 containers guarded by the dungeon bosses, there are 5 full containers in very well hidden areas in the overworld (one outside, and four being a choice between a container and a red potion... you should take the container). The second quest introduces a few old men inside dungeons that can take one full container away if you can't pay their price.
- Hearts Are Health: The very first game to incorporate the trope and has been using it since; small hearts recover health and the bigger Heart Container extends Link's health meter.
- He Knows About Timed Hits: The game shows you the basic plot of the game and a list of all the items Link can find, and closes with Link holding up a parchment that says, "Please look up the manual for details."
- Helpful Mook: Blue Bubbles (which only appear in the second quest) do not damage Link at all. Their only function is to remove the "no sword use" curse that Red Bubbles can inflict on Link. This marks a contrast with the enemy's eventual appearances in Majora's Mask and The Wind Waker, where the Blue Bubble inflicts the curse on Link (though it wears off after a while).
- Here There Were Dragons: Unlike later games, magic (while it does show up) doesn't play a large role — there are plenty of monsters and bizarre creatures, as well as a few minor enchanted items, but the powerful magical artifacts, spells and supernatural workings that are ubiquitous in later games are all absent. The artbook Hyrule Historia officially calls the NES games "The Era of Hyrule's Decline", with the implication that the magical forces and artifacts of earlier eras had declined and largely vanished by this game's time. The Master Sword, for instance, is put into a permanent sleep in the game's immediate prequels.
- Hitbox Dissonance:
- The Magical Rod's hitbox is extremely broken: It can hit enemies further away than its sprite intended.
- How the game handles how Lynel beams (and in the second quest, Stalfos) and Wizzrobes' magic projectiles work is quite inconsistent: Most times, it will graze Link but not count as a hit. If he is positioned at a certain position, it will hit him despite him not being directly at said projectile.
- Holy Burns Evil: The Silver Arrows are sacred projectiles, and are the only weapon capable of obliterating Ganon (the Sword merely incapacitates him).
- Inconsistent Dub: The English manual translation often doesn't match the in-game version, such as Ruby instead of Rupy (later Rupee), Whistle instead of Recorder, Magic Wand instead of Magical Rod, Magic Book instead of Book of Magic, and (most infamously) Ganon instead of Gannon.
- Interchangeable Antimatter Keys: Used to a higher degree here than in any other title in the series. Not only can keys transfer over from dungeon to dungeon, but you can even buy extras if you somehow manage to run out. There's also a "Magical Key" that leaves off the "antimatter" part, being usable to open an unlimited number of doors.
- Invincibility Power-Up: The Clock item, which not only freezes all enemies on screen, but it also renders Link immune to their Collision Damage.
- Invincible Minor Minion: "Bubbles" are flaming skulls that disable Link's ability to use a sword for awhile. There's absolutely no way to kill them. This was even worse in the Second Quest, where two new versions are added — a red one which takes away the sword ability completely, and a blue one which restores it. Touching the first requires touching the second, which is sometimes in a completely different room. You can also drink a Water of Life to end the red-Bubble effect, but, with the Nintendo Hard already cranked up to eleven in the second quest, this is widely considered a bad move.
- Invisibility: Ganon cannot be seen during battle. Link must hit him repeatedly with his sword to stun him (and make visible), at which point he has to shoot him with a Silver Arrow to defeat him.
- It May Help You on Your Quest: The memetic use of "It's dangerous to go alone! Take this!" could make this game the Trope Codifier.
- Jesus Taboo: The Bible is renamed the "Book of Magic" in English. Also, in a case of Earth Drift, all games past the first two no longer feature crosses on the shields.
- Kaizo Trap: After defeating Ganon, the room where Princess Zelda is located is guarded by flames. An unsuspecting player can accidentally walk into the flames and hurt themselves. And if you just so happened to beat Ganon with only half a heart remaining... well...
- Kid Hero: According to the Hyrule Historia, this incarnation of Link is only ten years old.
- Kill It with Fire:
- For Link, he has the Candle, and the Magical Rod after you find the Book of Magic.
- The Old Man in some of the dungeons will start launching fireballs at Link should he hurt him.
- Knockback: Both with Link and the enemies, some of which are sent flying all the way across the screen. Link can actually get knocked back into another enemy and take more damage.
- Kung Fu-Proof Mook: Several enemies are immune to various parts of your arsenal. Some simply require a specific subweapon to defeat, but just as common are enemies that can only be dealt with using the sword.
- Lava Is Boiling Kool-Aid: Lava is not only a cheap recolour of dungeon water, but also completely invisible in the dark.
- Law of Chromatic Superiority: If a monster has a red or orange version and a blue version, the blue version is generally tougher. The only exception is the blue Bubbles, which are far less annoying than the red versions. On the other side, if a beneficial item has a red and a blue version, the red is better — red potions have two doses, red ring is twice as strong as the blue ring, red candle has infinite use whereas blue candle has one use per screen. This also applies to the swords: the Magical Sword (red) is more powerful than the White Sword (blue), which is more powerful than the Sword (green by default, although its hilt changes color to match Link's tunic when he acquired the blue ring and the red ring).
- Leaning on the Fourth Wall: The designs of the second quest's first five labyrinths look like blocky letters which spell out "ZELDA".
- Legacy Character: Link and Zelda. Ganon, however, is the same individual from Ocarina of Time, having been resurrected between this game and The Legend of Zelda: A Link Between Worlds.
- Level-Locked Loot: The White Sword requires Link to have five hearts in order to pick it up and use it, whether they were received from labyrinths or found in the overworld. The Magical Sword requires twelve hearts.
- MacGuffin: The pieces of the Triforce of Wisdom, as well as the Triforce of Power which is under Ganon's tenure.
- Magic Music: The Recorder is a flute with certain magical effects. It can teleport Link to the dungeons he visited, and also weaken the boss Digdogger.
- Man-Eating Plant: Peahat, Manhandla, and Leever are all different types — Manhandla is comparable to a very aggressive mobile Venus flytrap, while Leever is a blood-drinking cactus. It isn't clear exactly what Peahat is, but the manual says it's a type of plant.
- Marathon Level: Level 9 in both quests is absurdly huge. Even if you know where to go, it'll take awhile to get there.
- The Maze:
- Two of them — The Lost Woods and the Lost Hills.
- Level 9 in both quests, and the majority of the labyrinths in the second.
- Level 8 in the second quest is unique in that the maze itself is the big challenge to the labyrinth. The labyrinth has the Goriya/Rope/Stalfos enemy theme, but it's also got more secret passages than any other level in the game, including a half dozen or so one-way passages, and a lot of automatically locking doors to force you back to the beginning if you take even one misstep.
- Mercy Invincibility: In this game, both Link and his foes have mercy invincibility, but Link's lasts longer. You can swing your sword as fast as you want, but enemies can't take damage that fast. Thankfully, neither can you, even if standing on top of an enemy who causes Collision Damage.
- Money Mauling: The bow, rather than having a stock of arrows like in the later games, costs you a Rupee for each shot (suggesting the arrows are literally made of money). If you run out of Rupees, the bow becomes useless until you collect more.
- Money Sink: Rupees are hard to come by. The maximum you can carry is 255, but you can spend 250 of them on the blue ring alone. Also, the magical shield (at least 90 rupees), blue candle (60), arrows (90) and meat (60) will cost you a lot of rupees. Most of these items are required, if not strongly recommended. Upgrades to carry more bombs also cost 100 rupees each. Money still has added utility even after all these items are purchased, as the arrows you fire share their ammunition pool with your rupees.
- Money to Throw Away: Every use of the bow costs one Rupee. If you run out of Rupees, the bow is useless until you find more.
- Mook Bouncer: The Wallmasters, which reside in the dungeons and take Link back to the first room if they catch him.
- Mooks Ate My Equipment: Like Likes. If you let one touch you, it quickly envelops you and you can kiss your Magical Shield (if you have one) goodbye. Your only chance to escape without losing your Magical Shield is to have the Magical Sword and give it the required three stabs as quickly as possible. If you have anything less than the Magical Sword, you'd better hope you were caught by one that has already taken damage!
- Mugging the Monster: See those old men just passing out information? Don't hurt them, because some of them will start firing fireballs at you and kill you.
- New Game Plus: As was not uncommon in those days, there is a "second quest" with a remixed extra-hard layout.
- New World Tease: Level 9. A foreboding music not heard anywhere else plays. You can't go more than two rooms in without the full Triforce of Wisdom.
- Night of the Living Mooks:
- The game marks the debut of Stalfos, which are skeletal soldiers that can be found in the dungeons. They're not too difficult to defeat, but it's important to land Link's attacks onto them accurately, as they tend to jump backwards to dodge them. In later games, they use a shield to deflect Link's sword slashes, requiring an opening (usually the moment when they prepare an attack) to hit them.
- Gibdos are large mummies that roam erratically in the later dungeons of the game, and require several attacks with the sword to be defeated. In the 3D games, they can paralyze Link with their scream and grab him to drain his Life Meter, not unlike ReDeads.
- Ghinis are cyclopean ghosts with large tongues that appear in the graveyards. They will increae in number if Link starts moving the tombstones. You have to defeat their leader so all of them disappear.
- Nintendo Hard: Only slightly more forgiving than its notoriously difficult sequel. Focusing more on combat than puzzles, this is by far the hardest of the standard style games. If you started on the later games, the difficulty's surprise is bigger.
- Now, Where Was I Going Again?: The fact that this game has nothing like the below 'assistance' is partly why much the game is such a huge Guide Dang It!, it's often pretty hard to figure out even what dungeons you've cleared in said game without a personal diary or strategy guide.
- NPC Roadblock: The old man won't let you go past the entrance of Ganon's lair until you get all pieces of the Triforce.
- Nuclear Candle: The two Candle items light up dark rooms by tossing a single fireball that burns for only a few seconds.
- Oculothorax:
- You'd never guess this from the game itself, but Digdogger is one of these. It's a lot more clear when it returns in Oracle of Seasons.
- Tektites aren't intimidating compared to the others, but they're spiderlike monsters with a big central eye, not unlike a much smaller and weaker Gohma.
- You'd never guess this from the game itself, but Digdogger
- One Bullet at a Time: All of Link's projectiles have a one "bullet" cap (sword beams, magic rod shots, and flames from candles) The Blue Candle is pretty terrible with the cap since you can only use it once per area/room. The Red Candle has infinite uses, but it's still capped at two flames at a time. Link is also limited to planting only one bomb at a time.
- Only the Worthy May Pass: No one can enter Death Mountain without the Triforce of Wisdom. This is partly about proving your worth, but also about being able to survive what lies inside.
- Our Dragons Are Different: Two bosses are draconic beasts — the one-horned Aquamentus and the long-necked, many-headed Gleeok — both of whom attack by shooting fireballs.
- Our Fairies Are Different: Fairies are tiny winged women who appear occasionally when enemies are slain, and will heal Link if he touches them.
- Palette Swap: Most monsters come in red and blue, with one color (usually blue) being tougher than the other.
- Paradiegetic Gameplay: In the Famicom Disk System version, the Pols Voice enemy is killed by yelling in the microphone in the Famicom's second controller. Each Japanese rerelease changes it so Pols Voices can be killed with a different method, such as pressing Select 4 times in the GBA version, or pressing L and R to virtually "switch" to the second controller and yell into the 3DS's microphone in the 3DS version. In all English releases, including the NES version, the enemy is instead weak to arrows, as the NES does not have a microphone.
- Permanently Missable Content: In the second quest, some of the old men in the dungeons ask for fifty Rupees, and, if you don't have that, you must give up a Heart Container. Not as in one unit of health, we mean one heart of your life capacitynote . In both quests, there are old men who offer you a choice between a Heart Container or a 2nd Potion. You can buy red potions, you can't buy heart containers. Potions are expendable. Always take the Heart Container.note
- Piñata Enemy: A mild example — Red Leevers and Blue Tektites are somewhat more likely to drop Blue Rupees than other enemies. The best way to grind for money is a circuit starting with the Tektites and Leevers on the southern shore, up to a certain screen just south of the desert with blue Tektites, then south along the lake shore neer Level 1 for more Red Leevers, and repeat.
- Player Death Is Dramatic: Trope Codifier; the entire screen turns red as Link dies before fading to black as he finally disappears.
- Plot Coupon: Eight Pieces of the Triforce of Wisdom. They grant access to the final dungeon.
- Point of No Return: In the final dungeon, you have to use the Silver Arrow to defeat Ganon. It is perfectly possible to blunder into the boss fight with him before you obtain this item, and the door locks behind you. All you can do at that point is let Ganon kill you so you can start the level over to find the arrow. If you're at full health, this can actually take at least half a minute of letting yourself get hit by fireballs.
- Power Up Letdown:
- The Candle (both versions) is fairly useless because of its extremely short range, it not working on certain enemies, and causing self inflicted damage to Link if you walk into your own fire. They do light up dark rooms and burn down select bushes, but that's it.
- The Clock is a wonderful one-use item which freezes all enemies on the screen — however, it has an annoying tendency to drop from the last creature you kill on the screen, rendering it utterly useless. It also will leave moving Peahats invulnerable, and it also prevents Wallmasters from spawning — which sounds great at first, but the path to the boss often requires killing every Wall Master in the room to open the door or gain a key.
- The two upgrades for the Boomerang and Magical Rod also have drawbacks of their own. The Magic Boomerang's screen-length reach also means a longer wait time for it to return should you miss with a throw, while the Book of Magic lets the Rod's beams spawn flames whenever they hit something, which more enemies are immune to than the standard beam.
- Pre-Final Boss: The final dungeon has Link defeating a Patra Mini-Boss right before taking on Ganon himself (and unlike the Patra he finds earlier in the dungeon, this one makes the orbit of the surrounding minions shift gradually, making it tricker to approach safely).
- Purposely Overpowered: The game itself regards the Water of Life as this. This is why you need to show a Letter to the old woman, and the source of temptation over passing on Container Hearts.US Instruction Booklet: The water of life is a medicine that can beat anything. So, those who don't have the right credentials can't buy it.
- Pyromaniac: Link has always had a thing for bombs, and this was the only game in the series (until the Oracle games) that required you to start several forest fires in order to progress, especially if you didn't have a guide telling you where to burn.
- Rainbow Speak: The opening text scroll makes liberal use of it. Ganon is highlighted in red (as is Zelda in the original), Link is highlighted in green, and either the Triforce (in the original) or Zelda (in the revised version) are highlighted in blue.
- Random Drop: Enemies and bosses will drop recovery hearts, Rupees, Bombs, Fairies, or the time-stopping Clock. Bosses guarding a Triforce fragment always drop a Container Heart.
- Recurring Boss: All bosses except the final one return at several later points, although only two do so as more than minibosses.
- Level 4: Manhandla, boss of the third dungeon, returns as a miniboss.
- Level 5: Three Dodongos show up for a miniboss battle, where a single one served as the final boss of the second dungeon.
- Level 6: The two-headed dragon boss of the fourth dungeon, Gleeok, shows up as a miniboss sporting a third head.
- Level 7: The fifth dungeon's boss, Digdogger, returns for a miniboss battle, followed later on by another trio of Dodongos. Later still, another Digdogger appears, and this one splits into three during the battle. Finally, the boss of this level is Aquamentus, the boss of the first dungeon.
- Level 8: A total of three Manhandlas appear in this dungeon, as do two Gohmas which, due to the Law of Chromatic Superiority, require three times as many hits to defeat as the one that served as the final boss of the sixth dungeon. The final boss is a four-headed Gleeok, which first appeared in two-headed form as the boss of Level 4.
- Reverse Shrapnel: The Patras in Level 9 are giant winged eyes with a bunch of smaller winged eyes circling around. The first one makes the winged eyes enlarge their orbit periodically, while the second one makes them spin in gyrosccope form.
- Rewarding Vandalism: It is possible to burn some bushes/saplings. Some of them have old men who yell at you for burning down/destroying the "door" to their hiding place and will take some of your money to have it repaired. This is justified because most of these people were probably hiding from all the monsters roaming the overworld: with their door gone, they are completely exposed. There are also Moblins who, if you find them, will bribe you not to give away their hiding place, accompanied by the words "It's a secret to everybody."
- Ring of Power: The Blue Ring halves damage Link takes; the Red Ring reduces it to a quarter.
- Rivers of Blood: One official US guide claims that the orange water found in the fifth and sixth dungeons is actually blood.
- Savage Setpiece: If you attack NPCs with your sword, the fires next to them start flinging fireballs at you.
- Save-Game Limits: Whenever you save in this game, you begin at the starting point, though you keep all your progress in every other way. The starting point in this game is outside the cave you receive the Level 1 sword. Also, saving adds a death to your death count. Since you can already save whenever you die, the save function (which you need a second controller to use) is essentially a suicide code. The 3DS and Wii U Virtual Console versions completely avert it. The restore point feature allows one to save anywhere at anytime.
- Save the Princess: The plot of the game revolves around Link trying to rescue Zelda from Ganon, for which he must retrieve the Triforce of Wisdom. All the games after that, though they usually do have Zelda kidnapped at some point, do not make it the major driving force of the plot (and in certain cases she's only in need of being saved late in the story, and in one case it's only her physical body that needs to be retrieved); other games do not even feature Zelda at all.
- Schizophrenic Difficulty: The game hits a major difficulty spike about halfway through the first quest with the introduction of tough enemies such as Wizzrobes and Darknuts. The beginning of the second quest is even harder, as you must deal with such enemies much earlier on and with less equipment/life at your disposal. The difficulty rapidly subsides as you near the end of the second quest, however, as you continue to get stronger while the game's challenge begins to come more from increasingly complex/confusing dungeon layouts than from strong enemies (whom you see less of at this point than you did in the first quest).
- Segmented Serpent: Moldorm is represented as a string of five red-and-orange circles. Unlike later games, they can be damaged anywhere on their bodies. Lanmola has a similar appearance, but with a large eye for its head segment.
- Sequence Breaking: Quite a lot, perhaps unsurprisingly:
- Later games carefully worked out where you could find and use keys so that none were left over and no doors were left locked; this one didn't do that, so you can easily clear level 2 with about six or seven of them in reserve by ignoring the locked doors and just bombing open necessary doorways in the eastern half of the level, making it even easier to beat some of the later dungeons.
- There is also very little to force you to do the dungeon levels in order. A few are unreachable (or more difficult) without treasures found in others, but even a level that couldn't be reached without, say, the raft didn't require you to actually complete the level in which you find the raft. This was by design, but careful planning allows you to delay even the first boss fight until you have many more power-ups than you would have otherwise. This is vital if you are playing a swordless quest.
- Theoretically, you're supposed to clear the first two dungeons before obtaining the White Sword, but since what qualifies you to "master using it" is not the number of dungeons you clear but the amount of Container Hearts you have (5), you can easily pick up two free ones in the overworld map using bombs and grab the White Sword before taking on any dungeons at all. The Magic Sword, meanwhile, requires 12 hearts to obtain, so it can be nabbed right after you beat Level 4 by getting the two remaining Container Hearts on the eastern shore, making Levels 5 and especially 6 much easier. The second quest also allows you to get the White Sword early on, but you will have to at least beat Level 1 first, since only one Heart Container is now hidden where Link can find it without needing any dungeon-obtained equipment.
- Shield-Bearing Mook: The Darknuts have shields that protect their fronts from attack.
- Shock and Awe: In the Broadcast Satellaview remake, beams from the Magical Sword are a little different from those of the Wooden and White Swords, which appear to explode in four directions after hitting something. Instead, beams from the Magical Sword explode into lightning.
- Skeleton Key: The Magical Key basically gives you infinite keys, allowing you to unlock every single door in every dungeon.
- So Near, Yet So Far: While the entrance to the final dungeon can be tough to find without looking carefully for it, you can enter the dungeon from very early in the game. But you can't make it more than a few rooms unless you have found all the Triforce shards.
- Spell Book: Level 8 has a Magic Book which gives the Magic Wand's attack flame properties. Curiously, in the Japanese version, it's explicitly The Bible.
- Stock Sound Effects: Aquamentus, Gleeok, and Ganon all use a pterodactyl roar lifted straight out of a Hanna-Barbera cartoon, just in low quality (and low pitch).
- Suspicious Videogame Generosity: Inverted: the tougher the room is, the likelier it is that an item (or a plain secret passage) is in there.
- Sword Beam: If your life meter is filled to maximum capacity, you can fire these at distant enemies. This is notable because the beam, unlike many later Zelda titles, carries the same power level as the blade itself, and they hit everything the sword hits as well (later games have enemies that are immune to the sword beam). Needless to say, getting the Magical Sword as early as possible is a major boon; even the White Sword is an improvement.
- Take a Third Option: In the second quest, some dungeons will contain old men that will seal you in the room and force you either pay 50 rupees or sacrifice a Heart Container in order to proceed. Players can also choose to attack the old man so the torches launch fireballs at Link until he dies and then restart at the dungeon entrance with both rupees and hearts intact.
- Talking with Signs: As Link is a Heroic Mime in the series proper, perhaps this is the only way he could truly talk. He holds up a sign saying "PLEASE LOOK UP THE MANUAL FOR DETAILS" in the opening scroll.
- Teleport Spam: Ganon during the final battle, which carried over into the 1989 Zelda cartoon.
- Throwing Your Sword Always Works: At full health, Link can fire his sword off, tip-first, at anything in a straight line. Modern interpretations replace this with Sword Beams.
- Time Stands Still: If an enemy drops a Clock, it will freeze all remaining enemies on the screen. However, this will not change their vulnerability — if a Peahat is still moving when the watch is grabbed, it will remain invulnerable. The effect ends when Link moves to a new screen.
- Took a Level in Badass: Stalfos and Ropes in the second quest go from being a free kill to being quite a threat. Stalfos now know how to throw swords at Link, dealing two hearts of damage if he comes into the path of them. Ropes now take several hits to kill instead of one.
- Trial-and-Error Gameplay: Due to graphical limitations, there's no clue as to which walls are bombable, which trees are burnable, and which screens have a "magic effect" when you blow the Recorder. Young Link is truly the most destructive fellow in Hyrule: in order to complete both quests (and particularly the second) you'll have attempted to destroy everything in the land. The original game came with a poster-size map of the overworld, so you could mark off your reign of terror as you went, and make notes of where the Quest 2 dungeons are found (the overworld has the same layout, but the dungeons are remixed).
- Tutorial Failure: In the instruction manual, the Pols Voice enemy is said to "hate loud noise". Naturally, the player would assume that their weakness would be the Recorder, then, but that's not the case at all. It does absolutely nothing to the Pols Voice. What the manual is actually referring to is the built-in microphone found in the Family Computer, the Japanese version of the NES, the functionality of which was removed entirely for the American release. This is fixed in later games, where musical items will kill the Pols Voices.
- Unbuilt Trope: While the first installment in the Zelda franchise, and the Trope Codifier of the Action-Adventure genre, its gameplay and story plays out in such a way that's highly unusual to newer players, and won't be seen until The Legend of Zelda: Breath of the Wild:
- The setting of Hyrule is desolate, barren of any towns and overrun by monsters. Aside from Link, Zelda, and Impa (in the manual), the only other human inhabitants are a few old men, old women and merchants that occupy various dwellings across the region, of which are well-hidden to protect themselves from the monsters. Because this is a truly open world, Link isn't obligated by the plot to follow the dungeons in any order (except the final dungeon, which he needs all the Triforce pieces before facing Ganon), and can access them once he obtains the proper equipment to traverse them.
- The old man himself is one of Link's most useful allies on his quest, but he's far from perfect. If Link destroys the wrong doors to his dwellings, the old man will chastise him and make him pay for door repairs, when other times he would give him an item or a piece of advice. The advice itself is oftentimes vague and unhelpful (in the English version), which could be amounted to technical reasons, but reinforces the human element — and potential senility — of the old man. On the second quest, he may even force the player into a Sadistic Choice of either giving up fifty rubies or a heart container, shifting into the role of a Stealth Mentor.
- While not as notorious, the old woman has her moments, particularly when the player gives her the highest payment option for her advice booth: she will simply give a snide remark on how rich the player is, subverting their expectations of value. Assuming each old man and woman are different people entirely, this reinforces the idea that each NPC is an individual, and thus will cooperate (or not) with Link to varying degrees.
- The monsters of this world are extremely dangerous and could easily kill Link, even when he comes prepared. Having the right equipment to handle certain enemies is only the first step to beating them, and even advanced fighting tactics aren't a guarantee. While much of this has to do with primitive coding on part of the enemies (leading to random, erratic movement patterns), there's also a logical element to this: a lone swordsman isn't going to easily handle a room full of experienced wizards or armored knights.
- Uncommon Time: The final dungeon music could be counted as patterns of seven bars, or as 14/4 or something like that depending on how the rhythms are divided. The unusual rhythm (it feels like part of the piece is missing) further contributes to the unsettling nature of the music.
- Unexpectedly Realistic Gameplay: Every dungeon has two maps: one that Link makes and one that he finds. Unlike later games, the latter will not fill in the former or show where he has been, so the player has to actually compare the two maps on their own.
- Unique Enemy: Blue Lamnolas only appear in a single room in level 9.
- Unlockable Difficulty Levels: After beating the first quest of the game, or by naming their save file ZELDA, players gain access to the (even harder) second quest.
- Updated Re-release: The GBA "NES Classics" edition touched up the translation in spots, notably in the introduction.
- Useless Useful Spell:
- Part of what makes the second quest so difficult is that certain "useless" items get a lot more mileage on their next go around, as they become essential to finding many helpful power-ups. The only indication you receive of this is finding said items much earlier in the game than before.
- The Red Candle can be this. Unlike the Blue Candle, you can use it as many times as you like in an area without having to leave and come back. However, you get it so late in the game that you've likely already found everything hidden by that point anyway. Just one dungeon after you find it, you'll find the Magic Book which allows you to get unlimited fires by using your wand anyway.
- The Very Definitely Final Dungeon: Level 9 — Death Mountain. You know you're there: "Spectacle Rock" is the overground architecture in the first quest (and the map, a skull, is by far the largest in the game). The music is much creepier than that used in the first eight dungeons, there are much stronger enemies that only appear in Level 9 in either quest, and these levels are much more mazelike than their predecessors. In addition, if you don't have all eight Triforce pieces, a guardian awaits in the first room beyond the entrance with some gratuitous Engrish.
- Video Game Cruelty Punishment:
- If you attack the old men in the dungeons, they respond by having their campfires shoot fireballs at you until you go away. The ones encountered on the surface simply can't be hit.
- Bombing certain walls or burning certain bushes can reveal a secret room. Some of the rooms are actually homes of an old man who will demand that you pay him for the door repairs.
- Villain Forgot to Level Grind:
- Aquamentus, boss of Level 1-1, returns as the boss of Level 7-1 with no improvements whatsoever. Two hits is all it takes and the Magical Shield can block its beams.
- Averted in the second quest with originally weak enemies such as Stalfos, who can now shoot sword-beams, and the Ropes, who now take more hits (and flash).
- Violation of Common Sense: One of the two "Pay me and I'll talk" old women — the one southwest of the Lost Woods. The payment options are 10, 30, and 50 rupees. Obviously, the lowest option doesn't net you any info since you're a cheap-ass for picking it, so logically, picking the highest option is the best since it means you're willing to pay anything for information, right? Nope! The woman says "Boy, you're rich!" and that's it. To get an actual hint, you have to pick the middle option.
- Wake-Up Call Boss: Three examples.
- Aquamentus in Level 1-1. If you have the White Sword and Magical Shield, or if you brought an Arrow to go with the dungeon's Bow, he's easy as pie. If you go after it with just the Wooden Sword and Shield, you're going to be frantically dodging his beams and trying to stab it in between his shots. It also takes six hits from the Wooden Sword to kill it, whereas you can sustain three hits from it if you're at full life. Basically, Aquamentus is there to prove that you can't just stab your way through the game.
- Manhandla in Level 3-1. If you did not get the White Sword nor know how to use your bombs properly, he's incredibly hard to kill with just the Wooden Sword.
- Gleeok (two heads) in Level 2-2. Unless you found the one possible heart container in the overworld to have enough hearts for the white sword, he's going to take a total of sixteen hits, and he'll be able to kill you in only two. This is where it becomes crystal-clear that the second quest is designed to grind you up. Because the doors are not closed, you can do the doorway hiding trick at full health, but you best not to get hit at all or else you'll have to fight this the hard way.
- Wanton Cruelty to the Common Comma: The opening crawl really goes to town with unnecessary quotation marks, to the point that it almost sounds like it's being sarcastic.
- Warp Whistle: The Recorder. Link can also use the Power Bracelet to access Warp Zones between four areas.
- What the Hell, Player?: Attacking the old men who dispense random Engrish tips will cause the fires flanking them to start shooting harmful energy bubbles at you like the statues in dungeons.
- Wide-Open Sandbox: One of the reasons the game was so well liked was that you can go anywhere in the game right from the start (sans two certain areas that require special items) — there are nearly no Railroading elements in the game at all, though the lack of these elements was itself potentially problematic; if you didn't have a guide, it could be difficult to know where to go.
- A Winner Is You: In the ending, Zelda thanks Link for saving Hyrule ("THANKS LINK, YOU'RE THE HERO OF HYRULE"), the credits roll, and then you unlock the much harder second quest. Beating the second quest has the same ending, with the post credits now showing you how many times you died and that "You have an amazing power and wisdom."